CHEVROLET S10 1995 2.G Owners Manual
Manufacturer: CHEVROLET, Model Year: 1995, Model line: S10, Model: CHEVROLET S10 1995 2.GPages: 354, PDF Size: 18.92 MB
Page 251 of 354
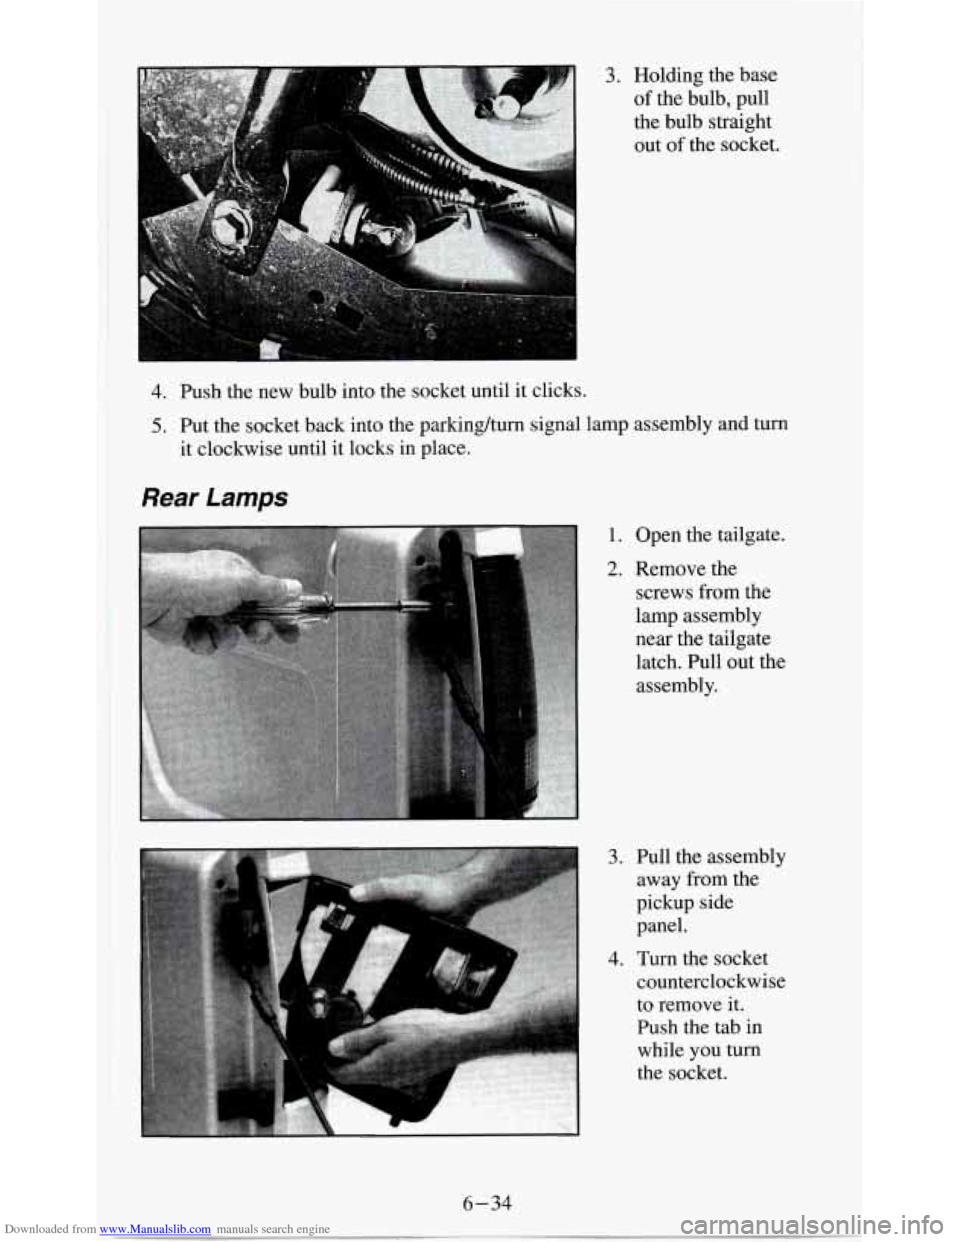
Downloaded from www.Manualslib.com manuals search engine 3. Holding the base
of the bulb, pull
the bulb straight out of the socket.
4. Push the new bulb into the socket until it clicks.
5. Put the socket back into the parkinghum signal lamp assembly and turn
it clockwise until it locks in place.
Rear Lamps
1. Open the tailgate.
2. Remove the
screws from the
lamp assembly
near the tailgate
latch. Pull out the assembly.
3. Pull the assembly away from the
pickup side
panel.
4. Turn the socket
counterclockwise to remove it.
Push the tab in
while you turn
the socket.
6-34
Page 252 of 354
Downloaded from www.Manualslib.com manuals search engine 5. Pull the bulb out.
6. Push the new bulb into the socket.
7. Put the socket into the assembly and turn the socket clockwise until it
locks in place.
8. Replace the assembly. Install and tighten the screws.
9. Close the tailgate.
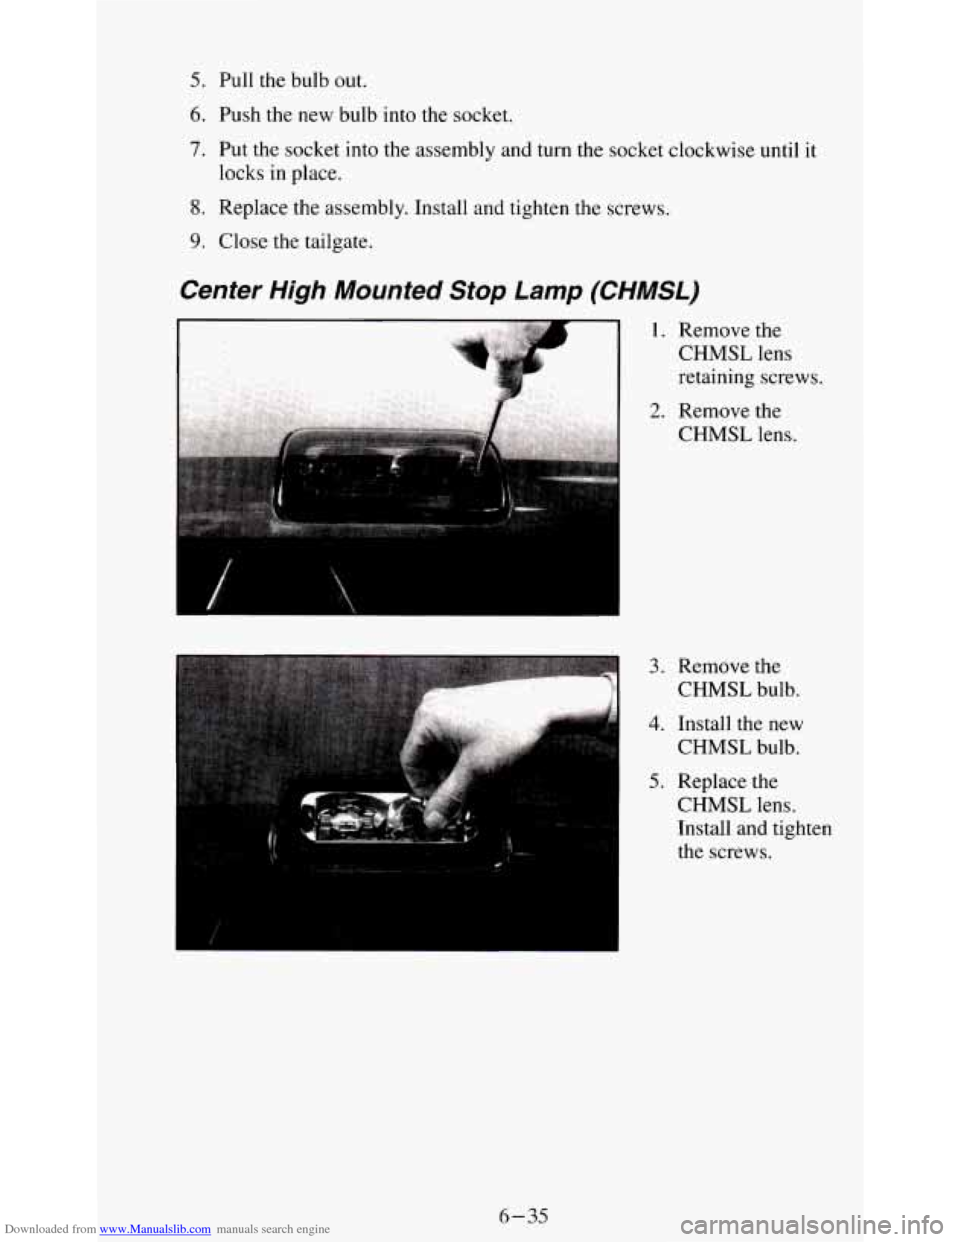
Center High Mounted Stop Lamp (CHMSL)
3. Remove the
CHMSL bulb.
4. Install the new
CHMSL bulb.
5. Replace the
CHMSL lens.
Install and tighten
the screws.
6-35
Page 253 of 354
Downloaded from www.Manualslib.com manuals search engine Other Maintenance Items
Windshield Wiper Blade Replacement
I NOTICE:
Use care when removing or installing a blade assembly.
Accidental bumping
can cause the arm to fall back and strike
the windshield.
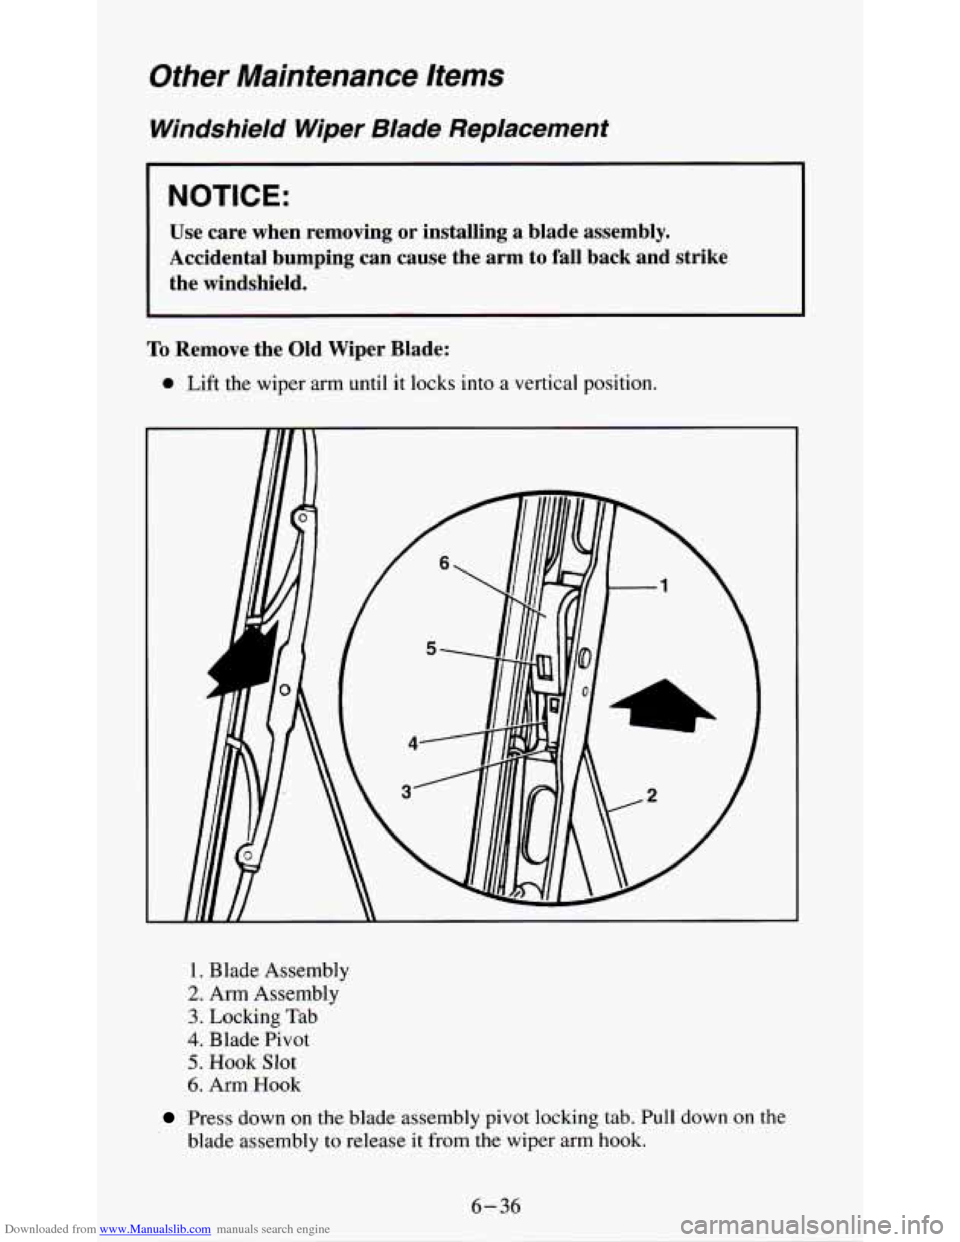
To Remove the Old Wiper Blade:
0 Lift the wiper arm until it locks into a vertical position.
1. Blade Assembly
2. Arm Assembly
3. Locking Tab
4. Blade Pivot
5. Hook Slot
6. Arm Hook
Press down on the blade assembly pivot locking tab. Pull down on the
blade assembly
to release it from the wiper arm hook.
Page 254 of 354
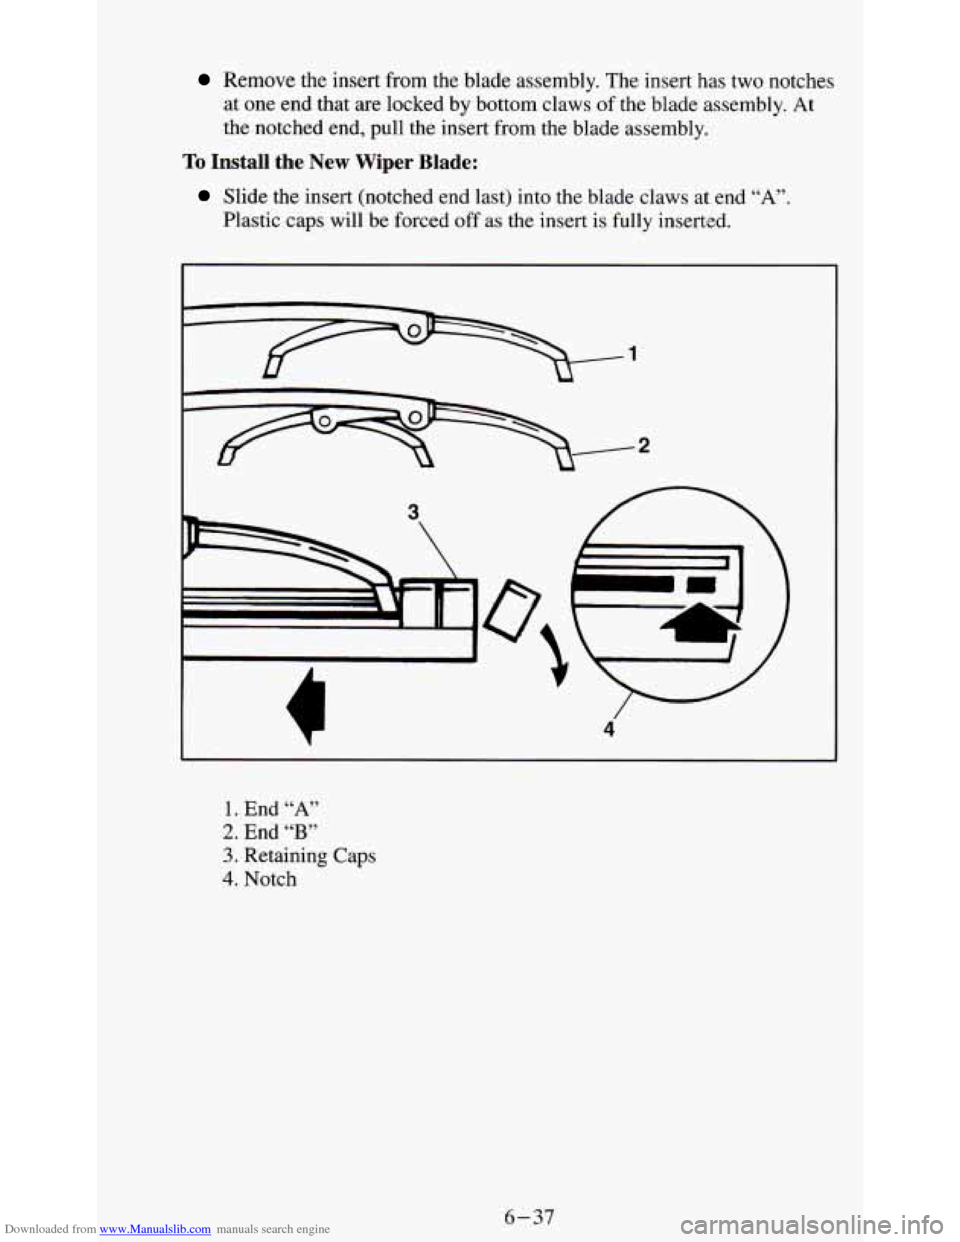
Downloaded from www.Manualslib.com manuals search engine Remove the insert from the blade assembly. The insert has two notches
at one end that are locked by bottom claws
of the blade assembly. At
the notched end, pull the insert from the blade assembly.
To Install the New Wiper Blade:
Slide the insert (notched end last) into the blade claws at end “A”.
Plastic caps will be forced
off as the insert is fully inserted.
1
1. End “A”
2. End “B”
3. Retaining Caps
4. Notch
6-37
Page 255 of 354
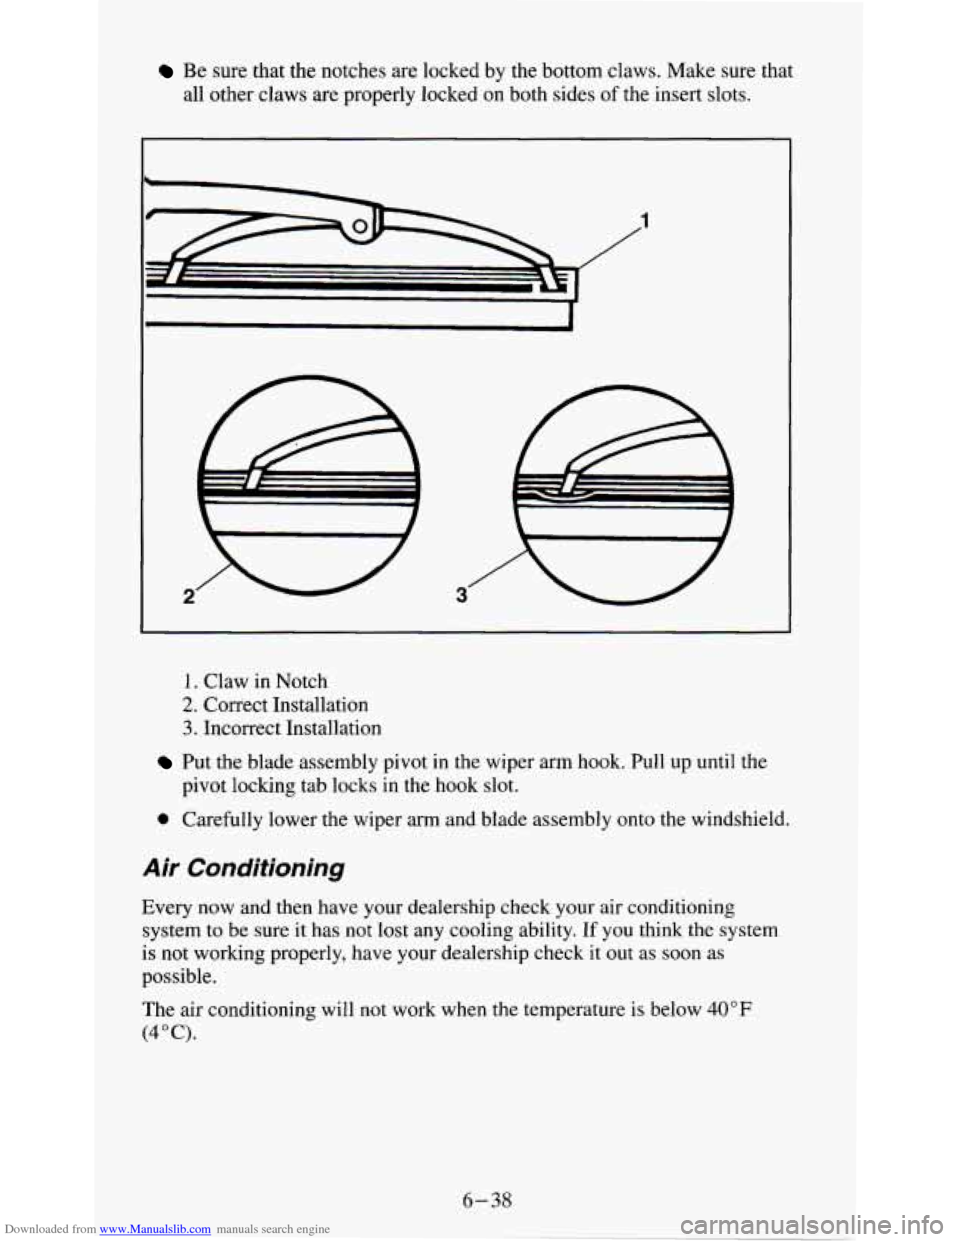
Downloaded from www.Manualslib.com manuals search engine Be sure that the notches are locked by the bottom claws. Make sure that
all other claws are properly locked on both sides
of the insert slots.
2 e 3 /
1. Claw in Notch
2. Correct Installation
3. Incorrect Installation
Put the blade assembly pivot in the wiper arm hook. Pull up until the
0 Carefully lower the wiper arm and blade assembly onto the windshield.
pivot locking tab locks
in the hook slot.
Air Conditioning
Every now and then have your dealership check your air conditioning
system to be sure it has not
lost any cooling ability. If you think the system
is not working properly, have your dealership check it out as soon as
possible.
The air conditioning will
not work when the temperature is below 40°F
(4°C).
6-38
Page 256 of 354
Downloaded from www.Manualslib.com manuals search engine Lock Cylinders
To be sure your locks operate properly, they must be lubricated.
Refer
to the Maintenance Schedule to determine how often to lubricate them
and what type of lubricant to use.
You should not
use penetrating oils because they could wash out the factory
installed lubricant and cause the lock to bind. De-icers which contain
alcohol could also wash away the lubricant,
so be sure to lubricate the lock
after using a de-icer of this type.
Exhaust System
To help prevent damage to your exhaust system, do not continue to drive
your vehicle if you notice:
Engine misfiring
Loss of performance
Exhaust system components hanging lower than normal.
Loud exhaust system noises.
Other unusual operating conditions
Have your engine and exhaust system serviced regularly.
Three-way Catalytic Converter
Your vehicle’s three-way catalytic converter is designed to reduce the
pollutants in your vehicle’s exhaust. Use only unleaded fuel in your vehicle.
If you use leaded fuel, you could damage your three-way catalytic converter
and other engine components.
Engine Control Module System
This system has an oxygen (02) sensor that helps keep your engine’s
air-fuel mixture at a proper level. Use only unleaded fuel in your vehicle. If
you use leaded fuel, you could damage your oxygen
(02) sensor and affect
your vehicle’s emissions.
Malfunction Indicator Lamp (SERVICE ENGINE
SOON)
This light on your instrument panel lets you know when your emission
system needs service. See “Malfunction Indicator Lamp” in the Index.
6-39
Page 257 of 354
Downloaded from www.Manualslib.com manuals search engine Tires
We don’t make tires. Your new vehicle comes with high quality tires made
by a leading tire manufacturer. These tires are warranted by the tire
manufacturers and their warranties are delivered with every new vehicle. If
your spare tire is a different brand than your road tires, you will have a tire
warranty folder from each of these manufacturers.
Inflation - Tire Pressure
The CertificatiodTire label which is on the driver’s door lock pillar, shows
the correct inflation pressures for your tires, when they’re cold. “Cold”
means your vehicle has been sitting for at least three hours or driven no
more than
a mile.
6-40
Page 258 of 354
Downloaded from www.Manualslib.com manuals search engine NOTICE:
~~
Don’t let anyone tell you that underinflation or overinflation is
all right. It’s not. If your tires don’t have enough air
(underinflation) you can get:
Too much flexing
Too much heat
Tire overloading
Bad wear
Bad handling
Bad fuel economy.
If your tires have too much air (overinflati
Unusual wear
Bad handling
Rough ride
Needless damage from road hazards. can
get
‘e re
When to Check
Check your tires once a month or more. Also, check the tire pressure of the
spare tire.
How to Check
Use a good quality pocket-type gage to check tire pressure. Simply looking
at the tires will not tell you the pressure, especially if you have radial tires
- which may look properly inflated even if they’re underinflated.
If your tires have valve caps, be sure to put them back on. They help prevent
leaks by keeping out dirt and moisture.
Tire Inspection and Rotation
Tires should be inspected every 6,000 to 8,000 miles (10 000 to 13 000 km)
for any signs of unusual wear. If unusual wear is present, rotate your tires as
soon
as possible and check wheel alignment. Also check for damaged tires
or wheels. See “When it’s Time for New Tires” and “Wheel Replacement”
later in
this section for more information.
6-41
Page 259 of 354
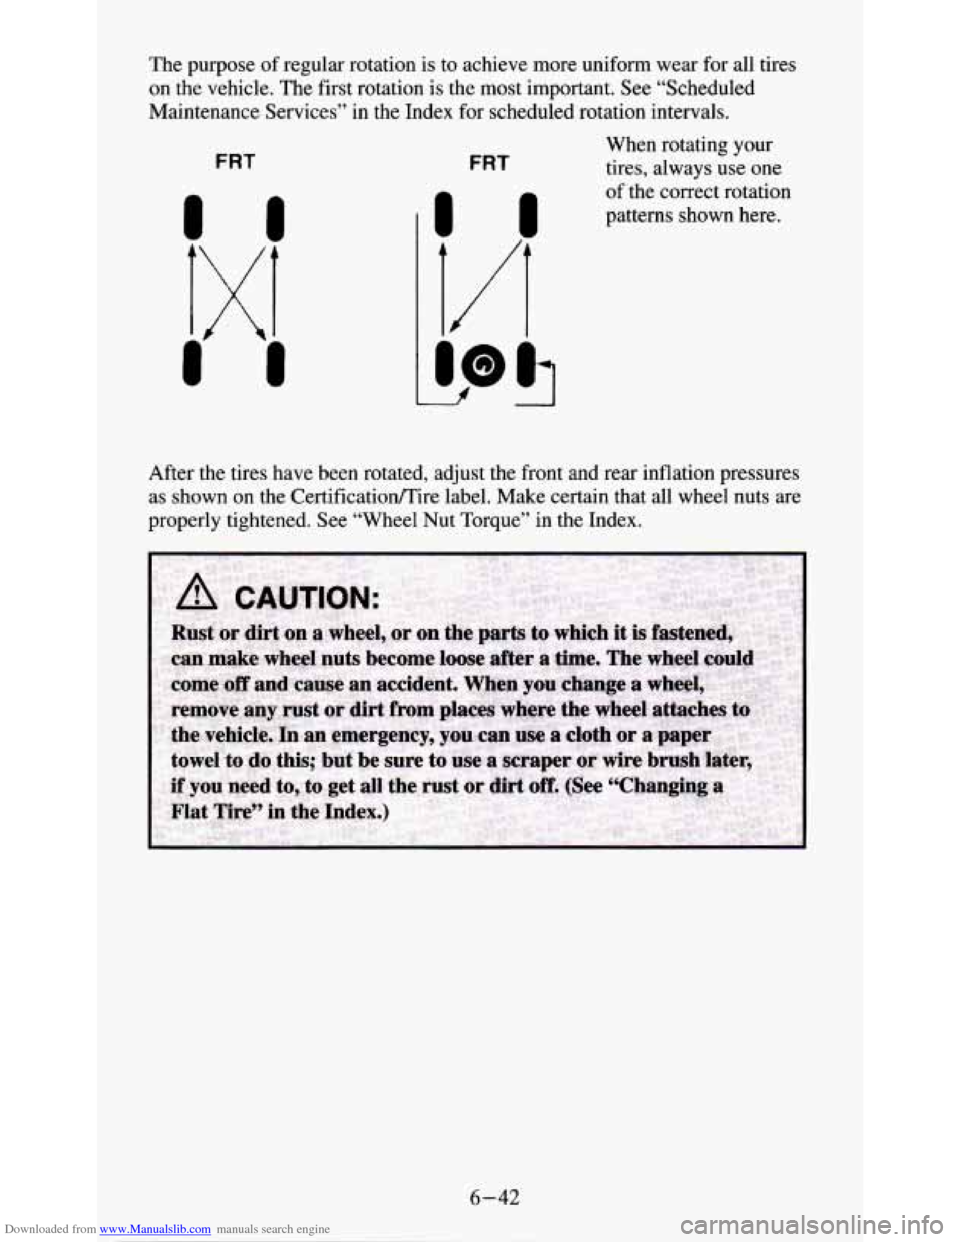
Downloaded from www.Manualslib.com manuals search engine The purpose of regular rotation is to achieve more uniform wear for all tires
on the vehicle. The first rotation is the most important. See “Scheduled
Maintenance Services” in
the Index for scheduled rotation intervals.
FRT
D
When rotating your
FRT tires, always use one
of the correct rotation
patterns shown here.
ID
[/[
After the tires have been rotated, adjust the front and rear inflation pressures
as shown on the CertificatiodTire label. Make certain that all wheel nuts are
properly tightened. See “Wheel Nut Torque” in the Index.
6-42
Page 260 of 354
Downloaded from www.Manualslib.com manuals search engine When it’s Time for New Tires
You need a new tire if:
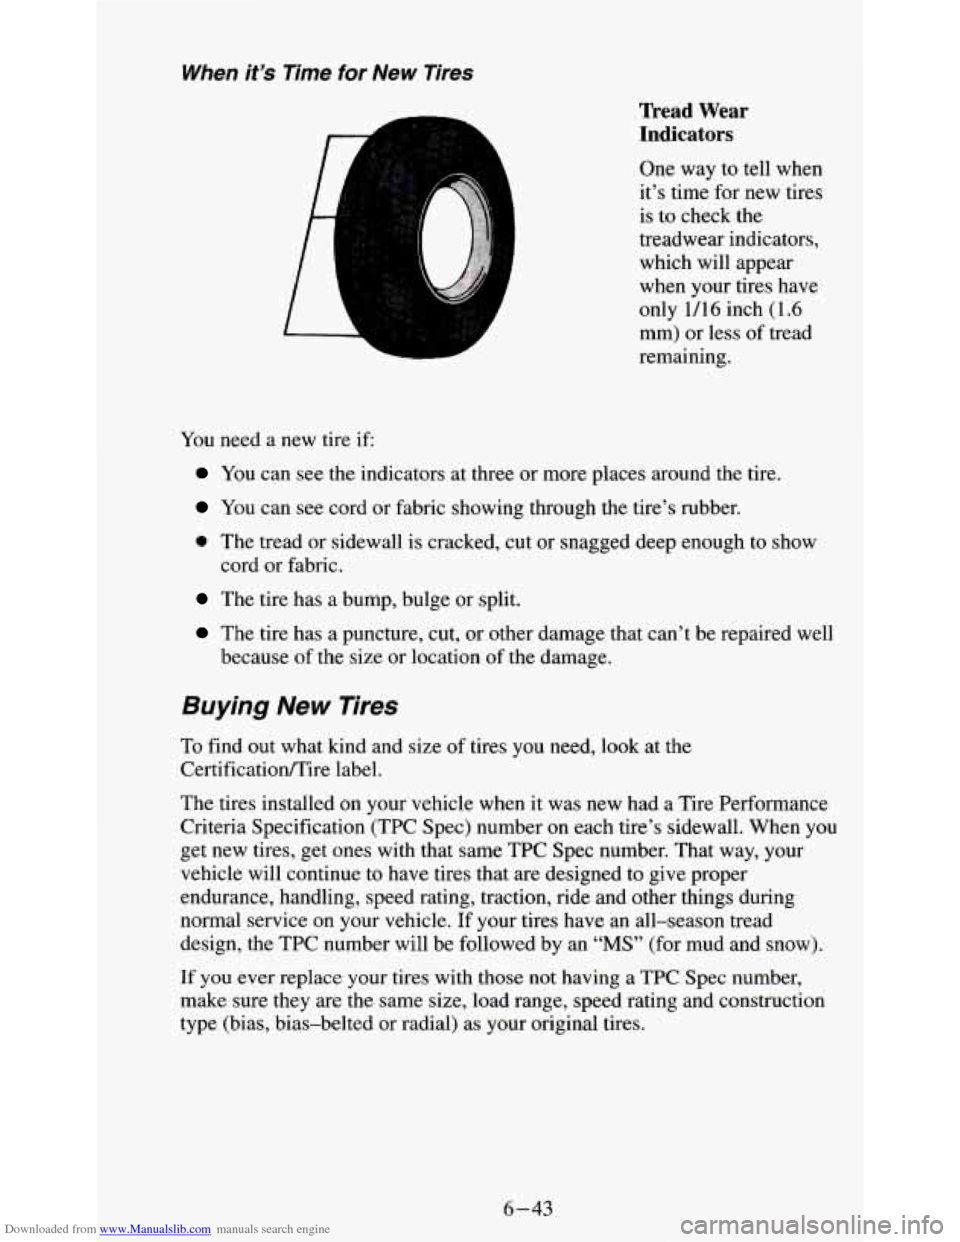
Tread Wear
Indicators
One way to tell when
it’s time for new tires
is to check the
treadwear indicators,
which will appear
when your tires have
only
1/16 inch (1.6
mm) or less of tread
remaining.
You can see the indicators at three or more places around the tire.
You can see cord or fabric showing through the tire’s rubber.
0 The tread or sidewall is cracked, cut or snagged deep enough to show
cord or fabric.
The tire has a bump, bulge or split.
The tire has a puncture, cut, or other damage that can’t be repaired well
because
of the size or location of the damage.
Buying New Tires
To find out what kind and size of tires you need, look at the
Certificationmire label.
The tires installed on your vehicle when it was new had a Tire Performance
Criteria Specification (TPC Spec) number on each tire’s sidewall. When you
get new tires, get ones with that same TPC Spec number. That way, your
vehicle will continue to have tires that are designed
to give proper
endurance, handling, speed rating, traction, ride and other things during
normal service on your vehicle. If your tires have an all-season tread
design, the TPC number will be followed by an
“MS” (for mud and snow).
If you ever replace your tires with those not having a TPC Spec number,
make sure they are the same size, load range, speed rating and construction
type (bias, bias-belted or radial) as your original tires.
6-43