remove CHEVROLET SILVERADO 2500 2023 Repair Manual
[x] Cancel search | Manufacturer: CHEVROLET, Model Year: 2023, Model line: SILVERADO 2500, Model: CHEVROLET SILVERADO 2500 2023Pages: 441, PDF Size: 14.4 MB
Page 278 of 441
Chevrolet Silverado 2500 HD/3500 HD Owner Manual (GMNA-Localizing-U.
S./Canada/Mexico-15546003) - 2022 - CRC - 5/5/21
Driving and Operating 277
Warning (Continued)
.Do not move the vehicle if someone is
in the path of the trailer. Some parts
of the trailer might be underwater and
not visible to people who are assisting
in launching the boat.
Disconnect the wiring to the trailer before
backing the trailer into the water to prevent
damage to the electrical circuits on the
trailer. Reconnect the wiring to the trailer
after removing the trailer from the water.
If the trailer has electric brakes that can
function when the trailer is submerged, it
might help to leave the electrical trailer
connector attached to maintain trailer brake
functionality while on the boat ramp.
To back the trailer into the water: 1. If equipped, place the vehicle in four-wheel-drive high.
2. Slowly back down the boat ramp until the boat is floating, but no further than
necessary.
3. Press and hold the brake pedal, but do not shift into P (Park) yet.
4. Have someone place chocks under the front wheels of the vehicle. 5. Gradually release the brake pedal to
allow the chocks to absorb the load of
the trailer.
6. Reapply the brake pedal. Then apply the parking brake and shift into P (Park).
7. Release the brake pedal.
Pulling the Trailer from the Water
To pull the trailer out of the water: 1. Press and hold the brake pedal.
2. Start the engine and shift into gear.
3. Release the parking brake.
4. Let up on the brake pedal.
5. Drive slowly until the tires are clear of the chocks.
6. Stop and have someone pick up and store the chocks.
7. Slowly pull the trailer from the water.
8. Once the vehicle and trailer have been driven from the sloped part of the boat
ramp, the vehicle can be shifted from
four-wheel-drive high. Shift into the drive
mode that is appropriate for the road
conditions.
Caution
If the vehicle tires begin to spin and the
vehicle begins to slide toward the water,
remove your foot from the accelerator
pedal and apply the brake pedal. Seek
help to have the vehicle towed up
the ramp.
Maintenance when Trailer Towing
The vehicle needs service more often when
used to tow trailers. See Maintenance
Schedule 0392. It is especially important to
check the engine oil, axle lubricant, belts,
cooling system, and brake system before
and during each trip.
Check periodically to see that all nuts and
bolts on the trailer hitch are tight.
Engine Cooling When Trailer Towing
The cooling system may temporarily
overheat during severe operating conditions.
See Engine Overheating 0318.
Page 302 of 441
Chevrolet Silverado 2500 HD/3500 HD Owner Manual (GMNA-Localizing-U.
S./Canada/Mexico-15546003) - 2022 - CRC - 5/5/21
Driving and Operating 301
On the Learn Sensors screen. Touch Relearn
to overwrite the current sensors and begin
the relearning process. See“Trailer Tire
Pressure Setup” previously in this section.
On the Learn Sensors screen, touch Next to
go to the Edit Recommended Tire Pressure
screen.
On the Edit Recommended Tire Pressure
screen, touch a number on the keypad to
change the
Recommended Tire Pressure for the trailer’s
tires. This will change the number at which
the vehicle displays alerts related to trailer
tire pressure. Touch Done to return to the
Trailer Profile view.
Trailer Maintenance
Touch to view a list of maintenance
reminders for the Trailer Profile.
Touch a reminder to view, reset, delete,
or edit it.
Reset Reminder
Touch Maintenance Complete in the
reminder view to reset the reminder. On the
pop-up, touch Reset to reset the time and
mileage values for the reminder. Touch
Cancel to return to the previous view and
nothing will change. Edit Reminder
Touch to edit the mileage or time settings
for the reminder. Touch Save to save the
new settings to the Trailer Profile.
Delete Reminder
Touch to delete the maintenance reminder.
On the pop-up, touch Delete to delete the
reminder or touch Cancel to return to the
previous view and nothing will change.
New Maintenance Reminder
Touch + New Maintenance Reminder to set
up a new reminder. Suggested reminders
that were previously set will have
checkmarks next to them. Suggested
reminders that have not been set will have
empty boxes next to them. The maximum
number of reminders is 50.
Edit Mileage
Touch to edit the Trailer Profile’s mileage.
Touch Reset to reset trailer mileage to zero,
or enter a new value and touch Save.
Touching back will return to the Trailer
Profile view.
Effect on Maintenance Reminders
If the mileage is reset or changed, and
mileage has already accumulated, any
maintenance reminders that have been set
up will be adjusted accordingly.
Reset Average Fuel Economy
Touch to reset the average fuel economy for
the Trailer Profile. Touch Reset to change,
or touch Cancel to go back to the
previous view.
Delete/Remove Trailer
Touch to remove the Trailer Profile and all
of its settings.
On the pop-up, touch Remove to remove the
Trailer Profile from the vehicle. Touch Cancel
to dismiss the pop-up and return to the
previous view.
Remove will be displayed if there is a
connected OnStar plan active with the
vehicle. Removing a trailer profile will
remove the profile from the vehicle but the
profile will still be associated with the user
account. However, if there is not a
connected OnStar plan then the remove
button will read DELETE and the profile will
be deleted permanently.
Page 306 of 441
Chevrolet Silverado 2500 HD/3500 HD Owner Manual (GMNA-Localizing-U.
S./Canada/Mexico-15546003) - 2022 - CRC - 5/5/21
Driving and Operating 305
For example, adding a 318 kg (700 lb) snow
plow actually adds more than 318 kg (700 lb)
to the front axle. Using the formula, if the
snow plow is 122 cm (4 ft) in front of the
front axle and the wheelbase is 305 cm
(10 ft), then:IW = 318 kg (700 lb)
IA = 122 cm (4 ft)
IW.B. = 305 cm (10 ft)
(W x (A + W.B.)/W.B. = (318 x (122 + 305))/305
= 445 kg (980 lb)
This means if the front axle reserve capacity
is more than 445 kg (980 lb), the snow plow
could be added without exceeding the
front GAWR.
Heavier equipment can be added on the
front of the vehicle if less cargo or fewer
passengers are carried, or by positioning
cargo toward the rear. This reduces the load
on the front. However, the front GAWR, rear
GAWR, and Gross Vehicle Weight
Rating (GVWR) must never be exceeded.{Warning
On some vehicles that have certain front
mounted equipment, such as a snow
plow, it may be possible to load the front
axle to the front Gross Axle Weight
Rating (GAWR) but not have enough
weight on the rear axle to have proper
braking performance. If the brakes cannot
work properly, the vehice could crash.
Always follow the snow plow
manufacturer or installer's
recommendation for rear ballast to
ensure a proper front and rear weight
distribution ratio. Maintaining a proper
front and rear weight distribution ratio is
necessary to provide proper braking
performance.
See your dealer for additional advice and
information about using a snow plow on the
vehicle. Also, see Vehicle Load Limits 0220.
Pickup Conversion to Chassis Cab
We are aware that some vehicle owners
might consider having the pickup box
removed and a commercial or recreational
body installed. Owners should be aware
that, as manufactured, there are differences
between a chassis cab and a pickup with the
box removed which could affect vehicle
safety. The components necessary to adapt
a pickup to permit its safe use with a
specialized body should be installed by the
body builder.
Page 310 of 441
Chevrolet Silverado 2500 HD/3500 HD Owner Manual (GMNA-Localizing-U.
S./Canada/Mexico-15546003) - 2022 - CRC - 5/5/21
Vehicle Care 309
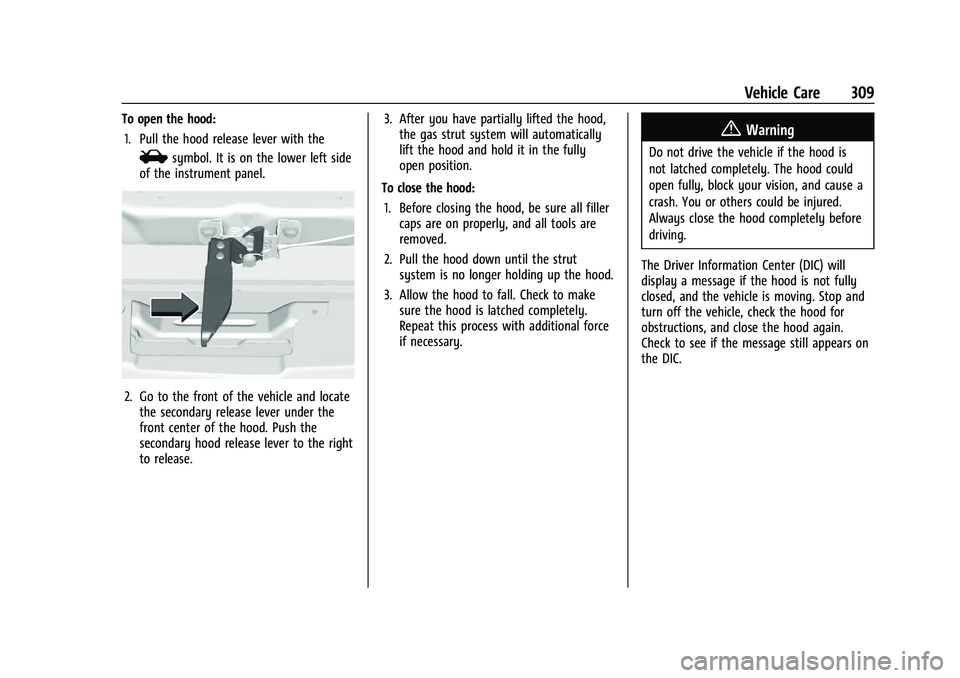
To open the hood:1. Pull the hood release lever with the
isymbol. It is on the lower left side
of the instrument panel.
2. Go to the front of the vehicle and locate the secondary release lever under the
front center of the hood. Push the
secondary hood release lever to the right
to release. 3. After you have partially lifted the hood,
the gas strut system will automatically
lift the hood and hold it in the fully
open position.
To close the hood: 1. Before closing the hood, be sure all filler caps are on properly, and all tools are
removed.
2. Pull the hood down until the strut system is no longer holding up the hood.
3. Allow the hood to fall. Check to make sure the hood is latched completely.
Repeat this process with additional force
if necessary.
{Warning
Do not drive the vehicle if the hood is
not latched completely. The hood could
open fully, block your vision, and cause a
crash. You or others could be injured.
Always close the hood completely before
driving.
The Driver Information Center (DIC) will
display a message if the hood is not fully
closed, and the vehicle is moving. Stop and
turn off the vehicle, check the hood for
obstructions, and close the hood again.
Check to see if the message still appears on
the DIC.
Page 312 of 441
Chevrolet Silverado 2500 HD/3500 HD Owner Manual (GMNA-Localizing-U.
S./Canada/Mexico-15546003) - 2022 - CRC - 5/5/21
Vehicle Care 311
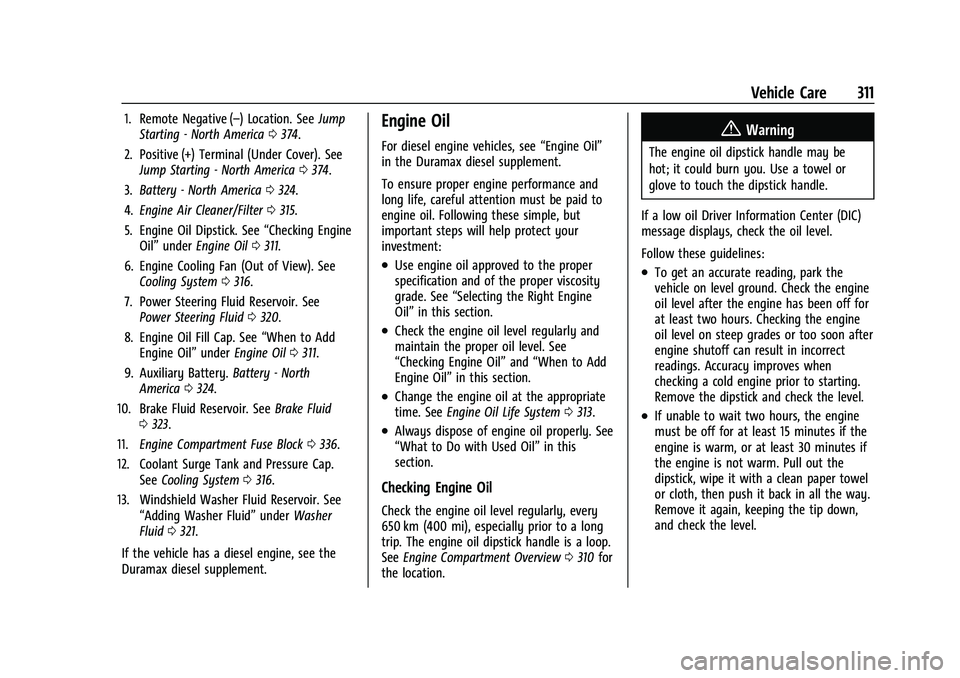
1. Remote Negative (–) Location. SeeJump
Starting - North America 0374.
2. Positive (+) Terminal (Under Cover). See Jump Starting - North America 0374.
3. Battery - North America 0324.
4. Engine Air Cleaner/Filter 0315.
5. Engine Oil Dipstick. See “Checking Engine
Oil” under Engine Oil 0311.
6. Engine Cooling Fan (Out of View). See Cooling System 0316.
7. Power Steering Fluid Reservoir. See Power Steering Fluid 0320.
8. Engine Oil Fill Cap. See “When to Add
Engine Oil” underEngine Oil 0311.
9. Auxiliary Battery. Battery - North
America 0324.
10. Brake Fluid Reservoir. See Brake Fluid
0 323.
11. Engine Compartment Fuse Block 0336.
12. Coolant Surge Tank and Pressure Cap. SeeCooling System 0316.
13. Windshield Washer Fluid Reservoir. See “Adding Washer Fluid” underWasher
Fluid 0321.
If the vehicle has a diesel engine, see the
Duramax diesel supplement.Engine Oil
For diesel engine vehicles, see “Engine Oil”
in the Duramax diesel supplement.
To ensure proper engine performance and
long life, careful attention must be paid to
engine oil. Following these simple, but
important steps will help protect your
investment:
.Use engine oil approved to the proper
specification and of the proper viscosity
grade. See “Selecting the Right Engine
Oil” in this section.
.Check the engine oil level regularly and
maintain the proper oil level. See
“Checking Engine Oil” and“When to Add
Engine Oil” in this section.
.Change the engine oil at the appropriate
time. SeeEngine Oil Life System 0313.
.Always dispose of engine oil properly. See
“What to Do with Used Oil” in this
section.
Checking Engine Oil
Check the engine oil level regularly, every
650 km (400 mi), especially prior to a long
trip. The engine oil dipstick handle is a loop.
See Engine Compartment Overview 0310 for
the location.
{Warning
The engine oil dipstick handle may be
hot; it could burn you. Use a towel or
glove to touch the dipstick handle.
If a low oil Driver Information Center (DIC)
message displays, check the oil level.
Follow these guidelines:
.To get an accurate reading, park the
vehicle on level ground. Check the engine
oil level after the engine has been off for
at least two hours. Checking the engine
oil level on steep grades or too soon after
engine shutoff can result in incorrect
readings. Accuracy improves when
checking a cold engine prior to starting.
Remove the dipstick and check the level.
.If unable to wait two hours, the engine
must be off for at least 15 minutes if the
engine is warm, or at least 30 minutes if
the engine is not warm. Pull out the
dipstick, wipe it with a clean paper towel
or cloth, then push it back in all the way.
Remove it again, keeping the tip down,
and check the level.
Page 313 of 441
Chevrolet Silverado 2500 HD/3500 HD Owner Manual (GMNA-Localizing-U.
S./Canada/Mexico-15546003) - 2022 - CRC - 5/5/21
312 Vehicle Care
When to Add Engine Oil
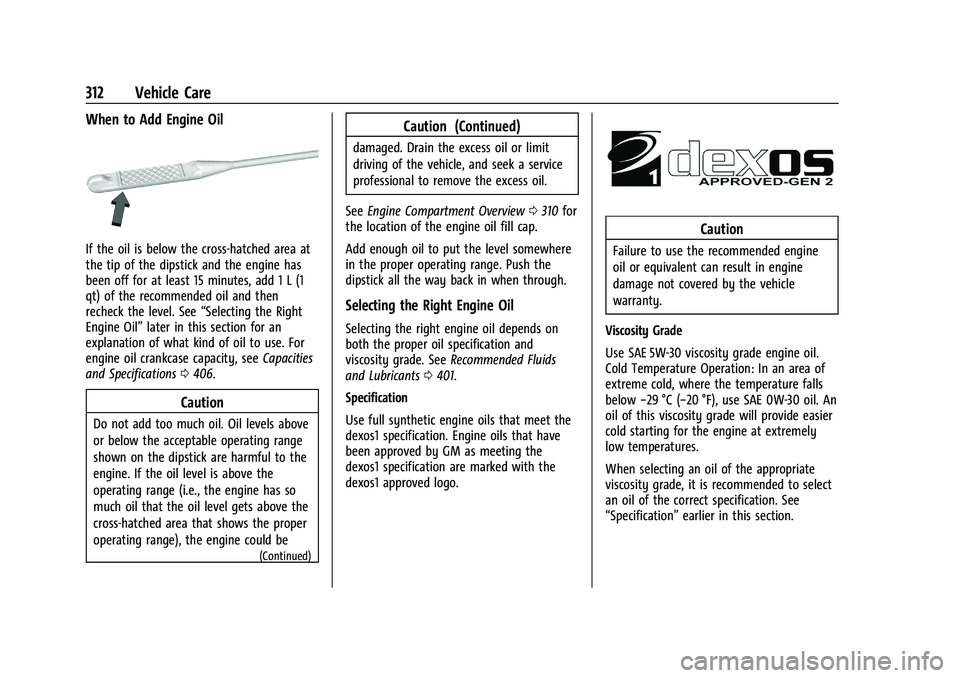
If the oil is below the cross-hatched area at
the tip of the dipstick and the engine has
been off for at least 15 minutes, add 1 L (1
qt) of the recommended oil and then
recheck the level. See“Selecting the Right
Engine Oil” later in this section for an
explanation of what kind of oil to use. For
engine oil crankcase capacity, see Capacities
and Specifications 0406.
Caution
Do not add too much oil. Oil levels above
or below the acceptable operating range
shown on the dipstick are harmful to the
engine. If the oil level is above the
operating range (i.e., the engine has so
much oil that the oil level gets above the
cross-hatched area that shows the proper
operating range), the engine could be
(Continued)
Caution (Continued)
damaged. Drain the excess oil or limit
driving of the vehicle, and seek a service
professional to remove the excess oil.
See Engine Compartment Overview 0310 for
the location of the engine oil fill cap.
Add enough oil to put the level somewhere
in the proper operating range. Push the
dipstick all the way back in when through.
Selecting the Right Engine Oil
Selecting the right engine oil depends on
both the proper oil specification and
viscosity grade. See Recommended Fluids
and Lubricants 0401.
Specification
Use full synthetic engine oils that meet the
dexos1 specification. Engine oils that have
been approved by GM as meeting the
dexos1 specification are marked with the
dexos1 approved logo.
Caution
Failure to use the recommended engine
oil or equivalent can result in engine
damage not covered by the vehicle
warranty.
Viscosity Grade
Use SAE 5W-30 viscosity grade engine oil.
Cold Temperature Operation: In an area of
extreme cold, where the temperature falls
below −29 °C (−20 °F), use SAE 0W-30 oil. An
oil of this viscosity grade will provide easier
cold starting for the engine at extremely
low temperatures.
When selecting an oil of the appropriate
viscosity grade, it is recommended to select
an oil of the correct specification. See
“Specification” earlier in this section.
Page 316 of 441
Chevrolet Silverado 2500 HD/3500 HD Owner Manual (GMNA-Localizing-U.
S./Canada/Mexico-15546003) - 2022 - CRC - 5/5/21
Vehicle Care 315
Select Reset then press the thumbwheel
or press the reset stem for several
seconds.
4. Press the thumbwheel or the reset stem to confirm the reset.
Engine Air Cleaner/Filter
The engine air cleaner/filter is on the driver
side of the engine compartment. See Engine
Compartment Overview 0310.
When to Inspect the Engine Air Cleaner/
Filter
If the vehicle is not equipped with the
engine air filter life system, see
Maintenance Schedule 0392 for intervals on
inspecting and replacing the engine air
cleaner filter.
How to Inspect/Replace the Engine Air
Cleaner/Filter
Do not start the engine or have the engine
running with the engine air cleaner/filter
housing open. Before removing the engine
air cleaner/filter, make sure that the engine
air cleaner/filter housing and nearby
components are free of dirt and debris. Do
not clean the engine air cleaner/filter or
components with water or compressed air. To inspect or replace the engine air cleaner/
filter:
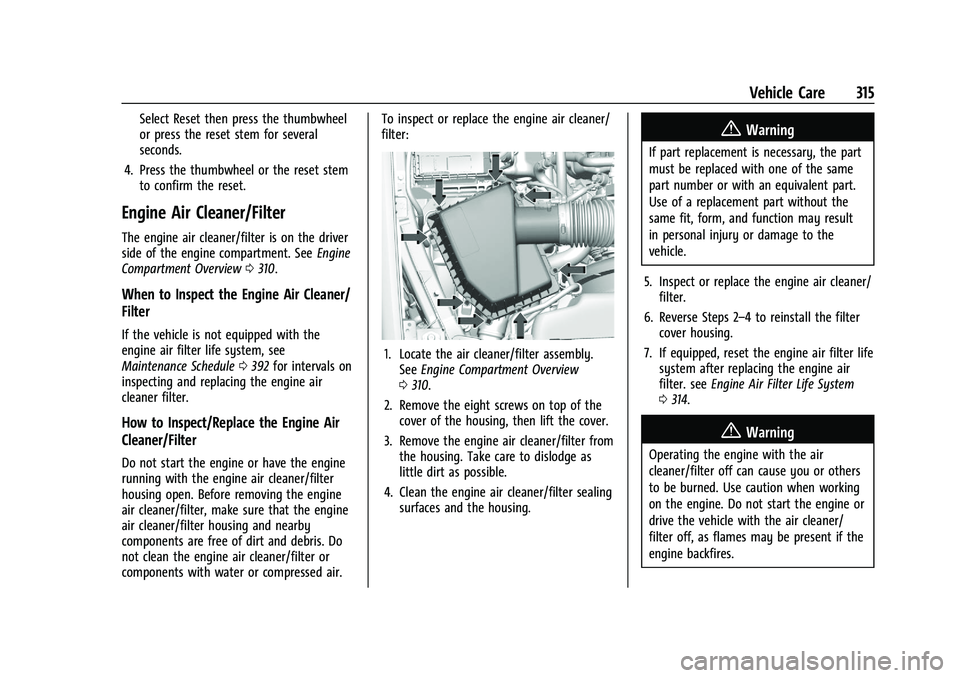
1. Locate the air cleaner/filter assembly.
See Engine Compartment Overview
0 310.
2. Remove the eight screws on top of the cover of the housing, then lift the cover.
3. Remove the engine air cleaner/filter from the housing. Take care to dislodge as
little dirt as possible.
4. Clean the engine air cleaner/filter sealing surfaces and the housing.
{Warning
If part replacement is necessary, the part
must be replaced with one of the same
part number or with an equivalent part.
Use of a replacement part without the
same fit, form, and function may result
in personal injury or damage to the
vehicle.
5. Inspect or replace the engine air cleaner/ filter.
6. Reverse Steps 2–4 to reinstall the filter cover housing.
7. If equipped, reset the engine air filter life system after replacing the engine air
filter. see Engine Air Filter Life System
0 314.
{Warning
Operating the engine with the air
cleaner/filter off can cause you or others
to be burned. Use caution when working
on the engine. Do not start the engine or
drive the vehicle with the air cleaner/
filter off, as flames may be present if the
engine backfires.
Page 319 of 441
Chevrolet Silverado 2500 HD/3500 HD Owner Manual (GMNA-Localizing-U.
S./Canada/Mexico-15546003) - 2022 - CRC - 5/5/21
318 Vehicle Care
{Warning
Steam and scalding liquids from a hot
cooling system are under pressure.
Turning the pressure cap, even a little,
can cause them to come out at high
speed and you could be burned. Never
turn the cap when the cooling system,
including the pressure cap, is hot. Wait
for the cooling system and pressure cap
to cool.
Caution
Failure to follow the specific coolant fill
procedure could cause the engine to
overheat and could cause system
damage. If coolant is not visible in the
surge tank, contact your dealer.
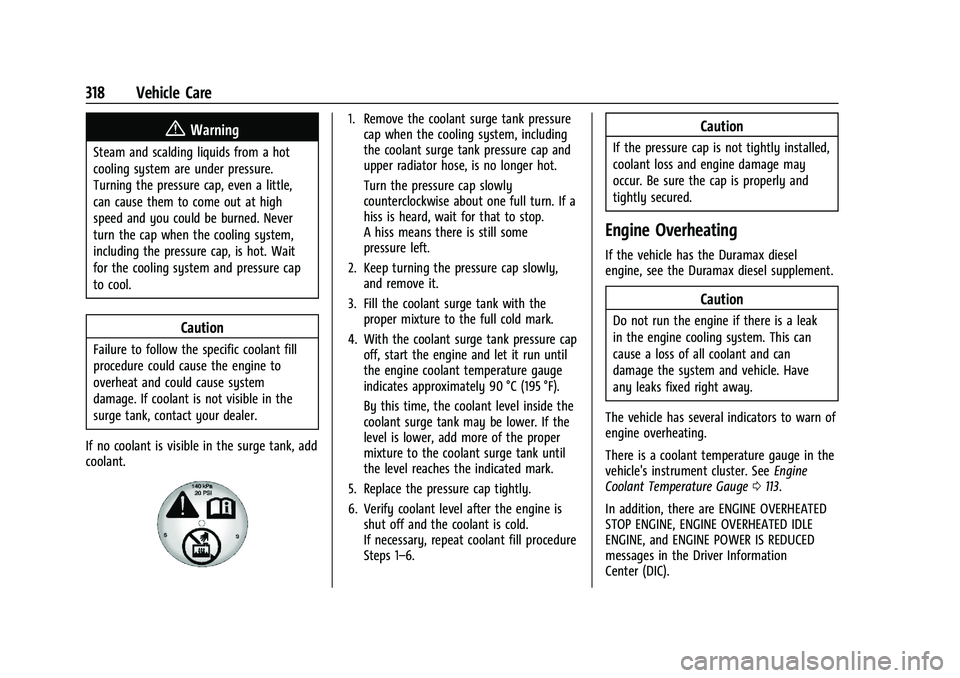
If no coolant is visible in the surge tank, add
coolant.
1. Remove the coolant surge tank pressure cap when the cooling system, including
the coolant surge tank pressure cap and
upper radiator hose, is no longer hot.
Turn the pressure cap slowly
counterclockwise about one full turn. If a
hiss is heard, wait for that to stop.
A hiss means there is still some
pressure left.
2. Keep turning the pressure cap slowly, and remove it.
3. Fill the coolant surge tank with the proper mixture to the full cold mark.
4. With the coolant surge tank pressure cap off, start the engine and let it run until
the engine coolant temperature gauge
indicates approximately 90 °C (195 °F).
By this time, the coolant level inside the
coolant surge tank may be lower. If the
level is lower, add more of the proper
mixture to the coolant surge tank until
the level reaches the indicated mark.
5. Replace the pressure cap tightly.
6. Verify coolant level after the engine is shut off and the coolant is cold.
If necessary, repeat coolant fill procedure
Steps 1–6.Caution
If the pressure cap is not tightly installed,
coolant loss and engine damage may
occur. Be sure the cap is properly and
tightly secured.
Engine Overheating
If the vehicle has the Duramax diesel
engine, see the Duramax diesel supplement.
Caution
Do not run the engine if there is a leak
in the engine cooling system. This can
cause a loss of all coolant and can
damage the system and vehicle. Have
any leaks fixed right away.
The vehicle has several indicators to warn of
engine overheating.
There is a coolant temperature gauge in the
vehicle's instrument cluster. See Engine
Coolant Temperature Gauge 0113.
In addition, there are ENGINE OVERHEATED
STOP ENGINE, ENGINE OVERHEATED IDLE
ENGINE, and ENGINE POWER IS REDUCED
messages in the Driver Information
Center (DIC).
Page 322 of 441
Chevrolet Silverado 2500 HD/3500 HD Owner Manual (GMNA-Localizing-U.
S./Canada/Mexico-15546003) - 2022 - CRC - 5/5/21
Vehicle Care 321
is heard. A fluid loss in this system could
indicate a problem. Have the system
inspected and repaired.
Wait for the power steering system to cool,
with the engine off, before checking the
fluid.
How to Check Power Steering Fluid
To check the power steering fluid:1. Set the ignition off and let the engine compartment cool down.
2. Wipe the cap and the top of the reservoir clean.
3. Unscrew the cap and wipe the dipstick with a clean rag.
4. Replace the cap and completely tighten it.
5. Remove the cap again and look at the fluid level on the dipstick.
The level should be between the ADD and
FULL marks. If necessary, add only enough
fluid to bring the level up to the hashed
area between the ADD and FULL marks, do
not overfill. To prevent contamination of brake fluid,
never check or fill the power steering
reservoir with the brake master cylinder
cover off.
What to Use
Caution
Use of the incorrect fluid may damage
the vehicle and the damages may not be
covered by the vehicle warranty. Always
use the correct fluid listed in
Recommended Fluids and Lubricants
0401.
To determine what kind of fluid to use, see
Recommended Fluids and Lubricants 0401.
Always use the proper fluid. Failure to use
the proper fluid can cause leaks and damage
hoses and seals.
Washer Fluid
What to Use
When windshield washer fluid needs to be
added, be sure to read the manufacturer's
instructions before use. Use a fluid that has
sufficient protection against freezing in an
area where the temperature may fall below
freezing.
Adding Washer Fluid
The vehicle has a low washer fluid message
on the DIC that comes on when the washer
fluid is low. The message is displayed for
15 seconds at the start of each ignition cycle.
When the WASHER FLUID LOW ADD FLUID
message displays, washer fluid will need to
be added to the windshield washer fluid
reservoir.
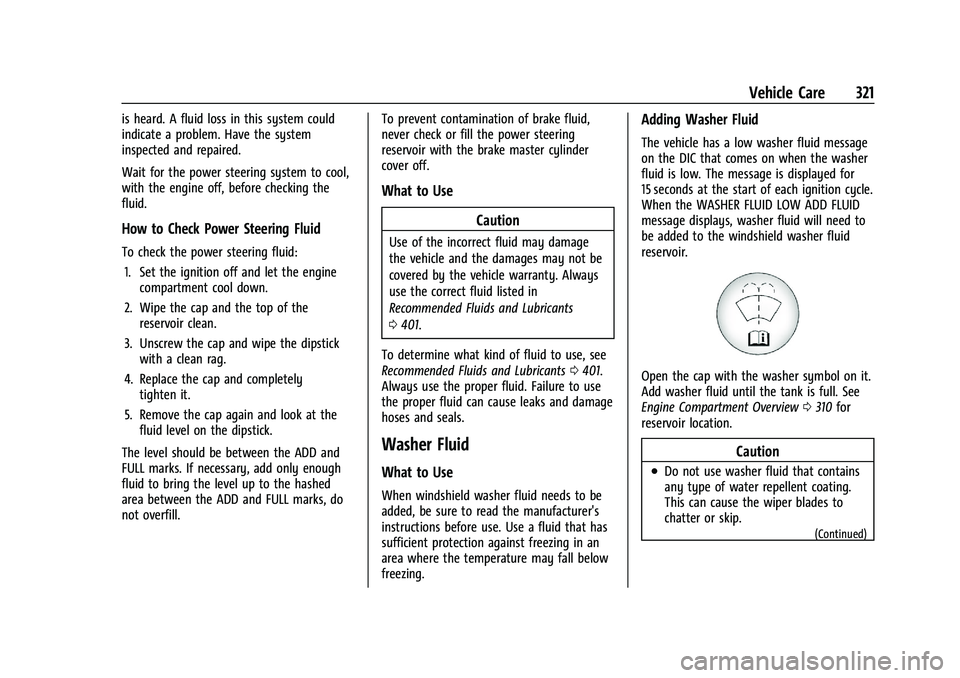
Open the cap with the washer symbol on it.
Add washer fluid until the tank is full. See
Engine Compartment Overview 0310 for
reservoir location.
Caution
.Do not use washer fluid that contains
any type of water repellent coating.
This can cause the wiper blades to
chatter or skip.
(Continued)
Page 325 of 441
Chevrolet Silverado 2500 HD/3500 HD Owner Manual (GMNA-Localizing-U.
S./Canada/Mexico-15546003) - 2022 - CRC - 5/5/21
324 Vehicle Care
installed. Add or remove fluid, as necessary,
only when work is done on the brake
hydraulic system.
{Warning
If too much brake fluid is added, it can
spill on the engine and burn, if the
engine is hot enough. You or others could
be burned, and the vehicle could be
damaged. Add brake fluid only when
work is done on the brake hydraulic
system.
When the brake fluid falls to a low level,
the brake warning light comes on. See Brake
System Warning Light 0117.
Brake fluid absorbs water over time which
degrades the effectiveness of the brake fluid.
Replace brake fluid at the specified intervals
to prevent increased stopping distance. See
Maintenance Schedule 0392.
What to Add
Use only GM approved DOT 4 brake fluid
from a clean, sealed container. See
Recommended Fluids and Lubricants 0401.
{Warning
The wrong or contaminated brake fluid
could result in damage to the brake
system. This could result in the loss of
braking leading to a possible injury.
Always use the proper GM approved
brake fluid.
Caution
If brake fluid is spilled on the vehicle's
painted surfaces, the paint finish can be
damaged. Immediately wash off any
painted surface.
Battery - North America
The original equipment battery is
maintenance free. Do not remove the cap
and do not add fluid.
Refer to the replacement number shown on
the original battery label when a new
battery is needed. See Engine Compartment
Overview 0310 for battery location.
{Warning
WARNING: Battery posts, terminals and
related accessories can expose you to
chemicals including lead and lead
compounds, which are known to the
State of California to cause cancer and
birth defects or other reproductive harm.
Wash hands after handling. For more
information go to
www.P65Warnings.ca.gov.
See the warning on the back cover.
Vehicle Storage
{Warning
Batteries have acid that can burn you and
gas that can explode. You can be badly
hurt if you are not careful. See Jump
Starting - North America 0374 for tips on
working around a battery without
getting hurt.
Infrequent Usage: Remove the black,
negative (−) cable from the battery to keep
the battery from running down.