CHEVROLET SILVERADO EV 2024 Owners Manual
Manufacturer: CHEVROLET, Model Year: 2024, Model line: SILVERADO EV, Model: CHEVROLET SILVERADO EV 2024Pages: 429, PDF Size: 8.98 MB
Page 91 of 429

Chevrolet Silverado EV Owner Manual (GMNA-Localizing-U.S./Canada-
16702912) - 2024 - CRC - 1/13/23
90 Seats and Restraints
6. To tighten the belt, push down on thechild restraint, pull the shoulder portion
of the belt to tighten the lap portion of
the belt, and feed the shoulder belt back
into the retractor.
There must be finger clearance between
the release pushbutton and the child
restraint. If there is not clearance
between the buckle release pushbutton
and the child restraint, move the seat
upward and repeat prior installation
steps. Otherwise secure the child
restraint in a rear seat.
When installing a forward-facing child
restraint, it may be helpful to use your
knee to push down on the child restraint
as you tighten the belt. Try to pull the belt out of the retractor
to make sure the retractor is locked.
If the retractor is not locked, repeat
Steps 5 and 6.
7. Before placing a child in the child restraint, make sure it is securely held in
place. To check, grasp the child restraint
at the seat belt path and attempt to
move it side to side and back and forth.
When the child restraint is properly
installed, there should be no more than
2.5 cm (1 in) of movement.
If the airbag is off, the OFF indicator in the
passenger airbag status indicator will come
on and stay on when the vehicle is started.
If a child restraint has been installed and
the ON indicator is lit, see “If the On
Indicator Is Lit for a Child Restraint” under
Passenger Sensing System 065.
To remove the child restraint, unbuckle the
vehicle seat belt and let it return to the
stowed position.
Page 92 of 429
Chevrolet Silverado EV Owner Manual (GMNA-Localizing-U.S./Canada-
16702912) - 2024 - CRC - 1/13/23
Storage 91
Storage
Storage Compartments
Storage Compartments . . . . . . . . . . . . . . . . . 91
Glove Box . . . . . . . . . . . . . . . . . . . . . . . . . . . . . . 91
Cupholders . . . . . . . . . . . . . . . . . . . . . . . . . . . . . 91
Underhood Storage (eTrunk™) . . . . . . . . . . 91
Underseat Storage . . . . . . . . . . . . . . . . . . . . . . 92
Floor Console Storage . . . . . . . . . . . . . . . . . . 93
Luggage/Load Locations
Cargo Area . . . . . . . . . . . . . . . . . . . . . . . . . . . . . 93
Additional Storage Features
Cargo Tie-Downs . . . . . . . . . . . . . . . . . . . . . . . 94
Storage Compartments{
Warning
Do not store heavy or sharp objects in
storage compartments. In a crash, these
objects may cause the cover to open and
could result in injury.
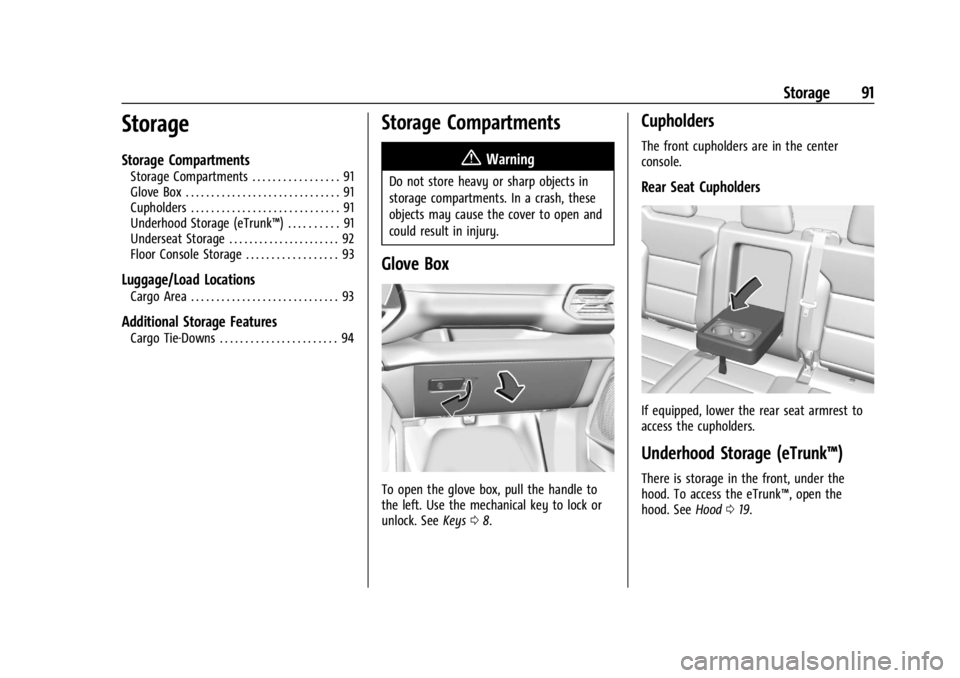
Glove Box
To open the glove box, pull the handle to
the left. Use the mechanical key to lock or
unlock. See Keys08.
Cupholders
The front cupholders are in the center
console.
Rear Seat Cupholders
If equipped, lower the rear seat armrest to
access the cupholders.
Underhood Storage (eTrunk™)
There is storage in the front, under the
hood. To access the eTrunk™, open the
hood. See Hood019.
Page 93 of 429

Chevrolet Silverado EV Owner Manual (GMNA-Localizing-U.S./Canada-
16702912) - 2024 - CRC - 1/13/23
92 Storage
Caution
When cleaning the eTrunk™, do not get
the exposed electrical components wet.
This may damage the vehicle.
There are four hooks (1) for use with the
convenience net, if equipped. The maximum
load per hook is 30 kg (66 lbs).
There are also four cargo tie-downs (2) in
the eTrunk™. These can be used to strap
cargo down and keep it from moving inside
the vehicle. The maximum load per corner is
50 kg (110 lbs).
Underseat Storage
There may be storage under the rear
passenger seat.
Base Level Underseat Storage
Lift up on the seat bench to access. Push the
seat bench down to close.Uplevel Underseat Storage
Pull the strap on the rear edge of the seat
cushion to release. Tilt the seat cushion
forward to access the storage. Rotate the
seat bench rearward and push down to
close.
Page 94 of 429
Chevrolet Silverado EV Owner Manual (GMNA-Localizing-U.S./Canada-
16702912) - 2024 - CRC - 1/13/23
Storage 93
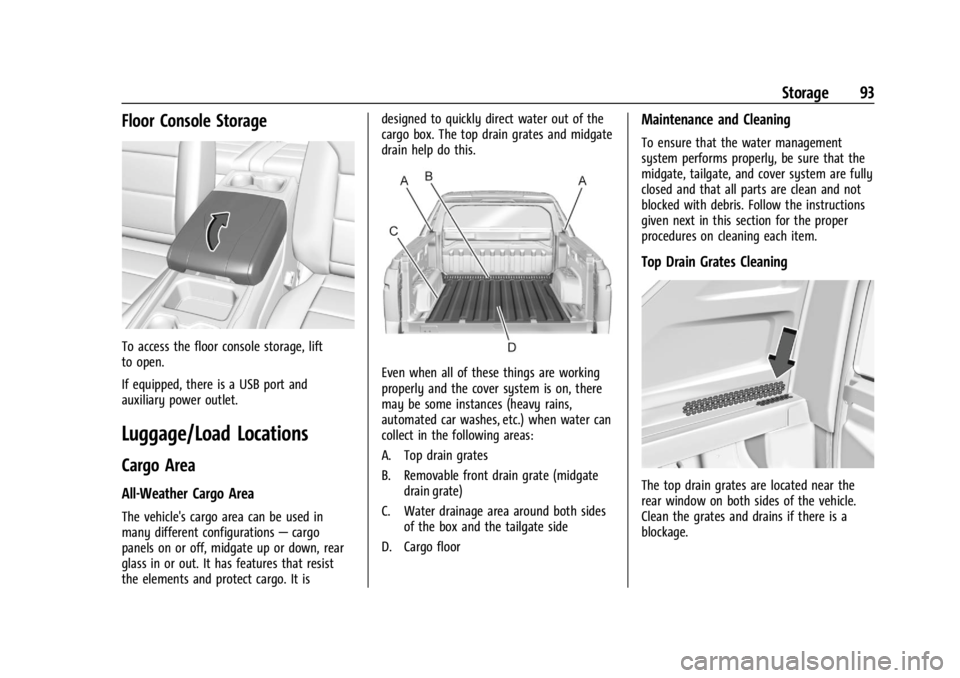
Floor Console Storage
To access the floor console storage, lift
to open.
If equipped, there is a USB port and
auxiliary power outlet.
Luggage/Load Locations
Cargo Area
All-Weather Cargo Area
The vehicle's cargo area can be used in
many different configurations—cargo
panels on or off, midgate up or down, rear
glass in or out. It has features that resist
the elements and protect cargo. It is designed to quickly direct water out of the
cargo box. The top drain grates and midgate
drain help do this.
Even when all of these things are working
properly and the cover system is on, there
may be some instances (heavy rains,
automated car washes, etc.) when water can
collect in the following areas:
A. Top drain grates
B. Removable front drain grate (midgate
drain grate)
C. Water drainage area around both sides of the box and the tailgate side
D. Cargo floor
Maintenance and Cleaning
To ensure that the water management
system performs properly, be sure that the
midgate, tailgate, and cover system are fully
closed and that all parts are clean and not
blocked with debris. Follow the instructions
given next in this section for the proper
procedures on cleaning each item.
Top Drain Grates Cleaning
The top drain grates are located near the
rear window on both sides of the vehicle.
Clean the grates and drains if there is a
blockage.
Page 95 of 429
Chevrolet Silverado EV Owner Manual (GMNA-Localizing-U.S./Canada-
16702912) - 2024 - CRC - 1/13/23
94 Storage
Midgate Drain Grate Removal and
Cleaning
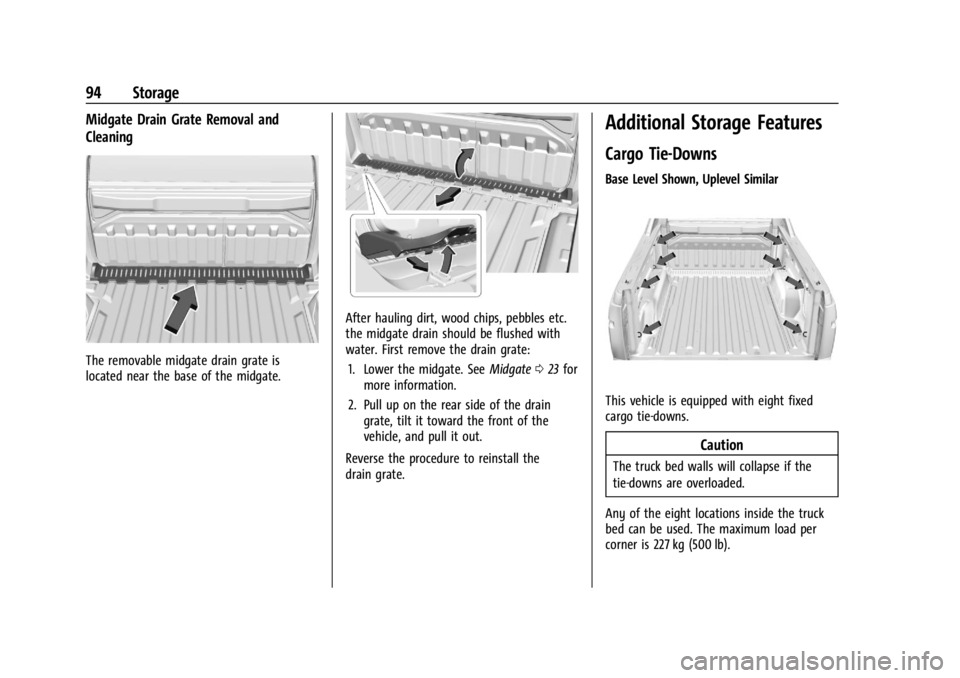
The removable midgate drain grate is
located near the base of the midgate.
After hauling dirt, wood chips, pebbles etc.
the midgate drain should be flushed with
water. First remove the drain grate:1. Lower the midgate. See Midgate023 for
more information.
2. Pull up on the rear side of the drain grate, tilt it toward the front of the
vehicle, and pull it out.
Reverse the procedure to reinstall the
drain grate.
Additional Storage Features
Cargo Tie-Downs
Base Level Shown, Uplevel Similar
This vehicle is equipped with eight fixed
cargo tie-downs.
Caution
The truck bed walls will collapse if the
tie-downs are overloaded.
Any of the eight locations inside the truck
bed can be used. The maximum load per
corner is 227 kg (500 lb).
Page 96 of 429
Chevrolet Silverado EV Owner Manual (GMNA-Localizing-U.S./Canada-
16702912) - 2024 - CRC - 1/13/23
Storage 95
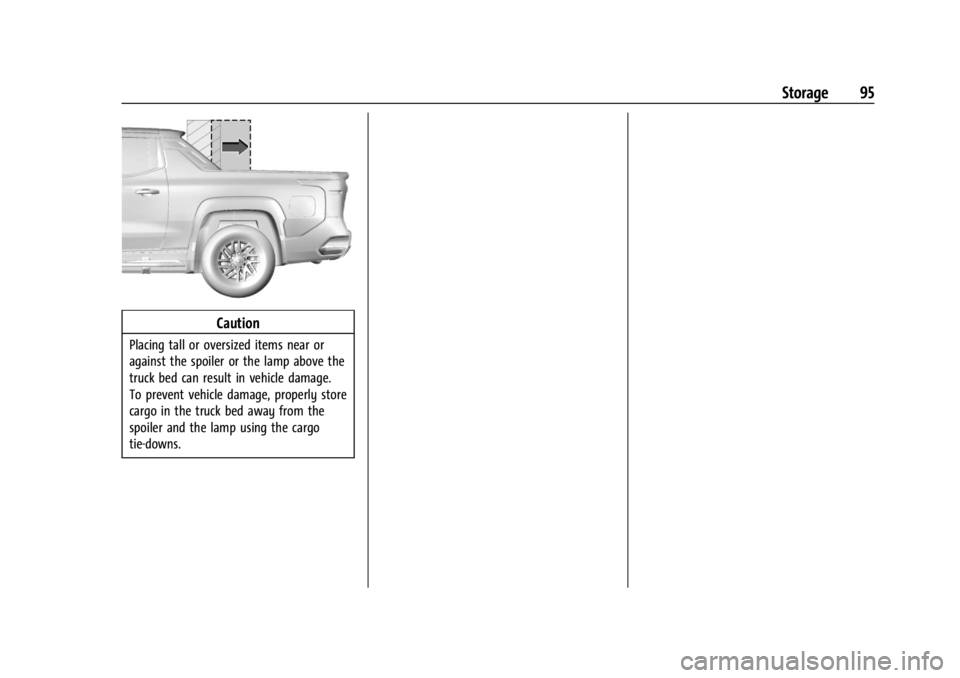
Caution
Placing tall or oversized items near or
against the spoiler or the lamp above the
truck bed can result in vehicle damage.
To prevent vehicle damage, properly store
cargo in the truck bed away from the
spoiler and the lamp using the cargo
tie-downs.
Page 97 of 429
Chevrolet Silverado EV Owner Manual (GMNA-Localizing-U.S./Canada-
16702912) - 2024 - CRC - 1/13/23
96 Instruments and Controls
Instruments and Controls
Controls
Steering Wheel Adjustment . . . . . . . . . . . . 97
Heated Steering Wheel . . . . . . . . . . . . . . . . . 97
Horn . . . . . . . . . . . . . . . . . . . . . . . . . . . . . . . . . . . 98
Pedestrian Safety Signal . . . . . . . . . . . . . . . . 98
Windshield Wiper/Washer . . . . . . . . . . . . . 98
Clock . . . . . . . . . . . . . . . . . . . . . . . . . . . . . . . . . . . 99
Power Outlets . . . . . . . . . . . . . . . . . . . . . . . . . . 99
Onboard Generator . . . . . . . . . . . . . . . . . . . . 101
Wireless Charging . . . . . . . . . . . . . . . . . . . . . 104
On-Screen Controls . . . . . . . . . . . . . . . . . . . . 107
Warning Lights, Gauges, and Indicators
Warning Lights, Gauges, andIndicators . . . . . . . . . . . . . . . . . . . . . . . . . . . . 107
Instrument Cluster (Base Level) . . . . . . . . 107
Instrument Cluster (Uplevel) . . . . . . . . . . . 109
Speedometer . . . . . . . . . . . . . . . . . . . . . . . . . . 110
Odometer . . . . . . . . . . . . . . . . . . . . . . . . . . . . . . 110
Trip Odometer . . . . . . . . . . . . . . . . . . . . . . . . . 110
Battery Gauge (High Voltage) . . . . . . . . . 110
Power Indicator Gauge . . . . . . . . . . . . . . . . . 111
Speed Limiter Indicator . . . . . . . . . . . . . . . . . 112
Seat Belt Reminders . . . . . . . . . . . . . . . . . . . . 112
Airbag Readiness Light . . . . . . . . . . . . . . . . . 113
Passenger Airbag Status Indicator . . . . . . 114
Charging System Light . . . . . . . . . . . . . . . . . 114
Low State of Charge Light . . . . . . . . . . . . . 114 Charge Cord Connected Light . . . . . . . . . . 114
Battery Fault Light . . . . . . . . . . . . . . . . . . . . . 115
Propulsion Power is Limited Light . . . . . . 115
Service Vehicle Soon Light (Propulsion
System Failure) . . . . . . . . . . . . . . . . . . . . . . . 115
Brake System Warning Light . . . . . . . . . . . 115
Electric Parking Brake Light . . . . . . . . . . . . 116
Service Electric Parking Brake Light . . . . 116
Antilock Brake System (ABS) Warning Light . . . . . . . . . . . . . . . . . . . . . . . . . . . . . . . . . 116
Four-Wheel-Drive Light . . . . . . . . . . . . . . . . . 117
Lane Keep Assist (LKA) Light . . . . . . . . . . . 117
Automatic Emergency Braking (AEB) Disabled Light . . . . . . . . . . . . . . . . . . . . . . . . 117
Vehicle Ahead Indicator . . . . . . . . . . . . . . . . 117
Pedestrian Ahead Indicator . . . . . . . . . . . . . 118
Traction Off Light . . . . . . . . . . . . . . . . . . . . . . 118
Traction Control System (TCS)/Electronic Stability Control Light . . . . . . . . . . . . . . . . 118
Electronic Stability Control (ESC) Off Light . . . . . . . . . . . . . . . . . . . . . . . . . . . . . . . . . 119
Driver Mode Control Light . . . . . . . . . . . . . 119
Four-Wheel Steering Light . . . . . . . . . . . . . 119
Air Suspension Light . . . . . . . . . . . . . . . . . . . 119
Tire Pressure Light . . . . . . . . . . . . . . . . . . . . . 120
Security Light . . . . . . . . . . . . . . . . . . . . . . . . . . 121
Vehicle Ready Light . . . . . . . . . . . . . . . . . . . . 121
One-Pedal Driving Light . . . . . . . . . . . . . . . . 121
High-Beam On Light . . . . . . . . . . . . . . . . . . . . 121
Lamps On Reminder . . . . . . . . . . . . . . . . . . . . 121 Cruise Control Light . . . . . . . . . . . . . . . . . . . . 122
Driver Attention Assist Light . . . . . . . . . . . 122
Door Ajar Light . . . . . . . . . . . . . . . . . . . . . . . . 122
Information Displays
Charging . . . . . . . . . . . . . . . . . . . . . . . . . . . . . . . 123
Driver Information Center (DIC) (Base
Level) . . . . . . . . . . . . . . . . . . . . . . . . . . . . . . . . 129
Driver Information Center (DIC) (Uplevel) . . . . . . . . . . . . . . . . . . . . . . . . . . . . . 130
Vehicle Status . . . . . . . . . . . . . . . . . . . . . . . . . 132
Head-Up Display (HUD) . . . . . . . . . . . . . . . . 133
Vehicle Messages
Vehicle Messages . . . . . . . . . . . . . . . . . . . . . . 135
Propulsion Power Messages . . . . . . . . . . . 136
Vehicle Speed Messages . . . . . . . . . . . . . . . 137
Universal Remote System
Universal Remote System . . . . . . . . . . . . . . 137
Universal Remote System Programming . . . . . . . . . . . . . . . . . . . . . . . . 137
Universal Remote System Operation . . . 138
Page 98 of 429

Chevrolet Silverado EV Owner Manual (GMNA-Localizing-U.S./Canada-
16702912) - 2024 - CRC - 1/13/23
Instruments and Controls 97
Controls
Steering Wheel Adjustment
Power Tilt and Telescoping Steering Wheel
To adjust the steering wheel, if equipped:1. Press the control up or down to tilt the steering wheel up or down.
2. Press the control rearward or forward to move the steering wheel closer or away
from you. Manual Steering Wheel
To adjust the steering wheel, if equipped:
1. Pull the lever down.
2. Move the steering wheel up or down.
3. Pull the lever up to lock the steering wheel in place.
Do not adjust the steering wheel while
driving.
Heated Steering Wheel
(: Press to turn the heated steering wheel
on or off. An indicator next to the button is
lit when the feature is turned on.
The steering wheel takes about
three minutes to start heating.
Automatic Heated Steering Wheel
The heated steering wheel may turn on
during a remote start along with the heated
seats when it is cold outside. The heated
steering wheel indicator may come on in
remote start.
Page 99 of 429
Chevrolet Silverado EV Owner Manual (GMNA-Localizing-U.S./Canada-
16702912) - 2024 - CRC - 1/13/23
98 Instruments and Controls
The heated steering wheel will turn on
when the auto heated seat is activated. The
heated steering wheel indicator will display
the state of the steering wheel heat.
SeeHeated and Ventilated Front Seats 047.
To turn this feature on or off, select
Settings > Vehicle > Comfort and
Convenience > Heated Steering Wheel >
Select ON or OFF.
Horn
To sound the horn, pressaon the
steering wheel.
Pedestrian Safety Signal
The vehicle is equipped with automatic
sound generation. The automatic sound is
generated to indicate the vehicle presence
to pedestrians. The sound changes if the
vehicle is speeding up or slowing down. It is
activated when the vehicle is shifted into a
forward gear, N (Neutral), or R (Reverse), up
to driving speeds of 34 km/h (21 mph).
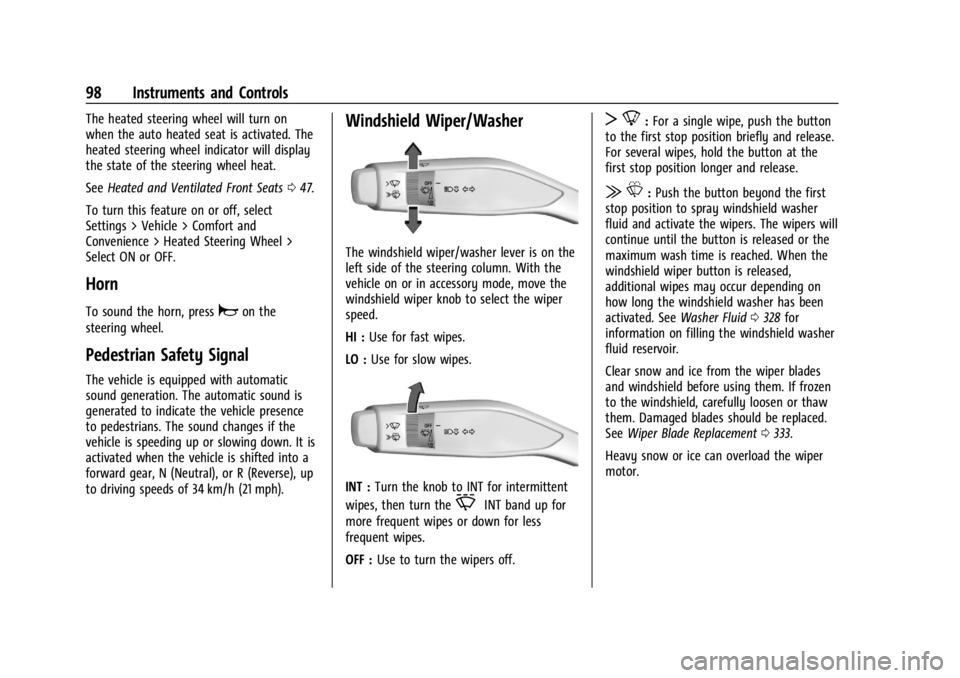
Windshield Wiper/Washer
The windshield wiper/washer lever is on the
left side of the steering column. With the
vehicle on or in accessory mode, move the
windshield wiper knob to select the wiper
speed.
HI : Use for fast wipes.
LO : Use for slow wipes.
INT : Turn the knob to INT for intermittent
wipes, then turn the
OINT band up for
more frequent wipes or down for less
frequent wipes.
OFF : Use to turn the wipers off.
T8:For a single wipe, push the button
to the first stop position briefly and release.
For several wipes, hold the button at the
first stop position longer and release.
| L:Push the button beyond the first
stop position to spray windshield washer
fluid and activate the wipers. The wipers will
continue until the button is released or the
maximum wash time is reached. When the
windshield wiper button is released,
additional wipes may occur depending on
how long the windshield washer has been
activated. See Washer Fluid0328 for
information on filling the windshield washer
fluid reservoir.
Clear snow and ice from the wiper blades
and windshield before using them. If frozen
to the windshield, carefully loosen or thaw
them. Damaged blades should be replaced.
See Wiper Blade Replacement 0333.
Heavy snow or ice can overload the wiper
motor.
Page 100 of 429
Chevrolet Silverado EV Owner Manual (GMNA-Localizing-U.S./Canada-
16702912) - 2024 - CRC - 1/13/23
Instruments and Controls 99
{Warning
In freezing weather, do not use the
washer until the windshield is warmed.
Otherwise the washer fluid can form ice
on the windshield, blocking your vision.
{Warning
Before driving the vehicle, always clear
snow and ice from the hood, windshield,
washer nozzles, roof, and rear of the
vehicle, including all lamps and windows.
Reduced visibility from snow and ice
buildup could lead to a crash.
Wiper Parking
If the vehicle is turned off while the wipers
are on LO, HI, or INT, they will
immediately stop.
If the windshield wiper lever is then moved
to OFF before the driver door is opened or
within 10 minutes, the wipers will restart
and move to the base of the windshield.
If the vehicle is turned off while the wipers
are performing wipes due to windshield
washing, the wipers continue to run until
they reach the base of the windshield.
Rain Sense
If equipped with Rain Sense and the feature
is turned on, a sensor near the top center of
the windshield detects the amount of water
on the windshield and controls the
frequency of the windshield wiper based on
the current sensitivity setting.
Keep this area of the windshield clear of
debris to allow for best system performance.
To turn the Rain Sense feature on or off, see
“Rain Sense Wipers” under Settings >
Vehicle > Comfort and Convenience > Rain
Sense > Enable/Disable.
If Rain Sense is enabled in Settings, turning
the wiper lever to INT will activate Rain
Sense.
Clock
Set the time and date using the
infotainment system. See "Time/Date" under
Settings 0166.
Power Outlets
Power Outlets 12-Volt Direct Current
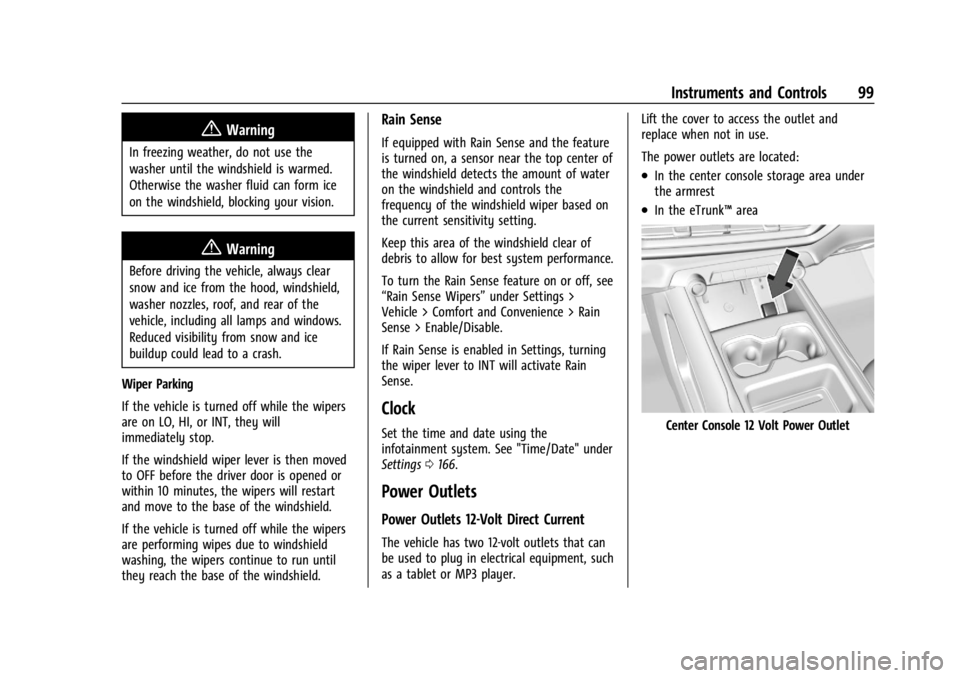
The vehicle has two 12-volt outlets that can
be used to plug in electrical equipment, such
as a tablet or MP3 player. Lift the cover to access the outlet and
replace when not in use.
The power outlets are located:
.In the center console storage area under
the armrest
.In the eTrunk™
area
Center Console 12 Volt Power Outlet