CHEVROLET TRACKER 2003 2.G Owners Manual
Manufacturer: CHEVROLET, Model Year: 2003, Model line: TRACKER, Model: CHEVROLET TRACKER 2003 2.GPages: 372, PDF Size: 2.65 MB
Page 101 of 372
{CAUTION:
It can be dangerous to get out of your vehicle
if the shift lever is not fully in PARK (P) with
the parking brake ®rmly set. Your vehicle can
roll. Do not leave your vehicle when the engine
is running unless you have to. If you have left
the engine running, the vehicle can move
suddenly. You or others could be injured.
To be sure your vehicle will not move, even
when you are on fairly level ground, always set
your parking brake and move the shift lever to
PARK (P).
{CAUTION:
Four-wheel drive vehicles with the transfer
case in NEUTRAL will allow the vehicle to roll,
even if your shift lever is in PARK (P). So, be
sure the transfer case is in a drive gear Ð not
in NEUTRAL. Always set your parking brake.
Follow the proper steps to be sure your vehicle will not
move. See
Shifting Into Park (P) on page 2-28.
If you are pulling a trailer, see
Towing a Trailer on
page 4-53.
2-33
Page 102 of 372
Mirrors
Manual Rearview Mirror
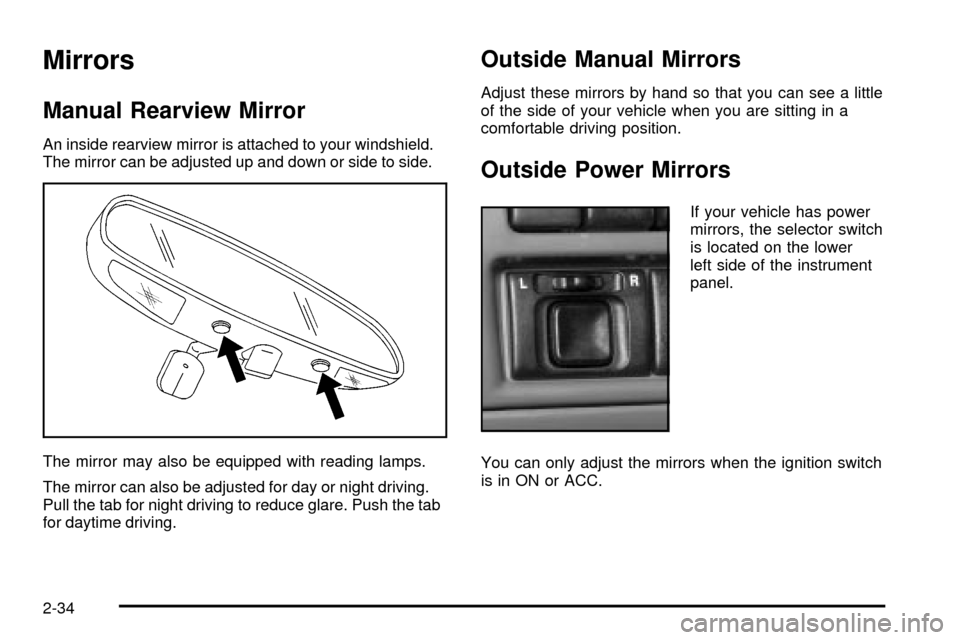
An inside rearview mirror is attached to your windshield.
The mirror can be adjusted up and down or side to side.
The mirror may also be equipped with reading lamps.
The mirror can also be adjusted for day or night driving.
Pull the tab for night driving to reduce glare. Push the tab
for daytime driving.
Outside Manual Mirrors
Adjust these mirrors by hand so that you can see a little
of the side of your vehicle when you are sitting in a
comfortable driving position.
Outside Power Mirrors
If your vehicle has power
mirrors, the selector switch
is located on the lower
left side of the instrument
panel.
You can only adjust the mirrors when the ignition switch
is in ON or ACC.
2-34
Page 103 of 372
To adjust the mirrors do the following:
1. Move the selector switch to the L (left) or R (right)
to select the mirror you wish to adjust.
2. Press the outer part of the four-way control pad,
located below the selector switch, that coincides
with the direction you want the mirror to go.
3. Return the selector switch to the center position to
help prevent moving the mirror accidentally.
Outside Convex Mirror
Your passenger's side mirror is convex. A convex
mirror's surface is curved so you can see more from the
driver's seat.
{CAUTION:
A convex mirror can make things (like other
vehicles) look farther away than they really are.
If you cut too sharply into the right lane, you
could hit a vehicle on your right. Check your
inside mirror or glance over your shoulder
before changing lanes.
Storage Areas
Glove Box
Use your key to lock and unlock the glove box. To open
the glove box, pull the latch toward you.
The glove box may have a two-position detent for
opening the door. Lower the door to the ®rst detent for
access to the glove box. Pull it to the next detent
for further access.
Cupholder(s)
Two cupholders are on the center console next to the
parking brake lever.
Coinholder(s)
Your instrument panel may have two coinholders
located to the left of the steering wheel.
2-35
Page 104 of 372
Luggage Carrier
{CAUTION:
If you try to carry something on top of your
vehicle that is longer or wider than the luggage
carrier Ð like paneling, plywood, a mattress
and so forth Ð the wind can catch it as you
drive along. This can cause you to lose
control. What you are carrying could be
violently torn off, and this could cause you or
other drivers to have a collision, and of course
damage your vehicle. You may be able to carry
something like this inside. But, never carry
something longer or wider than the luggage
carrier on top of your vehicle.
If your vehicle is equipped with a luggage carrier,
it has side rails and may be equipped with crossrails
attached to the roof to secure cargo.Use GM accessory racks that are compatible with your
luggage carrier for transporting sports equipment.
These are available through your GM dealer.
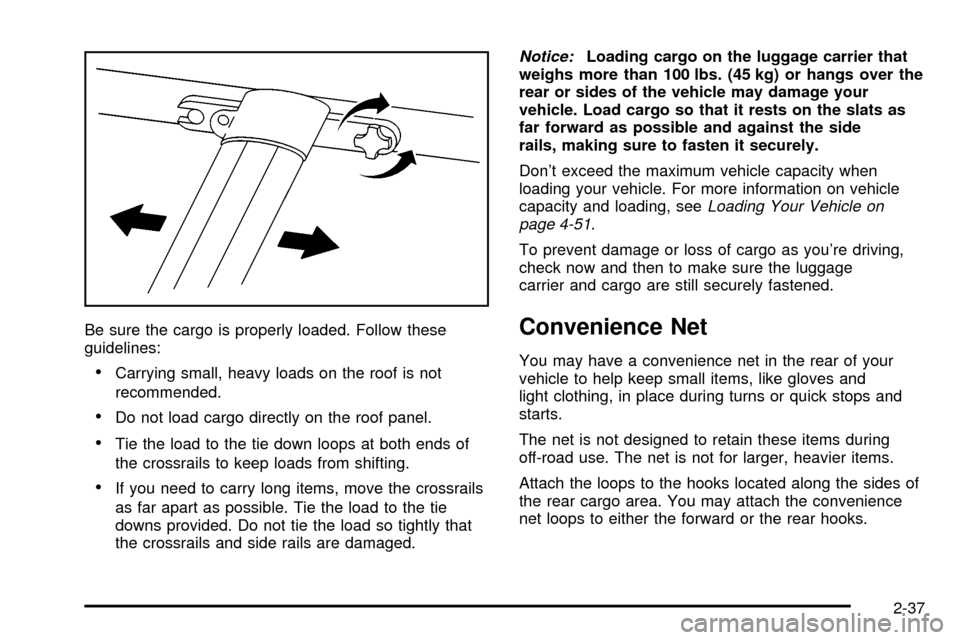
The crossrails, if equipped, are adjustable, but are only
designed to move a limited amount. The front and
rear crossrails are not interchangeable. If you do remove
the crossrails, make sure to mark them with front or
rear. When replacing the front and rear crossrails,
make sure to but them back in the same position they
came from as the front rail is slightly longer than the
rear rail.
Just loosen the slider knobs at each end of the crossrail
to move them.
·The front crossrail has limited movement when
traveling rearward.
·The back crossrail has limited movement when
traveling forward.
After adjusting them, make sure both sides of the
crossrails are even, then tighten the slider knobs.
2-36
Page 105 of 372
Be sure the cargo is properly loaded. Follow these
guidelines:
·Carrying small, heavy loads on the roof is not
recommended.
·Do not load cargo directly on the roof panel.
·Tie the load to the tie down loops at both ends of
the crossrails to keep loads from shifting.
·If you need to carry long items, move the crossrails
as far apart as possible. Tie the load to the tie
downs provided. Do not tie the load so tightly that
the crossrails and side rails are damaged.
Notice:Loading cargo on the luggage carrier that
weighs more than 100 lbs. (45 kg) or hangs over the
rear or sides of the vehicle may damage your
vehicle. Load cargo so that it rests on the slats as
far forward as possible and against the side
rails, making sure to fasten it securely.
Don't exceed the maximum vehicle capacity when
loading your vehicle. For more information on vehicle
capacity and loading, see
Loading Your Vehicle on
page 4-51.
To prevent damage or loss of cargo as you're driving,
check now and then to make sure the luggage
carrier and cargo are still securely fastened.
Convenience Net
You may have a convenience net in the rear of your
vehicle to help keep small items, like gloves and
light clothing, in place during turns or quick stops and
starts.
The net is not designed to retain these items during
off-road use. The net is not for larger, heavier items.
Attach the loops to the hooks located along the sides of
the rear cargo area. You may attach the convenience
net loops to either the forward or the rear hooks.
2-37
Page 106 of 372
Cargo Cover
Luggage or other cargo placed in the luggage
compartment can be hidden from view by a luggage
compartment cover, if your vehicle has this feature.
However, the luggage compartment covers are
not designed to support items loaded on top of them,
and should not be used as a shelf.
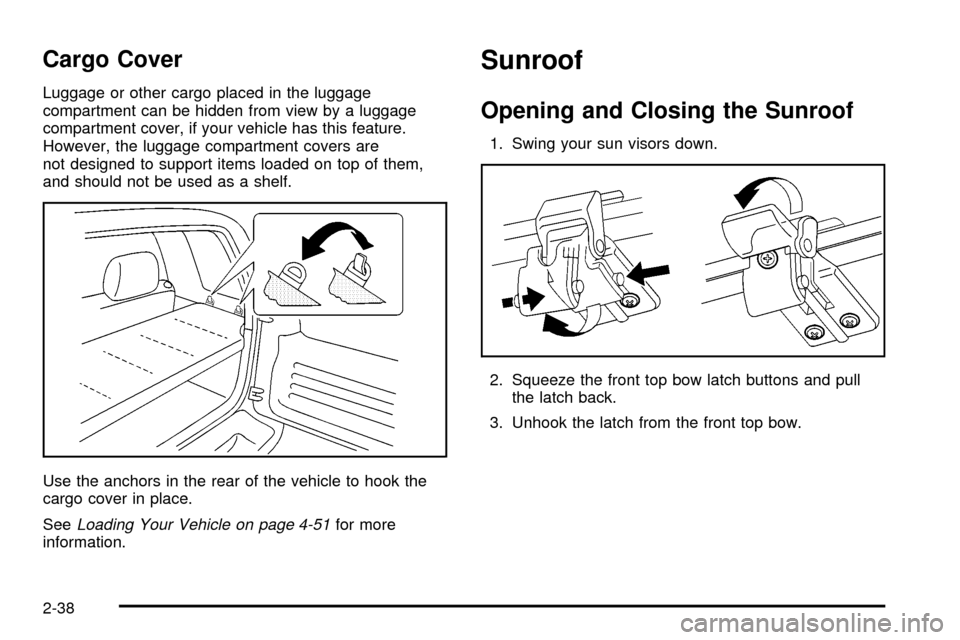
Use the anchors in the rear of the vehicle to hook the
cargo cover in place.
See
Loading Your Vehicle on page 4-51for more
information.
Sunroof
Opening and Closing the Sunroof
1. Swing your sun visors down.
2. Squeeze the front top bow latch buttons and pull
the latch back.
3. Unhook the latch from the front top bow.
2-38
Page 107 of 372
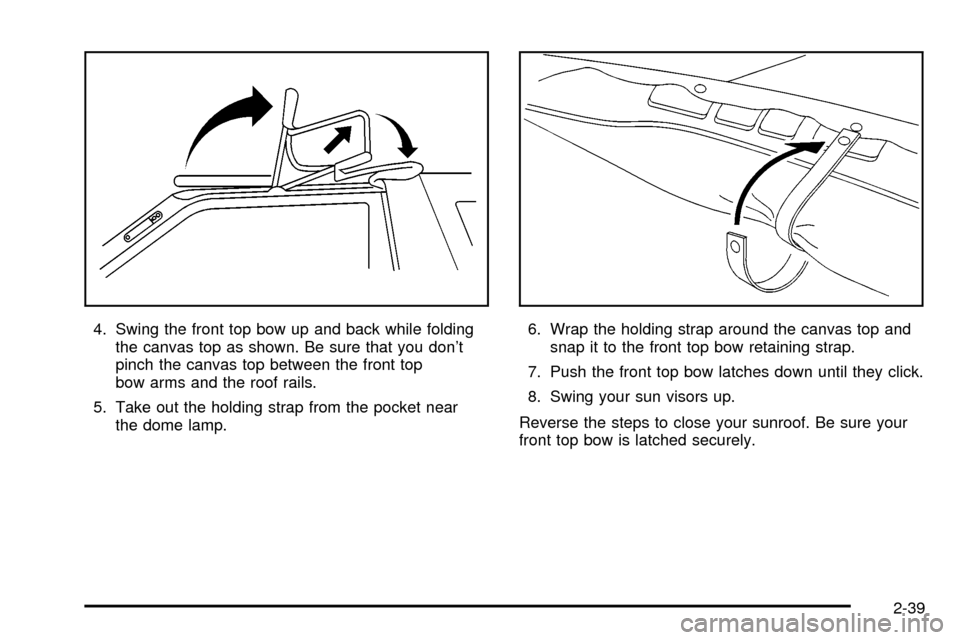
4. Swing the front top bow up and back while folding
the canvas top as shown. Be sure that you don't
pinch the canvas top between the front top
bow arms and the roof rails.
5. Take out the holding strap from the pocket near
the dome lamp.6. Wrap the holding strap around the canvas top and
snap it to the front top bow retaining strap.
7. Push the front top bow latches down until they click.
8. Swing your sun visors up.
Reverse the steps to close your sunroof. Be sure your
front top bow is latched securely.
2-39
Page 108 of 372

Convertible Top
Your convertible top features a sunroof, a removable
rear window and removable side windows.
Notice:If you lower the top when the vehicle is
moving or drive with any part of the top unfastened
or partially removed, you could damage your
vehicle. The repairs would not be covered by your
warranty. Always verify that the top is secure before
driving.
Removing and Installing the
Rear Window
The rear window on your vehicle is removable. This
allows you to open the back opening all the way or
to replace the window if it becomes deteriorated.
To remove the rear window do the following:
1. Open the rear gate all the way.
2. Unfasten the canvas ¯aps at the lower corners of
the rear window to uncover the zipper pull.
3. Unzip the rear window.4. Hang the rear window down so it hangs outside of
the vehicle.
5. Pull the rear window frame bar rearward (see
illustration above). Then slide the bar to the left
to remove the window.
Reverse the steps to install the rear window. Make sure
that all the hook and loop fastener strips and ¯aps
are correctly fastened and overlapped. Make sure that
the window is completely closed before driving.
2-40
Page 109 of 372
Removing and Installing the
Side Window
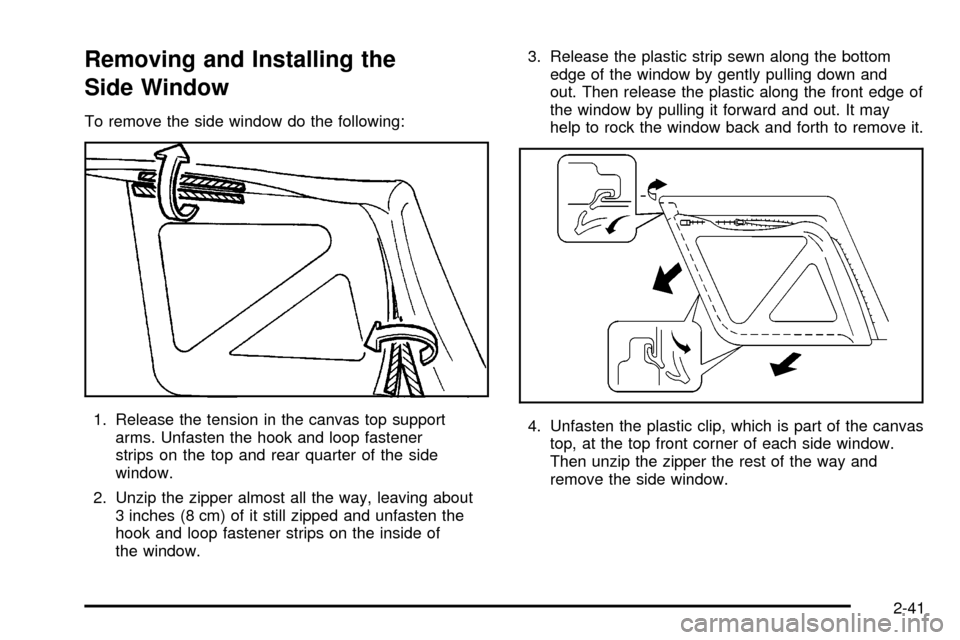
To remove the side window do the following:
1. Release the tension in the canvas top support
arms. Unfasten the hook and loop fastener
strips on the top and rear quarter of the side
window.
2. Unzip the zipper almost all the way, leaving about
3 inches (8 cm) of it still zipped and unfasten the
hook and loop fastener strips on the inside of
the window.3. Release the plastic strip sewn along the bottom
edge of the window by gently pulling down and
out. Then release the plastic along the front edge of
the window by pulling it forward and out. It may
help to rock the window back and forth to remove it.
4. Unfasten the plastic clip, which is part of the canvas
top, at the top front corner of each side window.
Then unzip the zipper the rest of the way and
remove the side window.
2-41
Page 110 of 372
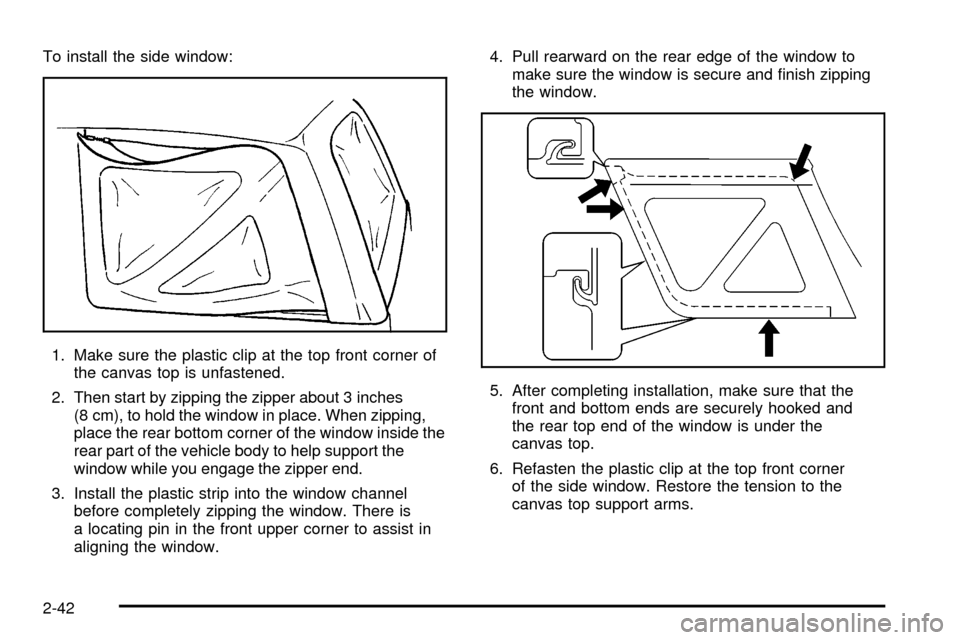
To install the side window:
1. Make sure the plastic clip at the top front corner of
the canvas top is unfastened.
2. Then start by zipping the zipper about 3 inches
(8 cm), to hold the window in place. When zipping,
place the rear bottom corner of the window inside the
rear part of the vehicle body to help support the
window while you engage the zipper end.
3. Install the plastic strip into the window channel
before completely zipping the window. There is
a locating pin in the front upper corner to assist in
aligning the window.4. Pull rearward on the rear edge of the window to
make sure the window is secure and ®nish zipping
the window.
5. After completing installation, make sure that the
front and bottom ends are securely hooked and
the rear top end of the window is under the
canvas top.
6. Refasten the plastic clip at the top front corner
of the side window. Restore the tension to the
canvas top support arms.
2-42