tow CHEVROLET TRACKER 2003 2.G Service Manual
[x] Cancel search | Manufacturer: CHEVROLET, Model Year: 2003, Model line: TRACKER, Model: CHEVROLET TRACKER 2003 2.GPages: 372, PDF Size: 2.65 MB
Page 240 of 372
Get the vehicle warmed up by driving about 15 miles
(24 km) when outside temperatures are above 50ÉF
(10ÉC). If it's colder than 50ÉF (10ÉC), drive the vehicle
in DRIVE (D) until the engine temperature gage
moves and then remains steady for 10 minutes.
A cold ¯uid check can be made after the vehicle has
been sitting for eight hours or more with the engine off,
but this is used only as a reference. Let the engine
run at idle for ®ve minutes if outside temperatures are
50ÉF (10ÉC) or more. If it's colder than 50ÉF (10ÉC), you
may have to idle the engine longer. Should the ¯uid
level be low during this cold check, you
mustcheck the
¯uid hot before adding ¯uid. Checking the ¯uid hot
will give you a more accurate reading of the ¯uid level.
Checking the Fluid Level
Prepare your vehicle as follows:
·Park your vehicle on a level place. Keep the engine
running.
·With the parking brake applied, place the shift lever
in PARK (P).
·With your foot on the brake pedal, move the shift
lever through each gear range, pausing for about
three seconds in each range. Then, position the shift
lever in PARK (P).
·Let the engine run at idle for three minutes or more.Then, without shutting off the engine, follow these steps:
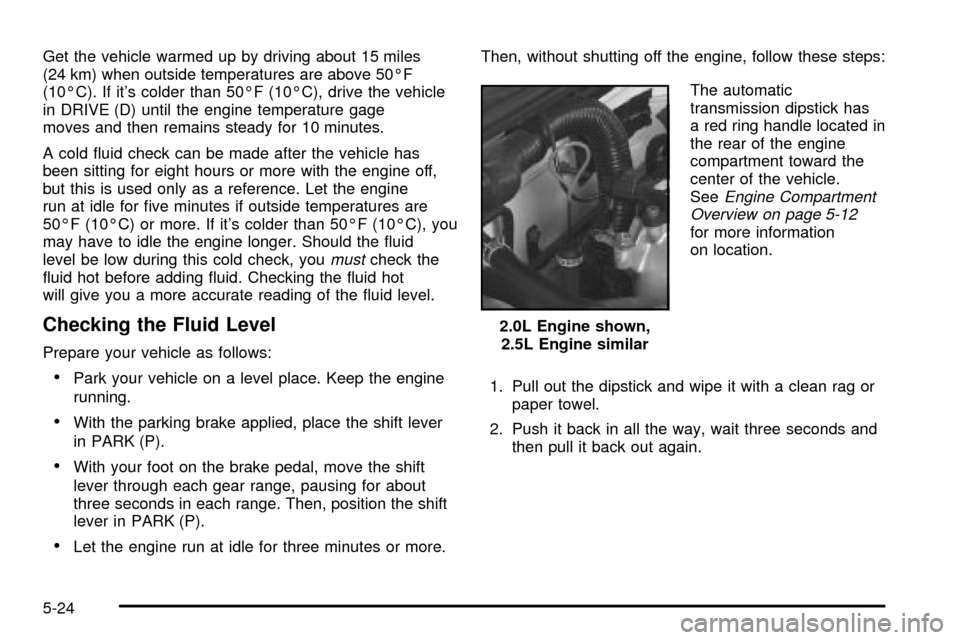
The automatic
transmission dipstick has
a red ring handle located in
the rear of the engine
compartment toward the
center of the vehicle.
See
Engine Compartment
Overview on page 5-12
for more information
on location.
1. Pull out the dipstick and wipe it with a clean rag or
paper towel.
2. Push it back in all the way, wait three seconds and
then pull it back out again. 2.0L Engine shown,
2.5L Engine similar
5-24
Page 245 of 372

Checking Coolant
The coolant recovery tank is located toward the front of
the engine compartment on the driver's side of the
vehicle. See
Engine Compartment Overview on
page 5-12for more information on location.
The vehicle must be on a level surface. When your
engine is cold, the coolant level should be at LOW, or a
little higher. When your engine is warm, the level should
be up to FULL, or a little higher.
Adding Coolant
If you need more coolant, add the proper coolant
mixtureat the coolant recovery tank.
{CAUTION:
Turning the radiator pressure cap when the
engine and radiator are hot can allow steam
and scalding liquids to blow out and burn you
badly. With the coolant recovery tank, you will
almost never have to add coolant at the
radiator. Never turn the radiator pressure
cap Ð even a little Ð when the engine and
radiator are hot.
5-29
Page 248 of 372

If No Steam Is Coming From Your
Engine
If you get an engine overheat warning but see or hear
no steam, the problem may not be too serious.
Sometimes the engine can get a little too hot when you:
·Climb a long hill on a hot day.
·Stop after high-speed driving.
·Idle for long periods in traffic.
·Tow a trailer.
If you get the overheat warning with no sign of steam,
try this for a minute or so:
1. In heavy traffic, let the engine idle in NEUTRAL (N)
while stopped. If it is safe to do so, pull off the road,
shift to PARK (P) or NEUTRAL (N) and let the
engine idle.
2. Turn on your heater to full hot at the highest fan
speed and open the window as necessary.If you no longer have the overheat warning, you can
drive. Just to be safe, drive slower for about 10 minutes.
If the warning doesn't come back on, you can drive
normally.
If the warning continues, pull over, stop, and park your
vehicle right away.
If there's still no sign of steam, push down the
accelerator until the engine speed is about twice as fast
as normal idle speed for at least three minutes while
you're parked. If you still have the warning,
turn off the
engine and get everyone out of the vehicleuntil it
cools down.
You may decide not to lift the hood but to get service
help right away.
5-32
Page 277 of 372
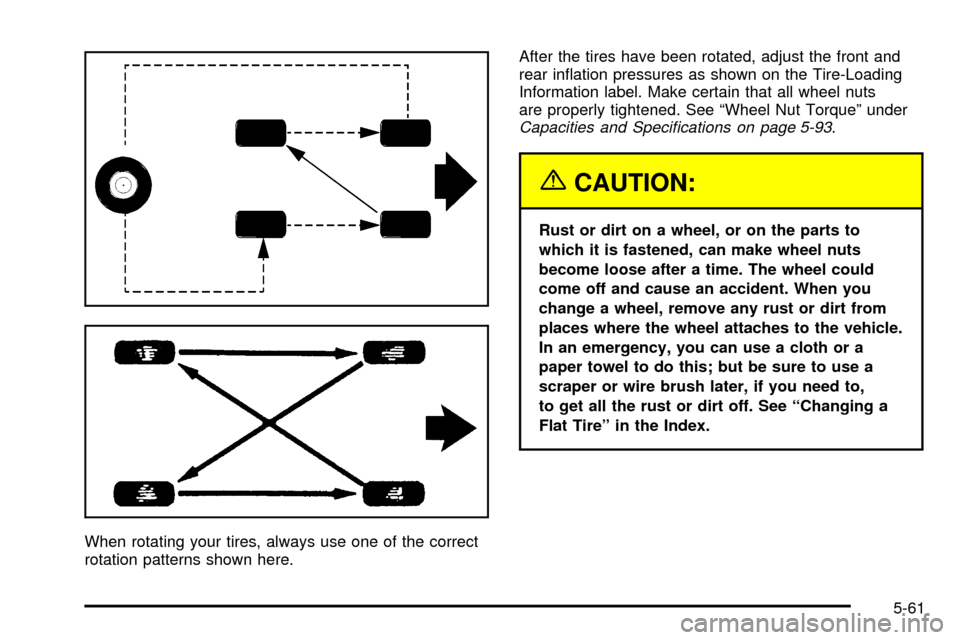
When rotating your tires, always use one of the correct
rotation patterns shown here.After the tires have been rotated, adjust the front and
rear in¯ation pressures as shown on the Tire-Loading
Information label. Make certain that all wheel nuts
are properly tightened. See ªWheel Nut Torqueº under
Capacities and Speci®cations on page 5-93.
{CAUTION:
Rust or dirt on a wheel, or on the parts to
which it is fastened, can make wheel nuts
become loose after a time. The wheel could
come off and cause an accident. When you
change a wheel, remove any rust or dirt from
places where the wheel attaches to the vehicle.
In an emergency, you can use a cloth or a
paper towel to do this; but be sure to use a
scraper or wire brush later, if you need to,
to get all the rust or dirt off. See ªChanging a
Flat Tireº in the Index.
5-61
Page 282 of 372
Tire Chains
Notice:Use tire chains only where legal and only
when you must. Use only SAE Class²S²type chains
that are the proper size for your tires. Install them
on the tires of the drive axle (four-wheel-drive
vehicles can use chains on both axles). Tighten
them as tightly as possible with the ends securely
fastened. Drive slowly and follow the chain
manufacturer's instructions. If you can hear the
chains contacting your vehicle, stop and retighten
them. If the contact continues, slow down until
it stops. Driving too fast or spinning the wheels
with chains on will damage your vehicle.
If a Tire Goes Flat
It's unusual for a tire to ªblowoutº while you're driving,
especially if you maintain your tires properly. If air goes
out of a tire, it's much more likely to leak out slowly.
But if you should ever have a ªblowout,º here are a few
tips about what to expect and what to do:
If a front tire fails, the ¯at tire will create a drag that
pulls the vehicle toward that side. Take your foot off the
accelerator pedal and grip the steering wheel ®rmly.
Steer to maintain lane position, and then gently brake to
a stop well out of the traffic lane.A rear blowout, particularly on a curve, acts much like a
skid and may require the same correction you'd use
in a skid. In any rear blowout, remove your foot from the
accelerator pedal. Get the vehicle under control by
steering the way you want the vehicle to go. It may be
very bumpy and noisy, but you can still steer. Gently
brake to a stop, well off the road if possible.
{CAUTION:
Lifting a vehicle and getting under it to do
maintenance or repairs is dangerous without
the appropriate safety equipment and training.
The jack provided with your vehicle is designed
only for changing a ¯at tire. If it is used for
anything else, you or others could be badly
injured or killed if the vehicle slips off the jack.
Use the jack provided with your vehicle only for
changing a ¯at tire.
If a tire goes ¯at, the next part shows how to use your
jacking equipment to change a ¯at tire safely.
5-66
Page 284 of 372
Removing the Spare Tire and Tools
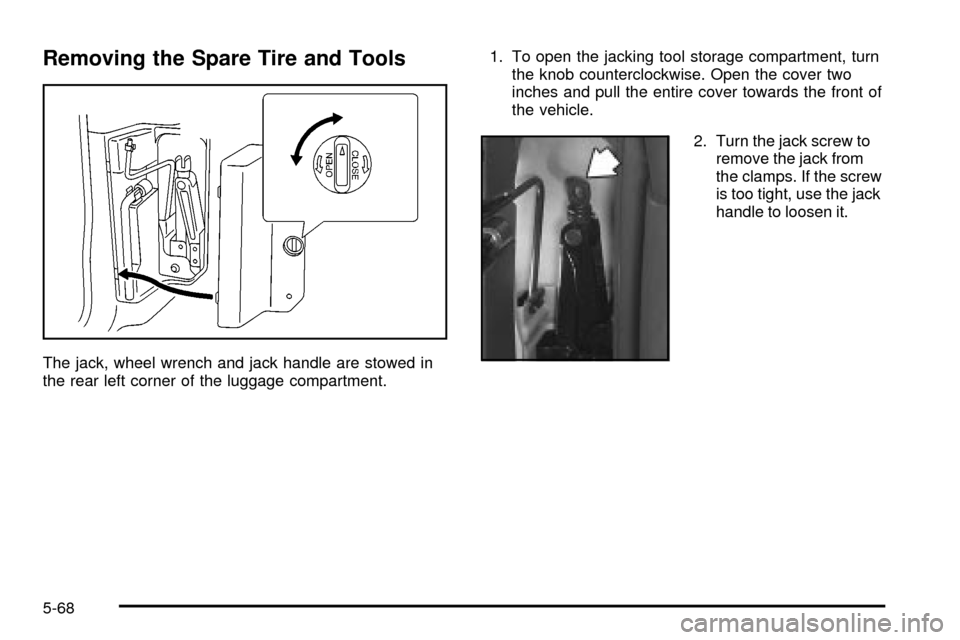
The jack, wheel wrench and jack handle are stowed in
the rear left corner of the luggage compartment.1. To open the jacking tool storage compartment, turn
the knob counterclockwise. Open the cover two
inches and pull the entire cover towards the front of
the vehicle.
2. Turn the jack screw to
remove the jack from
the clamps. If the screw
is too tight, use the jack
handle to loosen it.
5-68
Page 290 of 372
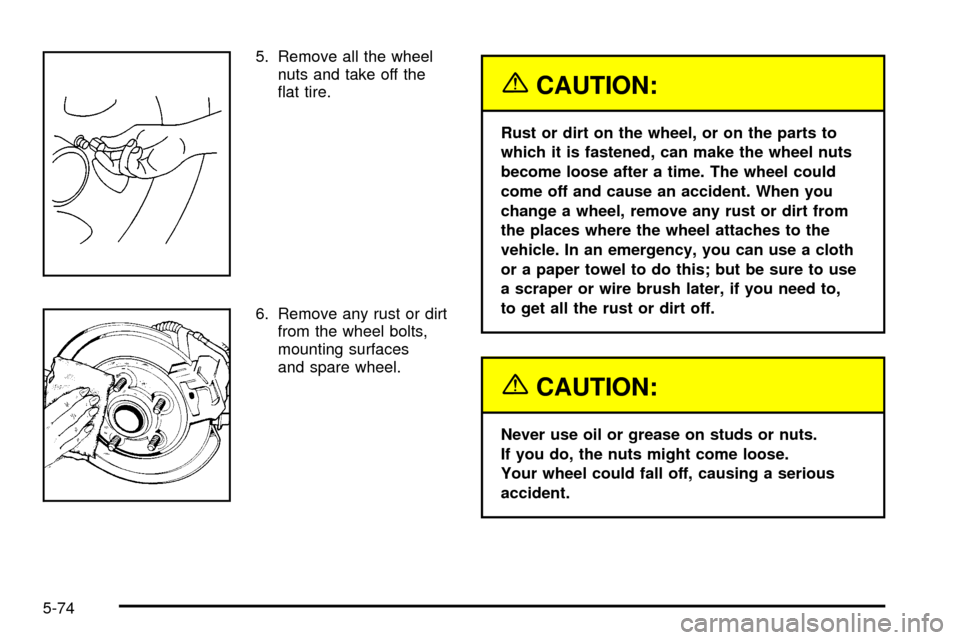
5. Remove all the wheel
nuts and take off the
¯at tire.
6. Remove any rust or dirt
from the wheel bolts,
mounting surfaces
and spare wheel.
{CAUTION:
Rust or dirt on the wheel, or on the parts to
which it is fastened, can make the wheel nuts
become loose after a time. The wheel could
come off and cause an accident. When you
change a wheel, remove any rust or dirt from
the places where the wheel attaches to the
vehicle. In an emergency, you can use a cloth
or a paper towel to do this; but be sure to use
a scraper or wire brush later, if you need to,
to get all the rust or dirt off.
{CAUTION:
Never use oil or grease on studs or nuts.
If you do, the nuts might come loose.
Your wheel could fall off, causing a serious
accident.
5-74
Page 291 of 372

7. Place the spare on the wheel mounting surface.
8. Reinstall the wheel
nuts with the
cone-shaped end of
the nuts toward
the wheel. Tighten
each nut by hand until
the wheel is held
against the hub.
9. Lower the vehicle by turning the jack handle
counterclockwise. Lower the jack completely.
5-75
Page 294 of 372
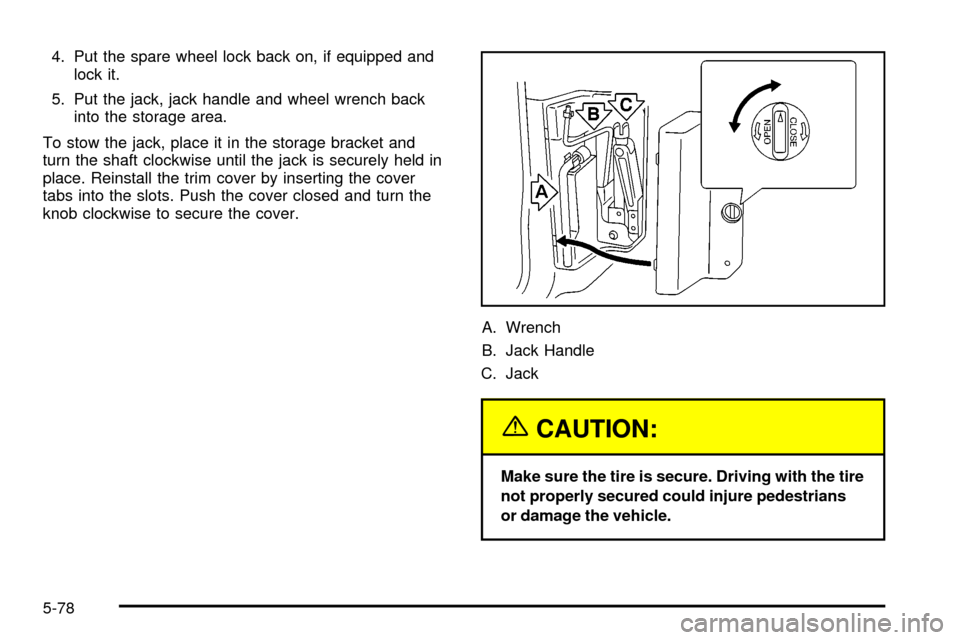
4. Put the spare wheel lock back on, if equipped and
lock it.
5. Put the jack, jack handle and wheel wrench back
into the storage area.
To stow the jack, place it in the storage bracket and
turn the shaft clockwise until the jack is securely held in
place. Reinstall the trim cover by inserting the cover
tabs into the slots. Push the cover closed and turn the
knob clockwise to secure the cover.
A. Wrench
B. Jack Handle
C. Jack
{CAUTION:
Make sure the tire is secure. Driving with the tire
not properly secured could injure pedestrians
or damage the vehicle.
5-78
Page 296 of 372

Cleaning the Inside of Your Vehicle
Use a vacuum cleaner often to get rid of dust and
loose dirt. Wipe vinyl, leather, plastic and painted
surfaces with a clean, damp cloth.
Cleaning Fabric/Carpet
Your dealer has cleaners for the cleaning of fabric and
carpet. They will clean normal spots and stains very well.
You can get GM-approved cleaning products from your
dealer. See
Vehicle Care/Appearance Materials on
page 5-87.
Here are some cleaning tips:
·Always read the instructions on the cleaner label.
·Clean up stains as soon as you can Ð before
they set.
·Carefully scrape off any excess stain.
·Use a clean cloth or sponge, and change to a clean
area often. A soft brush may be used if stains are
stubborn.
·If a ring forms on fabric after spot cleaning,
clean the entire area immediately or it will set.
Using Cleaner on Fabric
1. Vacuum and brush the area to remove any
loose dirt.
2. Always clean a whole trim panel or section.
Mask surrounding trim along stitch or welt lines.
3. Follow the directions on the container label.
4. Apply cleaner with a clean sponge. Do not saturate
the material and do not rub it roughly.
5. As soon as you have cleaned the section, use a
sponge to remove any excess cleaner.
6. Wipe cleaned area with a clean, water-dampened
towel or cloth.
7. Wipe with a clean cloth and let dry.
Special Fabric Cleaning Problems
Stains caused by such things as catsup, coffee (black),
egg, fruit, fruit juice, milk, soft drinks, vomit, urine
and blood can be removed as follows:
1. Carefully scrape off excess stain, then sponge the
soiled area with cool water.
2. If a stain remains, follow the cleaning instructions
described earlier.
5-80