key CHRYSLER CARAVAN 2000 Service Manual
[x] Cancel search | Manufacturer: CHRYSLER, Model Year: 2000, Model line: CARAVAN, Model: CHRYSLER CARAVAN 2000Pages: 436, PDF Size: 3.4 MB
Page 4 of 436
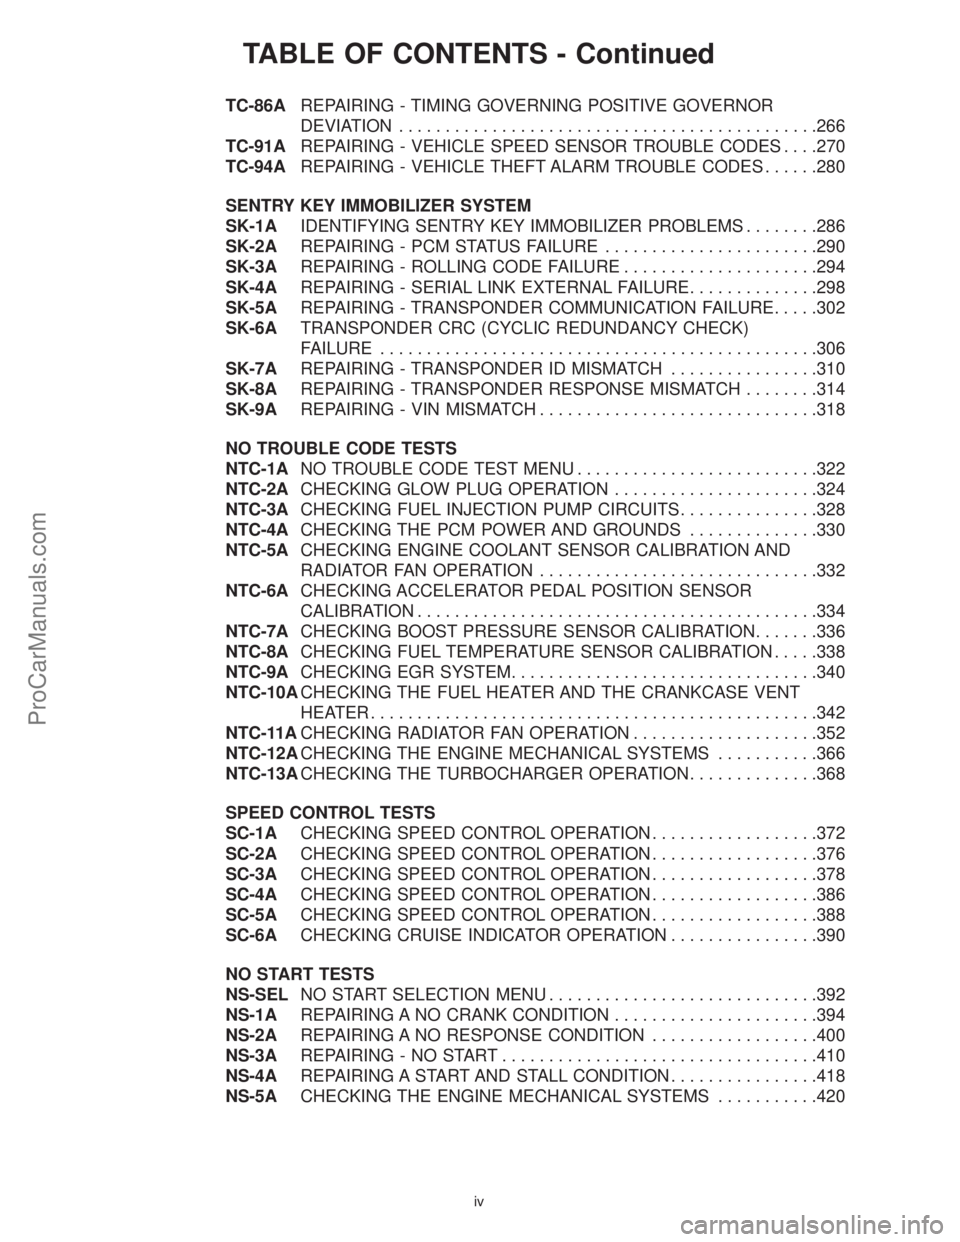
TABLE OF CONTENTS - Continued
TC-86AREPAIRING - TIMING GOVERNING POSITIVE GOVERNOR
DEVIATION.............................................266
TC-91AREPAIRING - VEHICLE SPEED SENSOR TROUBLE CODES. . . .270
TC-94AREPAIRING - VEHICLE THEFT ALARM TROUBLE CODES......280
SENTRY KEY IMMOBILIZER SYSTEM
SK-1AIDENTIFYING SENTRY KEY IMMOBILIZER PROBLEMS........286
SK-2AREPAIRING - PCM STATUS FAILURE.......................290
SK-3AREPAIRING - ROLLING CODE FAILURE.....................294
SK-4AREPAIRING - SERIAL LINK EXTERNAL FAILURE..............298
SK-5AREPAIRING - TRANSPONDER COMMUNICATION FAILURE.....302
SK-6ATRANSPONDER CRC (CYCLIC REDUNDANCY CHECK)
FAILURE...............................................306
SK-7AREPAIRING - TRANSPONDER ID MISMATCH................310
SK-8AREPAIRING - TRANSPONDER RESPONSE MISMATCH........314
SK-9AREPAIRING - VIN MISMATCH..............................318
NO TROUBLE CODE TESTS
NTC-1ANO TROUBLE CODE TEST MENU..........................322
NTC-2ACHECKING GLOW PLUG OPERATION......................324
NTC-3ACHECKING FUEL INJECTION PUMP CIRCUITS...............328
NTC-4ACHECKING THE PCM POWER AND GROUNDS..............330
NTC-5ACHECKING ENGINE COOLANT SENSOR CALIBRATION AND
RADIATOR FAN OPERATION..............................332
NTC-6ACHECKING ACCELERATOR PEDAL POSITION SENSOR
CALIBRATION...........................................334
NTC-7ACHECKING BOOST PRESSURE SENSOR CALIBRATION.......336
NTC-8ACHECKING FUEL TEMPERATURE SENSOR CALIBRATION.....338
NTC-9ACHECKING EGR SYSTEM.................................340
NTC-10ACHECKING THE FUEL HEATER AND THE CRANKCASE VENT
HEATER................................................342
NTC-11ACHECKING RADIATOR FAN OPERATION....................352
NTC-12ACHECKING THE ENGINE MECHANICAL SYSTEMS...........366
NTC-13ACHECKING THE TURBOCHARGER OPERATION..............368
SPEED CONTROL TESTS
SC-1ACHECKING SPEED CONTROL OPERATION..................372
SC-2ACHECKING SPEED CONTROL OPERATION..................376
SC-3ACHECKING SPEED CONTROL OPERATION..................378
SC-4ACHECKING SPEED CONTROL OPERATION..................386
SC-5ACHECKING SPEED CONTROL OPERATION..................388
SC-6ACHECKING CRUISE INDICATOR OPERATION................390
NO START TESTS
NS-SELNO START SELECTION MENU.............................392
NS-1AREPAIRING A NO CRANK CONDITION......................394
NS-2AREPAIRING A NO RESPONSE CONDITION..................400
NS-3AREPAIRING - NO START..................................410
NS-4AREPAIRING A START AND STALL CONDITION................418
NS-5ACHECKING THE ENGINE MECHANICAL SYSTEMS...........420
iv
ProCarManuals.com
Page 5 of 436
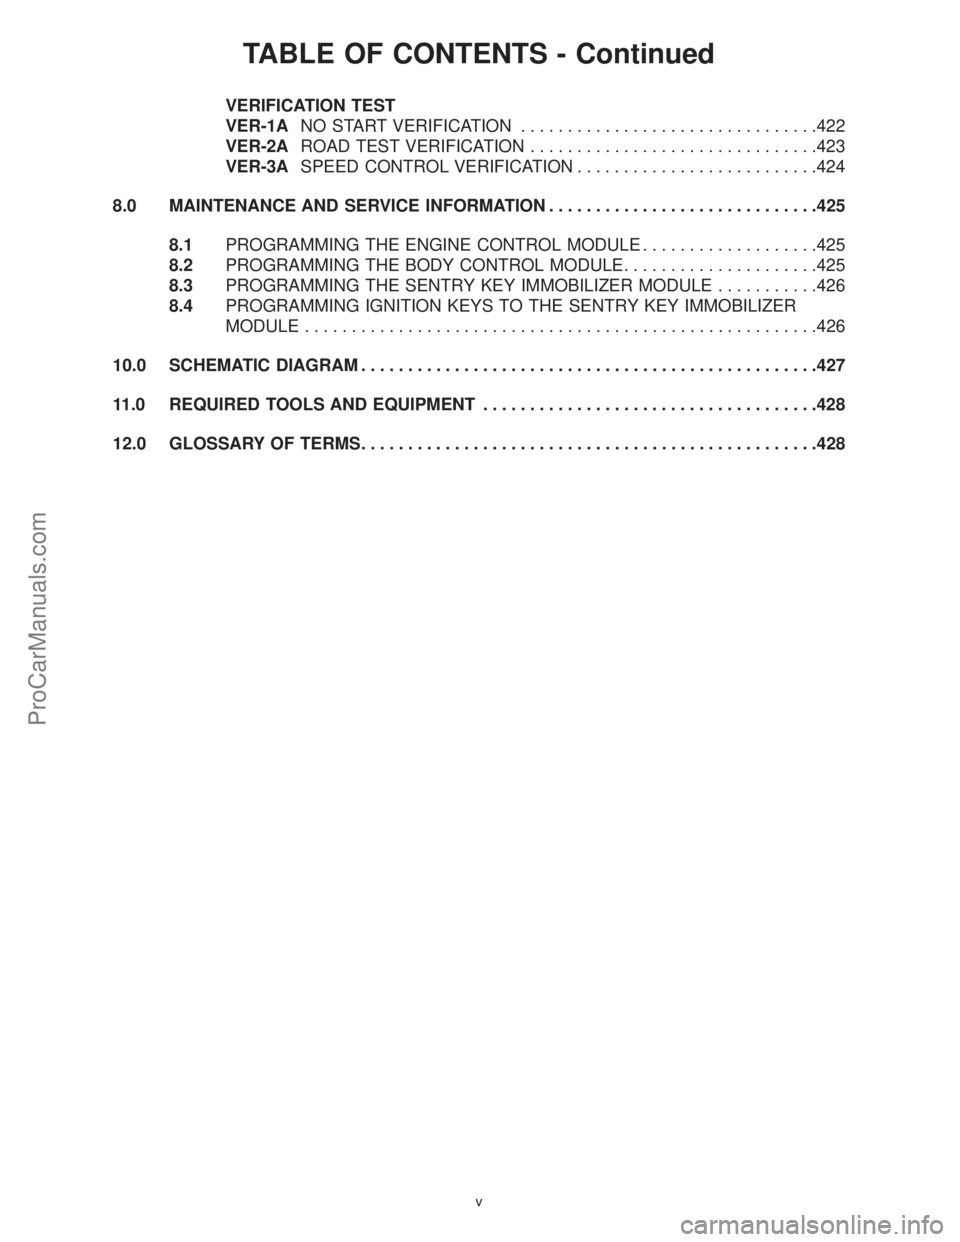
TABLE OF CONTENTS - Continued
VERIFICATION TEST
VER-1ANO START VERIFICATION................................422
VER-2AROAD TEST VERIFICATION...............................423
VER-3ASPEED CONTROL VERIFICATION..........................424
8.0 MAINTENANCE AND SERVICE INFORMATION.............................425
8.1PROGRAMMING THE ENGINE CONTROL MODULE...................425
8.2PROGRAMMING THE BODY CONTROL MODULE.....................425
8.3PROGRAMMING THE SENTRY KEY IMMOBILIZER MODULE...........426
8.4PROGRAMMING IGNITION KEYS TO THE SENTRY KEY IMMOBILIZER
MODULE.......................................................426
10.0 SCHEMATIC DIAGRAM.................................................427
11.0 REQUIRED TOOLS AND EQUIPMENT....................................428
12.0 GLOSSARY OF TERMS.................................................428
v
ProCarManuals.com
Page 7 of 436
1.0 INTRODUCTION
The procedures contained in this manual include all the specifications, instructions, and graphics
needed to diagnose engine control module (ECM) and sentry key immobilizer system (SKIS)
problems; they are no start, diagnostic trouble code, and no trouble code problems for the ECM.
The diagnostics in this manual are based on the trouble condition or symptom being present at
the time of diagnosis.
When repairs are required, refer to the appropriate volume of the service manual for proper
removal and repair procedure.
Diagnostic procedures change every year. New diagnostic systems may be added; carryover
systems may be enhanced. IT IS RECOMMENDED THAT YOU REVIEW THE ENTIRE MANUAL
TO BECOME FAMILIAR WITH ALL NEW AND CHANGED DIAGNOSTIC PROCEDURES.
This manual is designed to begin all diagnosis at the DTC TEST, which is located at the beginning
of Section 7.1. This will cover all the necessary requirements to begin a logical diagnostic path for
each problem. If there is a diagnostic trouble code (DTC) detected, it will direct you to the trouble
code test. If there are no trouble codes present, it will direct you by symptom to a no-trouble code
test.
This book reflects many suggested changes from readers of past issues. After using this book, if
you have any comments or recommendations, please fill out the form at the back of the book and
mail it back to us.
1.1 System Coverage
This diagnostic procedures manual covers all 2000 GS body equipped with the 2.5L VM diesel
engine.
1.2 Six-Step Troubleshooting Procedure
Diagnosis of the engine control module (ECM) and SKIS is done in six basic steps:
²verification of complaint
²verification of any related symptoms
²symptom analysis
²problem isolation
²repair of isolated problem
²verification of proper operation
2.0 IDENTIFICATION OF SYSTEM
The engine control module (ECM) is located in the center of the passenger compartment behind
the lower console. The sentry key immobilizer module is located below the steering column
behind the steering wheel.
3.0 SYSTEM DESCRIPTION AND FUNCTIONAL OPERATION
3.1 General Description
The 2.5L VM diesel engine system is equipped with the latest in technical advances. The
on-board diagnostics incorporated with the engine control module and SKIM are intended to
assist the field technician in repairing vehicle problems by the quickest means.
G
E
N
E
R
A
L
I
N
F
O
R
M
A
T
I
O
N
1
ProCarManuals.com
Page 9 of 436

After-Run- When fused ignition switch output is removed from the ECM cavity 47, the ECM
performs a self-diagnostic check in the following order:
1. Electrical shut-off test
2. Fuel quantity actuator test
3. Monitoring module test
4. Voltage regulator test
5. Main relay test (if tests 1-4 pass)
If any of tests 1-4 fail, the fault is stored in memory, and can be retrieved during the next ignition
cycle using the DRB.
3.2.3 Monitored Circuits
The ECM is able to monitor and identify most driveability related trouble conditions. Some circuits
are directly monitored through ECM feedback circuitry. In addition, the ECM monitors the voltage
state of some circuits and compares those states with expected values. Other systems are
monitored indirectly when the ECM conducts a rationality test to identify problems.
Although most subsystems of the powertrain control module are either directly or indirectly
monitored, there may be occasions when diagnostic trouble codes are not immediately identified.
For a trouble code to set, specific conditions must be met and unless these conditions are
encountered, a code will not set.
3.2.4 SKIS On-Board Diagnostics
The SKIS module has been programmed to transmit and monitor many different coded messages
as well as CCD Bus messages. This monitoring is called ``On-Board Diagnosis''.
Certain criteria must be met for a diagnostic trouble code to be entered into the Sentry Key
Immobilizer Module (SKIM) memory. The criteria may be a range of: input voltage, CCD Bus
messages, or coded messages to the SKIM. If all of the criteria for monitoring a circuit or function
are met and a fault is sensed, a diagnostic trouble code will be stored in the SKIM memory.
3.2.5 SKIS Overview
The Sentry Key Immobilizer System (SKIS) is an immobilizer system designed to prevent
unauthorized vehicle operation. The system consists of a Sentry Key Immobilizer Module (SKIM),
ignition key(s) equipped with a transponder chip, engine controller and body controller. When the
ignition switch is turned on, the SKIM interrogates the ignition key. If the ignition key is ªValidº the
SKIM sends a CCD Bus message to the body controller indicating the presence of a valid ignition
key. The BCM then supplies the ECM with a valid immobilizer signal allowing the engine to
continue to operate.
3.2.6 SKIS Operation
When ignition power is supplied to the SKIM, the SKIM performs an internal self-test. After the
self-test is completed, the SKIM energizes the antenna (this activates the transponder chip) and
sends a challenge to the transponder chip. The transponder chip responds to the challenge by
generating an encrypted response message using the following:
Secret Key þ This is an electronically stored value (identification number) that is unique to each
SKIS. The secret key is stored in the SKIM, BCM and all ignition key transponders.
Challenge þ This is a random number that is generated by the SKIM at each ignition key cycle.
G
E
N
E
R
A
L
I
N
F
O
R
M
A
T
I
O
N
3
ProCarManuals.com
Page 10 of 436
The secret key and challenge are plugged into an algorithm that produces the encrypted response
message. The transponder uses the crypto algorithm to receive, decode and respond to the
message sent by SKIM. After responding to the coded message, the transponder sends a
transponder I.D. message to the SKIM. The SKIM compares the transponder I.D. to the available
valid key codes in SKIM memory (8 key maximum). After validating the key the SKIM sends a
CCD Bus message called a ªSeed Requestº to the body controller then waits for a body controller
response. If the body controller does not respond, the SKIM will send the seed request again.
After three failed attempts the SKIM will stop sending the seed request and store a trouble code.
If the body controller sends a seed response, the SKIM sends a valid/invalid key message to the
body controller. This is an encrypted message that is generated using the following:
VIN þ Vehicle Identification Number
Seed þ This is a random number that is generated by the BCM at each ignition key cycle.
The VIN and seed are plugged into a rolling code algorithm that encrypts the ªvalid/invalid keyº
message. The body controller uses the rolling code algorithm to receive, decode and respond to
the valid/invalid key message sent by SKIM. After sending the valid/invalid key message the SKIM
waits 3.5 seconds for a PCM status message from the body controller. If the BCM does not
respond with a valid key message to the SKIM, a fault is detected and a trouble code stored.
The SKIS incorporates a warning (``ALARM SET'') lamp located in the message center. The lamp
receives switched ignition voltage and is hardwired to the body controller. The lamp is actuated
when the SKIM sends a CCD Bus message to the body controller requesting the lamp on. The
body controller then provides the ground for the lamp. The SKIM will request lamp operation for
the following:
± ± bulb check at ignition on
± to alert the vehicle operator to a SKIS malfunction
For all faults except transponder faults and VIN mismatch, the lamp remains on steady. In the
event of a transponder fault the light flashes at the rate of 1Hz (once per second). If a fault is
present the lamp will remain on or flashing for the complete ignition cycle. If a fault is stored in
SKIM memory which prevents the system from operating properly, the ECM will allow the engine
to start and run (for 2 seconds) up to six times. After the sixth attempt, the ECM disables the
starter relay until the fault is corrected..
3.3 Diagnostic Trouble Codes
Each diagnostic trouble code is diagnosed by following a specific testing procedure. The
diagnostic test procedures contain step-by-step instructions for determining the cause of trouble
codes as well as no trouble code problems. It is not necessary to perform all of the tests in this
book to diagnose an individual code.
Always begin by reading the diagnostic trouble codes using the DRB. This procedure begins in
the DTC TEST - Checking the System for Diagnostic Trouble Codes. This will direct you to the
specific test(s) that must be performed.
3.3.1 Hard Code
A diagnostic trouble code that comes back within one cycle of the ignition key is a ªhardº code.
This means that the defect is there every time the engine control module/SKIM checks that circuit
or function. Procedures in this manual verify if the trouble code is a hard code at the beginning
of each test. When it is not a hard code, an ªintermittentº test must be performed.
G
E
N
E
R
A
L
I
N
F
O
R
M
A
T
I
O
N
4
ProCarManuals.com
Page 11 of 436
3.3.2 Intermittent Code
A diagnostic trouble code that is not there every time the engine control module/SKIM checks the
circuit is an ªintermittentº code. Most intermittent codes are caused by wiring or connector
problems. Defects that come and go like this are the most difficult to diagnose; they must be
looked for under specific conditions that cause them. The following checks may assist you in
identifying a possible intermittent problem:
²Visually inspect related wire harness connectors. Look for broken, bent, pushed out, or
corroded terminals.
²Visually inspect the related harnesses. Look for chafed, pierced, or partially broken wire.
²Refer to any hotlines or technical service bulletins that may apply.
NOTE: Electromagnetic (radio) interference can cause an intermittent system malfunction. This
interference can interrupt communication between the ignition key transponder and the SKIM.
3.3.3 Reset Counter
The reset counter counts the number of times the vehicle has been started since codes were last
set, erased, or the battery was disconnected. The reset counter will count up to 255 start counts.
The number of starts helps determine when the trouble code actually happened. This is recorded
by the ECM and can be viewed on the DRB as the RESET COUNTER.
When there are no trouble codes stored in memory, the DRB will display ªNO TROUBLE CODES
FOUNDº and the reset counter will show ªRESET COUNT = XXX.º
3.3.4 ECM Diagnostic Trouble Codes
A/C CONTROL SHORT CIRCUIT
A/C CONTROL OPEN CIRCUIT
A/C SYSTEM PRESSURE SIGNAL HIGH EXCEEDED
A/C SYSTEM PRESSURE SIGNAL LOW EXCEEDED
A/C SYSTEM PRESSURE SUPPLY HIGH EXCEEDED
A/C SYSTEM PRESSURE SUPPLY LOW EXCEEDED
ACCELERATOR PEDAL SENSOR SIGNAL HIGH EXCEEDED
ACCELERATOR PEDAL SENSOR PLAUSIBILITY
ACCELERATOR PEDAL SENSOR PWG PLAUS WITH LOW IDLE SWITCH
ACCELERATOR PEDAL SENSOR PWG PLAUS WITH POTENTIOMETER
ATMOSPHERIC PRESSURE SENSOR SRC HIGH EXCEEDED
ATMOSPHERIC PRESSURE SENSOR SRC LOW EXCEEDED
BATTERY VOLTAGE SRC HIGH EXCEEDED
BRAKE SIGNAL PLAUS WITH REDUNDANT CONTACT
CLUTCH SIGNAL PLAUSIBILITY
CONTROL SLEEVE SENSOR SIGNAL HIGH EXCEEDED
CONTROL SLEEVE SENSOR START END POS. NOT ATTAINED
CONTROL SLEEVE SENSOR STOP END POS. NOT ATTAINED
CRUISE STATUS INDICATOR LAMP SHORT CIRCUIT
DIAGNOSTIC LAMP OPEN CIRCUIT
DIAGNOSTIC LAMP SHORT CIRCUIT
DIESEL POWER RELAY SHUTS OFF TOO EARLY
DIESEL POWER RELAY SHUTS OFF TOO LATE
EEPROM PLAUSIBILITY CHECKSUM ERROR FOR ADJ. (EGR)
EEPROM PLAUSIBILITY CHECKSUM ERROR IN CC212
EEPROM PLAUSIBILITY COMMUNICATION WITH EEPROM
EEPROM PLAUSIBILITY FUNC. SWITCH WRONG OR MISSING
EEPROM PLAUSIBILITY VER. NUMBER NOT CORRESPONDING
G
E
N
E
R
A
L
I
N
F
O
R
M
A
T
I
O
N
5
ProCarManuals.com
Page 13 of 436

3.3.5 SKIM Diagnostic Trouble Codes
ANTENNA FAILURE
COP FAILURE
EEPROM FAILURE
PCM STATUS FAILURE
INTERNAL FAULT
RAM FAILURE
ROLLING CODE FAILURE
SERIAL LINK EXTERNAL FAULT
STACK OVERFLOW FAILURE
TRANSPONDER COMMUNICATION FAILURE
TRANSPONDER CRC (CYCLIC REDUNDANCY CHECK) FAILURE
TRANSPONDER ID MISMATCH
TRANSPONDER RESPONSE MISMATCH
VIN MISMATCH
3.3.6 Handling No Trouble Code Problems
After reading Section 3.0 (System Description and Functional Operation), you should have a
better understanding of the theory and operation of the on-board diagnostics, and how this relates
to the diagnosis of a vehicle that may have a driveability-related symptom or complaint.
The ``no code'' system is broken down into three test methods:
± No Code Complete Test
± No Code Quick Individual Test
± No Code Quick Symptom Test
3.4 Using the DRB
Refer to the DRB user's guide for instructions and assistance with reading trouble codes, erasing
trouble codes, and other DRB functions.
3.5 DRB Error Messages and Blank Screen
Under normal operation, the DRB will display one of only two error messages:
± ± User-Requested WARM Boot or User-Requested COLD Boot
This is a sample of such an error message display:
ver: 2.14
date: 26 Jul93
file: key_itf.cc
date: Jul 26 1993
line 548
err: 0x1
User-Requested COLD Boot
Press MORE to switch between this display
and the application screen.
Press F4 when done noting information.
G
E
N
E
R
A
L
I
N
F
O
R
M
A
T
I
O
N
7
ProCarManuals.com
Page 39 of 436

TEST TC-2ACONTINUED - REPAIRING - A/C CONTROL OPEN CIRCUIT
*Perform Verification TEST VER-2A. **Check connectors - Clean / repair as necessary.
TEST TC-2A
CONTINUED FROM KEY OFF.
THE PREVIOUS REMOVE THE A/C
PAGE. CLUTCH RELAY.**
USING A VOLTMETER,
MEASURE THE DIESEL IS THE VOLTAGE NO REPAIR THE OPEN
TURN IGNITION ON. POWER RELAY OUTPUT ABOVE 10.0 VOLTS? DIESEL POWER RELAY
CIRCUIT. OUTPUT CIRCUIT.*
FIG.1
YES
KEY OFF. MEASURE THE
RESISTANCE BETWEEN IS THE RESISTANCE NO REPLACE THE A/C
USE AN OHMMETER IN A/C CLUTCH RELAY BELOW 100.0 OHMS? CLUTCH RELAY.*
THE FOLLOWING TERMINALS 85 AND 86.
STEPS. FIG.2
YES
MEASURE THE REPAIR THE A/C
DISCONNECT THE ECM RESISTANCE BETWEEN IS THE RESISTANCE YES CLUTCH RELAY
HARNESS GND AND THE A/C BELOW 5.0 OHMS? CONTROL CKT FOR A
CONNECTORS.** CLUTCH RELAY CONTROL SHORT TO GROUND.*
CKT (IN PDC). FIG.1
NO
MEASURE THE FROM THE RELAY TO
RESISTANCE OF THE THE ECM. IS THE RESISTANCE NO REPAIR OPEN A/C
A/C CLUTCH RELAY BELOW 5.0 OHMS? CLUTCH RELAY
CONTROL CIRCUIT... CONTROL CKT.*
FIG.3
YES
REPLACE THE ENGINE
CONTROL MODULE.*
T
R
O
U
B
L
E
C
O
D
E
T
E
S
T
S
33
ProCarManuals.com
Page 43 of 436

TEST TC-3ACONTINUED - REPAIRING - A/C SYSTEM PRESSURE SIGNAL HIGH EXCEEDED
*Perform Verification TEST VER-2A. **Check connectors - Clean / repair as necessary.
TEST TC-3A
CONTINUED FROM DISCONNECT THE A/C
THE PREVIOUS PRESSURE SENSOR
PAGE.
KEY ON. USING A THE A/C PRESSURE REPAIR A/C
VOLTMETER MEASURE SENSOR SIGNAL IS THE VOLTAGE YES PRESSURE SENSOR
THE VOLTAGE CIRCUIT AND GROUND. ABOVE 5.0 VOLTS? SIGNAL SHORTED TO
BETWEEN... VOLTAGE.*
FIG.1
NO
KEY OFF. WITH AN OHMMETER, REPAIR THE SHORT
DISCONNECT THE ECM MEASURE BETWEEN A/C IS THE RESISTANCE YES BETWEEN THE A/C
HARNESS SENSOR SIGNAL CKT BELOW 5.0 OHMS? PRESSURE SENSOR
CONNECTORS.** AND 5-VOLT REF CKT. SIGNAL CKT AND THE
FIG.1 5-VOLT SUPPLY CKT.*
NO
RECONNECT THE ECM
HARNESS TURN IGNITION ON.
CONNECTORS.
CONNECT A JUMPER
WIRE BETWEEN THE A/C WITH THE DRB, READ IS THE VOLTAGE YES REPLACE THE A/C
PRESSURE SENSOR THE A/C OUTPUT BELOW 1.0 VOLT? PRESSURE SENSOR.*
SIGNAL AND SENSOR VOLTAGE.
GROUND CKTS. FIG.1
NO
MOVE THE JUMPER
WIRE FROM A/C READ THE A/C IS THE VOLTAGE YES REPAIR THE OPEN
PRESSURE SENSOR OUTPUT VOLTAGE. BELOW 1.0 VOLT? SENSOR GROUND
GROUND TO ENGINE CIRCUIT.*
GROUND.
NO
REPLACE THE ENGINE
CONTROL MODULE.* TURN IGNITION OFF.
HARNESS
CONNECTOR.**
T
R
O
U
B
L
E
C
O
D
E
T
E
S
T
S
37
ProCarManuals.com
Page 51 of 436

TEST TC-5ACONTINUED - REPAIRING - A/C SYSTEM PRESSURE SUPPLY HIGH EXCEEDED
*Perform Verification TEST VER-2A. **Check connectors - Clean / repair as necessary.
TEST TC-5A TURN IGNITION OFF.
CONTINUED FROM DISCONNECT THE A/C
THE PREVIOUS PRESSURE SENSOR
PAGE. HARNESS
CONNECTOR.**
DISCONNECT THE ECM REMOVE THE DIESEL
HARNESS POWER RELAY.**
CONNECTORS.**
WITH A JUMPER WIRE, KEY ON.
CONNECT DIESEL POWER
RELAY CONN. CAVITIES USE A VOLTMETER IN
30 AND 87 (IN PDC). THE FOLLOWING
FIG.1 STEP.
MEASURE THE A/C REPAIR THE A/C
PRESSURE SENSOR IS THE VOLTAGE YES PRESSURE SENSOR
SUPPLY CIRCUIT. ABOVE 1.0 VOLT? SUPPLY CIRCUIT FOR
A SHORT TO
FIG.2 VOLTAGE.*
NO
REPLACE THE ENGINE
CONTROL MODULE.*
T
R
O
U
B
L
E
C
O
D
E
T
E
S
T
S
45
ProCarManuals.com