display CHRYSLER PACIFICA HYBRID 2021 Owners Manual
[x] Cancel search | Manufacturer: CHRYSLER, Model Year: 2021, Model line: PACIFICA HYBRID, Model: CHRYSLER PACIFICA HYBRID 2021Pages: 401, PDF Size: 26.88 MB
Page 216 of 401
214MULTIMEDIA
UCONNECT THEATER — UCONNECT 5/5 NAV
WITH 10.1-INCH DISPLAY (IF EQUIPPED)
UCONNECT THEATER OVERVIEW
Your Uconnect Theater is designed to give your
family years of enjoyment.
There are multiple ways to interact with your
Uconnect Theater system:
Play your favorite CDs, DVDs, or Blu-ray™ Discs
Plug and play a variety of standard video games
or devices into the HDMI port
Listen to audio over the wireless headphones
Plug and play a variety of devices into the Video
USB port
Plug in standard headphones to listen to audio
Project your mobile phone or tablet screen onto
the rear Uconnect Theater touchscreens
Please review this Owner's Manual to become
familiar with its features and operation.
GETTING STARTED
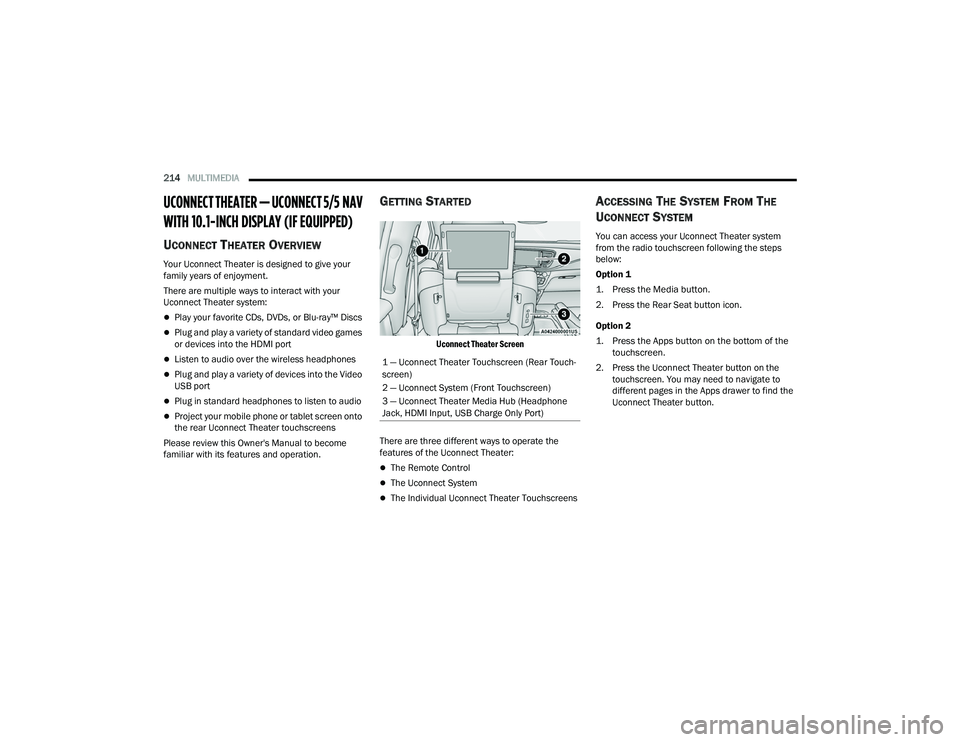
Uconnect Theater Screen
There are three different ways to operate the
features of the Uconnect Theater:
The Remote Control
The Uconnect System
The Individual Uconnect Theater Touchscreens
ACCESSING THE SYSTEM FROM THE
U
CONNECT SYSTEM
You can access your Uconnect Theater system
from the radio touchscreen following the steps
below:
Option 1
1. Press the Media button.
2. Press the Rear Seat button icon.
Option 2
1. Press the Apps button on the bottom of the
touchscreen.
2. Press the Uconnect Theater button on the touchscreen. You may need to navigate to
different pages in the Apps drawer to find the
Uconnect Theater button.
1 — Uconnect Theater Touchscreen (Rear Touch
-
screen)
2 — Uconnect System (Front Touchscreen)
3 — Uconnect Theater Media Hub (Headphone
Jack, HDMI Input, USB Charge Only Port)
21_RUP_OM_EN_USC_t.book Page 214
Page 221 of 401
MULTIMEDIA219
General Settings
To change source card order, select “Source Card
Reorder”, then press and hold source card on the
touchscreen, and drag and drop in desired order.
You can also adjust settings such as:
Brightness
Media port lighting on and off
Clock on and off
NOTE:System information can also be displayed under
General Settings.
Remote Settings
Under this setting, you can access the following:
Manage Remotes (this allows you to unpair
remotes)
Pair Remote
Remote sensitivity (this adjusts the speed and
sensitivity of cursor on screen when using
gesture pad) Ú page 387.
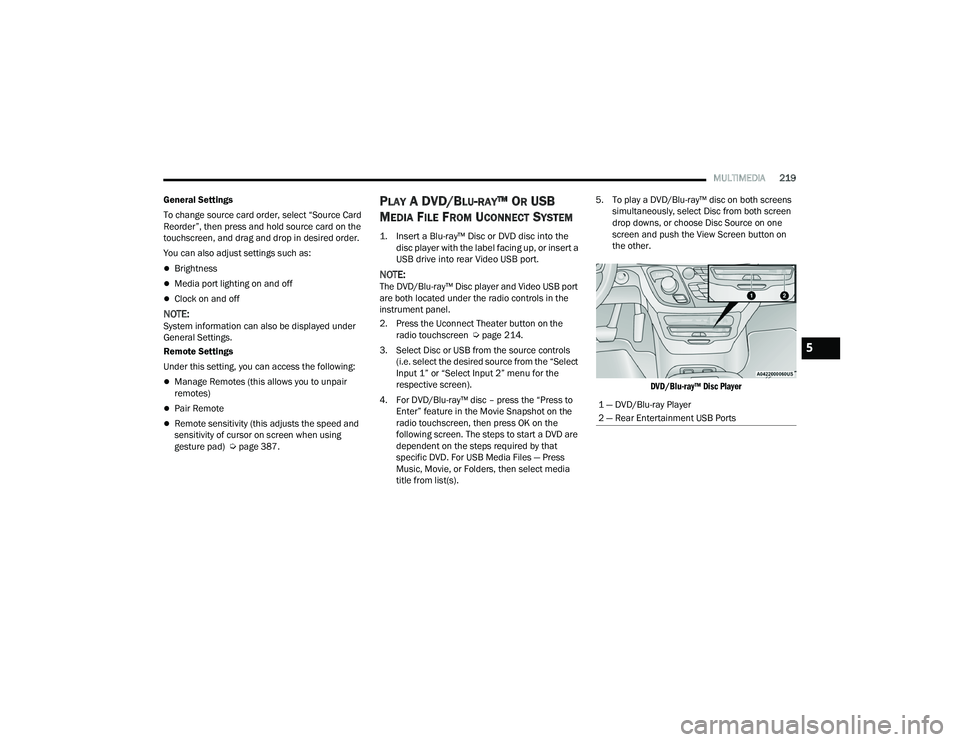
PLAY A DVD/BLU-RAY™ OR USB
M
EDIA FILE FROM UCONNECT SYSTEM
1. Insert a Blu-ray™ Disc or DVD disc into the
disc player with the label facing up, or insert a
USB drive into rear Video USB port.
NOTE:The DVD/Blu-ray™ Disc player and Video USB port
are both located under the radio controls in the
instrument panel.
2. Press the Uconnect Theater button on the radio touchscreen Ú page 214.
3. Select Disc or USB from the source controls (i.e. select the desired source from the “Select
Input 1” or “Select Input 2” menu for the
respective screen).
4. For DVD/Blu-ray™ disc – press the “Press to Enter” feature in the Movie Snapshot on the
radio touchscreen, then press OK on the
following screen. The steps to start a DVD are
dependent on the steps required by that
specific DVD. For USB Media Files — Press
Music, Movie, or Folders, then select media
title from list(s). 5. To play a DVD/Blu-ray™ disc on both screens
simultaneously, select Disc from both screen
drop downs, or choose Disc Source on one
screen and push the View Screen button on
the other.
DVD/Blu-ray™ Disc Player
1 — DVD/Blu-ray Player
2 — Rear Entertainment USB Ports
5
21_RUP_OM_EN_USC_t.book Page 219
Page 227 of 401
MULTIMEDIA225
What Does This Warranty Not Cover? This
warranty does not cover any damage or defect that
results from misuse, abuse or modification of the
Product other than by Aptiv. Foam earpieces,
which will wear over time through normal use, are
specifically not covered (replacement foam is
available for a nominal charge). APTIV IS NOT
LIABLE FOR ANY INJURIES OR DAMAGES TO
PERSONS OR PROPERTY RESULTING FROM THE
USE OF, OR ANY FAILURE OR DEFECT IN, THE
PRODUCT, NOR IS APTIV LIABLE FOR ANY
GENERAL, SPECIAL, DIRECT, INDIRECT,
INCIDENTAL, CONSEQUENTIAL, EXEMPLARY,
PUNITIVE OR OTHER DAMAGES OF ANY KIND OR
NATURE WHATSOEVER. Some states and
jurisdictions may not allow the exclusion or
limitation of incidental or consequential damages,
so the above limitation may not apply to you. This
warranty gives you specific legal rights. You may
also have other rights, which vary from jurisdiction
to jurisdiction.
What Will Aptiv Do? Aptiv, at its option, will repair
or replace any defective Product. Aptiv reserves
the right to replace any discontinued Product with
a comparable model. THIS WARRANTY IS THE
SOLE WARRANTY FOR THIS PRODUCT, SETS
FORTH YOUR EXCLUSIVE REMEDY REGARDING
DEFECTIVE PRODUCTS, AND IS IN LIEU OF ALL
OTHER WARRANTIES (EXPRESS OR IMPLIED), INCLUDING ANY WARRANTY FOR
MERCHANTABILITY OR FITNESS FOR A
PARTICULAR PURPOSE.
If you have any questions or comments regarding
your Aptiv wireless headphones, please email
[email protected] or phone: 888-293-3332.
DISPLAY SETTINGS
When watching a video source, pressing the
Settings icon on the touchscreen activates the
Settings menu. These settings control the
appearance of the video on the screen. The factory
default settings are already set for optimum
viewing, so there is no need to change these
settings under normal circumstances.
To change the settings, use one of the
touchscreens or remote. To reset all values back to
the original settings, select “Reset to Defaults”,
then select “YES.”
LISTENING TO AUDIO WITH THE SCREEN
C
LOSED
To listen to only the audio portion of the channel
with the screen closed:
Set the audio to the desired source and
channel.
Close the video screen.
When the screen is reopened, the video screen
will automatically turn back on and show the
appropriate display menu or media.
If the screen is closed and there is no audio heard,
verify that the headphones are turned on (the ON
indicator is illuminated) and the headphone
selector switch is on the desired channel. If the
headphones are turned on, push the remote
control’s power button to turn audio on. If audio is
still not heard, check that fully charged batteries
are installed in the headphones.
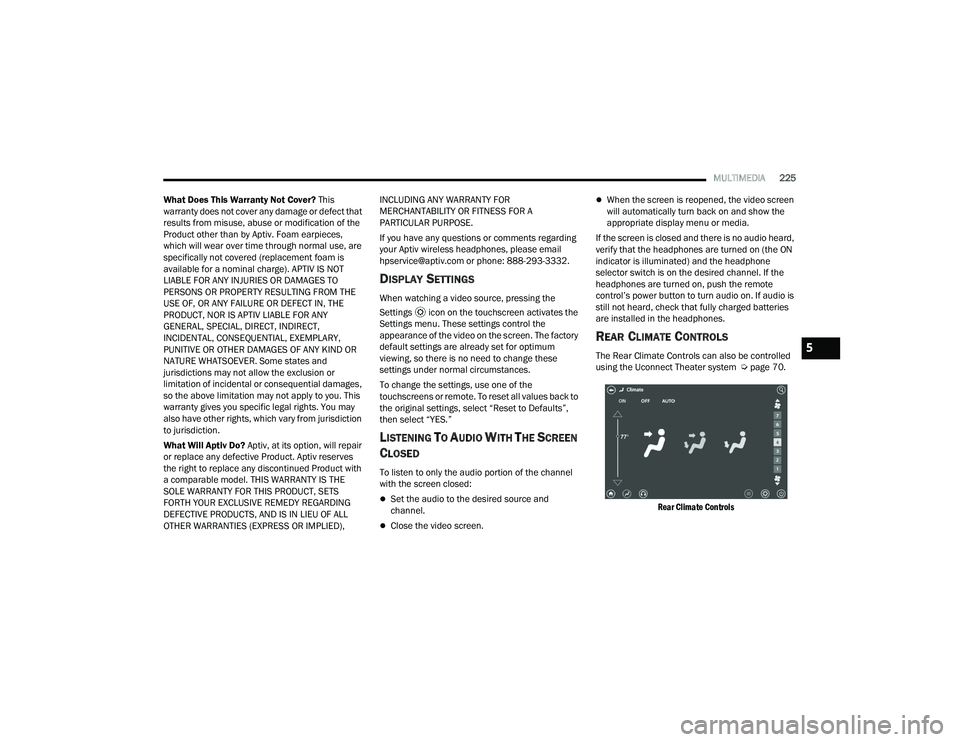
REAR CLIMATE CONTROLS
The Rear Climate Controls can also be controlled
using the Uconnect Theater system Ú page 70.
Rear Climate Controls
5
21_RUP_OM_EN_USC_t.book Page 225
Page 232 of 401
230MULTIMEDIA
Compressed Audio Files (MP3, WMA and AAC)
The Blu-ray™ Disc player is capable of playing MP3
(MPEG-1 Audio Layer 3), WMA (Windows Media
Audio) files and AAC (Advanced Audio Coding) from
a CD Data disc (usually a CD-R or CD-RW) or DVD
Data disc (usually a DVD-R or DVD-RW).
The Blu-ray™ Disc player always uses the file
extension to determine the audio format, so
MP3 files must always end with the extension
“.mp3” or “.MP3” and WMA files must always
end with the extension “.wma” or “.WMA” and
AAC files must always end with the extension
and “.aac” or “.AAC” or “m4a”. To prevent incor -
rect playback, do not use these extensions for
any other types of files.
For MP3 files, ID3v1, ID3v2 tag data (such as
artist name, track title, album, etc.) are
supported.
Any file that is copy protected (such as those
downloaded from many online music stores) will
not play. The Blu-ray™ player will automatically
skip the file and begin playing the next available
file.
Other compression formats such as MP3 Pro,
Ogg Vorbis, and ATRAC3 will not play. The
Blu-ray™ player will automatically skip the file
and begin playing the next available file.
If you are creating your own files, the recom -
mended fixed bit rate for MP3 files is between
32 and 320Kbps and the recommended fixed
bit rate for WMA files is between 16 and
192Kbps. Variable bit rates are also supported.
For both formats, the recommended sample
rate is either 44.1kHz or 48kHz.
To change the current file, use the remote
control “Seek Forward” or “Seek Back” buttons
to return to the start of the current or previous
file.
AAC (MPEG-4 AAC, Low Complexity Profile)
support.
AAC HE v1 (AAC High Efficiency v1 aka.
AAC/MPEG4v2 AAC+) support.
HE-AAC v1, v2 support. Disc Errors
If the Blu-ray™ Disc player is unable to read the
disc, a "Disc Error" message is displayed on the
rear screen and Radio displays. A dirty, damaged,
or incompatible disc format are all potential
causes for a "Disc Error" message.
If a disc has a damaged track which results in
audible or visible errors that persists for two
seconds, the Blu-ray™ Disc player will attempt to
continue playing the disc by skipping forward one
to three seconds at a time. If the end of the disc is
reached, the Blu-ray™ Disc player will return to the
beginning of the disc and attempt to play the start
of the first track.
The Blu-ray™ Disc player may shut down during
extremely hot conditions, such as when the
vehicle’s interior temperature is above 140°F
(60°C). When this occurs, the player will display
"High Temp" and will shut off the rear seat displays
until a safe temperature is reached. This shutdown
is necessary to protect the optics of the Blu-ray™
Disc player.
21_RUP_OM_EN_USC_t.book Page 230
Page 234 of 401
232MULTIMEDIA
Dolby
Manufactured under license from Dolby
Laboratories. Dolby and the double-D symbol are
trademarks of Dolby Laboratories.
DTS
For DTS patents, see
http://dts.com/patents.
Manufactured under license from DTS Licensing
Limited. DTS, the Symbol, DTS and the Symbol
together are registered trademarks, and DTS 2.0
Channel is a trademark of DTS, Inc. © DTS, Inc. All
Rights Reserved.
DVD
"The DVD logo” is a trademark of DVD Format/Logo
Licensing Corporation." or " DVD logo is a
trademark of DVD Format/Logo Licensing
Corporation registered in the US, Japan and other
countries."
BDA
“Blu-ray™ Disc, Blu-ray™, BD-Live, BONUSVIEW,
AVCREC and the logos are trademarks of the
Blu-ray™ Disc Association.” AVCHD
"AVCHD" and the "AVCHD" logo are trademarks of
Panasonic Corporation and Sony® Corporation.
BD-J
Java is a registered trademark of Oracle and/or its
affiliates.
MPEG
THIS PRODUCT IS LICENSED UNDER THE AVC
PATENT PORTFOLIO LICENSE FOR THE PERSONAL
AND NON-COMMERCIAL USE OF A CONSUMER TO
(i) ENCODE VIDEO IN COMPLIANCE WITH THE AVC
STANDARD ("AVC VIDEO") AND/OR (ii) DECODE
AVC VIDEO THAT WAS ENCODED BY A CONSUMER
ENGAGED IN A PERSONAL AND NON-COMMERCIAL
ACTIVITY AND/OR WAS OBTAINED FROM A VIDEO
PROVIDER LICENSED TO PROVIDE AVC VIDEO. NO
LICENSE IS GRANTED OR SHALL BE IMPLIED FOR
ANY OTHER USE. ADDITIONAL INFORMATION MAY
BE OBTAINED FROM MPEG LA, L.L.C. SEE
WWW.MPEGLA.COM .
DivX
This DivX Certified® device can play DivX® Home
Theater video files up to 576p (including .avi,
.divx). Download free software at
www.divx.com to
create, play and cast digital videos. Cinavia
"Cinavia Notice This product uses Cinavia
technology to limit the use of unauthorized copies
of some commercially-produced film and videos
and their soundtracks. When a prohibited use of
an unauthorized copy is detected, a message will
be displayed and playback or copying will be
interrupted. More information about Cinavia
technology is provided at the Cinavia Online
Consumer Information Center at
http://
www.cinavia.com/. To request additional
information about Cinavia by mail, send a postcard
with your mailing address to: Cinavia Consumer
Information Center, P.O. Box 86851, San Diego,
CA, 92138, USA.” “This product incorporates
proprietary technology under license from Verance
Corporation and is protected by US Patent 7,369,
677 and other US and worldwide patents issued
and pending as well as copyright and trade secret
protection for certain aspects of such technology.
Cinavia is a trademark of Verance Corporation.
Copyright 2004-2012 Verance Corporation. All
rights reserved by Verance. Reverse engineering or
disassembly is prohibited Ú page 387.
WARNING!
Use of controls or adjustments or performance
of procedures other than those specified herein
may result in hazardous radiation exposure.
21_RUP_OM_EN_USC_t.book Page 232
Page 246 of 401
244SAFETY
When the system is in RCP, the system shall
respond with both visual and audible alerts when a
detected object is present. Whenever an audible
alert is requested, the radio is also muted. Turn/
hazard signal status is ignored; the RCP state
always requests the chime.
Blind Spot Alert Off
When the BSM system is turned off there will be no
visual or audible alerts from either the BSM or RCP
systems.
NOTE:
The BSM system will store the current operating
mode when the vehicle is shut off. Each time the
vehicle is started the previously stored mode
will be recalled and used.
The BSM system can work in conjunction with
the KeySense function of the vehicle (if
equipped) Ú page 115.
FORWARD COLLISION WARNING (FCW)
W
ITH MITIGATION — IF EQUIPPED
FCW with Mitigation provides the driver with
audible warnings, visual warnings (within the
instrument cluster display), and may apply a brake
jerk to warn the driver when it detects a potential
frontal collision. The warnings and limited braking
are intended to provide the driver with enough time
to react, avoid or mitigate the potential collision.
NOTE:FCW monitors the information from the forward
looking sensors as well as the Electronic Brake
Controller (EBC), to calculate the probability of a
forward collision. When the system determines
that a forward collision is probable, the driver will
be provided with audible and visual warnings and
may provide a brake jerk warning.
If the driver does not take action based upon these
progressive warnings, then the system will provide
a limited level of active braking to help slow the
vehicle and mitigate the potential forward collision.
If the driver reacts to the warnings by braking and
the system determines that the driver intends to
avoid the collision by braking but has not applied
sufficient brake force, the system will compensate
and provide additional brake force as required.
If a FCW with Mitigation event begins at a speed
below 37 mph (60 km/h), the system may provide
the maximum braking possible to mitigate the
potential forward collision. If the Forward Collision
Warning with Mitigation event stops the vehicle
completely, the system will hold the vehicle at
standstill for two seconds and then release the
brakes. If a pedestrian is encountered in the path
at the same speed threshold, the system will
attempt to bring the vehicle to a stop.
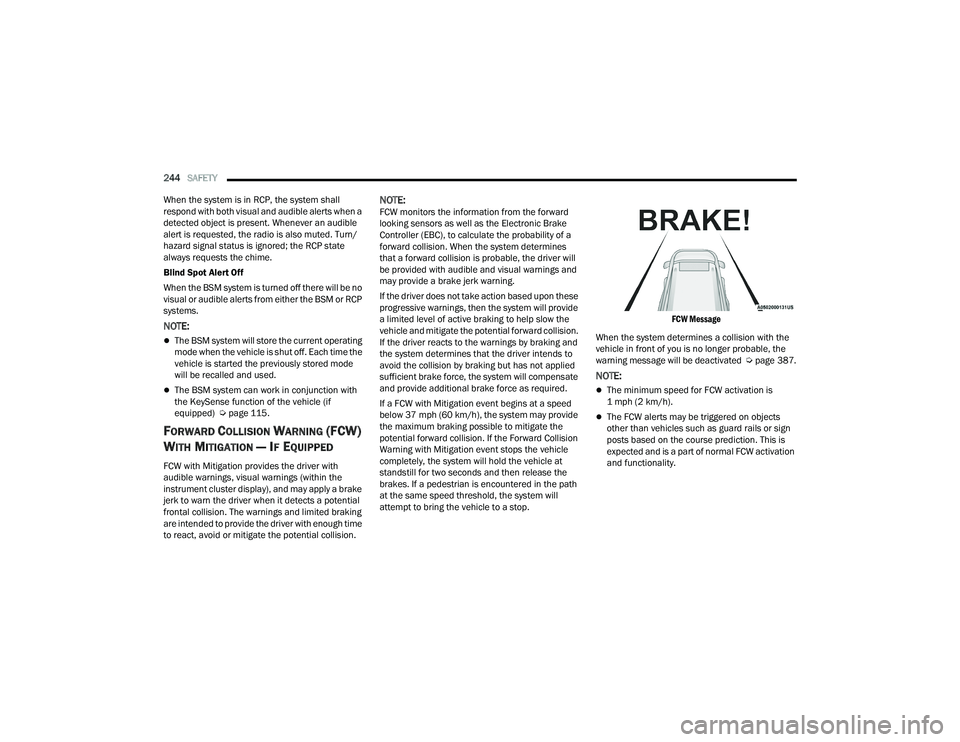
FCW Message
When the system determines a collision with the
vehicle in front of you is no longer probable, the
warning message will be deactivated Úpage 387.
NOTE:
The minimum speed for FCW activation is
1 mph (2 km/h).
The FCW alerts may be triggered on objects
other than vehicles such as guard rails or sign
posts based on the course prediction. This is
expected and is a part of normal FCW activation
and functionality.
21_RUP_OM_EN_USC_t.book Page 244
Page 248 of 401
246SAFETY
FCW Limited Warning
If the instrument cluster displays “ACC/FCW
Limited Functionality” or “ACC/FCW Limited
Functionality Clean Front Windshield”
momentarily, there may be a condition that limits
FCW functionality. Although the vehicle is still
drivable under normal conditions, the active
braking may not be fully available. Once the
condition that limited the system performance is
no longer present, the system will return to its full
performance state. If the problem persists, see an
authorized dealer.
Service FCW Warning
If the system turns off, and the instrument cluster
displays:
ACC/FCW Unavailable Service Required
Cruise/FCW Unavailable Service Required
This indicates there is an internal system fault.
Although the vehicle is still drivable under normal
conditions, have the system checked by an
authorized dealer.
Pedestrian Emergency Braking (PEB) — If
Equipped
The Pedestrian Emergency Braking (PEB) is a
subsystem of the FCW system which provides the
driver with audible and visual warnings in the
instrument cluster display, and may apply
automatic braking when it detects a potential
frontal collision with a pedestrian.
If a PEB event begins at a speed below 37 mph
(60 km/h), the system may provide braking to
mitigate the potential collision with a pedestrian. If
the PEB event stops the vehicle completely, the
system will hold the vehicle at a standstill for two
seconds and then release the brakes. When the
system determines a collision with the pedestrian
in front of you is no longer probable, the warning
message will be deactivated.
The minimum speed for PEB activation is 3 mph
(5 km/h). Turning PEB On Or Off
NOTE:The default status of PEB is “On.” This allows the
system to warn you of a possible frontal collision
with the pedestrian.
The PEB button is located in the Uconnect display
in the Controls settings Ú
page 189.
To turn the PEB system off, push the Pedestrian
Emergency Braking OFF button.
To turn the PEB system back on, push the Warning
Active Braking button.
Changing the PEB status to “Off” deactivates the
system, so no warning or active braking will be
available in case of a possible frontal collision with
the pedestrian.
NOTE:The PEB system will NOT retain the last setting
selected by the driver after ignition shut down. The
system will reset to the default setting when the
vehicle is restarted.
WARNING!
Pedestrian Emergency Braking (PEB) is not
intended to avoid a collision on its own, nor can
PEB detect every type of potential collision with
a pedestrian. The driver has the responsibility to
avoid a collision by controlling the vehicle via
braking and steering. Failure to follow this
warning could lead to serious injury or death.
21_RUP_OM_EN_USC_t.book Page 246
Page 249 of 401
SAFETY247
TIRE PRESSURE MONITORING SYSTEM
(TPMS)
The Tire Pressure Monitoring System (TPMS) will
warn the driver of a low tire pressure based on the
vehicle recommended cold placard pressure.
NOTE:The TPMS Warning Light will illuminate in the
instrument cluster and a chime will sound when
tire pressure is low in one or more of the four active
road tires. In addition, the instrument cluster will
display a graphic showing the pressure values of
each tire with the low tire pressure values in a
different color, or the Uconnect radio will display a
TPMS message. When this occurs you must
increase the tire pressure to the recommended
cold placard pressure in order for the TPMS
Warning Light to turn off.
The tire pressure will vary with temperature by
approximately 1 psi (7 kPa) for every 12°F (6.5°C).
This means that when the outside temperature
decreases, the tire pressure will decrease. Tire
pressure should always be set based on cold
inflation tire pressure. This is defined as the tire
pressure after the vehicle has not been driven for at least three hours, or driven less than 1 mile
(1.6 km) after a three hour period. The cold tire
inflation pressure must not exceed the maximum
inflation pressure molded into the tire sidewall.
The tire pressure will also increase as the vehicle
is driven. This is normal and there should be no
adjustment for this increased pressure.
See Ú
page 363 for information on how to
properly inflate the vehicle’s tires.
The TPMS will warn the driver of a low tire pressure
if the tire pressure falls below the low-pressure
warning limit for any reason, including low
temperature effects and natural pressure loss
through the tire.
The TPMS will continue to warn the driver of low
tire pressure as long as the condition exists, and
will not turn off until the tire pressure is at or above
the recommended cold placard pressure. Once the
low tire pressure warning (TPMS Warning Light)
illuminates, you must increase the tire pressure to
the recommended cold placard pressure in order
for the TPMS Warning Light to turn off. The system will automatically update and the
TPMS Warning Light will turn off once the system
receives the updated tire pressures. The vehicle
may need to be driven for up to 20 minutes above
15 mph (24 km/h) in order for the TPMS to receive
this information.
For example, your vehicle may have a
recommended cold (parked for more than three
hours) placard pressure of 33 psi (227 kPa). If the
ambient temperature is 68°F (20°C) and the
measured tire pressure is 28 psi (193 kPa), a
temperature drop to 20°F (-7°C) will decrease the
tire pressure to approximately 24 psi (165 kPa).
This tire pressure is low enough to turn on the
TPMS Warning Light. Driving the vehicle may cause
the tire pressure to rise to approximately 28 psi
(193 kPa), but the TPMS Warning Light will still be
on. In this situation, the TPMS Warning Light will
turn off only after the tires are inflated to the
vehicle’s recommended cold placard pressure
value Ú
page 387.
NOTE:When filling warm tires, the tire pressure may need
to be increased up to an additional 4 psi (28 kPa)
above the recommended cold placard pressure in
order to turn the TPMS Warning Light off.
6
21_RUP_OM_EN_USC_t.book Page 247
Page 250 of 401
248SAFETY
NOTE:
The TPMS is not intended to replace normal tire
care and maintenance, or to provide warning of
a tire failure or condition.
The TPMS should not be used as a tire pressure
gauge while adjusting your tire pressure.
Driving on a significantly underinflated tire
causes the tire to overheat and can lead to tire
failure. Underinflation also reduces fuel effi -
ciency and tire tread life, and may affect the
vehicle’s handling and stopping ability.
The TPMS is not a substitute for proper tire
maintenance, and it is the driver’s responsibility
to maintain correct tire pressure using an accu -
rate tire pressure gauge, even if underinflation
has not reached the level to trigger illumination
of the TPMS Warning Light.
Seasonal temperature changes will affect tire
pressure, and the TPMS will monitor the actual
tire pressure in the tire.
Premium System
The Tire Pressure Monitoring System (TPMS) uses
wireless technology with wheel rim mounted
electronic sensors to monitor tire pressure levels.
Sensors, mounted to each wheel as part of the
valve stem, transmit tire pressure readings to the
receiver module.
NOTE:It is particularly important for you to check the tire
pressure in all of the tires on your vehicle monthly
and to maintain the proper pressure.
The TPMS consists of the following components:
Receiver module
Four Tire Pressure Monitoring System sensors
Various Tire Pressure Monitoring System
messages, which display in the instrument
cluster
Tire Pressure Monitoring System Warning Light
SERVICE TPMS WARNING
When a system fault is detected, the Tire Pressure
Monitoring System (TPMS) Warning Light will flash
on and off for 75 seconds and then remain on
solid. The system fault will also sound a chime. In
addition, the instrument cluster will display a
"SERVICE TPM SYSTEM" message for a minimum
of five seconds and then display dashes (--) in
place of the pressure value to indicate which
sensor is not being received.
CAUTION!
The TPMS has been optimized for the original
equipment tires and wheels. TPMS pressures
and warning have been established for the tire
size equipped on your vehicle. Undesirable
system operation or sensor damage may
result when using replacement equipment
that is not of the same size, type, and/or style.
The TPMS sensor is not designed for use on
aftermarket wheels and may contribute to a
poor overall system performance or sensor
damage. Customers are encouraged to use
OEM wheels to ensure proper TPMS feature
operation.
Using aftermarket tire sealants may cause the
Tire Pressure Monitoring System (TPMS)
sensor to become inoperable. After using an
aftermarket tire sealant it is recommended
that you take your vehicle to an authorized
dealer to have your sensor function checked.
After inspecting or adjusting the tire pressure
always reinstall the valve stem cap. This will
prevent moisture and dirt from entering the
valve stem, which could damage the TPMS
sensor.
21_RUP_OM_EN_USC_t.book Page 248
Page 251 of 401
SAFETY249
If the ignition is cycled, this sequence will repeat,
providing the system fault still exists. If the system
fault no longer exists, the TPMS Warning Light will
no longer flash, and the “SERVICE TPM SYSTEM”
message will no longer display, and a pressure
value will display in place of the dashes. A system
fault can occur due to any of the following:
Jamming due to electronic devices or driving
next to facilities emitting the same radio
frequencies as the TPMS sensors
Installing some form of aftermarket window
tinting that affects radio wave signals
Lots of snow or ice around the wheels or wheel
housings
Using tire chains on the vehicle
Using wheels/tires not equipped with TPMS
sensors
Vehicles With Compact Spare — If Equipped
1. The compact spare tire does not have a Tire Pressure Monitoring System sensor.
Therefore, the TPMS will not monitor the
pressure in the compact spare tire.
2. If you install the compact spare tire in place of a road tire that has a pressure below the
low-pressure warning limit, upon the next
ignition cycle, the TPMS Warning Light will
remain on and a chime will sound. In addition,
the graphic in the instrument cluster will still
display a different color pressure value. 3. After driving the vehicle for up to 20 minutes
above 15 mph (24 km/h), the TPMS Warning
Light will flash on and off for 75 seconds and
then remain on solid. In addition, the
instrument cluster will display a “SERVICE TPM
SYSTEM” message for five seconds and then
display dashes (--) in place of the pressure
value.
4. For each subsequent ignition cycle, a chime will sound, the TPMS Warning Light will flash
on and off for 75 seconds and then remain on
solid, and the instrument cluster will display a
“SERVICE TPM SYSTEM” message for five
seconds and then display dashes (- -) in place
of the pressure value.
5. Once you repair or replace the original road tire and reinstall it on the vehicle in place of the
compact spare, the TPMS will update automat -
ically. In addition, the TPMS Warning Light will
turn off and the graphic in the instrument
cluster will display a new pressure value
instead of dashes (--), as long as no tire
pressure is below the low-pressure warning
limit in any of the four active road tires. The
vehicle may need to be driven for up to
20 minutes above 15 mph (24 km/h) in order
for the TPMS to receive this information.
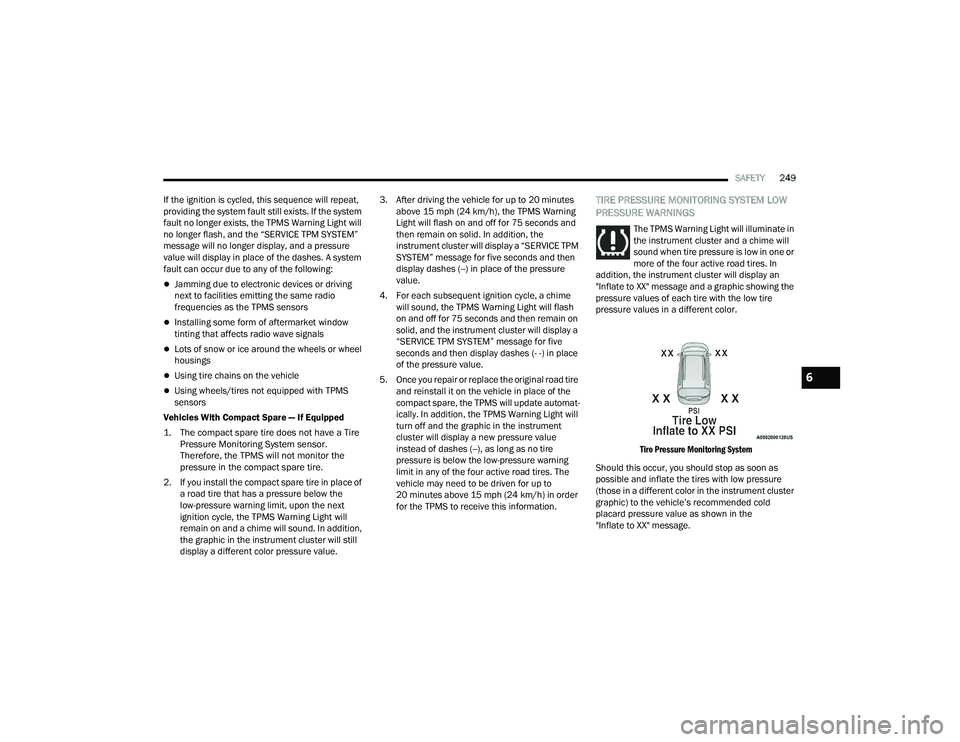
TIRE PRESSURE MONITORING SYSTEM LOW
PRESSURE WARNINGS
The TPMS Warning Light will illuminate in
the instrument cluster and a chime will
sound when tire pressure is low in one or
more of the four active road tires. In
addition, the instrument cluster will display an
"Inflate to XX" message and a graphic showing the
pressure values of each tire with the low tire
pressure values in a different color.
Tire Pressure Monitoring System
Should this occur, you should stop as soon as
possible and inflate the tires with low pressure
(those in a different color in the instrument cluster
graphic) to the vehicle’s recommended cold
placard pressure value as shown in the
"Inflate to XX" message.
6
21_RUP_OM_EN_USC_t.book Page 249