ECU CHRYSLER PACIFICA HYBRID 2022 Owner's Manual
[x] Cancel search | Manufacturer: CHRYSLER, Model Year: 2022, Model line: PACIFICA HYBRID, Model: CHRYSLER PACIFICA HYBRID 2022Pages: 384, PDF Size: 23.92 MB
Page 97 of 384
GETTING TO KNOW YOUR VEHICLE95
NOTE:
During Express Open or Express Close opera -
tion, any other actuation of the switch will stop
the sunroof.
If the sunshade is in the closed position when
the open switch is pushed, the sunshade will
automatically cycle to the halfway open position
prior to the sunroof opening.
Manual Open/Close
Push and hold the open switch and the sunroof will
open to the full open position.
To close the sunroof, push and hold the close
switch.
Any release of the switch during open or close
operation will stop the movement and the sunroof
will remain in a partially open condition until the
sunroof switch is pushed again.
OPENING AND CLOSING THE POWER
S
UNSHADE — IF EQUIPPED
The sunshade has two programmed open
positions: half-open and full-open. When opening
the sunshade from the closed position, the
sunshade will always stop at the half-open position
regardless of express or manual open operation.
The switch must be actuated again to continue to
the full-open position. Express Open/Close
Push the sunshade open switch and release it
within one second and the sunshade will open to
the half-open position and stop automatically.
Push and release the sunshade open switch again
from the half-open position and the sunshade will
open to the full-open position and stop
automatically. This is called Express Open.
Push the sunshade close switch and release it
within one second and the sunshade will close
automatically from any position. If the sunroof is
completely closed, the shade will close fully and
stop automatically. This is called Express Close.
NOTE:
During Express Open or Express Close opera
-
tion, any movement of the sunshade switch will
stop the shade.
If the sunroof is open, the shade will close to the
half-open position. Pushing the shade close
button again will automatically close both the
sunroof and shade completely.
Manual Open/Close
Push and hold the sunshade open switch and the
shade will open to the half-open position and stop
automatically. Push and hold the sunshade open
switch again and the shade will open automatically
to the full-open position. To close the shade, push and hold the sunshade
close switch.
Any release of the switch will stop the movement
and the sunshade will remain in a partially opened
condition until the switch is pushed again.
PINCH PROTECT FEATURE
This feature will detect an obstruction in the
closing of the sunroof during the Express Close
operation. If an obstruction in the path of the
sunroof is detected, the sunroof will automatically
retract. Remove the obstruction if this occurs.
NOTE:
If three consecutive sunroof close attempts result in
Pinch Protect reversals, Pinch Protect will disable
and the sunroof must be closed in Manual Mode.
VENTING SUNROOF
Push and release the Vent button within one
second and the sunroof will open to the vent
position. This is called Express Vent, and it will
occur regardless of sunroof position.
NOTE:If the sunshade is in the closed position when the
vent switch is pushed, the sunshade will automati
-
cally cycle to the halfway open position prior to the
sunroof opening to the Vent position.
2
22_RUP_OM_EN_USC_t.book Page 95
Page 108 of 384
106GETTING TO KNOW YOUR VEHICLE
STOW ‘N PLACE ROOF RACK — IF EQUIPPED
The crossbars and side rails are designed to carry
weight on vehicles equipped with a luggage rack.
The load must not exceed 150 lb (68 kg), and
should be uniformly distributed over the luggage
rack crossbars.
The crossbars on your vehicle are delivered stowed
within the roof rack side rails. Crossbars should
always be used whenever cargo is placed on the
roof rack. Check the straps frequently to be sure
that the load remains securely attached.
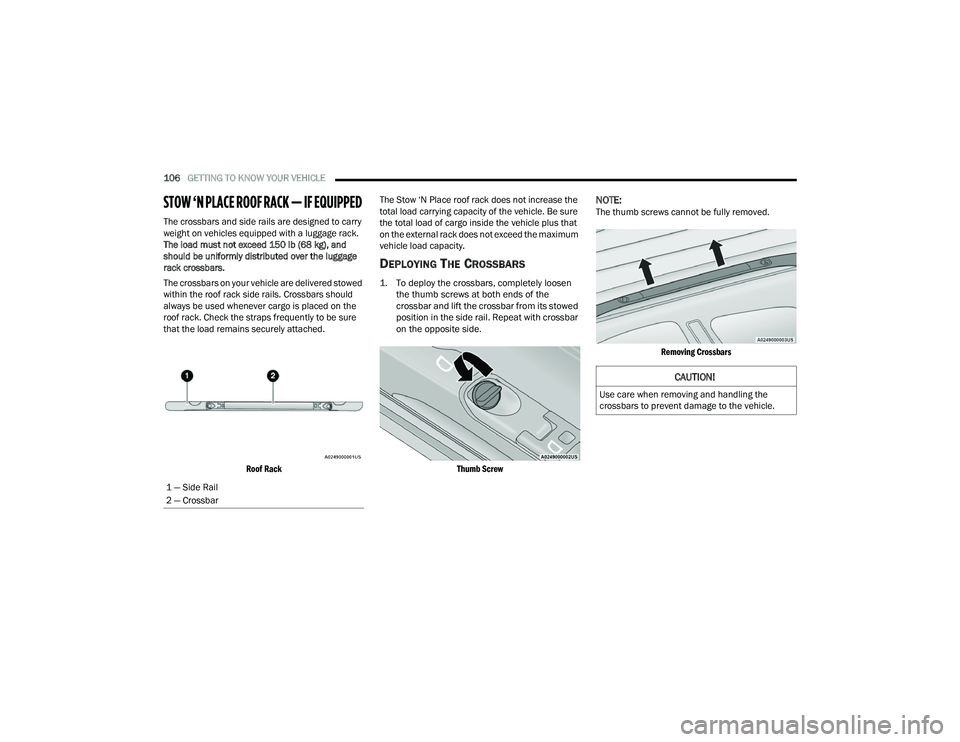
Roof Rack
The Stow ‘N Place roof rack does not increase the
total load carrying capacity of the vehicle. Be sure
the total load of cargo inside the vehicle plus that
on the external rack does not exceed the maximum
vehicle load capacity.
DEPLOYING THE CROSSBARS
1. To deploy the crossbars, completely loosen
the thumb screws at both ends of the
crossbar and lift the crossbar from its stowed
position in the side rail. Repeat with crossbar
on the opposite side.
Thumb Screw
NOTE:The thumb screws cannot be fully removed.
Removing Crossbars
1 — Side Rail
2 — Crossbar
CAUTION!
Use care when removing and handling the
crossbars to prevent damage to the vehicle.
22_RUP_OM_EN_USC_t.book Page 106
Page 111 of 384
GETTING TO KNOW YOUR VEHICLE109
(Continued)
NOTE:
To help control wind noise, stow the crossbars in
the side rails when they are not in use.
If any metallic object is placed over the satellite
radio antenna (if equipped), you may experience
interruption of satellite radio reception.
WARNING!
Cargo must be securely tied down before driving
your vehicle. Improperly secured loads can fly off
the vehicle, particularly at high speeds, resulting
in personal injury or property damage. Follow
the roof rack cautions when carrying cargo on
your roof rack.
CAUTION!
To prevent damage to the roof of your vehicle,
DO NOT carry any loads on the roof rack
without the crossbars deployed. The load
should be secured and placed on top of the
crossbars, not directly on the roof. If it is
necessary to place the load on the roof, place
a blanket or other protective layer between
the load and the roof surface.
To avoid damage to the roof rack and vehicle,
do not exceed the maximum roof rack load
capacity of 150 lb (68 kg). Always distribute
heavy loads as evenly as possible and secure
the load appropriately.
Load should always be secured to cross bars
first, with tie down loops used as additional
securing points if needed. Tie loops are
intended as supplementary tie down points
only. Do not use ratcheting mechanisms with
the tie loops. Check the straps and thumb
wheels frequently to be sure that the load
remains securely attached.
Long loads that extend over the windshield,
such as wood panels or surfboards, or loads
with large frontal area should be secured to
both the front and rear of the vehicle.
Travel at reduced speeds and turn corners
carefully when carrying large or heavy loads
on the roof rack. Wind forces, due to natural
causes or nearby truck traffic, can add sudden
upward lift to a load. This is especially true on
large flat loads and may result in damage to
the cargo or your vehicle.
CAUTION!
2
22_RUP_OM_EN_USC_t.book Page 109
Page 122 of 384
120GETTING TO KNOW YOUR INSTRUMENT PANEL
NOTE:
The charging system is independent from load
reduction. The charging system performs a diag-
nostic on the charging system continuously.
If the Battery Charge Warning Light is on it may
indicate a problem with the charging system
Ú page 121.
The electrical loads that may be switched off (if
equipped), and vehicle functions which can be
effected by load reduction:
Heated Seat/Vented Seats/Heated Wheel
Heated/Cooled Cup Holders — If Equipped
Rear Defroster And Heated Mirrors
HVAC System
115 Volts AC Power Inverter System
Audio and Telematics System
Loss of the battery charge may indicate one or
more of the following conditions:
The charging system cannot deliver enough
electrical power to the vehicle system because
the electrical loads are larger than the capability
of charging system. The charging system is still
functioning properly.
Turning on all possible vehicle electrical loads
(e.g. HVAC to max settings, exterior and interior
lights, overloaded power outlets +12 Volts,
150W, USB ports) during certain driving condi -
tions (city driving, towing, frequent stopping).
Installing options like additional lights, upfitter
electrical accessories, audio systems, alarms
and similar devices.
Unusual driving cycles (short trips separated by
long parking periods).
The vehicle was parked for an extended period
of time (weeks, months).
The battery was recently replaced and was not
charged completely.
The battery was discharged by an electrical load
left on when the vehicle was parked.
The battery was used for an extended period
with the engine not running to supply radio,
lights, chargers, +12 Volt portable appliances
like vacuum cleaners, game consoles and
similar devices. What to do when an electrical load reduction
action message is present (“Battery Saver On” or
“Battery Saver Mode”)
During a trip:
Reduce power to unnecessary loads if possible:
Turn off redundant lights (interior or exterior)
Check what may be plugged in to power
outlets +12 Volts, 150W, USB ports
Check HVAC settings (blower, temperature)
Check the audio settings (volume)
After a trip:
Check if any aftermarket equipment was
installed (additional lights, upfitter electrical
accessories, audio systems, alarms) and review
specifications if any (load and Ignition Off Draw
currents).
Evaluate the latest driving cycles (distance,
driving time and parking time).
The vehicle should have service performed if
the message is still present during consecutive
trips and the evaluation of the vehicle and
driving pattern did not help to identify the cause.
22_RUP_OM_EN_USC_t.book Page 120
Page 126 of 384
124GETTING TO KNOW YOUR INSTRUMENT PANEL
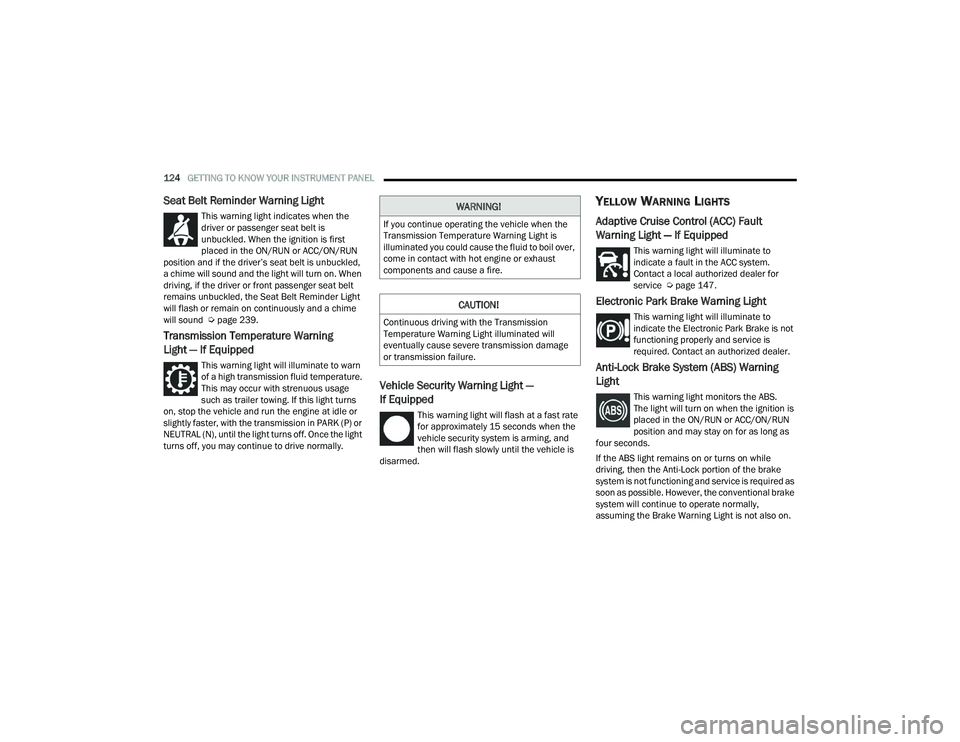
Seat Belt Reminder Warning Light
This warning light indicates when the
driver or passenger seat belt is
unbuckled. When the ignition is first
placed in the ON/RUN or ACC/ON/RUN
position and if the driver’s seat belt is unbuckled,
a chime will sound and the light will turn on. When
driving, if the driver or front passenger seat belt
remains unbuckled, the Seat Belt Reminder Light
will flash or remain on continuously and a chime
will sound Ú page 239.
Transmission Temperature Warning
Light — If Equipped
This warning light will illuminate to warn
of a high transmission fluid temperature.
This may occur with strenuous usage
such as trailer towing. If this light turns
on, stop the vehicle and run the engine at idle or
slightly faster, with the transmission in PARK (P) or
NEUTRAL (N), until the light turns off. Once the light
turns off, you may continue to drive normally.
Vehicle Security Warning Light —
If Equipped
This warning light will flash at a fast rate
for approximately 15 seconds when the
vehicle security system is arming, and
then will flash slowly until the vehicle is
disarmed.
YELLOW WARNING LIGHTS
Adaptive Cruise Control (ACC) Fault
Warning Light — If Equipped
This warning light will illuminate to
indicate a fault in the ACC system.
Contact a local authorized dealer for
service Ú page 147.
Electronic Park Brake Warning Light
This warning light will illuminate to
indicate the Electronic Park Brake is not
functioning properly and service is
required. Contact an authorized dealer.
Anti-Lock Brake System (ABS) Warning
Light
This warning light monitors the ABS.
The light will turn on when the ignition is
placed in the ON/RUN or ACC/ON/RUN
position and may stay on for as long as
four seconds.
If the ABS light remains on or turns on while
driving, then the Anti-Lock portion of the brake
system is not functioning and service is required as
soon as possible. However, the conventional brake
system will continue to operate normally,
assuming the Brake Warning Light is not also on.
WARNING!
If you continue operating the vehicle when the
Transmission Temperature Warning Light is
illuminated you could cause the fluid to boil over,
come in contact with hot engine or exhaust
components and cause a fire.
CAUTION!
Continuous driving with the Transmission
Temperature Warning Light illuminated will
eventually cause severe transmission damage
or transmission failure.
22_RUP_OM_EN_USC_t.book Page 124
Page 131 of 384
GETTING TO KNOW YOUR INSTRUMENT PANEL129
BLUE INDICATOR LIGHTS
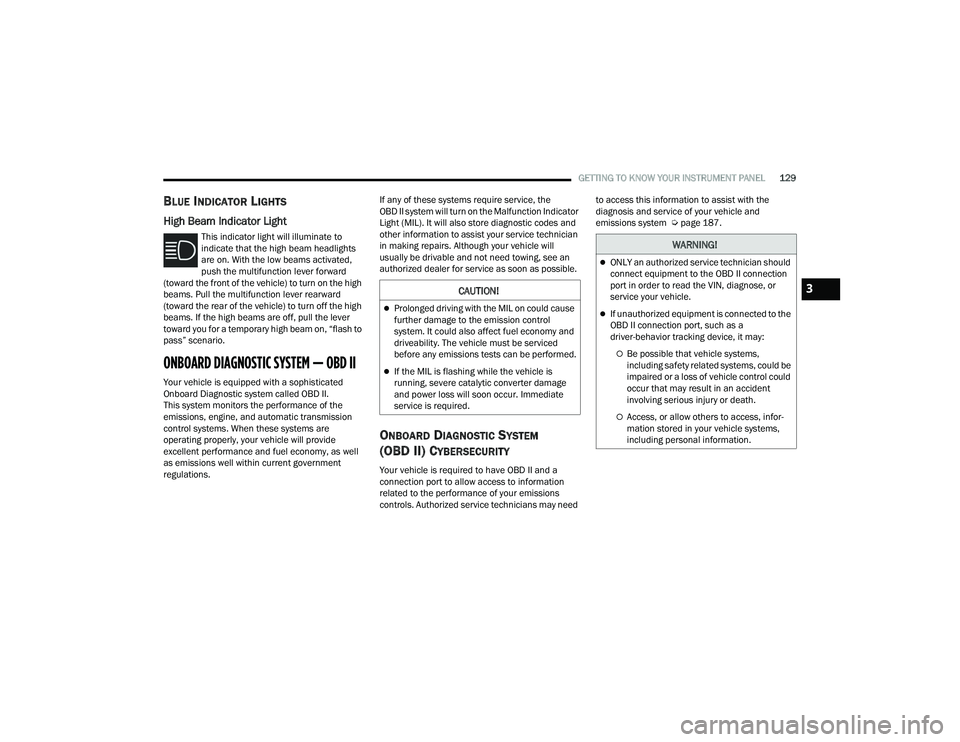
High Beam Indicator Light
This indicator light will illuminate to
indicate that the high beam headlights
are on. With the low beams activated,
push the multifunction lever forward
(toward the front of the vehicle) to turn on the high
beams. Pull the multifunction lever rearward
(toward the rear of the vehicle) to turn off the high
beams. If the high beams are off, pull the lever
toward you for a temporary high beam on, “flash to
pass” scenario.
ONBOARD DIAGNOSTIC SYSTEM — OBD II
Your vehicle is equipped with a sophisticated
Onboard Diagnostic system called OBD II.
This system monitors the performance of the
emissions, engine, and automatic transmission
control systems. When these systems are
operating properly, your vehicle will provide
excellent performance and fuel economy, as well
as emissions well within current government
regulations. If any of these systems require service, the
OBD II system will turn on the Malfunction Indicator
Light (MIL). It will also store diagnostic codes and
other information to assist your service technician
in making repairs. Although your vehicle will
usually be drivable and not need towing, see an
authorized dealer for service as soon as possible.
ONBOARD DIAGNOSTIC SYSTEM
(OBD II) C
YBERSECURITY
Your vehicle is required to have OBD II and a
connection port to allow access to information
related to the performance of your emissions
controls. Authorized service technicians may need to access this information to assist with the
diagnosis and service of your vehicle and
emissions system Ú
page 187.
CAUTION!
Prolonged driving with the MIL on could cause
further damage to the emission control
system. It could also affect fuel economy and
driveability. The vehicle must be serviced
before any emissions tests can be performed.
If the MIL is flashing while the vehicle is
running, severe catalytic converter damage
and power loss will soon occur. Immediate
service is required.
WARNING!
ONLY an authorized service technician should
connect equipment to the OBD II connection
port in order to read the VIN, diagnose, or
service your vehicle.
If unauthorized equipment is connected to the
OBD II connection port, such as a
driver-behavior tracking device, it may:
Be possible that vehicle systems,
including safety related systems, could be
impaired or a loss of vehicle control could
occur that may result in an accident
involving serious injury or death.
Access, or allow others to access, infor -
mation stored in your vehicle systems,
including personal information.
3
22_RUP_OM_EN_USC_t.book Page 129
Page 135 of 384

STARTING AND OPERATING133
(Continued)
(Continued)
AutoPark In Stop/Start Autostop Mode
AutoPark will engage when all of these condi
-
tions are met:
Vehicle is equipped with a gear selector
Vehicle is not in PARK
Vehicle speed is 1.2 mph (1.9 km/h) or less
Driver’s door is ajar
Driver’s seat belt is unbuckled or brake pedal is
not pressed
The message “ AutoPark Engaged ” will display in
the instrument cluster.
WARNING!
Never use the PARK position as a substitute
for the parking brake. Always apply the
parking brake fully when exiting the vehicle to
guard against vehicle movement and possible
injury or damage.
Your vehicle could move and injure you and
others if it is not in PARK. Check by trying to
move the transmission gear selector out of
PARK with the brake pedal released. Make
sure the transmission is in PARK before
exiting the vehicle.
The transmission may not engage PARK if the
vehicle is moving. Always bring the vehicle to a
complete stop before shifting to PARK, and
verify that the transmission gear position indi -
cator solidly indicates PARK (P) without
blinking. Ensure that the vehicle is completely
stopped, and the PARK position is properly
indicated, before exiting the vehicle.
It is dangerous to shift out of PARK or
NEUTRAL if the engine speed is higher than
idle speed. If your foot is not firmly pressing
the brake pedal, the vehicle could accelerate
quickly forward or in reverse. You could lose
control of the vehicle and hit someone or
something. Only shift into gear when the
engine is idling normally and your foot is firmly
pressing the brake pedal.
WARNING!
Unintended movement of a vehicle could
injure those in or near the vehicle. As with all
vehicles, you should never exit a vehicle while
the engine is running. Before exiting a vehicle,
always come to a complete stop, then apply
the parking brake, shift the transmission into
PARK, and turn the ignition OFF. When the
ignition is in the OFF position, the transmis -
sion is locked in PARK, securing the vehicle
against unwanted movement.
When exiting the vehicle, always make sure
the ignition is in the OFF position, remove the
key fob from the vehicle, and lock the vehicle.
Never leave children alone in a vehicle, or
with access to an unlocked vehicle. Allowing
children to be in a vehicle unattended is
dangerous for a number of reasons. A child or
others could be seriously or fatally injured.
Children should be warned not to touch the
parking brake, brake pedal or the transmis -
sion gear selector.
Do not leave the key fob in or near the vehicle
(or in a location accessible to children), and do
not leave the ignition in the ACC or ON/RUN
position. A child could operate power
windows, other controls, or move the vehicle.
WARNING!
4
22_RUP_OM_EN_USC_t.book Page 133
Page 137 of 384
STARTING AND OPERATING135
TO TURN OFF THE ENGINE USING
ENGINE START/STOP B
UTTON
1. Place the gear selector in PARK, then push
and release the ENGINE START/STOP button.
2. The ignition switch will return to the OFF position.
3. If the gear selector is not in PARK, the ENGINE START/STOP button must be held for two
seconds or three short pushes in a row with
the vehicle speed above 5 mph (8 km/h) before the engine will shut off. The ignition
switch position will remain in the ACC position
until the gear selector is in PARK and the
button is pushed twice to the OFF position.
If the gear selector is not in PARK and the
ENGINE START/STOP button is pushed once,
the instrument cluster will display a “Vehicle
Not In Park” message and the engine will
remain running. Never leave a vehicle out of
the PARK position, or it could roll.
NOTE:If the ignition switch is left in the ACC or ON/RUN
(engine not running) position and the transmission
is in PARK, the system will automatically time out
after 30 minutes of inactivity and the ignition will
switch to the OFF position.
ENGINE BLOCK HEATER — IF EQUIPPED
The engine block heater warms the engine and
permits quicker starts in cold weather.
Connect the cord to a 110-115 Volt AC electrical
outlet with a grounded, three-wire extension cord.
For ambient temperatures below 0°F (-18°C), the
engine block heater is recommended. For ambient
temperatures below -20°F (-29°C), the engine
block heater is required.
The engine block heater cord is routed under the
hood, behind to the passenger’s side headlamp.
Follow these steps to properly use the engine block
heater:
1. Locate the engine block heater cord (behind the passenger’s side headlamp).
2. Undo the hook-and-loop strap that secures the heater cord in place.
3. Pull the cord to the front of the vehicle and plug it into a grounded, three-wire extension
cord.
4. After the vehicle is running, reattach the cord to the hook-and-loop strap and properly stow it
away behind the passenger’s side headlamp.
NOTE:
The engine block heater cord is a factory
installed option. If your vehicle is not equipped,
heater cords are available from an authorized
dealer.
The engine block heater will require 110 Volt AC
and 6.5 Amps to activate the heater element.
The engine block heater must be plugged in at
least one hour to have an adequate warming
effect on the engine.
ENGINE BREAK-IN RECOMMENDATIONS
A long break-in period is not required for the engine
and drivetrain (transmission and axle) in your
vehicle.
Drive moderately during the first 300 miles
(500 km). After the initial 60 miles (100 km),
speeds up to 50 or 55 mph (80 or 90 km/h) are
desirable.
WARNING!
Remember to disconnect the engine block
heater cord before driving. Damage to the
110-115 Volt electrical cord could cause
electrocution.
4
22_RUP_OM_EN_USC_t.book Page 135
Page 140 of 384
138STARTING AND OPERATING
If exceptional circumstances should make it
necessary to engage the parking brake while the
vehicle is in motion, push on the EPB switch for as
long as engagement is desired. The BRAKE
warning lamp will illuminate, and a continuous
chime will sound. The rear stop lamps will also be
illuminated automatically while the vehicle
remains in motion.
To disengage the parking brake while the vehicle is
in motion, release the switch. If the vehicle is
brought to a complete stop using the parking
brake, when the vehicle reaches approximately
3 mph (4.8 km/h), the parking brake will remain
engaged.
In the unlikely event of a malfunction of the EPB
system, a yellow EPB fault lamp will illuminate. This
may be accompanied by the BRAKE warning lamp
flashing. In this case, urgent service of the EPB
system is required. Do not rely on the parking
brake to hold the vehicle stationary.
Auto Park Brake
The Electric Park Brake (EPB) can be programmed
to be applied automatically whenever the vehicle is
at a standstill and the automatic transmission is
placed in PARK. Auto Park Brake is enabled and
disabled by customer selection through the
customer programmable features Ú page 188.
SafeHold
SafeHold is a safety feature of the Electric Park
Brake (EPB) system that will engage the parking
brake automatically if the vehicle is left unsecured.
If the automatic transmission is not in PARK, the
seat belt is unbuckled, the driver door is open, the
vehicle is at a standstill, and there is no attempt to
press the brake pedal or accelerator pedal, the
parking brake will automatically engage to prevent
the vehicle from rolling.
SafeHold can be temporarily bypassed by pushing
the EPB while the driver door is open and brake
pedal is pressed. Once manually bypassed,
SafeHold will be enabled again once the vehicle
reaches 12 mph (20 km/h) or the ignition is cycled
to the OFF position and back to ON again.
Brake Service Mode
We recommend having your brakes serviced by an
authorized dealer. You should only make repairs
for which you have the knowledge and the right
equipment. You should only enter Brake Service
Mode during brake service.
When servicing your rear brakes, it may be
necessary for you or your technician to push the
rear piston into the rear caliper bore. With the
Electric Park Brake (EPB) system, this can only be
done after retracting the EPB actuator. Fortunately, actuator retraction can be done easily
by entering Brake Service in your vehicle
Ú
page 188. This menu-based system will guide
you through the steps necessary to retract the EPB
actuator in order to perform rear brake service.
Brake Service has requirements that must be met
in order to be activated:
The vehicle must be at a standstill.
The parking brake must be unapplied.
The transmission must be in PARK or NEUTRAL.
While in Brake Service, the EPB fault lamp will
flash continuously while the ignition switch is ON.
When brake service work is complete, the following
steps must be followed to reset the parking brake
system to normal operation:
Ensure the vehicle is at a standstill.
Press the brake pedal with moderate force.
Apply the EPB.
WARNING!
You can be badly injured working on or around a
motor vehicle. Do only that service work for
which you have the knowledge and the right
equipment. If you have any doubt about your
ability to perform a service job, take your vehicle
to a competent mechanic.
22_RUP_OM_EN_USC_t.book Page 138
Page 141 of 384

STARTING AND OPERATING139
(Continued)
(Continued)
AUTOMATIC TRANSMISSION
You must press and hold the brake pedal while
shifting out of PARK.
WARNING!
Never use the PARK position as a substitute
for the parking brake. Always apply the
parking brake fully when exiting the vehicle to
guard against vehicle movement and possible
injury or damage.
Your vehicle could move and injure you and
others if it is not in PARK. Check by trying to
move the transmission gear selector out of
PARK with the brake pedal released. Make
sure the transmission is in PARK before
exiting the vehicle.
The transmission may not engage PARK if the
vehicle is moving. Always bring the vehicle to a
complete stop before shifting to PARK, and
verify that the transmission gear position
indicator solidly indicates PARK (P) without
blinking. Ensure that the vehicle is completely
stopped, and the PARK position is properly
indicated, before exiting the vehicle.
It is dangerous to shift out of PARK or
NEUTRAL if the engine speed is higher than
idle speed. If your foot is not firmly pressing
the brake pedal, the vehicle could accelerate
quickly forward or in reverse. You could lose
control of the vehicle and hit someone or
something. Only shift into gear when the
engine is idling normally and your foot is firmly
pressing the brake pedal.
Unintended movement of a vehicle could
injure those in or near the vehicle. As with all
vehicles, you should never exit a vehicle while
the engine is running. Before exiting a vehicle,
always come to a complete stop, then apply
the parking brake, shift the transmission into
PARK, and turn the ignition OFF. When the
ignition is in the OFF position, the transmis -
sion is locked in PARK, securing the vehicle
against unwanted movement.
When exiting the vehicle, always make sure
the ignition is in the OFF position, remove the
key fob from the vehicle, and lock the vehicle.
WARNING!
Never leave children alone in a vehicle, or with
access to an unlocked vehicle. Allowing chil -
dren to be in a vehicle unattended is
dangerous for a number of reasons. A child or
others could be seriously or fatally injured.
Children should be warned not to touch the
parking brake, brake pedal or the transmis -
sion gear selector.
Do not leave the key fob in or near the vehicle
(or in a location accessible to children), and do
not leave the ignition in the ACC or ON/RUN
position. A child could operate power
windows, other controls, or move the vehicle.
CAUTION!
Damage to the transmission may occur if the
following precautions are not observed:
Shift into or out of PARK or REVERSE only after
the vehicle has come to a complete stop.
Do not shift between PARK, REVERSE,
NEUTRAL, or DRIVE when the engine is above
idle speed.
Before shifting into any gear, make sure your
foot is firmly pressing the brake pedal.
WARNING!
4
22_RUP_OM_EN_USC_t.book Page 139