CHRYSLER TOWN AND COUNTRY 2008 5.G Owners Manual
Manufacturer: CHRYSLER, Model Year: 2008, Model line: TOWN AND COUNTRY, Model: CHRYSLER TOWN AND COUNTRY 2008 5.GPages: 531, PDF Size: 4.51 MB
Page 221 of 531
UNDERSTANDING YOUR INSTRUMENT PANEL
CONTENTS
mInstrument Panels And Controls............223
mBase Instrument Cluster..................224
mPremium Instrument Cluster...............225
mInstrument Cluster Descriptions............226
mCompass Mini-Trip Computer (CMTC) Ð
If Equipped...........................239
NCompass Mini-Trip Computer (CMTC)
Odometer Displays....................239
NCompass Mini-Trip Computer (CMTC)
Reset Buttons........................240NCompass/Temperature Display...........241
mElectronic Vehicle Information Center (EVIC) Ð
If Equipped...........................243
NEVIC Displays.......................244
NTrip Functions.......................246
NCompass Display.....................247
NPersonal Settings (Customer Programmable
Features)...........................249
mRadio General Information................252
NRadio Broadcast Signals.................2524
Page 222 of 531
mSales Code REQ Ð AM/FM Stereo Radio And
6±Disc CD/DVD Changer
(MP3/WMA AUX Jack)..................254
NOperating Instructions - Radio Mode.......254
NOperation Instructions - (Disc Mode For CD
And MP3/WMA Audio Play, DVD-Video)....262
NNotes On Playing MP3/WMA Files........264
NList Button
(Disc Mode For MP3/WMA Play)..........267
NInfo Button
(Disc Mode For MP3/WMA Play)..........267
mSales Code RES Ð AM/FM Stereo Radio
With CD Player (MP3 AUX Jack)............269
NOperating Instructions - Radio Mode.......270NOperation Instructions - CD Mode For CD
And MP3 Audio Play..................275
NNotes On Playing MP3 Files.............277
NList Button (CD Mode For MP3 Play).......280
NInfo Button (CD Mode For MP3 Play).......280
mSales Code REN Ð Multimedia System Ð
If Equipped...........................282
NOperating Instructions Ð Satellite Radio
(If Equipped)........................282
NOperating Instructions Ð Voice Recognition
System (VR) (If Equipped)...............283
NOperating Instructions Ð Hands-Free
Communication (UConnectt) (If Equipped) . . . 283
NClock Setting Procedure.................283
220 UNDERSTANDING YOUR INSTRUMENT PANEL
Page 223 of 531
mSales Code RER Ð Multimedia System Ð
If Equipped...........................285
NOperating Instructions Ð Satellite Radio.....286
NOperating Instructions Ð Hands-Free
Communication (UConnectt) (If Equipped) . . . 286
NClock Setting Procedure.................286
mSatellite Radio Ð If Equipped
(REN/REQ/RER/RES/REU Radios Only).....288
NSystem Activation.....................289
NElectronic Serial Number/Sirius Identification
Number (ESN/SID)....................289
NSelecting Satellite Mode.................290
NSatellite Antenna......................290
NReception Quality.....................290NOperating Instructions - Satellite Mode......290
NOperating Instructions - Hands-Free Phone
(If Equipped)........................293
NOperating Instructions - Video Entertainment
System (VESt) (If Equipped).............293
mUniversal Consumer Interface (UCI) Ð
If Equipped...........................293
NConnecting The iPodtDevice............294
NControlling The iPodtUsing Radio Buttons . . . 294
NPlay Mode..........................295
NList Or Browse Mode..................296
mSirius Backseat TV&Trade; Ð If Equipped.....298
mVideo Entertainment System (VESt)Ð
If Equipped...........................299
UNDERSTANDING YOUR INSTRUMENT PANEL 221
4
Page 224 of 531
mRadio Operation And Cellular Phones........300
mRemote Sound System Controls Ð If Equipped . . 300
NRadio Operation......................301
NCD Player..........................301
mCD/DVD Maintenance...................301
mClimate Controls.......................302
NManual Heating, Ventilation And Air
Conditioning (HVAC) System.............302
NRear Manual Climate Control Zone Ð
If Equipped.........................308
NAutomatic Temperature Control (ATC) Ð
If Equipped.........................311NSummer Operation....................319
NWinter Operation.....................319
NVacation/Storage.....................320
NWindow Fogging.....................320
NOutside Air Intake....................320
NOperating Tips.......................321
NA/C Air Filter Ð If Equipped............321
mElectric Rear Window Defroster Ð
If Equipped...........................321
222 UNDERSTANDING YOUR INSTRUMENT PANEL
Page 225 of 531
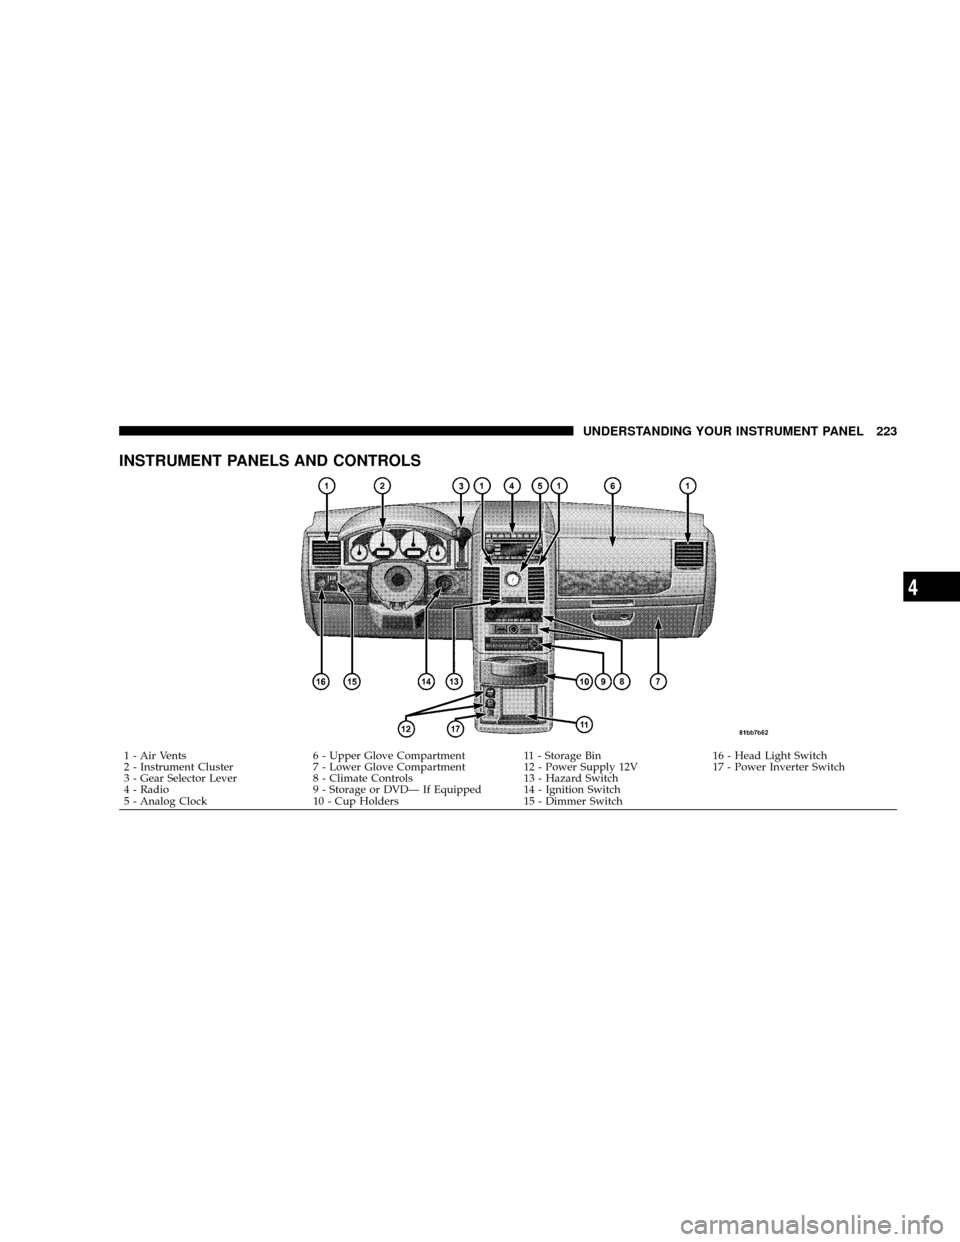
INSTRUMENT PANELS AND CONTROLS
1 - Air Vents 6 - Upper Glove Compartment 11 - Storage Bin 16 - Head Light Switch
2 - Instrument Cluster 7 - Lower Glove Compartment 12 - Power Supply 12V 17 - Power Inverter Switch
3 - Gear Selector Lever 8 - Climate Controls 13 - Hazard Switch
4 - Radio 9 - Storage or DVDÐ If Equipped 14 - Ignition Switch
5 - Analog Clock 10 - Cup Holders 15 - Dimmer Switch
UNDERSTANDING YOUR INSTRUMENT PANEL 223
4
Page 226 of 531
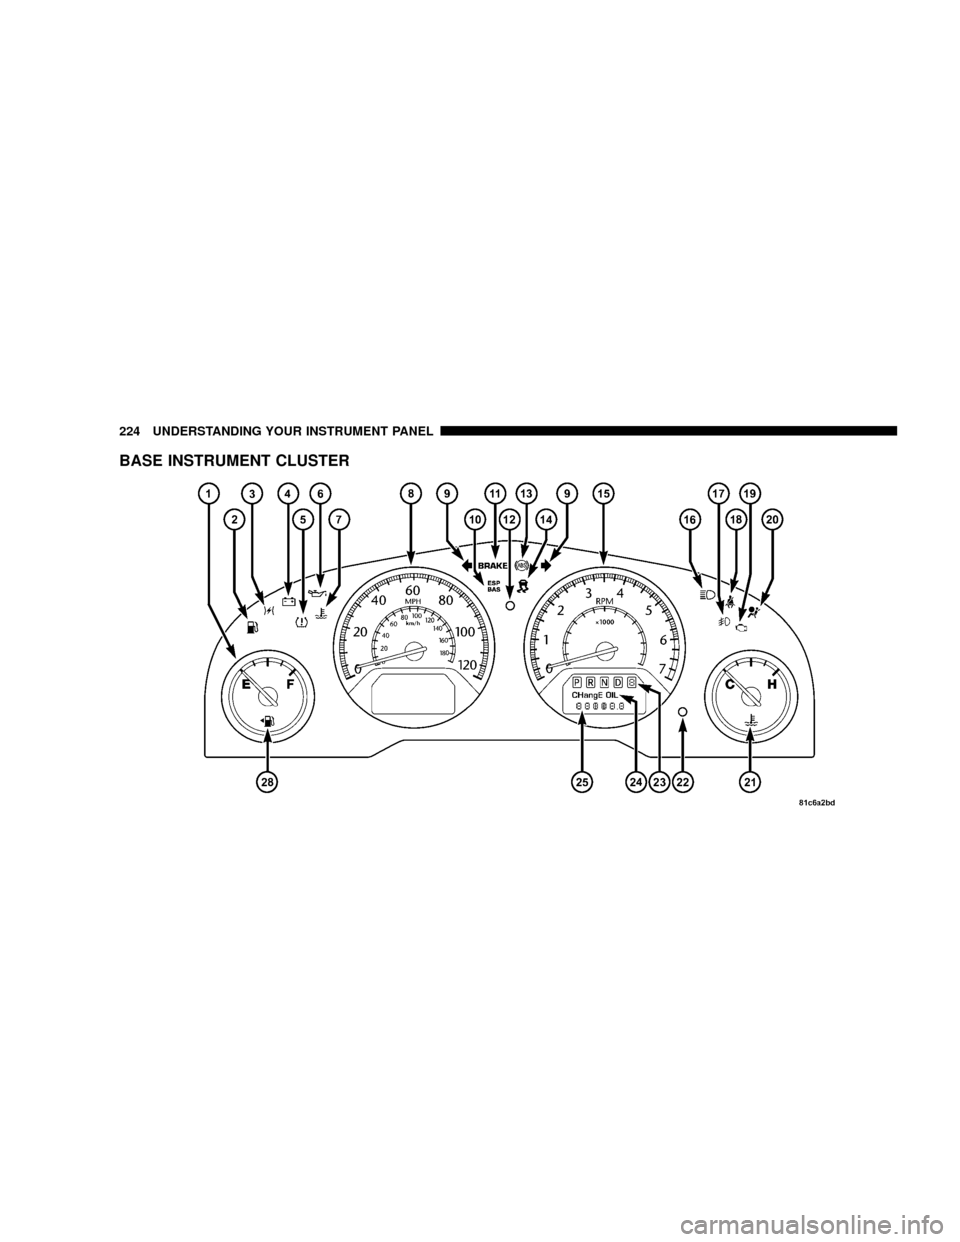
BASE INSTRUMENT CLUSTER
224 UNDERSTANDING YOUR INSTRUMENT PANEL
Page 227 of 531
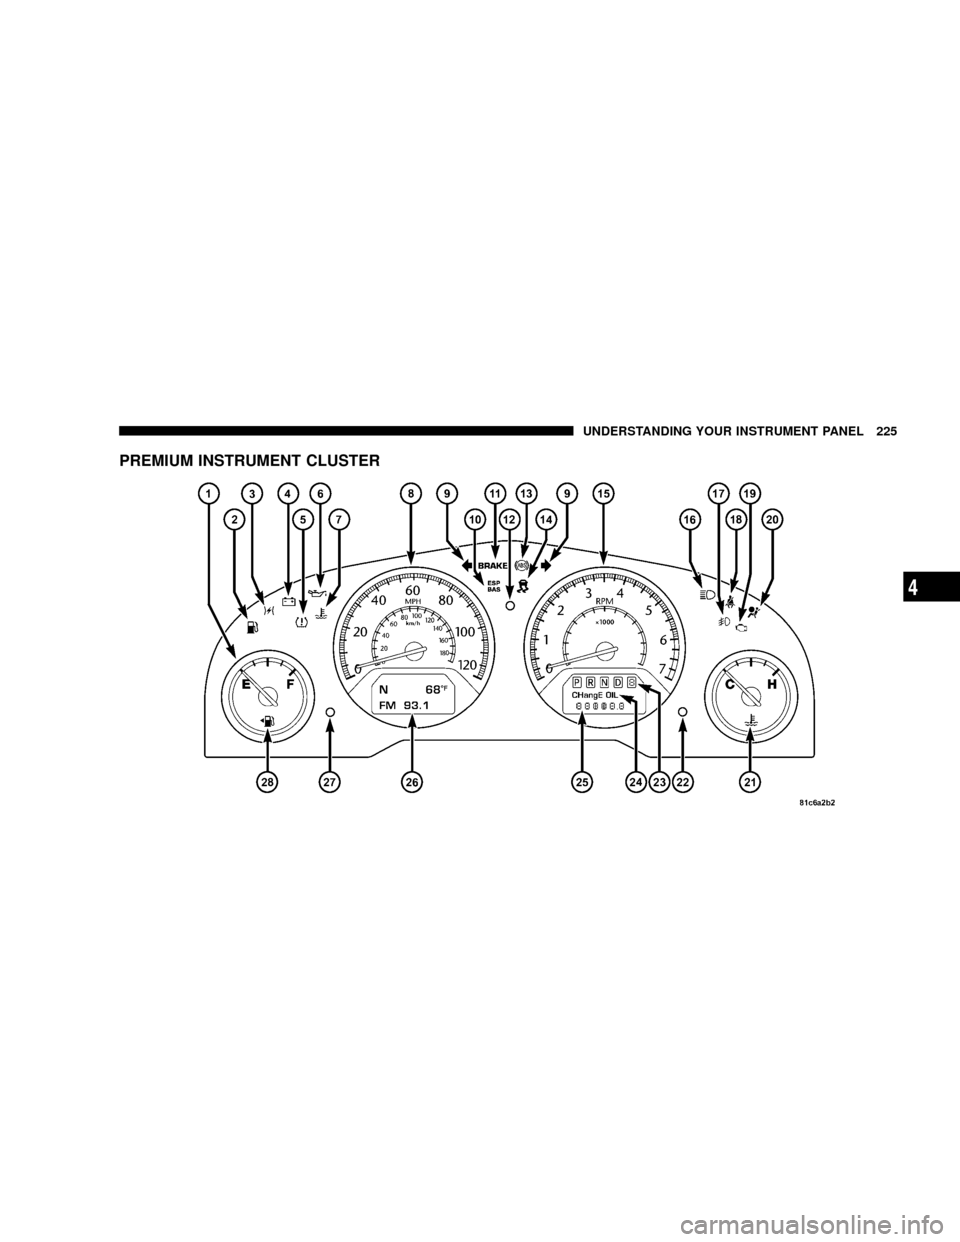
PREMIUM INSTRUMENT CLUSTER
UNDERSTANDING YOUR INSTRUMENT PANEL 225
4
Page 228 of 531
INSTRUMENT CLUSTER DESCRIPTIONS
1. Fuel Gauge
The pointer shows the level of fuel in the fuel tank when
the ignition switch is in the ON position.
2. Low Fuel Light
When the fuel level reaches approximately 2.0 gals
(7.8 L) this light will turn on and remain on until
fuel is added.
3. Electronic Throttle Control (ETC.) Light
This light informs you of a problem with the
Electronic Throttle Control system. If a prob-
lem is detected, the light will come on while the
engine is running. Cycle the ignition key when
the vehicle has completely stopped and the gear selector
is placed in the PARK position. The light should turn off.
If the light remains lit with the engine running your
vehicle will usually be drivable, however, see your
authorized dealer for service as soon as possible. If thelight is flashing when the engine is running, immediate
service is required and you may experience reduced
performance, an elevated/rough idle or engine stall and
your vehicle may require towing. The light will come ON
when the ignition is first turned on and remain on briefly
as a bulb check. If the light does not come on during
starting, have the system checked by an authorized
dealer.
4. Voltage Light
This light monitors the electrical system voltage.
The light should turn on momentarily as the
engine is started. If the light stays on or turns on while
driving, it indicates a problem with the charging system.
Immediate service should be obtained.
226 UNDERSTANDING YOUR INSTRUMENT PANEL
Page 229 of 531
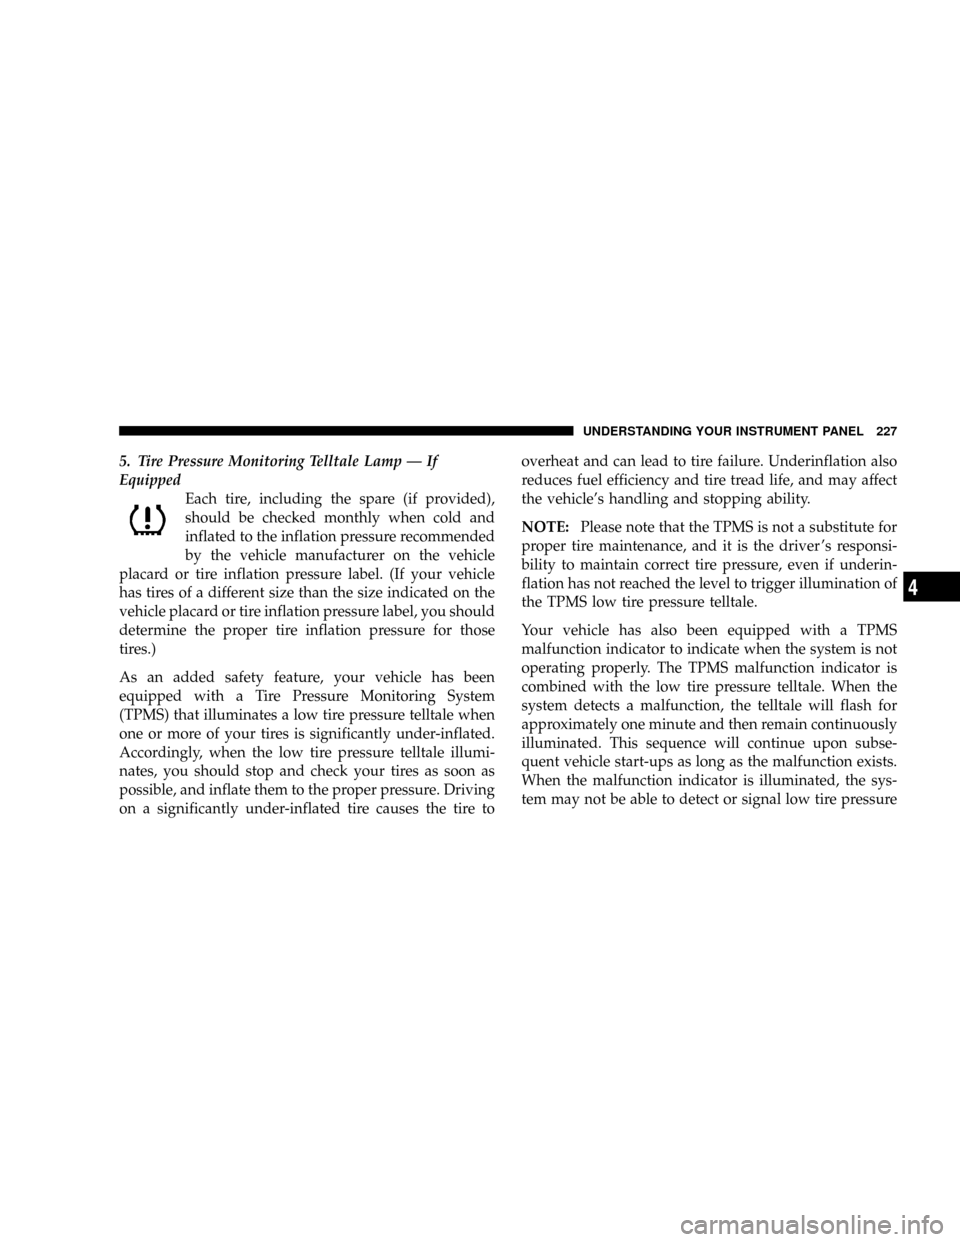
5. Tire Pressure Monitoring Telltale Lamp Ð If
Equipped
Each tire, including the spare (if provided),
should be checked monthly when cold and
inflated to the inflation pressure recommended
by the vehicle manufacturer on the vehicle
placard or tire inflation pressure label. (If your vehicle
has tires of a different size than the size indicated on the
vehicle placard or tire inflation pressure label, you should
determine the proper tire inflation pressure for those
tires.)
As an added safety feature, your vehicle has been
equipped with a Tire Pressure Monitoring System
(TPMS) that illuminates a low tire pressure telltale when
one or more of your tires is significantly under-inflated.
Accordingly, when the low tire pressure telltale illumi-
nates, you should stop and check your tires as soon as
possible, and inflate them to the proper pressure. Driving
on a significantly under-inflated tire causes the tire tooverheat and can lead to tire failure. Underinflation also
reduces fuel efficiency and tire tread life, and may affect
the vehicle's handling and stopping ability.
NOTE:Please note that the TPMS is not a substitute for
proper tire maintenance, and it is the driver 's responsi-
bility to maintain correct tire pressure, even if underin-
flation has not reached the level to trigger illumination of
the TPMS low tire pressure telltale.
Your vehicle has also been equipped with a TPMS
malfunction indicator to indicate when the system is not
operating properly. The TPMS malfunction indicator is
combined with the low tire pressure telltale. When the
system detects a malfunction, the telltale will flash for
approximately one minute and then remain continuously
illuminated. This sequence will continue upon subse-
quent vehicle start-ups as long as the malfunction exists.
When the malfunction indicator is illuminated, the sys-
tem may not be able to detect or signal low tire pressure
UNDERSTANDING YOUR INSTRUMENT PANEL 227
4
Page 230 of 531
as intended. TPMS malfunctions may occur for a variety
of reasons, including the installation of replacement or
alternate tires or wheels on the vehicle that prevent the
TPMS from functioning properly.
NOTE:Always check the TPMS malfunction telltale
after replacing one or more tires or wheels on your
vehicle to ensure that the replacement or alternate tires
and wheels allow the TPMS to continue to function
properly.CAUTION!
The TPMS has been optimized for the original
equipment tires and wheels. TPMS pressures and
warning have been established for the tire size
equipped on your vehicle. Undesirable system opera-
tion or sensor damage may result when using re-
placement equipment that is not of the same size,
type, and/or style. Aftermarket wheels can cause
sensor damage. Do not use aftermarket tire sealants
or balance beads if your vehicle is equipped with a
TPMS, as damage to the sensors may result.
For additional information on TPMS, refer to Section 5 Ð
Starting and Operating, ªTire Pressure Monitoring Sys-
temº of this manual.
228 UNDERSTANDING YOUR INSTRUMENT PANEL