open hood CHRYSLER VOYAGER 2023 Owners Manual
[x] Cancel search | Manufacturer: CHRYSLER, Model Year: 2023, Model line: VOYAGER, Model: CHRYSLER VOYAGER 2023Pages: 256, PDF Size: 13.97 MB
Page 4 of 256
2
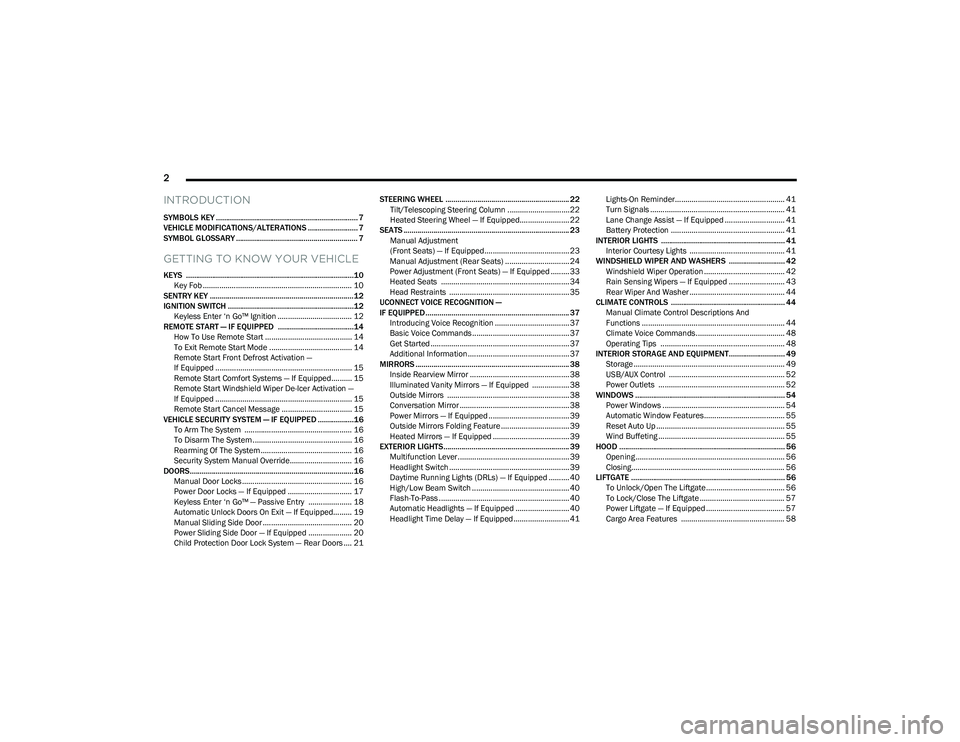
INTRODUCTION
SYMBOLS KEY ....................................................................... 7
VEHICLE MODIFICATIONS/ALTERATIONS ......................... 7
SYMBOL GLOSSARY ............................................................. 7
GETTING TO KNOW YOUR VEHICLE
KEYS ....................................................................................10
Key Fob ........................................................................ 10
SENTRY KEY ........................................................................12
IGNITION SWITCH ...............................................................12 Keyless Enter ‘n Go™ Ignition .................................... 12
REMOTE START — IF EQUIPPED ......................................14 How To Use Remote Start .......................................... 14
To Exit Remote Start Mode ........................................ 14
Remote Start Front Defrost Activation —
If Equipped .................................................................. 15
Remote Start Comfort Systems — If Equipped.......... 15
Remote Start Windshield Wiper De-Icer Activation —
If Equipped .................................................................. 15
Remote Start Cancel Message .................................. 15
VEHICLE SECURITY SYSTEM — IF EQUIPPED ..................16 To Arm The System .................................................... 16
To Disarm The System ................................................ 16
Rearming Of The System ............................................ 16
Security System Manual Override.............................. 16
DOORS..................................................................................16 Manual Door Locks ..................................................... 16
Power Door Locks — If Equipped ............................... 17
Keyless Enter ‘n Go™ — Passive Entry ..................... 18
Automatic Unlock Doors On Exit — If Equipped......... 19
Manual Sliding Side Door ........................................... 20
Power Sliding Side Door — If Equipped ..................... 20
Child Protection Door Lock System — Rear Doors .... 21 STEERING WHEEL .............................................................. 22
Tilt/Telescoping Steering Column ..............................22
Heated Steering Wheel — If Equipped........................ 22
SEATS ................................................................................... 23 Manual Adjustment
(Front Seats) — If Equipped......................................... 23
Manual Adjustment (Rear Seats) ............................... 24
Power Adjustment (Front Seats) — If Equipped ......... 33
Heated Seats .............................................................. 34
Head Restraints .......................................................... 35
UCONNECT VOICE RECOGNITION —
IF EQUIPPED ........................................................................ 37 Introducing Voice Recognition .................................... 37
Basic Voice Commands............................................... 37
Get Started ................................................................... 37
Additional Information................................................. 37
MIRRORS ............................................................................. 38 Inside Rearview Mirror ................................................ 38
Illuminated Vanity Mirrors — If Equipped .................. 38
Outside Mirrors ........................................................... 38
Conversation Mirror ..................................................... 38
Power Mirrors — If Equipped ....................................... 39
Outside Mirrors Folding Feature ................................. 39
Heated Mirrors — If Equipped ..................................... 39
EXTERIOR LIGHTS............................................................... 39 Multifunction Lever......................................................39
Headlight Switch .......................................................... 39
Daytime Running Lights (DRLs) — If Equipped .......... 40
High/Low Beam Switch ............................................... 40
Flash-To-Pass ...............................................................40
Automatic Headlights — If Equipped .......................... 40
Headlight Time Delay — If Equipped........................... 41 Lights-On Reminder..................................................... 41
Turn Signals ................................................................. 41
Lane Change Assist — If Equipped ............................. 41
Battery Protection ....................................................... 41
INTERIOR LIGHTS .............................................................. 41 Interior Courtesy Lights .............................................. 41
WINDSHIELD WIPER AND WASHERS ............................ 42 Windshield Wiper Operation ....................................... 42
Rain Sensing Wipers — If Equipped ........................... 43
Rear Wiper And Washer .............................................. 44
CLIMATE CONTROLS ......................................................... 44 Manual Climate Control Descriptions And
Functions ..................................................................... 44
Climate Voice Commands........................................... 48
Operating Tips ............................................................ 48
INTERIOR STORAGE AND EQUIPMENT............................ 49 Storage ......................................................................... 49
USB/AUX Control ........................................................ 52
Power Outlets ............................................................. 52
WINDOWS ........................................................................... 54 Power Windows ........................................................... 54
Automatic Window Features....................................... 55
Reset Auto Up .............................................................. 55
Wind Buffeting ............................................................. 55
HOOD ................................................................................... 56 Opening ........................................................................ 56
Closing.......................................................................... 56
LIFTGATE ............................................................................. 56 To Unlock/Open The Liftgate...................................... 56
To Lock/Close The Liftgate ......................................... 57
Power Liftgate — If Equipped ...................................... 57
Cargo Area Features .................................................. 58
23_RUV_OM_EN_US_t.book Page 2
Page 10 of 256
8
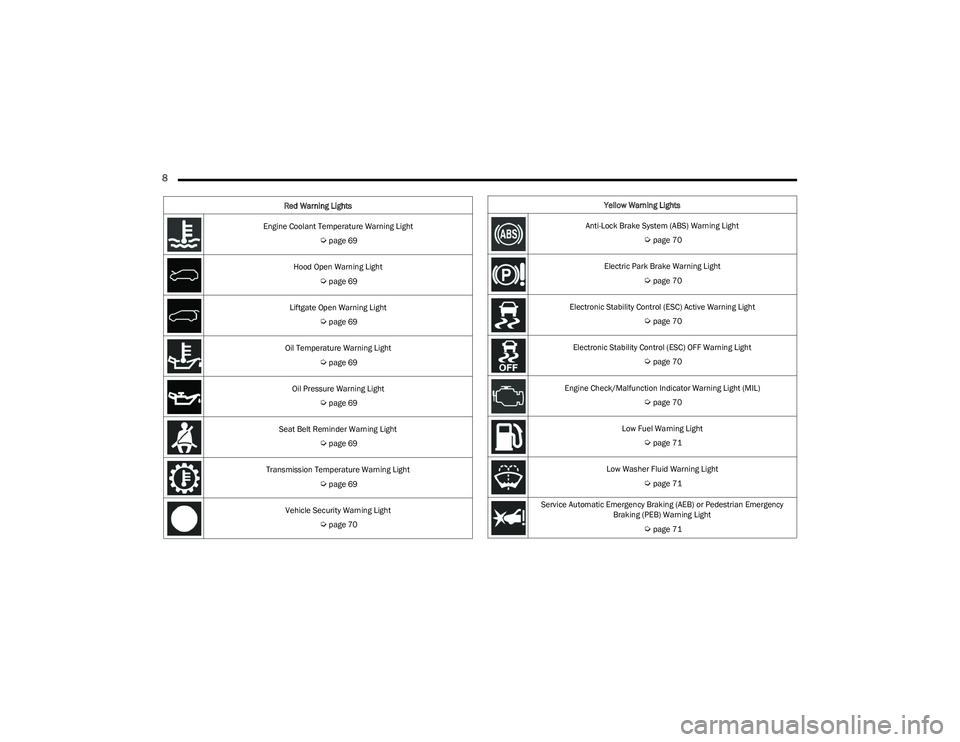
Engine Coolant Temperature Warning Light
Úpage 69
Hood Open Warning Light
Úpage 69
Liftgate Open Warning Light
Úpage 69
Oil Temperature Warning Light
Úpage 69
Oil Pressure Warning Light
Úpage 69
Seat Belt Reminder Warning Light
Úpage 69
Transmission Temperature Warning Light
Úpage 69
Vehicle Security Warning Light
Úpage 70
Red Warning Lights
Yellow Warning Lights
Anti-Lock Brake System (ABS) Warning Light
Úpage 70
Electric Park Brake Warning Light
Úpage 70
Electronic Stability Control (ESC) Active Warning Light
Úpage 70
Electronic Stability Control (ESC) OFF Warning Light
Úpage 70
Engine Check/Malfunction Indicator Warning Light (MIL)
Úpage 70
Low Fuel Warning Light
Úpage 71
Low Washer Fluid Warning Light
Úpage 71
Service Automatic Emergency Braking (AEB) or Pedestrian Emergency Braking (PEB) Warning Light
Úpage 71
23_RUV_OM_EN_US_t.book Page 8
Page 17 of 256
GETTING TO KNOW YOUR VEHICLE15
NOTE:
For vehicles equipped with the Keyless Enter ‘n Go™ —
Passive Entry feature, the message “Remote Start
Active — Push Start Button” will show in the instrument
cluster display until you push the START/STOP ignition
button.
To avoid unintentional shutdowns, the system will
disable for two seconds after receiving a valid Remote
Start request.
REMOTE START FRONT DEFROST
A
CTIVATION — IF EQUIPPED
When Remote Start is active, and the outside ambient
temperature is 40°F (4.5°C) or below, the system will
automatically activate front defrost for 15 minutes or less.
The time is dependent on the ambient temperature. Once
the timer expires, the system will automatically adjust the
settings depending on ambient conditions. See “Remote
Start Comfort Systems — If Equipped” in the next section
for detailed operation.
REMOTE START COMFORT SYSTEMS —
I
F EQUIPPED
When Remote Start is activated, the front and rear defrost
will automatically turn on in cold weather. The heated
steering wheel and driver heated seat feature will also
turn on if programmed in the comfort menu screen within
Uconnect Settings
Úpage 105. In warm weather, the
driver vented seat feature will automatically turn on when
the Remote Start is activated, if programmed via the comfort menu screen. The vehicle will adjust the climate
control settings depending on the outside ambient
temperature.
Automatic Temperature Control (ATC) — If Equipped
The climate controls automatically adjust to an optimal
temperature and mode, dependent upon the outside
ambient temperature. When the ignition is placed in the
ON/RUN position, the climate controls will resume their
previous settings.
Manual Temperature Control (MTC) — If Equipped
In ambient temperatures of 40°F (4.5°C) or below, the
climate settings will default to maximum heat, with
fresh air entering the cabin. If the front defrost timer
expires, the vehicle will enter Mix Mode.
In ambient temperatures from 40°F (4.5°C) to 78°F
(26°C), the climate settings will be based on the last
settings selected by the driver.
In ambient temperatures of 78°F (26°C) or above, the
climate settings will default to MAX A/C, Bi-Level mode,
and Recirculation on.
For more information on ATC, MTC, and climate control
settings, see
Úpage 44.
NOTE:
These features will stay on through the duration of Remote
Start until the ignition is placed in the ON/RUN position.
The climate control settings will change, and exit automatic
operation, if manually adjusted by the driver while the vehicle is
in Remote Start mode. This includes the OFF button on the
climate controls, which will turn the system off.
REMOTE START WINDSHIELD WIPER
D
E-ICER ACTIVATION — IF EQUIPPED
When the Remote Start system is active and the outside
ambient temperature is less than 33°F (0.6°C), the
Windshield Wiper De-Icer will activate. Exiting Remote
Start will resume its previous operation. If the Windshield
Wiper De-Icer was active, the timer and operation will
continue.
REMOTE START CANCEL MESSAGE
One of the following messages will display in the
instrument cluster if the vehicle fails to remote start or
exits Remote Start prematurely:
Remote Start Canceled — Door Open
Remote Start Canceled — Hood Open
Remote Start Canceled — Fuel Low
Remote Start Canceled — Liftgate Open
Remote Start Canceled — Too Cold
Remote Start Canceled — Time Expired
Remote Start Disabled — Start Vehicle To Reset
The message will stay active until the ignition is placed in
the ON/RUN position.
2
23_RUV_OM_EN_US_t.book Page 15
Page 58 of 256
56GETTING TO KNOW YOUR VEHICLE
HOOD
OPENING
The hood release lever (to open the primary latch) and
safety latch (to open the secondary latch) must be
released to open the hood.
1. Pull the hood release lever located under the
driver’s side of the instrument panel.
Hood Release Lever
2. Move to the outside of the front of the vehicle.
3. Push the safety latch release lever toward the passenger side of the vehicle. The safety latch is
located behind the center front edge of the hood.
Safety Latch Release Lever Location
4. Remove the support rod from the locking tab and insert it into the seat located on the underside of the
hood.
NOTE:
Before lifting the hood, check that the wiper arms are
not in motion and not in the lifted position.
While lifting the hood, use both hands.
Vehicle must be at a stop and the transmission must
be in PARK.
CLOSING
1. Hold up the hood with one hand and with the other
hand remove the support rod from its seat and
reinsert it into the locking tab.
2. Lower the hood to approximately 12 inches (30 cm) from the engine compartment and drop it. Make sure
that the hood is completely closed.
LIFTGATE
TO UNLOCK/OPEN THE LIFTGATE
The liftgate may be released in several ways:
Key fob
Outside handle
Button on overhead console
Push the liftgate button on the key fob twice within five
seconds to release the liftgate.
WARNING!
Be sure the hood is fully latched before driving your
vehicle. If the hood is not fully latched, it could open
when the vehicle is in motion and block your vision.
Failure to follow this warning could result in serious
injury or death.
CAUTION!
To prevent possible damage, do not slam the hood to
close it. Lower hood to approximately 12 inches (30 cm)
and drop the hood to close. Make sure hood is fully
closed for both latches. Never drive vehicle unless hood
is fully closed, with both latches engaged.
23_RUV_OM_EN_US_t.book Page 56
Page 71 of 256
GETTING TO KNOW YOUR INSTRUMENT PANEL69
NOTE:This light may turn on if the accelerator and brake pedals
are pressed at the same time.
If the light continues to flash when the vehicle is running,
immediate service is required and you may experience
reduced performance, an elevated/rough idle, or engine
stall and your vehicle may require towing. The light will
come on when the ignition is placed in the ON/RUN or
ACC/ON/RUN position and remain on briefly as a bulb
check. If the light does not come on during starting, have
the system checked by an authorized dealer.
Engine Coolant Temperature Warning Light
This warning light warns of an overheated
engine condition. If the engine coolant
temperature is too high, this indicator will
illuminate and a single chime will sound. If the
temperature reaches the upper limit, a continuous chime
will sound for four minutes or until the engine is able to
cool; whichever comes first.
If the light turns on while driving, safely pull over and stop
the vehicle. If the Air Conditioning (A/C) system is on, turn
it off. Also, shift the transmission into NEUTRAL (N) and
idle the vehicle. If the temperature reading does not return
to normal, turn the engine off immediately and call for
service
Úpage 187.
Hood Open Warning Light
This warning light will illuminate when the hood
is left open and not fully closed.
NOTE:If the vehicle is moving, there will also be a single chime.
Liftgate Open Warning Light
This warning light will illuminate when the
liftgate is open.
NOTE:If the vehicle is moving, there will also be a single chime.
Oil Temperature Warning Light
This warning light will illuminate to indicate the
engine oil temperature is high. If the light turns
on while driving, stop the vehicle and shut off
the engine as soon as possible. Wait for oil
temperature to return to normal levels.
Oil Pressure Warning Light
This warning light will illuminate to indicate low
engine oil pressure. If the light turns on while
driving, stop the vehicle, shut off the engine as
soon as possible, and contact an authorized
dealer. A chime will sound when this light turns on.
Do not operate the vehicle until the cause is corrected.
This light does not indicate how much oil is in the engine.
The engine oil level must be checked under the hood.
Seat Belt Reminder Warning Light
This warning light indicates when the driver or
passenger seat belt is unbuckled. When the
ignition is first placed in the ON/RUN or
ACC/ON/RUN position and if the driver’s seat
belt is unbuckled, a chime will sound and the light will turn on. When driving, if the driver or front passenger seat belt
remains unbuckled, the Seat Belt Reminder Light will flash
or remain on continuously and a chime will sound
Úpage 134.
Transmission Temperature Warning Light
This warning light will illuminate to warn of a
high transmission fluid temperature. This may
occur with strenuous usage such as trailer
towing. If this light turns on, stop the vehicle
and run the engine at idle or slightly faster, with the
transmission in PARK (P) or NEUTRAL (N), until the light
turns off. Once the light turns off, you may continue to
drive normally.
WARNING!
If you continue operating the vehicle when the Transmission
Temperature Warning Light is illuminated you could cause
the fluid to boil over, come in contact with hot engine or
exhaust components and cause a fire.
CAUTION!
Continuous driving with the Transmission Temperature
Warning Light illuminated will eventually cause severe
transmission damage or transmission failure.
3
23_RUV_OM_EN_US_t.book Page 69
Page 80 of 256

78STARTING AND OPERATING
TO TURN OFF THE ENGINE USING
ENGINE START/STOP B
UTTON
1. Place the gear selector in PARK, then push and
release the ENGINE START/STOP button.
2. The ignition switch will return to the OFF position.
3. If the gear selector is not in PARK, the ENGINE START/STOP button must be held for two seconds or
three short pushes in a row with the vehicle speed
above 5 mph (8 km/h) before the engine will shut off.
The ignition switch position will remain in the ACC
position until the gear selector is in PARK and the
button is pushed twice to the OFF position. If the gear
selector is not in PARK and the ENGINE START/STOP
button is pushed once, the instrument cluster will
display a “Vehicle Not In Park” message and the
engine will remain running. Never leave a vehicle out
of the PARK position, or it could roll.
NOTE:If the ignition switch is left in the ACC or RUN (engine not
running) position and the transmission is in PARK, the
system will automatically time out after 30 minutes of
inactivity and the ignition will switch to the OFF position.
ENGINE BLOCK HEATER — IF EQUIPPED
The engine block heater warms the engine and permits
quicker starts in cold weather.
Connect the cord to a 110-115 Volt AC electrical outlet
with a grounded, three-wire extension cord. For ambient temperatures below 0°F (-18°C), the engine
block heater is recommended. For ambient temperatures
below -20°F (-29°C), the engine block heater is required.
The engine block heater cord is routed under the hood,
behind to the passenger’s side headlamp. See the
following steps to properly use the engine block heater:
1. Locate the engine block heater cord (behind the
passenger’s side headlamp).
2. Undo the hook-and-loop strap that secures the heater cord in place.
3. Pull the cord to the front of the vehicle and plug it into a grounded, three-wire extension cord.
4. After the vehicle is running, reattach the cord to the hook-and-loop strap and properly stow it away behind
the passenger’s side headlamp.
NOTE:
The engine block heater cord is a factory installed
option. If your vehicle is not equipped, heater cords are
available from an authorized dealer.
The engine block heater will require 110 Volt AC and
6.5 Amps to activate the heater element.
The engine block heater must be plugged in at least
one hour to have an adequate warming effect on the
engine.
ENGINE BREAK-IN RECOMMENDATIONS
A long break-in period is not required for the engine and
drivetrain (transmission and axle) in your vehicle.
Drive moderately during the first 300 miles (500 km).
After the initial 60 miles (100 km), speeds up to 50 or
55 mph (80 or 90 km/h) are desirable.
While cruising, brief full-throttle acceleration within the
limits of local traffic laws contributes to a good break-in.
Wide-open throttle acceleration in low gear can be
detrimental and should be avoided.
The engine oil installed in the engine at the factory is a
high-quality energy conserving type lubricant. Oil changes
should be consistent with anticipated climate conditions
under which vehicle operations will occur. For the
recommended viscosity and quality grades
Úpage 197.
NOTE:A new engine may consume some oil during its first few
thousand miles (kilometers) of operation. This should be
considered a normal part of the break-in and not inter -
preted as a problem.
WARNING!
Remember to disconnect the engine block heater cord
before driving. Damage to the 110-115 Volt electrical
cord could cause electrocution.
CAUTION!
Never use Non-Detergent Oil or Straight Mineral Oil in
the engine or damage may result.
23_RUV_OM_EN_US_t.book Page 78
Page 87 of 256
STARTING AND OPERATING85
STOP/START SYSTEM — IF EQUIPPED
The Stop/Start function is designed to reduce fuel
consumption. The system will stop the engine automatically
during a vehicle stop if the required conditions are met.
Releasing the brake pedal, pressing the accelerator pedal or
shifting out of DRIVE (D) will automatically re-start the engine.
This vehicle has been upgraded with a heavy-duty starter,
enhanced battery, and other upgraded engine parts to
handle the additional engine starts.
AUTOSTOP MODE
The Stop/Start feature is enabled after every normal
customer engine start. At that time, the system will go into
STOP/START READY and if all other conditions are met,
can go into a STOP/START AUTOSTOP ACTIVE.
To Activate Auto STOP/START, The Following Must Occur:
The system must be in STOP/START READY state.
A STOP/START READY message will be displayed in
the instrument cluster within the Stop/Start section
Úpage 67.
The vehicle must be completely stopped.
The gear selector must be in a forward gear and the
brake pedal pressed.
The engine will shut down, the tachometer will move to the
zero position and the Stop/Start telltale will illuminate
indicating you are in Autostop. Customer settings will be
maintained throughout the Auto Stop/Start process.
POSSIBLE REASONS THE ENGINE DOES
N
OT AUTOSTOP
Prior to engine shut down, the system will check many
safety and comfort conditions for Stop/Start and ensure
they are fulfilled. Detailed information about the operation
of the Stop/Start system may be viewed in the instrument
cluster display Stop/Start screen. In the following
situations the engine will not stop:
If Stop/Start is manually disabled by the Stop/Start
OFF button.
Driver’s seat belt is not buckled.
Driver’s door is not closed.
Battery temperature is too warm or cold.
Battery charge is low. During this time a message will
display "Stop/Start Not Ready Battery Charging".
The vehicle is on a steep grade.
Cabin heating or cooling is in process and an accept -
able cabin temperature has not been achieved.
HVAC is set to full defrost mode at a high blower speed.
HVAC is set to MAX A/C.
Engine has not reached normal operating temperature.
The transmission is not in a forward gear.
Hood is open.
Brake pedal is not pressed with sufficient pressure.
Accelerator pedal input.
Engine temperature is too high.
5 mph (8 km/h) threshold has not been achieved from
previous Autostop.
Steering angle is beyond threshold.
It may be possible for the vehicle to be driven several
times without the Stop/Start system going into a
STOP/START READY state under more extreme conditions
of the items previously listed.
TO START THE ENGINE WHILE IN AUTO
S
TOP/START
While in a forward gear, the engine will start when the
brake pedal is released or the accelerator pedal is
pressed. The transmission will automatically re-engage
upon engine restart.
Conditions That Will Cause The Engine To Start
Automatically While In Auto Stop/Start:
The transmission selector is moved out of DRIVE.
To maintain cabin temperature comfort.
HVAC is set to full defrost mode.
HVAC system temperature or fan speed is manually
adjusted.
Battery voltage drops too low. During this time a
message will display "Stop/Start Not Ready Battery
Charging".
Stop/Start OFF switch is pushed.
A Stop/Start system error occurs.
Steering angle beyond threshold.
4
23_RUV_OM_EN_US_t.book Page 85
Page 123 of 256
121
SAFETY
SAFETY FEATURES
ANTI-LOCK BRAKE SYSTEM (ABS)
The ABS provides increased vehicle stability and brake
performance under most braking conditions. The system
automatically prevents wheel lock and enhances vehicle
control during braking.
The ABS performs a self-check cycle to ensure that the
ABS is working properly each time the vehicle is started
and driven. During this self-check, you may hear a slight
clicking sound as well as some related motor noises.
The ABS is activated during braking when the system
detects one or more wheels are beginning to lock. Road
conditions such as ice, snow, gravel, bumps, railroad
tracks, loose debris, or panic stops may increase the
likelihood of ABS activation(s).
You also may experience the following normal
characteristics when the ABS activates:
ABS motor noise or clicking sounds (you may continue
to hear for a short time after the stop)
Brake pedal pulsations
A slight drop of the brake pedal at the end of the stop
The ABS is designed to function with the Original
Equipment Manufacturer (OEM) tires. Modification may
result in degraded ABS performance.
Anti-Lock Brake System (ABS) Warning
Light
The yellow ABS Warning Light will turn on when the ignition
is placed in the ON/RUN mode and may stay on for as long
as four seconds.
If the ABS Warning Light remains on or comes on while
driving, it indicates that the anti-lock portion of the brake
system is not functioning and that service is required.
However, the conventional brake system will continue to
operate normally if the ABS Warning Light is on.
If the ABS Warning Light is on, the brake system should be
serviced as soon as possible to restore the benefits of
Anti-Lock Brakes. If the ABS Warning Light does not come
on when the ignition is placed in the ON/RUN mode, have
the light repaired as soon as possible.
REAR SEAT REMINDER ALERT (RSRA)
RSRA alerts of the possible presence of an object, passenger,
or pet in the rear seats through a visual and auditory
notification. When the system is activated, it displays the
message “Check Rear Seat” on the instrument cluster display
and sounds an auditory alert upon the driver placing the
ignition in the OFF position to exit the vehicle. The system
will activate automatically if a rear door is opened within
10 minutes of the ignition being placed in the ON/RUN position.
RSRA should be used as a reminder to check the rear seats, it
does not directly detect objects, passengers, or pets and is only
activated when the previous conditions are met.
WARNING!
The ABS contains sophisticated electronic equip -
ment that may be susceptible to interference caused
by improperly installed or high output radio transmit -
ting equipment. This interference can cause possible
loss of anti-lock braking capability. Installation of
such equipment should be performed by qualified
professionals.
Pumping of the Anti-Lock Brakes will diminish their
effectiveness and may lead to a collision. Pumping
makes the stopping distance longer. Just press firmly
on your brake pedal when you need to slow down
or stop.
The ABS cannot prevent the natural laws of physics
from acting on the vehicle, nor can it increase
braking or steering efficiency beyond that afforded
by the condition of the vehicle brakes and tires or the
traction afforded.
The ABS cannot prevent collisions, including those
resulting from excessive speed in turns, following
another vehicle too closely, or hydroplaning.
The capabilities of an ABS equipped vehicle must
never be exploited in a reckless or dangerous
manner that could jeopardize the user’s safety
or the safety of others.
6
23_RUV_OM_EN_US_t.book Page 121
Page 187 of 256
IN CASE OF EMERGENCY185
NOTE:
For sealant bottle installation, follow these steps in
reverse order.
The Sealant Bottle is a one tire application use and
needs to be replaced after each use. Always replace
these components immediately at your original equip -
ment vehicle dealer.
Replace the Tire Service Kit Sealant Bottle prior to the
expiration date (printed on the bottle label) to ensure
optimum operation of the system.
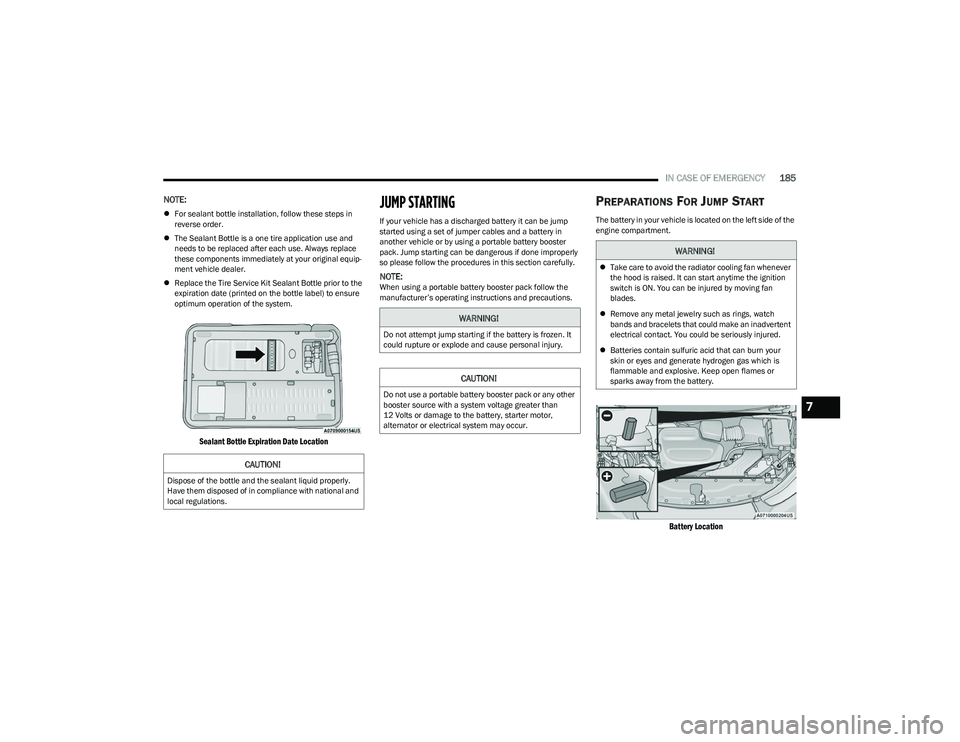
Sealant Bottle Expiration Date Location
JUMP STARTING
If your vehicle has a discharged battery it can be jump
started using a set of jumper cables and a battery in
another vehicle or by using a portable battery booster
pack. Jump starting can be dangerous if done improperly
so please follow the procedures in this section carefully.
NOTE:When using a portable battery booster pack follow the
manufacturer’s operating instructions and precautions.
PREPARATIONS FOR JUMP START
The battery in your vehicle is located on the left side of the
engine compartment.
Battery Location
CAUTION!
Dispose of the bottle and the sealant liquid properly.
Have them disposed of in compliance with national and
local regulations.
WARNING!
Do not attempt jump starting if the battery is frozen. It
could rupture or explode and cause personal injury.
CAUTION!
Do not use a portable battery booster pack or any other
booster source with a system voltage greater than
12 Volts or damage to the battery, starter motor,
alternator or electrical system may occur.
WARNING!
Take care to avoid the radiator cooling fan whenever
the hood is raised. It can start anytime the ignition
switch is ON. You can be injured by moving fan
blades.
Remove any metal jewelry such as rings, watch
bands and bracelets that could make an inadvertent
electrical contact. You could be seriously injured.
Batteries contain sulfuric acid that can burn your
skin or eyes and generate hydrogen gas which is
flammable and explosive. Keep open flames or
sparks away from the battery.
7
23_RUV_OM_EN_US_t.book Page 185
Page 189 of 256
IN CASE OF EMERGENCY187
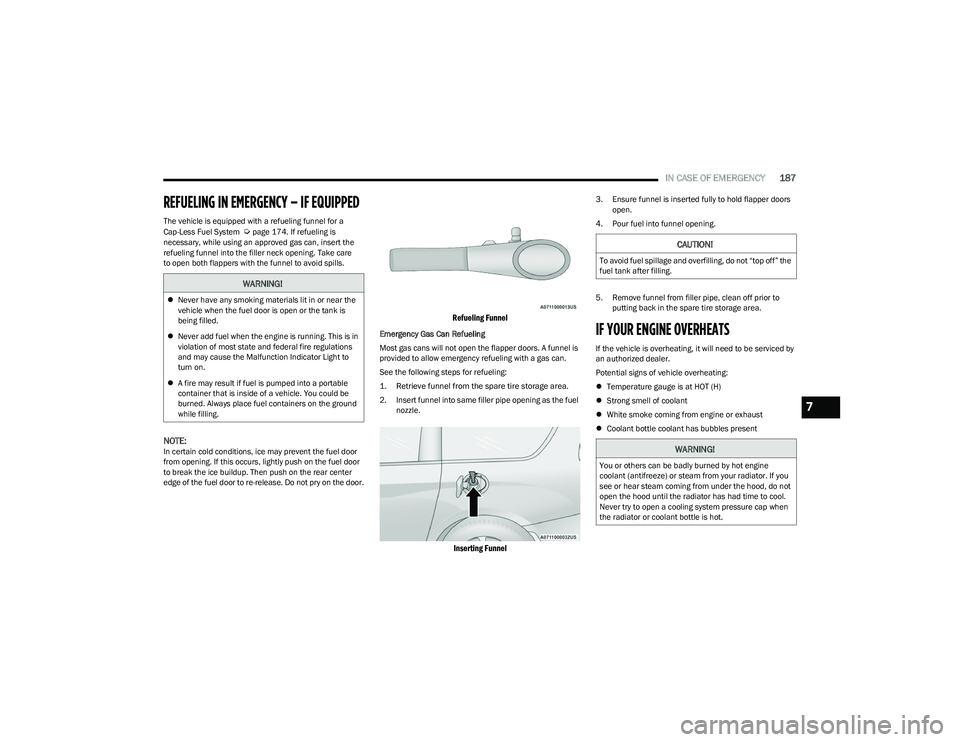
REFUELING IN EMERGENCY – IF EQUIPPED
The vehicle is equipped with a refueling funnel for a
Cap-Less Fuel System Úpage 174. If refueling is
necessary, while using an approved gas can, insert the
refueling funnel into the filler neck opening. Take care
to open both flappers with the funnel to avoid spills.
NOTE:In certain cold conditions, ice may prevent the fuel door
from opening. If this occurs, lightly push on the fuel door
to break the ice buildup. Then push on the rear center
edge of the fuel door to re-release. Do not pry on the door.
Refueling Funnel
Emergency Gas Can Refueling
Most gas cans will not open the flapper doors. A funnel is
provided to allow emergency refueling with a gas can.
See the following steps for refueling:
1. Retrieve funnel from the spare tire storage area.
2. Insert funnel into same filler pipe opening as the fuel nozzle.
Inserting Funnel
3. Ensure funnel is inserted fully to hold flapper doors open.
4. Pour fuel into funnel opening.
5. Remove funnel from filler pipe, clean off prior to putting back in the spare tire storage area.
IF YOUR ENGINE OVERHEATS
If the vehicle is overheating, it will need to be serviced by
an authorized dealer.
Potential signs of vehicle overheating:
Temperature gauge is at HOT (H)
Strong smell of coolant
White smoke coming from engine or exhaust
Coolant bottle coolant has bubbles present
WARNING!
Never have any smoking materials lit in or near the
vehicle when the fuel door is open or the tank is
being filled.
Never add fuel when the engine is running. This is in
violation of most state and federal fire regulations
and may cause the Malfunction Indicator Light to
turn on.
A fire may result if fuel is pumped into a portable
container that is inside of a vehicle. You could be
burned. Always place fuel containers on the ground
while filling.
CAUTION!
To avoid fuel spillage and overfilling, do not “top off” the
fuel tank after filling.
WARNING!
You or others can be badly burned by hot engine
coolant (antifreeze) or steam from your radiator. If you
see or hear steam coming from under the hood, do not
open the hood until the radiator has had time to cool.
Never try to open a cooling system pressure cap when
the radiator or coolant bottle is hot.
7
23_RUV_OM_EN_US_t.book Page 187