CITROEN C-ELYSÉE 2015 Owner's Manual
Manufacturer: CITROEN, Model Year: 2015, Model line: C-ELYSÉE, Model: CITROEN C-ELYSÉE 2015Pages: 285, PDF Size: 13.42 MB
Page 21 of 285
19
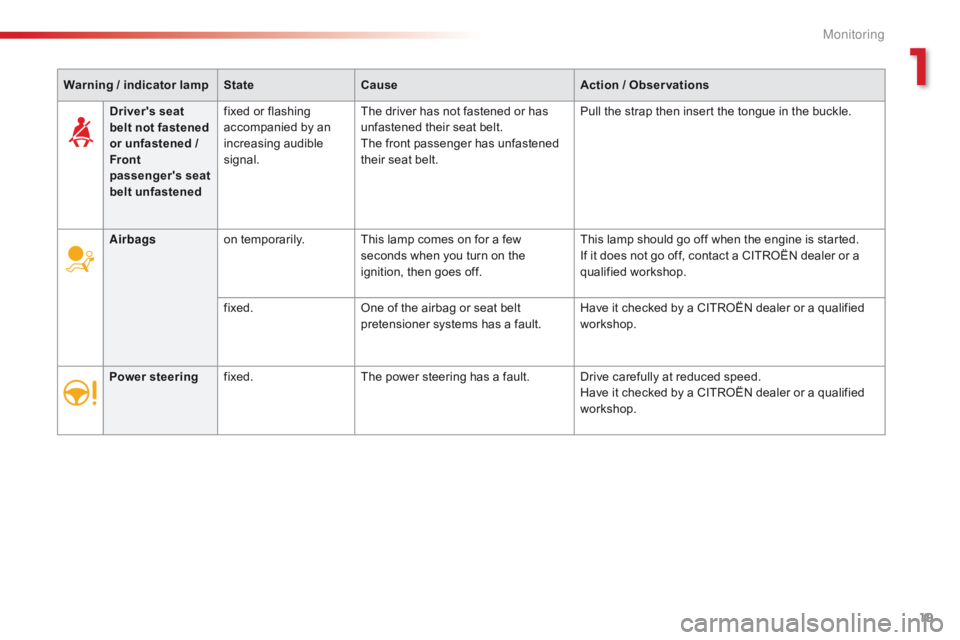
Warning / indicator lampStateCause Action / Observations
Airbags on temporarily. This lamp comes on for a few
seconds when you turn on the
ignition, then goes off. This lamp should go off when the engine is started.
If it does not go off, contact a CITROËN dealer or a
qualified workshop.
fixed. One of the airbag or seat belt
pretensioner systems has a fault. Have it checked by a CITROËN dealer or a qualified
workshop.
Power steering fixed. The power steering has a fault. Drive carefully at reduced speed.
Have it checked by a CITROËN dealer or a qualified
workshop.
Driver's seat
belt not fastened
or unfastened
/
Front
passenger's seat
belt unfastened fixed or flashing
accompanied by an
increasing audible
signal.
The driver has not fastened or has
unfastened their seat belt.
The front passenger has unfastened
their seat belt. Pull the strap then insert the tongue in the buckle.
1
Monitoring
Page 22 of 285
20
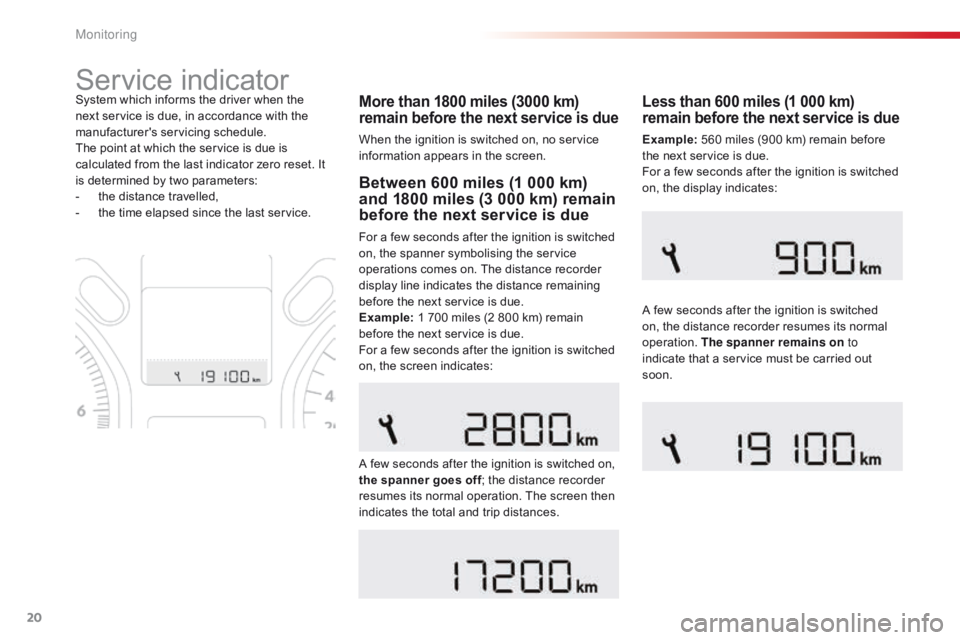
Service indicator
More than 1800 miles (3000 km)
remain before the next service is due
When the ignition is switched on, no service
information appears in the screen.
System which informs the driver when the
next service is due, in accordance with the
manufacturer's servicing schedule.
The point at which the service is due is
calculated from the last indicator zero reset. It
is determined by two parameters:
-
t
he distance travelled,
-
t
he time elapsed since the last service.
Between 600 miles (1 000 km)
and 1800 miles (3 000 km) remain
before the next service is due
For a few seconds after the ignition is switched
on, the spanner symbolising the service
operations comes on. The distance recorder
display line indicates the distance remaining
before the next service is due.
Example: 1 700 miles (2 800 km) remain
before the next service is due.
For a few seconds after the ignition is switched
on, the screen indicates:
A few seconds after the ignition is switched on,
the spanner goes off ; the distance recorder
resumes its normal operation. The screen then
indicates the total and trip distances.
Less than 600 miles (1 000 km)
remain before the next service is due
Example: 560 miles (900 km) remain before
the next service is due.
For a few seconds after the ignition is switched
on, the display indicates:
A few seconds after the ignition is switched
on, the distance recorder resumes its normal
operation. The spanner remains on to
indicate that a service must be carried out
soon.
Monitoring
Page 23 of 285
21
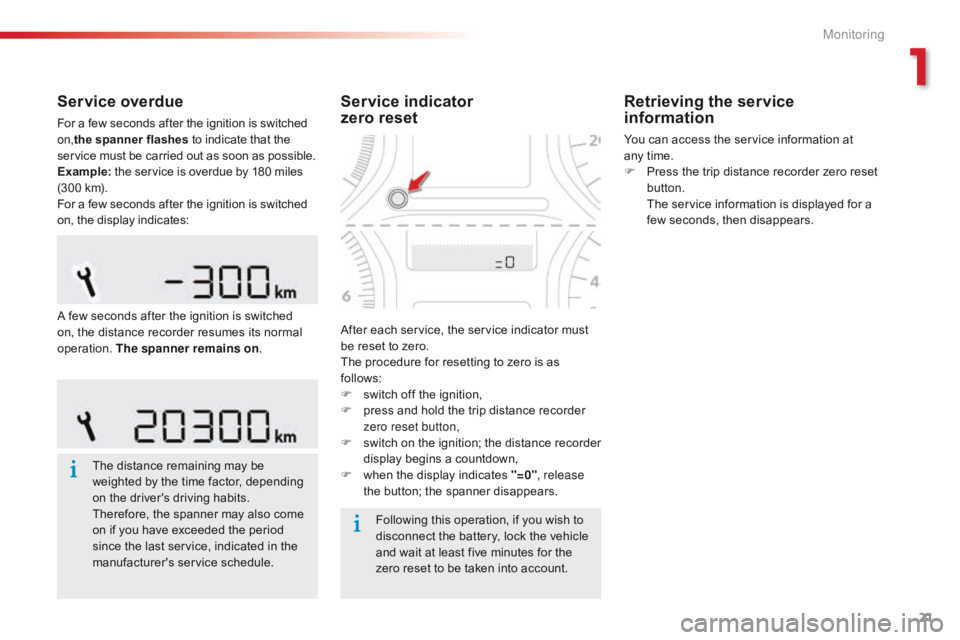
Service overdue
For a few seconds after the ignition is switched
on,the spanner flashes to indicate that the
service must be carried out as soon as possible.
Example: the service is overdue by 180 miles
(300 km).
For a few seconds after the ignition is switched
on, the display indicates:
The distance remaining may be
weighted by the time factor, depending
on the driver's driving habits.
Therefore, the spanner may also come
on if you have exceeded the period
since the last service, indicated in the
manufacturer's service schedule. Following this operation, if you wish to
disconnect the battery, lock the vehicle
and wait at least five minutes for the
zero reset to be taken into account.
Service indicator
zero reset
After each service, the service indicator must
be reset to zero.
The procedure for resetting to zero is as
follows:
F
s
witch off the ignition,
F
p
ress and hold the trip distance recorder
zero reset button,
F
s
witch on the ignition; the distance recorder
display begins a countdown,
F
w
hen the display indicates "=0" , release
the button; the spanner disappears.
Retrieving the service
information
You can access the service information at
any time.
F
P
ress the trip distance recorder zero reset
button.
T
he service information is displayed for a
few seconds, then disappears.
A few seconds after the ignition is switched
on, the distance recorder resumes its normal
operation. The spanner remains on .
1
Monitoring
Page 24 of 285
22
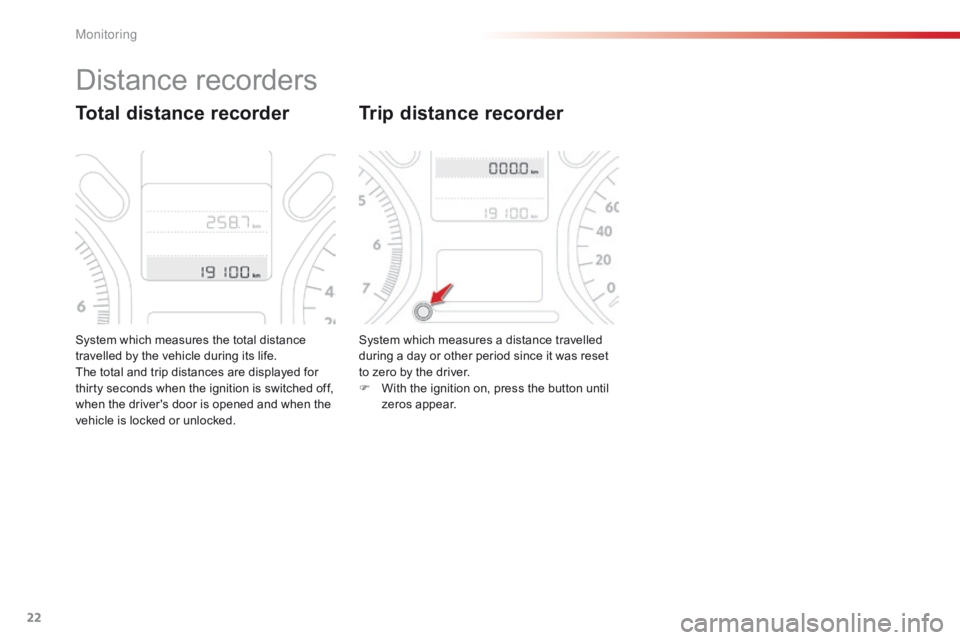
System which measures the total distance
travelled by the vehicle during its life.
The total and trip distances are displayed for
thirty seconds when the ignition is switched off,
when the driver's door is opened and when the
vehicle is locked or unlocked.
Total distance recorder
System which measures a distance travelled
during a day or other period since it was reset
to zero by the driver.
F
W
ith the ignition on, press the button until
zeros appear.
Trip distance recorder
Distance recorders
M
Page 25 of 285
23
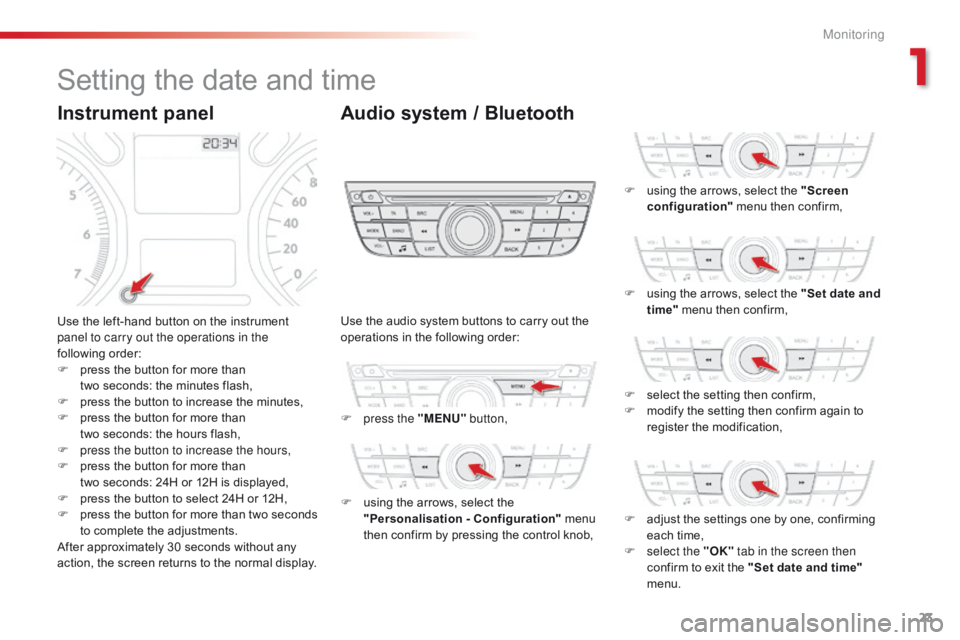
Setting the date and time
Use the left-hand button on the instrument
panel to carry out the operations in the
following order:
F
p
ress the button for more than
two
seconds: the minutes flash,
F
p
ress the button to increase the minutes,
F
p
ress the button for more than
two
seconds: the hours flash,
F
p
ress the button to increase the hours,
F
p
ress the button for more than
two
seconds: 24H or 12H is displayed,
F
p
ress the button to select 24H or 12H,
F
p
ress the button for more than two seconds
to complete the adjustments.
After approximately 30 seconds without any
action, the screen returns to the normal display. Use the audio system buttons to carry out the
operations in the following order:
F
p
ress the "MENU" button,
F
u
sing the arrows, select the
"Personalisation - Configuration" menu
then confirm by pressing the control knob, F
u
sing the arrows, select the "Screen
configuration" menu then confirm,
F
u
sing the arrows, select the "Set date and
time" menu then confirm,
F
s
elect the setting then confirm,
F
m
odify the setting then confirm again to
register the modification,
F
a
djust the settings one by one, confirming
each time,
F
s
elect the "OK" tab in the screen then
confirm to exit the "Set date and time"
menu.
Instrument panel Audio system / Bluetooth
1
Monitoring
Page 26 of 285
24
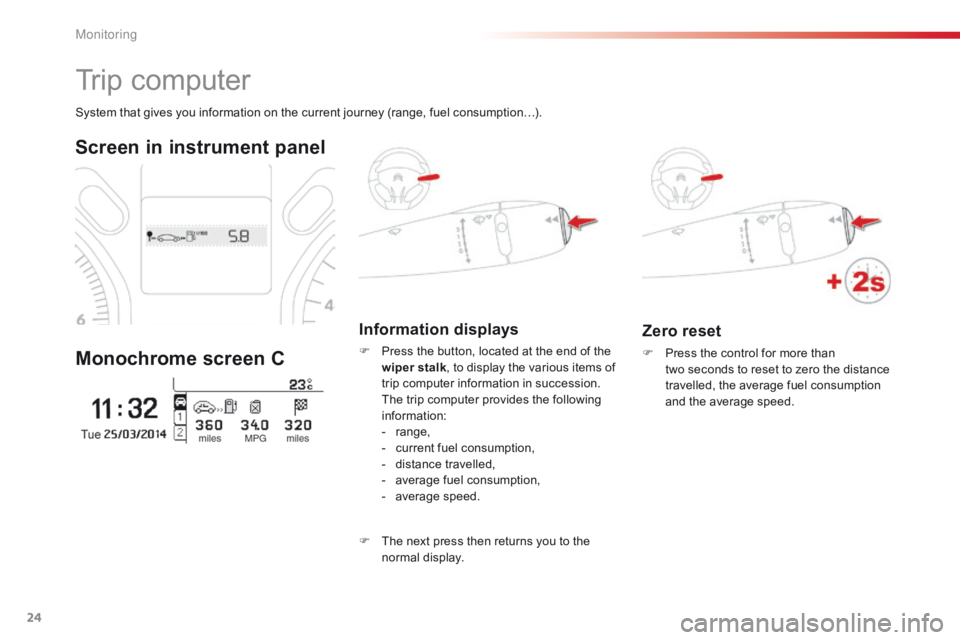
Zero reset
F Press the control for more than two seconds to reset to zero the distance
travelled, the average fuel consumption
and the average speed.
System that gives you information on the current journey (range, fuel consumption…).
Trip computer
Screen in instrument panel
Monochrome screen C
Information displays
F Press the button, located at the end of the wiper stalk , to display the various items of
trip computer information in succession.
T
he trip computer provides the following
information:
-
ra
nge,
-
c
urrent fuel consumption,
-
d
istance travelled,
-
a
verage fuel consumption,
-
a
verage speed.
F
T
he next press then returns you to the
normal display.
M
Page 27 of 285
25
If dashes are displayed continuously
while driving in place of the digits,
contact a CITROËN dealer or a
qualified workshop.This function is only displayed from
30
km/h.
This value may vary following a change
in the style of driving or the relief,
resulting in a significant change in the
current fuel consumption.
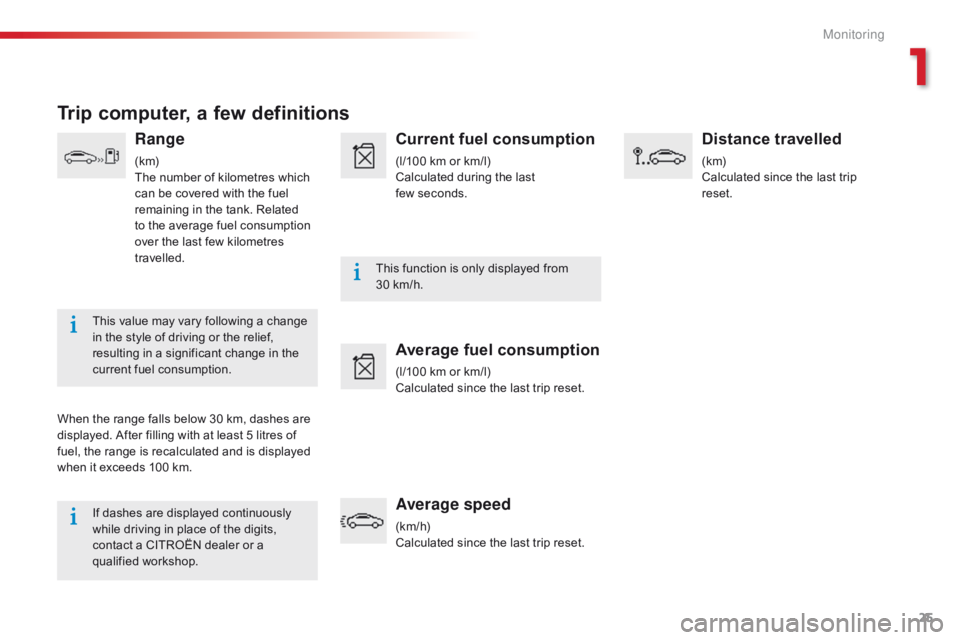
Trip computer, a few definitions
Range
(k m)
The number of kilometres which
can be covered with the fuel
remaining in the tank. Related
to the average fuel consumption
over the last few kilometres
travelled.
When the range falls below 30 km, dashes are
displayed. After filling with at least 5 litres of
fuel, the range is recalculated and is displayed
when it exceeds 100 km.
Current fuel consumption
(l/100 km or km/l)
Calculated during the last
few seconds.
Average fuel consumption
(l/100 km or km/l)
Calculated since the last trip reset.
Average speed
(km/h)
Calculated since the last trip reset.
Distance travelled
(k m)
Calculated since the last trip
reset.
1
Monitoring
Page 28 of 285
26
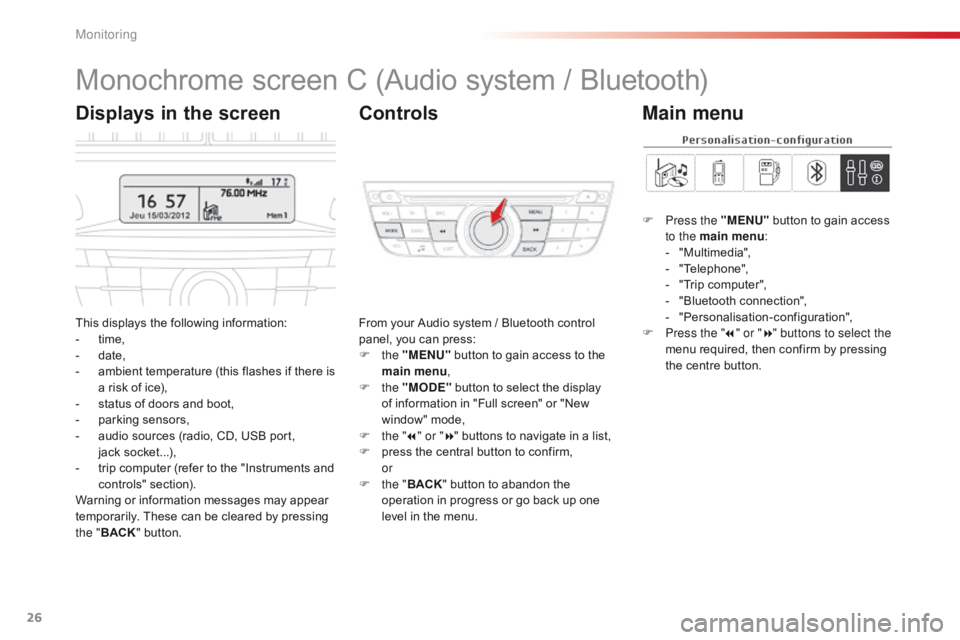
Monochrome screen C (Audio system / Bluetooth)
This displays the following information:
- t ime,
-
d
ate,
-
a
mbient temperature (this flashes if there is
a risk of ice),
-
s
tatus of doors and boot,
-
p
arking sensors,
-
a
udio sources (radio, CD, USB port,
jack
s
ocket...),
-
t
rip computer (refer to the "Instruments and
controls" section).
Warning or information messages may appear
temporarily. These can be cleared by pressing
the " BACK " button. From your Audio system / Bluetooth control
panel, you can press:
F
the "MENU" button to gain access to the
main menu ,
F
the "MODE" button to select the display
of information in "Full screen" or "New
window" mode,
F
t
he "7" or " 8" buttons to navigate in a list,
F
p
ress the central button to confirm,
or
F
t
he "BACK " button to abandon the
operation in progress or go back up one
level in the menu.
Displays in the screen Controls
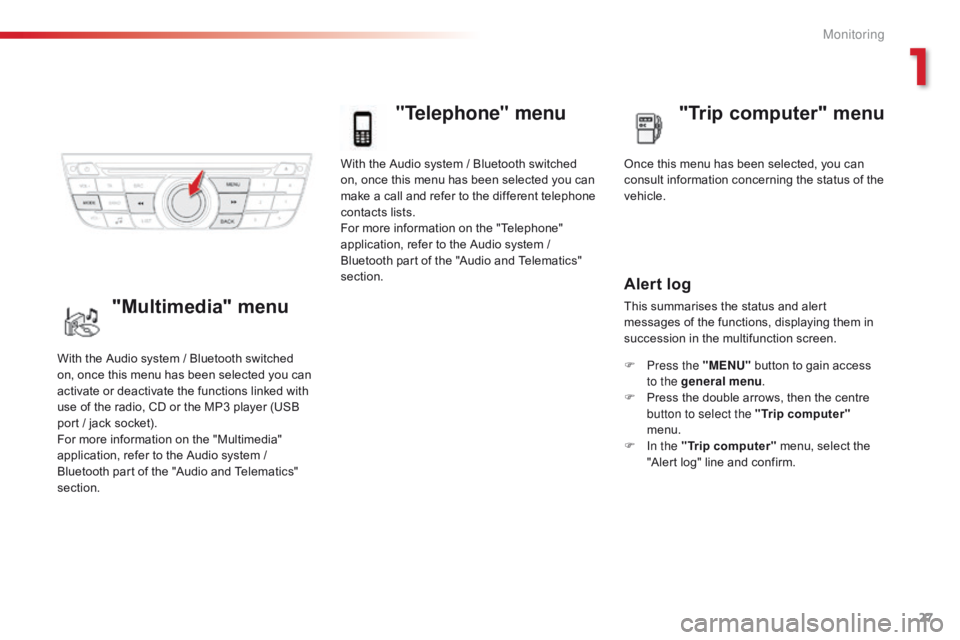
F Press the "MENU" button to gain access
to the main menu :
-
"
Multimedia",
-
"
Telephone",
-
"
Trip computer",
-
"
Bluetooth connection",
-
"
Personalisation-configuration",
F
P
ress the " 7" or " 8" buttons to select the
menu required, then confirm by pressing
the centre button.
Main menu
Monitoring
Page 29 of 285
27
With the Audio system / Bluetooth switched
on, once this menu has been selected you can
make a call and refer to the different telephone
contacts lists.
For more information on the "Telephone"
application, refer to the Audio system /
Bluetooth part of the "Audio and Telematics"
section.
"Telephone" menu
Once this menu has been selected, you can
consult information concerning the status of the
vehicle.
Alert log
This summarises the status and alert
messages of the functions, displaying them in
succession in the multifunction screen.
F
P
ress the "MENU" button to gain access
to the general menu .
F
P
ress the double arrows, then the centre
button to select the " Trip computer"
menu.
F
I
n the " Trip computer " menu, select the
"Alert log" line and confirm.
With the Audio system / Bluetooth switched
on, once this menu has been selected you can
activate or deactivate the functions linked with
use of the radio, CD or the MP3 player (USB
port / jack socket).
For more information on the "Multimedia"
application, refer to the Audio system /
Bluetooth part of the "Audio and Telematics"
section."Multimedia" menu "Trip computer" menu
1
Monitoring
Page 30 of 285
28
"Bluetooth
connection" menu
With the Audio system / Bluetooth switched
on, once this menu has been selected you
can connect or disconnect a Bluetooth device
(telephone, media player) and define the
connection mode (hands-free kit, playing audio
f i l e s).
For more information on the "Bluetooth
connection" application, refer to the Audio
system / Bluetooth part of the "Audio and
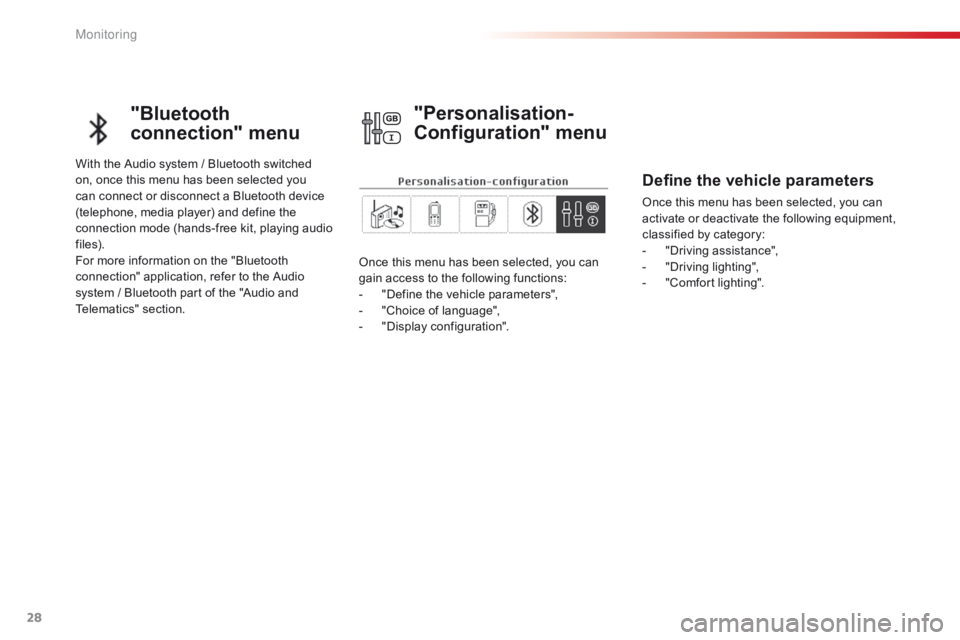
Telematics" section.Once this menu has been selected, you can
gain access to the following functions:
-
"
Define the vehicle parameters",
-
"
Choice of language",
-
"
Display configuration".
"Personalisation-
Configuration" menu
Define the vehicle parameters
Once this menu has been selected, you can
activate or deactivate the following equipment,
classified by category:
-
"
Driving assistance",
-
"
Driving lighting",
-
"
Comfort lighting".
M