oil pressure CITROEN C-ELYSÉE 2016 Owners Manual
[x] Cancel search | Manufacturer: CITROEN, Model Year: 2016, Model line: C-ELYSÉE, Model: CITROEN C-ELYSÉE 2016Pages: 260, PDF Size: 7.11 MB
Page 11 of 260

9
Eco-driving
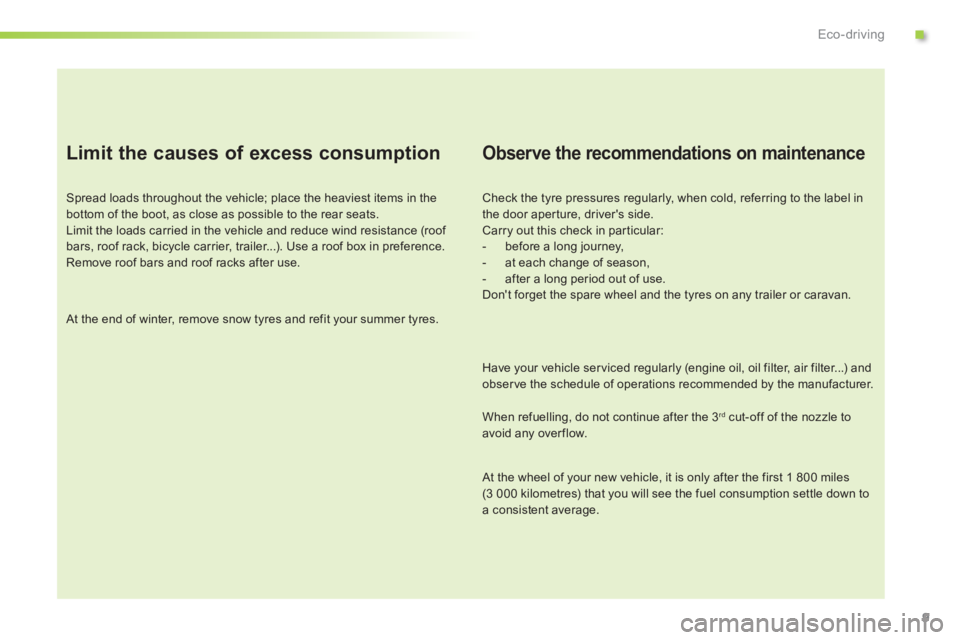
Limit the causes of excess consumption
Spread loads throughout the vehicle; place the heaviest items in the bottom of the boot, as close as possible to the rear seats.
Limit
the loads carried in the vehicle and reduce wind resistance (roof
b
ars, roof rack, bicycle carrier, trailer...). Use a roof box in preference.
Remove
roof bars and roof racks after use.
At
the end of winter, remove snow tyres and refit your summer tyres.
Observe the recommendations on maintenance
Check the tyre pressures regularly, when cold, referring to the label in the door aperture, driver's side.
Carry
out this check in particular:
-
b
efore a long journey,
-
a
t each change of season,
-
a
fter a long period out of use.
Don't
forget the spare wheel and the tyres on any trailer or caravan.
Have
your vehicle serviced regularly (engine oil, oil filter, air filter...) and
o
bserve the schedule of operations recommended by the manufacturer.
When
refuelling, do not continue after the 3
rd cut-off of the nozzle to a
void
any
over flow.
At
the
wheel
of
your
new
vehicle,
it
is
only
after the first 1 800 miles
(
3 000
kilometres)
that
you
will
see
the
fuel
consumption settle down to
a
consistent
average.
.
Page 21 of 260

19
C-elysee_en_Chap01_controle-de-marche_ed01-2016
C-elysee_en_Chap01_controle-de-marche_ed01-2016
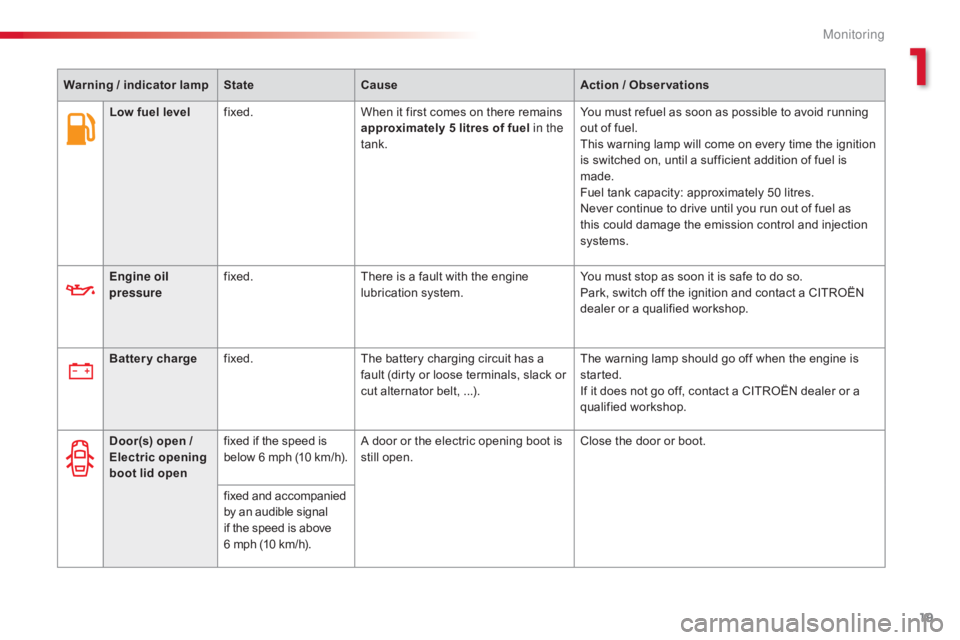
Warning / indicator lampStateCause Action / Observations
Engine oil
pressure fixed.
There
is a fault with the engine
l
ubrication system.You
must stop as soon it is safe to do so.
Park,
switch off the ignition and contact a CITROËN
d
ealer or a qualified workshop.
Battery charge fixed. The
battery charging circuit has a
f
ault (dirty or loose terminals, slack or
c
ut alternator belt, ...).The
warning lamp should go off when the engine is
s
tarted.
If
it does not go off, contact a CITROËN dealer or a
q
ualified
w
orkshop.
Door(s) open /
Electric opening
boot lid open fixed
if the speed is
b
elow
6
m
ph
(
10 km/h).A
door or the electric opening boot is
s
till open.Close
the door or boot.
fixed
and accompanied
b
y an audible signal
i
f the speed is above
6
mph (10 km/h).
Low fuel level
fixed. When
it first comes on there remains
a
pproximately 5 litres of fuel in the
tank. You
must refuel as soon as possible to avoid running
o
ut of fuel.
This
warning lamp will come on every time the ignition
i
s switched on, until a sufficient addition of fuel is
m
ade.
Fuel
tank capacity: approximately 50 litres.
Never
continue to drive until you run out of fuel as
t
his could damage the emission control and injection
s
ystems.
1
Monitoring
Page 144 of 260

142
C-elysee_en_Chap09_info-pratiques_ed01-2016
F Check that the compressor switch is at t
he "O "
position.
F
U
ncoil fully the electric cable, stowed under
t
he compressor.
F
C
onnect compressor's plug to the vehicle's
1
2 V socket.
F
S
witch on the ignition. If
after around 5 to 7 minutes the
p
ressure is not attained, this indicates
t
hat the tyre is not repairable; contact
a
CITROËN dealer or a qualified
w
orkshop for assistance.
Take care, the sealant product is
h
armful if swallowed and causes i
rritation to the eyes.
Keep this product out of the reach of
c
hildren.
The
use-by date is marked on the
c
artridge.
After
use, do not discard the
c
artridge by the roadside, take it to
a
CITROËN dealer or an authorised
w
aste disposal site.
Don't
forget to obtain a new sealant
c
artridge, available from a CITROËN
d
ealer or a qualified workshop.
F
S tart the compressor by placing the switch a
t the "I"
position and leave it running until
t
he tyre pressure reaches 2.0 bar.
T
he sealant product is injected into the tyre
u
nder pressure; do not disconnect the pipe
f
rom the valve during this operation (risk of
sp
lashing
an
d
s
tains).
Practical information
Page 145 of 260

143
C-elysee_en_Chap09_info-pratiques_ed01-2016
You can also use the compressor, without injecting sealant, to check and if necessary
a
djust the tyre pressures F
C heck that the compressor switch is at
t
he "O "
position.
F
U
ncoil fully the electric cable, stowed under
t
he compressor.
F
C
onnect the compressor's plug to the
v
ehicle's 12 V socket.
F
S
witch on the ignition.
F
P
lace the switch in the " O"
position.
F
R
emove
the
kit.
F
D
rive
immediately
for
approximately
t
hree
miles
(five
kilometres),
at
reduced
s
peed
(between
15
and
35
mph
(20
and
6
0 km/h)),
to
plug
the
puncture.
F
S
top
to
check
the
repair
and
the
tyre
p
ressure
using
the
kit.
Checking / adjusting tyre pressures
F Remove the valve cap from the tyre and p
lace it in a clean area.
F
U
ncoil the pipe stowed under the
c
ompressor.
F
S
crew the pipe onto the valve and tighten
f
i r m l y.
9
Practical information
Page 183 of 260

181
C-elysee_en_Chap10_verifications_ed01-2016
Petrol engines
1. Screenwash fluid reservoir.
2. C oolant header tank.
3.
A
ir filter.
4.
B
rake fluid reservoir.
5.
B
attery.
6.
F
usebox.
7.
E
ngine oil dipstick.
8.
E
ngine oil filler cap.
To
avoid damaging the electrical units,
n
ever use a high pressure jet wash in
t
he engine compartment.
10
Checks
Page 184 of 260

182
C-elysee_en_Chap10_verifications_ed01-2016
To avoid damaging the electrical units, never use a high pressure jet wash in
t
he engine compartment.
Diesel engine
1. Screenwash fluid reservoir.
2. C oolant header tank.
3.
A
ir filter.
4.
B
rake fluid reservoir.
5.
B
attery.
6.
F
usebox.
7.
E
ngine oil dipstick.
8.
E
ngine oil filler cap.
9.
P
riming
pu
mp.
Checks
Page 187 of 260

185
C-elysee_en_Chap10_verifications_ed01-2016
Coolant level
The coolant level should be close to the "MA X" mark but should never
e
xceed it.
In
addition, as the cooling system is pressurised,
w
ait
at
least one hour after switching off the
e
ngine
before carrying out any work.
To
avoid
any risk of scalding, unscrew the cap
b
y
two
turns to allow the pressure to drop.
W
hen
the
pressure has dropped, remove the
c
ap
and
top up the level.
Changing the coolant
The coolant does not have to be replaced at routine ser vices.
Fluid specification
The coolant must conform to the manufacturer's r ecommendations.
When
the engine is warm, the temperature of
t
he coolant is regulated by the fan.
The cooling fan may star t after switching
off the engine: take care with ar ticles and
clothing that might be caught by the fan
blades.
Fluid specification
For optimum cleaning and to avoid freezing, t his fluid must not be topped up or replaced
w
ith plain water.
In
w
intry
c
onditions,
i
t
i
s
r
ecommended
t
hat
y
ou
u
se an ethyl alcohol or methanol based fluid.
Screenwash fluid level
Top up the level when necessary.
To p p i n g u p
This additive must be topped up by a CITROËN dealer or a qualified workshop without delay.
Diesel additive level (Diesel
engine with particle filter)
A low additive level is indicated by illumination of the service warning lamp, accompanied
b
y an audible warning and a message in the
s
creen (if a display screen is fitted).Avoid
prolonged contact of used oil or
f
luids with the skin.
Most of these fluids are harmful to
h
ealth or indeed very corrosive.
Do not discard used oil or fluids into
s
ewers or onto the ground.
Take used oil to a CITROËN dealer or
a
qualified workshop (France) or to an
a
uthorised waste disposal site.
Used products
10
Checks
Page 251 of 260

249
C-elysee_en_Chap14_index-alpha_ed01-2016
Labels, identification .....................................19 3
Lamps, front .................................................. 15
3
Level,
AdBlue
® additive ................................. 13 3
Level,
brake
fluid ........................................... 18
4
Level,
Diesel
additive
.................................... 18
5
Level,
engine
coolant
.................................... 18
5
Level,
engine
oil
...............................
.............183
Levels
and
checks
..............................
...181-185
Level,
screenwash fluid
................................ 18
5
Lighting
................
............................................ 91
Lighting,
guide-me home
................................ 95
L
ighting,
i
nterior
.............................................. 99
Lo
ading
..............................
....................... 8, 178
Load
reduction mode
.................................... 16
8
Locating
your
vehicle
...................................... 34
L
ow
fuel
level
..............................
..................129
Maintenance
(
advice)
.................................... 17
5
Maintenance, routine
........................................ 8
M
ap
reading
lamps
......................................... 99
M
arkings,
id
entification
................................. 19
3
Mat
.......
......................................................... 17 7
Menu,
main
..............................
.....................198
Mirror, rear view
.............................................. 47
M
irrors,
door.................................................... 46
Mirror, vanity
..............................
.....................59
Misfuel prevention
...............................
..........13 0
Mountings,
I
sofix
........................... 1
23, 126, 127
MP3
CD
................
................................ 203, 204Pads,
b
rake
...................................................18
7
Paint
colour code
..........................................19
3
Parking
brake
.......................................... 6
7, 187
Parking
sensors, rear......................................89
Petrol
...............................
..............................131
Player,
MP3 CD
...............................
..... 203, 204
Port,
USB
................................................6
0, 205
Pre-heater,
D
iesel
...............................
............13
Pressures, tyres
.................................... 1
44, 193
Pre-tensioning
seat belts
..............................10
9
Priming
the fuel system
................................13
2
Protecting
children
....1
10, 114-116, 121, 124-127
Puncture
................
........................................140
Number
plate lamps
......................................
15
8
Opening the bonnet
......................................18
0
Opening
the boot
..............................
........33, 40
Opening
the doors
...............................
.....33, 39
L
MP
N
O
Indicators, direction ..............................1 00, 154
Inflating tyres .............................. ...................... 8
Inflating
tyres and accessories
(using
the kit)
..............................
................140
Input,
a
uxiliary
...............................
........ 207, 235
Instrument
panel
...............................
..............10
Isofix
m
ountings
............................ 1
23, 126, 127
Jack
........
............................................... 145,
14
6
Jump
starting
..............................
..................165
Key
with remote control
............... 3
3, 34, 36, 64
Kit,
han
ds-free
.............................................. 20
9
Kit,
temporary puncture repair
......................14
0
J
K
.
Alphabetical index