change CITROEN C-ELYSÉE 2022 Handbook (in English)
[x] Cancel search | Manufacturer: CITROEN, Model Year: 2022, Model line: C-ELYSÉE, Model: CITROEN C-ELYSÉE 2022Pages: 260, PDF Size: 8.4 MB
Page 8 of 260
6
Eco- driving
Optimise the use of your
gearbox
With a manual gearbox, move off gently
and change up without waiting. During
acceleration change up early.
With an automatic gearbox, give preference
to automatic mode and avoid pressing the
accelerator pedal heavily or suddenly.
Drive smoothly
Maintain a safe distance between vehicles,
use engine braking rather than the
brake pedal, and press the accelerator
progressively. These practices contribute
towards a reduction in fuel consumption and
CO
2 emissions and also help reduce the
background traffic noise.
Control the use of your electrical
equipment
Before moving off, if the passenger
compartment is too warm, ventilate it by
opening the windows and air vents before
using the air conditioning.
Above 30
mph (50 km/h), close the windows
and leave the air vents open.
Consider using equipment that can help
keep the temperature in the passenger
compartment down (sunroof blind and window
blinds, etc.).
Unless it has automatic regulation, switch off
the air conditioning as soon as the desired
temperature has been reached. Switch off the headlamps and foglamps when
the ambient light level does not require their
use.
Avoid running the engine before moving off,
particularly in winter; your vehicle will warm up
much faster while driving.
As a passenger, if you avoid connecting your
multimedia devices (film, music, video game,
etc.), you will contribute towards limiting the
consumption of electrical energy, and so of
fuel.
Disconnect your portable devices before
leaving the vehicle.
The gear shift indicator invites you to engage
the most suitable gear: as soon as the
indication is displayed in the instrument panel,
follow it straight away.
For vehicles fitted with an automatic gearbox,
this indicator appears only in manual mode. If your vehicle has cruise control, make use of
the system at speeds above 25
mph (40 km/h)
when the traffic is flowing well. Switch off the demisting and defrosting
controls, if these are not controlled
automatically.
Switch off the heated seat as soon as
possible.
Eco-driving is a range of everyday practices
that allow the motorist to optimise their fuel
consumption and CO
2 emissions.
Eco-driving
Page 9 of 260
7
Limit the causes of excess
consumption
Spread loads throughout the vehicle; place
the heaviest items in the bottom of the boot,
as close as possible to the rear seats.
Limit the loads carried in the vehicle and
reduce wind resistance (roof bars, roof rack,
bicycle carrier, trailer, etc.). Use a roof box in
preference.
Remove roof bars and roof racks after use.
At the end of winter, remove snow tyres and
refit your summer tyres.
Observe the recommendations
on maintenance
Check the tyre pressures regularly, when cold,
referring to the label in the door aperture,
driver's side.
Carry out this check in particular:
-
b
efore a long journey,
-
a
t each change of season,
-
a
fter a long period out of use. Have your vehicle ser viced regularly (engine
oil, oil filter, air filter, passenger compartment
filter, etc.) and obser ve the schedule of
operations in the manufacturer's service
schedule. Don't forget the spare wheel and the tyres on
any trailer or caravan.
With a BlueHDi diesel engine, if the SCR
system is faulty, your vehicle becomes
polluting. Visit a CITROËN or a qualified
workshop as soon as possible to bring your
vehicle’s nitrogen oxide emissions back in line
with regulations.
When filling the tank, do not continue after the
3
rd cut-off of the nozzle to avoid over flow.
At the wheel of your new vehicle, it is only
after the first 1,800
miles (3,000 kilometres)
that you will see the fuel consumption settle
down to a consistent average.
.
Eco-driving
Page 20 of 260
18
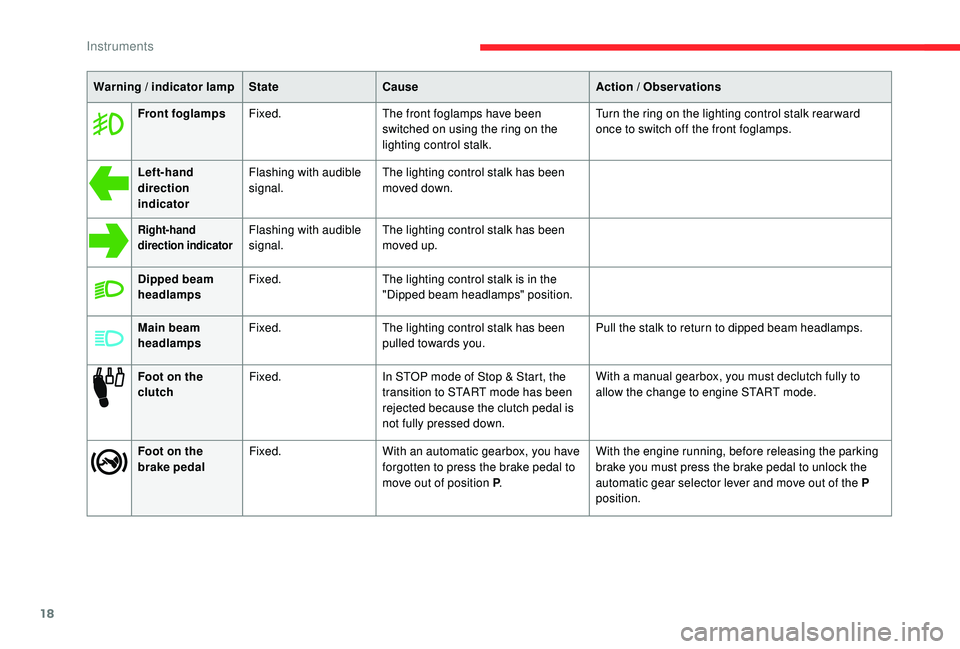
Warning / indicator lampStateCause Action / Observations
Front foglamps Fixed. The front foglamps have been
switched on using the ring on the
lighting control stalk. Turn the ring on the lighting control stalk rear ward
once to switch off the front foglamps.
Left-hand
direction
indicator Flashing with audible
signal.
The lighting control stalk has been
moved down.
Right-hand
direction indicatorFlashing with audible
signal.The lighting control stalk has been
moved up.
Dipped beam
headlamps Fixed.
The lighting control stalk is in the
"Dipped beam headlamps" position.
Main beam
headlamps Fixed.
The lighting control stalk has been
pulled towards you. Pull the stalk to return to dipped beam headlamps.
Foot on the
clutch Fixed.
In STOP mode of Stop & Start, the
transition to START mode has been
rejected because the clutch pedal is
not fully pressed down. With a manual gearbox, you must declutch fully to
allow the change to engine START mode.
Foot on the
brake pedal Fixed.
With an automatic gearbox, you have
forgotten to press the brake pedal to
move out of position P.With the engine running, before releasing the parking
brake you must press the brake pedal to unlock the
automatic gear selector lever and move out of the P
position.
Instruments
Page 27 of 260
25
Audio system / Bluetooth With CITROËN Connect Radio
F Select the "Settings" menu.
F
Sel
ect "Date and time ".
F
Sel
ect the " Date" or "Time " tab.
F
C
hoose the display formats.
F
C
hange the date and/or time using the
numeric keypad.
F
C
onfirm with " OK".
The system does not automatically
manage the change between winter and
summer time (depending on country).
With CITROËN Connect Nav
Adjustment of the time and date is only
available if synchronisation with GPS is
deactivated.
F
Sel
ect the " Settings " menu.
F
P
ress the " OPTIONS " button to go to the
secondary page.
F
Sel
ect "Setting the time- date". F
Sel
ect the "
Date" or "Time " tab.
F
A
djust the date and/or time using the
numeric keypad.
F
C
onfirm with "
OK".
Additional adjustments
You can choose:
-
T o change the display format of the date
and time (12h/24h).
-
T
o change the time zone.
-
T
o activate or deactivate synchronisation
with the GPS (UTC).
The system does not automatically
manage the change between winter and
summer time (depending on country).
The change between winter and summer
time is done by changing the time zone.
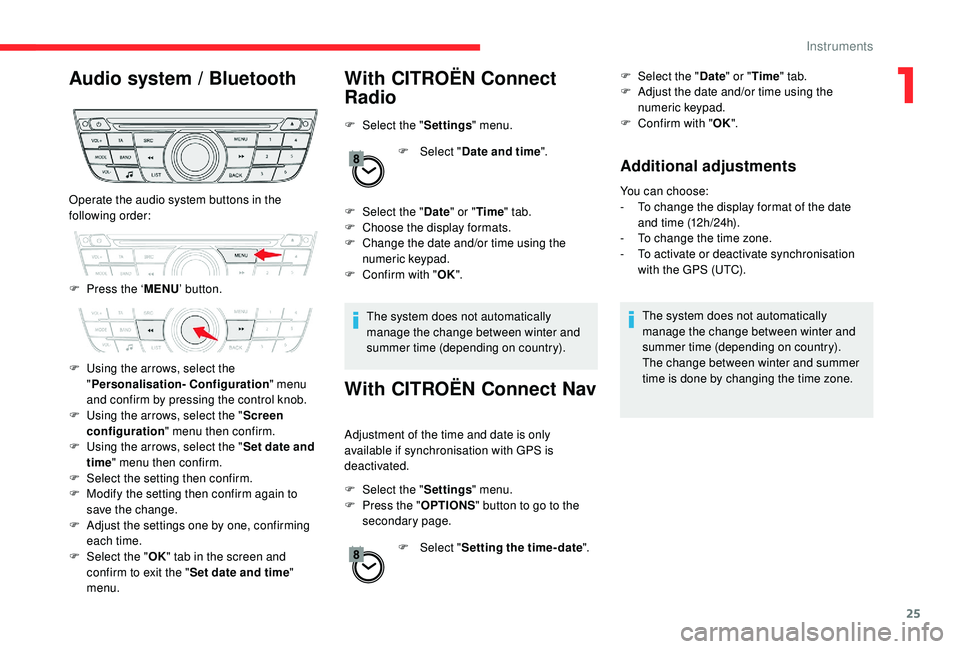
Operate the audio system buttons in the
following order:
F
P
ress the ‘ MENU’ button.
F
U
sing the arrows, select the
" Personalisation- Configuration " menu
and confirm by pressing the control knob.
F
U
sing the arrows, select the " Screen
configuration " menu then confirm.
F
U
sing the arrows, select the " Set date and
time " menu then confirm.
F
S
elect the setting then confirm.
F
M
odify the setting then confirm again to
save the change.
F
A
djust the settings one by one, confirming
each time.
F
Sel
ect the " OK" tab in the screen and
confirm to exit the " Set date and time"
menu.
1
Instruments
Page 30 of 260
28
This value may vary following a change
in the driving style or the relief, resulting
in a significant change in the current fuel
consumption.
When the range falls below 18
miles (30 km),
dashes are displayed. After filling with at least
5
litres of fuel, the range is recalculated and is
displayed if it exceeds 60
miles (100 km).
If dashes are displayed continuously while
driving instead of the digits, contact a
CITROËN dealer or a qualified workshop.
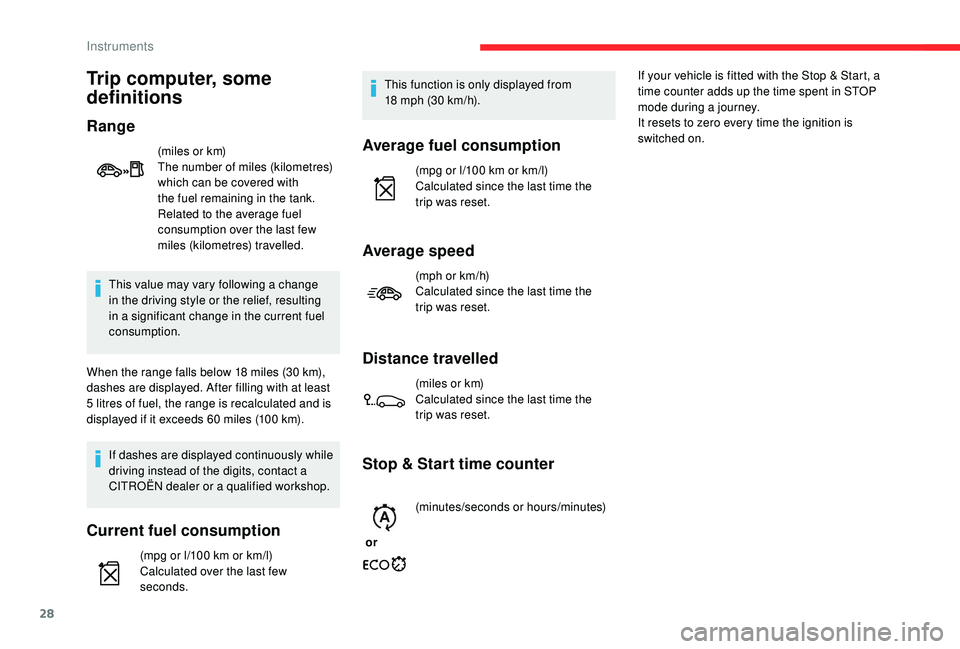
Current fuel consumption
(mpg or l/100 km or km/l)
C alculated over the last few
seconds. This function is only displayed from
18
mph (30 km/h).
Average fuel consumption
(mpg or l/100 km or km/l)
C alculated since the last time the
trip was reset.
Average speed
(mph or km/h)
Calculated since the last time the
trip was reset.
Distance travelled
(miles or km)
Calculated since the last time the
trip was reset.
Stop & Start time counter
or (minutes/seconds or hours/minutes) If your vehicle is fitted with the Stop & Start, a
time counter adds up the time spent in STOP
mode during a journey.
It resets to zero every time the ignition is
switched on.
Trip computer, some
definitions
Range
(miles or km)
The number of miles (kilometres)
which can be covered with
the fuel remaining in the tank.
Related to the average fuel
consumption over the last few
miles (kilometres) travelled.
Instruments
Page 41 of 260
39
Rear bench seat
Depending on the version, your vehicle is
equipped with one of these three bench seats:
-
F
ixed bench seat.
-
B
ench seat with fixed one-piece cushion
and split folding backrest (2/3 -1/3) with
fixed head restraints.
-
B
ench seat with fixed one-piece cushion
and split folding backrest (2/3 -1/3) with
adjustable head restraints.
To remove and refit the fixed bench seat,
contact a CITROËN dealer or a qualified
workshop.
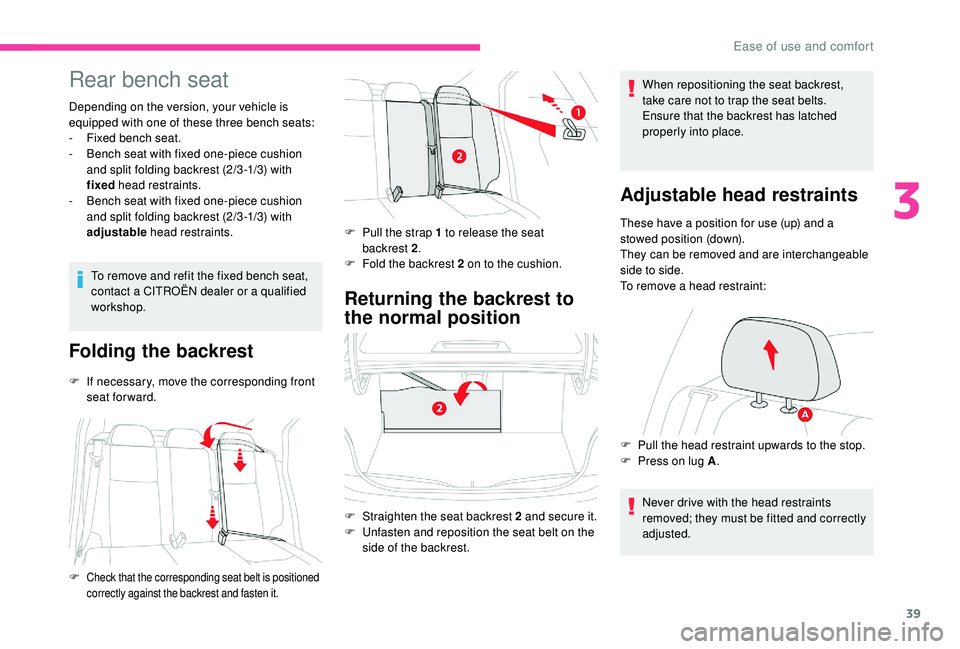
Folding the backrest
F If necessary, move the corresponding front seat forward.
Returning the backrest to
the normal position
When repositioning the seat backrest,
take care not to trap the seat belts.
Ensure that the backrest has latched
properly into place.
Adjustable head restraints
These have a position for use (up) and a
stowed position (down).
They can be removed and are interchangeable
side to side.
To remove a head restraint:
Never drive with the head restraints
removed; they must be fitted and correctly
adjusted.
F
P
ull the head restraint upwards to the stop.
F
P
ress on lug A .
F
S
traighten the seat backrest 2
and secure it.
F
U
nfasten and reposition the seat belt on the
side of the backrest.
F
Check that the corresponding seat belt is positioned correctly against the backrest and fasten it.
F Pull the strap 1 to release the seat
backrest 2 .
F
F
old the backrest 2 on to the cushion.
3
Ease of use and comfort
Page 43 of 260

41
Electric model
Adjustment
F Move the control A to the right or to the left to select the corresponding mirror.
F
M
ove the control in all four directions to
adjust.
F
R
eturn the control to the central position.
Manual folding
You can manually fold the mirrors (parking
obstruction, narrow garage, etc.)
F
T
urn the mirror towards the vehicle.
Rear view mirror
Equipped with an anti-dazzle system, which
darkens the mirror glass and reduces the
nuisance to the driver caused by the sun,
headlamps of other vehicles, etc.
Adjustment
F Adjust the mirror so that the mirror is directed correctly in the "day" position.
Day / night position
F Pull the lever to change to the "night" anti-dazzle position.
F
P
ush the lever to change to the normal
"day" position.
Heating / Ventilation
This system operates only with the engine
running.
1 Temperature.
2 A ir f low.
3 Air distribution.
4 Air intake / Air recirculation.
Temperature
F Turn the thumb wheel from
blue (cold) to red (hot) to adjust
the temperature to your liking.
Air flow
F Turn the thumb wheel to obtain a comfortable air flow.
3
Ease of use and comfort
Page 50 of 260

48
Fittings
Glove box
It can be used to hold a water bottle, the
vehicle's handbook pack, etc.
Depending on version, it may have a lid. In this
case:
F
T
o open the glove box, raise the handle.
Removable ashtray
F Raise the cover to open the ashtray.
F T o empty it, with the cover raised, pull the
ashtray upward.
It contains the front passenger airbag
deactivation switch.
To avoid any problem of inter ference
or risk of overturning, do not place the
ashtray near the gear lever.
Sun visor
Provides protection against sunlight from the
front or the side.
The passenger's sun visor is fitted with a vanity
mirror with concealing flap and a ticket holder.
If after a long period parked in the
sun, the interior temperature is very
high, first ventilate the passenger
compartment for a few moments.
Put the air flow control at a setting high
enough to quickly change the air in the
passenger compartment.
The air conditioning system does not
contain chlorine and does not present
any danger to the ozone layer.
Stop & Star t
The heating and air conditioning systems
only work when the engine is running.
To maintain a comfortable temperature
in the passenger compartment, you can
temporarily deactivate the Stop & Start
system.
For more information on Stop & Star t ,
refer to the corresponding section.
Ease of use and comfort
Page 56 of 260
54
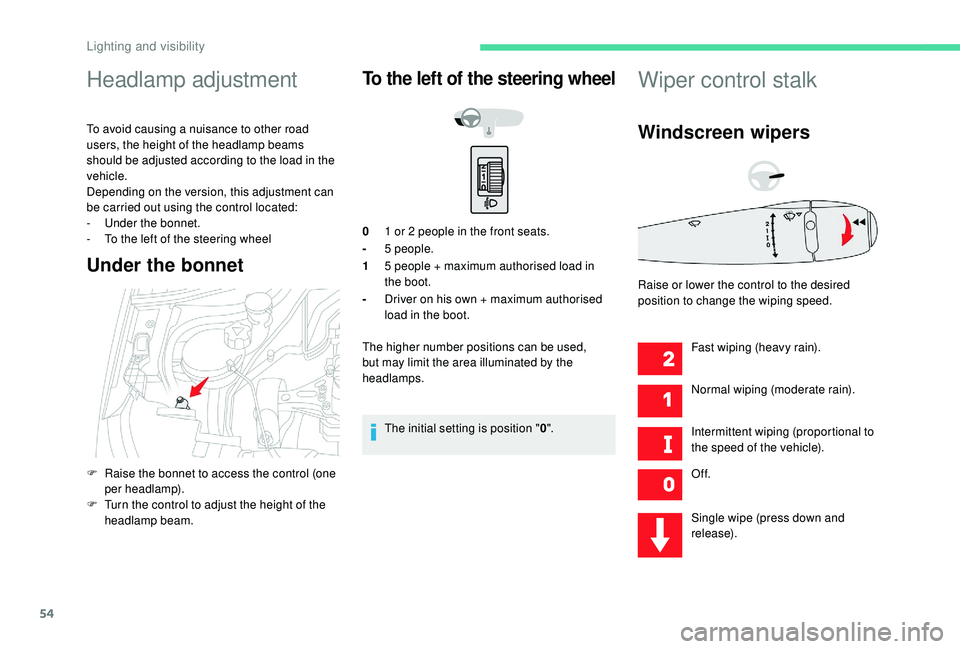
Headlamp adjustment
To avoid causing a nuisance to other road
users, the height of the headlamp beams
should be adjusted according to the load in the
vehicle.
Depending on the version, this adjustment can
be carried out using the control located:
-
U
nder the bonnet.
-
T
o the left of the steering wheel
Under the bonnet
To the left of the steering wheel
01 or 2 people in the front seats.
- 5
people.
1 5
people + maximum authorised load in
the boot.
- Driver on his own + maximum authorised
load in the boot.
The higher number positions can be used,
but may limit the area illuminated by the
headlamps.
The initial setting is position " 0".
Wiper control stalk
Windscreen wipers
Fast wiping (heavy rain).
Normal wiping (moderate rain).
Intermittent wiping (proportional to
the speed of the vehicle).
Of f.
Single wipe (press down and
release).
F
R
aise the bonnet to access the control (one
per headlamp).
F
T
urn the control to adjust the height of the
headlamp beam. Raise or lower the control to the desired
position to change the wiping speed.
Lighting and visibility
Page 62 of 260

60
If you purchased your vehicle outside the
Brand network, we invite you to check
the configuration of these ser vices and,
if desired, have a dealer change it to suit
your wishes. In a multilingual country,
configuration is possible in the official
national language of your choice.
For technical reasons and, in particular,
to improve the quality of the "telematic
services" services for customers, the
manufacturer reser ves the right to carry
out updates to the vehicle's on-board
communication system.Electronic stability control
(ESC)
A set of the following Electronic Stability
systems:
-
a
nti-lock braking system (ABS) and
electronic brake force distribution (EBFD),
-
em
ergency braking assistance (EBA),
-
w
heel anti-slip regulation (ASR) or traction
control,
-
d
ynamic stability control (DSC).
Definitions
Anti-lock braking system (ABS)
and electronic brake force
distribution (EBFD)
These systems improve the stability and
manoeuvrability of your vehicle when braking
and contribute towards improved control in
corners, in particular on poor or slippery road
surfaces.
The ABS prevents wheel lock in the event of
emergency braking.
The electronic brake force distribution system
manages the braking pressure wheel by wheel.
Emergency braking assistance
(EBA)
In an emergency, this system enables you to
reach the optimum braking pressure more
quickly and therefore reduce the stopping
distance.
Anti-slip regulation (ASR)
This system optimises traction in order to
avoid wheel slip by acting on the brakes of
the driving wheels and on the engine. It also
improves the directional stability of the vehicle
on acceleration.
Dynamic stability control (DSC)
If there is a difference between the path
followed by the vehicle and that required by the
driver, this system monitors each wheel and
automatically acts on the brake of one or more
wheels and on the engine to return the vehicle
to the required path, within the limits of the laws
of physics. It is triggered in relation to the speed at which
the brake pedal is pressed. This is felt by a
reduction in the resistance of the pedal and an
increase in braking efficiency.
Safety