Citroen C ZERO 2012 1.G Owner's Manual
Manufacturer: CITROEN, Model Year: 2012, Model line: C ZERO, Model: Citroen C ZERO 2012 1.GPages: 168, PDF Size: 5.06 MB
Page 131 of 168
129
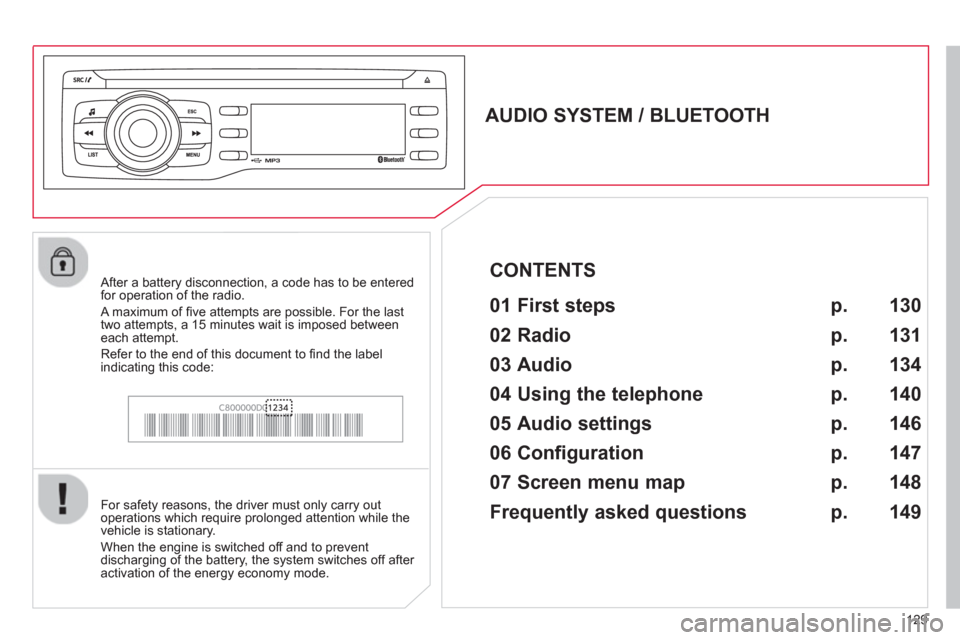
AUDIO SYSTEM / BLUETOOTH
01 First steps
For safety reasons, the driver must only carry out
operations which require prolonged attention while the
vehicle is stationary.
When the engine is switched o
ff and to prevent
discharging of the battery, the system switches off after
activation of the energy economy mode.
CONTENTS
02 Radio
03 Audio
04 Using the telephone
05 Audio settings
06 Configuration
07 Screen menu map
Frequently asked questions p.
p.
p.
p.
p.
p.
p.
p. 130
131
134
140
146
147
148
149 After a battery disconnection, a code has to be enteredfor operation of the radio.
A maximum of fi ve attempts are possible. For the last
two attempts, a 15 minutes wait is imposed between each attempt.
R
efer to the end of this document to fi nd the label indicating this code:
Page 132 of 168
01 FIRST STEPS
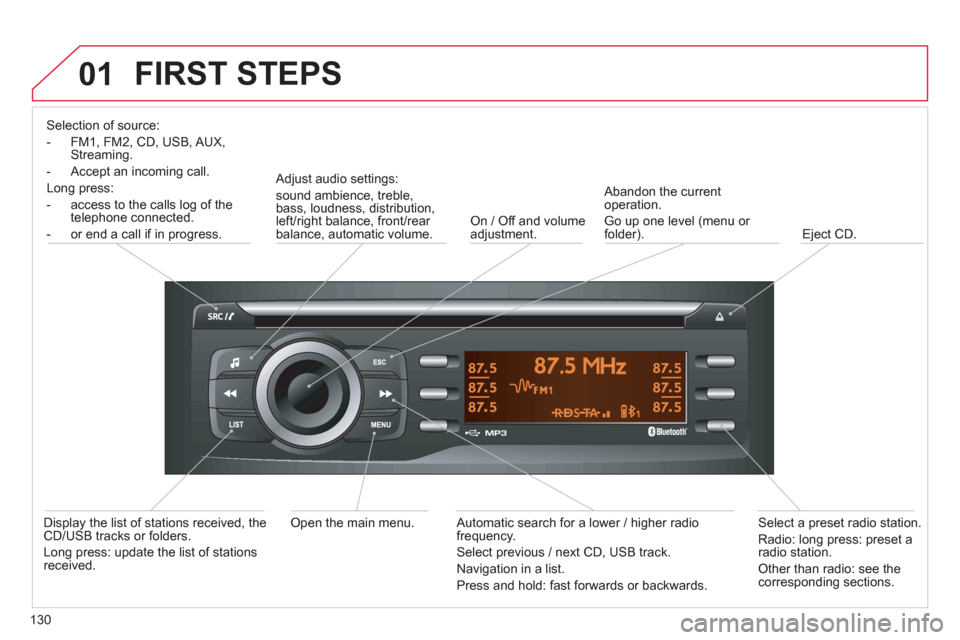
Selection of source:
- FM1, FM2, CD, USB, AUX,
Streaming.
-
Accept an incoming call.
Long press:
- access to the calls lo
g of the
telephone connected.
- or end a call i
f in progress.
Adjust audio settings:
sound ambience, treble,
bass, loudness, distribution,
left/right balance, front/rear balance, automatic volume. On / Off and volume
adjustment.
A
bandon the current
operation.
Go up one level (menu or folder).
Eject CD.
Select a
preset radio station.
Radio: long press: preset a
radio station.
Other than radio: see the corresponding sections.
Automatic search for a lower / higher radio
frequency.
Select previous / next CD, USB track.
Navigation in a list.
Pr
ess and hold: fast forwards or backwards.
Open the main menu.
Display the list of stations received, theCD/USB tracks or folders.
Lon
g press: update the list of stationsreceived.
1
30
Page 133 of 168
02
131
RADIO
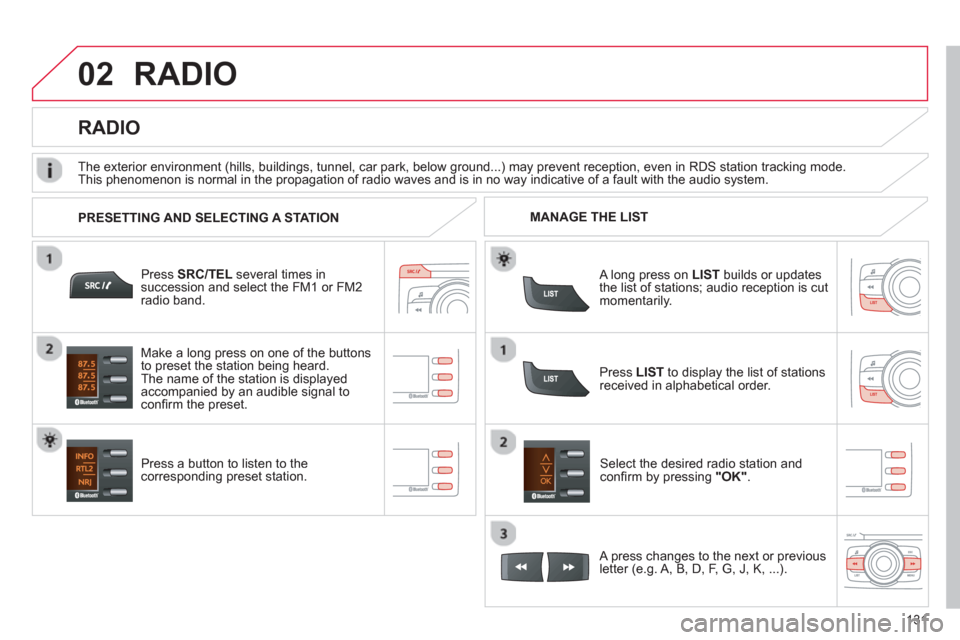
Press SRC/TEL several times insuccession and select the FM1 or FM2radio band.
Pr
ess a button to listen to the corresponding preset station.Select the desired radio station and confi rm by pressing "OK".
RADIO
Press LIST
to display the list of stations received in alphabetical order.
The exterior environment
(hills, buildings, tunnel, car park, below ground...) may prevent reception, even in RDS station tracking mode.This phenomenon is normal in the propagation of radio waves and is in no way indicative of a fault with the audio system.
A long press on LIST
builds or updates
the list of stations; audio reception is cut
momentarily.
Make a long press on one o
f the buttons
to preset the station being heard.
The name of the station is displayedaccompanied by an audible signal to confi rm the preset.
A press changes to the next or previous
letter (e.g. A, B, D, F, G, J, K, ...). MANAGE THE LIST
PRESETTING AND SELECTING A STATION
Page 134 of 168
02
132
RDS, if displayed, enables you to continue listening to the same station by automatic retuning to alternative frequencies. However,
in certain conditions, coverage of an RDS station may not be assured throughout the country as radio stations do not cover
100 % of the territory. This explains the loss of reception of thestation during a journey.
RADIO
RDS
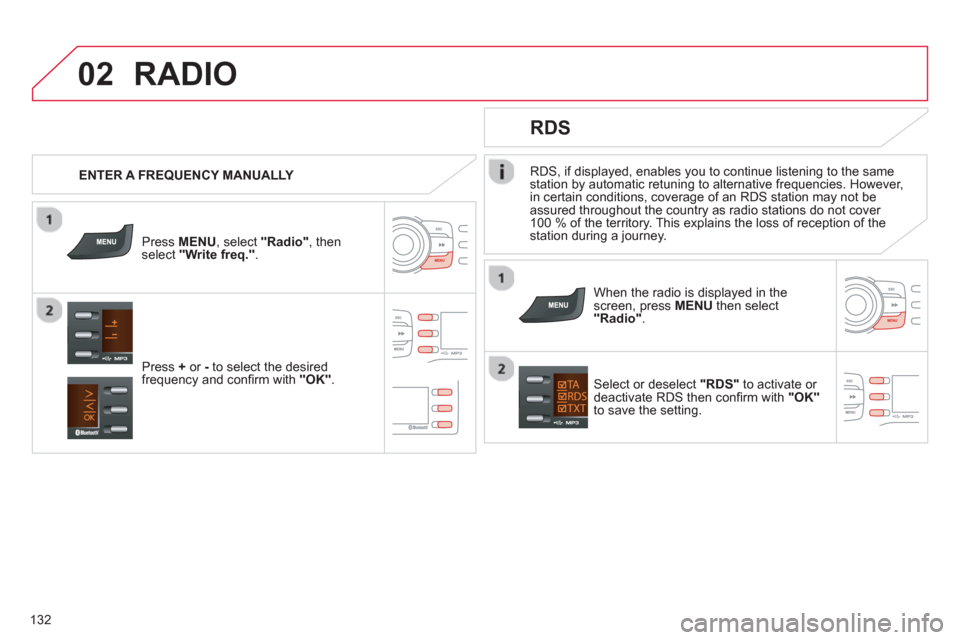
When the radio is displayed in thescreen, press MENUthen select "Radio" .
Select or deselect "RDS"
to activate or deactivate RDS then confi rm with "OK"
to save the setting.
ENTER A FREQUENCY MANUALLY
Press MENU
, select "Radio"
, thenselect "Write freq."
.
Pr
ess + or -
to select the desired
frequency and confi rm with "OK".
Page 135 of 168
02
133
RADIO
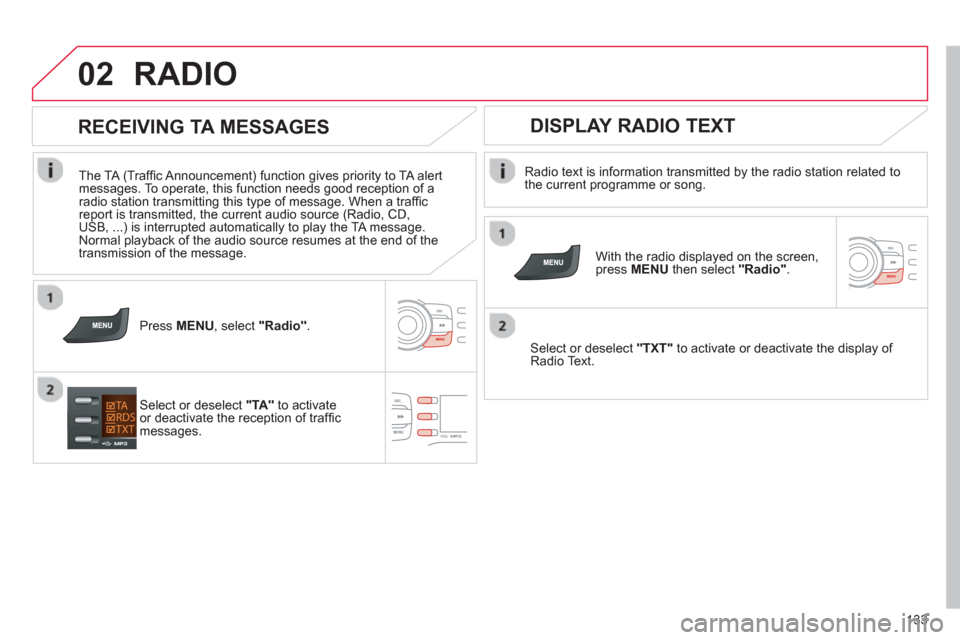
Radio text is information transmitted by the radio station related to
the current programme or song.
With the radio displayed on the screen, press MENUthen select "Radio".
Select or deselect "TXT"to activate or deactivate the display of Radio Text.
DISPLAY RADIO TEXT
RECEIVING TA MESSAGES
The TA (Traffi c Announcement) function gives priority to TA alert messages. To operate, this function needs good reception of a
radio station transmitting this type of message. When a traffi c
report is transmitted, the current audio source (Radio, CD,USB, ...) is interrupted automatically to play the TA message.
Normal playback of the audio source resumes at the end of the
transmission of the message.
Press MENU, select "Radio".
Select or deselect "TA"
to activateor deactivate the reception of traffi cmessages.
Page 136 of 168
03
134
AUDIO
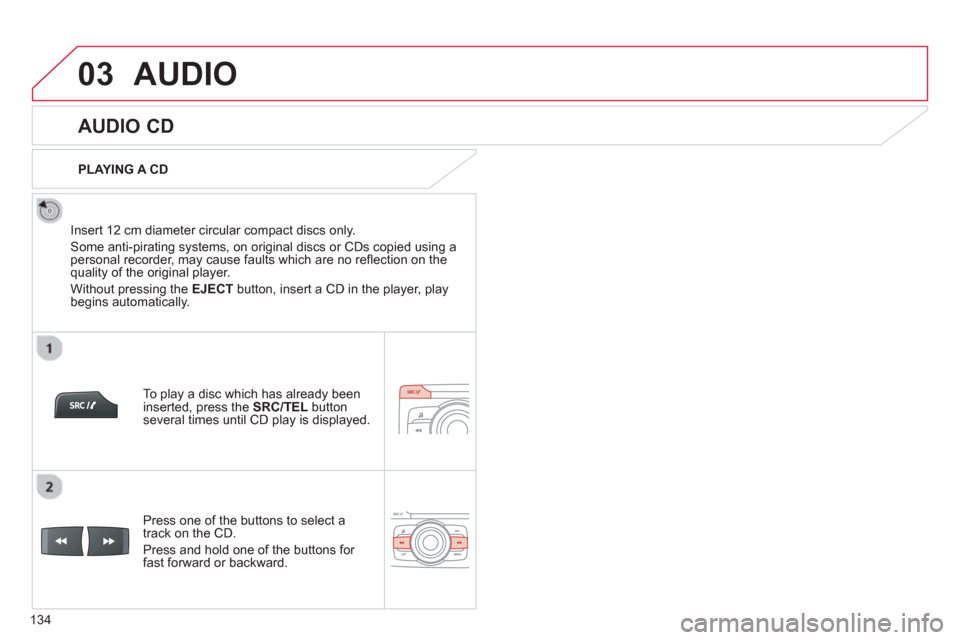
AUDIO CD
Insert 12 cm diameter circular compact discs only.
Some anti-piratin
g systems, on original discs or CDs copied using apersonal recorder, may cause faults which are no refl ection on thequality of the original player.
Without pressing the EJECT
button, insert a CD in the player, playbegins automatically.
To pla
y a disc which has already been
inserted, press the SRC/TEL
button several times until CD play is displayed.
Pr
ess one of the buttons to select a
track on the CD.
Pr
ess and hold one of the buttons for fast forward or backward.
PLAYING A CD
Page 137 of 168
03
135
AUDIO
CD, USB
INFORMATION AND ADVICE
On a single disc, the CD player can read up to 255 MP3 fi les spread
over 8 folder levels with a maximum of 192 folders. However, it is
recommended that this be kept to 2 levels so as to limit the time taken
to access and play the CD.
Durin
g play, the folder structure is not observed.
In order to be able to pla
y a recorded CDR or CDRW, when recordingit is preferable to select standards ISO 9660 level 1.2 or Joliet.
If the disc is recorded in another format, it ma
y not be played correctly.
It is recommended that the same recording standard is always usedfor an individual disc, with as low a speed as possible (4x maximum)for optimum sound quality.
In the particular case o
f a multi-session CD, the Joliet standard is
recommended.
Do not connect a hard disk or U
SB device other than audio players to
the USB port. This may cause damage to your installation.
The audio s
ystem will only play fi les with ".mp3", ".wma", ".wav" and".ogg" extension on USB.
A high compression rate can adversely affect sound quality.
The pla
ylists accepted on CD, MP3, iPod and USB connection are
types ".m3u" and ".wpl".
The number of fi les reco
gnised is limited to 5 000 in 500 folders on a maximum of 8 levels.
Page 138 of 168
03
136
CD, USB
AUDIO
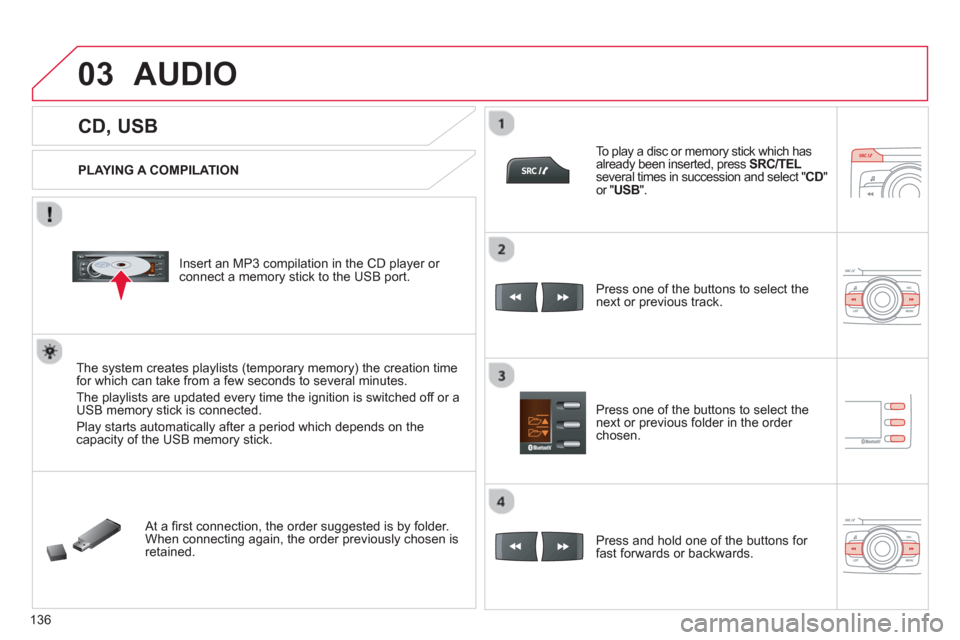
PLAYING A COMPILATION
Insert an MP3 compilation in the CD pla
yer or connect a memory stick to the USB port.
The system creates playlists
(temporary memory) the creation timefor which can take from a few seconds to several minutes.
The pla
ylists are updated every time the ignition is switched off or aUSB memory stick is connected.
Pla
y starts automatically after a period which depends on the capacity of the USB memory stick.
At a fi rst connection, the order suggested is by folder.When connecting again, the order previously chosen is retained.
To pla
y a disc or memory stick which has
already been inserted, press SRC/TELseveral times in succession and select "CD"or "USB".
Press one of the buttons to select the next or previous track.
Pr
ess one of the buttons to select the next or previous folder in the order chosen.
Pr
ess and hold one of the buttons for
fast forwards or backwards.
Page 139 of 168
03
137
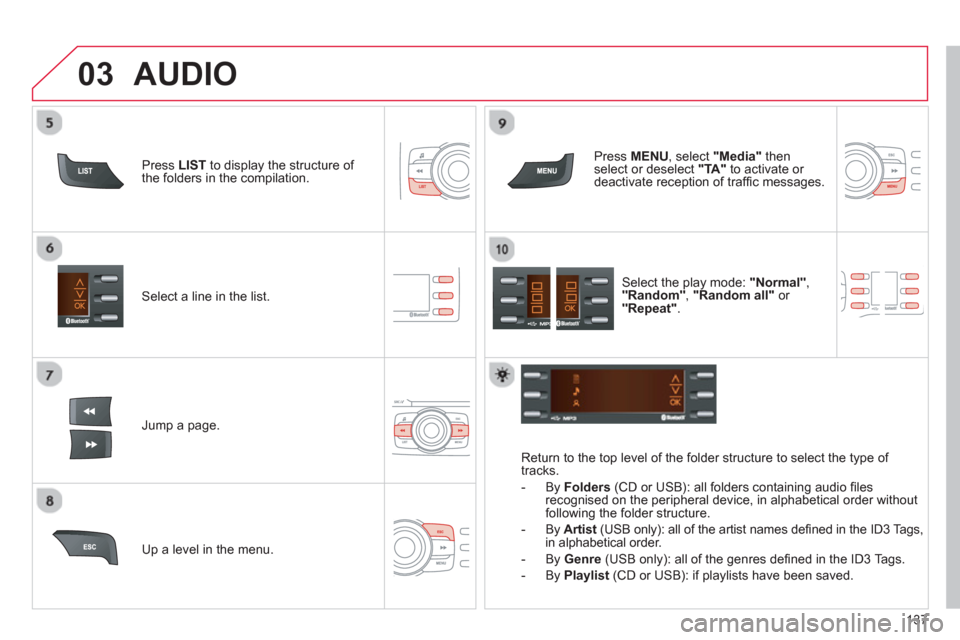
Select a line in the list.
Jump a page.
Pr
ess MENU, select "Media"
thenselect or deselect "TA "
to activate or
deactivate reception of traffi c messages.
U
p a level in the menu.
AUDIO
Return to the top level of the folder structure to select the type of
tracks.
-
By Folders
(CD or USB): all folders containing audio fi les recognised on the peripheral device, in alphabetical order withoutfollowing the folder structure.
- B
y Artist
(USB only): all of the artist names defi ned in the ID3 Tags,
in alphabetical order.
- B
y Genre
(USB only): all of the genres defi ned in the ID3 Tags.
-
By Playlist
(CD or USB): if playlists have been saved.
Pr
ess LISTto display the structure of
the folders in the compilation.
Select the pla
y mode: "Normal" ,"Random" , "Random all"or "Repeat".
Page 140 of 168
03
138
AUDIO
iPod ®
or PORTABLE PLAYER
Management of the device is via the audio system controls; refer to the "CD, USB"section.
The audio
fi les on a Mass Storage portable player *
can
be heard through the vehicle's speakers by connectingit to the USB port (cable not supplied).
The iPod Æ must be updated regularly for the best connection. Æ
The playlists are those defi ned in the iPod®.
The iPod®
must be generation 3 or later.
®
*
Check your player's manual.