audio CITROEN C1 2018 Owners Manual
[x] Cancel search | Manufacturer: CITROEN, Model Year: 2018, Model line: C1, Model: CITROEN C1 2018Pages: 269, PDF Size: 7.63 MB
Page 5 of 269
.
C1_en_Chap00a_sommaire_ed01-2016
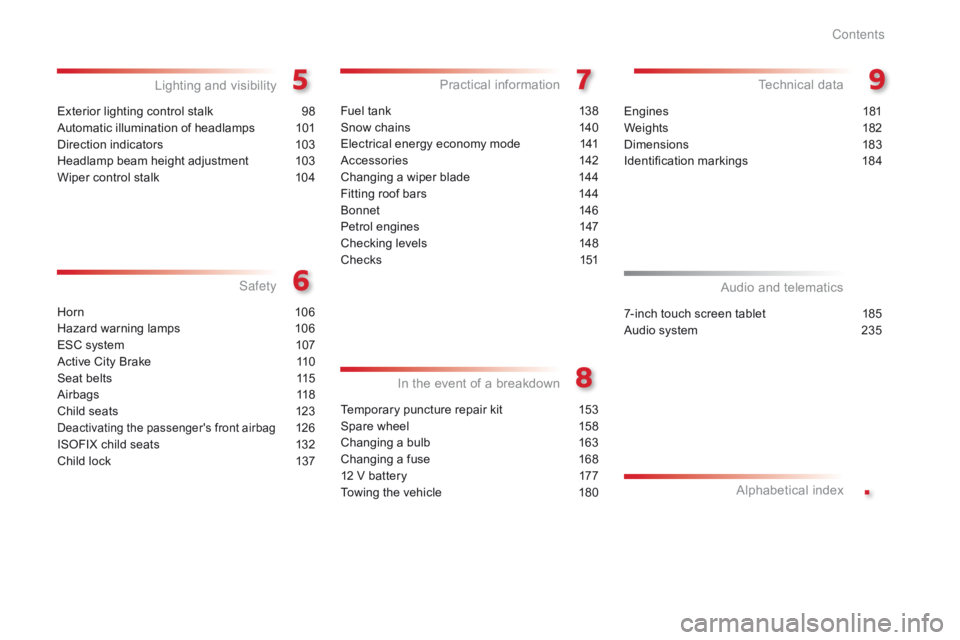
Exterior lighting control stalk 98
Automatic illumination of headlamps
1
01
Direction
indicators
1
03
Headlamp
beam height adjustment
1
03
Wiper
control stalk
1
04
Lighting and v isibility
Horn 10 6
Hazard warning lamps
1
06
ESC
system
1
07
Active
City Brake
1
10
Seat
belts
1
15
Airbags
1
18
Child
seats
1
23
Deactivating the passenger's front airbag 126
ISOFIX
child
seats
1
32
Child
lock
1
37
Safety
In
t
he
e
vent
o
f
a
b
reakdown
Fuel tank 138
Snow chains
1
40
Electrical
energy economy mode
1
41
Accessories
1
42
Changing
a wiper blade
1
44
Fitting
roof bars
1
44
Bonnet
14
6
Petrol
engines
1
47
Checking
levels
1
48
C h e c ks
1
51
Practical information Technical da ta
7-inch touch screen tablet 185
Audio system
2
35
Audio and telematics
Alphabetical
in
dex
Temporary puncture repair kit 1 53
Spare wheel
1
58
Changing
a bulb
1
63
Changing
a fuse
1
68
12
V battery
1
77
Towing
the vehicle
1
80Engines
1
81
Weights
1
82
Dimensions
1
83
Identification
ma
rkings
1
84
Contents
Page 8 of 269
6
C1_en_Chap00b_vue-ensemble_ed01-2016
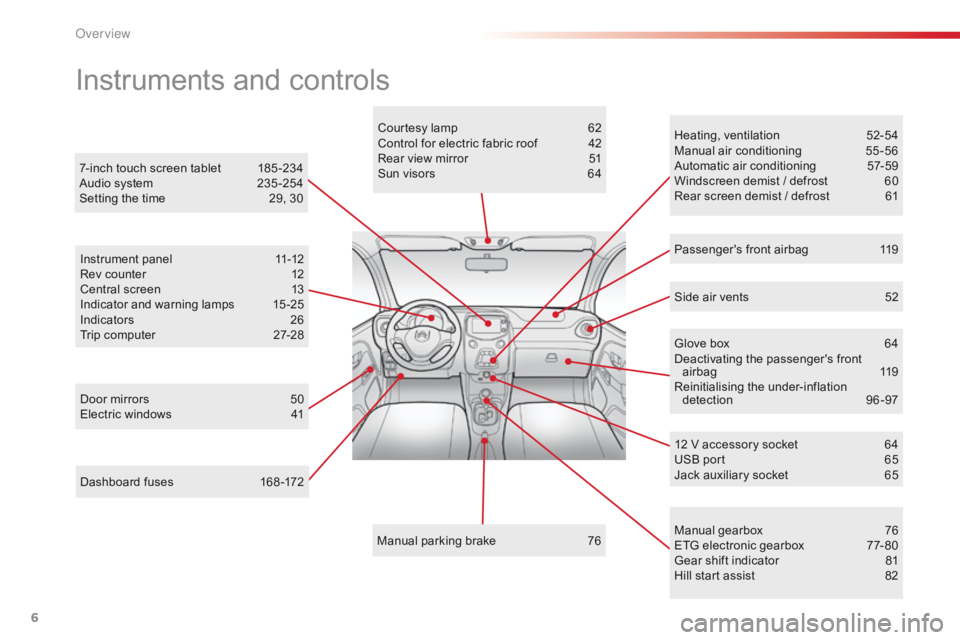
Dashboard fuses 168 -172
Instruments and controls
Door mirrors 5 0
Electric windows 4 1Courtesy
lamp
6
2
Control for electric fabric roof
4
2
Rear view mirror
5
1
Sun visors
6
4
Manual
par
king
b
rake
7
6Heating,
v
entilation
5
2-54
Manual
a
ir
c
onditioning
5
5-56
Automatic air conditioning
5
7-59
Windscreen demist / defrost
6
0
Rear screen demist / defrost
6
1
7-inch touch screen tablet
1
85 -234
Audio system
2
35 -254
Setting the time
2
9, 30
Manual
g
earbox
7
6
ETG
electronic gearbox
7
7- 80
Gear
shift indicator
8
1
Hill
start assist
8
2
12
V accessory socket
6
4
USB
port
6
5
Jack
auxiliary socket
6
5
Instrument
panel
1
1-12
Rev counter
1
2
Central screen
1
3
Indicator and warning lamps
1
5 -25
Indicators
2
6
Trip computer
2
7-28
Side air vents
5
2
Passenger's front airbag
1
19
Glove box
6
4
Deactivating
t
he
p
assenger's
f
ront
ai
rbag
1
19
Reinitialising t he u nder-inflation d
etection 9 6-97
O
Page 9 of 269
7
C1_en_Chap00b_vue-ensemble_ed01-2016
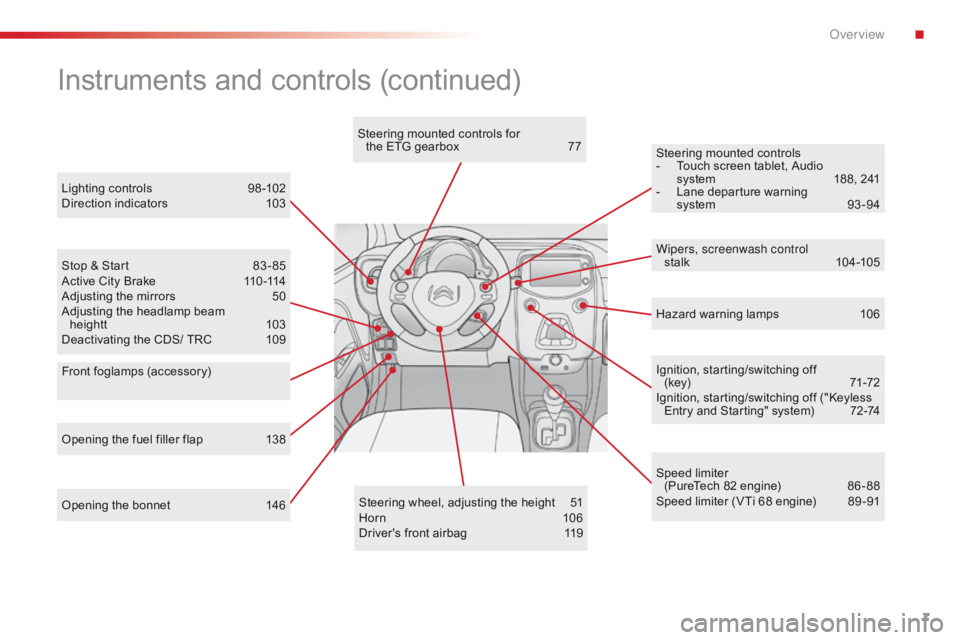
Opening the bonnet 146Steering wheel, adjusting the height 5 1
Horn 10 6
Driver's
front airbag
1
19Ignition,
starting/switching off
(key)
7
1-72
Ignition, starting/switching off ("Keyless
E
ntry and Starting" system)
7
2-74
Steering mounted controls
-
T
ouch screen tablet, Audio
s
ystem
1
88, 241
-
L
ane departure warning
s
ystem
9
3 -94
Instruments and controls (continued)
Lighting controls 9
8 -102
Direction indicators 1 03
Stop
& Start
8
3 - 85
Active
City Brake
1
10 -114
Adjusting
the mirrors
5
0
Adjusting
the headlamp beam
heightt
1
03
Deactivating
the CDS/ TRC
1
09 Wipers, screenwash control
stalk
10
4 -105
Speed
limiter
(PureTech
82 engine)
8
6 - 88
Speed
limiter (VTi 68 engine)
8
9 -91
Opening
the fuel filler flap
1
38 Hazard
warning lamps
1
06
Steering
mounted controls for
the ETG gearbox
7
7
Front foglamps (accessory)
.
Over view
Page 24 of 269
22
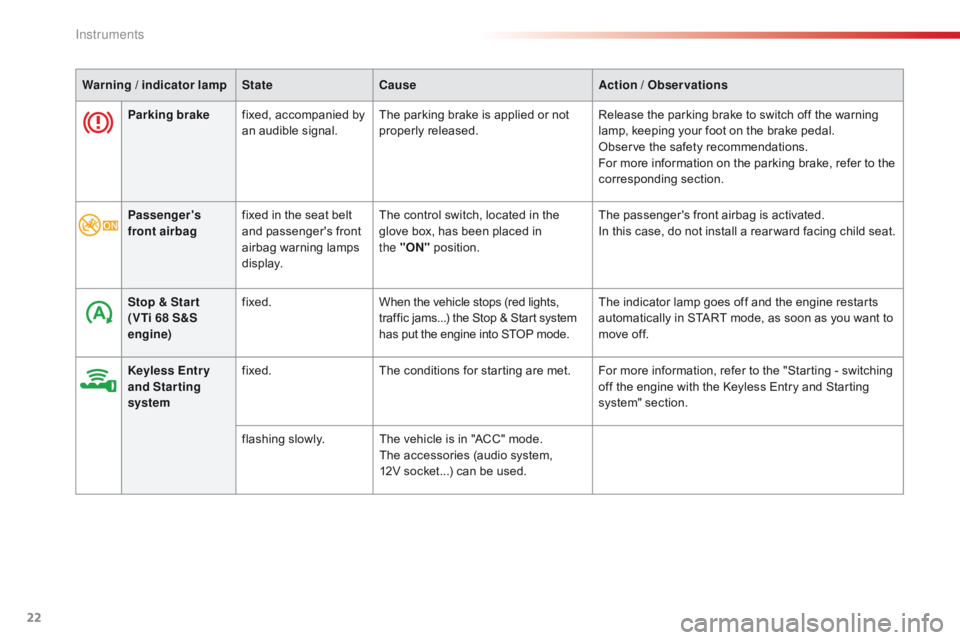
Parking brakefixed, accompanied by a
n audible signal.The
parking brake is applied or not p
roperly r eleased.Release
the parking brake to switch off the warning l
amp, keeping your foot on the brake pedal.
Observe
the safety recommendations.
For
more information on the parking brake, refer to the
c
orresponding
s
ection.
Warning
/ indicator lamp
State Cause Action
/ Observations
Passenger's
front airbag fixed
in the seat belt
a
nd passenger's front
a
irbag
w
arning
lam
ps
d
isplay. The
control switch, located in the
g
love box, has been placed in
t
he "ON"
p
osition.The
passenger's front airbag is activated.
In
this case, do not install a rear ward facing child seat.
Stop & Star t
(VTi 68 S&S
engine) fixed.
When
the vehicle stops (red lights,
t
raffic jams...) the Stop & Start system
h
as put the engine into STOP mode.The
indicator lamp goes off and the engine restarts
a
utomatically in START mode, as soon as you want to
m
ove off.
Keyless Entr y
and Starting
system fixed.
The
conditions for starting are met. For more information, refer to the "Starting - switching
o
ff the engine with the Keyless Entry and Starting
s
ystem" section.
flashing
s
lowly.The
vehicle is in "ACC" mode.
The
accessories (audio system,
1
2V socket...) can be used.
Instruments
Page 31 of 269
29
C1_en_Chap01_instrument- de-bord_ed01-2016
Audio system
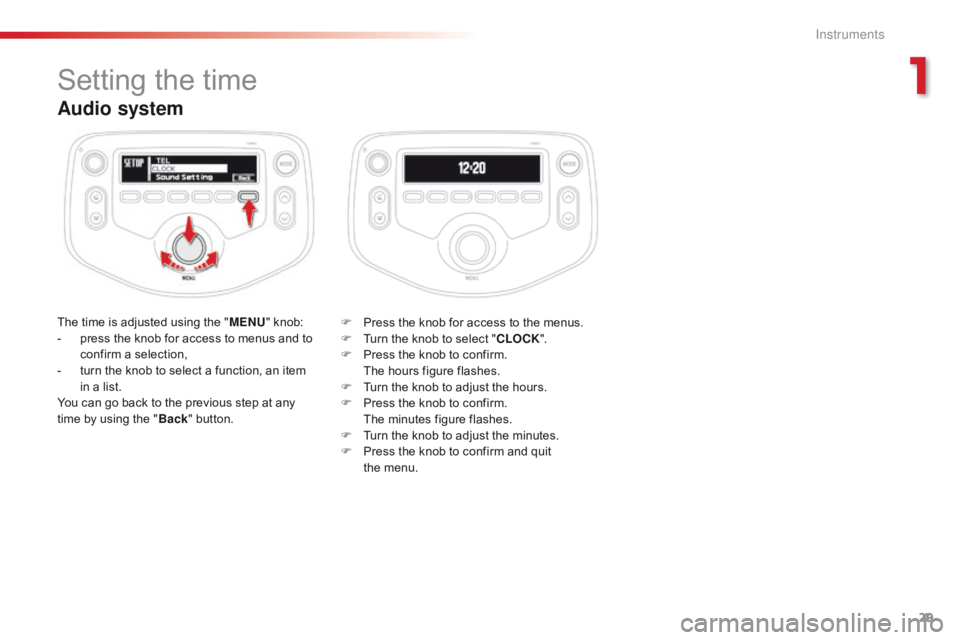
The time is adjusted using the "M ENU" knob:
- p ress the knob for access to menus and to
c
onfirm a selection,
-
t
urn the knob to select a function, an item
i
n a list.
You
can go back to the previous step at any
t
ime by using the "Back "
button. F
P ress the knob for access to the menus.
F
T
urn the knob to select "CLOCK ".
F
P
ress the knob to confirm.
T
he hours figure flashes.
F
T
urn the knob to adjust the hours.
F
P
ress the knob to confirm.
T
he minutes figure flashes.
F
T
urn the knob to adjust the minutes.
F
P
ress the knob to confirm and quit
t
he menu.
Setting the time
1
Instruments
Page 67 of 269
65
C1_en_Chap03_ergonomie-confort_ed01-2016
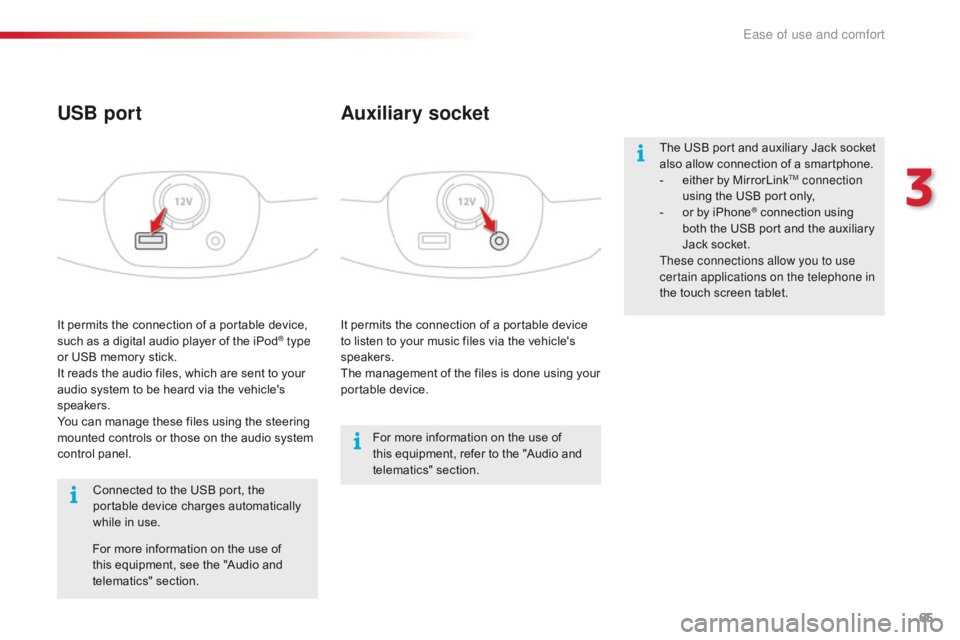
It permits the connection of a portable device to listen to your music files via the vehicle's
s
peakers.
The
management of the files is done using your
p
ortable
d
evice.
It
permits
the
connection
of
a
portable
device,
s
uch
as
a
digital
audio
player
of
the
iPod® type
or
USB
memory
stick.
It
reads
the
audio
files,
which
are
sent
to
your
a
udio
system
to
be
heard
via
the
vehicle's
s
peakers.
You
can
manage
these
files
using
the
steering
m
ounted
controls
or
those
on
the
audio
system
c
ontrol
panel.
Auxiliary socket
USB port
For more information on the use of t
his equipment, refer to the "Audio and
t
elematics"
se
ction.
For
more
information
on
the
use
of
t
his
equipment,
see
the
"Audio
and
t
elematics"
se
ction.
Connected
to
the
USB
port,
the
p
ortable
device
charges
automatically
w
hile
in
use. The
USB port and auxiliary Jack socket
a
lso allow connection of a smartphone.
-
e
ither by MirrorLink
TM connection
using
the
USB
port
only,
-
o
r
by
iPhone
® connection using b
oth
the
USB
port and the auxiliary
J
ack
socket.
These connections allow you to use
certain applications on the telephone in
the
touch
screen
tablet.
3
Ease of use and comfort
Page 73 of 269
71
C1_en_Chap04_conduite_ed01-2016
Starting - switching off the engine with the key
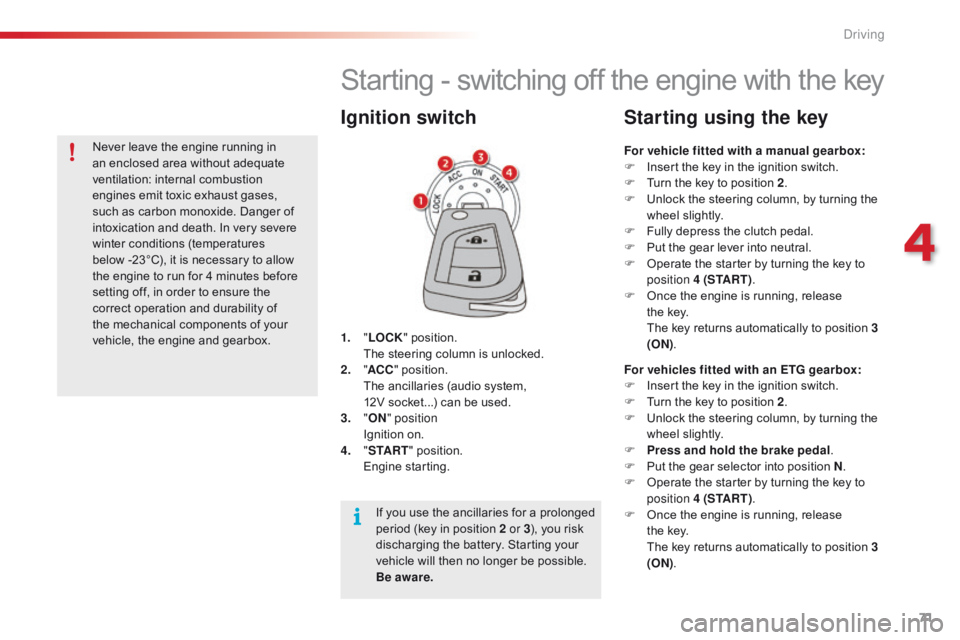
1. "LOCK " position. T
he steering column is unlocked.
2.
" AC
C"
position.
T
he ancillaries (audio system,
1
2V socket...) can be used.
3.
"ON " position
I
gnition on.
4.
" S
TA R T"
position.
E
ngine
s
tarting.
Ignition switch
For vehicle fitted with a manual gearbox:
F I nsert the key in the ignition switch.
F
T
urn the key to position 2.
F
U
nlock the steering column, by turning the
w
heel slightly.
F
F
ully depress the clutch pedal.
F
P
ut the gear lever into neutral.
F
O
perate the starter by turning the key to
p
osition 4 (S TA R T ) .
F
O
nce the engine is running, release
t
he key.
T
he key returns automatically to position 3
(ON) .
Starting using the key
For vehicles fitted with an ETG gearbox:
F
I nsert the key in the ignition switch.
F
T
urn the key to position 2.
F
U
nlock the steering column, by turning the
w
heel slightly.
F
P
ress and hold the brake pedal .
F
P
ut the gear selector into position N.
F
O
perate the starter by turning the key to
p
osition 4 (S TA R T ) .
F
O
nce the engine is running, release
t
he key.
T
he key returns automatically to position 3
(ON) .
If
you
use
the
ancillaries
for
a
prolonged
p
eriod
(key
in
position
2 or 3 ),
you
risk
d
ischarging
the
battery.
Starting
your
v
ehicle
will
then
no
longer
be
possible.
B
e aware.
Never
leave
the
engine
running
in
a
n
enclosed
area
without
adequate
v
entilation:
in
ternal
c
ombustion
e
ngines
emit
toxic
exhaust
gases,
s
uch
as
carbon
monoxide.
Danger
of
i
ntoxication
and
death.
In
very
severe
w
inter
conditions
(temperatures
b
elow -23°C),
it
is
necessary
to
allow
t
he
engine
to
run
for
4
minutes
before
s
etting
off,
in
order
to
ensure
the
c
orrect
operation
and
durability
of
t
he
mechanical
components
of
your
v
ehicle,
the
engine
and
gearbox.
4
Driving
Page 143 of 269
141
C1_en_Chap07_info-pratiques_ed01-2016
Electrical energy economy mode*
System which manages the duration of use of certain functions to conserve a sufficient level of charge in the battery.
After
the engine has stopped, you can still use functions such as the audio system, windscreen
w
ipers, dipped beam headlamps, courtesy lamps, etc. for a maximum combined duration of
t
wenty minutes.
This
period may be greatly reduced if the battery is not fully charged.
Let
the engine run for the duration
s
pecified to ensure that the battery
c
harge is sufficient.
Do
not repeatedly and continuously
r
estart the engine in order to charge the
b
attery.
A
flat battery prevents the engine from
s
tarting.
Refer
to the "Battery" section.
Switching to economy mode
Once this time has elapsed the active functions are put on standby.
Exiting economy mode
These functions are reactivated automatically next time the vehicle is driven.
To restore the use of these functions
immediately,
start the engine and let it run for at
l
east 5 minutes.
*
O
nly on vehicles with the "Keyless Entry and
S
tarting" system.
7
Practical information
Page 144 of 269

142
C1_en_Chap07_info-pratiques_ed01-2016
Accessories
A wide range of accessories and genuine parts is available from the CITROËN dealer network.
T hese accessories and parts are all suitable for your vehicle and benefit from CITROËN's recommendation and warranty.
"Transport solutions":
boot carpet, boot liner,
transverse
roof bars, bicycle carrier, ski carrier,
r
oof boxes, boot dividers, ...
"Styling":
rear diffuser, aluminium gear knob,
a
lloy wheels, exterior expressive stickers,
c
hrome mirror shells, door sill finishers, ...
"Comfort" :
door deflectors, insulated module,
s
un blinds, scented air freshener, portable
a
shtray, coat hanger fitted to head restraint,
r
eading lamp, front and rear parking sensors,
c
entre armrest, cigarette lighter, ..."Security and safety":
anti-theft alarm,
v
ehicle tracking system, snow chains, wheel
n
on-slip covers, wheel security bolts, child
s
eats, first aid kit, warning triangle, high
v
isibility vest, breathalyzer, fire extinguisher,
p
et seat belt, foglamp kit, seat belt cutter/glass
h
ammer,
...
"
Protection":
mats, mud flaps, vehicle cover,
s
eat covers, side protective mouldings, bumper
p
rotectors,
...
T
o prevent the mat from becoming caught
u
nder the pedals:
-
e
nsure that the mat is secured correctly,
-
n
ever fit one mat on top of another."Multimedia":
audio
system, speaker, semi-
integral
navigation systems, hands-free kit,
d
riving assistance systems, 230 V socket, rear
m
ulti-media support, DVD players, portable
s
atellite navigation system, smartphone
s
upport, digital radio, ...
Practical information
Page 172 of 269
170
C1_en_Chap08_en-cas-pannes_ed01-2016
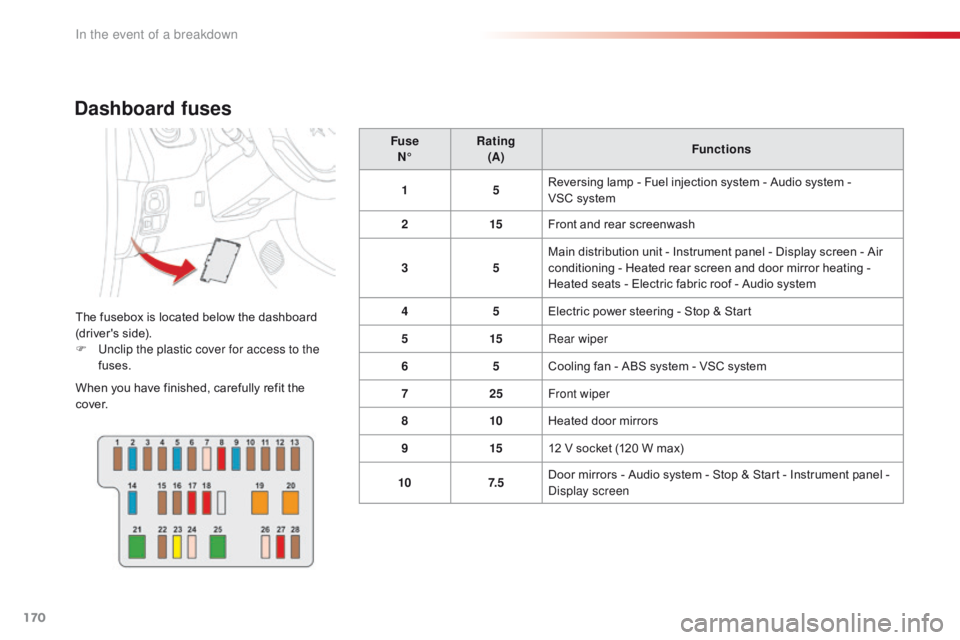
Dashboard fuses
The fusebox is located below the dashboard (driver's side).
F
U
nclip the plastic cover for access to the
fuses.
When
you have finished, carefully refit the
c
ove r. Fuse
N° Rating
(A) Functions
1 5Reversing lamp - Fuel injection system - Audio system -
V
SC system
2 15Front and rear screenwash
3 5Main distribution unit - Instrument panel - Display screen - Air
c
onditioning - Heated rear screen and door mirror heating -
H
eated seats - Electric fabric roof - Audio system
4 5Electric power steering - Stop & Start
5 15Rear wiper
6 5Cooling
fan - ABS system - VSC system
7 25Front wiper
8 10Heated
door mirrors
9 1512
V socket (120 W max)
10 7. 5Door
mirrors - Audio system - Stop & Start - Instrument panel -
D
isplay screen
In the event of a breakdown