tow Citroen C4 CACTUS RHD 2015 1.G Owner's Manual
[x] Cancel search | Manufacturer: CITROEN, Model Year: 2015, Model line: C4 CACTUS RHD, Model: Citroen C4 CACTUS RHD 2015 1.GPages: 326, PDF Size: 8.56 MB
Page 5 of 326
.
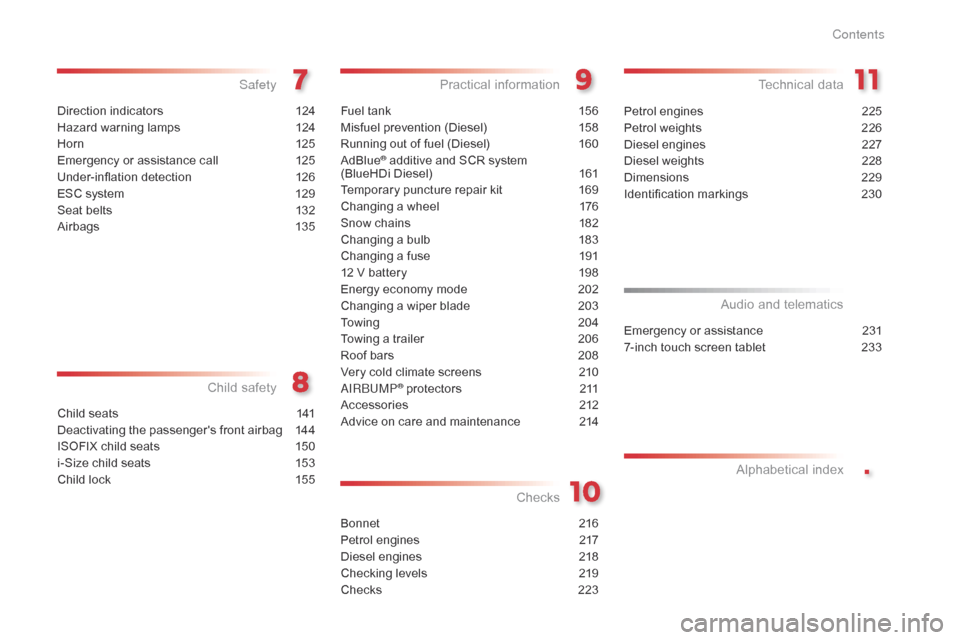
Direction indicators 124
Hazard warning lamps
1
24
H or n
12
5
Emergency
or assistance call
1
25
Under-inflation
d
etection
1
26
ESC
system
1
29
Seat
belts
1
32
Airbags
1
35
Safety
Child seats 1 41
Deactivating the passenger's front airbag
1
44
ISOFIX
child seats
1
50
i-Size
child seats
1
53
Child
lock
1
55
Child safety
Checks
Fuel tank 156
Misfuel prevention (Diesel)
1
58
Running
out of fuel (Diesel)
1
60
AdBlue
® additive and SCR system
(
BlueHDi Diesel) 1 61
Temporary
puncture repair kit
1
69
Changing
a wheel
1
76
Snow
chains
1
82
Changing
a bulb
1
83
Changing
a fuse
1
91
12
V
battery
1
98
Energy
economy mode
2
02
Changing
a wiper blade
2
03
To w i n g
2
0 4
Towing
a trailer
2
06
Roof
bars
2
08
Very
cold climate screens
2
10
aI
R
b
UM
P
® protectors 2 11
Accessories
2
12
Advice
on
care and maintenance
2
14
Practical information Technical da ta
Emergency or assistance 231
7-inch touch screen tablet
2
33
Audio and telematics
Alphabetical
in
dex
Bonnet 2 16
Petrol engines
2
17
Diesel
engines
2
18
Checking
levels
2
19
Checks
2
23Petrol
engines
2
25
Petrol weights
2
26
Diesel engines
2
27
Diesel weights
2
28
Dimensions
2
29
Identification
ma
rkings
2
30
Contents
Page 6 of 326
4
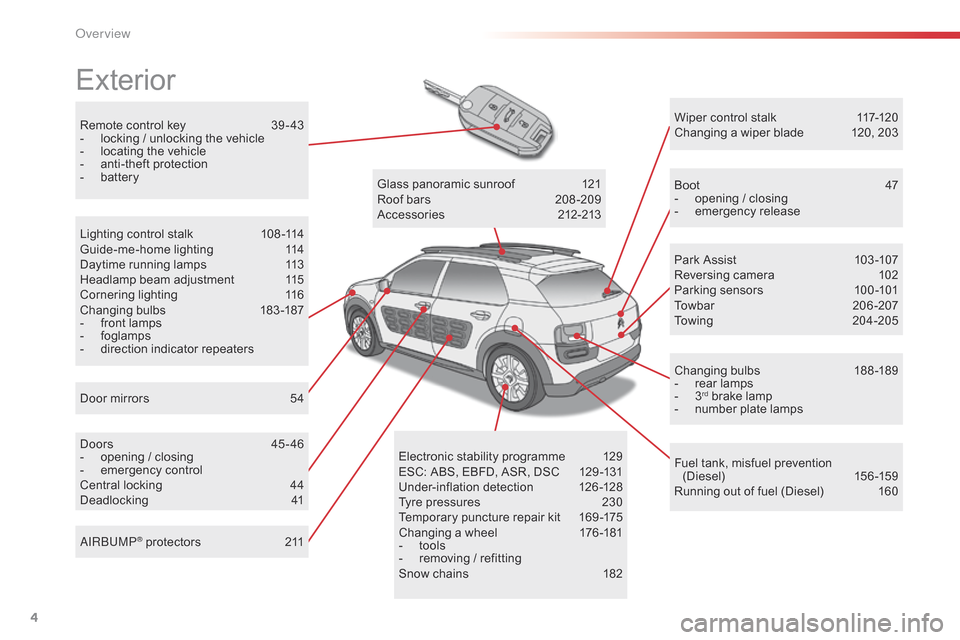
Remote control key 39 - 43
- l ocking / unlocking the vehicle
-
l
ocating the vehicle
-
a
nti-theft protection
-
b
attery
Exterior
Door mirrors 5 4
Lighting control stalk
1
08 -114
Guide-me-home lighting
1
14
Daytime running lamps
1
13
Headlamp beam adjustment
1
15
Cornering lighting
1
16
Changing
bu
lbs
1
83-187
-
f
ront lamps
-
fo
glamps
-
d
irection indicator repeaters
Doors
4
5 - 46
-
o
pening / closing
-
em
ergency
c
ontrol
Central
locking
4
4
Deadlocking
4
1Glass
panoramic sunroof
1
21
Roof bars
2
08 -209
Accessories
2
12-213
Wiper control stalk
1
17-120
Changing a wiper blade
1
20, 203
Boot
4
7
-
o
pening / closing
-
em
ergency
r
elease
Park Assist
1
03 -107
Reversing camera
1
02
Parking sensors
1
00 -101
Towbar
20
6-207
Towing
20
4-205
Changing
bu
lbs
1
88-189
- r ear lamps
- 3rd brake lamp
-
n
umber plate lamps
Fuel
tank, misfuel prevention
(
Diesel)
15
6 -159
Running
out of fuel (Diesel)
1
60
Electronic
s
tability
pro
gramme
1
29
ESC:
ABS,
EBFD,
ASR,
DSC
1
29 -131
Under-inflation
d
etection
1
26-128
Tyre
pressures
2
30
Temporary
puncture
repair
kit
1
69 -175
Changing
a
wheel
1
76 -181
-
t
ools
-
r
emoving
/
refitting
Snow
chains
1
82
aI
R
b
UM
P
® protectors 2 11
over view
Page 11 of 326
9
Optimise the use of your gearbox
With a manual gearbox, move off gently and change up without waiting. During acceleration change up early.
The
gear efficiency indicator invites you engage the most suitable gear:
a
s soon as the indication is displayed in the instrument panel, follow it
s
traight away.
Control the use of your electrical
equipment
Before moving off, if the passenger compartment is too warm, ventilate it by opening the windows and air vents before using the air conditioning.
Above
30 mph (50 km/h), close the windows and leave the air vents
ope
n.
Remember
to make use of equipment that can help keep the
t
emperature in the passenger compartment down (sunroof and window
b
linds...).
To
save energy, do not set the air conditioning at too low a temperature.
As
soon as the desired temperature has been reached, limit the use of
t
he air conditioning, except if regulation is automatic.
Switch
off the demisting and defrosting controls as soon as you consider
p
ossible.
Switch
off the heated seat as soon as possible.
Switch
off the headlamps and foglamp when the level of light does not
r
equire their use.
Avoid
running the engine before moving off, particularly in winter; your
v
ehicle will warm up much faster while driving.
As
a passenger, if you avoid connecting your multimedia devices
(
film, music, video game...), you will contribute towards limiting the
c
onsumption of electrical energy, and so of fuel.
Disconnect
your portable devices before leaving the vehicle.
Eco-driving
Eco-driving is a range of everyday practices that allow the motorist to optimise their fuel consumption and CO2 emissions.
With
an
electronic
gearbox,
do
not
press
the
accelerator
pedal
heavily
o
r
s
uddenly.
Drive smoothly
Maintain a safe distance between vehicles, use engine braking rather t han the brake pedal, and press the accelerator progressively. These
p
ractices contribute towards a reduction in fuel consumption and CO
2
emissions
and
also
help
reduce
the
background
traffic
noise.
If
your
vehicle
has
cruise
control,
make
use
of
the
system
at
speeds
a
bove
25
mph
(40
km/h)
when
the
traffic
is
flowing
well.
.
Eco-driving
Page 15 of 326
13
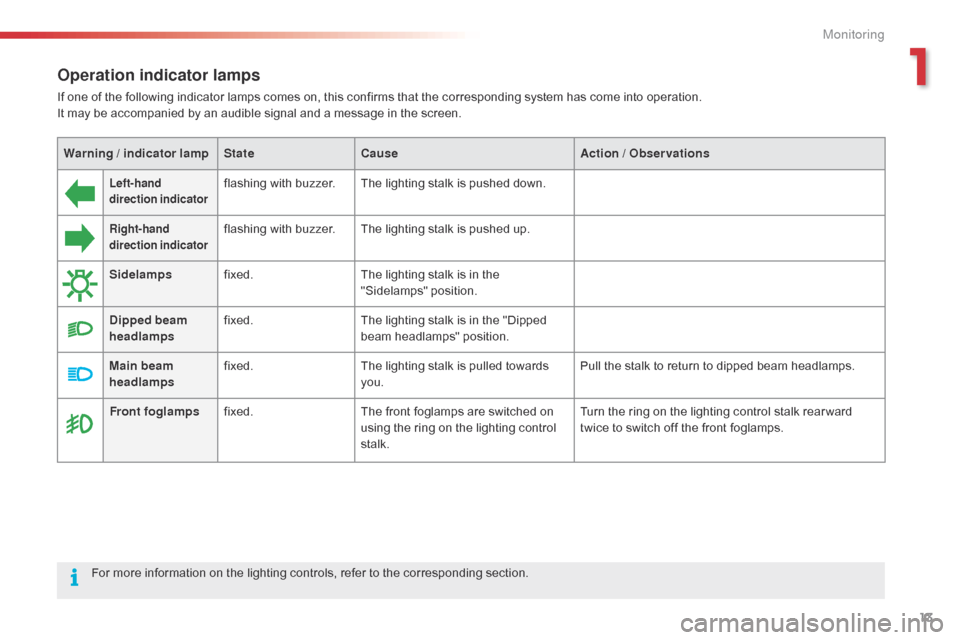
Operation indicator lamps
If one of the following indicator lamps comes on, this confirms that the corresponding system has come into operation.
I t may be accompanied by an audible signal and a message in the screen.
Left-hand
direction indicatorflashing with buzzer.The lighting stalk is pushed down.
Right-hand
direction indicatorflashing with buzzer.The lighting stalk is pushed up.
Sidelamps fixed. The
lighting stalk is in the
"
Sidelamps"
p
osition.
Dipped beam
headlamps fixed.
The
lighting stalk is in the "Dipped
b
eam headlamps" position.
Main beam
headlamps fixed.
The
lighting stalk is pulled towards
yo
u. Pull
the stalk to return to dipped beam headlamps.
Front foglamps fixed. The
front foglamps are switched on
u
sing the ring on the lighting control
st
alk. Turn
the ring on the lighting control stalk rear ward
t
wice to switch off the front foglamps.
For
more
information
on
the lighting controls, refer to the corresponding section.
Warning / indicator lamp
StateCause Action / Observations
1
Monitoring
Page 23 of 326

21
Low fuel levelfixed, accompanied by a
n audible signal and
a
message. When
it first comes on there remains a
pproximately 5 litres of fuel in the
tank.
You
are then using the fuel reserve.You
must refuel as soon as possible to avoid running o
ut of fuel.
Until
sufficient fuel is added, this warning lamp will
c
ome on every time the ignition is switched on,
a
ccompanied by an audible signal and a message.
This
audible signal and message are repeated with
i
ncreasing frequency as the drops towards "0".
Fuel
t
ank
c
apacity:
-
Pe
trol: approximately 50 litres.
-
D
iesel: approximately 45 or 50 litres (depending
o
n version).
Never
continue to drive until you run out of fuel as
t
his could damage the emission control and injection
s
ystems.
Seat belt(s)
not fastened /
unfastened fixed
or
flashing
a
ccompanied by an
a
udible
s
ignal.A
seat belt has not been fastened or
h
as been unfastened.Pull
the strap then insert the tongue in the buckle.
Airbags on
temporarily. This lamp comes on for a few
s
econds when you turn on the
i
gnition, then goes off.This
lamp should go off when the engine is started.
If
it does not go off, contact a CITROËN dealer or a
q
ualified
w
orkshop.
fixed. One
of the airbag or seat belt
p
retensioner systems has a fault.Have
it checked by a CITROËN dealer or a qualified
w
orkshop.
Warning / indicator lamp
StateCause Action / Observations
1
Monitoring
Page 48 of 326
46
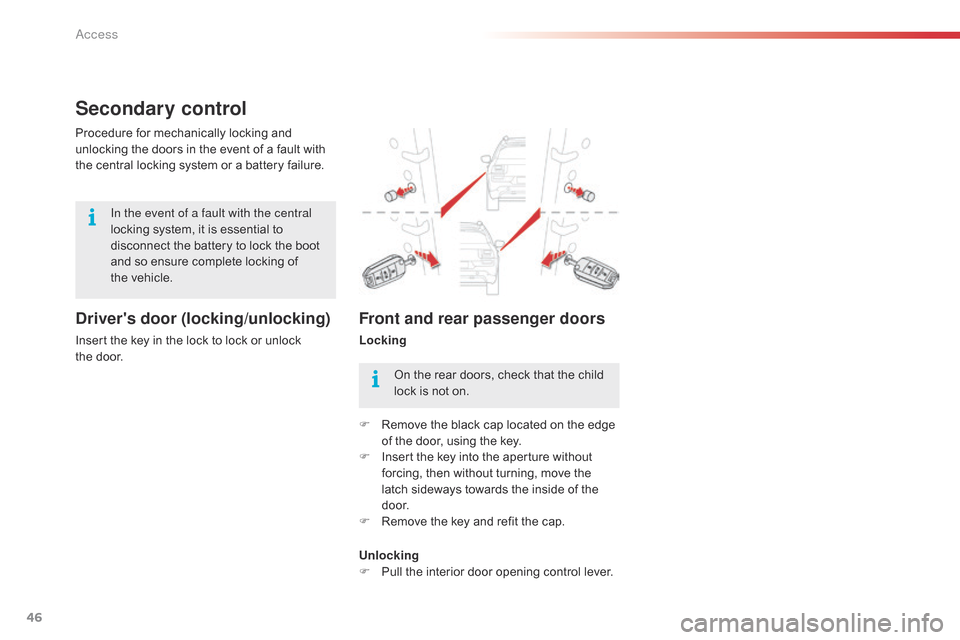
Secondary control
Driver's door (locking/unlocking)
Insert the key in the lock to lock or unlock the door.
Procedure
for mechanically locking and
u
nlocking the doors in the event of a fault with
t
he central locking system or a battery failure.
Front and rear passenger doors
Locking
In the event of a fault with the central
locking
system,
it
is
essential
to
d
isconnect
the
battery
to
lock
the
boot
a
nd
so
ensure
complete
locking
of
t
he vehicle.
On the rear doors, check that the child
l
ock is not on.
F
R
emove the black cap located on the edge
o
f the door, using the key.
F
I
nsert the key into the aperture without
f
orcing, then without turning, move the
l
atch sideways towards the inside of the
d
o o r.
F
R
emove the key and refit the cap.
Unlocking
F
P
ull the interior door opening control lever.
Access
Page 55 of 326
53
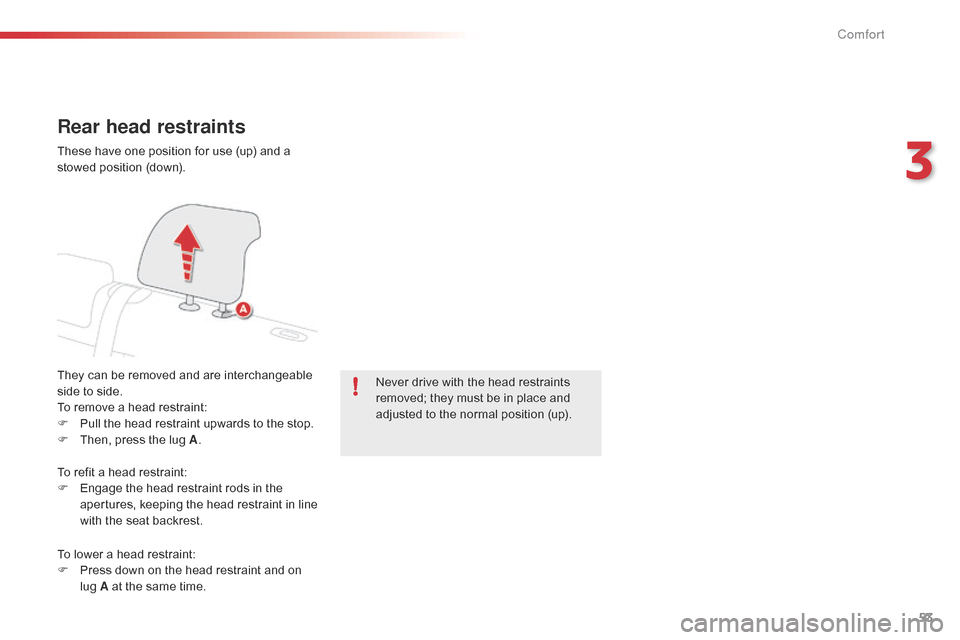
Rear head restraints
They can be removed and are interchangeable side to side.
To
remove a head restraint:
F
P
ull the head restraint upwards to the stop.
F
T
hen, press the lug A. Never
drive with the head restraints
r
emoved; they must be in place and
a
djusted to the normal position (up).
These
have one position for use (up) and a
s
towed position (down).
To refit a head restraint:
F
E
ngage the head restraint rods in the
a
pertures,
k
eeping
t
he
h
ead
r
estraint
i
n
l
ine
w
ith the seat backrest.
To
lower a head restraint:
F
P
ress down on the head restraint and on
l
ug A at the same time.
3
Comfort
Page 56 of 326
54
Mirrors
Each fitted with an adjustable mirror glass providing the lateral rear ward vision necessary
f
or overtaking or parking. They can also be
f
olded for parking in confined spaces.
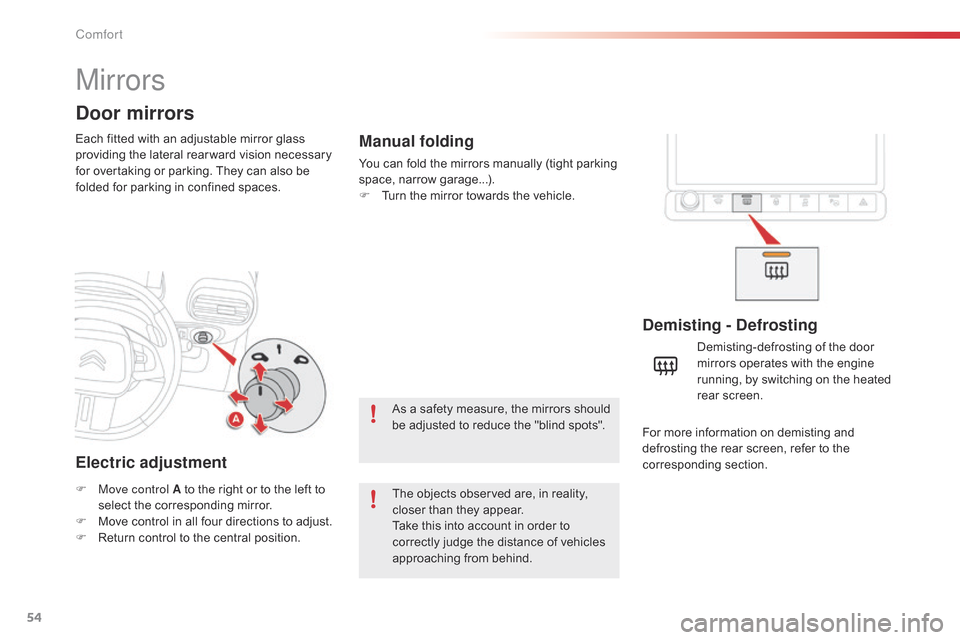
Door mirrors
Demisting - Defrosting
F Move control A to the right or to the left to s
elect the corresponding mirror.
F
M
ove control in all four directions to adjust.
F
R
eturn control to the central position. Demisting-defrosting
of the door
m
irrors operates with the engine
r
unning, by switching on the heated
re
ar
sc
reen.
Electric adjustment
The objects observed are, in reality, c
loser than they appear.
Take
this into account in order to
c
orrectly judge the distance of vehicles
a
pproaching from behind.
Manual folding
You can fold the mirrors manually (tight parking space, nar row g arage...).
F
T
urn the mirror towards the vehicle.
As
a safety measure, the mirrors should
b
e adjusted to reduce the "blind spots".For
more information on demisting and
d
efrosting the rear screen, refer to the
c
orresponding
s
ection.
Comfort
Page 60 of 326

58
In order for these systems to be fully effective, follow the operation and maintenance guidelines belo w:
F
T
o obtain an even air distribution, take care not to obstruct the exterior air intake grilles
l
ocated at the base of the windscreen, the nozzles, the vents and the air outlets, as well
a
s the air extractor located in the boot.
F
D
o not cover the sunshine sensor, located on the dashboard; this is used for regulation
o
f the air conditioning system.
F
O
perate the air conditioning system for at least 5 to 10 minutes, once or twice a month
t
o keep it in per fect working order.
F
E
nsure that the passenger compartment filter is in good condition and have the filter
e
lements replaced regularly.
W
e recommend the use of a combined passenger compartment filter. Thanks to its
s
pecial active additive, it contributes to the purification of the air breathed by the
o
ccupants and the cleanliness of the passenger compartment (reduction of allergic
s
ymptoms, bad odours and greasy deposits).
F
T
o ensure correct operation of the air conditioning system, you are also advised to have
i
t checked regularly as recommended in the maintenance and warranty guide.
F
I
f the system does not produce cold air, switch it off and contact a CITROËN dealer or a
q
ualified
w
orkshop.
Recommendations for ventilation and air conditioning
If after an extended stop in sunshine, the i nterior t emperature i s v ery h igh, f irst
v
entilate the passenger compartment for
a
few moments.
Put
the air flow control at a setting high
e
nough to quickly change the air in the
p
assenger
c
ompartment.
The
air conditioning system does not
c
ontain chlorine and does not present
a
ny danger to the ozone layer.
The
condensation created by the air
c
onditioning results in a discharge
o
f water under the vehicle which is
p
er fectly normal.
When
towing
the
maximum
load
on
a
steep
gradient
in
high
temperatures,
switching
off
the
a
ir
conditioning
increases
the
available
engine
power
and
so
improves
the
towing
ability.
Stop & Start
The heating and air conditioning s ystems only work when the engine
i
s running. To maintain a comfortable
t
emperature in the passenger
c
ompartment, you can temporarily
d
eactivate the Stop & Start system (see
t
he corresponding section).
Comfort
Page 69 of 326

67
Front demist - defrost
Switching onWith Stop & Start, when demisting has been activated, the STOP mode is not
a
vailable.
F
P
ress
this
button
to
demist
or
d
efrost
the
windscreen
and
side
w
indows
as
quickly
as
possible.
T
he
indicator
lamp
in
the
button
c
omes
on.
The
system
automatically
manages
the
air
c
onditioning
(depending
on
version),
air
f
low
and
air
intake,
and
provides
optimum
d
istribution
towards
the
windscreen
and
side
w
indows.
Switching off
F To switch off demisting, press t
his button again, the indicator
l
amp goes off.
3
Comfort