display Citroen C4 PICASSO RHD 2013 1.G User Guide
[x] Cancel search | Manufacturer: CITROEN, Model Year: 2013, Model line: C4 PICASSO RHD, Model: Citroen C4 PICASSO RHD 2013 1.GPages: 420, PDF Size: 9.66 MB
Page 37 of 420
1
35
Monitoring
instrument panel, by choosing:
- a colour scheme,
- a display mode.
Choosing a colour scheme
It depends on the colour scheme chosen for
the touch screen tablet. To modify it with the
vehicle stationary: �) select the "Configuration
" menu of the
touch screen tablet,
�) press the "Color schemes" button,�)
choose a colour scheme, �)
confirm.
The system restar ts to take account of the
m
odifications to the touch screen tablet
and the instrument panel. Each mode corresponds to the t
ype of
information displa
yed in the configurable area.
Personalisation of
the type 2 instrument panel
Displa
y zones
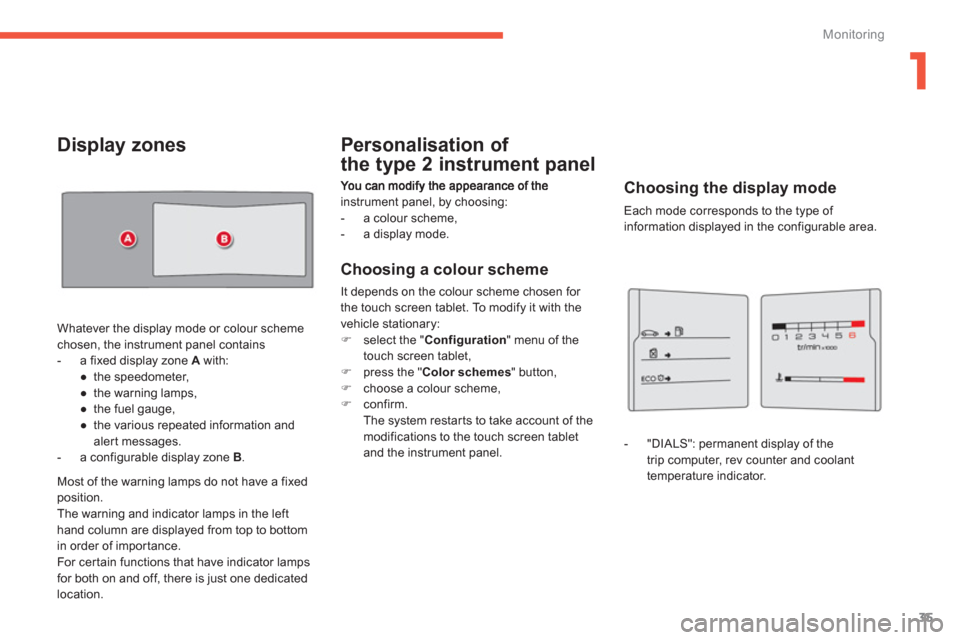
Whatever the display mode or colour scheme chosen, the instrument panel contains
- a fixed display zone A
with:
●
the speedometer,
●
the warning lamps,
●
the
fuel gauge,
●
the various repeated information and
alert messages.
- a configurable display zone B .
Choosing the display mode
- "DIALS": permanent display of the
trip computer, rev counter and coolant
temperature indicator.
Most of the warnin
g lamps do not have a fixedposition.
The warning and indicator lamps in the lefthand column are displayed from top to bottom
in order of importance.
For cer tain functions that have indicator lamps for both on and off, there is just one dedicated
location.
Page 38 of 420
36
Monitoring
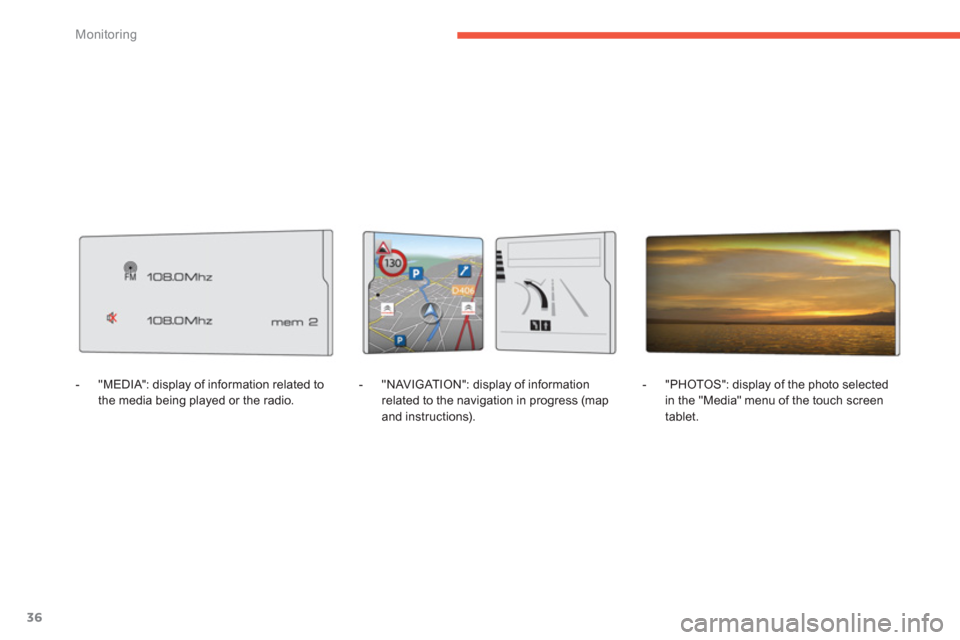
- "MEDIA": display of information related to
the media being played or the radio.
- "NAVIGAT ION": display of information
related to the navigation in progress (map
and instructions).
- "PH
OTOS": display of the photo selected
in the "Media" menu of the touch screen
tablet.
Page 39 of 420
1
37
Monitoring
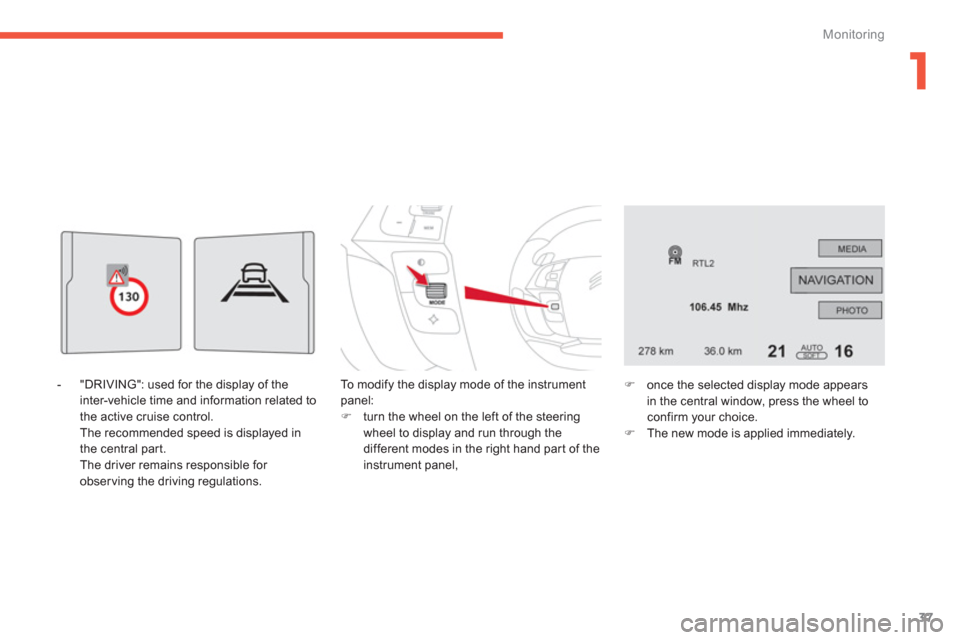
- "DRIVING": used for the display of the
inter-vehicle time and information related tothe active cruise control.
The recommended speed is displayed in
the central part.
The driver remains responsible fo
r
observing the driving regulations. To m o d i
fy the display mode of the instrument panel:�) turn the wheel on the left of the steering
wheel to display and run through the
different modes in the right hand part of the
instrument panel,
�) once the selected display mode appearsin the central window, press the wheel to confirm your choice. �)
The new mode is applied immediately.
Page 45 of 420
1
43
Monitoring
Deactivation indicator lamps
If one of the following indicator lamps comes on, this confirms that the corresponding system has been switched off intentionally.
This is may be accompanied by an audible signal and the display of a message.
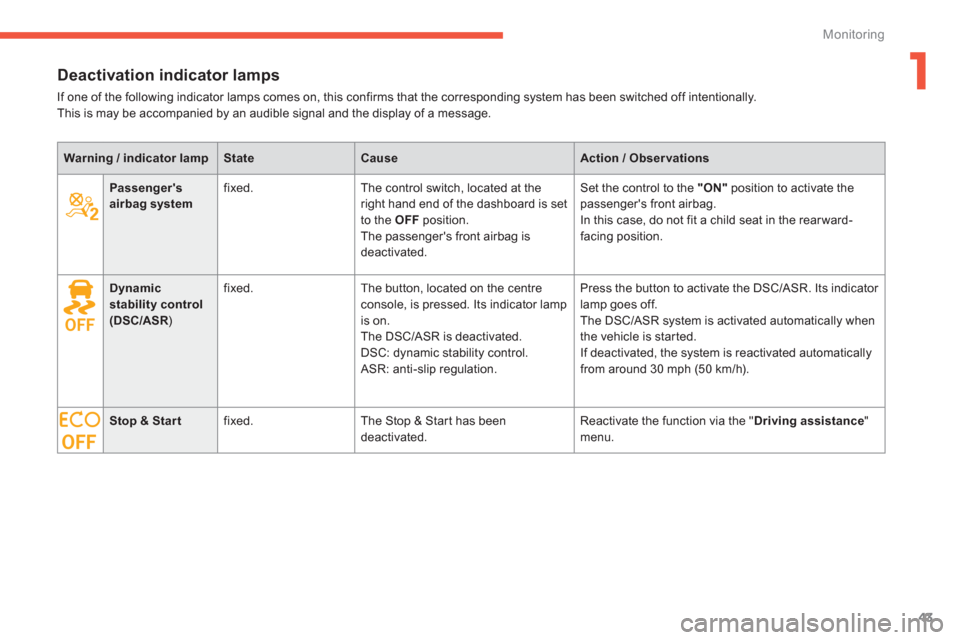
Warning / indicator lampStateCauseAction / Observations
Passenger's airbag system
fixed. The control switch, located at the
right hand end of the dashboard is set
to the OFFposition.
The passen
ger's front airbag is deactivated.
Set the control to the "ON"position to activate the passenger's front airbag.
In this case, do not fit a child seat in the rear ward-
facing position.
Dynamic stability control(DSC/ASR)R
fixed. The button, located on the centre console, is pressed. Its indicator lamp is on.
The DSC/ASR is deactivated.
DSC: dynamic stability control.
ASR: anti-slip regulation. Press the button to activate the D
SC/ASR. Its indicator
lamp goes off.
The DSC/ASR system is activated automatically when
the vehicle is started.
If deactivated, the system is reactivated automaticallyfrom around 30 mph (50 km/h).
Stop & Start
fixed. The Stop & Star t has been
deactivated. R
eactivate the function via the " Driving assistance"
menu.
Page 53 of 420
1
51
Monitoring
Service indicator
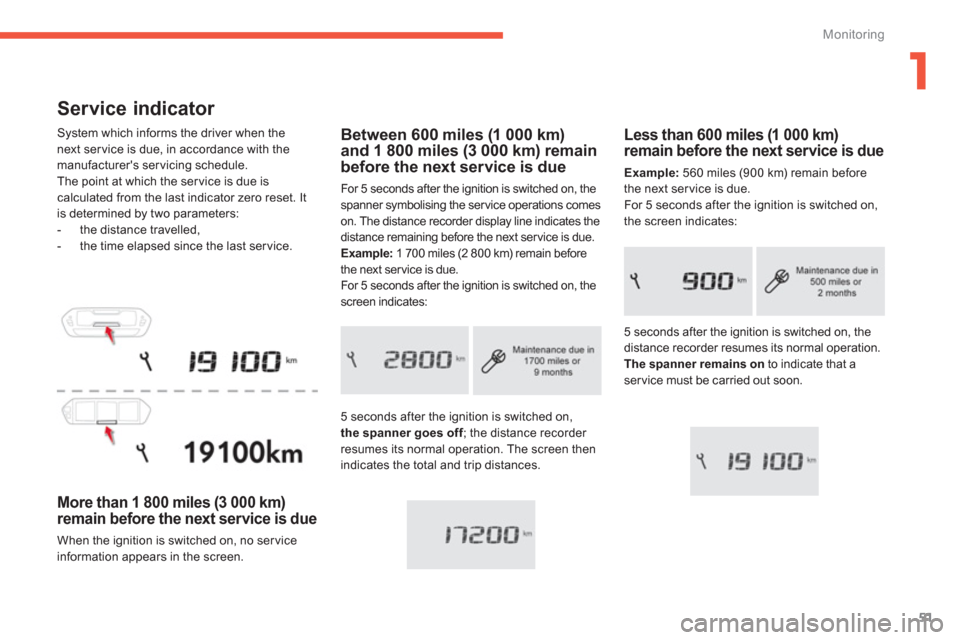
System which informs the driver when the next ser vice is due, in accordance with themanufacturer's servicing schedule.
The point at which the ser vice is due is
calculated from the last indicator zero reset. It
is determined by two parameters:
- the distance travelled,
- the time elapsed since the last service.
More than 1 800 miles (3 000 km)
remain before the next service is due
When the ignition is switched on, no ser vice
information appears in the screen.
Less than 600 miles (1 000 km)remain before the next service is due
Example:560 miles (900 km) remain before
the next service is due.
For 5 seconds after the ignition is switched on,
the screen indicates:
Between 600 miles (1 000 km)and 1 800 miles (3 000 km) remainbefore the next service is due
For 5 seconds after the ignition is switched on, the
spanner symbolising the ser vice operations comes
on. The distance recorder display line indicates the
distance remaining before the next ser vice is due.
Example:
1 700 miles (2 800 km) remain before
the next service is due.
For 5 seconds after the ignition is switched on, thescreen indicates:
5 seconds a
fter the ignition is switched on,the spanner goes off; the distance recorder fresumes its normal operation. The screen thenindicates the total and trip distances. 5 seconds a
fter the ignition is switched on, the distance recorder resumes its normal operation.
The spanner remains onto indicate that aservice must be carried out soon.
Page 54 of 420
52
Monitoring
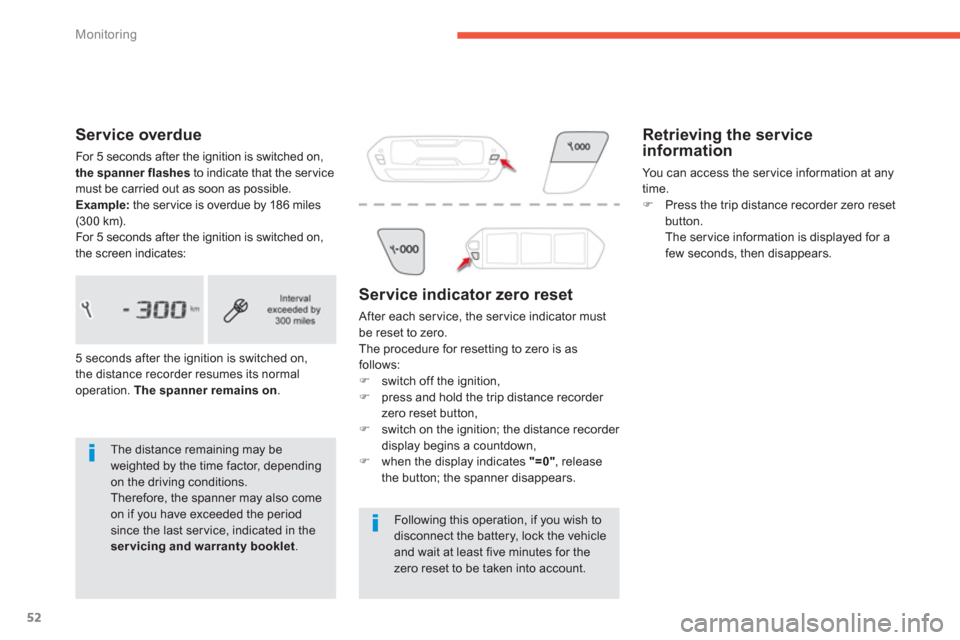
Service overdue
For 5 seconds after the ignition is switched on,
the spanner flashesto indicate that the service must be carried out as soon as possible. Example:the ser vice is overdue by 186 miles (300 km).
For 5 seconds after the ignition is switched on,
the screen indicates:
The distance remaining may be weighted by the time factor, dependingon the driving conditions. Therefore, the spanner may also comeon if you have exceeded the period since the last service, indicated in the servicing and warranty booklet.
5 seconds after the ignition is switched on,
the distance recorder resumes its normal
operation. The spanner remains on.
Service indicator zero reset
After each ser vice, the ser vice indicator mustbe reset to zero.
The procedure for resetting to zero is as
follows: �) switch off the ignition,�)
press and hold the trip distance recorder
zero reset button,�) switch on the ignition; the distance recorder display begins a countdown, �)
when the display indicates "=0", release
the button; the spanner disappears.
Following this operation, if you wish to disconnect the battery, lock the vehicle and wait at least five minutes for the zero reset to be taken into account.
Retrieving the serviceinformation
You can access the ser vice information at anytime. �)Press the trip distance recorder zero reset button.
The ser vice information is displayed for afew seconds, then disappears.
Page 56 of 420
54
Monitoring
Distance recorders
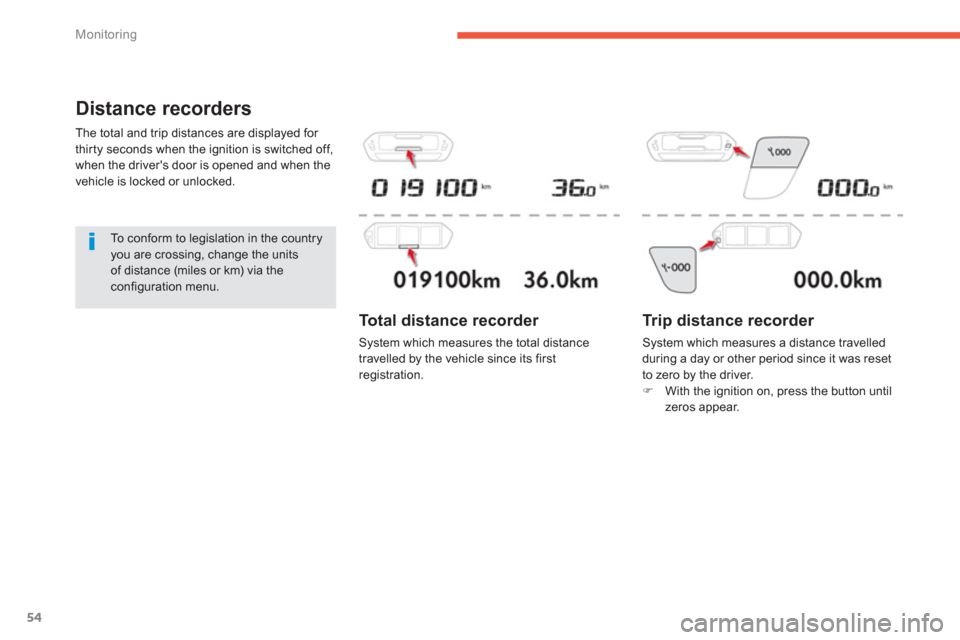
The total and trip distances are displayed for
thirty seconds when the ignition is switched off,
when the driver's door is opened and when the
v
ehicle is locked or unlocked.
To c o nform to legislation in the country you are crossing, change the units of distance (miles or km) via theconfiguration menu.
Trip distance recorder
System which measures a distance travelled
during a day or other period since it was reset
to zero by the driver.�)With the ignition on, press the button until
zeros appear.
Total distance recorder
System which measures the total distance
travelled by the vehicle since its first registration.
Page 60 of 420
58
Monitoring
Tr i p c o m p u t e r
Type 1 instrument panel
System that gives you information on the journey in progress (range, fuel consumption…).
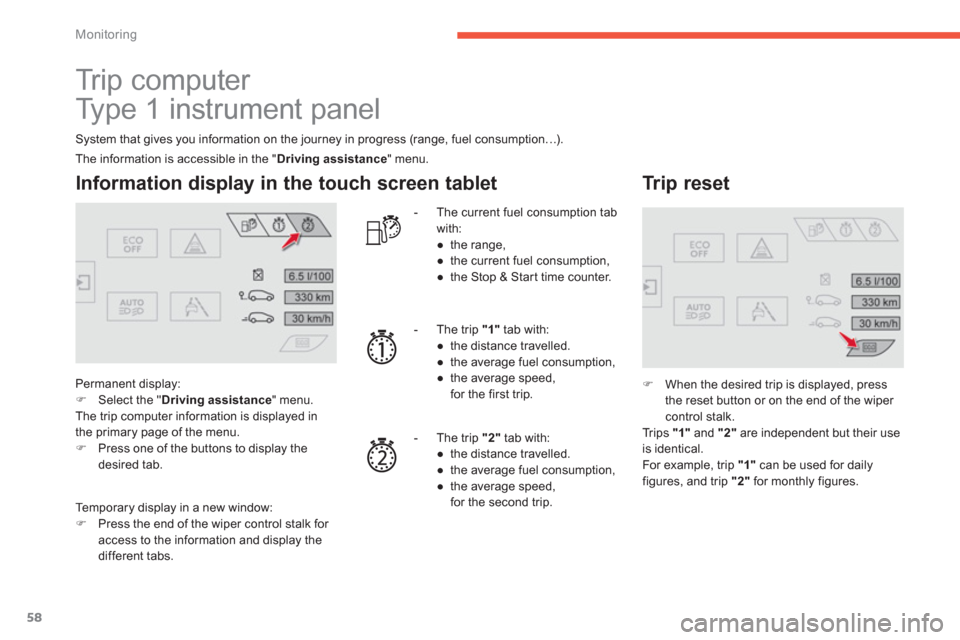
Information display in the touch screen tablet
Permanent display: �)Select the " Driving assistance" menu.
The trip computer information is displayed in
the primary page of the menu. �)Press one of the buttons to display thedesired tab.
- The current fuel consumption tab
with:
●
the ran
ge,
●
the current fuel consumption,
●
the Stop & Star t time counter.
- The tri
p "1"
tab with:
●
the distance travelled.
●
the average fuel consumption,
●
the average speed,
for the first trip.
-
The trip "2"tab with:
●
th
e distance travelled.
●
the average fuel consumption,
●
the average speed,
for the second trip.
Trip reset
�)When the desired trip is displayed, press
the reset button or on the end of the wiper
control stalk.
Trips "1"
and "2"are independent but their useis identical.
For example, trip "1"
can be used for daily figures, and trip "2"
for monthly figures. Th
e information is accessible in the " Driving assistance " menu.
Temporary display in a new window: �)Press the end of the wiper control stalk for access to the information and display the different tabs.
Page 61 of 420
1
59
Monitoring
Tr i p c o m p u t e r
Type 2 instrument panel
Information display in the instrument panel
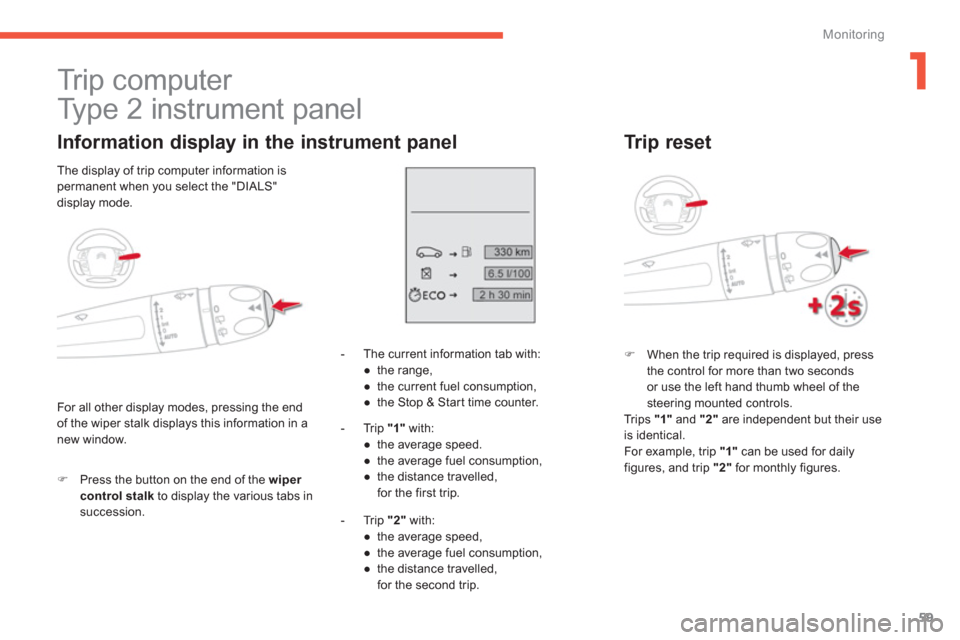
�)Press the button on the end of the wiper control stalk
to display the various tabs insuccession.- Th
e current information tab with:
●
the range,
●
the current fuel consumption,
●
the Stop & Star t time counter.
- Tr i p "1"
with:
●
the avera
ge speed.
●
the average fuel consumption,
●
the distance travelled, for the first trip.
-
Trip "2"
with:
●
t
he average speed,
●
the average fuel consumption,
●
the distance travelled,
for the second trip.
Tr ip reset
�)
When the trip required is displayed, press
the control for more than two secondsor use the left hand thumb wheel of the steering mounted controls.
Trips "1"
and "2"are independent but their use
is identical.
For example, trip "1"can be used for daily figures, and trip "2"for monthly figures.
For all other display modes, pressing the end
of the wiper stalk displays this information in anew window. The displa
y of trip computer information ispermanent when you select the "DIALS"
display mode.
Page 62 of 420
60
Monitoring
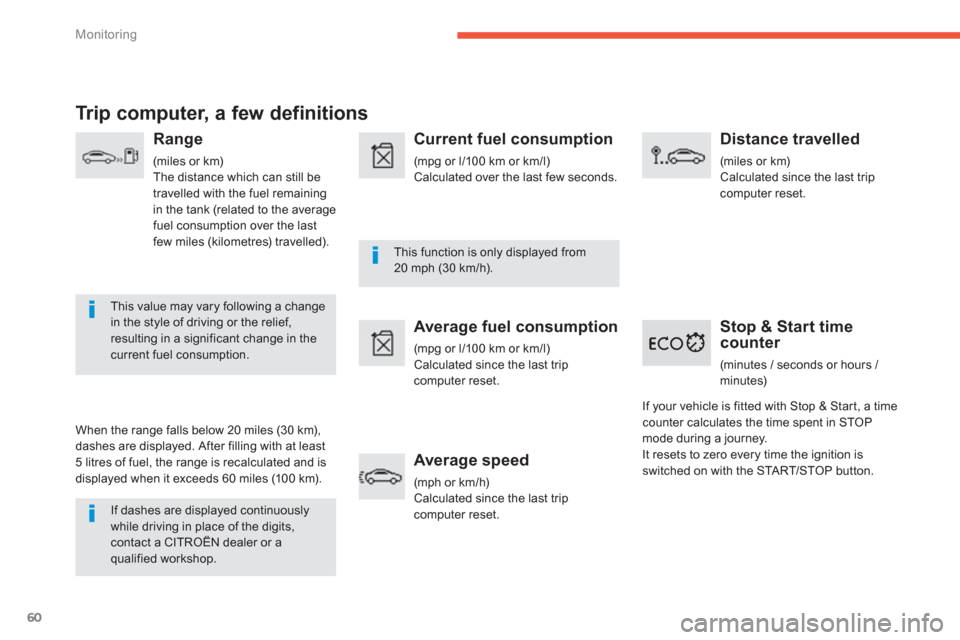
Tr ip computer, a few definitions
Range
(miles or km)
The distance which can still be
travelled with the fuel remainingin the tank (related to the average fuel consumption over the last few miles (kilometres) travelled).
This value may vary following a changein the style of driving or the relief,resulting in a significant change in thecurrent fuel consumption.
When the ran
ge falls below 20 miles (30 km),
dashes are displayed. After filling with at least 5 litres of fuel, the range is recalculated and is
displayed when it exceeds 60 miles (10 0 km).
If dashes are displayed continuously while driving in place of the digits,
contact a CITROËN dealer or a qualified workshop.
This function is only displayed from 20 mph (30 km/h).
Current fuel consumption
(mpg or l/100 km or km/l) Calculated over the last few seconds.
Average fuel consumption
(mpg or l/100 km or km/l) Calculated since the last trip computer reset.
Average speed
(mph or km/h)Calculated since the last trip computer reset.
Distance travelled
(miles or km)
Calculated since the last trip
computer reset.
Stop & Start time counter
(minutes / seconds or hours /
minutes)
If your vehicle is fitted with Stop & Star t, a timecounter calculates the time spent in STOP mode during a journey.
It resets to zero every time the ignition isswitched on with the STA R T/STOP button.