buttons Citroen C4 PICASSO RHD 2015 1.G User Guide
[x] Cancel search | Manufacturer: CITROEN, Model Year: 2015, Model line: C4 PICASSO RHD, Model: Citroen C4 PICASSO RHD 2015 1.GPages: 428, PDF Size: 10.09 MB
Page 98 of 428
96
Heating
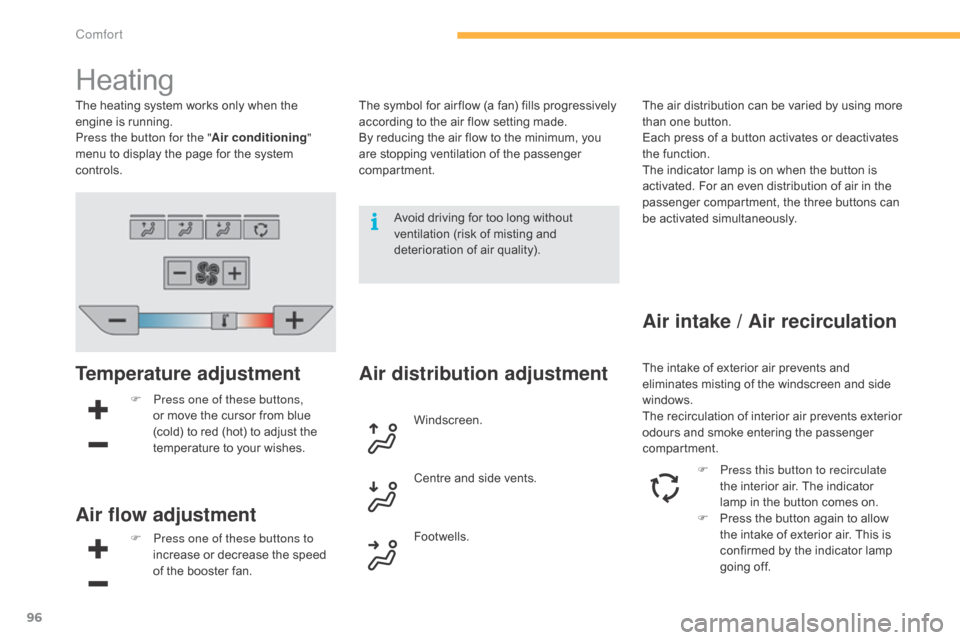
Temperature adjustment
F Press one of these buttons, or move the cursor from blue
(
cold) to red (hot) to adjust the
t
emperature to your wishes.
Air flow adjustment
F Press one of these buttons to increase or decrease the speed
o
f the booster fan.
Air distribution adjustmentThe intake of exterior air prevents and eliminates misting of the windscreen and side
w
indows.
The
recirculation of interior air prevents exterior
o
dours and smoke entering the passenger
c
ompartment.
Windscreen.
Centre
and
side
vents.
Footwells. The
air distribution can be varied by using more
t
han one button.
Each press of a button activates or deactivates
t
he function.
The indicator lamp is on when the button is
a
ctivated. For an even distribution of air in the
p
assenger compartment, the three buttons can
b
e activated simultaneously.
Air intake / Air recirculation
F Press this button to recirculate
the interior air. The indicator
l
amp in the button comes on.
F
P
ress the button again to allow
t
he intake of exterior air. This is
c
onfirmed by the indicator lamp
g
oing off.
Avoid
driving
for
too
long
without
v
entilation
(risk
of
misting
and
d
eterioration
of
air
quality).
The
heating
system
works
only
when
the
e
ngine
is
running.
Press the button for the " Air conditioning"
menu
to
display
the
page
for
the
system
c
ontrols.
The
symbol
for
air flow
(a
fan)
fills
progressively
a
ccording
to
the
air
flow
setting
made.
By
reducing
the
air
flow
to
the
minimum,
you
a
re
stopping
ventilation
of
the
passenger
c
ompartment.
Comfort
Page 99 of 428
97
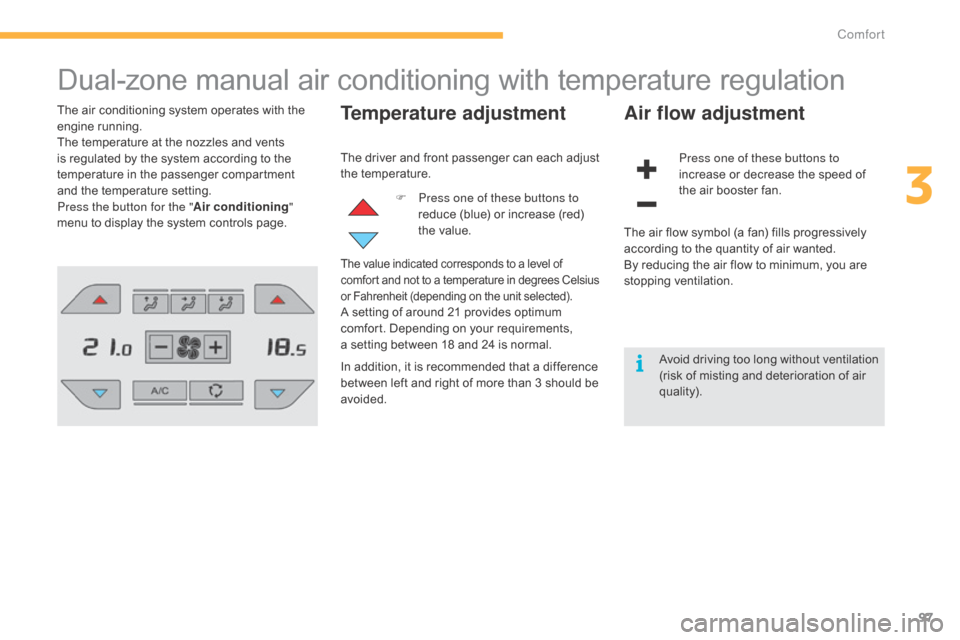
Dual-zone manual air conditioning with temperature regulation
The air conditioning system operates with the engine r unning.
The
temperature at the nozzles and vents
i
s regulated by the system according to the
t
emperature in the passenger compartment
a
nd the temperature setting.
Press the button for the " Air conditioning"
menu
to display the system controls page.Temperature adjustment
F Press one of these buttons to reduce (blue) or increase (red)
t
he value.
Air flow adjustment
Press one of these buttons to
increase or decrease the speed of
t
he air booster fan.
The
driver
and
front
passenger
can
each
adjust
t
he t
emperature.
The value indicated corresponds to a level of c
omfort and not to a temperature in degrees Celsius o
r Fahrenheit (depending on the unit selected).
A setting of around 21 provides optimum comfort. Depending on your requirements,
a
setting between 18 and 24 is normal.
In
addition, it is recommended that a difference
b
etween left and right of more than 3 should be
av
oided. The
air flow symbol (a fan) fills progressively
a
ccording to the quantity of air wanted.
By reducing the air flow to minimum, you are
s
topping
v
entilation.
Avoid
d
riving
t
oo
l
ong
w
ithout
v
entilation
(
risk of misting and deterioration of air
q
uality).
3
Comfort
Page 100 of 428
98
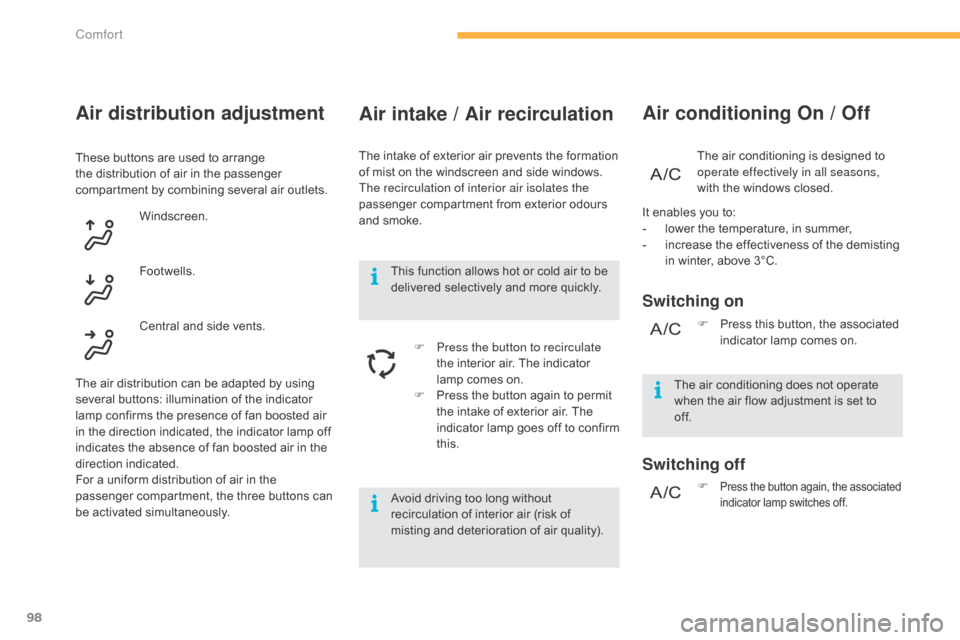
Air intake / Air recirculation
The intake of exterior air prevents the formation of mist on the windscreen and side windows.
The recirculation of interior air isolates the
passenger
compartment from exterior odours
a
nd smoke.
F
P
ress the button to recirculate
the
interior air. The indicator
l
amp comes on.
F
P
ress the button again to permit
t
he intake of exterior air. The
i
ndicator lamp goes off to confirm
t
his. The
air conditioning is designed to ope
rate effectively in all seasons,
with
the windows closed.
Air conditioning On / Off
Switching on
Switching off
The air conditioning does not operate when the air flow adjustment is set to
o
f f. F
P
ress this button, the associated
i
ndicator lamp comes on.
Avoid
driving
too
long
without
r
ecirculation
of
interior
air
(risk
of
m
isting
and
deterioration
of
air
quality).
This
function
allows
hot
or
cold
air
to
be
d
elivered
selectively
and
more
quickly.
It
enables you to:
-
l
ower the temperature, in summer,
-
i
ncrease the effectiveness of the demisting
i
n winter, above 3°C.
F
Press the button again, the associated indicator lamp switches off.
Air distribution adjustment
These buttons are used to arrange the distribution of air in the passenger
c
ompartment by combining several air outlets.
Windscreen.
The
air distribution can be adapted by using
s
everal buttons: illumination of the indicator
l
amp confirms the presence of fan boosted air
i
n the direction indicated, the indicator lamp off
i
ndicates the absence of fan boosted air in the
d
irection
i
ndicated.
For
a uniform distribution of air in the
p
assenger compartment, the three buttons can
b
e activated simultaneously.
Footwells.
Central
and side vents.
Comfort
Page 101 of 428
99
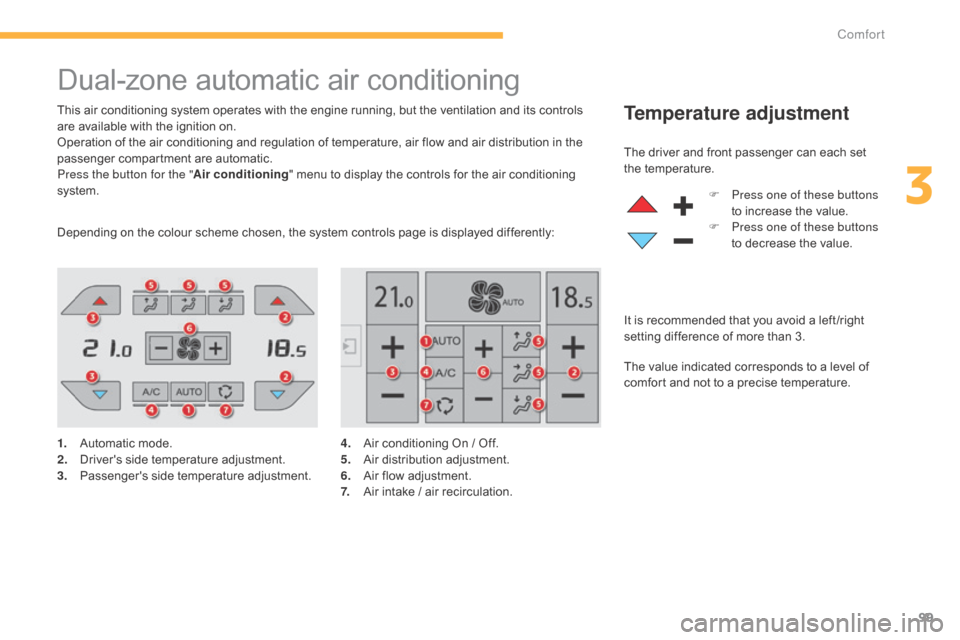
Dual-zone automatic air conditioning
This air conditioning system operates with the engine running, but the ventilation and its controls are available with the ignition on.
Operation
of the air conditioning and regulation of temperature, air flow and air distribution in the
p
assenger compartment are automatic.
Press the button for the " Air conditioning"
menu to display the controls for the air conditioning
s
ystem.Temperature adjustment
1. Automatic mode.
2. D river's side temperature adjustment.
3.
P
assenger's
s
ide
t
emperature
a
djustment. The
driver and front passenger can each set
t
he
t
emperature.
F
P
ress one of these buttons
to increase the value.
F
P
ress one of these buttons
to decrease the value.
The value indicated corresponds to a level of
c
omfort and not to a precise temperature.
It is recommended that you avoid a left /right
s
etting difference of more than 3.
Depending on the colour scheme chosen, the system controls page is displayed differently:
4. A ir conditioning On / Off.
5. A ir d istribution a djustment.
6.
A
ir flow adjustment.
7.
A
ir intake / air recirculation.
3
Comfort
Page 103 of 428
101
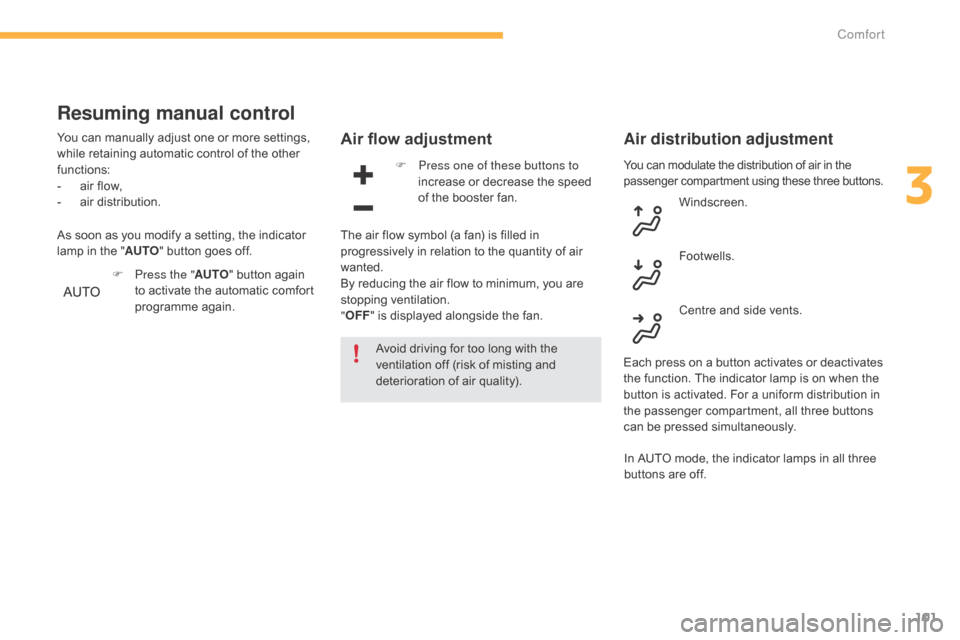
You can modulate the distribution of air in the passenger compartment using these three buttons.
Air flow adjustment
Avoid driving for too long with the ventilation off (risk of misting and
d
eterioration of air quality).
Air distribution adjustment
F Press one of these buttons to increase or decrease the speed
o
f the booster fan.
The
air
flow symbol (a fan) is filled in
p
rogressively in relation to the quantity of air
w
anted.
By
reducing the air flow to minimum, you are
s
topping
v
entilation.
" OFF "
is
displayed alongside the fan. Windscreen.
Footwells.
Centre
and side vents.
Each
press on a button activates or deactivates
t
he function. The indicator lamp is on when the
b
utton is activated. For a uniform distribution in
t
he passenger compartment, all three buttons
c
an be pressed simultaneously.
Resuming manual control
You can manually adjust one or more settings, while retaining automatic control of the other
f
unctions:
-
a
ir flow,
-
a
ir distribution.
F
P
ress the "AUTO"
button again
t
o activate the automatic comfort
p
rogramme
ag
ain.
As
soon as you modify a setting, the indicator
l
amp in the "AUTO "
button goes off.
In
AUTO mode, the indicator lamps in all three
b
uttons are off.
3
Comfort
Page 106 of 428

104
Front demist - defrost
F Press this button to demist or d
efrost the windscreen and side
w
indows as quickly as possible.
T
he indicator lamp in the button
c
omes on.
With
Stop & Start, when demisting has
b
een activated, the STOP mode is not
a
vailable.
The
system automatically manages the air
c
onditioning (depending on version), air
f
low
and
air intake, and provides optimum
d
istribution towards the windscreen and side
w
indows.
F
T
o switch it off press this button, the
indicator
lamp goes off.Ventilation with ignition on
function
With the ignition on, you can use the ventilation system and have access to the "Air
conditioning "
menu to adjust the air flow and
a
ir distribution in the passenger compartment.
This
function is available for a few minutes,
d
epending on the state of charge of the battery
o
f your vehicle.
This
function does not activate the air
c
onditioning.
You
can make use of the residual heat in the
e
ngine to warm the passenger compartment
u
sing the temperature setting buttons.
Comfort
Page 162 of 428
160
Switching on / Pause
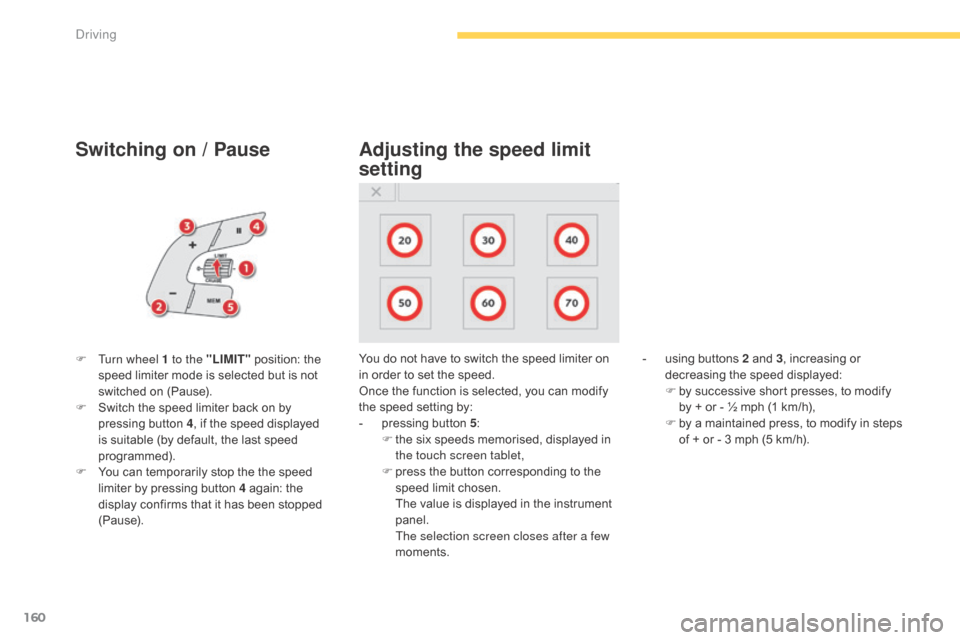
F Turn wheel 1 to the "LIMIT" position: the s
peed limiter mode is selected but is not
s
witched on (Pause).
F
S
witch the speed limiter back on by
p
ressing button 4,
if the speed displayed
i
s suitable (by default, the last speed
pro
grammed).
F
Y
ou can temporarily stop the the speed
l
imiter by pressing button 4 again: the
d
isplay confirms that it has been stopped
(
Pause). You
do not have to switch the speed limiter on i
n order to set the speed.
Once
the function is selected, you can modify
t
he speed setting by:
-
p
ressing button 5:
F
t
he six speeds memorised, displayed in
t
he touch screen tablet,
F
p
ress the button corresponding to the
s
peed limit chosen.
T
he value is displayed in the instrument
pan
el.
T
he selection screen closes after a few
moments.
Adjusting the speed limit
setting
- using buttons 2 and 3, increasing or d
ecreasing the speed displayed:
F
b
y successive short presses, to modify
b
y + or - ½ mph (1 km/h),
F
b
y a maintained press, to modify in steps
o
f + or - 3 mph (5 km/h).
Driving
Page 165 of 428
163
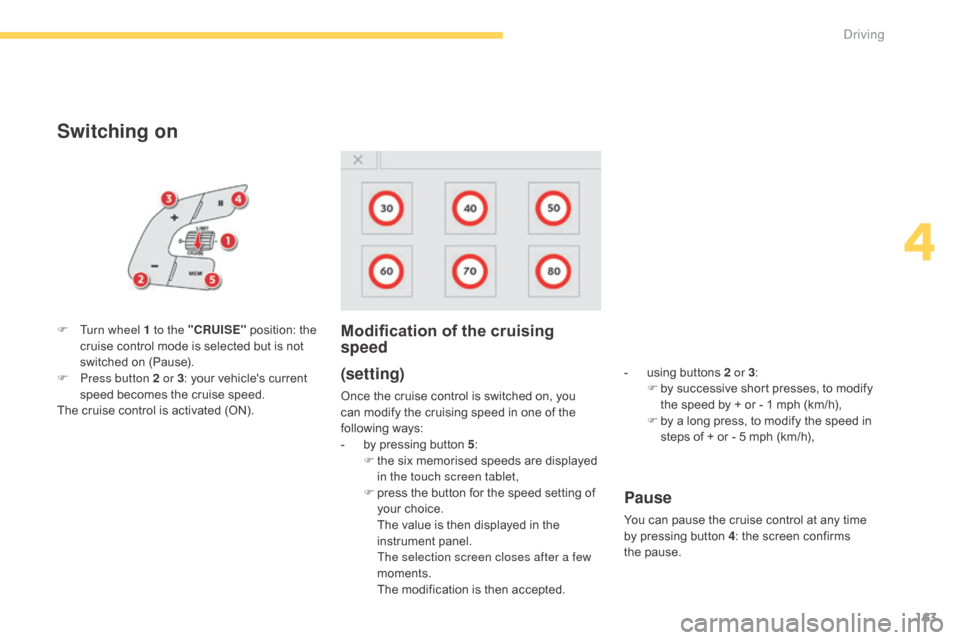
Switching on
(setting)
Once the cruise control is switched on, you can modify the cruising speed in one of the
f
ollowing
w
ays:
-
b
y pressing button 5:
F
t
he six memorised speeds are displayed
i
n the touch screen tablet,
F
p
ress the button for the speed setting of
y
our
c
hoice.
T
he value is then displayed in the
in
strument
pan
el.
T
he selection screen closes after a few
moments.
T
he modification is then accepted.
F
T
urn wheel 1 to the "CRUISE"
position:
the
c
ruise
control
mode
is
selected
but
is
not
s
witched
on
(Pause).
F
P
ress button 2 or 3
:
your
vehicle's
current
s
peed
becomes
the
cruise
speed.
The
cruise
control
is
activated
(ON).
Modification of the cruising
speed
- using buttons 2 or 3:
F b y successive short presses, to modify
t
he speed by + or - 1 mph (km/h),
F
b
y a long press, to modify the speed in
s
teps of + or - 5 mph (km/h),
Pause
You can pause the cruise control at any time by pressing button 4:
the screen confirms
t
he pause.
4
Driving
Page 166 of 428
164
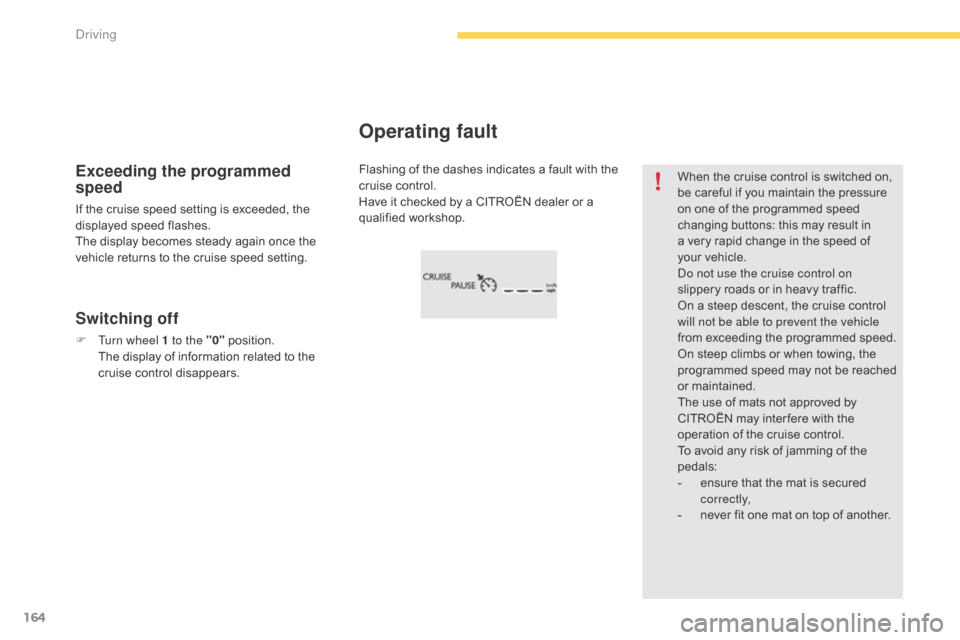
Flashing of the dashes indicates a fault with the cruise control.
Have
it checked by a CITROËN dealer or a
q
ualified
w
orkshop.
Operating fault
Exceeding the programmed
speed
If the cruise speed setting is exceeded, the displayed speed flashes.
The
display becomes steady again once the
v
ehicle returns to the cruise speed setting.
Switching off
F Turn wheel 1 to the "0" position. T
he display of information related to the
c
ruise control disappears. When
the cruise control is switched on,
b
e careful if you maintain the pressure
o
n one of the programmed speed
c
hanging buttons: this may result in
a
very rapid change in the speed of
y
our vehicle.
do n
ot use the cruise control on
slippery roads or in heavy traffic.
On a steep descent, the cruise control
w
ill not be able to prevent the vehicle
from exceeding the programmed speed.
On steep climbs or when towing, the
p
rogrammed speed may not be reached
o
r maintained.
The
use of mats not approved by
C
ITROËN may inter fere with the
o
peration of the cruise control.
To
avoid any risk of jamming of the
ped
als:
-
e
nsure that the mat is secured
c
o r r e c t l y,
-
n
ever fit one mat on top of another.
Driving
Page 169 of 428
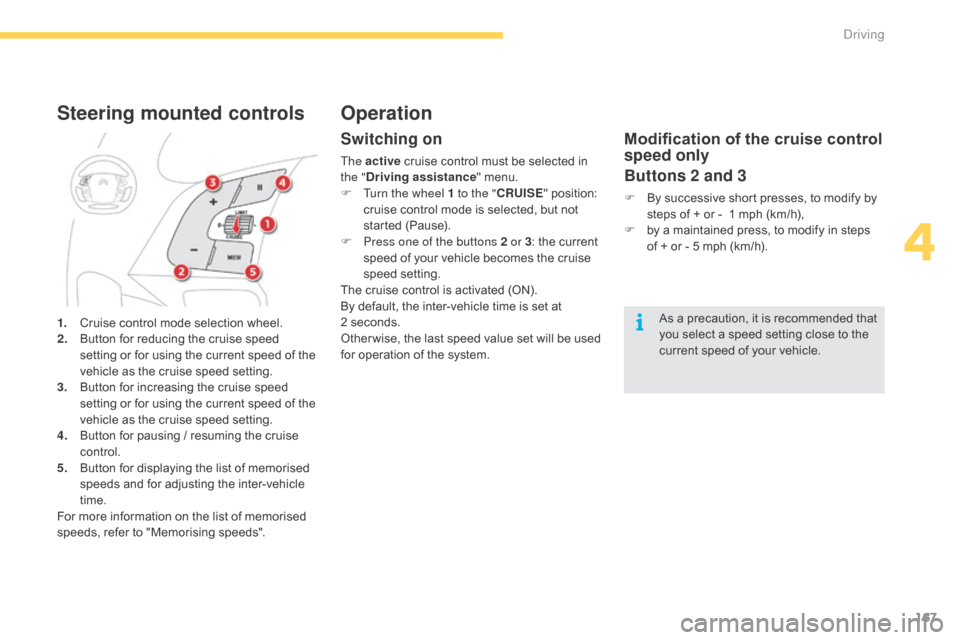
167
1. Cruise control mode selection wheel.
2. B utton for reducing the cruise speed
s
etting or for using the current speed of the
v
ehicle as the cruise speed setting.
3.
B
utton for increasing the cruise speed
s
etting or for using the current speed of the
v
ehicle as the cruise speed setting.
4.
B
utton for pausing / resuming the cruise
c
ontrol.
5.
B
utton for displaying the list of memorised
s
peeds and for adjusting the inter-vehicle
t
ime.
For
more information on the list of memorised
s
peeds, refer to "Memorising speeds".
Steering mounted controls
Switching on
The active cruise control must be selected in t
he " Driving assistance "
menu.
F
T
urn the wheel 1 to the " CRUISE"
position:
c
ruise control mode is selected, but not
s
tarted (Pause).
F
P
ress one of the buttons 2 or 3 :
the current
s
peed of your vehicle becomes the cruise
s
peed setting.
The
cruise control is activated (ON).
By
default, the inter-vehicle time is set at
2 s
econds.
Other wise,
the last speed value set will be used
f
or operation of the system.
Modification of the cruise control
speed only
Buttons 2 and 3
F By successive short presses, to modify by s
teps of + or - 1 mph (km/h),
F
b
y a maintained press, to modify in steps
o
f + or - 5 mph (km/h).
As
a precaution, it is recommended that
y
ou select a speed setting close to the
c
urrent speed of your vehicle.
Operation
4
Driving