battery CITROEN C5 AIRCROSS 2020 Handbook (in English)
[x] Cancel search | Manufacturer: CITROEN, Model Year: 2020, Model line: C5 AIRCROSS, Model: CITROEN C5 AIRCROSS 2020Pages: 292, PDF Size: 8.59 MB
Page 51 of 292
49
Unlocking
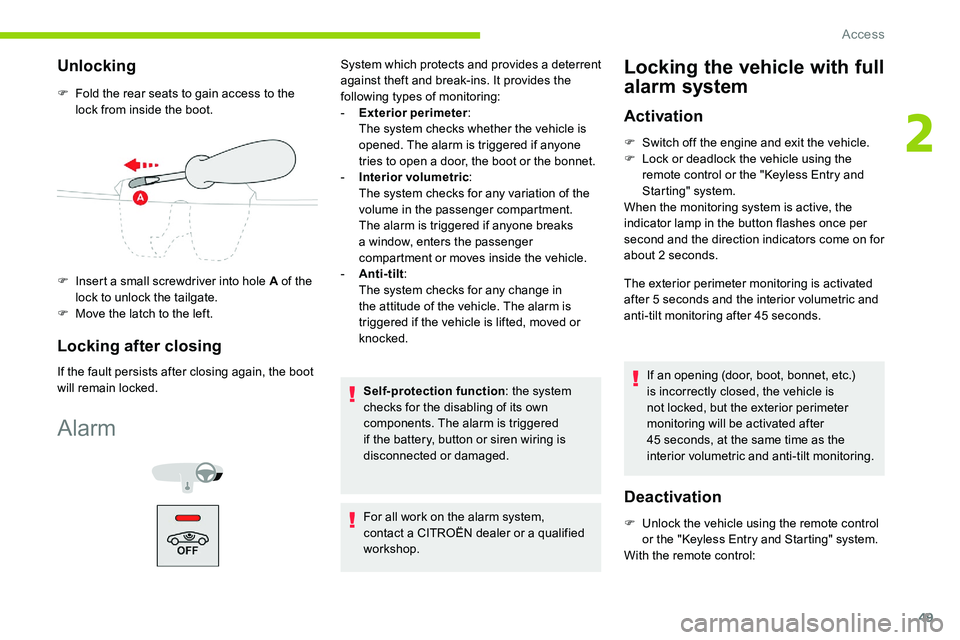
F Fold the rear seats to gain access to the lock from inside the boot.
F
I
nsert a small screwdriver into hole A of the
lock to unlock the tailgate.
F
M
ove the latch to the left.
Locking after closing
If the fault persists after closing again, the boot
will remain locked.
Alarm
System which protects and provides a deterrent
a gainst theft and break-ins. It provides the
following types of monitoring:
-
E
xterior perimeter :
The system checks whether the vehicle is
opened. The alarm is triggered if anyone
tries to open a
door, the boot or the bonnet.
-
I
nterior volumetric :
The system checks for any variation of the
volume in the passenger compartment.
The alarm is triggered if anyone breaks
a
window, enters the passenger
compartment or moves inside the vehicle.
-
A
nti-tilt :
The system checks for any change in
the attitude of the vehicle. The alarm is
triggered if the vehicle is lifted, moved or
knocked.
Self-protection function : the system
checks for the disabling of its own
components. The alarm is triggered
if the battery, button or siren wiring is
disconnected or damaged.
For all work on the alarm system,
contact a
CITROËN dealer or a qualified
workshop.Locking the vehicle with full
alarm system
Activation
F Switch off the engine and exit the vehicle.
F L ock or deadlock the vehicle using the
remote control or the "Keyless Entry and
Starting" system.
When the monitoring system is active, the
indicator lamp in the button flashes once per
second and the direction indicators come on for
about 2
seconds.
The exterior perimeter monitoring is activated
after 5
seconds and the interior volumetric and
anti-tilt monitoring after 45
seconds.
If an opening (door, boot, bonnet, etc.)
is incorrectly closed, the vehicle is
not locked, but the exterior perimeter
monitoring will be activated after
45
seconds, at the same time as the
interior volumetric and anti-tilt monitoring.
Deactivation
F Unlock the vehicle using the remote control or the "Keyless Entry and Starting" system.
With the remote control:
2
Access
Page 53 of 292

51
Operating fault
When the ignition is switched on, fixed
illumination of the indicator lamp in the button
indicates a fault with the system.
Have it checked by a
CITROËN dealer or
a
qualified workshop.
Electric windows
Manual operation
To open or close the window, press or pull the
switch gently, without exceeding the point of
resistance. The window stops as soon as the
switch is released.
Automatic operation
F To open/close the window, press/pull the switch beyond the resistance point: the
window opens/closes completely when the
switch is released.
Operating the switch again stops the movement
of the window.
The electric window switches remain
operational for approximately 45
seconds
after switching off the ignition.
Once this time has elapsed, the electric
windows will not operate. To reactivate
them, switch the ignition on again.
Deactivating the rear
controls for the rear
windows
1. Left-hand front.
2. Right-hand front.
3. Right-hand rear.
4. Left-hand rear.
5. Deactivation of the electric window
controls located at the rear seats.
Safety anti-pinch
When the window rises and meets an obstacle,
it stops and immediately partially lowers again. The red indicator lamp in the button comes
on, accompanied by a
message confirming
activation of the system. It remains on for as
long as the deactivation is maintained.
Use of the rear electric windows from the
driver's controls remains possible. For your children's safety, press switch
5 to prevent operation of the rear windows
irrespective of their positions.
Reinitialising the electric
windows
Following reconnection of the battery, or if
the windows move abnormally, the anti-pinch
function must be reinitialised.
The safety anti-pinch function is not active
during these operations.
For each of the windows:
F
L
ower the window fully, then raise it; it will
rise in steps of a
few centimetres each time
the control is pressed. Repeat the operation
until the window is fully closed.
F
C
ontinue to pull the switch for at least one
second after reaching the window closed
position.
2
Access
Page 54 of 292
52
Panoramic opening
sunroof
The panoramic sunroof consists of a movable
g lass panel that slides over the roof and a blind
that can be opened independently. Opening the
sunroof automatically opens the blind.
F
T
o operate the panoramic opening sunroof
or the blind, use the buttons in the roof
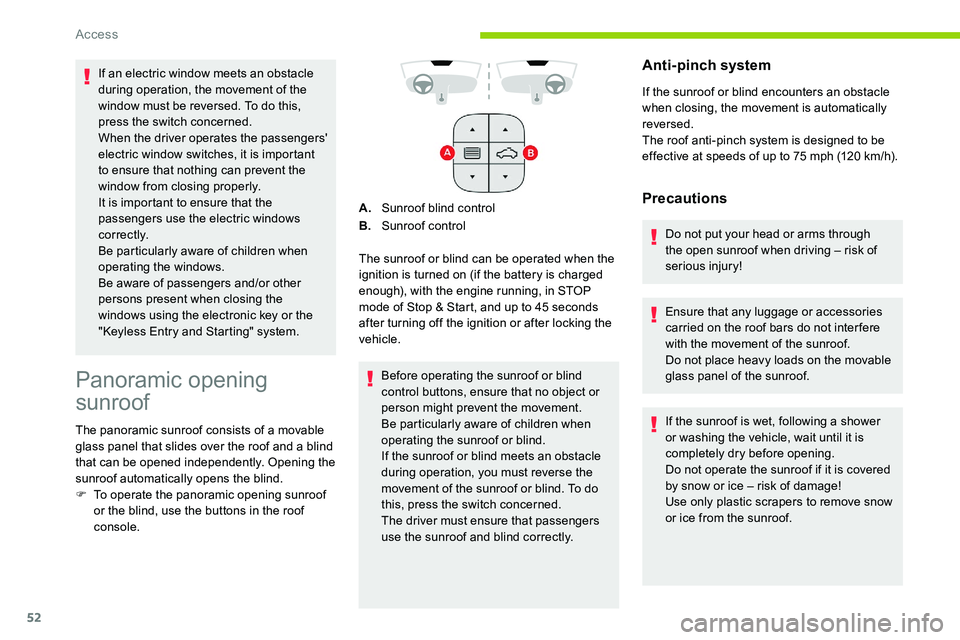
console. A.
Sunroof blind control
B. Sunroof control
The sunroof or blind can be operated when the
ignition is turned on (if the battery is charged
enough), with the engine running, in STOP
mode of Stop & Start, and up to 45 seconds
after turning off the ignition or after locking the
vehicle.
Before operating the sunroof or blind
control buttons, ensure that no object or
person might prevent the movement.
Be particularly aware of children when
operating the sunroof or blind.
If the sunroof or blind meets an obstacle
during operation, you must reverse the
movement of the sunroof or blind. To do
this, press the switch concerned.
The driver must ensure that passengers
use the sunroof and blind correctly.
Anti-pinch system
If the sunroof or blind encounters an obstacle
when closing, the movement is automatically
reversed.
The roof anti-pinch system is designed to be
effective at speeds of up to 75
mph (120 km/h).
Precautions
Do not put your head or arms through
the open sunroof when driving – risk of
serious injury!
Ensure that any luggage or accessories
carried on the roof bars do not inter fere
with the movement of the sunroof.
Do not place heavy loads on the movable
glass panel of the sunroof.
If the sunroof is wet, following a
shower
or washing the vehicle, wait until it is
completely dry before opening.
Do not operate the sunroof if it is covered
by snow or ice – risk of damage!
Use only plastic scrapers to remove snow
or ice from the sunroof.
If an electric window meets an obstacle
during operation, the movement of the
window must be reversed. To do this,
press the switch concerned.
When the driver operates the passengers'
electric window switches, it is important
to ensure that nothing can prevent the
window from closing properly.
It is important to ensure that the
passengers use the electric windows
c o r r e c t l y.
Be particularly aware of children when
operating the windows.
Be aware of passengers and/or other
persons present when closing the
windows using the electronic key or the
"Keyless Entry and Starting" system.
Access
Page 55 of 292
53
Check the condition of the sunroof seals
regularly (presence of dust or deposits,
dead leaves, etc.).
If using a car wash, check that the sunroof
is correctly closed in advance and keep
the tip of the high-pressure lance at least
30
centimetres from the seals.
Never leave the vehicle with the sunroof
open.
Operation
When opening the sunroof fully, the movable
glass moves to a partially open position, then
slides over the roof. All intermediate positions
are allowed.
Depending on the speed of the vehicle,
the partially open position may vary to
improve the acoustics.
Opening and closing
F To open the sunroof or the blind, use the
part of the button located towards the rear .
F
To close the sunroof or the blind, use the
part of the button located towards the front .
Operation of buttons
F Pressing a button beyond its point of
resistance directly opens or closes the
sunroof fully.
F
P
ressing the button down again stops the
current movement.
F
I
f you hold a button (without going beyond
the point of resistance), the movement of
the sunroof or blind stops when you release
the button.
F
W
hen the sunroof is closed: pressing once
without passing the point of resistance
moves it to a
partially open position.
F
W
hen the sunroof is partially open: pressing
once without passing the point of resistance
opens or closes it fully.
You can close the sunroof and windows,
then the blind, by pressing and holding the
door locking control. The movement stops
when you release the locking control.
Closing of the blind is limited by the
position of the sunroof: the blind cannot go
further than the front of the mobile glass.
During simultaneous movements of the
sunroof and blind, the blind automatically
stops or resumes movement depending on
the position of the sunroof.
Reinitialisation
Following reconnection of the battery or in
the event of a fault or jerky movement of the
sunroof or blind, reinitialisation is required.
F
C
heck that nothing is inter fering with the
sunroof or blind and that the seals are
clean.
F
W
ith the ignition on, fully close the sunroof
and blind.
F
P
ress and hold the front part of button B ,
until the sunroof and blind move slightly,
then hold for a
further 1 second before
releasing.
F
W
ait 2 seconds and then press and hold
the front part of button B . The blind and the
sunroof will open and close, one after the
other. When both are completely closed
again, hold for a
further 2 seconds and
release.
If there is an operating fault, restart the
whole procedure.
2
Access
Page 58 of 292

56
Height
F Pull the control upwards to raise or push it downwards to lower, as many times as
necessary to obtain the position required.
Electrically-adjusted seats
To avoid discharging the battery, carry
out these adjustments with the engine
running.
Longitudinal adjustment Backrest angle
F Tilt the control for wards or rear wards.
Electric lumbar adjustment
The control allows independent adjustment of
the depth and vertical position of the lumbar
support.
F
P
ress and hold the front or rear
of the control to increase or
reduce the lumbar support.
F
P
ress and hold the top or bottom
of the control to raise or lower the
lumbar support area.
Seat cushion height and angle
Comfort functions
Storing driving positions
(Depending on the country of sale.)
Associated with the electrically-adjusted
driver's seat, this function allows two driving
positions to be memorised, to make these
adjustments easier if there are frequent driver
changes.
It takes account of the electric adjustments of
the seat and the door mirrors.
F
P
ush the control for wards or rear wards to
slide the seat. F
T
ilt the rear of the control upwards or
downwards to obtain the required height.
F
T
ilt the front of the control upwards or
downwards to obtain the required angle.
Ease of use and comfort
Page 69 of 292

67
Air distribution adjustment
You can vary the air distribution in the passenger
compartment using the three buttons 7.
Windscreen and side windows.
Central and side air vents.
Footwells.
Each press on a
button activates or deactivates
the function. The indicator lamp is on when the
button is activated. For a
uniform distribution
of air in the passenger compartment, the three
buttons can be activated simultaneously.
In AUTO mode, the indicator lamps in all three
buttons 7
are of f.
Air conditioning on/off
The air conditioning is designed to operate
effectively in all seasons, with the windows
closed.
It enables you to:
-
l
ower the temperature in summer,
-
i
ncrease the effectiveness of the demisting
in winter, above 3°C.
F
P
ress button 8 to activate/deactivate the air
conditioning system. When the indicator lamp is on, the air
conditioning function is activated.
The air conditioning does not operate
when the air flow adjustment is inhibited.
To obtain cool air more quickly, you can
use recirculation of the interior air for
a few moments. Then return to the intake
of exterior air.
Switching off the air conditioning may
result in some discomfort (humidity,
mi st ing).
Mono-zone/Dual-zone
The passenger temperature setting can be
linked to the driver's setting (mono-zone
function).
It is available in the secondary page by
pressing button 11 "OPTIONS ".
F
P
ress button 14
to activate the "MONO"
function; its status is displayed as " ON".
The function is automatically deactivated if the
passenger uses their temperature adjustment
buttons (dual-zone function).
Ventilation with the ignition on
When the ignition is switched on, you can
use the ventilation system to adjust the air
flow 5
and air distribution 7 settings in the
passenger compartment, for a
period which
depends on the battery charge.
System switch-off
F Press button 4 .
Its indicator lamp comes on and all other
indicator lamps for the system go off.
This action deactivates all functions of the air
conditioning system.
By reducing the air flow 5
to a minimum, you
are stopping ventilation.
Temperature is no longer regulated. A slight
flow of air can still be felt, resulting from the
for ward movement of the vehicle. This function does not allow the operation of
the air conditioning system.
Recirculation of interior air
The intake of exterior air prevents the formation
of mist on the windscreen and side windows.
Recirculation of the interior air isolates the
passenger compartment from outside odours
and fumes and allows the temperature required
in the passenger compartment to be reached
more rapidly.
F
P
ress this button to activate/
deactivate the function (confirmed
by the illumination/extinction of the
indicator lamp).
The system activates automatically when
reverse gear is engaged.
3
Ease of use and comfort
Page 72 of 292
70
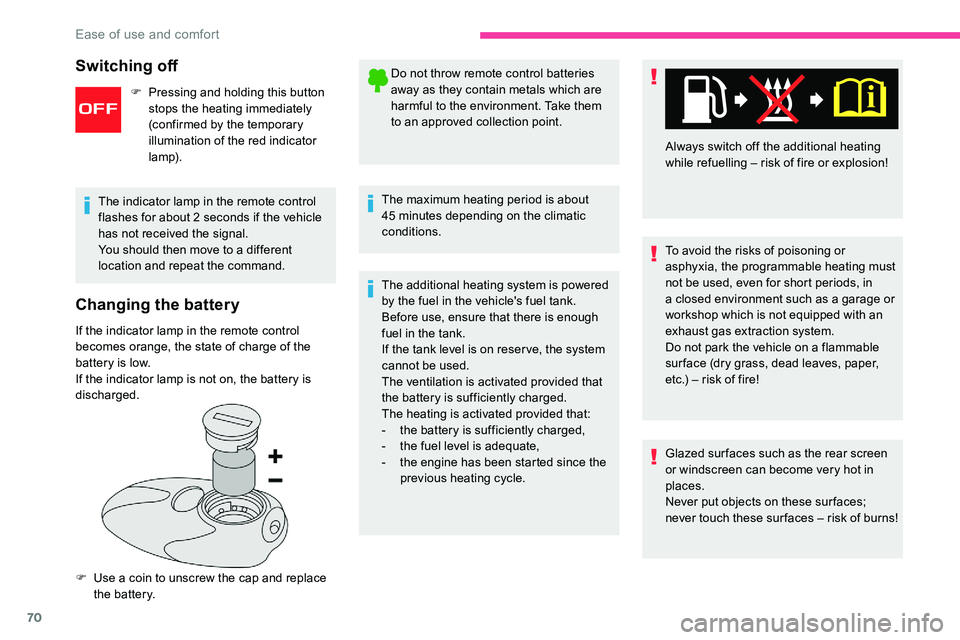
Changing the battery
If the indicator lamp in the remote control
becomes orange, the state of charge of the
battery is low.
If the indicator lamp is not on, the battery is
discharged.
F
U
se a coin to unscrew the cap and replace
the battery. Do not throw remote control batteries
away as they contain metals which are
harmful to the environment. Take them
to an approved collection point.
The maximum heating period is about
45 minutes depending on the climatic
conditions.
The additional heating system is powered
by the fuel in the vehicle's fuel tank.
Before use, ensure that there is enough
fuel in the tank.
If the tank level is on reser ve, the system
cannot be used.
The ventilation is activated provided that
the battery is sufficiently charged.
The heating is activated provided that:
-
t
he battery is sufficiently charged,
-
t
he fuel level is adequate,
-
t
he engine has been started since the
previous heating cycle. To avoid the risks of poisoning or
asphyxia, the programmable heating must
not be used, even for short periods, in
a
closed environment such as a garage or
workshop which is not equipped with an
exhaust gas extraction system.
Do not park the vehicle on a
flammable
sur face (dry grass, dead leaves, paper,
etc.) – risk of fire!
Glazed sur faces such as the rear screen
or windscreen can become very hot in
places.
Never put objects on these sur faces;
never touch these sur faces – risk of burns! Always switch off the additional heating
while refuelling – risk of fire or explosion!
The indicator lamp in the remote control
flashes for about 2 seconds if the vehicle
has not received the signal.
You should then move to a different
location and repeat the command.
Switching off
F Pressing and holding this button stops the heating immediately
(confirmed by the temporary
illumination of the red indicator
lamp).
Ease of use and comfort
Page 75 of 292

73
Operation
The charger works with the engine running and
in STOP mode of Stop & Start.
Charging is managed by the smartphone.
For versions with Keyless Entry and Starting,
operation of the charger may be interrupted
when opening a door or switching off the
ignition.
Charging
F With the charging area clear, place a device
at its centre.
The system only supports charging one
portable device at a
time.
Once the portable device is detected, the
charge indicator lamp comes on in green. It
stays lit for the whole time that the battery is
being charged. Do not leave any metal objects (coins,
keys, vehicle remote control, etc.) in
the charging area while a
device is
being charged – risk of overheating or
interrupting the charging process!Checking operation
The status of the indicator lamp allows the
operation of the charger to be monitored.
Status of the
indicator lamp Meaning
Off Engine switched off.
No compatible portable
device detected.
Charging finished.
Fixed, green Compatible portable
device detected.
Charging.
Flashing, orange Foreign object detected
in the charging zone.
Portable device not
correctly centred in the
charging zone. Fixed, orange
Fault with the portable
device's battery meter.
Temperature of the
portable device's battery
too high.
Charger fault.
Front armrest
It includes a refrigerated storage space
( depending on version) and is illuminated when
the cover is opened. If the indicator lamp is lit orange:
-
r
emove the portable device, then reposition
it in the middle of the charging zone.
or
-
r
emove the portable device and try again in
a quarter of an hour.
If the problem persists, have the system
checked by a CITROËN dealer or a qualified
workshop.
3
Ease of use and comfort
Page 82 of 292
80
Turn and release the ring:
F o nce for wards to switch on the front
foglamps and then a
second time for the
rear foglamps.
F
o
nce rear wards to switch off the rear
foglamps and then a
second time for the
front foglamps.
If the lighting is switched off automatically
(" AUTO " position) or the dipped beam
headlamps are switched off manually, the
foglamps and sidelamps remain on.
F
T
urn the ring rear wards to switch the
foglamps off; the sidelamps will then switch
of f.
In good or rainy weather, both day and
night, using the front foglamps and the
rear foglamp is prohibited. In these
situations, the power of their beams may
dazzle other drivers. They should only be
used in fog or falling snow.
In these weather conditions, it is your
responsibility to switch on the foglamps
and dipped beam headlamps manually as
the sunshine sensor may detect sufficient
light.
Switch off the foglamps when they are no
longer necessary. Switching off of the lighting when the
ignition is switched off
On switching off the ignition, all of the
lighting turns off immediately, except for
dipped beam if automatic guide-me-home
lighting is activated.
Switching on the lighting after
switching off the ignition
From the AUTO
position, move the main
lighting ring to the desired position or,
from another position, move the ring to the
AUTO position then to a
position.
On opening the driver's door a
temporary
audible signal warns the driver that the
lighting is on.
It will go off automatically after a
period of
time that depends on the state of charge
in battery (entering energy economy
m o d e).Direction indicators
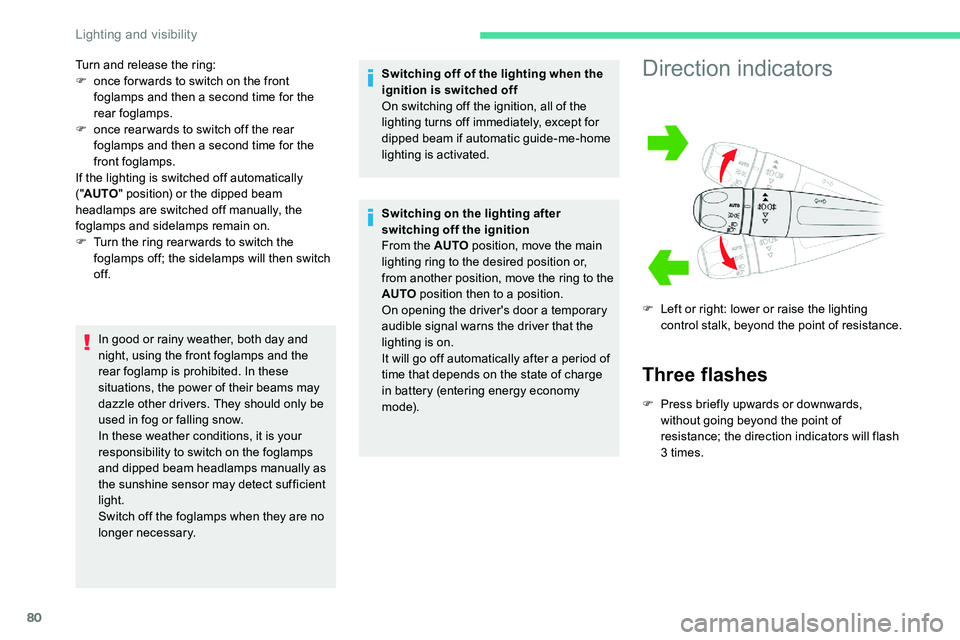
Three flashes
F Press briefly upwards or downwards, without going beyond the point of
resistance; the direction indicators will flash
3
times.
F
L
eft or right: lower or raise the lighting
control stalk, beyond the point of resistance.
Lighting and visibility
Page 92 of 292
90
Automatic operation of
hazard warning lamps
When braking in an emergency, depending on
the force of deceleration, the hazard warning
lamps come on automatically. They switch off
automatically when you next accelerate.
It is also possible to switch them off by pressing
the button.
HornEmergency or assistance
call
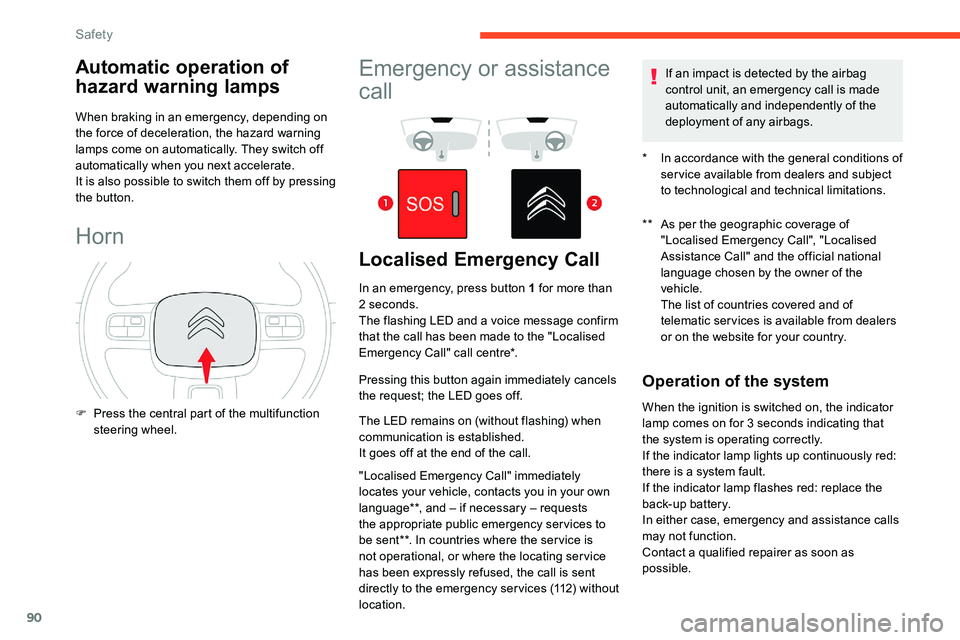
Localised Emergency Call
* In accordance with the general conditions of
service available from dealers and subject
to technological and technical limitations.
**
A
s per the geographic coverage of
"Localised Emergency Call", "Localised
Assistance Call" and the official national
language chosen by the owner of the
vehicle.
T
he list of countries covered and of
telematic services is available from dealers
or on the website for your country.
In an emergency, press button 1
for more than
2
seconds.
The flashing LED and a
voice message confirm
that the call has been made to the "Localised
Emergency Call" call centre*.
Pressing this button again immediately cancels
the request; the LED goes off.
The LED remains on (without flashing) when
communication is established.
It goes off at the end of the call.
"Localised Emergency Call" immediately
locates your vehicle, contacts you in your own
language**, and – if necessary – requests
the appropriate public emergency services to
be sent**. In countries where the ser vice is
not operational, or where the locating ser vice
has been expressly refused, the call is sent
directly to the emergency services (112) without
location. If an impact is detected by the airbag
control unit, an emergency call is made
automatically and independently of the
deployment of any airbags.
Operation of the system
F Press the central part of the multifunction
steering wheel. When the ignition is switched on, the indicator
lamp comes on for 3
seconds indicating that
the system is operating correctly.
If the indicator lamp lights up continuously red:
there is a
system fault.
If the indicator lamp flashes red: replace the
back-up battery.
In either case, emergency and assistance calls
may not function.
Contact a
qualified repairer as soon as
possible.
Safety