light CITROEN C5 AIRCROSS 2020 Handbook (in English)
[x] Cancel search | Manufacturer: CITROEN, Model Year: 2020, Model line: C5 AIRCROSS, Model: CITROEN C5 AIRCROSS 2020Pages: 292, PDF Size: 8.59 MB
Page 39 of 292
37
Ensure that no person or object could
prevent the correct closing of the windows
and sunroof.
If, on versions with alarm, you want to
leave the windows and/or sunroof partly
open, you must first deactivate the
volumetric alarm protection.
For more information on the Alarm, refer
to the corresponding section.
Deadlocking
Deadlocking deactivates the exterior
and interior door controls, as well as the
central locking button on the dashboard.
The horn remains operational.
You must therefore never leave anyone
inside the vehicle when it is deadlocked.
If your vehicle is fitted with an alarm,
activation is confirmed by fixed
illumination of the direction indicators for
a
few seconds.
With the remote control
F Within 5 seconds of locking the
vehicle, press the button again to
deadlock it.
With the key
F Within 5 seconds of locking the vehicle, turn
the key to the rear again to deadlock it.
Locating your vehicle
This function allows you to identify your vehicle
from a distance, particularly in poor light. Your
vehicle must be locked.
F
P
ress this button. The courtesy
lamps will come on and the
direction indicators will flash for
a
few seconds.
Welcome lighting
Availability of this function depends on version. F
B
riefly press this button. The
sidelamps, dipped beam
headlamps, number plate lamps
and door mirror spotlamps come
on for 30 seconds.
Pressing again before the end of the timed
period switches off the lamps immediately.
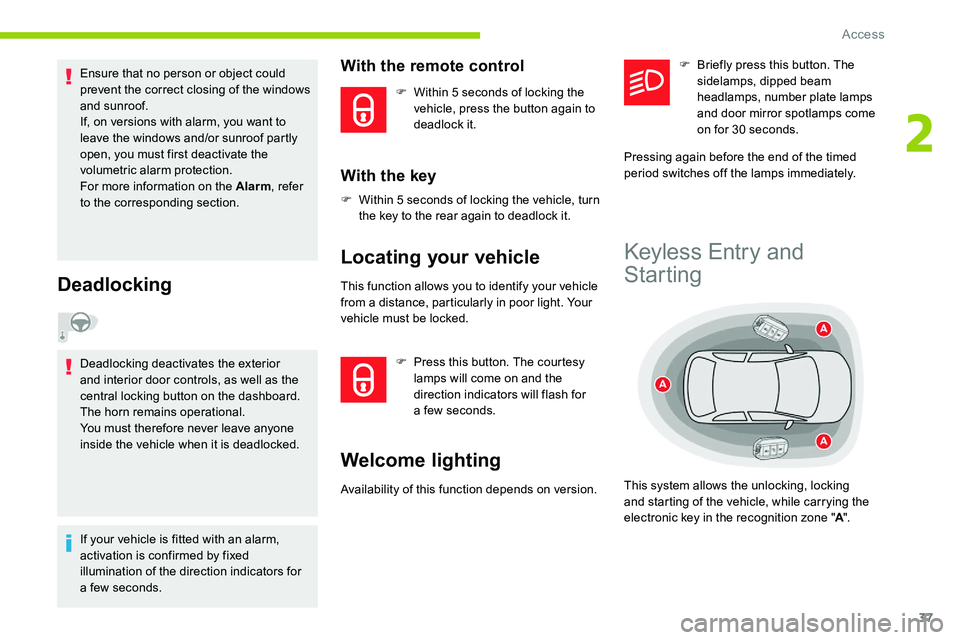
Keyless Entry and
Starting
This system allows the unlocking, locking
and starting of the vehicle, while carrying the
electronic key in the recognition zone " A".
2
Access
Page 44 of 292
42
If the vehicle is fitted with an alarm, this
function will not be activated when locking
with the key.
If the alarm is activated, the siren sounds
on opening the door; switch on the ignition
to stop it.
Central locking not
functioning
Use these procedures in the following cases:
- c entral locking fault,
-
b
attery disconnected or discharged. In the event of a
malfunction with the
central locking system, the battery must
be disconnected to lock the boot and thus
ensure that the vehicle is locked fully.
Driver's door
F Turn the key towards the rear of the vehicle to lock it, or towards the front to unlock it.
Passenger doors
Unlocking
F P ull the interior door opening handle.
Locking
F
O
pen the door.
F
F
or the rear doors, check that the child
lock is not on. Refer to the corresponding
section. F
R
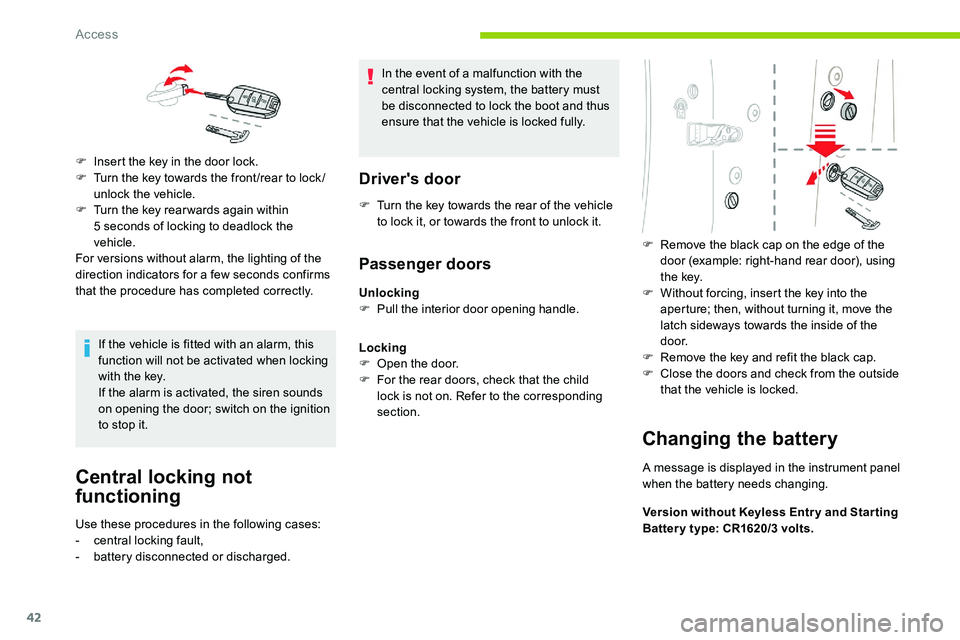
emove the black cap on the edge of the
door (example: right-hand rear door), using
t h e key.
F W ithout forcing, insert the key into the
aperture; then, without turning it, move the
latch sideways towards the inside of the
d o o r.
F
R
emove the key and refit the black cap.
F
C
lose the doors and check from the outside
that the vehicle is locked.
Changing the battery
A message is displayed in the instrument panel
when the battery needs changing.
Version without Keyless Entr y and Star ting
Batter y type: CR1620/3
volts.
F
I
nsert the key in the door lock.
F
T
urn the key towards the front /rear to lock /
unlock the vehicle.
F
T
urn the key rear wards again within
5
seconds of locking to deadlock the
vehicle.
For versions without alarm, the lighting of the
direction indicators for a
few seconds confirms
that the procedure has completed correctly.
Access
Page 49 of 292
47
It is possible to interrupt the operation of
the tailgate at any point.
Pressing one of these controls again
interrupts the movement that is under way.
Following the interruption of a movement,
pressing one of these controls again
reverses the movement.
" Hands-Free Tailgate Access "
The "Hands-Free Tailgate Access"
function is activated/deactivated in
the Driving/Vehicle menu of the
touch screen.
Ensure that you are steady on your
feet before per forming the quick foot
movement.
Take care not to touch the exhaust system
which may be hot – risk of burns!
Automatic locking using the " Hands-
Free Tailgate Access " function
Memorising an opening
position
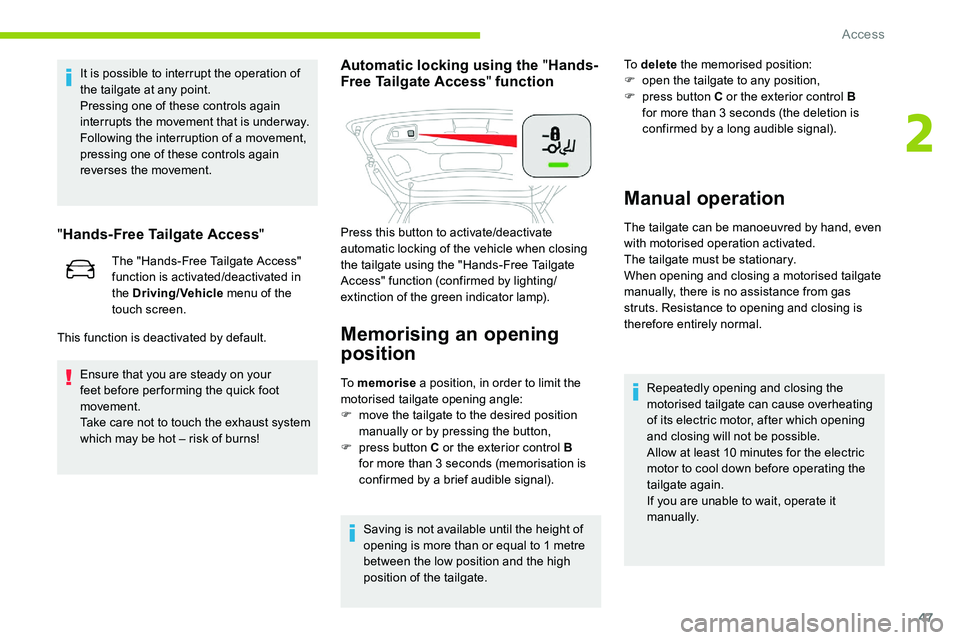
To memorise a position, in order to limit the
motorised tailgate opening angle:
F
m
ove the tailgate to the desired position
manually or by pressing the button,
F
p
ress button C or the exterior control B
for more than 3
seconds (memorisation is
confirmed by a
brief audible signal).
Saving is not available until the height of
opening is more than or equal to 1
metre
between the low position and the high
position of the tailgate. To delete
the memorised position:
F
o
pen the tailgate to any position,
F
p
ress button C or the exterior control B
for more than 3 seconds (the deletion is
confirmed by a long audible signal).
Manual operation
The tailgate can be manoeuvred by hand, even
with motorised operation activated.
The tailgate must be stationary.
When opening and closing a
motorised tailgate
manually, there is no assistance from gas
struts. Resistance to opening and closing is
therefore entirely normal.
This function is deactivated by default. Press this button to activate/deactivate
automatic locking of the vehicle when closing
the tailgate using the "Hands-Free Tailgate
Access" function (confirmed by lighting/
extinction of the green indicator lamp).
Repeatedly opening and closing the
motorised tailgate can cause overheating
of its electric motor, after which opening
and closing will not be possible.
Allow at least 10
minutes for the electric
motor to cool down before operating the
tailgate again.
If you are unable to wait, operate it
manually.
2
Access
Page 55 of 292
53
Check the condition of the sunroof seals
regularly (presence of dust or deposits,
dead leaves, etc.).
If using a car wash, check that the sunroof
is correctly closed in advance and keep
the tip of the high-pressure lance at least
30
centimetres from the seals.
Never leave the vehicle with the sunroof
open.
Operation
When opening the sunroof fully, the movable
glass moves to a partially open position, then
slides over the roof. All intermediate positions
are allowed.
Depending on the speed of the vehicle,
the partially open position may vary to
improve the acoustics.
Opening and closing
F To open the sunroof or the blind, use the
part of the button located towards the rear .
F
To close the sunroof or the blind, use the
part of the button located towards the front .
Operation of buttons
F Pressing a button beyond its point of
resistance directly opens or closes the
sunroof fully.
F
P
ressing the button down again stops the
current movement.
F
I
f you hold a button (without going beyond
the point of resistance), the movement of
the sunroof or blind stops when you release
the button.
F
W
hen the sunroof is closed: pressing once
without passing the point of resistance
moves it to a
partially open position.
F
W
hen the sunroof is partially open: pressing
once without passing the point of resistance
opens or closes it fully.
You can close the sunroof and windows,
then the blind, by pressing and holding the
door locking control. The movement stops
when you release the locking control.
Closing of the blind is limited by the
position of the sunroof: the blind cannot go
further than the front of the mobile glass.
During simultaneous movements of the
sunroof and blind, the blind automatically
stops or resumes movement depending on
the position of the sunroof.
Reinitialisation
Following reconnection of the battery or in
the event of a fault or jerky movement of the
sunroof or blind, reinitialisation is required.
F
C
heck that nothing is inter fering with the
sunroof or blind and that the seals are
clean.
F
W
ith the ignition on, fully close the sunroof
and blind.
F
P
ress and hold the front part of button B ,
until the sunroof and blind move slightly,
then hold for a
further 1 second before
releasing.
F
W
ait 2 seconds and then press and hold
the front part of button B . The blind and the
sunroof will open and close, one after the
other. When both are completely closed
again, hold for a
further 2 seconds and
release.
If there is an operating fault, restart the
whole procedure.
2
Access
Page 62 of 292

60
Rear seats
The 3 seats of the 2nd row are independent
and of the same width. Their backrests are
adjustable to adapt the boot load space.
Rear head restraints
The rear head restraints can be removed.
To remove a head restraint:
F
p
ull the head restraint as far up as it will go,
F
p
ress the lugs A to release the head
restraint and remove it completely,
F
s
tow the head restraint.
To refit a
head restraint:
F
i
nsert the head restraint rods into the guides
in the corresponding seat backrest,
F
p
ush the head restraint down as far as it will
go,
F
p
ress the lugs A to release the head
restraint and push it fully down. Never drive with passengers seated at
the rear when the head restraints are
removed; they must be in place and in the
high position.
Longitudinal adjustment
Seat operations must only be done with
the vehicle stationary.
Each seat can be adjusted individually.
F
Ra
ise the control and slide the seat
forwards or backwards.
They have two positions:
-
a high position , for when the seat is in use:
F
p
ull the head restraint fully up.
-
a low position , for stowing, when the seat
is not in use:
F
p
ress the lugs A to release the head
restraint and push it fully down.
Once the backrest is folded, it is no longer
possible to slide the seat.
Automatic "electrochrome " model
This system automatically and progressively
changes between day and night use by means
of a
s
ensor measuring the light coming from the
rear of the vehicle.
In order to ensure optimum visibility during
your manoeuvres, the mirror lightens
automatically when reverse gear is
engaged.
Ease of use and comfort
Page 66 of 292

64
Air distribution adjustment
You can vary the air distribution in the
passenger compartment using the three
buttons 7.
Windscreen and side windows.
Central and side air vents.
Footwells.
Each press on a
button activates or deactivates
the function. The indicator lamp is on when the
button is activated. For a
uniform distribution
of air in the passenger compartment, the three
buttons can be activated simultaneously.
Maximum air conditioning
The system automatically adjusts the
temperature setting to the lowest possible, the
air distribution towards the centre and outer
vents, the air flow to maximum.
F
P
ress button 9 to activate/deactivate the
function; its indicator lamp comes on/goes
of f.
Automatic visibility
programme
For more information on the button 1
" Automatic Visibility Programme ", refer to
the section " Front demist – defrost ".
Air conditioning on/off
The air conditioning is designed to operate
effectively in all seasons, with the windows
closed.
It enables you to:
-
l
ower the temperature in summer,
-
i
ncrease the effectiveness of the demisting
in winter, above 3°C.
F
P
ress button 8 to activate/deactivate the air
conditioning system.
When the indicator lamp is on, the air
conditioning function is activated.
The air conditioning does not operate when
the air flow adjustment is inhibited.
To obtain cool air more quickly, you can
use recirculation of the interior air for a
few
moments. Then return to the intake of
exterior air.
Switching off the air conditioning may result
in some discomfort (humidity, misting).
System switch-off
Avoid driving for long periods with
the system off – risk of misting and
deterioration of air quality!
Pressing any button reactivates the
system with the settings that were in use
before the deactivation.
F
P
ress button 4
; its indicator lamp comes
on and all the other indicator lamps of the
system go off.
This action deactivates all functions of the air
conditioning system.
Temperature is no longer regulated. A slight
flow of air can still be felt, resulting from the
for ward movement of the vehicle.
Dual-zone automatic air
conditioning
Press the Air conditioning menu
button located under the touch
screen to display the system
controls page.
Ease of use and comfort
Page 69 of 292

67
Air distribution adjustment
You can vary the air distribution in the passenger
compartment using the three buttons 7.
Windscreen and side windows.
Central and side air vents.
Footwells.
Each press on a
button activates or deactivates
the function. The indicator lamp is on when the
button is activated. For a
uniform distribution
of air in the passenger compartment, the three
buttons can be activated simultaneously.
In AUTO mode, the indicator lamps in all three
buttons 7
are of f.
Air conditioning on/off
The air conditioning is designed to operate
effectively in all seasons, with the windows
closed.
It enables you to:
-
l
ower the temperature in summer,
-
i
ncrease the effectiveness of the demisting
in winter, above 3°C.
F
P
ress button 8 to activate/deactivate the air
conditioning system. When the indicator lamp is on, the air
conditioning function is activated.
The air conditioning does not operate
when the air flow adjustment is inhibited.
To obtain cool air more quickly, you can
use recirculation of the interior air for
a few moments. Then return to the intake
of exterior air.
Switching off the air conditioning may
result in some discomfort (humidity,
mi st ing).
Mono-zone/Dual-zone
The passenger temperature setting can be
linked to the driver's setting (mono-zone
function).
It is available in the secondary page by
pressing button 11 "OPTIONS ".
F
P
ress button 14
to activate the "MONO"
function; its status is displayed as " ON".
The function is automatically deactivated if the
passenger uses their temperature adjustment
buttons (dual-zone function).
Ventilation with the ignition on
When the ignition is switched on, you can
use the ventilation system to adjust the air
flow 5
and air distribution 7 settings in the
passenger compartment, for a
period which
depends on the battery charge.
System switch-off
F Press button 4 .
Its indicator lamp comes on and all other
indicator lamps for the system go off.
This action deactivates all functions of the air
conditioning system.
By reducing the air flow 5
to a minimum, you
are stopping ventilation.
Temperature is no longer regulated. A slight
flow of air can still be felt, resulting from the
for ward movement of the vehicle. This function does not allow the operation of
the air conditioning system.
Recirculation of interior air
The intake of exterior air prevents the formation
of mist on the windscreen and side windows.
Recirculation of the interior air isolates the
passenger compartment from outside odours
and fumes and allows the temperature required
in the passenger compartment to be reached
more rapidly.
F
P
ress this button to activate/
deactivate the function (confirmed
by the illumination/extinction of the
indicator lamp).
The system activates automatically when
reverse gear is engaged.
3
Ease of use and comfort
Page 73 of 292
71
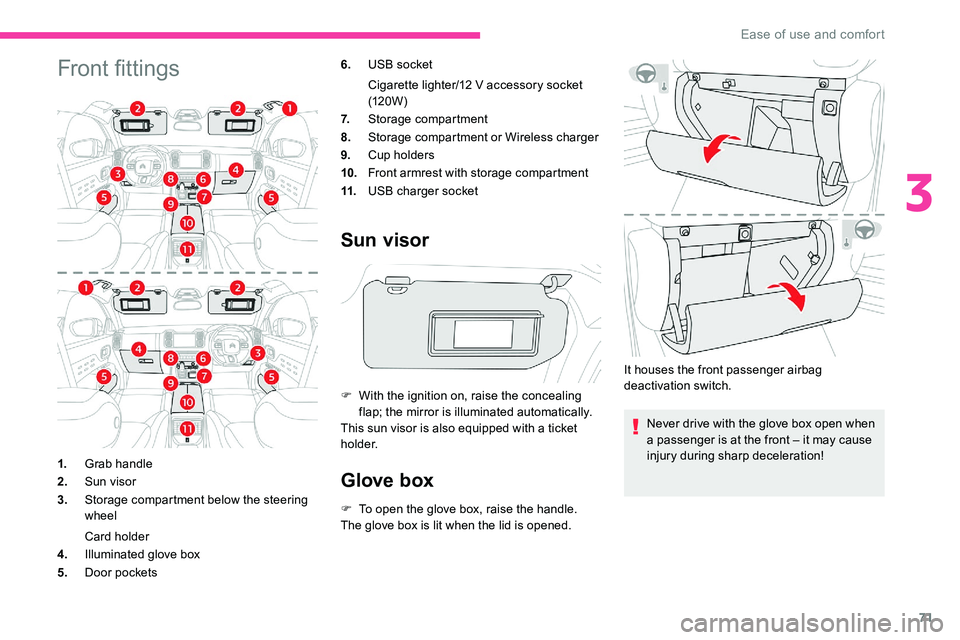
Front fittings6.USB socket
Cigarette lighter/12
V accessory socket
(120W)
7. Storage compartment
8. Storage compartment or Wireless charger
9. Cup holders
10. Front armrest with storage compartment
11. USB charger socket
Sun visor
F With the ignition on, raise the concealing
flap; the mirror is illuminated automatically.
This sun visor is also equipped with a
ticket
h o l d e r.
Glove box
F To open the glove box, raise the handle.
The glove box is lit when the lid is opened.
1.
Grab handle
2. Sun visor
3. Storage compartment below the steering
wheel
Card holder
4. Illuminated glove box
5. Door pockets It houses the front passenger airbag
deactivation switch.
Never drive with the glove box open when
a passenger is at the front – it may cause
injury during sharp deceleration!
3
Ease of use and comfort
Page 74 of 292
72
Cigarette lighter/12 V
a ccessory socket(s)
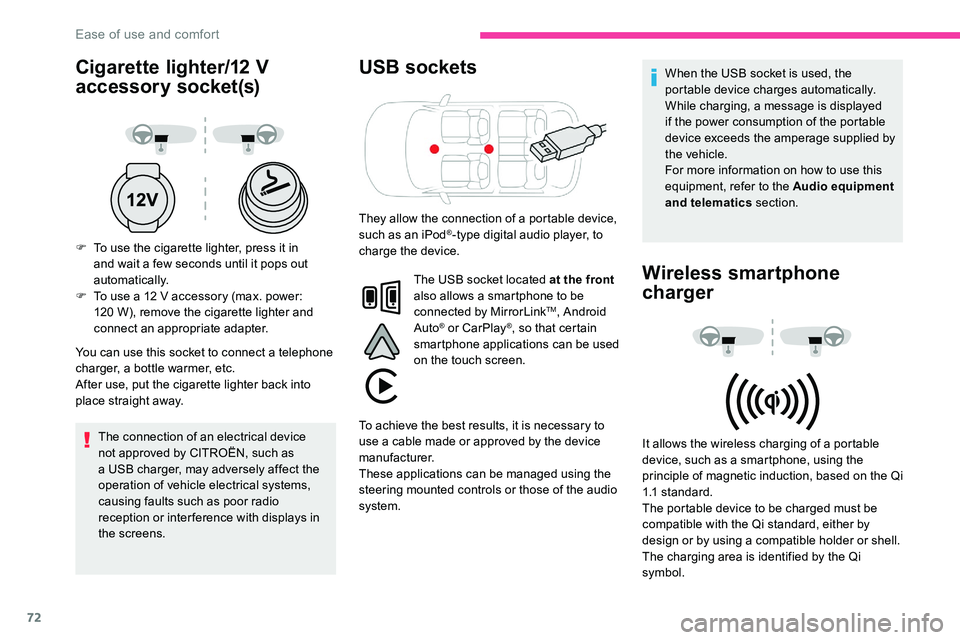
F To use the cigarette lighter, press it in
and wait a few seconds until it pops out
automatically.
F
T
o use a 12 V accessory (max. power:
120
W), remove the cigarette lighter and
connect an appropriate adapter.
You can use this socket to connect a
telephone
charger, a bottle warmer, etc.
After use, put the cigarette lighter back into
place straight away.
The connection of an electrical device
not approved by CITROËN, such as
a
USB charger, may adversely affect the
operation of vehicle electrical systems,
causing faults such as poor radio
reception or inter ference with displays in
the screens.
USB sockets
The USB socket located at the front
also allows a smartphone to be
connected by MirrorLink
TM, Android
Auto® or CarPlay®, so that certain
smartphone applications can be used
on the touch screen. When the USB socket is used, the
portable device charges automatically.
While charging, a message is displayed
if the power consumption of the portable
device exceeds the amperage supplied by
the vehicle.
For more information on how to use this
equipment, refer to the Audio equipment
and telematics
section.
Wireless smartphone
charger
It allows the wireless charging of a portable
d evice, such as a smartphone, using the
principle of magnetic induction, based on the Qi
1.1
standard.
The portable device to be charged must be
compatible with the Qi standard, either by
design or by using a
compatible holder or shell.
The charging area is identified by the Qi
symbol.
They allow the connection of a
portable device,
such as an iPod
®-type digital audio player, to
charge the device.
To achieve the best results, it is necessary to
use a
cable made or approved by the device
manufacturer.
These applications can be managed using the
steering mounted controls or those of the audio
system.
Ease of use and comfort
Page 77 of 292

75
Courtesy lampsInterior ambient lighting
The dimmed passenger compartment lighting
improves visibility in the vehicle when the light
i s p o o r.
At night, the interior ambient lighting comes on
automatically when the sidelamps are switched
on.
Depending on version, the ambient lighting
includes:
-
t
wo LEDs located in the front courtesy lamp.
-
a l
ight source in the storage compartment at
the front of the centre console.
-
a l
ight source for each of the front footwells.
-
i
lluminated bezels for the front cup holders.
-
a l
ight source for each of the interior door
opening controls.
The ambient lighting switches off automatically
when the sidelamps are switched off.
1.
Front courtesy lamp
2. Front map reading lamps
3. Rear courtesy lamp
4. Rear map reading lamps (depending on
ve r s i o n)
Front and rear courtesy lamps
In this position, the courtesy
lamp comes on gradually: -
w
hen the vehicle is locked,
-
w
hen the ignition is switched on,
-
3
0 seconds after the last door is closed.
Permanently off.
Permanent lighting.
In "permanent lighting" mode, the lighting time varies
according to the circumstances:
-
w
hen the ignition is off, approximately ten minutes,
-
i
n energy economy mode, approximately thirty
seconds,
-
w
ith the engine running, unlimited.
When the front courtesy lamp is in the
"permanent lighting" position, the rear
courtesy lamp also comes on, except if it
is in the "permanently off " position.
To switch off the rear courtesy lamp, put it
in the "permanently off " position.
Front and rear map reading
lamps
F With the ignition on, operate the corresponding switch. Take care not to put anything in contact
with the courtesy lamps.
-
o
n unlocking the vehicle,
-
o
n removing the key from the ignition,
-
o
n opening a
door,
-
o
n activating the remote control locking
button, in order to locate your vehicle.
It switches off gradually: The interior ambient lighting can
be activated or deactivated and its
brightness adjusted in the Driving/
Vehicle
menu of the touch screen.
3
Ease of use and comfort