steering wheel adjustment CITROEN C5 AIRCROSS 2022 Handbook (in English)
[x] Cancel search | Manufacturer: CITROEN, Model Year: 2022, Model line: C5 AIRCROSS, Model: CITROEN C5 AIRCROSS 2022Pages: 276, PDF Size: 7.92 MB
Page 4 of 276

2
Contents
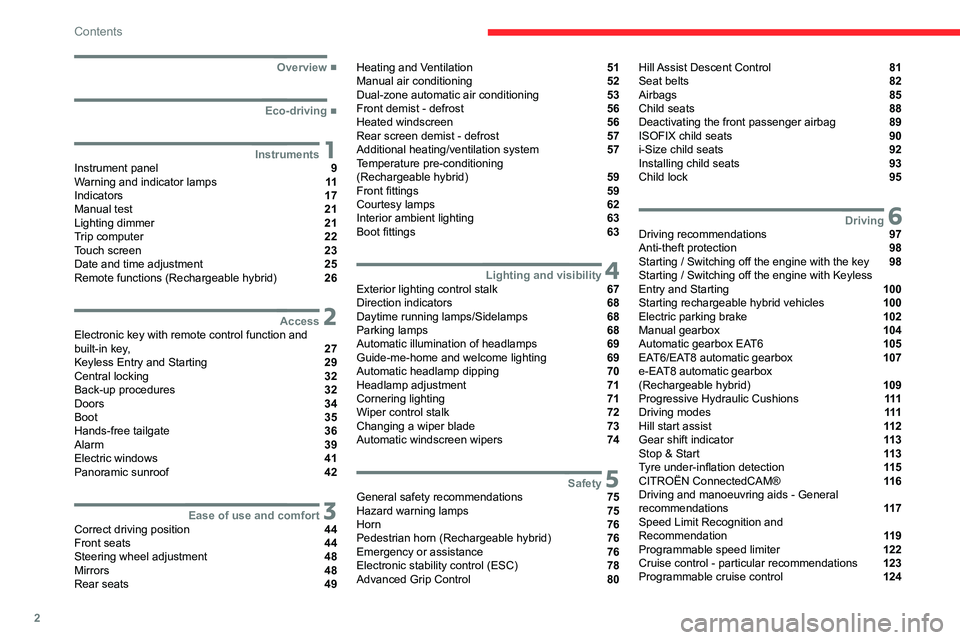
■
Overview
■
Eco-driving
1InstrumentsInstrument panel 9
Warning and indicator lamps 11
Indicators 17
Manual test 21
Lighting dimmer 21
Trip computer 22
Touch screen 23
Date and time adjustment 25
Remote functions (Rechargeable hybrid) 26
2AccessElectronic key with remote control function and
built-in key, 27
Keyless Entry and Starting 29
Central locking 32
Back-up procedures 32
Doors 34
Boot 35
Hands-free tailgate 36
Alarm 39
Electric windows 41
Panoramic sunroof 42
3Ease of use and comfortCorrect driving position 44
Front seats 44
Steering wheel adjustment 48
Mirrors 48
Rear seats 49
Heating and Ventilation 51
Manual air conditioning 52
Dual-zone automatic air conditioning 53
Front demist - defrost 56
Heated windscreen 56
Rear screen demist - defrost 57
Additional heating/ventilation system 57
Temperature pre-conditioning
(Rechargeable hybrid)
59
Front fittings 59
Courtesy lamps 62
Interior ambient lighting 63
Boot fittings 63
4Lighting and visibilityExterior lighting control stalk 67
Direction indicators 68
Daytime running lamps/Sidelamps 68
Parking lamps 68
Automatic illumination of headlamps 69
Guide-me-home and welcome lighting 69
Automatic headlamp dipping 70
Headlamp adjustment 71
Cornering lighting 71
Wiper control stalk 72
Changing a wiper blade 73
Automatic windscreen wipers 74
5SafetyGeneral safety recommendations 75
Hazard warning lamps 75
Horn 76
Pedestrian horn (Rechargeable hybrid) 76
Emergency or assistance 76
Electronic stability control (ESC) 78
Advanced Grip Control 80
Hill Assist Descent Control 81
Seat belts 82
Airbags 85
Child seats 88
Deactivating the front passenger airbag 89
ISOFIX child seats 90
i-Size child seats 92
Installing child seats 93
Child lock 95
6DrivingDriving recommendations 97
Anti-theft protection 98
Starting / Switching off the engine with the key 98
Starting / Switching off the engine with Keyless
Entry and Starting
100
Starting rechargeable hybrid vehicles 100
Electric parking brake 102
Manual gearbox 104
Automatic gearbox EAT6 105
EAT6/EAT8 automatic gearbox 107
e-EAT8 automatic gearbox
(Rechargeable hybrid)
109
Progressive Hydraulic Cushions 111
Driving modes 111
Hill start assist 11 2
Gear shift indicator 11 3
Stop & Start 11 3
Tyre under-inflation detection 11 5
CITROËN ConnectedCAM® 11 6
Driving and manoeuvring aids - General
recommendations
11 7
Speed Limit Recognition and
Recommendation
11 9
Programmable speed limiter 122
Cruise control - particular recommendations 123
Programmable cruise control 124
Page 12 of 276

10
Instruments
8.Coolant temperature indicator (°C) (Petrol
or Diesel)
Battery charge level and remaining range
(miles or km) (Rechargeable hybrid)
9. Total distance recorder (miles or km)
10. Trip distance recorder (miles or km)
Control button
A.Short press: display the alerts log, reminder
of servicing information or the remaining
range associated with the AdBlue
® and the
SCR system (miles or km) and tyre pressure
status information display.
Long press: reset the service indicator or trip
distance recorder (depending on the context).
Displays
Some lamps have a fixed location, others can
change location.
For certain functions that have indicator lamps
for both operation and deactivation, there is only
one dedicated location.
Permanent information
In the standard display, the instrument panel
shows:
–
in fixed locations:
•
Rev counter (Petrol or Diesel).
•
Fuel level indicator
.
•
Coolant temperature indicator
.
•
Charge level and range indicator
(Rechargeable hybrid).
• Power indicator (Rechargeable hybrid).
• Distance recorders.
–
in variable locations:
•
Information related to the gearbox and gear
shift indicator
.
•
Digital speedometer
.
•
Status or alert messages displayed
temporarily
.
Optional information
Depending on the selected display mode and
active features, additional information may be
displayed:
–
Rev counter (Petrol or Diesel).
–
T
rip computer.
–
Driving aid functions.
–
Speed limiter or cruise control.
–
Media currently playing.
–
Navigation instructions.
–
Analogue speedometer
.
–
Engine oil level and temperature.
Customising the instrument
panel
You can modify the appearance of the instrument
panel by choosing:
–
a display colour
.
–
a display mode.
Display language and units
These depend on the touch screen
settings.
When travelling abroad, the speed must be
shown in the official units of the country you
are driving in (mph, miles or km/h, km).
As a safety measure, these adjustments must be carried out with the vehicle
stationary.
Choosing the display colour
► Press " Settings" in the upper banner
of the touch screen.
►
Select "
Color schemes".
►
Select a display colour
.
Choosing the display mode
In each mode, specific types of information are
displayed on the instrument panel.
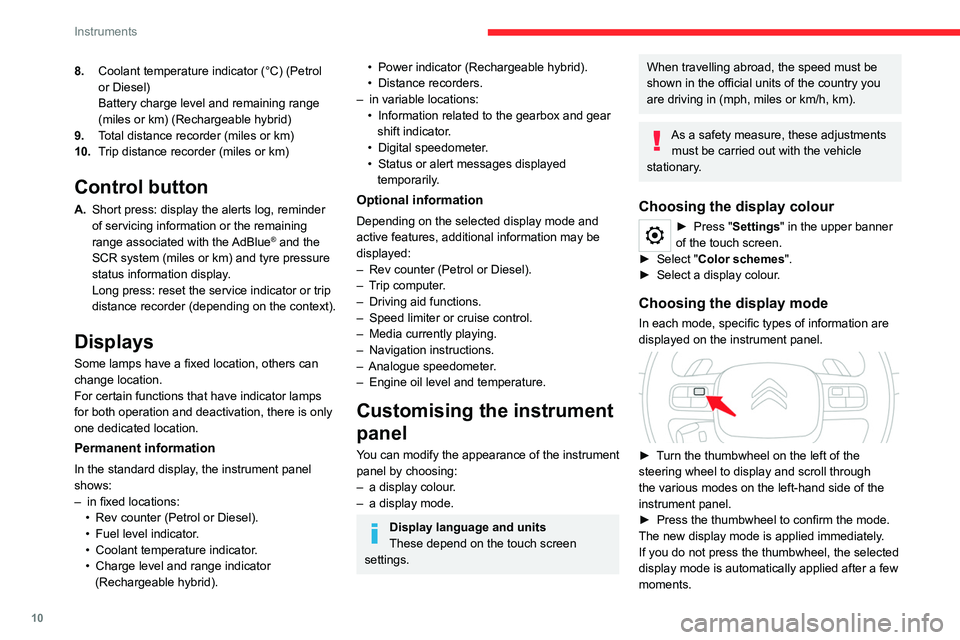
► Turn the thumbwheel on the left of the
steering wheel to display and scroll through
the various modes on the left-hand side of the
instrument panel.
►
Press the thumbwheel to confirm the mode.
The new display mode is applied immediately
.
If you do not press the thumbwheel, the selected
display mode is automatically applied after a few
moments.
Page 46 of 276

44
Ease of use and comfort
Correct driving position
Before taking to the road and to make the most
of the ergonomic layout of the instruments and
controls, carry out these adjustments in the
following order:
–
the height of the head restraint,
–
the seat backrest angle,
–
the seat cushion height,
–
the longitudinal position of the seat,
–
the height and reach of the steering wheel,
–
the rear view mirror and door mirrors.
Once these adjustments have been
made, check the instrument panel can be
viewed correctly from your driving position.
Front seats
Caution when moving the
front seats
For safety reasons, only adjust seats
when the vehicle is stationary.
Before moving the seat backwards,
ensure that there is no person or object
that might prevent the full travel of the seat.
There is a risk of trapping or pinching
passengers if present in the rear seats or of
jamming the seat if large objects are placed
on the floor behind the seat.
Front head restraints
Adjusting the height
The adjustment is correct when the upper edge of the head restraint is level
with the top of the head.
‘Two-way’ adjustment model
Upwards:
► pull the head restraint up to the desired
position; the head restraint can be felt to click
into position.
Downwards:
►
press lug
A and push the head restraint down
to the desired position.
‘Four-way’ adjustment model
Upwards:
► pull the head restraint up to the desired
position; the head restraint can be felt to click
into position.
Downwards:
► press and hold button B and push the head
restraint down to the desired position.
Adjusting the angle
“Four-way” adjustment model
► press and hold button B and push the lower
part of the head restraint forwards or backwards.
Removing a head restraint
► Pull the head restraint up as far as it will go.
► Press the lug(s) A (depending on version)
to unlock the head restraint and remove it
completely,
► Stow the head restraint securely.
Page 50 of 276

48
Ease of use and comfort
With the engine running, on engaging reverse
gear, the mirror glasses tilt downwards.
They return to their initial position:
– A few seconds after coming out of reverse
gear.
– Once the vehicle speed exceeds 6 mph
(10 km/h).
– When the engine is switched off.
It is set via theDriving/Vehicle touch
screen menu.
Rear view mirror
Equipped with an anti-dazzle system, which
darkens the mirror glass and reduces the
nuisance to the driver caused by the sun,
headlamps of other vehicles, etc.
Manual model
Adjustment
► Adjust the mirror so that the glass is directed
correctly in the "day" position.
Day/night position
Steering wheel
adjustment
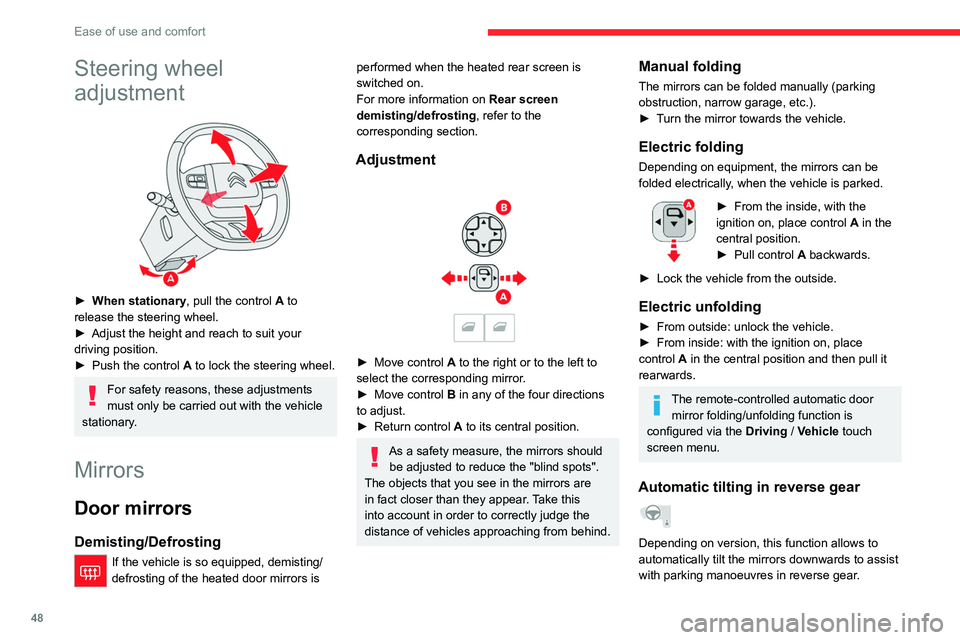
► When stationary , pull the control A to
release the steering wheel.
►
Adjust the height and reach to suit your
driving position.
►
Push the control
A to lock the steering wheel.
For safety reasons, these adjustments
must only be carried out with the vehicle
stationary.
Mirrors
Door mirrors
Demisting/Defrosting
If the vehicle is so equipped, demisting/
defrosting of the heated door mirrors is
performed when the heated rear screen is
switched on.
For more information on Rear screen
demisting/defrosting , refer to the
corresponding section.
Adjustment
► Move control A to the right or to the left to
select the corresponding mirror.
►
Move control
B in any of the four directions
to adjust.
►
Return control A
to its central position.
As a safety measure, the mirrors should be adjusted to reduce the "blind spots".
The objects that you see in the mirrors are
in fact closer than they appear. Take this
into account in order to correctly judge the
distance of vehicles approaching from behind.
Manual folding
The mirrors can be folded manually (parking
obstruction, narrow garage, etc.).
►
T
urn the mirror towards the vehicle.
Electric folding
Depending on equipment, the mirrors can be
folded electrically, when the vehicle is parked.
► From the inside, with the
ignition on, place control A
in the
central position.
►
Pull control A
backwards.
►
Lock the vehicle from the outside.
Electric unfolding
► From outside: unlock the vehicle.
► From inside: with the ignition on, place
control
A in the central position and then pull it
rearwards.
The remote-controlled automatic door mirror folding/unfolding function is
configured via the Driving
/ Vehicle touch
screen menu.
Automatic tilting in reverse gear
Depending on version, this function allows to
automatically tilt the mirrors downwards to assist
with parking manoeuvres in reverse gear.
Page 73 of 276

71
Lighting and visibility
4– if the windscreen is dirty, misted or
obscured (by a sticker, etc.) in front of the
camera,
–
if the vehicle is facing highly reflective
signs.
When the system detects thick fog, it
temporarily deactivates the function.
The system is not able to detect:
–
road users that do not have their own
lighting, such as pedestrians,
–
vehicles whose lighting is obscured (for
example: vehicles running behind a safety
barrier on a motorway),
–
vehicles at the top or bottom of a steep
slope, on winding roads, on crossroads.
Headlamp adjustment
Manual headlamp
adjustment
To avoid dazzling other road users, the height
of these headlamp beams must be adjusted
according to the load in the vehicle.
0 (Initial setting) Driver only or driver + front passenger
1 5 people
4 5 people + load in the boot
5 Driver only + load in the boot
This information is provided as a guide only.
Depending on version, the unused positions may
be required.
Automatic adjustment of the Full LED technology
headlamps
This system automatically adjusts the height of
the headlamp beams according to the load in the
vehicle.
In the event of a malfunction, this warning
lamp comes on on the instrument panel,
accompanied by the display of a message and
an audible signal.
The system then places the headlamp beams in
the lowest position.
Have the system checked by a CITROËN dealer
or a qualified workshop.
Do not touch the "Full LED" technology
headlamps - risk of electrocution!
Cornering lighting
This system makes use of the beam from a front
foglamp to illuminate the inside of a bend, when
the main or dipped beam headlamps are on and
the vehicle speed is below 25 mph (40
km/h)
(urban driving, winding road, junctions, parking
manoeuvres).
Without/With cornering lighting
Activation / Deactivation
It is set via the Driving / Vehicle touch
screen menu.
Switching on / off
This system starts:
– when the corresponding direction indicator is
switched on.
or
–
from a certain angle of rotation of the steering
wheel.
It becomes inactive:
–
below a certain angle of rotation of the
steering wheel.
–
above 25 mph (40
km/h).
Page 128 of 276

126
Driving
4.Pause/resume cruise control with the speed
setting previously saved
Confirmation of vehicle restart after automatic
stop (versions with Stop & Go function)
5. Use the speed suggested by the Speed Limit
Recognition and Recommendation ( MEM
display)
6. Display and adjustment of the distance
setting to the vehicle in front
Use
Activating the system (pause)
► With the engine running, turn the thumbwheel
1 downwards to the CRUISE position. Cruise
control is ready to operate (grey display).
Switching on cruise control and setting
the speed
With a manual gearbox, your speed must be
between 19 and 112 mph (30 and 180 km/h).
With an automatic EAT6 gearbox, your speed
must be between 1 and 112 mph (2 and
180 km/h).
With an automatic EAT8 gearbox, your speed
must be between 0 and 112 mph (0 and
180 km/h).
► Press button 2 or 3: the current speed
becomes the speed setting (minimum 19 mph
(30 km/h)) and cruise control is immediately
activated (green display).
Highway Driver Assist
Only available on versions with automatic
gearbox.
This system automatically adjusts the speed and
corrects the trajectory of the vehicle, using the
Adaptive Cruise Control with Stop&Go function
in conjunction with the Lane Positioning Assist.
These two functions must be activated and in
operation.
This system is especially suitable for driving on
motorways and main roads.
For more information on Adaptive Cruise
Control and Lane Positioning Assist, refer to
the corresponding sections.
The system assists the driver by acting on the steering, acceleration and braking,
within the limits of the laws of physics and the
capabilities of the vehicle. Certain road
infrastructure elements or vehicles present on
the road may not be properly seen or may be
poorly interpreted by the camera and radar,
resulting in an unexpected change in
direction, a lack of steering correction and/or
inappropriate management of acceleration or
braking.
Adaptive Cruise Control
Refer to the General recommendations on the
use of driving and manoeuvring aids and to
Cruise control - particular recommendations.
This system automatically maintains the speed
of your vehicle at a value which you set (speed
setting), while keeping a safe distance from the
vehicle in front (target vehicle), and which has
been set beforehand by the driver. The system
automatically manages the acceleration and
deceleration of the vehicle.
With the Stop function , the system manages
the braking until the vehicle comes to a complete
stop.
With the Stop
& Go function, the system
manages the braking until the vehicle comes to a
complete stop and the restarting of the vehicle.
The brake lamps come on if the vehicle is slowed down by the system.
It can be dangerous to drive if the brake
lamps are not in perfect working order.
To do so, it has a camera located at the top of
the windscreen and, depending on version, a
radar located in the front bumper.
Primarily designed for driving on main
roads and motorways, this system only
works with moving vehicles driving in the
same direction as your vehicle.
If the driver operates a direction indicator
to overtake a slower vehicle, the cruise
control allows the vehicle to temporarily
approach the vehicle in front to assist the
overtaking manoeuvre, without ever
exceeding the speed setting.
Some vehicles present on the road may
not be properly seen or may be poorly
interpreted by the camera and/or radar (e.g. a
lorry), which may lead to a poor assessment
of the distances and lead to the vehicle
inappropriately accelerating or braking.
Steering-mounted controls
1. ON (CRUISE position)/OFF (position 0)
2. Activation of cruise control at the current
speed/decrease speed setting
3. Activation of cruise control at the current
speed/increase speed setting
Page 141 of 276

139
Driving
6Function statusIndicator lamp Display and/or associated
messageComments
ON
(orange)/(green)
"Take control of the vehicle." –
If, while correcting the trajectory
, the system detects
that the driver has not held the steering wheel for a few
seconds, it stops correcting and returns control to the
driver.
– If, while correcting the trajectory , the system determines
that the correction will not be enough and that a solid line
will be crossed (orange line): the driver is warned that they
must provide additional trajectory adjustment.
The duration of audible warnings will increase if multiple
corrections are performed in quick succession. The
warning will become continuous, persisting until the driver
responds.
This message may also be displayed if you have your
hands on the steering wheel.
Operating limits
The system goes into standby automatically in
the following cases:
–
ESC deactivated or operation triggered.
–
Speed below 43 mph (70
km/h) or greater
than 112 mph (180
km/h),
–
Electrical connection of a trailer
.
–
Use of a"space-saver" spare wheel detected
(as detection is not immediate, deactivation of
the system is recommended).
–
Dynamic driving style detected, pressure on
the brake or accelerator pedal.
–
Driving where there are no lane markings.
–
Activation of the direction indicators.
– Crossing the inside line on a bend.
– Driving in a tight corner .
–
Inactivity by the driver detected during
correction.
The following situations may interfere with the operation of the system or
prevent it from working:
–
Insufficient contrast between the road
surface and the side of the road (e.g. shade).
–
Lane markings worn, hidden (snow
, mud)
or multiple (roadworks, etc.),
–
Running close to the vehicle in front (the
lane markings may not be detected).
–
Roads that are narrow
, winding.
Risk of undesirable operation
We recommend deactivating the system in the
following driving situations:
–
Driving on damaged, unstable or very slippery
(ice) road surfaces,
–
Poor weather conditions.
–
Driving on a speed circuit.
–
Driving on a rolling road.
Page 252 of 276

250
Alphabetical index
S
Safety, children 86, 88–92
Saturation of the particle filter (Diesel)
172
Screen menu map
214
Screens, very cold conditions
166
Screenwash
72
Screenwash, front
72
Screenwash, rear
73
SCR (Selective Catalytic Reduction)
19, 173
Seat belts
82–85, 90
Seat belts, rear
83
Seats, electric
46
Seats, front
44–46
Seats, heated
47
Seats, rear
49–50
Selector, gear
107–110
Sensors (warnings)
11 8
Serial number, vehicle
206
Service indicator
17, 21
Servicing
17, 171, 173
Settings, equipment
23, 25
Settings, system
217, 240
Sidelamps
68, 187
Smartphone
26
Snow chains
166
Snow screen
166
Socket, 12 V accessory
60, 64
Socket, auxiliary
213, 235
Socket, Jack
235
Speed limiter
121–123, 125
Speed limit recognition
119–120
Speedometer
9–10, 118
Sport mode
111 – 11 2
Spotlamps, side 69
Stability control (ESC)
78, 80
Starting a Diesel engine
152
Starting the engine
98, 100
Starting the vehicle
98–100, 107–109
Starting using another battery
101, 194
State of charge, battery
24
Station, radio
210–211, 234
Stay, bonnet
168–169
Steering mounted controls, audio
208, 221
Steering wheel, adjustment
48
Stickers, customising ~ Stickers,
expressive
176
Stopping the vehicle
98–101, 107–109
Stop & Start
23, 52, 56, 113–114, 152, 168, 171, 197
Storage
60–64
Storage box
66
Storage compartments
60
Storage wells
63, 66
Storing driving positions
46
Stowing rings
63
Sunroof, panoramic
42–43
Sunshine sensor
51
Sun visor
60
Suspension
173
Suspension with progressive hydraulic
stops
111
Switching off the engine
98
Synchronising the remote control
34T
Tables of engines 204–205
Tables of fuses
189, 193
Tank, fuel
152–153
Technical data
203–205
Telephone
61, 215–216, 237–239
Temperature, coolant
18
Ticket holder
60
Time (setting)
25, 217, 241
TMC (Traffic info)
228
Tool box
66
Tools
178–180
Top 360 Vision
143, 145
Topping-up AdBlue®
174
Top Rear Vision
143–144
Top Tether (fixing)
90
Total distance recorder
20–21
Touch screen
24, 59
Touch screen tablet
23
Towball, quickly detachable
163–165
Towbar
80, 162
Towbar with quickly detachable
towball
163–165
Towed loads
202–203, 205
Towing another vehicle
199, 201
Traction battery charge
157
Traction battery (Rechargeable
hybrid)
20, 154, 160
Traction control (ASR)
78–80
Traffic information (TMC)
228
Trailer
80, 162
Trailer stability assist (TSA)
80
Trajectory control systems
78