light CITROEN C6 2012 Handbook (in English)
[x] Cancel search | Manufacturer: CITROEN, Model Year: 2012, Model line: C6, Model: CITROEN C6 2012Pages: 216, PDF Size: 10.23 MB
Page 22 of 216
20
IN BRIE
F
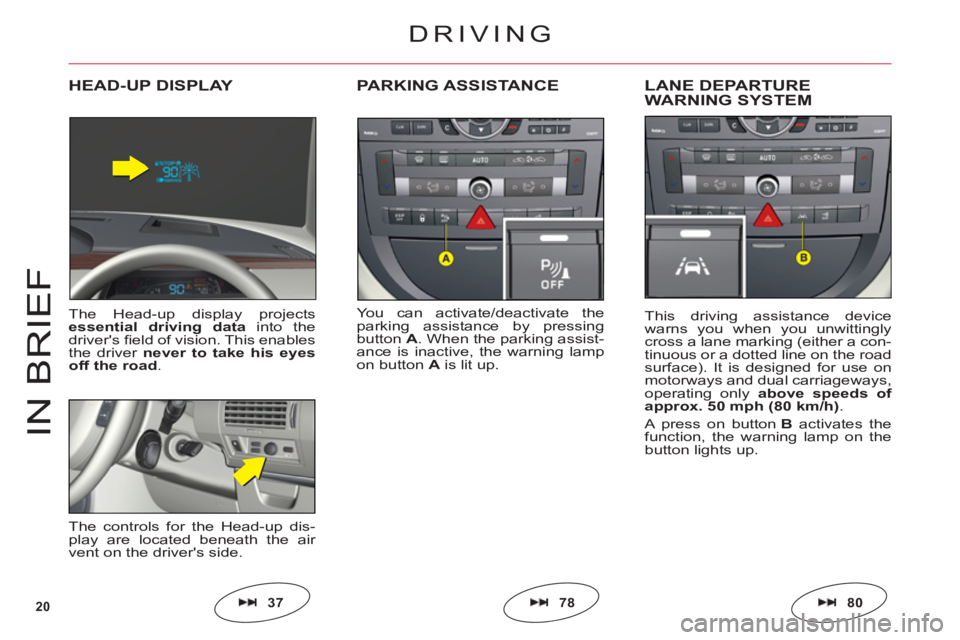
You can activate/deactivate the
parking assistance by pressing
buttonA. When the parking assist-
ance is inactive, the warning lampon button Ais lit up.
PARKING ASSISTANCELANE DEPARTURE
WARNING SYSTEM
This driving assistance device
warns you when you unwittinglycross a lane marking (either a con-
tinuous or a dotted line on the roadsurface). It is designed for use onmotorways and dual carriageways,
operating only above speeds of
approx. 50 mph (80 km/h).
A press on button Bactivates thefunction, the warning lamp on the
button lights up.
HEAD-UP DISPLAY
The Head-up display projectsessential driving data into thedriver's fi eld of vision. This enablesthe driver never to take his eyesoff the road.
The controls for the Head-up dis-play are located beneath the air
vent on the driver's side.
807837
DRIVING
Page 23 of 216
21
ECO-DRIVING
Eco-driving is a range of everyday practices that allow the motorist to optimise their fuel consumption and CO2
emissions.
Optimise the use of your
gearbox
With a manual gearbox, move off
gently, change up without waiting
and drive by changing up quite
soon. If your vehicle has the sys-
tem, the gear shift indicator invites
you to change up; it is displayed
in the instrument panel, follow its
instructions.
With an automatic or electronic
gearbox, stay in Drive "D" or
Auto "A", according to the type
of gear selector, without pressing
the accelerator pedal heavily or
suddenly.
Drive smoothly
Maintain a safe distance between
vehicles, use engine braking
rather than the brake pedal, and
press the accelerator progres-
sively. These attitudes contribute
towards a reduction in fuel con-
sumption and CO
2 emissions and
also helps reduce the background
traffi c noise.
When the traffi c is fl owing well,
and if you have cruise control,
make use of the system at speeds
above 25 mph (40 km/h).
Control the use of your
electrical equipment
Before moving off, if the passenger compartment is too warm, ventilate it by opening the windows and air vents before using the air conditioning.
Above 30 mph (50 km/h), close the windows and leave the air vents open.
Remember to make use of equipment that can help keep the temperature in the passenger compartment down (sun roof and window blinds...).
Switch off the air conditioning, unless
it has automatic digital regulation, as
soon as the desired temperature is
attained.
Switch off the demisting and defrost-
ing controls, if not automatic.
Switch off the heated seat as soon as
possible.
Switch off the headlamps and front
foglamps when the level of light
does not require their use.Avoid running the engine before
moving off, particularly in winter;
your vehicle will warm up much
faster while driving.
As a passenger, if you avoid con-
necting your multimedia devices
(fi lm, music, video game...), you
will contribute towards limiting the
consumption of electrical energy,
and so of fuel.
Disconnect your portable devices
before leaving the vehicle.
Page 25 of 216
23
II
ABDC
REMOTE CONTROL
Note:The simultaneous use of other high frequency equipment (mobile telephones, domestic
alarms, etc.) may momentarily hinder the operation of the remote control.
If there is a permanent fault, the remote control has to bereinitialised. See "Changing the remote control battery".
•
•
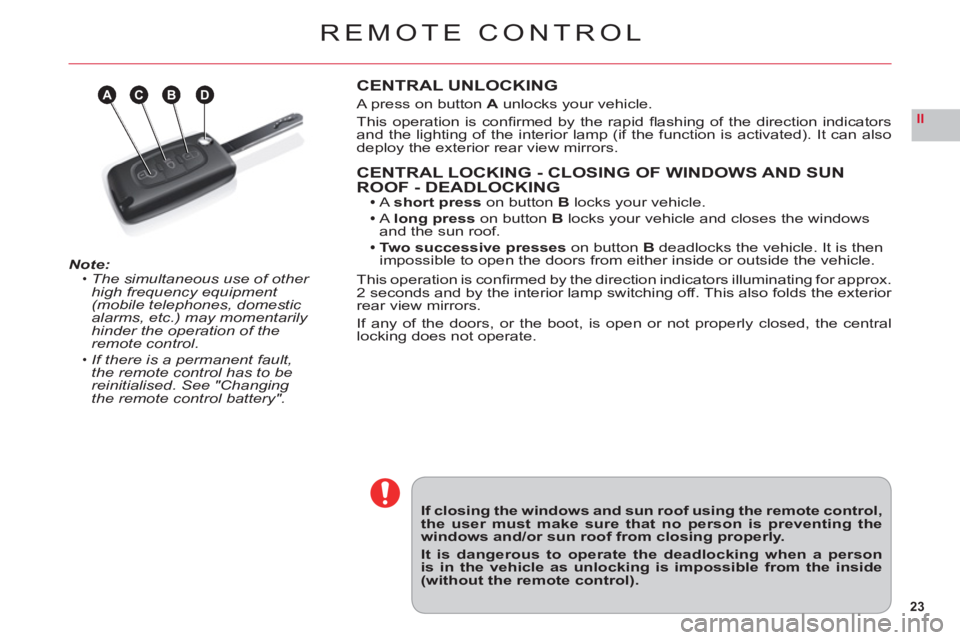
CENTRAL UNLOCKING
A press on button A unlocks your vehicle.
This operation is confi rmed b
y the rapid fl ashing of the direction indicators
and the lighting of the interior lamp (if the function is activated). It can alsodeploy the exterior rear view mirrors.
CENTRAL LOCKING - CLOSING OF WINDOWS AND SUN
ROOF - DEADLOCKINGA short presson buttonB locks your vehicle.
Along presson buttonB locks your vehicle and closes the windows and the sun roof.Two successive presses on button Bdeadlocks the vehicle. It is then
impossible to open the doors from either inside or outside the vehicle.
This operation is confi rmed b
y the direction indicators illuminating for approx.
2 seconds and by the interior lamp switching off. This also folds the exterior
rear view mirrors.
If any of the doors, or the boot, is open or not properly closed, the centrallocking does not operate.
If closing the windows and sun roof using the remote control,the user must make sure that no person is preventing thewindows and/or sun roof from closing properly.
It is dangerous to operate the deadlocking when a personis in the vehicle as unlocking is impossible from the inside(without the remote control).
Page 26 of 216
24
II
REMOTE CONTROL
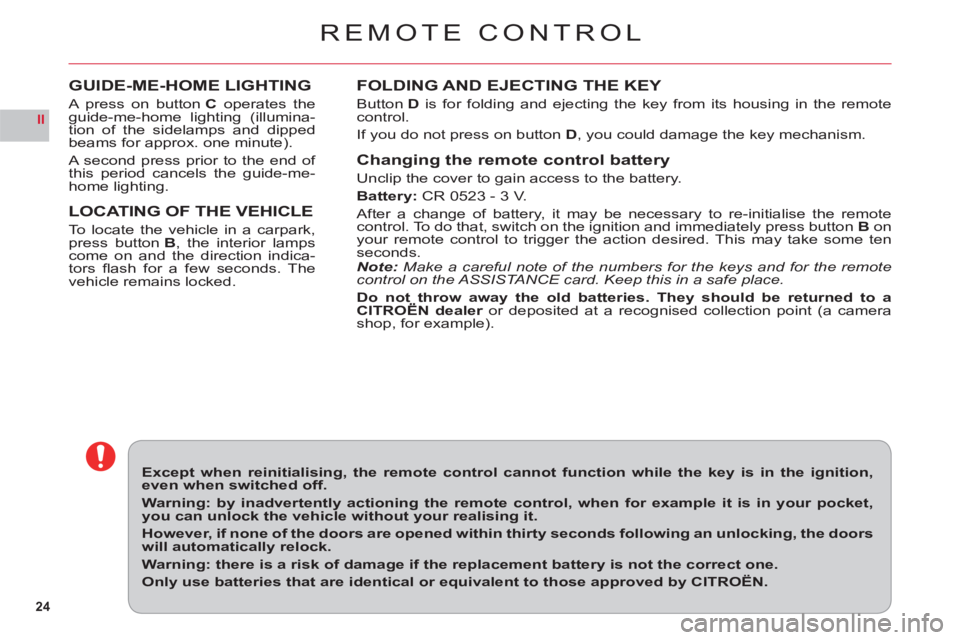
FOLDING AND EJECTING THE KEY
ButtonD is for folding and ejecting the key from its housing in the remotecontrol.
If
you do not press on button D, you could damage the key mechanism.
Changing the remote control battery
Unclip the cover to gain access to the battery.
Battery:CR 0523 - 3 V.
After a chan
ge of battery, it may be necessary to re-initialise the remotecontrol. To do that, switch on the ignition and immediately press button Bonyour remote control to trigger the action desired. This may take some tenseconds.Note: Make a careful note of the numbers for the keys and for the remote
control on the ASSISTA NCE card. Keep this in a safe place.
Do not throw away the old batteries. They should be returned to aCITROËN dealer or deposited at a recognised collection point (a camerarshop, for example).
Except when reinitialising, the remote control cannot function while the key is in the ignition,even when switched off.
Warning: by inadvertently actioning the remote control, when for example it is in your pocket,you can unlock the vehicle without your realising it.
However, if none of the doors are opened within thirty seconds following an unlocking, the doorswill automatically relock.
Warning: there is a risk of damage if the replacement battery is not the correct one.
Only use batteries that are identical or equivalent to those approved by CITROËN.
GUIDE-ME-HOME LIGHTING
A press on buttonC operates theguide-me-home lighting (illumina-
tion of the sidelamps and dipped
beams for approx. one minute).
A second press prior to the end of
this period cancels the guide-me-home lighting.
LOCATING OF THE VEHICLE
To locate the vehicle in a carpark,press button B, the interior lampscome on and the direction indica-
tors fl ash for a few seconds. Thevehicle remains locked.
Page 29 of 216
27
II
AB
ANTI-INTRUSION ALARM
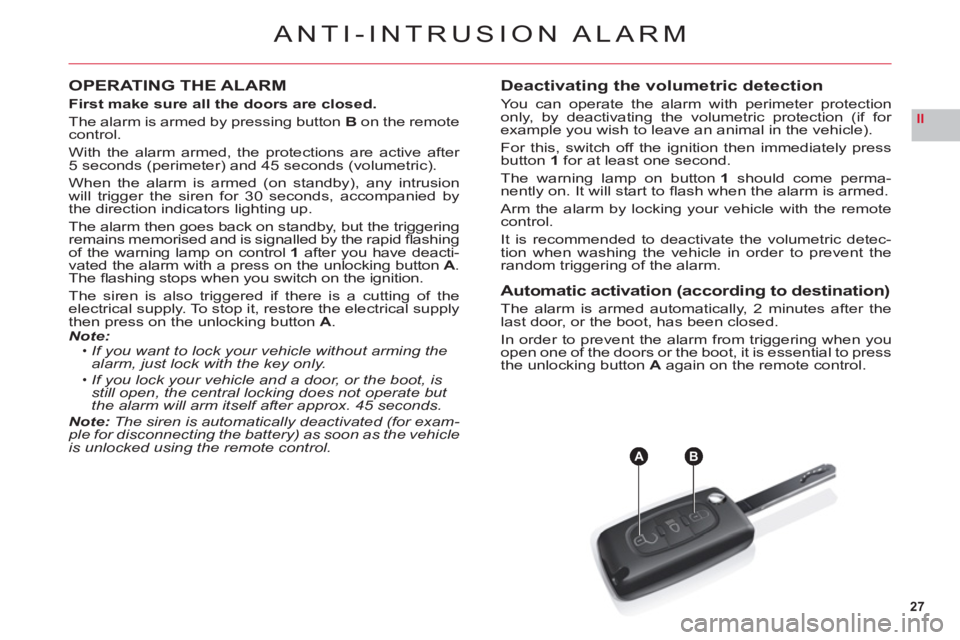
OPERATING THE ALARM
First make sure all the doors are closed.
The alarm is armed by pressing button Bon the remote control.
With the alarm armed, the protections are active after 5 seconds (perimeter) and 45 seconds (volumetric).
When the alarm is armed (on standby), any intrusion
will trigger the siren for 30 seconds, accompanied by
the direction indicators lighting up.
The alarm then
goes back on standby, but the triggering remains memorised and is signalled by the rapid fl ashing
of the warning lamp on control1 after you have deacti-
vated the alarm with a press on the unlocking button A.The fl ashing stops when you switch on the ignition.
The siren is also triggered if there is a cutting of the electrical supply. To stop it, restore the electrical supply
then press on the unlocking button A.Note:If you want to lock your vehicle without arming the
alarm, just lock with the key only.
If you lock your vehicle and a door, or the boot, is still open, the central locking does not operate but the alarm will arm itself after approx. 45 seconds.Note:The siren is automatically deactivated (for exam-ple for disconnecting the battery) as soon as the vehicle is unlocked using the remote control.
•
•
Deactivating the volumetric detection
You can operate the alarm with perimeter protection
only, by deactivating the volumetric protection (if for example you wish to leave an animal in the vehicle).
For this, switch o
ff the ignition then immediately pressbutton1 for at least one second.
The warning lamp on button1should come perma-nently on. It will start to fl ash when the alarm is armed.
Arm the alarm b
y locking your vehicle with the remotecontrol.
It is recommended to deactivate the volumetric detec-
tion when washing the vehicle in order to prevent the
random triggering of the alarm.
Automatic activation (according to destination)
The alarm is armed automatically, 2 minutes after the
last door, or the boot, has been closed.
In order to prevent the alarm from triggering when you
open one of the doors or the boot, it is essential to press
the unlocking button A again on the remote control.
Page 30 of 216
28
II
STEERING LOCK – IGNITION – STA R T ER
NEVER REMOVE THE IGNITION KEY BEFORE THE ENGINE HAS COME TO A COMPLETE STOP.
IT IS ESSENTIAL ALWAYS TO DRIVE WITH THE ENGINE RUNNING, SO AS TO RETAIN STEERING AND BRAKING ASSISTANCE (risk of the steering lock engaging and loss of safety features).
Do not hang a heavy object on the key; it could pull the key out of alignment in the switch and could cause a malfunction.
When stationary, having removed the key, carefully turn the steering wheel if you wish to lock the steering.
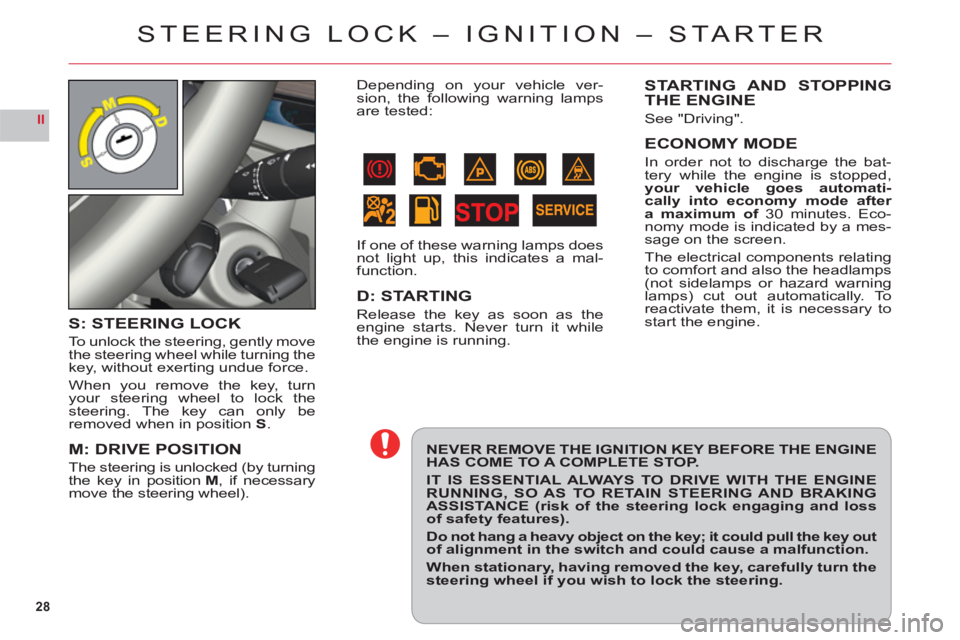
S: STEERING LOCK
To unlock the steering, gently move
the steering wheel while turning the
ke
y, without exerting undue force.
When you remove the key, turn
your steering wheel to lock the
steering. The key can only beremoved when in positionS.
M: DRIVE POSITION
The steering is unlocked (by turningthe key in positionM, if necessarymove the steering wheel).
STARTING AND STOPPINGTHE ENGINE
See "Driving".
ECONOMY MODE
In order not to discharge the bat-
tery while the engine is stopped,your vehicle goes automati-cally into economy mode after
a maximum of 30 minutes. Eco-nomy mode is indicated by a mes-sage on the screen.
The electrical components relatin
gto comfort and also the headlamps(not sidelamps or hazard warninglamps) cut out automatically. Toreactivate them, it is necessary tostart the engine.
Depending on your vehicle ver-
sion, the following warning lamps are tested:
If one of these warning lamps does
not light up, this indicates a mal-
function.
D: STARTING
Release the key as soon as the engine starts. Never turn it while
the engine is running.
Page 33 of 216
31
II
INSTRUMENT PANEL
WARNING LAMPS
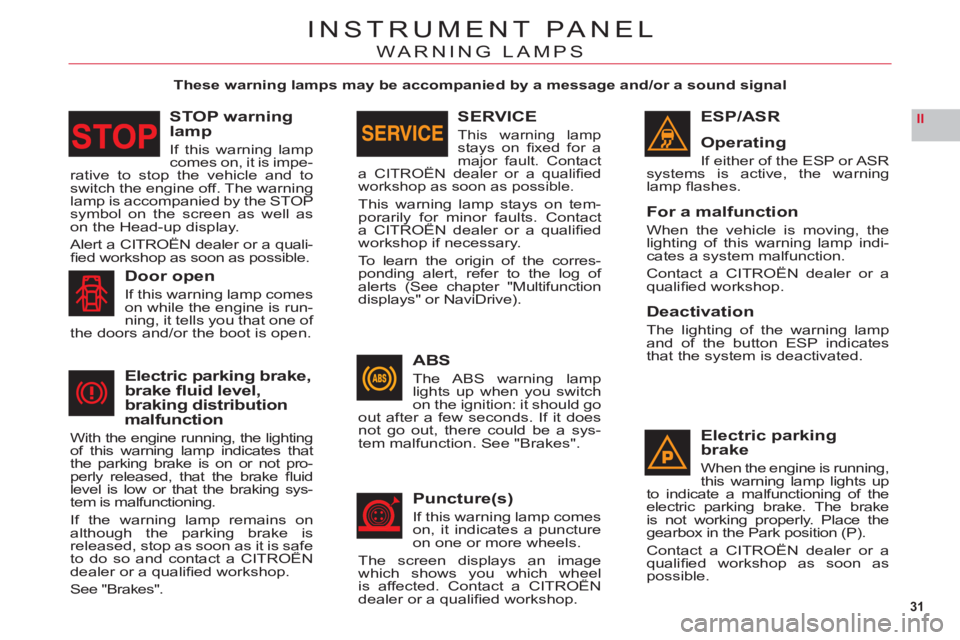
These warning lamps may be accompanied by a message and/or a sound signal
ESP/ASR
Operatin
g
If either of the ESP or ASR systems is active, the warning lamp fl ashes.
For a malfunction
When the vehicle is moving, the lighting of this warning lamp indi-cates a system malfunction.
Contact a CITROËN dealer or a qualifi ed workshop.
Deactivation
The lighting of the warning lamp and of the button ESP indicates
that the system is deactivated.
Electric parkingbrake
When the engine is running,
this warning lamp lights up
to indicate a malfunctioning of the electric parking brake. The brake is not working properly. Place the gearbox in the Park position (P).
Contact a CITROËN dealer or a qualifi ed workshop as soon as possible.
ABS
The ABS warning lamplights up when you switchon the ignition: it should goout after a few seconds. If it doesnot go out, there could be a sys-
tem malfunction. See "Brakes".
Puncture(s)
If this warning lamp comes
on, it indicates a punctureon one or more wheels.
The screen displa
ys an imagewhich shows you which wheelis affected. Contact a CITROËNy
dealer or a qualifi ed workshop.
Door open
If this warning lamp comes
on while the engine is run-ning, it tells you that one of
the doors and/or the boot is open.
Electric parking brake,brake fl uid level,braking distributionmalfunction
With the engine running, the lighting
of this warning lamp indicates that
the parking brake is on or not pro-
perly released, that the brake fl uid level is low or that the braking sys-
tem is malfunctioning.
If the warning lamp remains on although the parking brake is released, stop as soon as it is safe to do so and contact a CITROÀN ,p
dealer or a qualifi ed workshop.
See "Brakes".
SERVICE
This warning lampstays on fi xed for a
major fault. Contacta CITROËN dealer or a qualifi edj
workshop as soon as possible.
This warning lamp stays on tem-porarily for minor faults. Contacta CITROËN dealer or a qualifi edpy
workshop if necessary.
To learn the ori
gin of the corres-
ponding alert, refer to the log of
alerts (See chapter "Multifunction
displays" or NaviDrive).
STOP warning lamp
If this warning lamp comes on, it is impe-rative to stop the vehicle and to switch the engine off. The warning lamp is accompanied by the STOP symbol on the screen as well as
on the Head-up display.
Alert a CITROËN dealer or a quali-fi ed workshop as soon as possible.
Page 34 of 216
32
II
INSTRUMENT PANEL
WARNING LAMPS
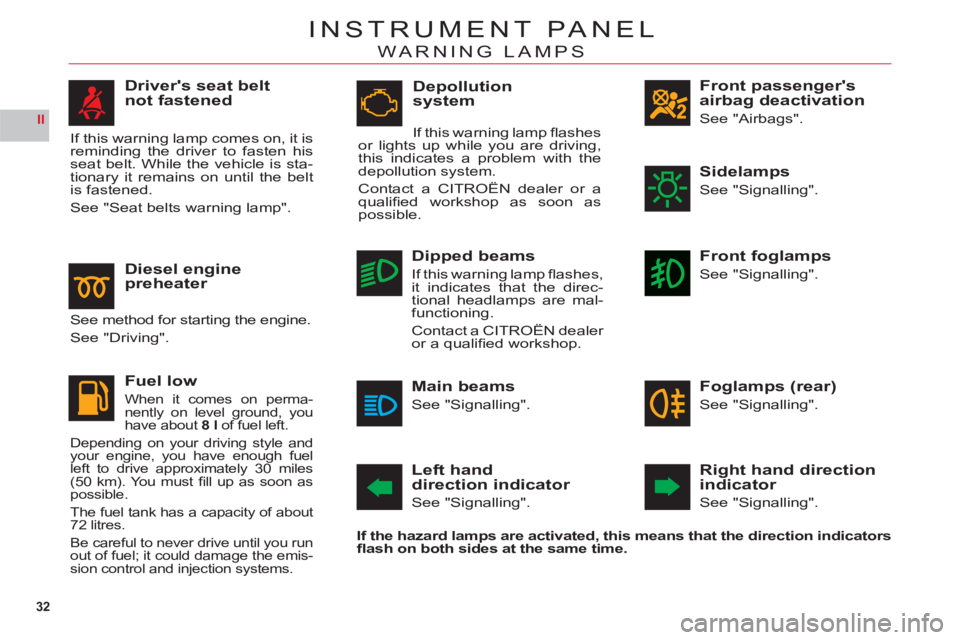
Front passenger'sairbag deactivation
See "Airbags".
Left handdirection indicator
See "Signalling".
Right hand directionindicator
See "Signalling".
If the hazard lam
ps are activated, this means that the direction indicatorsfl ash on both sides at the same time.
Sidelamps
See "Signalling".
Front foglamps
See "Signalling".
Dipped beams
If this warning lamp fl ashes, it indicates that the direc-
tional headlamps are mal-functioning.
Contact a CITROËN dealer
or a qualifi ed workshop.
Foglamps (rear)
See "Signalling".
Main beams
See "Signalling".
Driver's seat belt
not fastened
If this warning lamp comes on, it is reminding the driver to fasten his seat belt. While the vehicle is sta-
tionary it remains on until the belt
is fastened.
See "Seat belts warning lamp".
Depollution
system
If this warning lamp fl ashesor lights up while you are driving,
this indicates a problem with the
depollution system.
Contact a CITROËN dealer or a
qualifi ed workshop as soon as
possible.
Diesel enginepreheater
See method for starting the engine.
See "Driving".
Fuel low
When it comes on perma-
nently on level ground, you
have about 8 l of fuel left.
Depending on your driving style and your engine, you have enough fuel
left to drive approximately 30 miles (50 km). You must fi ll up as soon as
possible.
The fuel tank has a capacity of about
72 litres.
Be careful to never drive until you run
out of fuel; it could damage the emis-
sion control and injection systems.
Page 36 of 216
34
II
INSTRUMENT PANEL
MAINTENANCE INDICATOR
It informs you when the next routine service is due in accordance with the vehicle servicing schedule in theMaintenance and Warranty Guide. This information is dependent on two parameters: the mileage covered, and the
time elapsedsince the last visit.
Operation
From switching on the ignition and
for a few seconds, the spanner
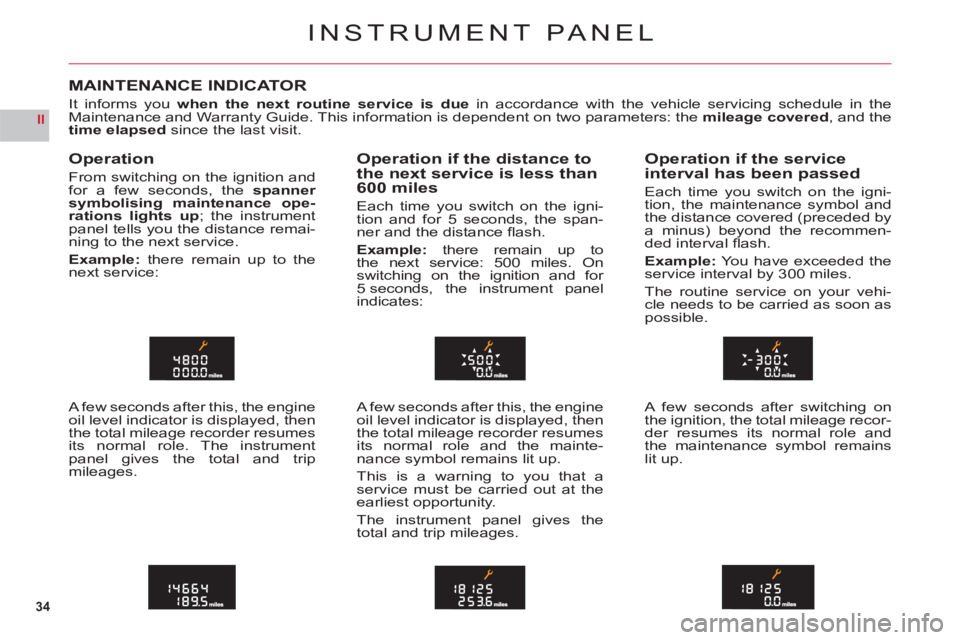
symbolising maintenance ope-rations lights up; the instrumentpanel tells you the distance remai-ning to the next service.
Example:there remain up to thenext service:
A few seconds after this, the engine
oil level indicator is displayed, then
the total mileage recorder resumesits normal role. The instrumentpanel gives the total and tripmileages.
Operation if the distance tothe next service is less than
600 miles
Each time you switch on the igni-
tion and for 5 seconds, the span-
n
er and the distance fl ash.
Example: there remain up to
the next service: 500 miles. On
switching on the ignition and for 5 seconds, the instrument panel
indicates:
A few seconds after this, the engine oil level indicator is displayed, then
the total mileage recorder resumes its normal role and the mainte-
nance symbol remains lit up.
This is a warnin
g to you that a service must be carried out at the earliest opportunity.
The instrument panel
gives the
total and trip mileages.
Operation if the service
interval has been passed
Each time you switch on the igni-
tion, the maintenance symbol andthe distance covered (preceded bya minus) beyond the recommen-ded interval fl ash.
Example:Yo u have exceeded theservice interval by 300 miles.
The routine service on your vehi-cle needs to be carried as soon aspossible.
A few seconds after switching on
the ignition, the total mileage recor-der resumes its normal role andthe maintenance symbol remainslit up.
Page 37 of 216
35
II
00
00A
A
INSTRUMENT PANEL
Maintenance intervals
If you use your vehicle in particu-larly diffi cult conditions, it is essen-
tialto use the service schedule for "severe conditions" comprisingshorter intervals between services.See "Maintenance and WarrantyGuide".
Reset to zero
It is reset by your CITROËN dealer
or a qualifi ed workshop after eachservice. However, if you do your
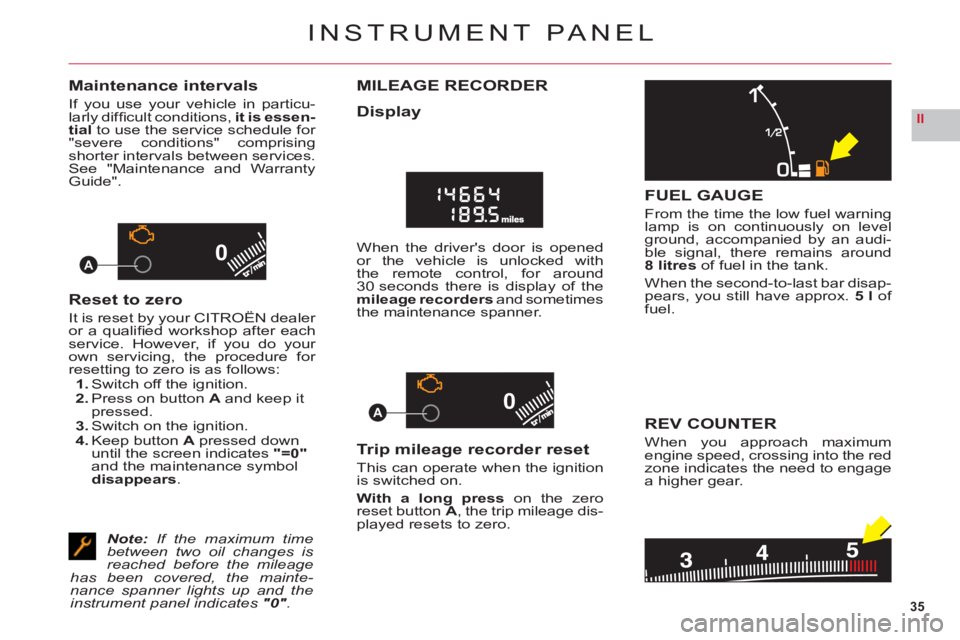
own servicing, the procedure for resetting to zero is as follows:1. Switch off the ignition.2. Press on button A and keep it pressed.3. Switch on the ignition.4. Keep buttonA pressed down until the screen indicates"=0"
and the maintenance symboldisappears.
Note:If the maximum time between two oil changes is reached before the mileage has been covered, the mainte-nance spanner lights up and the instrument panel indicates "0".
MILEAGE RECORDER
Display
When the driver's door is opened or the vehicle is unlocked with
the remote control, for around
30 seconds there is display of the mileage recorders and sometimes
the maintenance spanner.
Trip mileage recorder reset
This can operate when the ignition is switched on.
With a long press on the zero
reset buttonA, the trip mileage dis-
played resets to zero.
FUEL GAUGE
From the time the low fuel warninglamp is on continuously on levelground, accompanied by an audi-
ble signal, there remains around8 litresof fuel in the tank.
When the second-to-last bar disap-pears, you still have approx. 5 l of
fuel.
REV COUNTER
When you approach maximumengine speed, crossing into the redzone indicates the need to engage
a higher gear.