ESP Citroen DS3 2014 1.G Owner's Manual
[x] Cancel search | Manufacturer: CITROEN, Model Year: 2014, Model line: DS3, Model: Citroen DS3 2014 1.GPages: 376, PDF Size: 12.55 MB
Page 13 of 376
11
DS3_en_Chap00b_vue-ensemble_ed01-2014
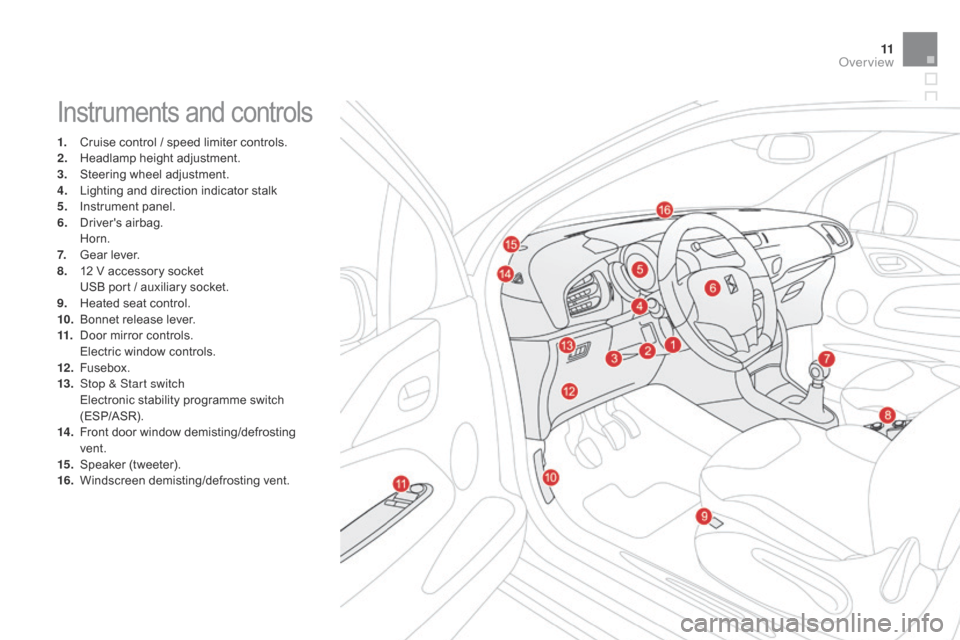
Instruments and controls
1. Cruise control / speed limiter controls.
2. H eadlamp height adjustment.
3.
S
teering wheel adjustment.
4.
L
ighting and direction indicator stalk
5.
I
nstrument panel.
6.
D
river's
ai
rbag.
H
orn.
7.
G
ear lever.
8.
1
2 V accessory socket
U
SB port / auxiliary socket.
9.
H
eated seat control.
10.
B
onnet release lever.
11.
D
oor mirror controls.
E
lectric window controls.
12 .
F
usebox.
13.
S
top & Start switch
E
lectronic stability programme switch
(
ESP/ASR).
14 .
F
ront door window demisting/defrosting
ve
nt.
15.
S
peaker
(
tweeter).
16.
W
indscreen
d
emisting/defrosting
v
ent.
Over view
Page 25 of 376
23
DS3_en_Chap01_controle-de-marche_ed01-2014
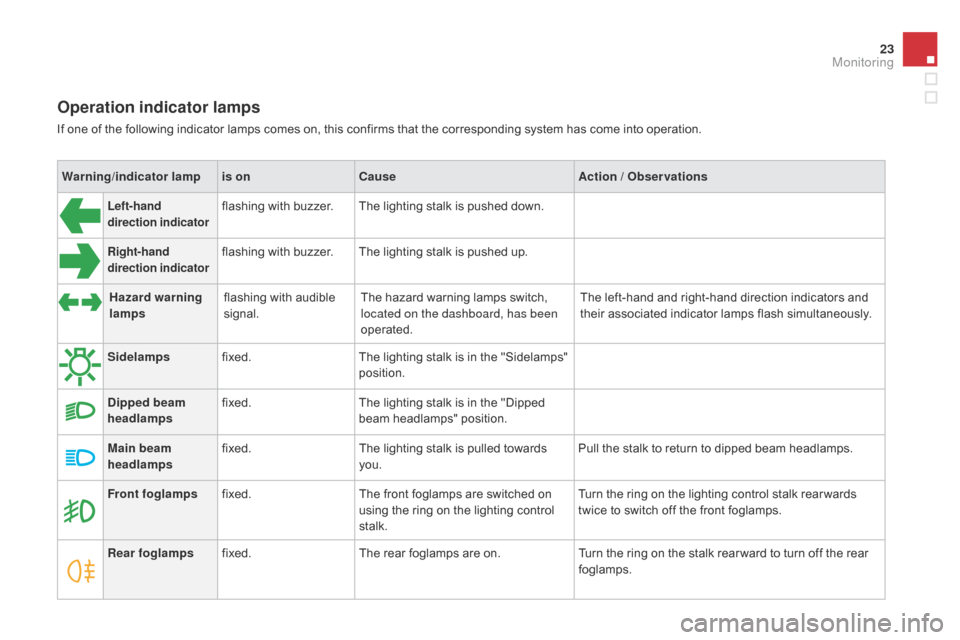
Operation indicator lamps
If one of the following indicator lamps comes on, this confirms that the corresponding system has come into operation.
W arning /indicator lampis on
cau
seAction / Observations
Left-hand
direction indicatorflashing with buzzer.The lighting stalk is pushed down.
Right-hand
direction indicatorflashing with buzzer.The lighting stalk is pushed up.
Sidelamps fixed. The
lighting stalk is in the "Sidelamps"
p
osition.
di
pped beam
headlamps fixed.
The
lighting stalk is in the "Dipped
b
eam headlamps" position.
Main beam
headlamps fixed.
The
lighting stalk is pulled towards
yo
u. Pull
the stalk to return to dipped beam headlamps.
Front foglamps fixed. The
front foglamps are switched on
u
sing the ring on the lighting control
st
alk. Turn
the ring on the lighting control stalk rear wards
t
wice to switch off the front foglamps.
Rear foglamps fixed. The
rear foglamps are on.Turn
the ring on the stalk rear ward to turn off the rear
fo
glamps.
Hazard warning
lamps
flashing
with audible
s
ignal. The
hazard warning lamps switch,
l
ocated on the dashboard, has been
operated. The
left-hand and right-hand direction indicators and
t
heir associated indicator lamps flash simultaneously.
Monitoring
Page 26 of 376
DS3_en_Chap01_controle-de-marche_ed01-2014
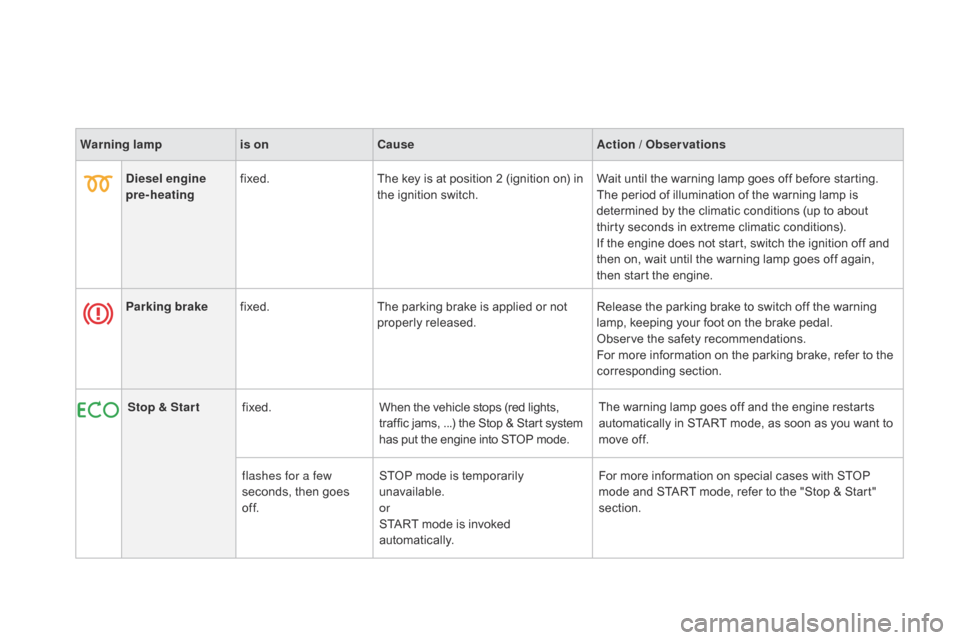
Warning lampis oncau seAction / Observations
di
esel engine
pre-heating fixed.
The
key is at position 2 (ignition on) in
t
he ignition switch.Wait
until the warning lamp goes off before starting.
The
period of illumination of the warning lamp is
d
etermined by the climatic conditions (up to about
t
hirty seconds in extreme climatic conditions).
If
the engine does not start, switch the ignition off and
t
hen on, wait until the warning lamp goes off again,
t
hen start the engine.
Parking brake fixed. The
parking brake is applied or not
p
roperly
r
eleased.Release
the parking brake to switch off the warning
l
amp, keeping your foot on the brake pedal.
Observe
the safety recommendations.
For
more information on the parking brake, refer to the
c
orresponding
s
ection.
Stop & Star t fixed. When
the vehicle stops (red lights,
t
raffic jams, ...) the Stop & Start system
h
as put the engine into STOP mode.The
warning lamp goes off and the engine restarts
a
utomatically in START mode, as soon as you want to
m
ove off.
flashes for a few
seconds,
then goes
o
f f.STOP
mode is temporarily
u
navailable.
or
START
mode is invoked
au
tomatically.For
more information on special cases with STOP
m
ode and START mode, refer to the "Stop & Start"
s
ection.
Page 28 of 376
DS3_en_Chap01_controle-de-marche_ed01-2014
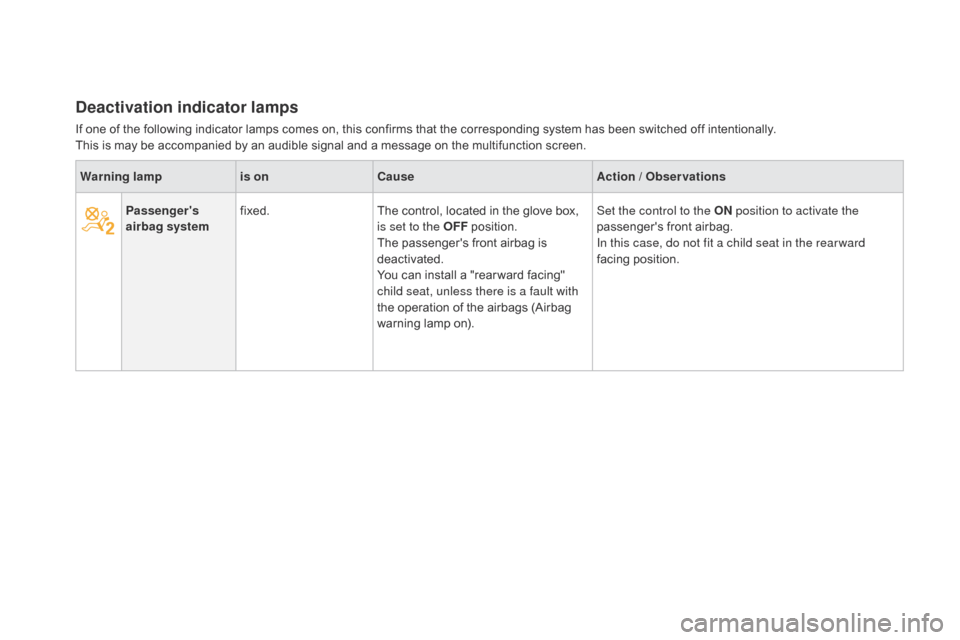
deactivation indicator lamps
If one of the following indicator lamps comes on, this confirms that the corresponding system has been switched off intentionally.
T his is may be accompanied by an audible signal and a message on the multifunction screen.
Warning lamp is on
cau
seAction / Observations
Passenger's
airbag system fixed.
The
control, located in the glove box,
i
s set to the OFF
p
osition.
The
passenger's front airbag is
d
eactivated.
You
can install a "rear ward facing"
c
hild seat, unless there is a fault with
the
operation of the airbags (Airbag
w
arning lamp on).Set the control to the ON
position to activate the
passenger's
front airbag.
In this case, do not fit a child seat in the rear ward
facing
position.
Page 30 of 376
DS3_en_Chap01_controle-de-marche_ed01-2014
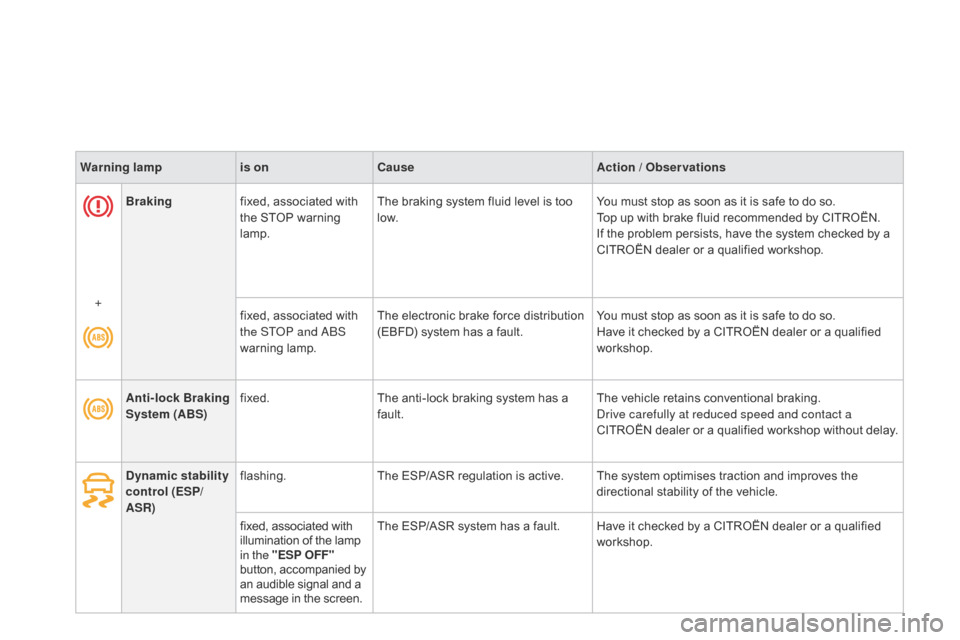
Brakingfixed, associated with t
he STOP warning
lam
p.The
braking system fluid level is too l
ow.You
must stop as soon as it is safe to do so.
Top up with brake fluid recommended by CITROËN.
If
the problem persists, have the system checked by a
C
ITROËN dealer or a qualified workshop.
+ fixed,
associated with
t
he ST
oP a
nd ab
S
w
arning
lam
p.The
electronic brake force distribution
(
EBFD) system has a fault.You
must stop as soon as it is safe to do so.
Have
it checked by a CITROËN dealer or a qualified
w
orkshop.
Warning lamp
is on
cau
se
Action / Observations
Anti-lock Braking
System (ABS) fixed.
The
anti-lock braking system has a
f
ault.The
vehicle retains conventional braking.
Drive carefully at reduced speed and contact a
CITROËN
d
ealer
o
r
a q
ualified
w
orkshop
w
ithout
d
elay.
dy
namic stability
control (ESP/
ASR) flashing.
The
ESP/ASR regulation is active. The system optimises traction and improves the
d
irectional stability of the vehicle.
fixed,
associated with
i
llumination of the lamp
i
n the "ESP OFF"
button,
accompanied by
a
n audible signal and a
m
essage in the screen.The
ESP/ASR system has a fault. Have it checked by a CITROËN dealer or a qualified
w
orkshop.
Page 35 of 376
33
DS3_en_Chap01_controle-de-marche_ed01-2014
Warning lampis oncau seAction / Observations
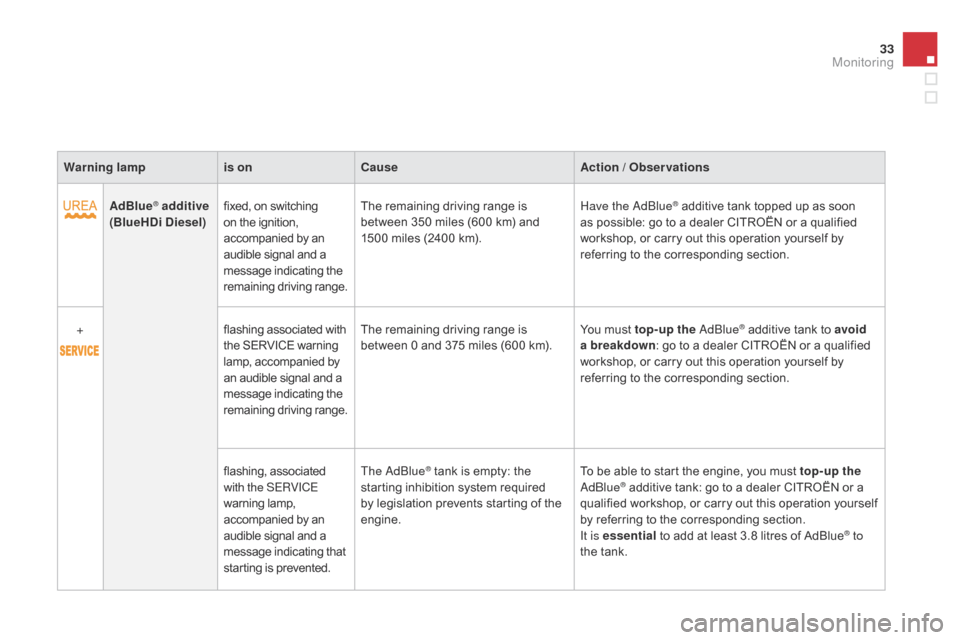
AdBlue
® additive
(BlueH
d i d iesel) fixed,
on switching o
n the ignition, a
ccompanied by an
a
udible signal and a
m
essage indicating the
r
emaining
d
riving
r
ange.The
remaining driving range is b
etween 350 miles (600 km) and
1
500 miles (2400 km).Have the
adbl ue® additive tank topped up as soon a
s
possible:
go
to
a dealer CITROËN or a qualified
w
orkshop,
or
carry out this operation yourself by
r
eferring
to
the
corresponding section.
+ flashing
associated
with
t
he
SERVICE
warning
l
amp,
accompanied
by
a
n
audible
signal
and
a
m
essage
indicating
the
r
emaining
d
riving
r
ange. The
remaining
driving
range
is
b
etween
0
and
375
miles
(600
km). You
must
top-up the a d
blu
e
® additive tank to avoid
a
breakdown :
go
to
a
dealer
CITROËN or a qualified
w
orkshop,
or
carry
out
this
operation yourself by
r
eferring
to
the
corresponding
section.
flashing,
as
sociated
w
ith the SERVICE
warning
lam
p,
a
ccompanied
by
an
a
udible
signal
and
a
m
essage
indicating
that
s
tarting
is
prevented. The
a
d
blu
e
® tank is empty: the s
tarting
inhibition system required
b
y
legislation prevents starting of the
e
ngine. To
be able to start the engine, you must top-up the a
dblu e® additive tank: go to a dealer CITROËN or a q
ualified workshop, or carry out this operation yourself
b
y
referring to the corresponding section.
It is essential
to add at least 3.8 litres of AdBlue
® to
the
tank.
Monitoring
Page 52 of 376
DS3_en_Chap02_ecrans-multifonction_ed01-2014
Languages
Once the "Languages" menu has been selected, you can change the language used by the s
creen by choosing one from a defined list.
Units
Once the "Units" menu has been selected, you can change the units of the following
par
ameters:
-
t
emperature (°C or °F),
-
f
uel consumption (l/100 km, mpg or km/l).
Once
the fuel consumption units have
b
een set to mpg, the information in the
i
nstrument panel screen on speed and
d
istance will also be in mph and miles.
For
safety
reasons,
configuration
by
the
d
river of the multifunction screen must
o
nly be done when stationary.
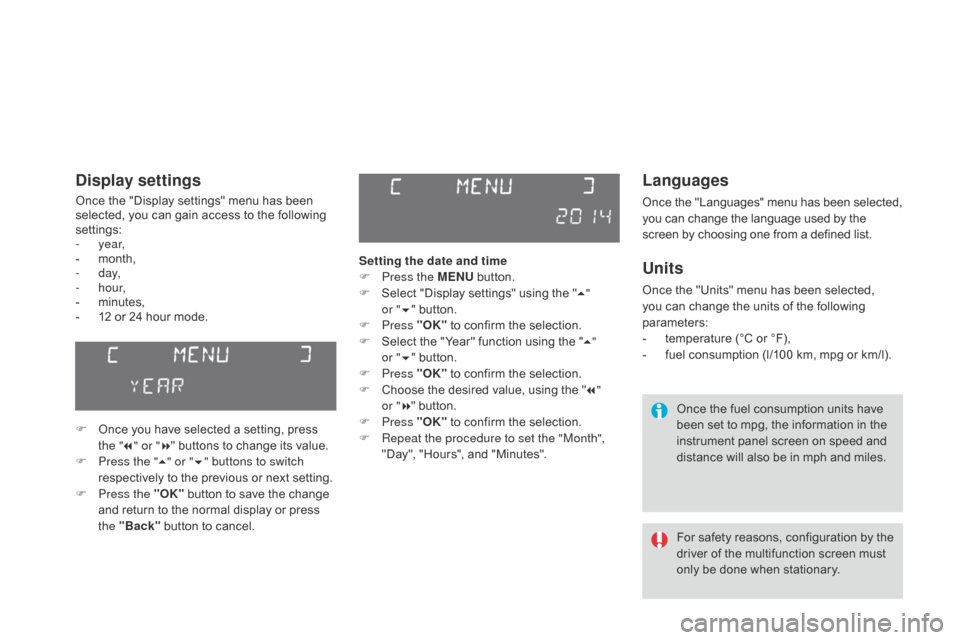
display settings
Once the "Display settings" menu has been selected, you can gain access to the following
se
ttings:
-
year,
-
m
onth,
-
d ay,
-
h o u r,
-
m
inutes,
-
1
2 or 24 hour mode.
F
O
nce you have selected a setting, press
t
he "7" or " 8"
buttons to change its value.
F
P
ress the " 5" or " 6" buttons to switch
respectively
to the previous or next setting.
F
P
ress the "OK"
button to save the change
a
nd return to the normal display or press
t
he "Back"
button to cancel. Setting the date and time
F
P
ress the MENU
button.
F
S
elect "Display settings" using the "5 "
or " 6"
button.
F
Press "OK"
to confirm the selection.
F
S
elect the "Year" function using the "5 "
or " 6"
button.
F
Press "OK"
to confirm the selection.
F
C
hoose the desired value, using the "7 "
or " 8"
button.
F
Press "OK"
to confirm the selection.
F
R
epeat the procedure to set the "Month",
"Day",
"Hours", and "Minutes".
Page 57 of 376
55
DS3_en_Chap02_ecrans-multifonction_ed01-2014
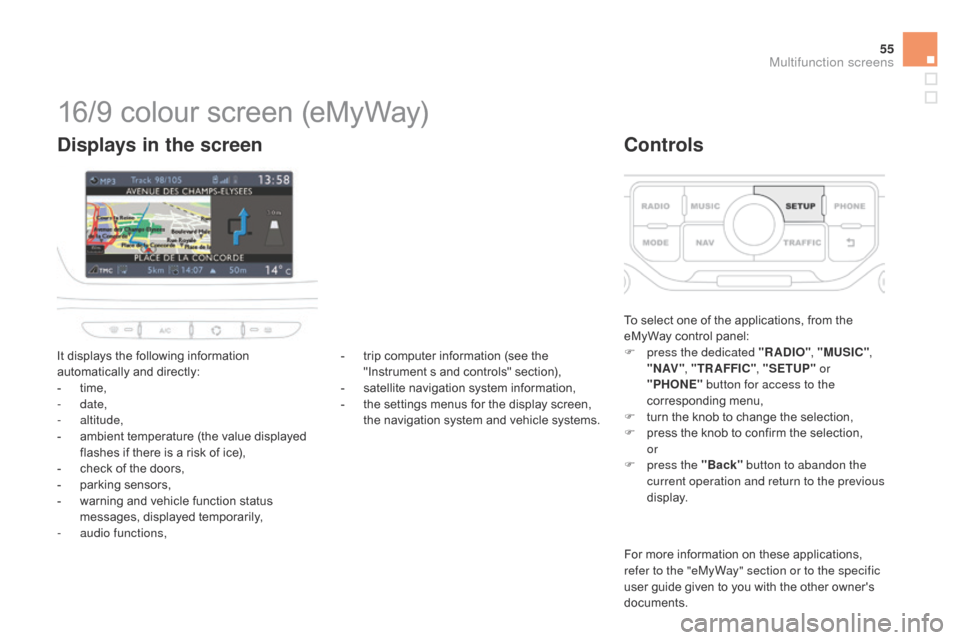
16/9 colour screen (eMyWay)
It displays the following information automatically and directly:
-
t
ime,
-
date,
-
altitude,
-
a
mbient temperature (the value displayed
f
lashes if there is a risk of ice),
-
c
heck of the doors,
-
p
arking sensors,
-
w
arning and vehicle function status
m
essages, displayed temporarily,
-
a
udio functions,
displays in the screen
To select one of the applications, from the eMyWay control panel:
F
p
ress the dedicated "RA
dI
O", "MUSI
c
",
" N AV " , "TR AFFI
c",
"SETUP" or
"PHONE" button for access to the
corresponding
m
enu,
F
t
urn the knob to change the selection,
F
p
ress the knob to confirm the selection,
or
F
p
ress the "Back" button to abandon the
current operation and return to the previous
display.
controls
For more information on these applications, r efer to the "eMyWay" section or to the specific
user
guide given to you with the other owner's
d
ocuments.
-
t
rip
computer
information
(see
the
"
Instrument
s
and
controls"
section),
-
s
atellite
navigation
system
information,
-
t
he
settings
menus
for
the
display
screen,
t
he
navigation
system
and
vehicle
systems.
Multifunction screens
Page 69 of 376
67
DS3_en_Chap03_ouvertures_ed01-2014
In the event of unwanted opening of the window on closing (for example in the p
resence of frost):
F
p
ress the switch beyond the point
of
resistance and release it; the
w
indow opens completely,
F
t
hen immediately pull the switch
w
ithout going beyond the point of
r
esistance until the window closes
fully,
F
c
ontinue to hold the switch for
approximately
one second after the
w
indow has closed.
The safety anti-pinch function is not
active during these operations.
Safety anti-pinch
on the driver's side, the one-touch front electric
window has a safety anti-pinch function.
When
the window rises and meets an obstacle,
i
t stops and partially lowers again.
Reinitialisation
Always remove t he k ey f rom t he i gnition w
hen leaving the vehicle, even for a
s
hort time.
In
the event of contact during operation
o
f the windows, reverse the movement
o
f the window. To do this, press the
c
orresponding
s
witch.
When the driver operates the
passenger
electric window switch, they
s
hould ensure that no one is preventing
c
orrect closing of the window.
be p
articularly aware of children when
operating
t
he
w
indows.
In
the
event
of
a
malfunction
you
have
to
r
einitialise the operation of the electric
windows:
F
r
elease
the
switch
and
pull
it
again
until
the
w
indow
closes
completely,
F
h
old
the
switch
for
approximately
one
s
econd
after
closing,
F
p
ress the switch to lower the window
automatically.
The safety anti-pinch function is not active
during these operations.
Access
Page 81 of 376
79
DS3_en_Chap04_confort_ed01-2014
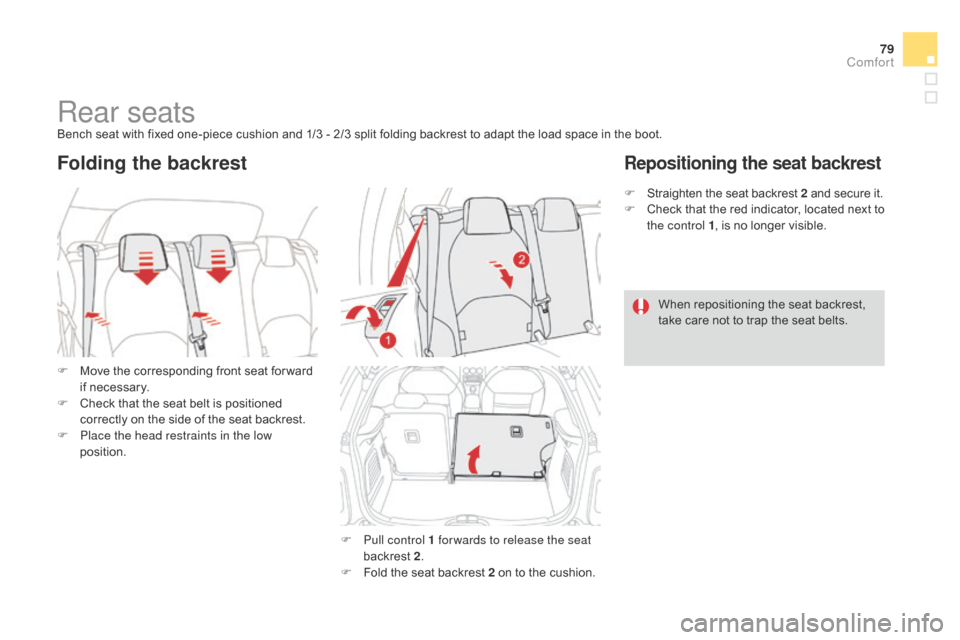
Rear seatsBench seat with fixed one-piece cushion and 1/3 - 2/3 split folding backrest to adapt the load space in the boot.
F
M
ove the corresponding front seat for ward
i
f necessary.
F
C
heck that the seat belt is positioned
c
orrectly on the side of the seat backrest.
F
P
lace the head restraints in the low
position.
Folding the backrest
F Pull control 1 for wards to release the seat backrest 2.
F
F
old the seat backrest 2 on to the cushion.F
S
traighten the seat backrest 2
and secure it.
F
C
heck
t
hat
t
he
r
ed
i
ndicator,
l
ocated
n
ext
t
o
t
he control 1
, is no longer visible.
Repositioning the seat backrest
When repositioning the seat backrest, t
ake care not to trap the seat belts.
comfort