window CITROEN DS3 2018 Handbook (in English)
[x] Cancel search | Manufacturer: CITROEN, Model Year: 2018, Model line: DS3, Model: CITROEN DS3 2018Pages: 248, PDF Size: 8.79 MB
Page 74 of 248
72
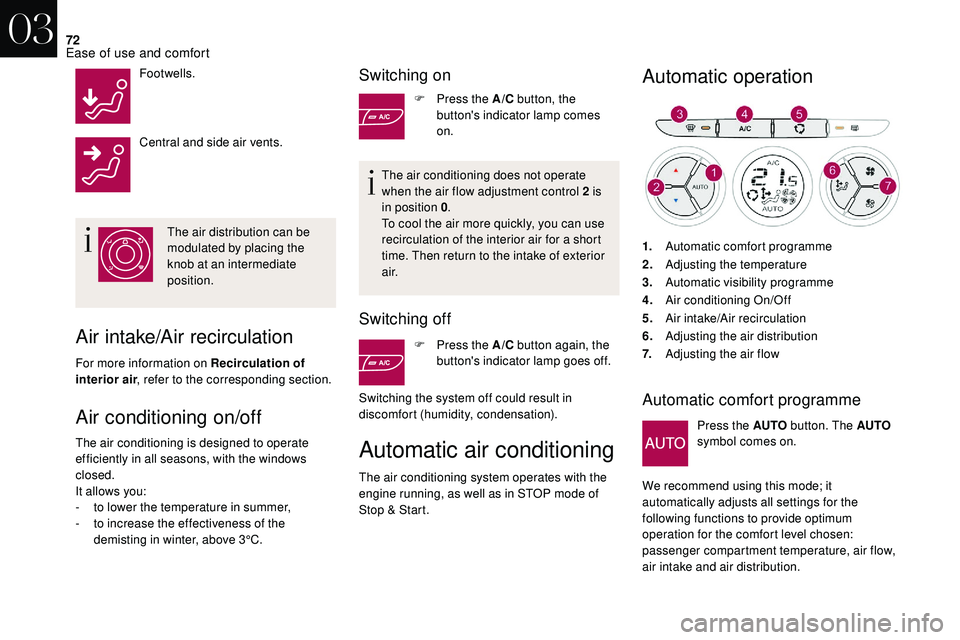
Footwells.
Central and side air vents.The air distribution can be
modulated by placing the
knob at an intermediate
position.
Air intake/Air recirculation
For more information on Recirculation of
interior air , refer to the corresponding section.
Automatic air conditioning
The air conditioning system operates with the
engine running, as well as in STOP mode of
Stop & Start.
Automatic operation
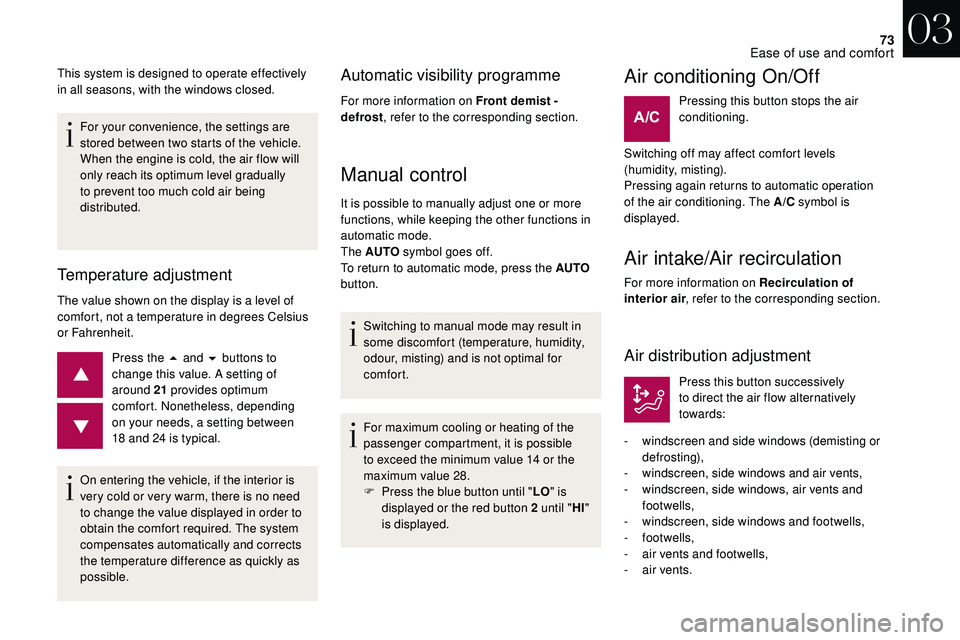
1.Automatic comfort programme
2. Adjusting the temperature
3. Automatic visibility programme
4. Air conditioning On/Off
5. Air intake/Air recirculation
6. Adjusting the air distribution
7. Adjusting the air flow
Automatic comfort programme
Press the AUTO button. The AUTO
symbol comes on.
We recommend using this mode; it
automatically adjusts all settings for the
following functions to provide optimum
operation for the comfort level chosen:
passenger compartment temperature, air flow,
air intake and air distribution.Air conditioning on/off
The air conditioning is designed to operate
efficiently in all seasons, with the windows
closed.
It allows you:
-
t
o lower the temperature in summer,
-
t
o increase the effectiveness of the
demisting in winter, above 3°C.
Switching on
F Press the A/C button, the
button's indicator lamp comes
on.
The air conditioning does not operate
when the air flow adjustment control 2
is
in position 0 .
To cool the air more quickly, you can use
recirculation of the interior air for a
short
time. Then return to the intake of exterior
a i r.
Switching off
F Press the A/C button again, the
button's indicator lamp goes off.
Switching the system off could result in
discomfort (humidity, condensation).
03
Ease of use and comfort
Page 75 of 248
73
For your convenience, the settings are
stored between two starts of the vehicle.
When the engine is cold, the air flow will
only reach its optimum level gradually
to prevent too much cold air being
distributed.
Temperature adjustment
The value shown on the display is a level of
c omfort, not a temperature in degrees Celsius
or Fahrenheit.
Press the 5
and 6 buttons to
change this value. A setting of
around 21
provides optimum
comfort. Nonetheless, depending
on your needs, a setting between
18
and 24 is typical.
This system is designed to operate effectively
in all seasons, with the windows closed.
On entering the vehicle, if the interior is
very cold or very warm, there is no need
to change the value displayed in order to
obtain the comfort required. The system
compensates automatically and corrects
the temperature difference as quickly as
possible.
Automatic visibility programme
For more information on Front demist -
defrost , refer to the corresponding section.
Manual control
It is possible to manually adjust one or more
functions, while keeping the other functions in
automatic mode.
The AUTO symbol goes off.
To return to automatic mode, press the AUTO
button.
Switching to manual mode may result in
some discomfort (temperature, humidity,
odour, misting) and is not optimal for
comfort.
For maximum cooling or heating of the
passenger compartment, it is possible
to exceed the minimum value 14
or the
maximum value 28.
F
P
ress the blue button until " LO" is
displayed or the red button 2 until " HI"
is displayed.
Air conditioning On/Off
Pressing this button stops the air
conditioning.
Switching off may affect comfort levels
(humidity, misting).
Pressing again returns to automatic operation
of the air conditioning. The A/C symbol is
displayed.
Air intake/Air recirculation
For more information on Recirculation of
interior air , refer to the corresponding section.
Air distribution adjustment
Press this button successively
to direct the air flow alternatively
towards:
-
w
indscreen and side windows (demisting or
def r o st ing),
-
w
indscreen, side windows and air vents,
-
w
indscreen, side windows, air vents and
footwells,
-
w
indscreen, side windows and footwells,
-
footwells,
-
a
ir vents and footwells,
-
a
ir vents.
03
Ease of use and comfort
Page 76 of 248
74
Deactivating the system
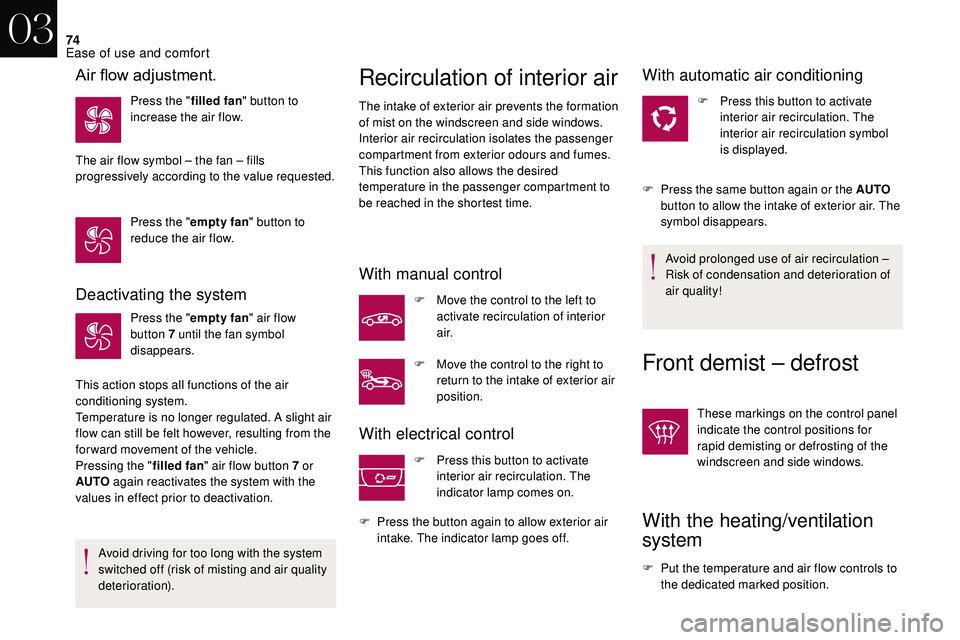
Press the "empty fan" air flow
button 7 until the fan symbol
disappears.
This action stops all functions of the air
conditioning system.
Temperature is no longer regulated. A slight air
flow can still be felt however, resulting from the
for ward movement of the vehicle.
Pressing the " filled fan" air flow button 7
or
AUTO again reactivates the system with the
values in effect prior to deactivation.
Avoid driving for too long with the system
switched off (risk of misting and air quality
deterioration).
Recirculation of interior air
The intake of exterior air prevents the formation
of mist on the windscreen and side windows.
Interior air recirculation isolates the passenger
compartment from exterior odours and fumes.
This function also allows the desired
temperature in the passenger compartment to
be reached in the shortest time.
With manual control
F Move the control to the left to activate recirculation of interior
a i r.
F
M
ove the control to the right to
return to the intake of exterior air
position.
With electrical control
F Press this button to activate interior air recirculation. The
indicator lamp comes on.
F
P
ress the button again to allow exterior air
intake. The indicator lamp goes off.
With automatic air conditioning
F Press this button to activate interior air recirculation. The
interior air recirculation symbol
is displayed.
F
P
ress the same button again or the AUTO
button to allow the intake of exterior air. The
symbol disappears.
Avoid prolonged use of air recirculation –
Risk of condensation and deterioration of
air quality!
Front demist – defrost
These markings on the control panel
indicate the control positions for
rapid demisting or defrosting of the
windscreen and side windows.
With the heating/ventilation
system
F Put the temperature and air flow controls to the dedicated marked position.
Air flow adjustment.
Press the " filled fan" button to
increase the air flow.
The air flow symbol – the fan – fills
progressively according to the value requested.
Press the " empty fan" button to
reduce the air flow.
03
Ease of use and comfort
Page 77 of 248
75
With the manual air
conditioning system
F Put the temperature and air flow controls to the dedicated marked position.
F
P
ut the air intake control to the "Exterior air
intake" position
(manual control moved to the right or
electrical control with indicator lamp off).
F
P
ut the air distribution control to the
"Windscreen" position.
F
S
witch on the air conditioning by pressing
the A /C button; the green indicator lamp in
the button comes on.
With Stop & Start, when the demisting/
defrosting, air conditioning and air flow
functions are activated, STOP mode is not
available.
With automatic air
conditioning
Automatic visibility programme
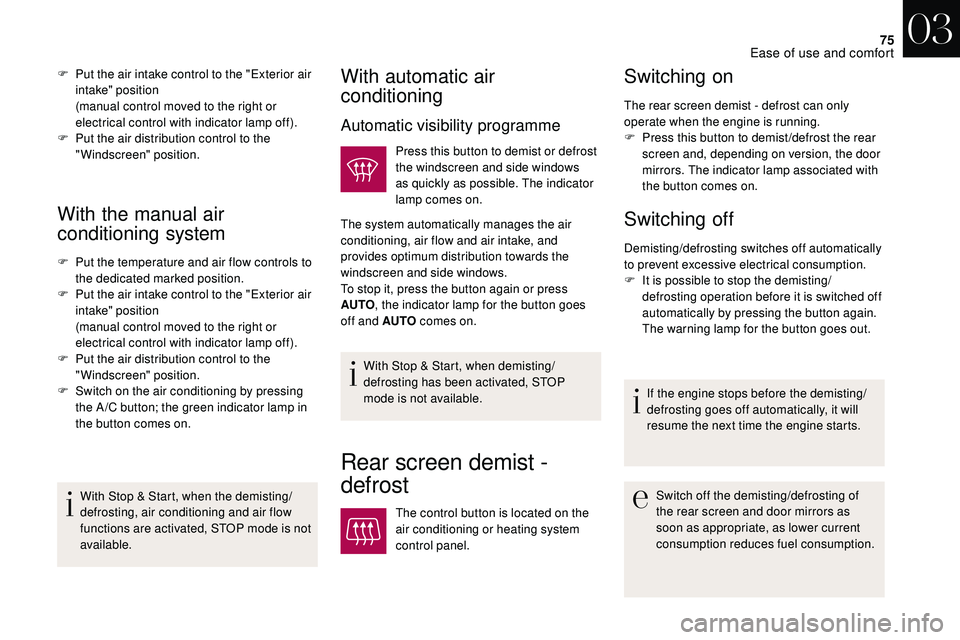
Press this button to demist or defrost
the windscreen and side windows
as quickly as possible. The indicator
lamp comes on.
The system automatically manages the air
conditioning, air flow and air intake, and
provides optimum distribution towards the
windscreen and side windows.
To stop it, press the button again or press
AUTO , the indicator lamp for the button goes
off and AUTO comes on.
With Stop & Start, when demisting/
defrosting has been activated, STOP
mode is not available.
F
P
ut the air intake control to the "Exterior air
intake" position
(manual control moved to the right or
electrical control with indicator lamp off).
F
P
ut the air distribution control to the
"Windscreen" position.
Rear screen demist -
defrost
The control button is located on the
air conditioning or heating system
control panel.
Switching on
The rear screen demist - defrost can only
operate when the engine is running.
F
P
ress this button to demist /defrost the rear
screen and, depending on version, the door
mirrors. The indicator lamp associated with
the button comes on.
Switching off
Demisting/defrosting switches off automatically
to prevent excessive electrical consumption.
F
I
t is possible to stop the demisting/
defrosting operation before it is switched off
automatically by pressing the button again.
The warning lamp for the button goes out.
If the engine stops before the demisting/
defrosting goes off automatically, it will
resume the next time the engine starts.
Switch off the demisting/defrosting of
the rear screen and door mirrors as
soon as appropriate, as lower current
consumption reduces fuel consumption.
03
Ease of use and comfort
Page 104 of 248
102
Deployment
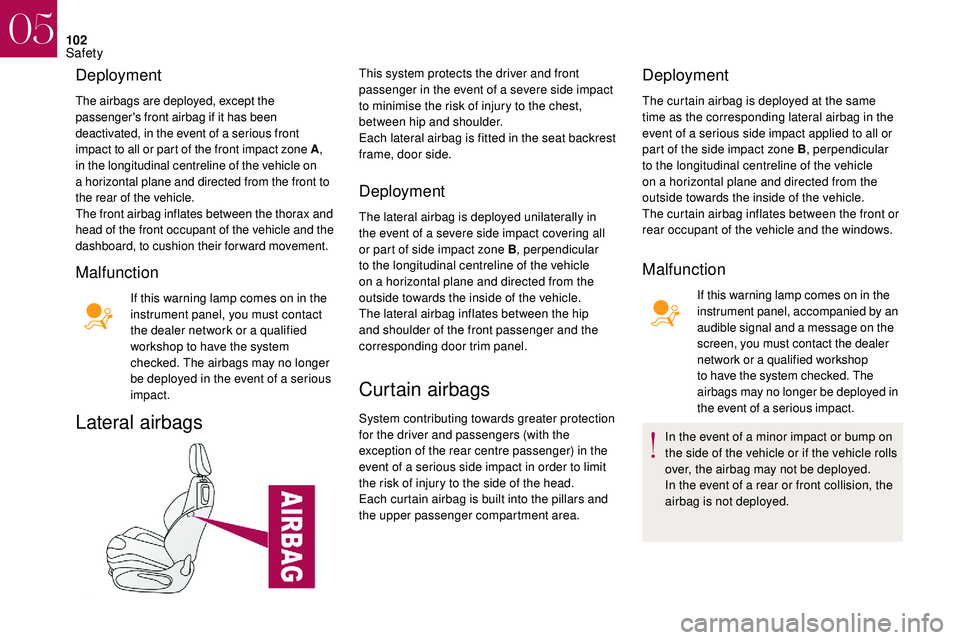
The airbags are deployed, except the
passenger's front airbag if it has been
deactivated, in the event of a serious front
impact to all or part of the front impact zone A ,
in the longitudinal centreline of the vehicle on
a
horizontal plane and directed from the front to
the rear of the vehicle.
The front airbag inflates between the thorax and
head of the front occupant of the vehicle and the
dashboard, to cushion their forward movement.
Malfunction
If this warning lamp comes on in the
instrument panel, you must contact
the dealer network or a
qualified
workshop to have the system
checked. The airbags may no longer
be deployed in the event of a
serious
impact.
Lateral airbags
This system protects the driver and front
passenger in the event of a severe side impact
to minimise the risk of injury to the chest,
between hip and shoulder.
Each lateral airbag is fitted in the seat backrest
frame, door side.
Deployment
The lateral airbag is deployed unilaterally in
the event of a severe side impact covering all
or part of side impact zone B , perpendicular
to the longitudinal centreline of the vehicle
on a
horizontal plane and directed from the
outside towards the inside of the vehicle.
The lateral airbag inflates between the hip
and shoulder of the front passenger and the
corresponding door trim panel.
Curtain airbags
System contributing towards greater protection
for the driver and passengers (with the
exception of the rear centre passenger) in the
event of a
serious side impact in order to limit
the risk of injury to the side of the head.
Each curtain airbag is built into the pillars and
the upper passenger compartment area.
Deployment
The curtain airbag is deployed at the same
time as the corresponding lateral airbag in the
event of a
serious side impact applied to all or
part of the side impact zone B , perpendicular
to the longitudinal centreline of the vehicle
on a
horizontal plane and directed from the
outside towards the inside of the vehicle.
The curtain airbag inflates between the front or
rear occupant of the vehicle and the windows.
Malfunction
If this warning lamp comes on in the
instrument panel, accompanied by an
audible signal and a
message on the
screen, you must contact the dealer
network or a
qualified workshop
to have the system checked. The
airbags may no longer be deployed in
the event of a
serious impact.
In the event of a
minor impact or bump on
the side of the vehicle or if the vehicle rolls
over, the airbag may not be deployed.
In the event of a
rear or front collision, the
airbag is not deployed.
05
Safety
Page 116 of 248
11 4
Advice
The incorrect installation of a child seat in
a vehicle compromises the child's protection
in the event of an accident.
Ensure that there is no seat belt or seat belt
buckle under the child seat, as this could
destabilise it.
Remember to fasten the seat belts or the
child seat harnesses keeping the slack
relative to the child's body to a
minimum,
even for short journeys.
When installing a
child seat using the seat
belt, ensure that the seat belt is tightened
correctly on the child seat and that it secures
the child seat firmly on the seat of your
vehicle. If your passenger seat is adjustable,
move it for wards if necessary.
At rear seating positions, always leave
sufficient space between the front seat and:
-
a r
ear ward facing child seat,
-
t
he child's feet for a child seat fitted
forward facing.
To do this, move the front seat for wards
and, if necessary, move its backrest into the
upright position.
For optimal installation of the "forward facing"
child seat, verify that its backrest is as close
as possible to the backrest of the vehicle
seat, if possible in contact with it. The head restraint must be removed
before installing a
child seat with
a
backrest on a passenger seat.
Ensure that the head restraint is stored or
attached securely to prevent it from being
thrown around the vehicle in the event of
sharp braking. Refit the head restraint when
the child seat is removed.
Children at the front
The legislation on carrying children on the
front passenger seat is specific to each
country. Refer to the legislation in force in
your country.
Deactivate the passenger's front airbag when
a
rear ward facing child seat is installed on the
front passenger seat.
Otherwise, the child risks being seriously
injured or killed if the airbag is deployed.
Installing a
booster seat
The chest part of the seat belt must be
positioned on the child's shoulder without
touching the neck.
Ensure that the lap part of the seat belt
passes correctly over the child's thighs. We recommend using a
booster seat with
a backrest equipped with a belt guide at
shoulder level.
As a
safety precaution, do not leave:
-
a c
hild or children alone and unattended in
a
vehicle,
-
a c
hild or an animal in a vehicle under the
sun, with the windows closed,
-
t
he keys within the reach of children inside
the vehicle.
To prevent accidental opening of the doors
and rear windows, use the child lock.
Take care not to open the rear windows by
more than one third.
To protect young children from the rays of the
sun, fit side blinds on the rear windows.
05
Safety
Page 155 of 248
153
Energy economy mode
System which manages the duration of use of
certain functions to conser ve a sufficient level
of charge in the battery.
After the engine has stopped, you can still
use functions such as the audio equipment,
windscreen wipers, dipped beam headlamps,
courtesy lamps, etc. for a
maximum combined
period of thirty minutes.
This period may be greatly reduced if the
battery is not fully charged.
Switching to this mode
Once this period has elapsed, a message
appears in the screen indicating that the
vehicle has switched to economy mode and the
active functions are put on standby.
Exiting the mode
These functions are reactivated automatically
next time the vehicle is driven.
F
T
o restore these functions immediately, start
the engine and let it run briefly. If the telephone is being used at the same
time, it will be interrupted after 10
minutes.The engine will not start if the battery is
discharged.
The time available to you will then be double
the period for which the engine is left running.
However, this period will always be between
five and thirty minutes.
Changing front or rear
wiper blades
Procedure for replacing a used window wiper
w ith a new one without tools.
Before removing a front wiper
F Within one minute after switching off the ignition, operate the wiper stalk to
position the wiper blades vertically on the
windscreen.
This position is used to avoid damage to the
wiper and the bonnet.
Removing
F Lift the corresponding wiper arm.
F U nclip and remove the wiper blade.
Refitting
F At the front, check the size of the wiper, because the shortest wiper is fitted to the
passenger side of the vehicle.
F
P
osition and clip the new wiper blade to the
arm.
F
C
arefully lower the wiper arm.
After refitting a front wiper
F Switch on the ignition.
F O perate the wiper stalk again to park the
wiper blades.
Bonnet
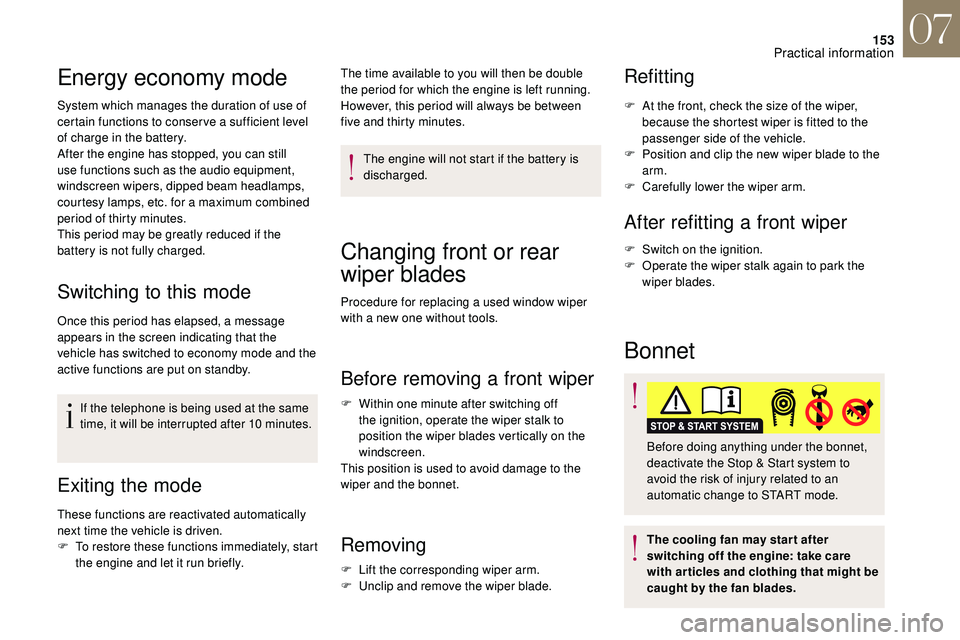
Before doing anything under the bonnet,
deactivate the Stop & Start system to
avoid the risk of injury related to an
automatic change to START mode.
The cooling fan may star t after
switching off the engine: take care
with articles and clothing that might be
caught by the fan blades.
07
Practical information
Page 185 of 248
183
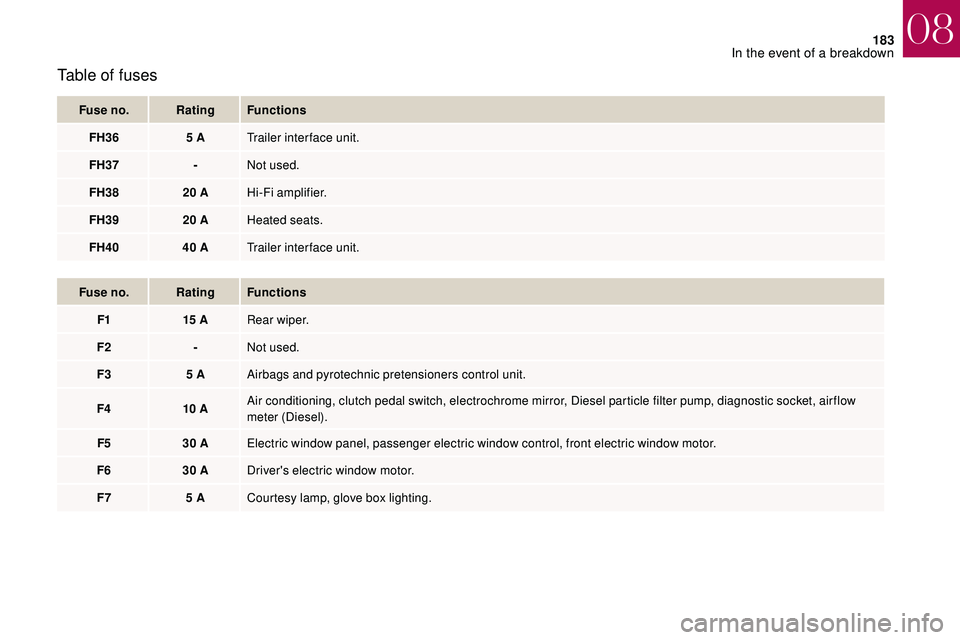
Table of fuses
Fuse no.Rating Functions
FH36 5
ATrailer inter face unit.
FH37 -Not used.
FH38 20
AHi-Fi amplifier.
FH39 20
AHeated seats.
FH40 40
ATrailer inter face unit.
Fuse no. Rating Functions
F1 15
ARear wiper.
F2 -Not used.
F3 5
AAirbags and pyrotechnic pretensioners control unit.
F4 10
AAir conditioning, clutch pedal switch, electrochrome mirror, Diesel particle filter pump, diagnostic socket, air flow
meter (Diesel).
F5 30
AElectric window panel, passenger electric window control, front electric window motor.
F6 30
ADriver's electric window motor.
F7 5
ACourtesy lamp, glove box lighting.
08
In the event of a breakdown
Page 186 of 248
184
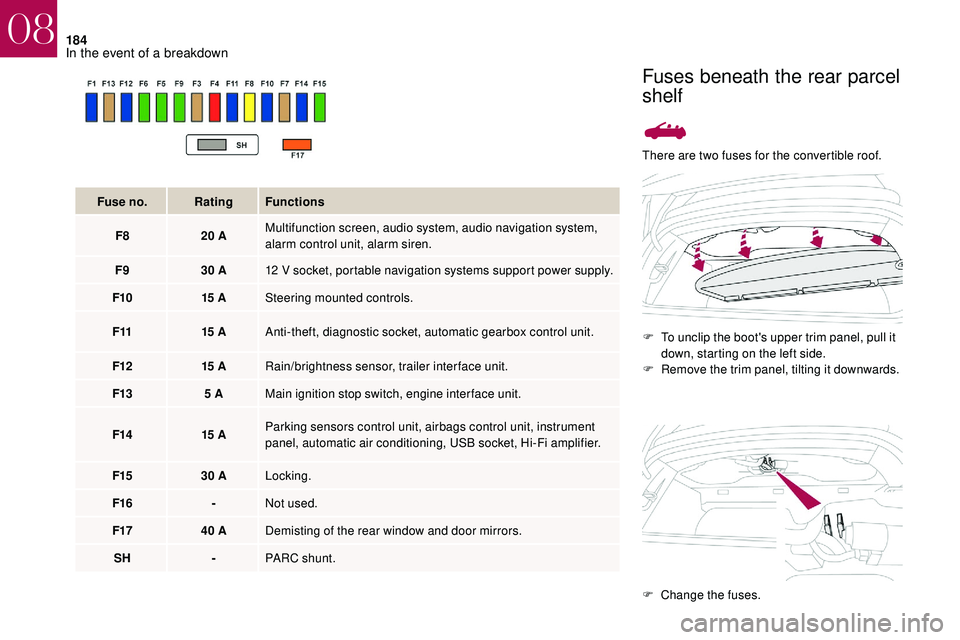
There are two fuses for the convertible roof.F
T
o unclip the boot's upper trim panel, pull it
down, starting on the left side.
F
R
emove the trim panel, tilting it downwards.
Fuse no.
Rating Functions
F8 20
A Multifunction screen, audio system, audio navigation system,
alarm control unit, alarm siren.
F9 30
A 12
V socket, portable navigation systems support power supply.
F10 15
A Steering mounted controls.
F11 15
A Anti-theft, diagnostic socket, automatic gearbox control unit.
F12 15
A Rain/brightness sensor, trailer interface unit.
F13 5
A Main ignition stop switch, engine interface unit.
F14 15
A Parking sensors control unit, airbags control unit, instrument
panel, automatic air conditioning, USB socket, Hi-Fi amplifier.
F15 30
A Locking.
F16 -Not used.
F17 40
A Demisting of the rear window and door mirrors.
SH -PARC shunt.
Fuses beneath the rear parcel
shelf
F Change the fuses.
08
In the event of a breakdown
Page 192 of 248
190
Charging the battery using
a
battery charger
For optimum ser vice life of the battery, it is
essential to maintain an adequate state of
charge.
In some circumstances it may be necessary to
charge the battery:
-
i
f you use your vehicle mostly for short
journeys,
-
i
f the vehicle is to be taken off the road for
several weeks.
Contact the dealer network or a
qualified
workshop.
If you plan to charge your vehicle's battery
yourself, use only a
charger compatible
with lead-acid batteries of a
nominal
voltage of 12
V.
Follow the instructions provided by the
manufacturer of the charger.
Never reverse polarities. It is not necessary to disconnect the
battery.
Never try to charge a frozen battery – Risk
of explosion!
If the battery has frozen, have it checked
in the dealer network or by a
qualified
workshop who will check that the internal
components have not been damaged and
that the container has not cracked, which
would mean a
risk of toxic and corrosive
acid leaking.
Disconnecting the battery
Some functions, including Stop & Start,
are not available if the battery is not
sufficiently charged.
F
S
witch off the ignition.
F
S
witch off all electrical consumers (audio
system, lighting, wipers,etc.).
F
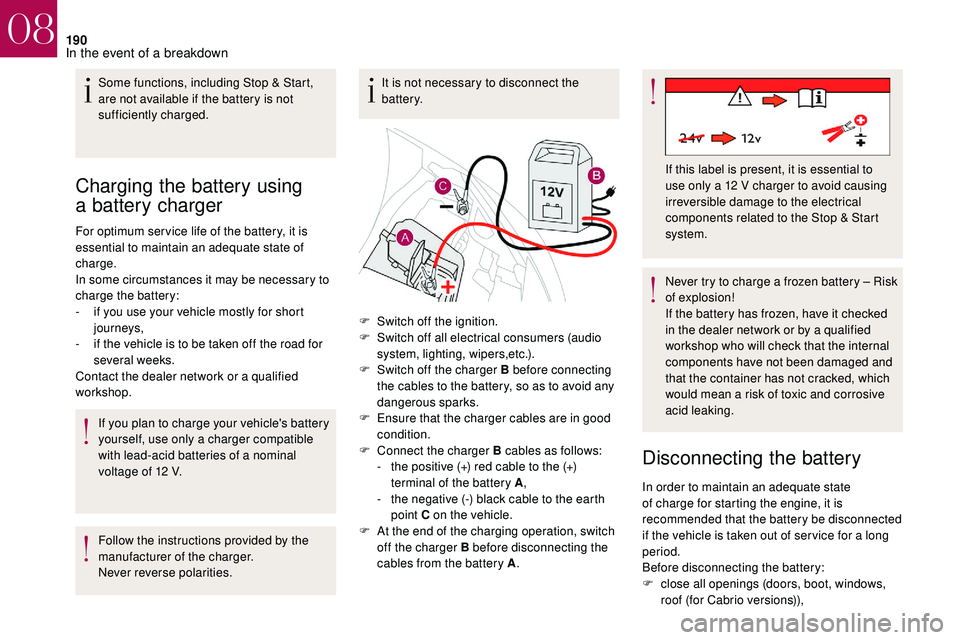
S
witch off the charger B before connecting
the cables to the battery, so as to avoid any
dangerous sparks.
F
E
nsure that the charger cables are in good
condition.
F
C
onnect the charger B cables as follows:
-
t
he positive (+) red cable to the (+)
terminal of the battery A ,
-
t
he negative (-) black cable to the earth
point C on the vehicle.
F
A
t the end of the charging operation, switch
off the charger B before disconnecting the
cables from the battery A . If this label is present, it is essential to
use only a
12 V charger to avoid causing
irreversible damage to the electrical
components related to the Stop & Start
system.
In order to maintain an adequate state
of charge for starting the engine, it is
recommended that the battery be disconnected
if the vehicle is taken out of ser vice for a
long
period.
Before disconnecting the battery:
F
c
lose all openings (doors, boot, windows,
roof (for Cabrio versions)),
08
In the event of a breakdown