headlamp CITROEN DS3 2018 Handbook (in English)
[x] Cancel search | Manufacturer: CITROEN, Model Year: 2018, Model line: DS3, Model: CITROEN DS3 2018Pages: 248, PDF Size: 8.79 MB
Page 4 of 248
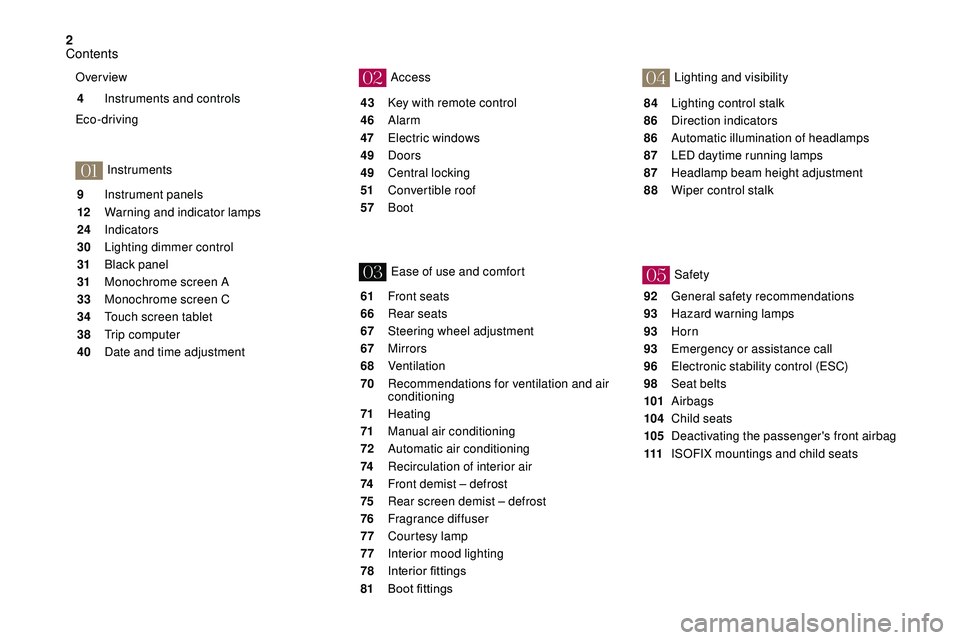
2
01
02
03
04
05
9 Instrument panels
12
W
arning and indicator lamps
24
Indicators
30
L
ighting dimmer control
31
B
lack panel
31
M
onochrome screen A
33
M
onochrome screen C
34
T
ouch screen tablet
38
T
rip computer
40
D
ate and time adjustment
4
I
nstruments and controls
43
K
ey with remote control
46
Alarm
47
E
lectric windows
49
D
oors
49
C
entral locking
51 C onvertible roof
57 Boot
61
F
ront seats
66
R
ear seats
67
S
teering wheel adjustment
67
Mirrors
68
V
entilation
70
R
ecommendations for ventilation and air
conditioning
71
H
eating
71
M
anual air conditioning
72
A
utomatic air conditioning
74
R
ecirculation of interior air
74
F
ront demist – defrost
75
R
ear screen demist – defrost
76
F
ragrance diffuser
77
C
ourtesy lamp
77
I
nterior mood lighting
78 Interior
fi
ttings
81 Boot
fittings84
L
ighting control stalk
86
D
irection indicators
86
A
utomatic illumination of headlamps
87
LE
D daytime running lamps
87
H
eadlamp beam height adjustment
88 W iper control stalk
92
G
eneral safety recommendations
93
H
azard warning lamps
93
H
orn
93
E
mergency or assistance call
96
E
lectronic stability control (ESC)
98
Se
at belts
101
Airbags
104
Ch
ild seats
105
D
eactivating the passenger's front airbag
111
I
SOFIX mountings and child seats
Over view
Instruments Access
Ease of use and comfort Safety Lighting and visibility
Eco-driving
Contents
Page 7 of 248
5
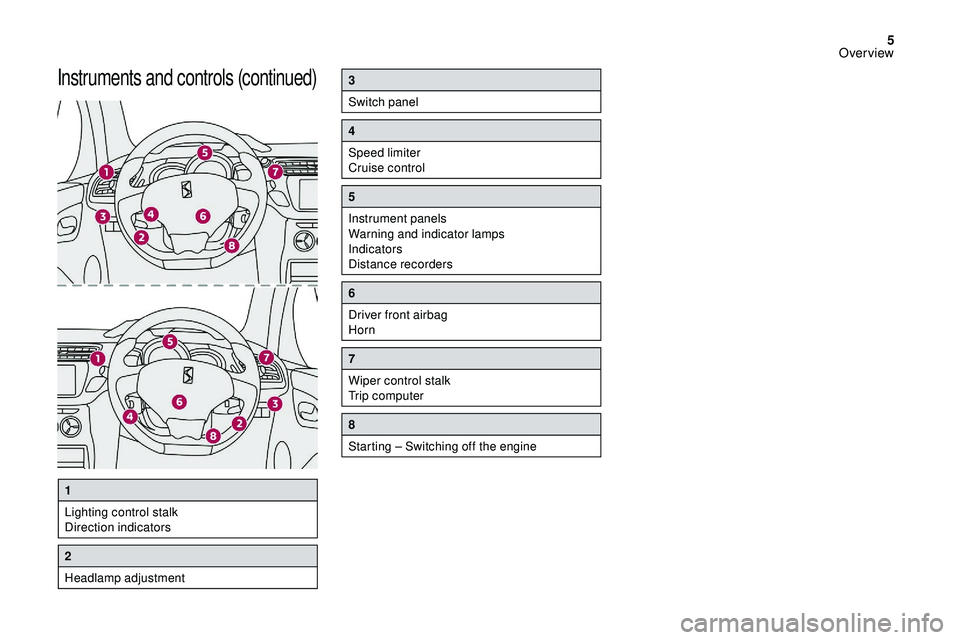
Instruments and controls (continued)3
Switch panel
4
Speed limiter
Cruise control
5
Instrument panels
Warning and indicator lamps
Indicators
Distance recorders
6
Driver front airbag
Horn
7
Wiper control stalk
Trip computer
8
Starting – Switching off the engine
1
Lighting control stalk
Direction indicators
2
Headlamp adjustment
Over view
Page 8 of 248

6
Eco-driving
Eco-driving is a range of everyday practices
t hat allow the motorist to optimise their fuel
consumption and CO
2 emissions.
Optimise the use of your gearbox
With a manual gearbox, move off gently
an d change up without waiting. During
acceleration, change up early.
With an automatic gearbox, give preference
to automatic mode and avoid pressing the
accelerator pedal heavily or suddenly.
The gear efficiency indicator invites you to
engage the most suitable gear: as soon as the
indication is displayed in the instrument panel,
follow it straight away.
For vehicles fitted with an automatic gearbox,
this indicator appears only in manual mode.
Drive smoothly
Maintain a safe distance between vehicles,
u se engine braking rather than the
brake pedal, and press the accelerator
progressively. These practices contribute
towards a
reduction in fuel consumption and
CO
2 emissions and also help reduce the
b
ackground traffic noise.
If your vehicle has cruise control, make use of
the system at speeds above 25
mph (40 km/h)
when the traffic is flowing well.
Control the use of your electrical
equipment
Switch off the demisting and defrosting
controls, if these are not automatically
managed.
Switch off the heated seat as soon as
possible.
Switch off the headlamps and front foglamps
when the ambient light level does not require
their use.
Avoid running the engine before moving off,
particularly in winter; your vehicle will warm up
much faster while driving.
Before moving off, if the passenger
compartment is too warm, ventilate it by
opening the windows and air vents before
using the air conditioning.
Above 30
mph (50
km/h), close the windows
and leave the air vents open.
Consider using equipment that can help
keep the temperature in the passenger
compartment down (sunroof blind and window
blinds, etc.).
Unless it has automatic regulation, switch off
the air conditioning as soon as the desired
temperature has been reached. As a
passenger, if you avoid connecting your
multimedia devices (film, music, video game,
etc.), you will contribute towards limiting the
consumption of electrical energy, and so of
fuel.
Disconnect your portable devices before
leaving the vehicle.
Eco-driving
Page 25 of 248
23
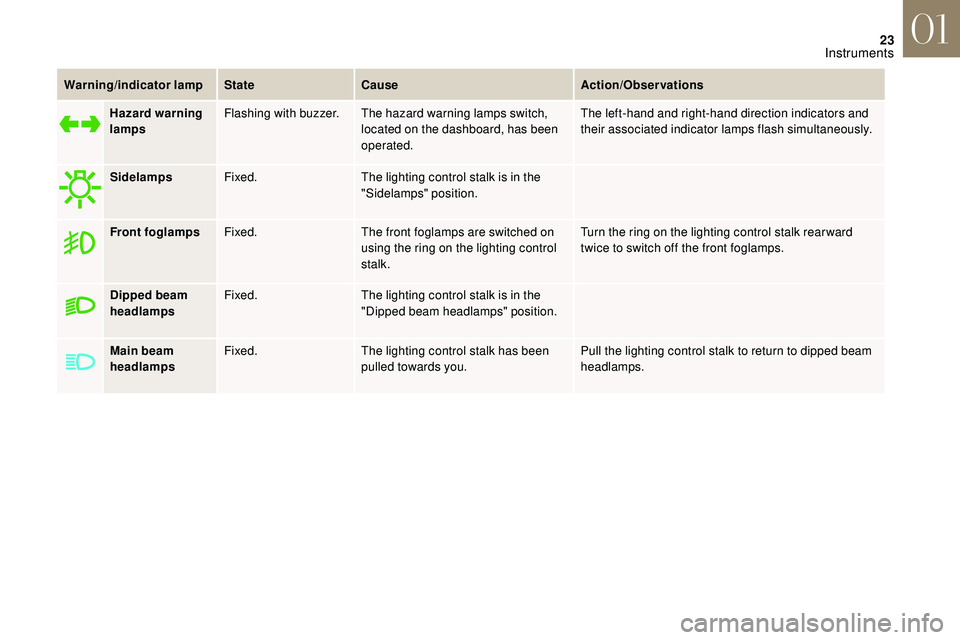
Warning/indicator lampStateCause Action/Observations
Hazard warning
lamps Flashing with buzzer. The hazard warning lamps switch,
located on the dashboard, has been
operated. The left-hand and right-hand direction indicators and
their associated indicator lamps flash simultaneously.
Sidelamps Fixed. The lighting control stalk is in the
"Sidelamps" position.
Front foglamps Fixed. The front foglamps are switched on
using the ring on the lighting control
stalk. Turn the ring on the lighting control stalk rear ward
twice to switch off the front foglamps.
Dipped beam
headlamps Fixed.
The lighting control stalk is in the
"Dipped beam headlamps" position.
Main beam
headlamps Fixed.
The lighting control stalk has been
pulled towards you. Pull the lighting control stalk to return to dipped beam
headlamps.
01
Instruments
Page 70 of 248
68
Unfolding
F From outside: unlock the vehicle using the remote control or the key.
F
F
rom inside: with the ignition on, pull the
control A in the central position rearwards.
The folding and unfolding of the door
mirrors using the remote control can be
deactivated in the dealer network or by
a
qualified workshop.
If necessary the mirrors can be folded
manually.
Rear view mirror
Equipped with an anti-dazzle system, which
darkens the mirror glass and reduces the
nuisance to the driver caused by the sun,
headlamps from other vehicles, etc.
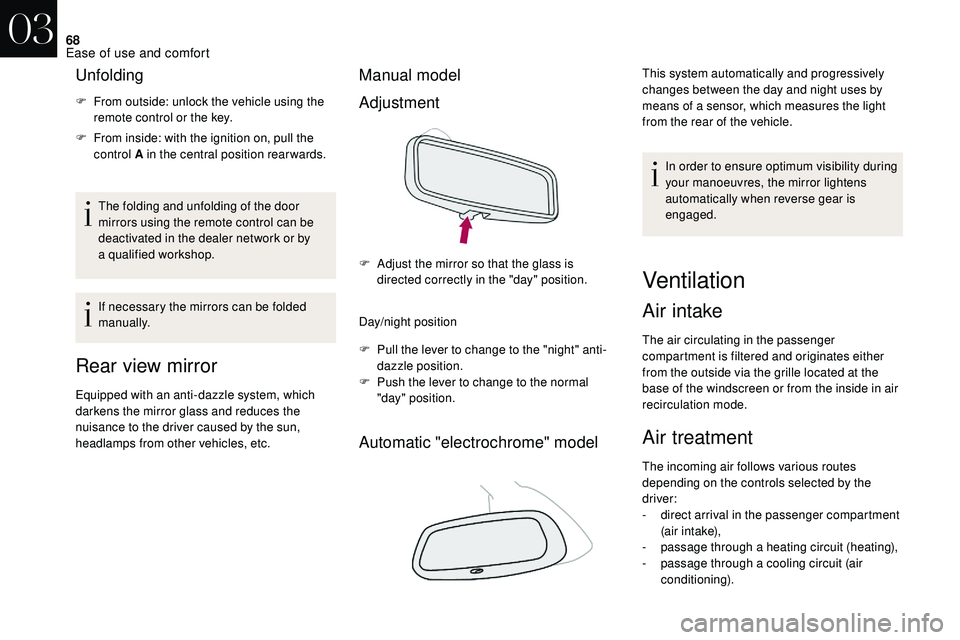
Manual model
Adjustment
Day/night position
F
P
ull the lever to change to the "night" anti-
dazzle position.
F
P
ush the lever to change to the normal
"day" position.
Automatic "electrochrome" model
This system automatically and progressively
changes between the day and night uses by
means of a
sensor, which measures the light
from the rear of the vehicle.
In order to ensure optimum visibility during
your manoeuvres, the mirror lightens
automatically when reverse gear is
engaged.
F
A
djust the mirror so that the glass is
directed correctly in the "day" position.
Ventilation
Air intake
The air circulating in the passenger
compartment is filtered and originates either
from the outside via the grille located at the
base of the windscreen or from the inside in air
recirculation mode.
Air treatment
The incoming air follows various routes
depending on the controls selected by the
driver:
-
d
irect arrival in the passenger compartment
(air intake),
-
p
assage through a
heating circuit (heating),
-
p
assage through a cooling circuit (air
conditioning).
03
Ease of use and comfort
Page 86 of 248
84
Lighting control stalk
Main lighting
The various front and rear lamps of the vehicle
are designed to adapt the driver's visibility
progressively according to the climatic
conditions:
-
s
idelamps, to be seen,
-
d
ipped beam headlamps to see without
dazzling other drivers,
-
m
ain beam headlamps to see clearly when
the road is clear.
Additional lighting
Other lamps are installed to fulfil the
requirements of particular conditions of
visibility:
-
a r
ear foglamp to be seen from afar,
-
f
ront foglamps for greater visibility,
-
L
ED daytime running lamps, to be seen
during the day.
Programming
You can adjust the settings of certain functions:
- gu ide-me-home lighting,
-
a
utomatic illumination of headlamps, In some climatic conditions (low
temperature, humidity), the presence
of mist on the internal sur face of the
headlamp and rear lamp glass is normal;
this disappears a
few minutes after the
lighting is switched on.
Travelling abroad
LED/Xenon headlamps
If planning to use your vehicle in a
country
that drives on the other side of the road, the
headlamp dipped beams must be adjusted to
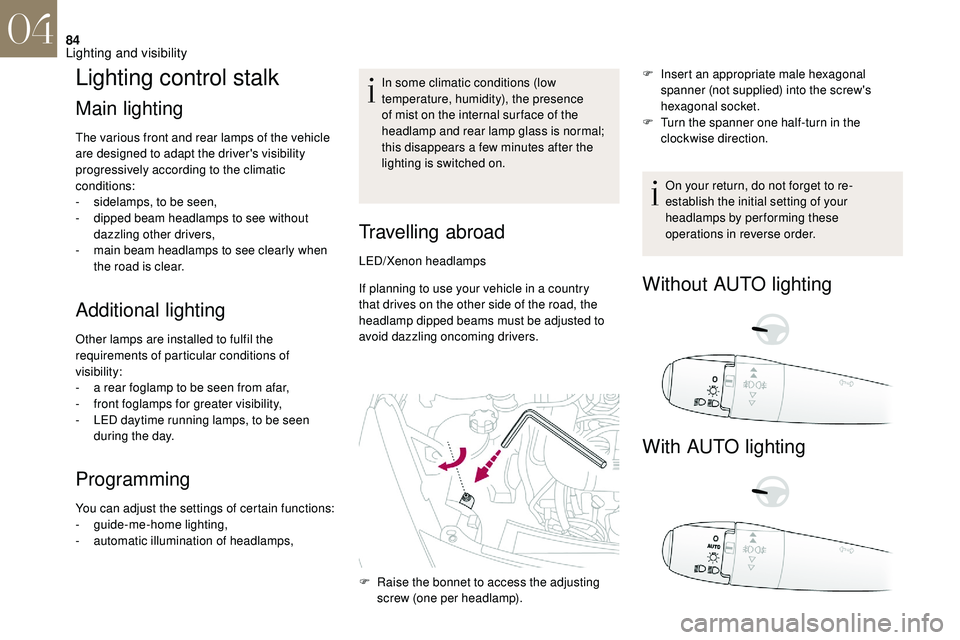
avoid dazzling oncoming drivers. F
I
nsert an appropriate male hexagonal
spanner (not supplied) into the screw's
hexagonal socket.
F
T
urn the spanner one half-turn in the
clockwise direction.
On your return, do not forget to re-
establish the initial setting of your
headlamps by performing these
operations in reverse order.
Without AUTO lighting
With AUTO lighting
F Raise the bonnet to access the adjusting screw (one per headlamp).
04
Lighting and visibility
Page 87 of 248
85
Selection of main lighting
mode
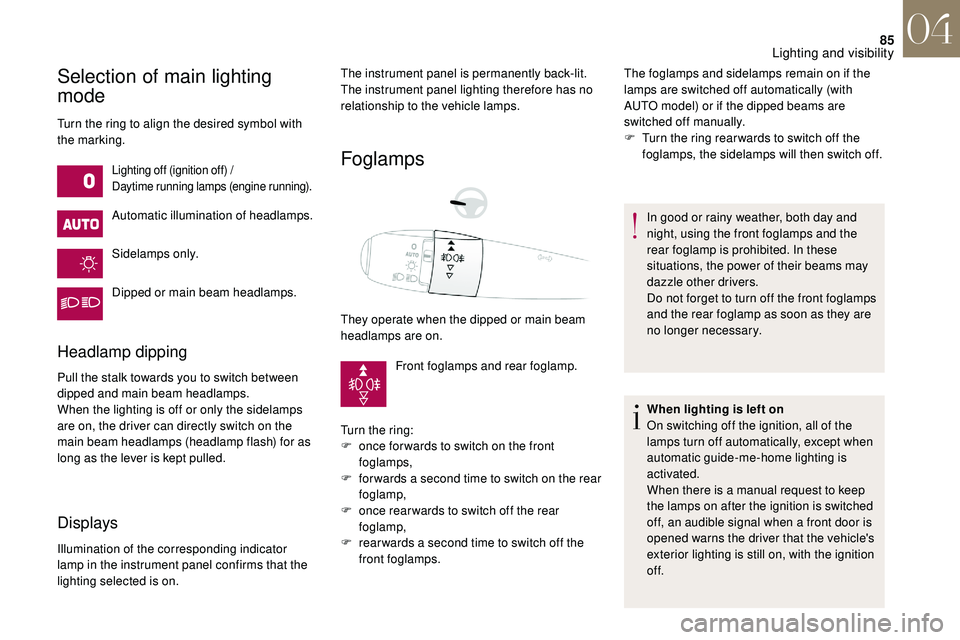
Turn the ring to align the desired symbol with
the marking.
Lighting off (ignition off) /
Daytime running lamps (engine running).
Automatic illumination of headlamps.
Sidelamps only.
Dipped or main beam headlamps.
Headlamp dipping
Pull the stalk towards you to switch between
dipped and main beam headlamps.
When the lighting is off or only the sidelamps
are on, the driver can directly switch on the
main beam headlamps (headlamp flash) for as
long as the lever is kept pulled.
Displays
Illumination of the corresponding indicator
lamp in the instrument panel confirms that the
lighting selected is on.
Foglamps
The instrument panel is permanently back-lit.
The instrument panel lighting therefore has no
relationship to the vehicle lamps.
They operate when the dipped or main beam
headlamps are on.Front foglamps and rear foglamp.
Turn the ring:
F
o
nce for wards to switch on the front
foglamps,
F
f
or wards a second time to switch on the rear
foglamp,
F
o
nce rear wards to switch off the rear
foglamp,
F
r
ear wards a second time to switch off the
front foglamps. The foglamps and sidelamps remain on if the
lamps are switched off automatically (with
AUTO model) or if the dipped beams are
switched off manually.
F
T
urn the ring rear wards to switch off the
foglamps, the sidelamps will then switch off.
In good or rainy weather, both day and
night, using the front foglamps and the
rear foglamp is prohibited. In these
situations, the power of their beams may
dazzle other drivers.
Do not forget to turn off the front foglamps
and the rear foglamp as soon as they are
no longer necessary.
When lighting is left on
On switching off the ignition, all of the
lamps turn off automatically, except when
automatic guide-me-home lighting is
activated.
When there is a
manual request to keep
the lamps on after the ignition is switched
off, an audible signal when a
front door is
opened warns the driver that the vehicle's
exterior lighting is still on, with the ignition
of f.
04
Lighting and visibility
Page 88 of 248
86
Direction indicators
Three flashes
F Press briefly upwards or downwards, without going beyond the point of
resistance; the direction indicators will flash
3
times.
Manual guide-me-home
lighting
The temporary illumination of the dipped beam
headlamps after the vehicle's ignition has been
switched off makes the driver's exit easier
when the light is poor.
Switching on
F With the ignition off, "flash" the headlamps using the lighting control stalk.
F
A
nother "headlamp flash" switches the
function off.
Switching off
Manual guide-me-home lighting goes off
automatically at the end of a given period of
time.
Automatic illumination of
headlamps
The sidelamps and dipped beam headlamps
are switched on automatically, without any
action on the part of the driver, when a
low level
of ambient light is detected or in certain cases
of activation of the windscreen wipers.
As soon as the brightness returns to
a
sufficient level or after the windscreen wipers
are switched off, these lamps are switched off
automatically and the daytime running lamps
come on.
Switching on
F Turn the ring to the AUTO position. Activation of the function is confirmed by the
display of a
message.
Switching off
F Turn the ring to a position other than AUTO.
Deactivation of the function is confirmed by
the display of a
message.
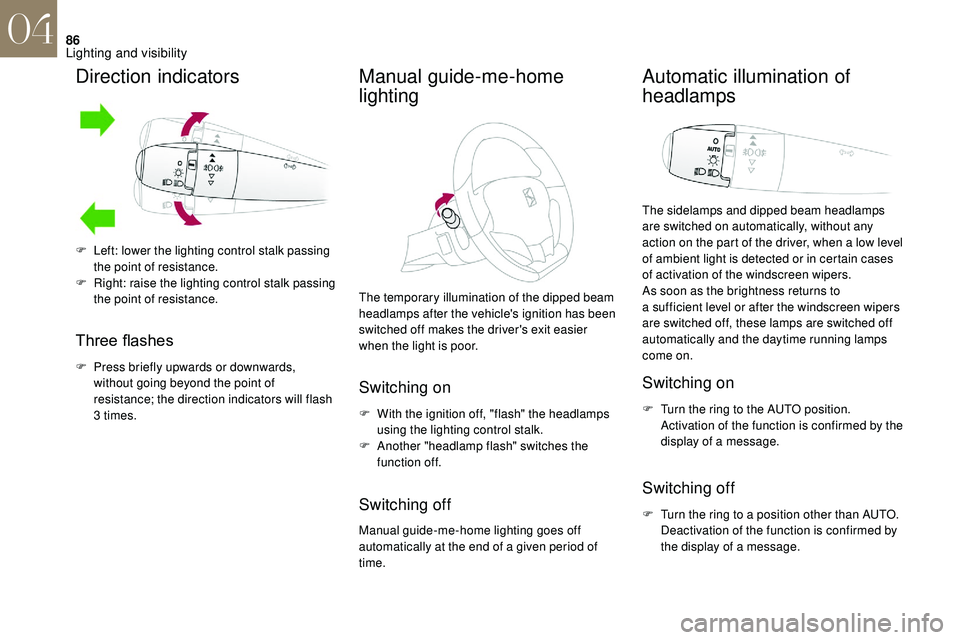
F
L
eft: lower the lighting control stalk passing
the point of resistance.
F
R
ight: raise the lighting control stalk passing
the point of resistance.
04
Lighting and visibility
Page 89 of 248
87
Operating fault
In the event of a fault with the
s unshine sensor, the lighting comes
on, this warning lamp is displayed
in the instrument panel and/or
a
message appears in the screen,
accompanied by an audible signal.
Contact the dealer network or a
qualified
workshop.
Do not cover the sunshine sensor, linked
with the rain sensor and located in the
centre of the windscreen behind the
interior mirror, as this would disable the
associated functions.
In fog or snow, the sunshine sensor may
detect sufficient light. In this case, the
lighting will not come on automatically.
Automatic guide-me-home
lighting
When the automatic illumination of headlamps
is activated, if the ambient light level is low,
the dipped beam headlamps remain lit when
switching off the ignition.
Programming
Activation, deactivation and the
duration of the guide-me-home
lighting are set in the vehicle
configuration or parameters menu
(except monochrome screen A
where the duration is fixed: 60
s).
LED daytime running
lamps
This daytime lighting, which is a signature of
t he vehicle, consists of two sets of six LEDs
located on the vertical scoop under each
headlamp.
When starting the vehicle, the daytime running
lamps come on automatically, if the lighting
control stalk is in the 0
or AUTO position.
If the sidelamps and headlamps are switched
on manually or automatically, the daytime
running lamps go off.
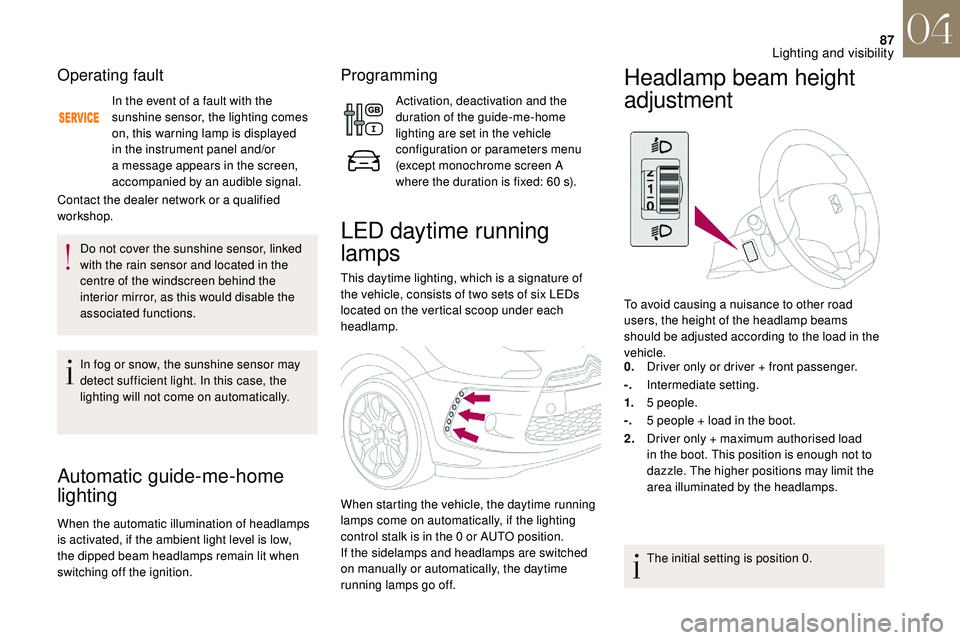
Headlamp beam height
adjustment
To avoid causing a nuisance to other road
u sers, the height of the headlamp beams
should be adjusted according to the load in the
vehicle.
0. Driver only or driver + front passenger.
-. Intermediate setting.
1. 5
people.
-. 5
people + load in the boot.
2. Driver only + maximum authorised load
in the boot. This position is enough not to
dazzle. The higher positions may limit the
area illuminated by the headlamps.
The initial setting is position 0.
04
Lighting and visibility
Page 119 of 248
11 7
In case of towing
Driving with a trailer places greater
d emands on the towing vehicle and
requires extra care from the driver.
Distribution of loads
F Distribute the load in the trailer so that the heaviest items are as close as possible to
the axle and the nose weight approaches
the maximum permitted without exceeding
it.
Air density decreases with altitude, thus
reducing engine performance. The maximum
towed load must be reduced by 10% for every
1,000
metres of altitude.
Please respect the maximum towable
weights.
Side wind
F Take into account the increased sensitivity to wind.
Cooling
Towing a trailer on a slope increases the
t emperature of the coolant.
As the fan is electrically controlled, its cooling
capacity is not dependent on the engine speed.
F
T
o lower the engine speed, reduce your
speed.
The maximum towable load on an incline
depends on the gradient and the exterior
temperature.
In all cases, keep a
check on the coolant
temperature.
F
I
f this warning lamp and the
STOP warning lamp come on,
stop the vehicle and switch off
the engine as soon as possible.
New vehicle
Do not pull a trailer before having driven at least
approximately 600
miles (1,000
kilometres).
Braking
Towing a trailer increases the braking distance.
T o avoid overheating of the brakes, the use of
engine braking is recommended.
Ty r e s
F Check the tyre pressures of the towing vehicle and of the trailer, observing the
recommended pressures.
Lighting
F Check the electrical lighting and signalling on the trailer and the headlamp beam height
of your vehicle.
For more information on Headlamp
beam height adjustment , refer to the
corresponding section.
The rear parking sensors will be
deactivated automatically to avoid
the audible signal if a
genuine
DS
AUTOMOBILES towbar is used.
If the exterior temperature is high, it is
recommended that the engine be allowed
to idle for 1
to 2 minutes after the vehicle
comes to a
stop, to facilitate its cooling.
06
Driving