ESP Citroen DS5 HYBRID4 RHD 2014 1.G User Guide
[x] Cancel search | Manufacturer: CITROEN, Model Year: 2014, Model line: DS5 HYBRID4 RHD, Model: Citroen DS5 HYBRID4 RHD 2014 1.GPages: 382, PDF Size: 14.52 MB
Page 94 of 382
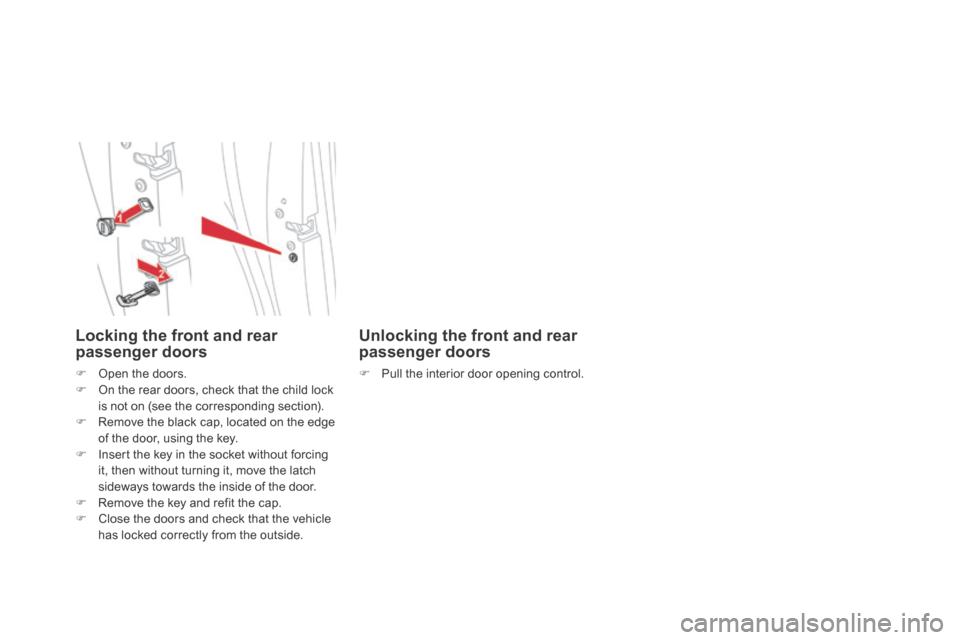
Locking the front and rear passenger doors
Open the doors. On the rear doors, check that the child lock is not on (see the corresponding section). Remove the black cap, located on the edge of the door, using the key. Insert the key in the socket without forcing it, then without turning it, move the latch sideways towards the inside of the door. Remove the key and refit the cap. Close the doors and check that the vehicle has locked correctly from the outside.
Unlocking the front and rear passenger doors
Pull the interior door opening control.
Page 100 of 382
Safety anti-pinch
When the window rises and meets an obstacle, it stops and immediately partially lowers again. In the event of unwanted opening of the window on closing, press the switch until the window opens completely, then pull the switch immediately until the window closes. Continue to hold the switch for approximately one second after the window has closed. The safety anti-pinch function is not active during this operation.
Deactivating the rear window controls
Reinitialisation of the
electric windows
In the event of contact during operation of the windows, you must reverse the
movement of the window. To do this, press the switch concerned. When operating the passenger electric window switches, the driver must ensure that no one is preventing correct closing of the windows. The driver must ensure that the passengers use the electric windows c o r r e c t l y. Be aware of children when operating the windows. Be aware of passengers or other persons present when closing the windows using the the electronic key or the "Keyless Entry and Starting" system.
Following reconnection of the battery, the safety anti-pinch function must be reinitialised. The safety anti-pinch function is not active during these operations: - lower the window completely, then raise it, it will rise in steps of a few centimetres each time the switch is pressed. Repeat the operation until the window closes completely, - continue to press the switch for at least one second after reaching this position, window closed. For the safety of your children, press switch 5 to prevent operation of the rear windows irrespective of their position.
The warning lamp in the button comes on, accompanied by a message confirming activation. It remains on, as long as the child lock is activated. The interior controls for the rear doors are also deactivated. Opening the doors from the outside and operation of the rear electric windows from the driver's controls remain possible.
Page 110 of 382
Storing driving positions
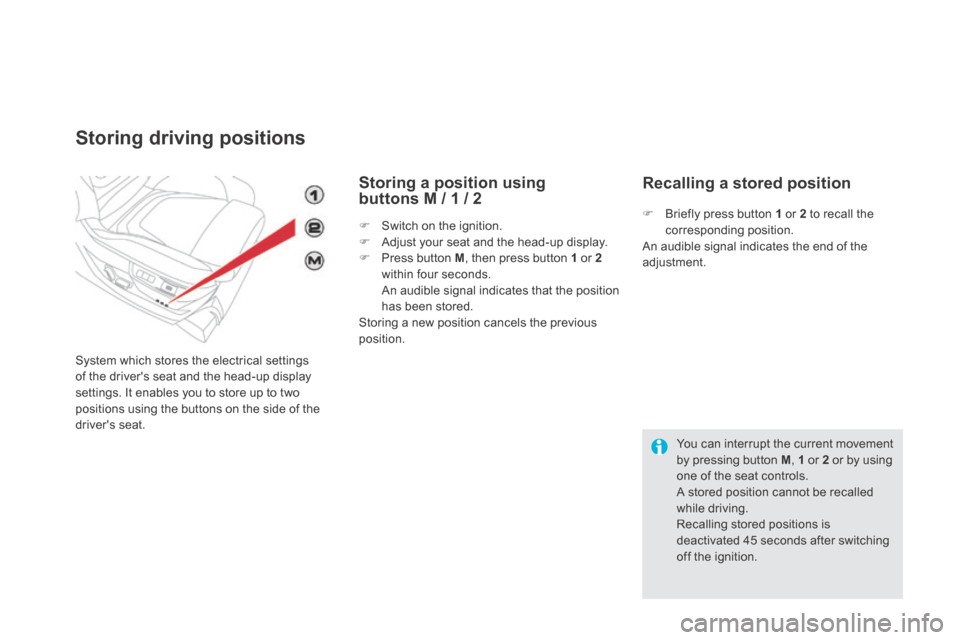
System which stores the electrical settings of the driver's seat and the head-up display settings. It enables you to store up to two positions using the buttons on the side of the driver's seat.
Storing a position using buttons M / 1 / 2
Switch on the ignition. Adjust your seat and the head-up display. Press button M , then press button 1 or 2within four seconds. An audible signal indicates that the position has been stored. Storing a new position cancels the previous position.
Recalling a stored position
Briefly press button 1 or 2 to recall the
corresponding position. An audible signal indicates the end of the adjustment.
You can interrupt the current movement by pressing button M , 1 or 2 or by using one of the seat controls. A stored position cannot be recalled while driving. Recalling stored positions is deactivated 45 seconds after switching off the ignition.
Page 113 of 382
111Comfort
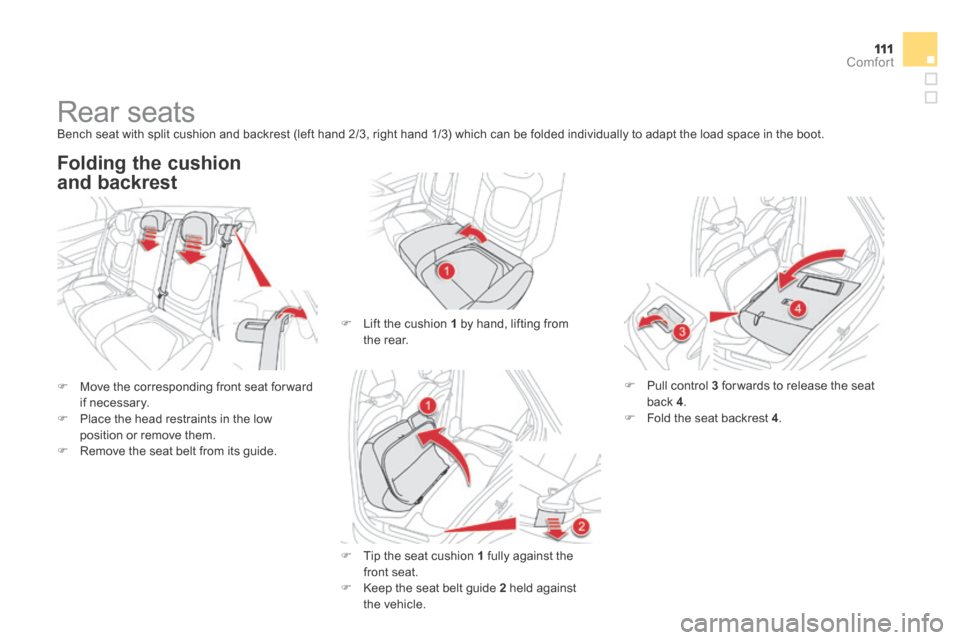
Rear seats Bench seat with split cushion and backrest (left hand 2/3, right hand 1/3) which can be folded individually to adapt the load space in the boot.
Move the corresponding front seat for ward if necessary. Place the head restraints in the low
position or remove them. Remove the seat belt from its guide.
Folding the cushion
and backrest
Lift the cushion 1 by hand, lifting from the rear.
Tip the seat cushion 1 fully against the front seat. Keep the seat belt guide 2 held against the vehicle.
Pull control 3 for wards to release the seat back 4. Fold the seat backrest 4 .
Page 116 of 382
Mirrors
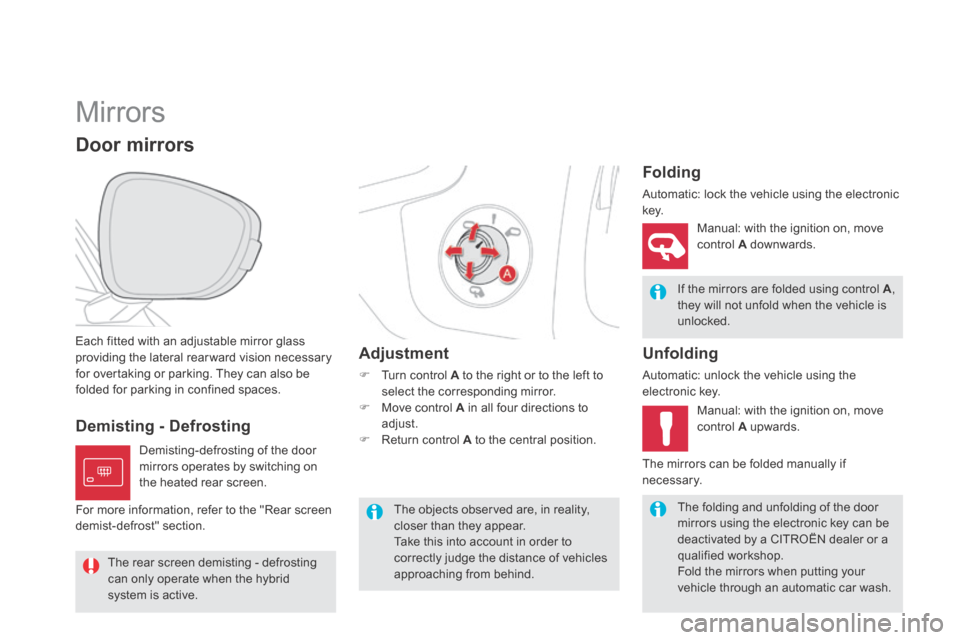
Each fitted with an adjustable mirror glass providing the lateral rear ward vision necessary for overtaking or parking. They can also be folded for parking in confined spaces.
Door mirrors
If the mirrors are folded using control A , they will not unfold when the vehicle is unlocked.
The folding and unfolding of the door mirrors using the electronic key can be
deactivated by a CITROËN dealer or a qualified workshop. Fold the mirrors when putting your vehicle through an automatic car wash.
The objects observed are, in reality, closer than they appear. Take this into account in order to correctly judge the distance of vehicles approaching from behind.
Demisting - Defrosting
Adjustment
Turn control A to the right or to the left to select the corresponding mirror. Move control A in all four directions to adjust. Return control A to the central position.
Folding
Automatic: lock the vehicle using the electronic key.
Unfolding
Automatic: unlock the vehicle using the electronic key.
Manual: with the ignition on, move control A downwards.
Manual: with the ignition on, move control A upwards.
Demisting-defrosting of the door mirrors operates by switching on the heated rear screen.
The rear screen demisting - defrosting can only operate when the hybrid system is active.
For more information, refer to the "Rear screen demist-defrost" section.
The mirrors can be folded manually if necessary.
Page 127 of 382
125Comfort
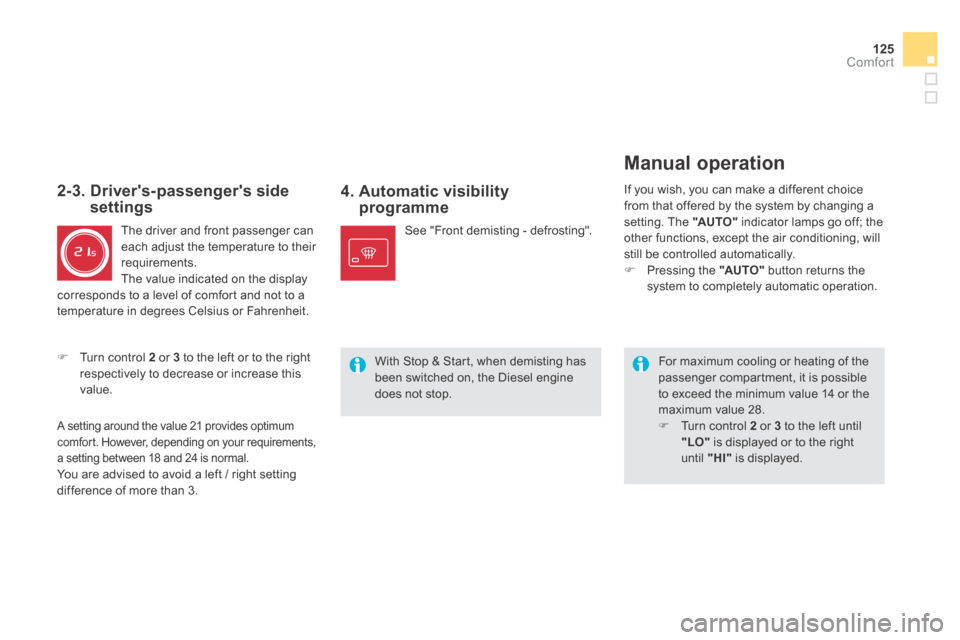
4. Automatic visibility programme
For maximum cooling or heating of the passenger compartment, it is possible to exceed the minimum value 14 or the maximum value 28. Turn control 2 or 3 to the left until "LO" is displayed or to the right until "HI" is displayed.
See "Front demisting - defrosting".
2-3. Driver's-passenger's side settings
The driver and front passenger can each adjust the temperature to their requirements. The value indicated on the display corresponds to a level of comfort and not to a temperature in degrees Celsius or Fahrenheit.
Turn control 2 or 3 to the left or to the right respectively to decrease or increase this value.
A setting around the value 21 provides optimum comfort. However, depending on your requirements, a setting between 18 and 24 is normal. You are advised to avoid a left / right setting difference of more than 3.
Manual operation
If you wish, you can make a different choice from that offered by the system by changing a setting. The "AUTO" indicator lamps go off; the other functions, except the air conditioning, will still be controlled automatically. Pressing the "AUTO" button returns the system to completely automatic operation.
With Stop & Start, when demisting has been switched on, the Diesel engine does not stop.
Page 146 of 382
Tyre under-infl ation detection
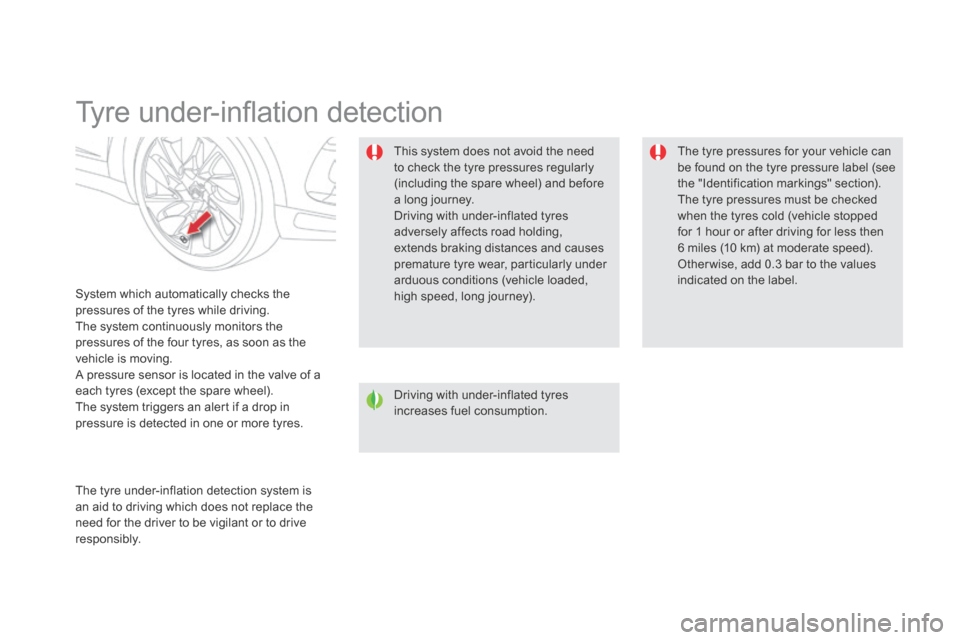
System which automatically checks the pressures of the tyres while driving. The system continuously monitors the pressures of the four tyres, as soon as the vehicle is moving. A pressure sensor is located in the valve of a each tyres (except the spare wheel). The system triggers an alert if a drop in pressure is detected in one or more tyres.
This system does not avoid the need to check the tyre pressures regularly (including the spare wheel) and before a long journey. Driving with under-inflated tyres
adversely affects road holding, extends braking distances and causes premature tyre wear, particularly under arduous conditions (vehicle loaded, high speed, long journey).
The tyre pressures for your vehicle can be found on the tyre pressure label (see the "Identification markings" section). The tyre pressures must be checked when the tyres cold (vehicle stopped
for 1 hour or after driving for less then 6 miles (10 km) at moderate speed). Other wise, add 0.3 bar to the values indicated on the label.
Driving with under-inflated tyres increases fuel consumption.
The tyre under-inflation detection system is an aid to driving which does not replace the need for the driver to be vigilant or to drive responsibly.
Page 148 of 382
Lane departure warning system
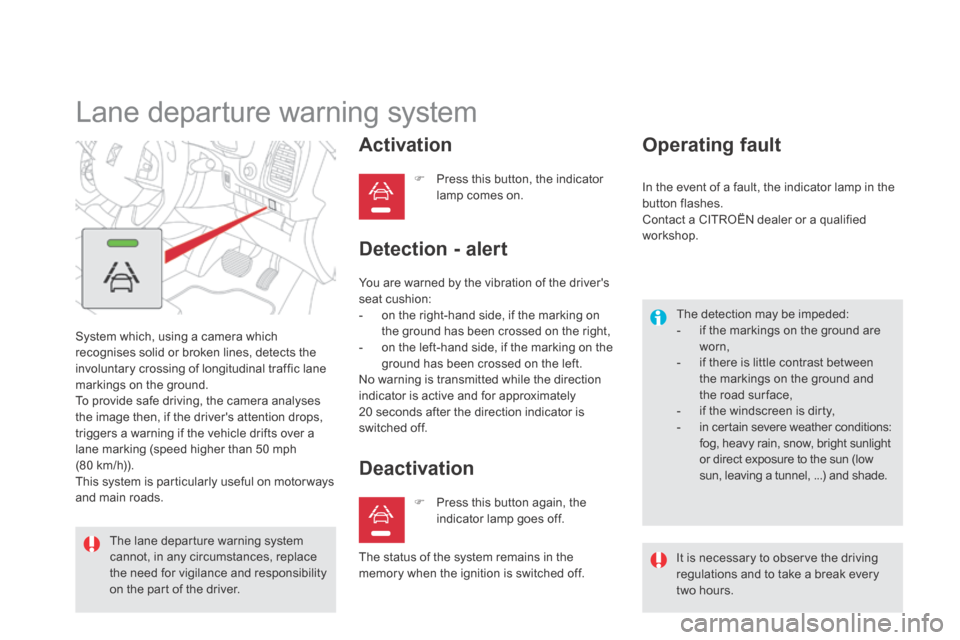
System which, using a camera which recognises solid or broken lines, detects the involuntary crossing of longitudinal traffic lane markings on the ground. To provide safe driving, the camera analyses the image then, if the driver's attention drops, triggers a warning if the vehicle drifts over a lane marking (speed higher than 50 mph (80 km/h)). This system is particularly useful on motor ways and main roads.
Activation
Press this button, the indicator lamp comes on.
The lane departure warning system cannot, in any circumstances, replace the need for vigilance and responsibility on the part of the driver.
Deactivation
You are warned by the vibration of the driver's seat cushion: - on the right-hand side, if the marking on the ground has been crossed on the right, - on the left-hand side, if the marking on the ground has been crossed on the left. No warning is transmitted while the direction indicator is active and for approximately 20 seconds after the direction indicator is switched off.
Detection - alert
Operating fault
The detection may be impeded: - if the markings on the ground are worn, - if there is little contrast between the markings on the ground and the road sur face, - if the windscreen is dirty, - in certain severe weather conditions: fog, heavy rain, snow, bright sunlight or direct exposure to the sun (low sun, leaving a tunnel, ...) and shade.
Press this button again, the indicator lamp goes off.
In the event of a fault, the indicator lamp in the button flashes. Contact a CITROËN dealer or a qualified workshop.
The status of the system remains in the memory when the ignition is switched off. It is necessary to observe the driving regulations and to take a break every
two hours.
Page 152 of 382
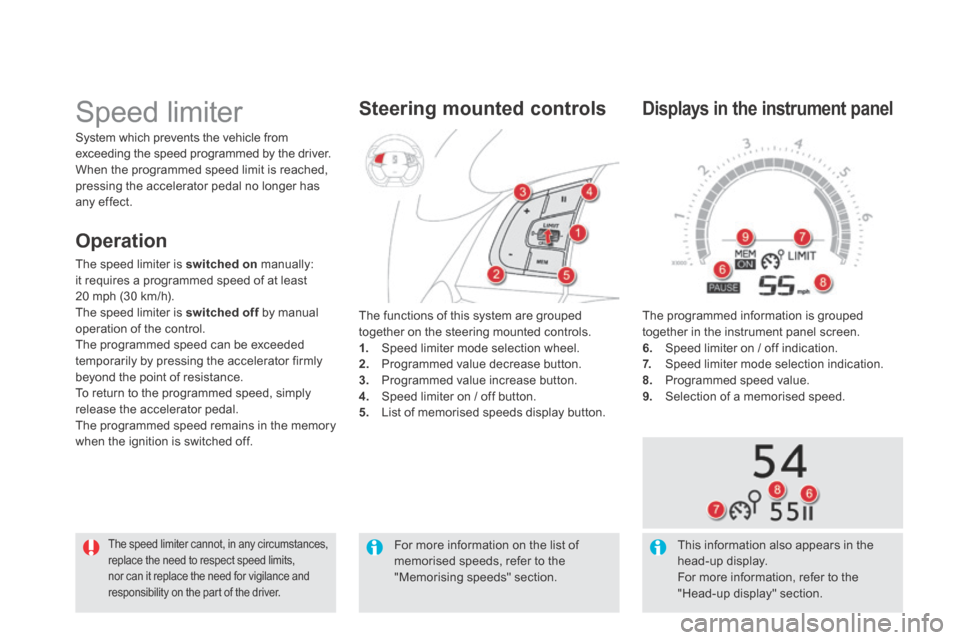
The programmed information is grouped together in the instrument panel screen. 6. Speed limiter on / off indication. 7. Speed limiter mode selection indication. 8. Programmed speed value. 9. Selection of a memorised speed.
Displays in the instrument panel
Speed limiter
The speed limiter cannot, in any circumstances, replace the need to respect speed limits, nor can it replace the need for vigilance and
responsibility on the part of the driver.
The functions of this system are grouped together on the steering mounted controls. 1. Speed limiter mode selection wheel. 2. Programmed value decrease button. 3. Programmed value increase button. 4. Speed limiter on / off button. 5. List of memorised speeds display button.
Steering mounted controls
System which prevents the vehicle from exceeding the speed programmed by the driver. When the programmed speed limit is reached, pressing the accelerator pedal no longer has any effect.
This information also appears in the head-up display. For more information, refer to the "Head-up display" section.
Operation
The speed limiter is switched on manually: it requires a programmed speed of at least 20 mph (30 km/h). The speed limiter is switched off by manual switched off by manual switched offoperation of the control. The programmed speed can be exceeded temporarily by pressing the accelerator firmly beyond the point of resistance. To return to the programmed speed, simply release the accelerator pedal. The programmed speed remains in the memory when the ignition is switched off.
For more information on the list of memorised speeds, refer to the "Memorising speeds" section.
Page 153 of 382
151Driving
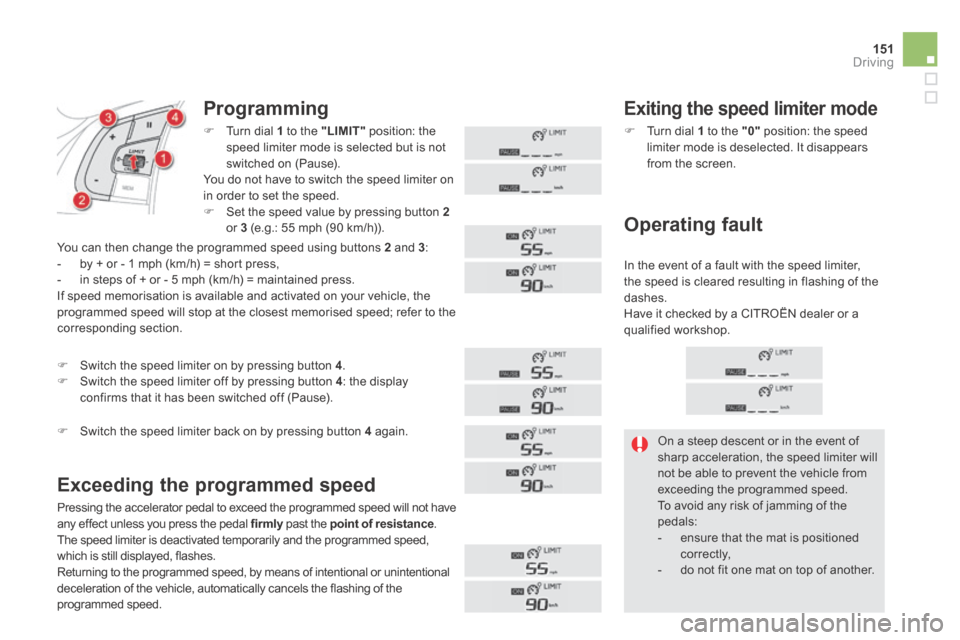
Programming
Exceeding the programmed speed
Exiting the speed limiter mode
Operating fault
On a steep descent or in the event of sharp acceleration, the speed limiter will not be able to prevent the vehicle from exceeding the programmed speed. To avoid any risk of jamming of the pedals: - ensure that the mat is positioned c o r r e c t l y, - do not fit one mat on top of another.
Switch the speed limiter back on by pressing button 4 again.
You can then change the programmed speed using buttons 2 and 3 : - by + or - 1 mph (km/h) = short press, - in steps of + or - 5 mph (km/h) = maintained press. If speed memorisation is available and activated on your vehicle, the programmed speed will stop at the closest memorised speed; refer to the corresponding section.
Turn dial 1 to the "LIMIT" position: the speed limiter mode is selected but is not switched on (Pause). You do not have to switch the speed limiter on in order to set the speed. Set the speed value by pressing button 2or 3 (e.g.: 55 mph (90 km/h)).
Switch the speed limiter on by pressing button 4 . Switch the speed limiter off by pressing button 4 : the display confirms that it has been switched off (Pause).
Pressing the accelerator pedal to exceed the programmed speed will not have any effect unless you press the pedal firmly past the firmly past the firmlypoint of resistance . The speed limiter is deactivated temporarily and the programmed speed, which is still displayed, flashes. Returning to the programmed speed, by means of intentional or unintentional
deceleration of the vehicle, automatically cancels the flashing of the programmed speed.
Turn dial 1 to the "0" position: the speed limiter mode is deselected. It disappears from the screen.
In the event of a fault with the speed limiter, the speed is cleared resulting in flashing of the dashes. Have it checked by a CITROËN dealer or a qualified workshop.