tow Citroen GRAND C4 PICASSO RHD 2016 2.G Service Manual
[x] Cancel search | Manufacturer: CITROEN, Model Year: 2016, Model line: GRAND C4 PICASSO RHD, Model: Citroen GRAND C4 PICASSO RHD 2016 2.GPages: 523, PDF Size: 13.63 MB
Page 252 of 523
250
I UF: seat suitable for the installation of an
ISOFIX U niversal seat, F or ward
facing
s
ecured using the upper strap to the top
t
ether on ISOFIX seats.
IL- SU:
s
eat suitable for the installation of an
I sofix
Semi- Universal
sea
t
ei
ther:
-
r
ear ward facing fitted with an upper strap
o
r a support leg,
-
f
or ward facing fitted with a support leg,
-
a
sleeper cot fitted with an upper strap or a
s
upport leg.
Remove
and stow the head restraint
b
efore installing a child seat on a
p
assenger seat. Refit the head restraint
o
nce the child seat has been removed.
For
more information on ISOFIX mountings
and
in particular on securing the upper strap,
r
efer to the corresponding section.
X:
s
eat not suitable for the installation of a
child
seat or sleeper cot for the weight group
i
ndicated.
(1) :
T
he outer seat in row 2 must be adjusted
t
o 3 notches back from the fully for ward
p
osition.
Safety
Page 254 of 523
252
I UF: seat suitable for the installation of an
ISOFIX U niversal seat, F or ward
facing
s
ecured using the upper strap to the top
t
ether on ISOFIX seats.
IL- SU:
s
eat suitable for the installation of an
I sofix
Semi- Universal
sea
t
ei
ther:
-
r
ear ward facing fitted with an upper strap
o
r a support leg,
-
f
or ward facing fitted with a support leg,
-
a
sleeper cot fitted with an upper strap or a
s
upport leg.
Remove
and stow the head restraint
b
efore installing a child seat on a
p
assenger seat. Refit the head restraint
o
nce the child seat has been removed.
For
more information on ISOFIX mountings
and
in particular on securing the upper strap,
r
efer to the corresponding section.
X:
s
eat not suitable for the installation of a
child
seat or sleeper cot for the weight group
i
ndicated.
Safety
Page 255 of 523
253
Child seats
The incorrect installation of a child seat in a vehicle compromises the child's protection in
t
he event of an accident.
Check
that there is no seat belt or seat belt
b
uckle under the child seat as this could
de
stabilise
i
t.
Remember
to fasten the seat belts or the
c
hild seat harnesses keeping the slack in
relation
to the child's body to a minimum,
even
for short journeys.
For
the installation of a child seat using a
s
eat belt, ensure that this is well tensioned
o
n the child seat and that it is holding the
c
hild seat firmly against the seat of your
v
ehicle. If your front passenger seat is
a
djustable, move it for ward if necessary.
At the rear seats, always leave sufficient
space
between the front seat and:
-
a
rear ward facing child seat,
-
t
he feet of a child seated in a for ward
f
acing child seat.
Recommendations
For this, move the front seat for ward and if necessary straighten its backrest.
For
o
ptimum
in
stallation
o
f
t
he
fo
rward
f
acing
c
hild seat, ensure that the back of the child
s
eat is as close as possible to the backrest
o
f the vehicle's seat, or in contact if possible.
The
head restraint must be removed before
i
nstalling a child seat with a backrest on the
p
assenger
sea
t.
Ensure
that the head restraint is stowed or
a
ttached securely so that it is not thrown
a
round the vehicle in the event of sharp
b
raking.
Refit
the head restraint as soon as the child
s
eat is removed.Installing a booster
cushion
As a safety precaution, do not leave:
- o ne or more children alone and
u
nsupervised in a vehicle,
-
a
child or an animal in a vehicle which
i
s exposed to the sun, with the windows
c
losed,
-
t
he keys within reach of children inside
t
he vehicle.
To
prevent accidental opening of the doors,
u
se the child lock.
Take
care not to open the rear windows by
m
ore than one third.
To
protect young children from the rays of
t
he sun, fit side blinds on the rear windows.
The
chest part of the seat belt must be
p
ositioned on the child's shoulder without
t
ouching the neck.
Ensure that the lap part of the seat belt
passes correctly over the child's thighs.
CITROËN recommends the use of a booster
s
eat which has a back, fitted with a seat belt
g
uide at shoulder level.
The
legislation
on
carrying
a
child
on
the
f
ront
passenger
seat
is
specific
to
each
c
ountry.
Refer
to
the
legislation
in
force
in
t
he
country
in
which
you
are
driving.
Deactivate
the
passenger
front
airbag
when
a
rear ward
facing
child
seat
is
installed
on
t
he
f
ront
p
assenger
sea
t.
O
therwise,
t
he
c
hild
would
risk
being
seriously
injured
or
k
illed
if
the
airbag
were
deployed.
Children at the front
6
Safety
Page 257 of 523
255
Fuel
Capacity of the tank: approximately 57 litres (petrol) or 55 litres (Diesel).
Low fuel levelRefuelling
When the low fuel level is reached, t
his warning lamp comes on in the
i
nstrument panel, accompanied by an
a
udible warning and a message and
t
he last bar of the fuel gauge comes
o
n in orange.
F
T
ake care to select the pump that delivers
t
he correct type of fuel for your vehicle.
F
I
ntroduce the nozzle so as to push in the
m
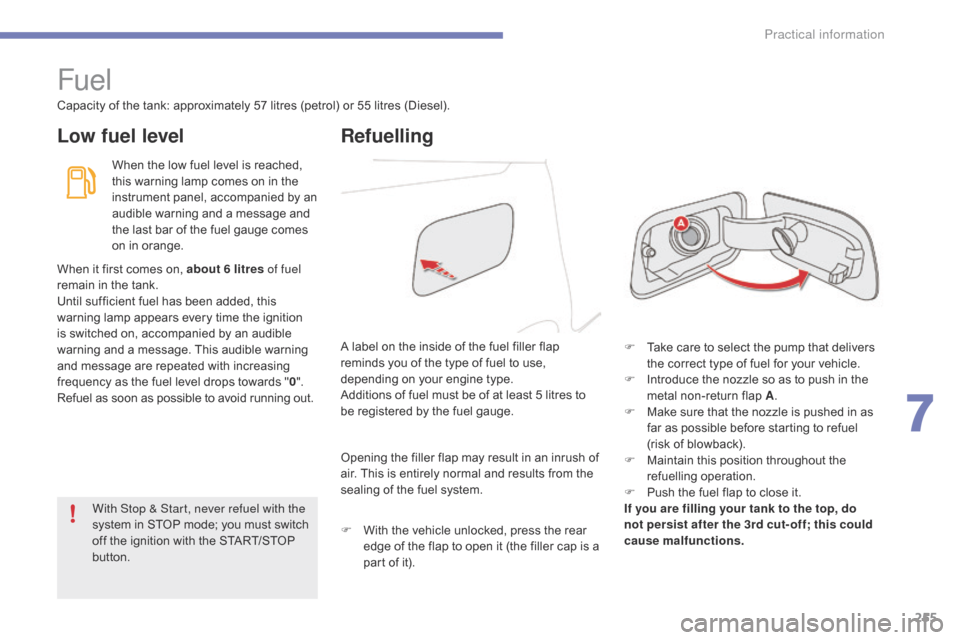
etal non-return flap A.
F
M
ake sure that the nozzle is pushed in as
f
ar as possible before starting to refuel
(risk
of blowback).
F
M
aintain this position throughout the
r
efuelling
ope
ration.
F
P
ush the fuel flap to close it.
If you are filling your tank to the top, do
not persist after the 3rd cut- off; this could
cause malfunctions.
A
label on the inside of the fuel filler flap
r
eminds you of the type of fuel to use,
d
epending on your engine type.
Additions
of fuel must be of at least 5 litres to
b
e registered by the fuel gauge.
When
it
first comes on, about 6 litres of fuel
remain
in
the tank.
Until
sufficient fuel has been added, this
w
arning
lamp appears every time the ignition
i
s
switched on, accompanied by an audible
w
arning
and a message. This audible warning
a
nd
message are repeated with increasing
f
requency
as the fuel level drops towards "0 ".
Refuel
as
soon as possible to avoid running out.Opening
the filler flap may result in an inrush of
a
ir. This is entirely normal and results from the
s
ealing of the fuel system.
F
W
ith the vehicle unlocked, press the rear
e
dge of the flap to open it (the filler cap is a
p
art of it).
With Stop & Start, never refuel with the
system
in STOP mode; you must switch
o
ff
the ignition with the START/STOP
b
utton.
7
Practical information
Page 261 of 523
259
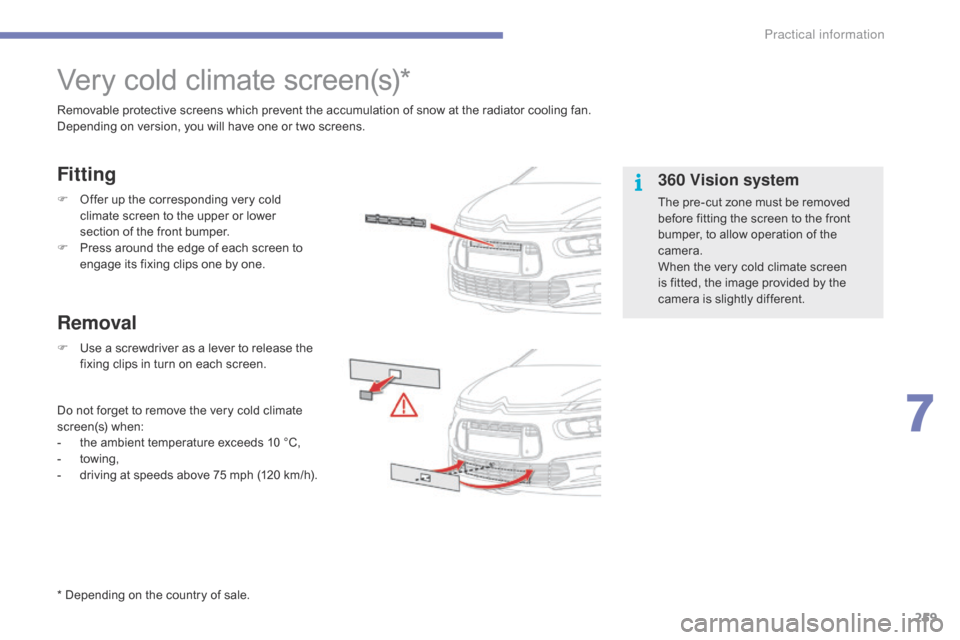
Very cold climate screen(s)*
Removable protective screens which prevent the accumulation of snow at the radiator cooling fan.
D epending on version, you will have one or two screens.
F
O
ffer up the corresponding very cold
c
limate screen to the upper or lower
s
ection of the front bumper.
F
P
ress around the edge of each screen to
e
ngage its fixing clips one by one.
F
U
se a screwdriver as a lever to release the
f
ixing clips in turn on each screen.
Do
not forget to remove the very cold climate
s
creen(s)
w
hen:
-
t
he ambient temperature exceeds 10 °C,
-
tow
ing,
-
d
riving
a
t
s
peeds
a
bove
7
5
m
ph
(
120 km/h).
Removal Fitting
360 Vision system
The pre-cut zone must be removed before fitting the screen to the front
b
umper, to allow operation of the
c
amera.
When
the very cold climate screen
i
s fitted, the image provided by the
c
amera is slightly different.
* Depending
on
the
country
of
sale.
7
Practical information
Page 262 of 523
260
Towbar with quickly detachable towball
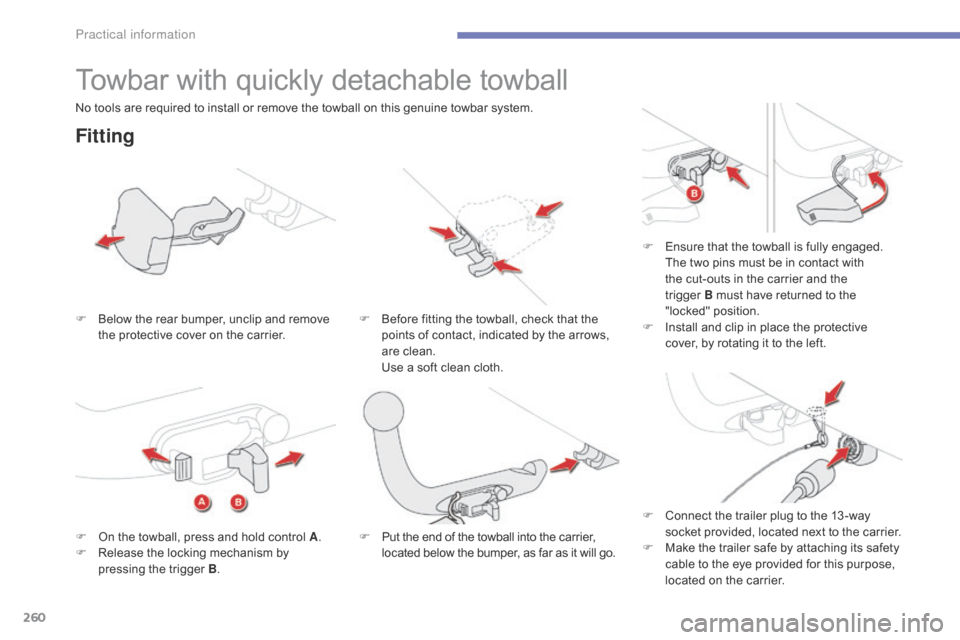
Fitting
F Below the rear bumper, unclip and remove t
he protective cover on the carrier.F
B efore fitting the towball, check that the p
oints of contact, indicated by the arrows,
a
re clean.
U
se a soft clean cloth.F
E
nsure that the towball is fully engaged.
T
he two pins must be in contact with
t
he cut-outs in the carrier and the
t
rigger
B must have returned to the "
locked" p osition.
F I nstall and clip in place the protective
c
over, by rotating it to the left.
F
O
n the towball, press and hold control A.
F
R
elease the locking mechanism by
p
ressing the trigger B. F
P
ut the end of the towball into the carrier,
l
ocated below the bumper, as far as it will go.
No
tools are required to install or remove the towball on this genuine towbar system.
F
C
onnect the trailer plug to the 13 -way
s
ocket provided, located next to the carrier.
F
M
ake the trailer safe by attaching its safety
c
able to the eye provided for this purpose,
l
ocated on the carrier.
Practical information
Page 263 of 523
261
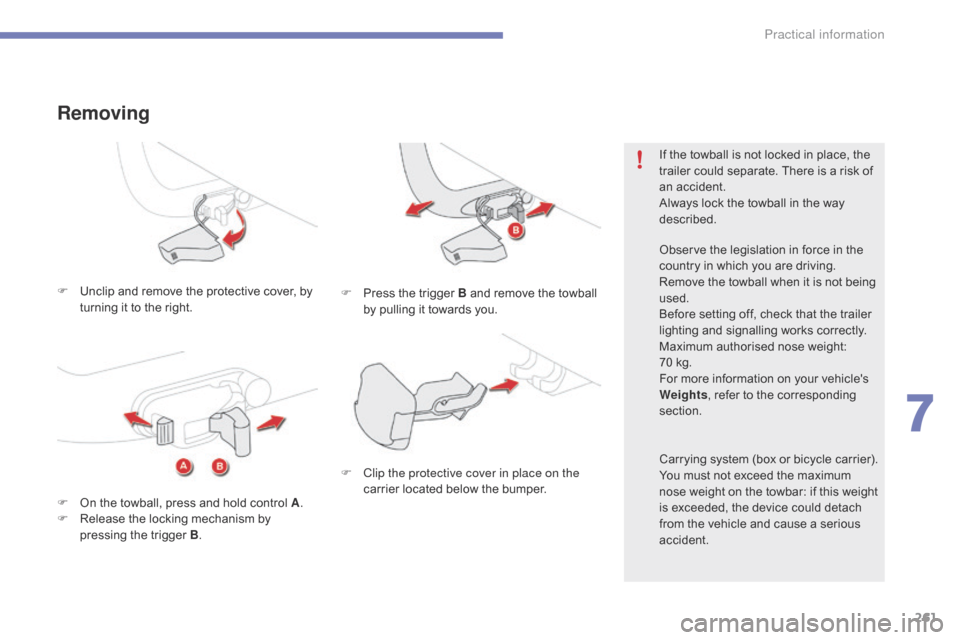
F Unclip and remove the protective cover, by t
urning it to the right.
Removing
F Press the trigger B and remove the towball b
y pulling it towards you.
F
O
n
the
towball,
press
and
hold
control
A .
F
R
elease
the
locking
mechanism
by
p
ressing
the
trigger
B . If
the towball is not locked in place, the
t
railer could separate. There is a risk of
a
n accident.
Always lock the towball in the way
de
scribed.
Observe the legislation in force in the
c
ountry in which you are driving.
Remove the towball when it is not being u
sed.
Before
setting off, check that the trailer
l
ighting and signalling works correctly.
Maximum
authorised nose weight:
7
0 kg.
For
more information on your vehicle's
W
eights,
refer to the corresponding
s
ection.
Carrying
system (box or bicycle carrier).
You
must not exceed the maximum
n
ose weight on the towbar: if this weight
i
s exceeded, the device could detach
f
rom the vehicle and cause a serious
a
ccident.
F
C
lip the protective cover in place on the
carrier
located below the bumper.
7
Practical information
Page 264 of 523
262
Towing a trailer
We recommend the use of genuine CITROËN towbars and their harnesses
t
hat have been tested and approved
f
rom the design stage of your vehicle,
a
nd that the fitting of the towbar is
e
ntrusted to a CITROËN dealer or a
q
ualified
w
orkshop.
If
the towbar is not fitted by a
C
ITROËN dealer, it must still be
f
itted in accordance with the vehicle
m
anufacturer's
i
nstructions.
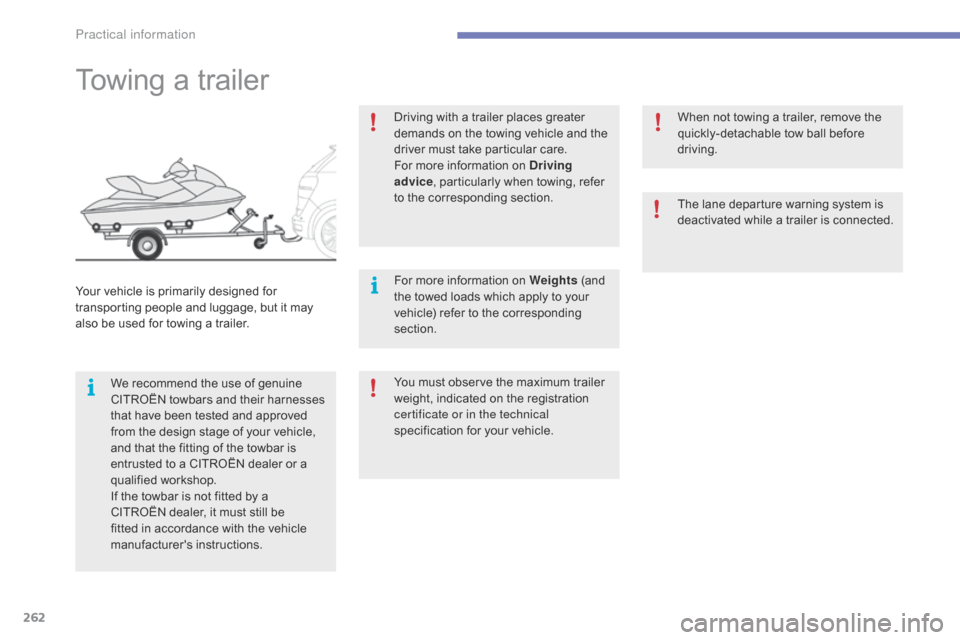
Your
vehicle is primarily designed for
t
ransporting people and luggage, but it may
a
lso
be used for towing a trailer. Driving with a trailer places greater
d
emands on the towing vehicle and the
d
river must take particular care.
For more information on Driving
advice , particularly when towing, refer
t
o the corresponding section.
For more information on Weights
(and
t
he towed loads which apply to your
v
ehicle) refer to the corresponding
s
ection.
You must observe the maximum trailer w
eight, indicated on the registration
c
ertificate or in the technical
specification
for your vehicle.When
not towing a trailer, remove the
q
uickly-detachable tow ball before
d
riving.
The lane departure warning system is
d
eactivated while a trailer is connected.
Practical information
Page 266 of 523
264
Accessories
A wide range of accessories and genuine parts is available from the CITROËN dealer network.
T hese accessories and parts are all suitable for your vehicle and benefit from CITROËN's recommendation and warranty.
"Comfort"
Door deflectors, sun blind, insulated module, coat hanger fixed to head restraint, mobile
r
eading lamp, mirror for caravan, front and rear
par
king
s
ensors,
p
rogrammable
a
dditional
h
eating, smoker's kit, solar film for rear door
w
indows, portable scented air freshener...
"Transport systems"
Boot carpet, boot liner, boot net, boot
spacers, transverse roof bars, ski carrier, roof
b
oxes, towbars, towbar wiring harnesses,
b
icycle carriers for towbar and roof bars,
t
owbars with fixed and detachable towball,
s
eparation net, sliding carrier, boot organiser
(
Grand C4 Picasso)...
If
a towbar and wiring harness are fitted
o
utside the CITROËN dealer network, the
i
nstallation must be done strictly in line with the
ma
nufacturer's
r
ecommendations.
If
your vehicle has a detachable towball, it is
r
ecommended that the ball be removed when
n
ot towing.
"Styling"
Gear lever knobs, aluminium foot rest, alloy wheels, door sill finishers, interior mirror
s
hells...
"Security and safety"
Anti-intrusion alarm, vehicle tracking system, c hild seats and booster cushions, breathalyser,
f
irst aid kit, fire extinguisher, warning triangle,
h
igh visibility vest, wheel security bolts, snow
c
hains, non-slip covers, winter tyres, foglamp
k
it, security film for front door windows, dog
g
uard, pet seat belt...
"Protection"
Mats*, seat covers compatible with lateral airbags, mud flaps, door protective mouldings,
b
umper protection strips, vehicle cover, boot
s
ill protector, door sill protectors, seat and boot
p
rotective covers for pets...
The
rear bodywork has been designed to avoid
s
p r ay.
*
T
o avoid any risk of jamming the pedals:
-
e
nsure that mats are correctly positioned
a
nd secured,
-
n
ever fit one mat on top of another.
Practical information
Page 270 of 523
268
TOTAL & CITROËN
Partners in performance and
protecting the environment
Innovation in the search for
performance
For over 40 year, the TOTAL Research and Development departments have developed lubricants
f
or CITROËN, to match the latest technical innovations
o
n CITROËN vehicles, both for competition and for
e
veryday motoring.
For you, this is an assurance that you will obtain the
best
per formance from your engine.
Optimum protection for
your engine
By having your CITROËN vehicle serviced with TOTAL lubricants, you are
c
ontributing towards improving the life
a
nd per formance of your engine, while
a
lso protecting the environment.
Practical information