tow Citroen GRAND C4 PICASSO RHD 2016 2.G User Guide
[x] Cancel search | Manufacturer: CITROEN, Model Year: 2016, Model line: GRAND C4 PICASSO RHD, Model: Citroen GRAND C4 PICASSO RHD 2016 2.GPages: 523, PDF Size: 13.63 MB
Page 95 of 523
93
In order for these systems to be fully effective, follow the operation and maintenance guidelines belo w:
F
T
o obtain an even air distribution, take care not to obstruct the exterior air intake grilles
l
ocated at the base of the windscreen, the nozzles, the vents and the air outlets, as well
a
s the air extractor located in the boot.
F
D
o not cover the sunshine sensor, located on the dashboard; this is used for regulation
o
f the air conditioning system.
F
O
perate the air conditioning system for at least 5 to 10 minutes, once or twice a month
t
o keep it in per fect working order.
F
E
nsure that the passenger compartment filter is in good condition and have the filter
e
lements replaced regularly.
W
e recommend the use of a combined passenger compartment filter. Thanks to its
s
pecial active additive, it contributes to the purification of the air breathed by the
o
ccupants and the cleanliness of the passenger compartment (reduction of allergic
s
ymptoms, bad odours and greasy deposits).
F
T
o ensure correct operation of the air conditioning system, you are also advised to have
i
t checked regularly as recommended in the maintenance and warranty guide.
F
I
f the system does not produce cold air, switch it off and contact a CITROËN dealer or a
q
ualified
w
orkshop.
Recommendations for ventilation and air conditioning
If after an extended stop in sunshine, the i nterior t emperature i s v ery h igh, f irst
v
entilate the passenger compartment for
a
few moments.
Put
the air flow control at a setting high
e
nough to quickly change the air in the
p
assenger
c
ompartment.
The
air conditioning system does not
c
ontain chlorine and does not present
a
ny danger to the ozone layer.
The
condensation created by the air
c
onditioning results in a discharge
o
f water under the vehicle which is
p
er fectly normal.
When
towing
the
maximum
load
on
a
steep
gradient
in
high
temperatures,
switching
off
the
a
ir
conditioning
increases
the
available
engine
power
and
so
improves
the
towing
ability.
Stop & Start
The heating and air conditioning s ystems only work when the engine is
r
unning.
To
maintain a comfortable temperature
i
n the passenger compartment, you can
t
emporarily deactivate the Stop & Start
s
ystem.
For
more information on Stop & Star t,
refer
to the corresponding section.
3
Ease of use and comfort
Page 104 of 523
102
Front demist -
d
efrost
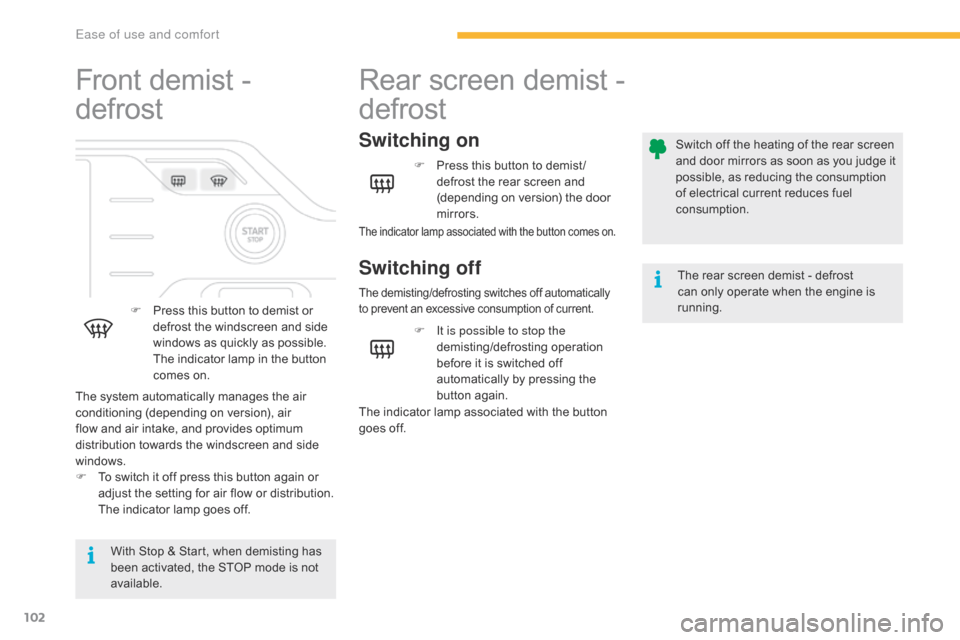
F Press this button to demist or d
efrost the windscreen and side
w
indows as quickly as possible.
T
he indicator lamp in the button
c
omes on.
With
Stop & Start, when demisting has
b
een activated, the STOP mode is not
a
vailable.
The
system automatically manages the air
c
onditioning (depending on version), air
f
low
and
air intake, and provides optimum
d
istribution towards the windscreen and side
w
indows.
F
T
o
switch it off press this button again or
a
djust the setting for air flow or distribution.
T
he
indicator lamp goes off.
Rear screen demist -
d efrost
Switching on
Switching off
F Press this button to demist /
defrost the rear screen and
(
depending on version) the door
m
irrors.
The demisting/defrosting switches off automatically to prevent an excessive consumption of current.
The rear screen demist - defrost can only operate when the engine is
r
unning.
Switch
off the heating of the rear screen
a
nd door mirrors as soon as you judge it
p
ossible, as reducing the consumption
o
f electrical current reduces fuel
c
onsumption.
F
I
t is possible to stop the
demisting/defrosting
o
peration
b
efore
it
is
switched
off
a
utomatically
by
pressing
the
bu
tton
ag
ain.
The
indicator
lamp
associated
with
the
button
g
oes
off.
The indicator lamp associated with the button comes on.
Ease of use and comfort
Page 109 of 523
107
Removable console
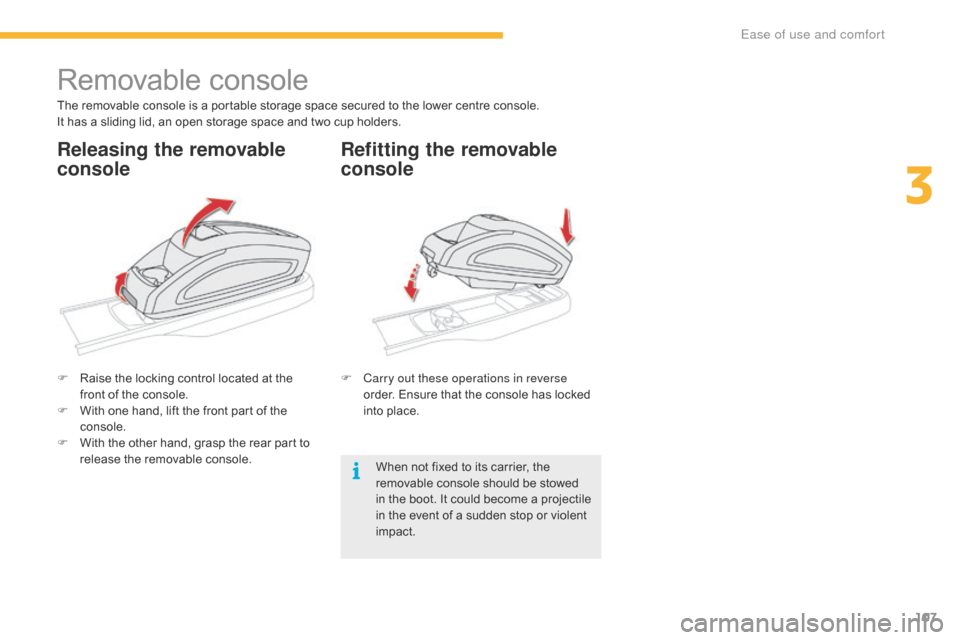
The removable console is a portable storage space secured to the lower centre console.
I t has a sliding lid, an open storage space and two cup holders.
F
R
aise the locking control located at the
f
ront of the console.
F
W
ith one hand, lift the front part of the
c
onsole.
F
W
ith the other hand, grasp the rear part to
r
elease the removable console.F
C
arry out these operations in reverse
order.
Ensure that the console has locked
i
nto place.
When
not fixed to its carrier, the
r
emovable console should be stowed
i
n the boot. It could become a projectile
i
n the event of a sudden stop or violent
im
pact.
Releasing the removable
consoleRefitting the removable
console
3
Ease of use and comfort
Page 112 of 523
110
Storage boxes
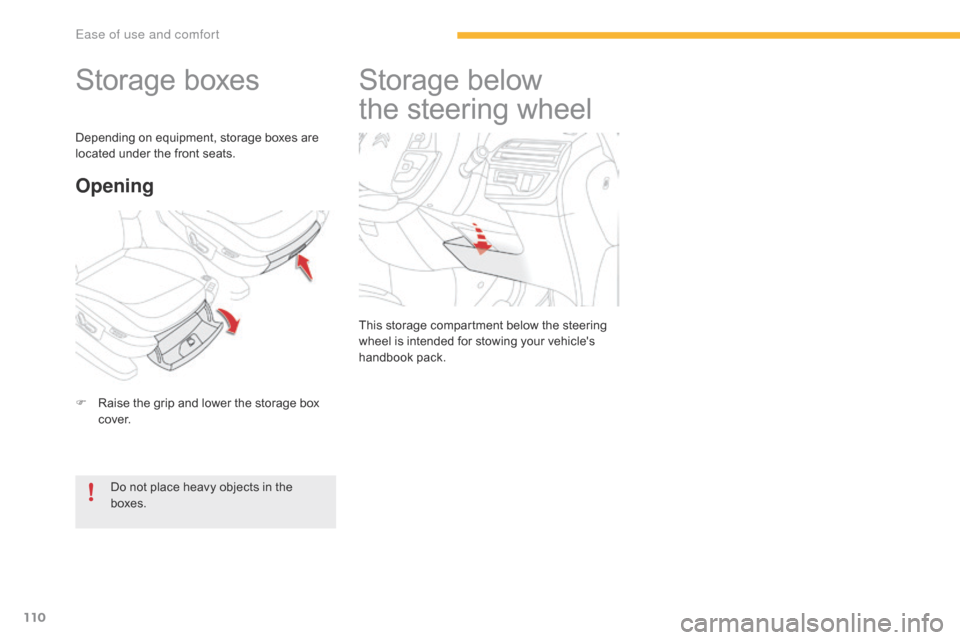
F Raise the grip and lower the storage box c
ove r.
Opening
Do not place heavy objects in the boxes.
Depending
on equipment, storage boxes are
l
ocated under the front seats.
Storage belo
w
t
he steering wheel
This storage compartment below the steering w
heel is intended for stowing your vehicle's
han
dbook
pa
ck.
Ease of use and comfort
Page 113 of 523
111
Rear fittings
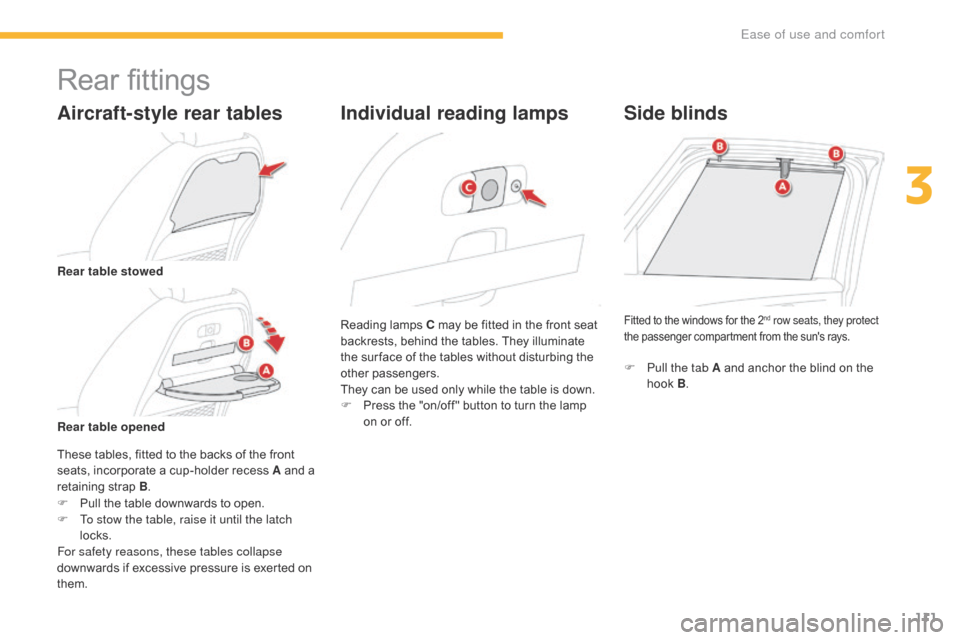
Aircraft-style rear tables
These tables, fitted to the backs of the front seats, incorporate a cup-holder recess A and a
r
etaining strap B.
F
P
ull the table downwards to open.
F
T
o stow the table, raise it until the latch
locks.
For safety reasons, these tables collapse
downwards
if excessive pressure is exerted on
t
hem. Reading
lamps C may be fitted in the front seat
b
ackrests, behind the tables. They illuminate
t
he sur face of the tables without disturbing the
o
ther
p
assengers.
They can be used only while the table is down.
F
P
ress the "on/off " button to turn the lamp
o
n or off.
Individual reading lamps
Rear table stowed
Rear table opened
Side blinds
Fitted to the windows for the 2nd row seats, they protect
the
passenger
compartment
from the sun's rays.
F Pull the tab A and anchor the blind on the h
ook B.
3
Ease of use and comfort
Page 117 of 523
115
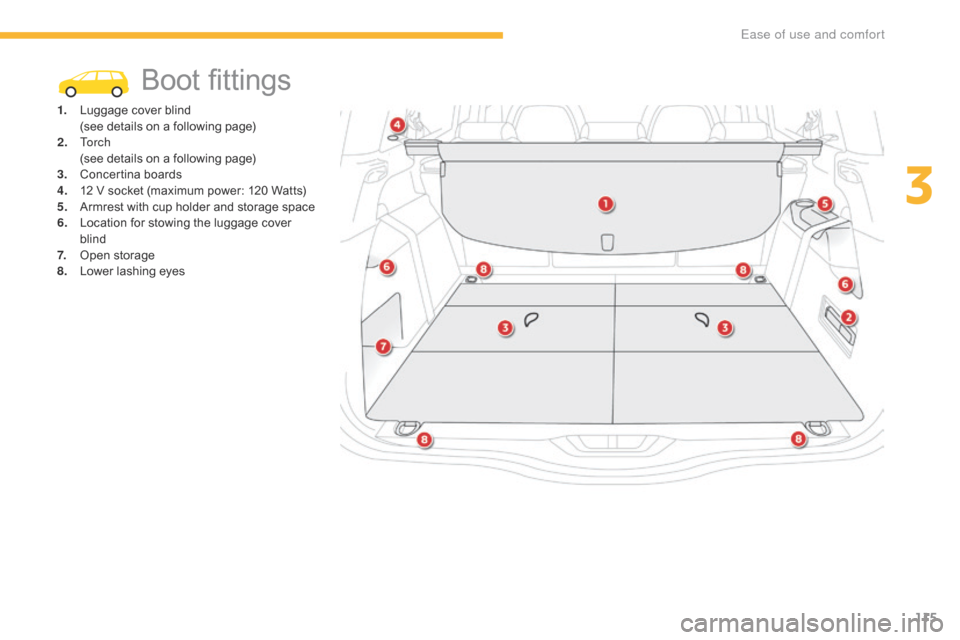
Boot fittings
1. Luggage cover blind (
see details on a following page)
2.
T
o r c h
(
see details on a following page)
3.
C
oncertina
b
oards
4.
1
2 V socket (maximum power: 120 Watts)
5.
A
rmrest with cup holder and storage space
6.
L
ocation for stowing the luggage cover
b
lind
7.
O
pen
s
torage
8.
L
ower lashing eyes
3
Ease of use and comfort
Page 118 of 523
116
Luggage cover roller
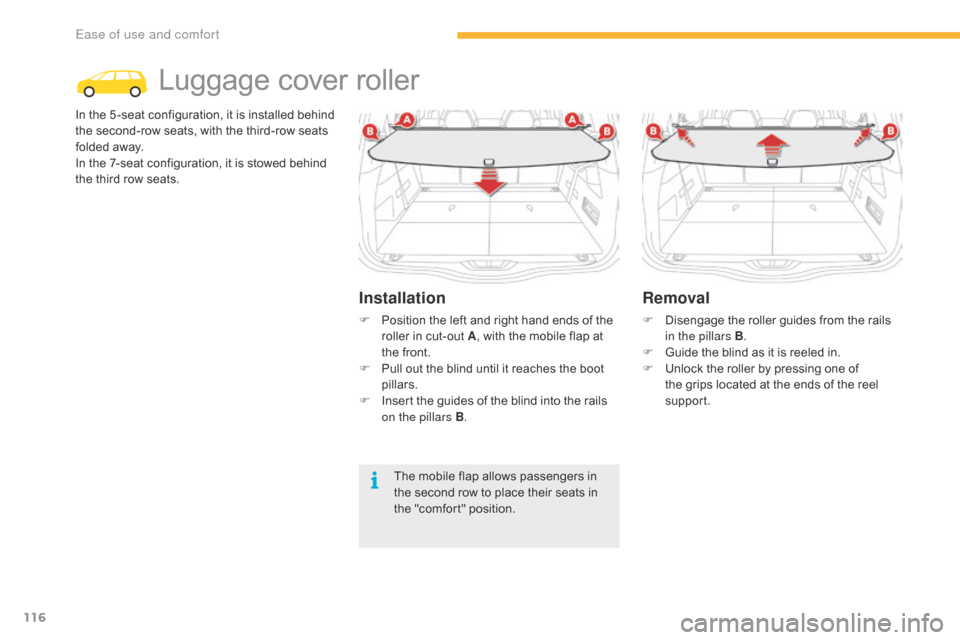
In the 5 -seat configuration, it is installed behind t
he second-row seats, with the third-row seats
f
olded away.
In
the 7-seat configuration, it is stowed behind
t
he third row seats.
Installation
F Position the left and right hand ends of the r
oller in cut-out A,
with the mobile flap at
t
he front.
F
P
ull out the blind until it reaches the boot
p
illars.
F
I
nsert the guides of the blind into the rails
o
n the pillars B .
Removal
F Disengage the roller guides from the rails i
n the pillars B .
F
G
uide the blind as it is reeled in.
F
U
nlock the roller by pressing one of
t
he grips located at the ends of the reel
sup
port.
The
mobile
flap
allows
passengers
in
t
he
second
row
to
place
their
seats
in
t
he
"comfort"
position.
Ease of use and comfort
Page 119 of 523
117
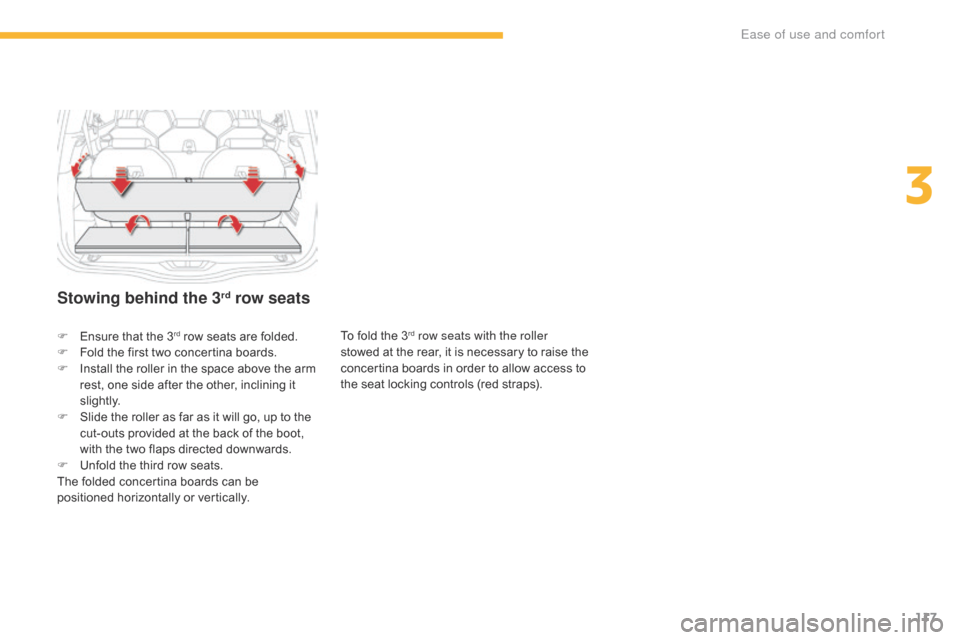
Stowing behind the 3rd row seats
To fold the 3rd row seats with the roller
stowed
at
the
rear, it is necessary to raise the
c
oncertina
boards in order to allow access to
t
he
seat
locking controls (red straps).
F
E
nsure
that
the
3rd row seats are folded.
F
F
old
the
first
two
concertina boards.
F
I
nstall
the
roller
in
the space above the arm
r
est,
one
side
after the other, inclining it
s
li g ht l y.
F
S
lide
the
roller
as
far as it will go, up to the
c
ut-outs
provided
at the back of the boot,
w
ith
the
two
flaps
directed downwards.
F
U
nfold
the
third
row seats.
The
folded
concertina
boards can be
p
ositioned
horizontally or vertically.
3
Ease of use and comfort
Page 124 of 523
122
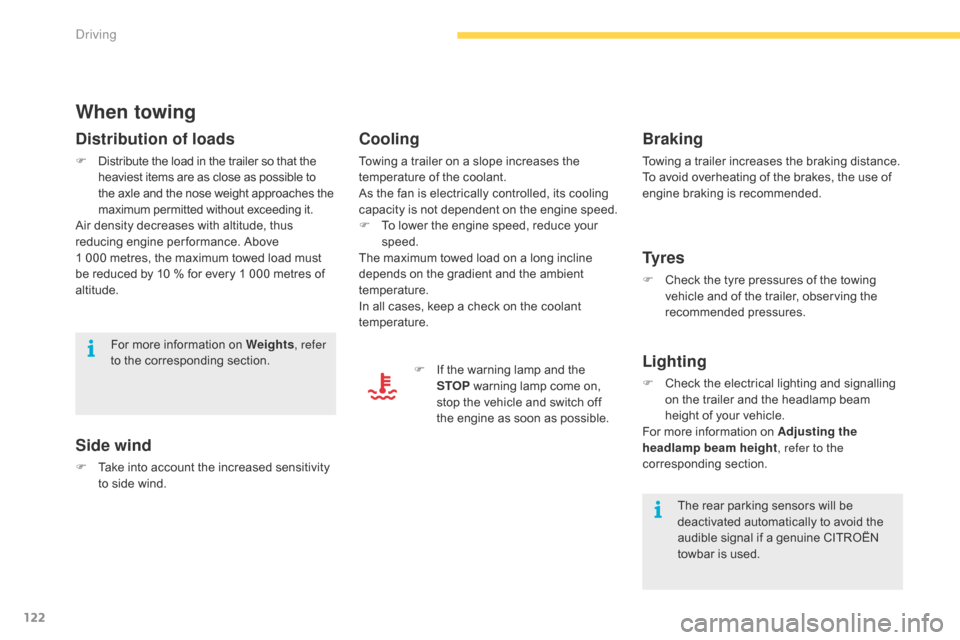
When towing
Distribution of loads
F Distribute the load in the trailer so that the h
eaviest items are as close as possible to t
he axle and the nose weight approaches the
m
aximum permitted without exceeding it.
Air
density decreases with altitude, thus
r
educing engine per formance. Above
1 0
00 metres, the maximum towed load must
b
e reduced by 10 % for every 1 000 metres of
al
titude.
Side wind
F Take into account the increased sensitivity t
o side wind.
For
more information on Weights
, refer
to the corresponding section.
The rear parking sensors will be
d
eactivated automatically to avoid the
a
udible signal if a genuine CITROËN
t
owbar is used.
Cooling
Towing a trailer on a slope increases the temperature of the coolant.
As
the fan is electrically controlled, its cooling
c
apacity is not dependent on the engine speed.
F
T
o lower the engine speed, reduce your
s
peed.
The
maximum towed load on a long incline
d
epends on the gradient and the ambient
t
emperature.
In
all cases, keep a check on the coolant
t
emperature. F
I
f the warning lamp and the
S
TOP
warning lamp come on,
s
top the vehicle and switch off
t
he engine as soon as possible.
Braking
Towing a trailer increases the braking distance.
T o avoid overheating of the brakes, the use of
e
ngine braking is recommended.
Ty r e s
F Check the tyre pressures of the towing v
ehicle and of the trailer, observing the
re
commended
p
ressures.
Lighting
F Check the electrical lighting and signalling o
n the trailer and the headlamp beam
h
eight of your vehicle.
For
more information on Adjusting the
headlamp beam height , refer to the
corresponding
s
ection.
Driving
Page 132 of 523
130
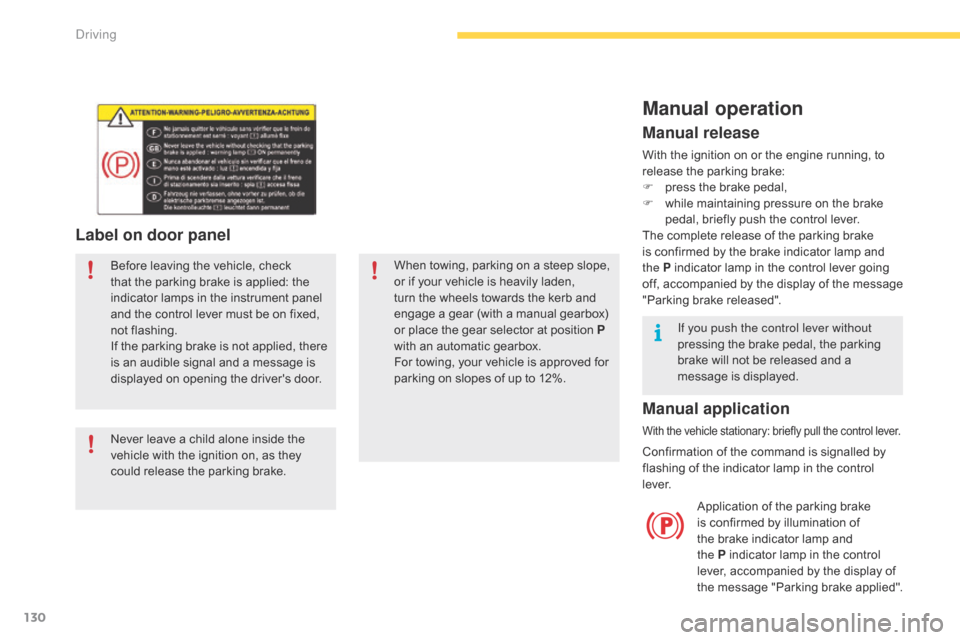
Label on door panel
Before leaving the vehicle, check that the parking brake is applied: the
i
ndicator lamps in the instrument panel
a
nd the control lever must be on fixed,
n
ot
f
lashing.
If
the parking brake is not applied, there
i
s an audible signal and a message is
d
isplayed on opening the driver's door.
Never
leave a child alone inside the
v
ehicle with the ignition on, as they
c
ould release the parking brake.When
towing, parking on a steep slope, o
r if your vehicle is heavily laden,
t
urn the wheels towards the kerb and
e
ngage a gear (with a manual gearbox)
o
r place the gear selector at position P
with
an automatic gearbox.
For
towing, your vehicle is approved for
p
arking on slopes of up to 12%.
Manual operation
Application of the parking brake is confirmed by illumination of
t
he brake indicator lamp and
t
he P indicator lamp in the control
l
ever, accompanied by the display of
t
he
m
essage
"
Parking
b
rake
a
pplied".
Manual release
With the ignition on or the engine running, to release the parking brake:
F
p
ress the brake pedal,
F
w
hile maintaining pressure on the brake
p
edal, briefly push the control lever.
The
complete release of the parking brake
i
s confirmed by the brake indicator lamp and
t
he P indicator lamp in the control lever going
o
ff,
a
ccompanied
b
y
t
he
d
isplay
o
f
t
he
m
essage
"
Parking brake released".
If you push the control lever without
pressing
the brake pedal, the parking
b
rake will not be released and a
m
essage is displayed.
Manual application
With the vehicle stationary: briefly pull the control lever.
Confirmation of the command is signalled by flashing of the indicator lamp in the control
l
eve r.
Driving