instrument panel CITROEN RELAY 2017 Handbook (in English)
[x] Cancel search | Manufacturer: CITROEN, Model Year: 2017, Model line: RELAY, Model: CITROEN RELAY 2017Pages: 292, PDF Size: 9.04 MB
Page 41 of 292
39
Gearbox and steering wheel
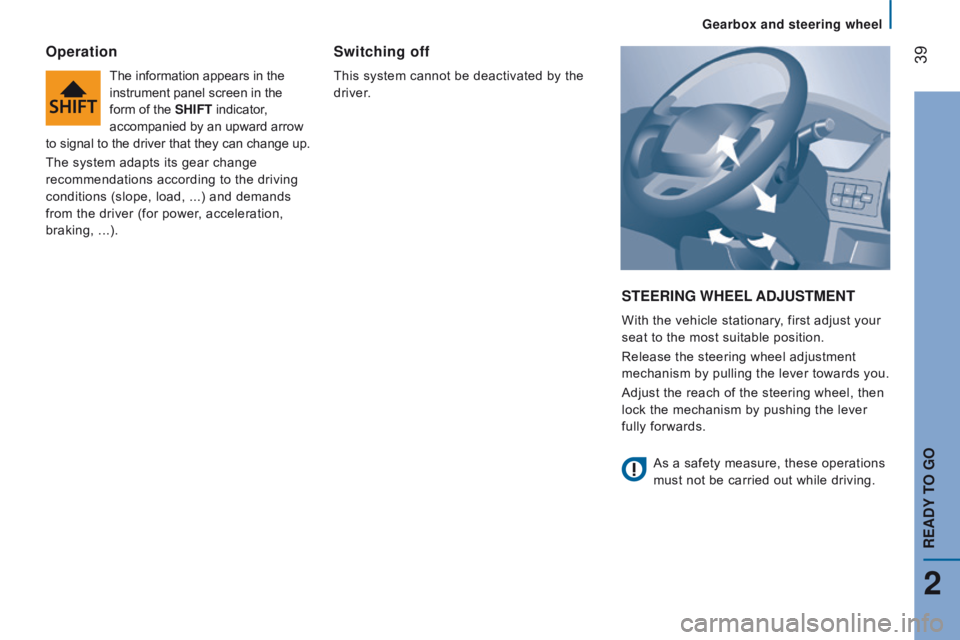
StEErInG WHEEL A dju S t ME nt
With the vehicle stationary, first adjust your
seat to the most suitable position.
Release the steering wheel adjustment
mechanism by pulling the lever towards you.
Adjust the reach of the steering wheel, then
lock the mechanism by pushing the lever
fully forwards.
Operation
The information appears in the
instrument panel screen in the
form of the SHIF
t indicator,
accompanied by an upward arrow
to signal to the driver that they can change up.
The system adapts its gear change
recommendations according to the driving
conditions (slope, load, ...) and demands
from the driver (for power, acceleration,
braking,
...).
Switching off
This system cannot be deactivated by the
driver.
As a safety measure, these operations
must not be carried out while driving.
2
rEAdY tO GO
Page 45 of 292
43The Stop & Start system puts the engine
temporarily into standby - ST OP mode -
during stops in the traffic (red lights, traffic
jams, or other...). The engine restarts
automatically - START mode - as soon as
you want to move off. The restart takes
place instantly, quickly and silently.
Perfect for urban use, the Stop & Start
system reduces fuel consumption and
exhaust emissions and offers the comfort of
complete silence when stationary.
StOP & StA rt
Operation
Going into engine StOP mode
With the vehicle stationary, put the gear
lever into neutral, then release the clutch
pedal.
-
This indicator lamp comes on
in the instrument panel and
the engine goes into standby. Automatic stopping of the engine is
only possible after the vehicle has
exceed a speed of about 6 mph (10 km/h),
to avoid repeated stopping of the engine
when driving slowly.
Never leave your vehicle with out first
turning off the ignition with the key. Never refuel with the engine in ST OP
mode; you must switch off the ignition
with the key. Going into engine S
t
A
rt mode
-
This indicator lamp goes of
f
and the engine restarts.
If following an automatic restart in START
mode, the driver takes no action on the
vehicle during the next 3 minutes, the
system stops the engine definitively. The
engine can then only be restarted using
the key.
With the vehicle in gear, automatic engine
restarting is only allowed by fully depressing
the clutch pedal.
2
rEAdY tO GO
Starting and switching off
Page 46 of 292
44Special cases
This indicator lamp in the
instrument panel flashes for a
few seconds, then goes off.
t
his operation is perfectly normal. S
t
A
rt invoked automatically
The START mode may be invoked
automatically in the following circumstances:
-
the vehicle is free wheeling on a
gradient,
-
the windscreen wiper is on fast wipe,
-
the air conditioning is running,
-
the engine has been stopped for around
3 minutes with Stop & Start,
-
some special conditions (battery charge,
engine temperature, braking assistance,
ambient temperature...) where the
engine is needed to assure control of
a system.
In this case, a message appears
in the instrument panel screen,
accompanied by this indicator
lamp, which flashes for a few
seconds, then goes off.
Good practice
With a manual gearbox in STOP mode, if a
gear is engaged without fully depressing the
clutch pedal, restarting may not take place.
An indicator lamp and/or message is
displayed in the instrument panel asking
you to fully depress the clutch pedal to allow
restarting.
t
his operation is perfectly normal. With the engine stopped in STOP
mode, if the driver unfasten's
their seat belt and opens a front
door, the engine can only be
restarted using the ignition key. There is
an audible signal, accompanied by flashing
of this indicator lamp and the display of a
message.
S
tOP
mode may be unavailable
STOP mode is not invoked in the following
circumstances:
-
the system is initialising,
-
the driver's door is open,
-
the driver's seat belt is not fastened,
-
the air conditioning is running,
-
the heated rear screen is on,
-
the windscreen wiper is on fast wipe,
-
reverse gear is engaged, for a parking
manoeuvre,
-
some special conditions (battery
charge, engine temperature, particle
filter regeneration, braking assistance,
ambient temperature...) where the
engine is needed to assure control of
a
system,
-
in intensive use of Stop & Start, it may
be deactivated to conserve starting
ability; go to a CITROËN dealer to have
the function reactivated.
Starting and switching off
Page 47 of 292
45
deactivation
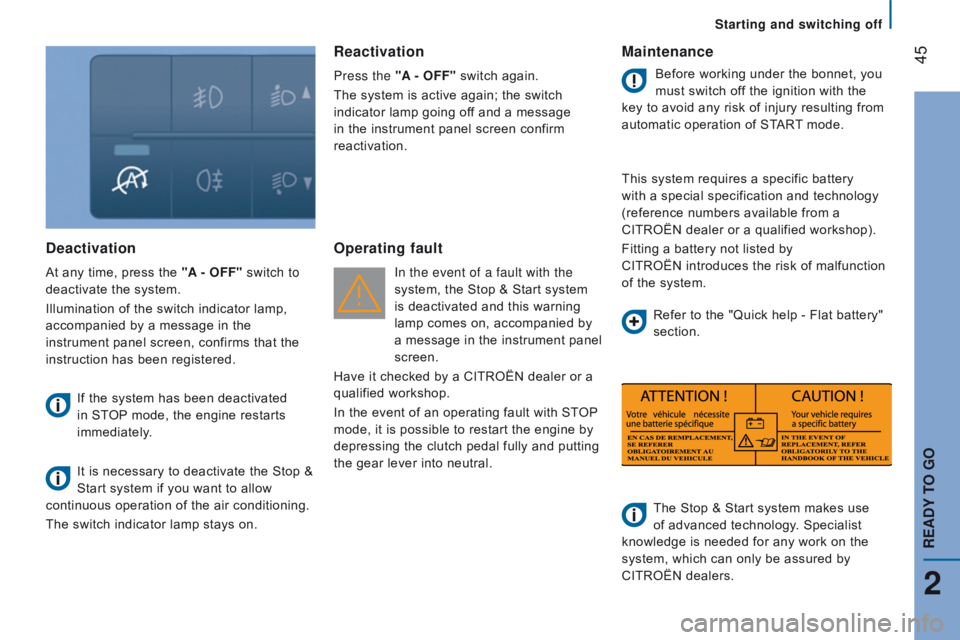
At any time, press the "A - OFF" switch to
deactivate the system.
Illumination of the switch indicator lamp,
accompanied by a message in the
instrument panel screen, confirms that the
instruction has been registered.
If the system has been deactivated
in STOP mode, the engine restarts
immediately.
It is necessary to deactivate the Stop
&
Start system if you want to allow
continuous operation of the air conditioning.
The switch indicator lamp stays on.
reactivation
Press the "A - OFF" switch again.
The system is active again; the switch
indicator lamp going off and a message
in the instrument panel screen confirm
reactivation.
Operating fault
In the event of a fault with the
system, the Stop & Start system
is deactivated and this warning
lamp comes on, accompanied by
a message in the instrument panel
screen.
Have it checked by a CITROËN dealer or a
qualified workshop.
In the event of an operating fault with STOP
mode, it is possible to restart the engine by
depressing the clutch pedal fully and putting
the gear lever into neutral.
Maintenance
Before working under the bonnet, you
must switch off the ignition with the
key to avoid any risk of injury resulting from
automatic operation of START mode.
This system requires a specific battery
with a special specification and technology
(reference numbers available from a
CITROËN dealer or a qualified workshop).
Fitting a battery not listed by
CITROËN
introduces the risk of malfunction
of the system.
The Stop & Start system makes use
of advanced technology. Specialist
knowledge is needed for any work on the
system, which can only be assured by
CITROËN dealers. Refer to the "Quick help - Flat battery"
section.
2
rEAdY tO GO
Starting and switching off
Page 51 of 292

49AutOMAtI c ILL u MI n At IO n
Activation
Turn the ring to this position.
Do not cover the sunshine sensor at
the top centre of the windscreen.
GuIdE-ME-HOME LIGHtInG
Ignition off or key in the StOP
position.
Within 2 minutes after switching off the
engine, position the ignition key in the STOP
position or remove it.
Pull the lighting stalk towards the steering
wheel.
t
he indicator lamp comes on in
the instrument panel.
Each action on the lighting stalk,
pulled towards the steering
wheel, prolongs the guide me home
lighting by 30 seconds up to approximately
3
minutes. When this time has elapsed, the
lamps are switched off automatically.
Deactivate this control by keeping the stalk
pulled towards the steering wheel for more
than 2 seconds. If your vehicle is fitted with this function:
when you leave your vehicle, the dipped
beam headlamps remain on for the selected
duration (when leaving a car park for
example).
You can adjust the sensitivity of the
sunshine sensor.
Refer to the "Technology on board -
Vehicle configuration" section.
If your vehicle is fitted with this function, the
dipped beam headlamps are switched on
automatically if the light is poor.
In fog or snow, the sunshine sensor may
detect sufficient light. Therefore, the lamps
will not be switched on automatically. If
necessary, you must switch on the dipped
beam headlamps manually.
They are switched off when the light returns
to a sufficient level.
LEd dAYtIME runnInG LAMPS
On starting the vehicle, in daylight the LED
daytime running lamps come on automatically.
If the sidelamps and headlamps are switched
on manually or automatically, the daytime
running lamps go off.
Programming
For countries where exterior lighting by
day is not a legal requirement, you can
activate or deactivate the function via the
configuration menu.
The lamps are switched off automatically
when the ignition is switched off.
3
EASE OF uSE and cOMFOrt
Steering mounted controls
Page 53 of 292

51Activation
Operation
Once the function is activated, the system
operates as follows:
If the ambient light level is sufficient and/or if
the traffic conditions do not allow illumination
of the main beam headlamps:Refer to the "Technology on board -
Vehicle configuration" section.
F
Flash the headlamps (going beyond the
point of resistance) to activate the function. If the situation requires a change of
headlamp beam, the driver can take over at
any time.
F
Flashing the headlamps again pauses
the function and the system changes to
"automatic illumination of headlamps"
mode.
The function is deactivated automatically
below 9 mph (15 km/h).
If main beam is still needed, flash the
headlamps again; main beam will then
remain on until the vehicle reaches a speed
of 25 mph (40 km/h).
Above 25 mph (40 km/h), the function is
reactivated automatically (provided that the
headlamps have not been flashed again in
the meantime, to change to dipped beam).
d
eactivation
F
T
urn the lighting control stalk ring to the
"
d
ipped beam" position.The system may suffer interference or
not work correctly:
-
Under conditions of poor visibility
(falling snow, heavy rain or dense
fog, ...),
-
If the windscreen is dirty
, misted or
obscured (by a sticker, ...) in front
of the camera,
-
If the vehicle is facing highly
reflective signs.
The system is not able to detect:
-
Road users that do not have their
own lighting, such as pedestrians,
-
V
ehicles whose lighting is
obscured, such as when running
behind a safety barrier on a
motorway, for example,
-
V
ehicles at the top or bottom of a
steep slope, on winding roads, on
crossroads.
-
Dipped beam is maintained,
this indicator lamp comes on
in the instrument panel.
If the ambient light level is very low and the
traffic conditions permit: -
Main beam comes on
automatically: these
indicator lamps come
on in the instrument
panel.
F
T
urn the lighting control stalk
ring to this position.
F
Activate the function with the
MO d E
button; in the "Automatic headlamp
dipping" menu, select "ON".
3
EASE OF uSE and cOMFOrt
Steering mounted controls
Page 54 of 292

52
HEAdLAMP BEAM
You are advised to adjust the height of the
headlamp beams in accordance with the
load in your vehicle.
This function works in the dipped and main
beam headlamps position.Press these controls, located
on the dashboard, several times
in succession to adjust the
headlamps.
An indicator in the screen shows
the adjustment position selected
(0, 1, 2, 3).
PArKInG LAMPS
This system enables you to leave the lamps
on when parked; with the ignition off, key in
the STOP position or key removed.
Move the ring on the lighting stalk to position
O then to dipped or main beam headlamps.
t
he indicator lamp in the
instrument panel comes on.
The lamps will remain on while
you are parked.
Leaving the lighting on for long periods may
significantly reduce the state of charge of
your vehicle's battery.
travelling abroad
If using your vehicle in a country
that drives on the other side of the road,
the headlamps must be adjusted to avoid
dazzling on-coming drivers.
Contact a CITROËN dealer or a qualified
workshop.
Steering mounted controls
Page 56 of 292

54cruISE cOntrOL
(3
LI tr E H dI E n GI n E )
"This is the speed at which the driver wishes to
travel".
This aid to driving in free-flowing traffic conditions
enables the vehicle to maintain a constant
speed programmed by the driver, except when a
considerable load is carried on a steep gradient.
In order to be programmed or activated,
the vehicle speed must be greater than
approximately 18 mph (30 km/h), with 2nd gear
or higher engaged.
Function selected.
Function deactivated.
If your vehicle is fitted with cruise control,
this is displayed on the instrument panel by
an indicator located in the rev counter.
Steering mounted controls
Page 57 of 292

55
Selecting the function - On
Selecting On switches the function on. A
message appears in the instrument panel
screen to confirm the action.
Programming a speed
Accelerate to the required speed, with 2nd
to 6th gear engaged.
Move the control upwards (+), for
approximately one second, to store this
speed.
Release the pressure on the accelerator
pedal, the vehicle will maintain this speed.
Switching off / deactivating the function
Press the brake or clutch pedal or place
the ring in the OFF position, the indicator
goes
off.
If the dynamic stability control system comes
into operation, the cruise control system is
deactivated temporarily.
-
increase the speed in steps, by means of
brief presses, or continuously by pressing
and holding the control upwards (+ sign),
temporarily exceeding the
programmed speed
When the cruise control is active, it is still
possible to exceed the programmed speed
by depressing the accelerator pedal (to
overtake another vehicle for example).
-
decrease the speed continuously
by pressing and holding the control
downwards (- sign).
restore - rES
To restore the vehicle's
programmed speed (for example
after pressing the brake or clutch
pedal), gradually return to the chosen speed
and press
r ES.
The indicator lamp comes on, the cruise
control function is restored.
changing the programmed speed
while the cruise control is in operation
You can:
3
EASE OF uSE and cOMFOrt
Steering mounted controls
Page 59 of 292

57
cruISE cOntrOL
"This is the speed at which the driver wishes
to drive".
This aid to driving in free-flowing traffic
enables the vehicle to maintain the speed
programmed by the driver, unless a
steep gradient or heavy load makes this
impossible.In order for it to be programmed or
activated, the vehicle speed must be greater
than 18 mph (30 km/h) with 2
nd gear or
higher engaged. Function selected.
Function deactivated.
Selecting the function
- Turn the ring fully upwards. The cruise
control is selected but is not yet active
and no speed has been programmed.
The indicator comes on in the instrument
panel
The status of the cruise control is given
by an indicator in the rev counter and
messages in the instrument panel screen.
3
EASE OF uSE and cOMFOrt
Steering mounted controls