DAEWOO NUBIRA 2004 Service Repair Manual
Manufacturer: DAEWOO, Model Year: 2004, Model line: NUBIRA, Model: DAEWOO NUBIRA 2004Pages: 2643, PDF Size: 80.54 MB
Page 2461 of 2643

9Q – 12IROOF
DAEWOO V–121 BL4
GENERAL DESCRIPTION
AND SYSTEM OPERATION
ROOF
The roof is a one–piece painted metal unit which incorpo-
rates a single solid headliner. There are two moldings, one
per side on the vehicle’s roof, which enclose and hide the
roof rail seams. The roof moldings are serviceable as indi-
vidual units.
The one–piece formed headliner consists of a molded
substrate covered with a foam–backed cloth facing. The
one–piece construction requires that the headliner be ser-
viced as a complete assembly.
POWER SUNROOF/SUNROOF
CONTROL SWITCH
The sunroof has the following characteristics:
S Intended to provide light and air through the roof
the vehicle.
S Built into the roof.
S Made of glass.
S Equipped with a sunshade that opens and closes
manually.
S Powered by an electric motor.
S Controlled by a toggle switch built into the interior
courtesy lamp assembly.
The sunroof control switch is a toggle button located on the
right side of the interior courtesy lamp assembly.
To operate the sunroof, the ignition must be ON.Tilting the Sunroof, Open and Closed
To tilt open the rear end of the sunroof, press and hold the
forward portion of the toggle button until the sunroof tilts
open.
To close the sunroof from a tilted–open position, press and
hold the rear portion of the toggle button until the sunroof
tilts closed.
Sliding the Sunroof, Open and Closed
To slide open the sunroof, press the rear portion of the
toggle button until the sunroof slides. If the sun shade is
closed, the sunroof will pull the sunshade open when the
sunroof slides open.
To close the sunroof from a slid–open position, press the
forward portion of the toggle button until the sunroof slides
closed.
SUN VISORS WITH VANITY MIRROR
The sun visors swing down in order to block out glare.
They also swing to the side when they are released from
the support. To replace the vanity mirror lamp, refer to
Section 9B, Lighting Systems.
PASSENGER ASSIST HANDLES
There is a passenger assist handle for each rear outboard
seat and for the front passenger seat. Passengers can use
these handles to assist in keeping their balance over rough
roads or during sharp turns.
COAT HOOKS
The coat hooks are located on the left and the right rear
passenger assist handles.
Page 2462 of 2643

SECTION : 9R
BODY FRONT END
TABLE OF CONTENTS
SPECIFICATIONS9R–1 . . . . . . . . . . . . . . . . . . . . . . . . . .
Fastener Tightening Specifications 9R–1. . . . . . . . . . .
MAINTENANCE AND REPAIR9R–2 . . . . . . . . . . . . . . .
ON–VEHICLE SERVICE 9R–2. . . . . . . . . . . . . . . . . . . . .
Lubrication 9R–2. . . . . . . . . . . . . . . . . . . . . . . . . . . . . . . .
Fasteners 9R–2. . . . . . . . . . . . . . . . . . . . . . . . . . . . . . . .
Anticorrosion Materials 9R–2. . . . . . . . . . . . . . . . . . . . .
Front End Sealing 9R–2. . . . . . . . . . . . . . . . . . . . . . . . .
Cowl Vent Grille 9R–2. . . . . . . . . . . . . . . . . . . . . . . . . . .
Hood 9R–3. . . . . . . . . . . . . . . . . . . . . . . . . . . . . . . . . . . . . Hood Hinges 9R–3. . . . . . . . . . . . . . . . . . . . . . . . . . . . . .
Hood Prop Rod 9R–4. . . . . . . . . . . . . . . . . . . . . . . . . . . .
Hood Secondary Latch 9R–4. . . . . . . . . . . . . . . . . . . . .
Hood Latch Release Cable 9R–5. . . . . . . . . . . . . . . . . .
Notchback Radiator Grille 9R–5. . . . . . . . . . . . . . . . . . .
Hatchback Radiator Grille 9R–6. . . . . . . . . . . . . . . . . . .
Front Wheel Well Splash Shield 9R–6. . . . . . . . . . . . .
Fender 9R–7. . . . . . . . . . . . . . . . . . . . . . . . . . . . . . . . . . .
GENERAL DESCRIPTION AND SYSTEM
OPERATION9R–10 . . . . . . . . . . . . . . . . . . . . . . . . . . . . .
Body Front End 9R–10. . . . . . . . . . . . . . . . . . . . . . . . . .
SPECIFICATIONS
FASTENER TIGHTENING SPECIFICATIONS
ApplicationNSmLb–FtLb–In
A–Pillar Fender Bolt10–89
Fender Bolt (Front of Fascia)4–35
Front Bumper Fascia–to–Fender Bolt2.5–22
Hinge Bolts2720–
Hood–to–Hinge Bolts2720–
Hood Latch Bolts8–71
Hood Release Handle Nuts4–35
Lower Fender Bolt10–89
Radiator Grille Nuts4–35
Splash Shield screws2–18
Upper Fender Bolts10–89
Page 2463 of 2643
9R – 2IBODY FRONT END
DAEWOO V–121 BL4
MAINTENANCE AND REPAIR
ON–VEHICLE SERVICE
LUBRICATION
The hood hinges and the locking mechanisms require pe-
riodic lubrication for proper operation. Refer to Section 0B,
General Information for the specific types and intervals of
lubrication.
FASTENERS
Notice : Dissimilar metals in direct contact with each other
may corrode rapidly. Make sure to use the correct fasten-
ers to prevent premature corrosion.
Many aluminum components are used on current models.
Aluminum in contact with steel may corrode rapidly if it is
not protected by special finishes or isolators.
The fasteners used have a special finish which provides
adequate protection from corrosion. These special fasten-
ers differ in color in order to easily identify them from the
standard metric fasteners, which are medium blue.
When replacing fasteners, avoid substituting otherwise
similar fasteners in the same location.
ANTICORROSION MATERIALS
In order to provide rust resistance, anticorrosion materials
have been applied to the interior surfaces of most of the
metal panels. When you service these panels, properly re-
coat them with a service–type anticorrosion material if any
of the original material has been disturbed.
FRONT END SEALING
All locations where waterleaks may occur are sealed dur-
ing production with high quality, durable sealers. If it be-
comes necessary to reseal specific areas, use a high–
quality sealer of medium–bodied consistency which will
retain its flexible characteristics after curing and can be
painted, if necessary.
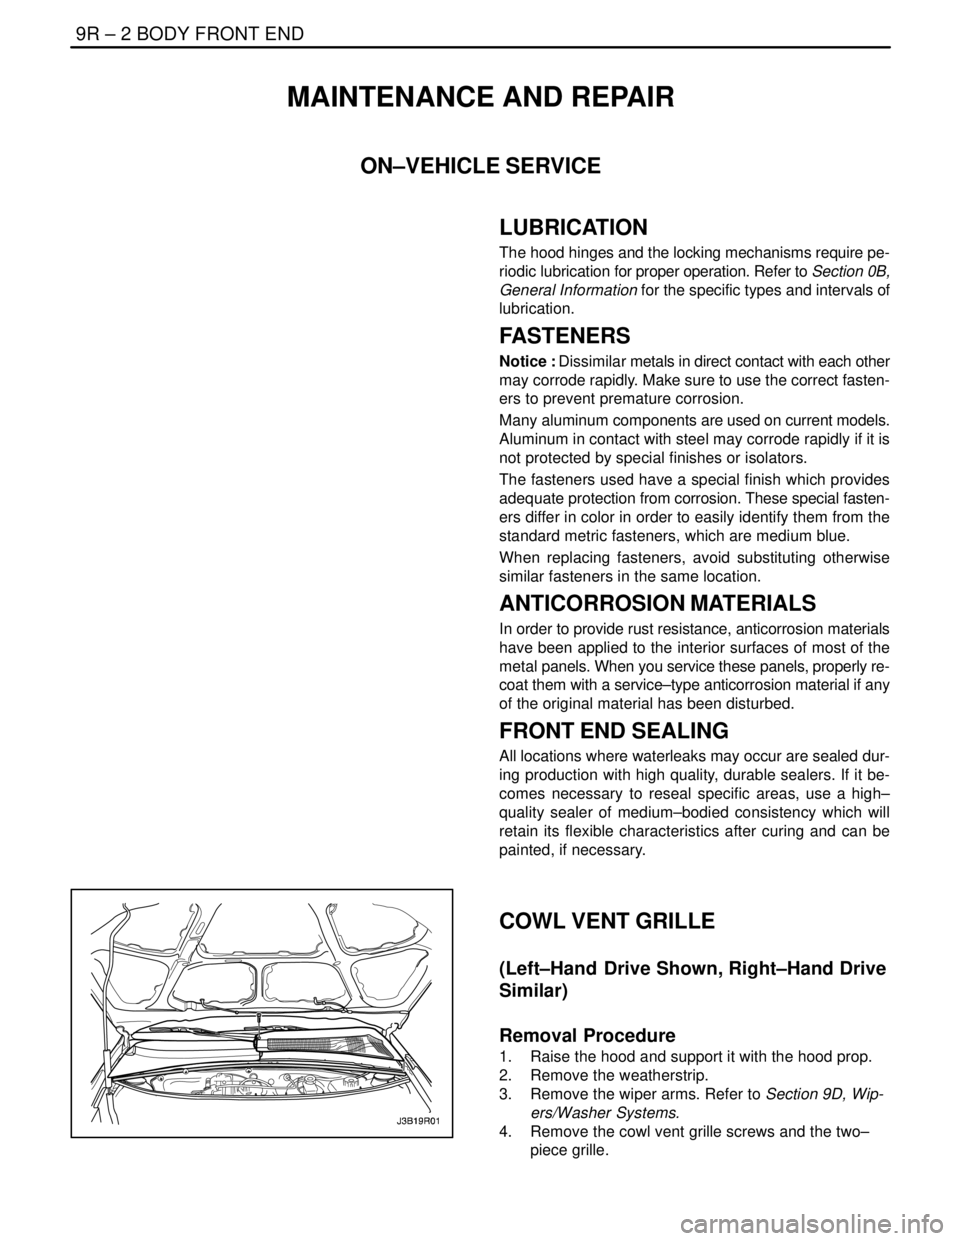
COWL VENT GRILLE
(Left–Hand Drive Shown, Right–Hand Drive
Similar)
Removal Procedure
1. Raise the hood and support it with the hood prop.
2. Remove the weatherstrip.
3. Remove the wiper arms. Refer to Section 9D, Wip-
ers/Washer Systems.
4. Remove the cowl vent grille screws and the two–
piece grille.
Page 2464 of 2643
BODY FRONT END 9R – 3
DAEWOO V–121 BL4
Installation Procedure
Notice : Dissimilar metals in direct contact with each other
may corrode rapidly. Make sure to use the correct fasten-
ers to prevent premature corrosion.
1. Install the two–piece grille and the cowl vent grille
screws.
Tighten
Tighten the cowl vent grille screws to 4SNSm (35 lb–
in).
2. Remove the wiper arms. Refer to Section 9D, Wip-
ers/Washer Systems.
3. Install the weatherstrip.
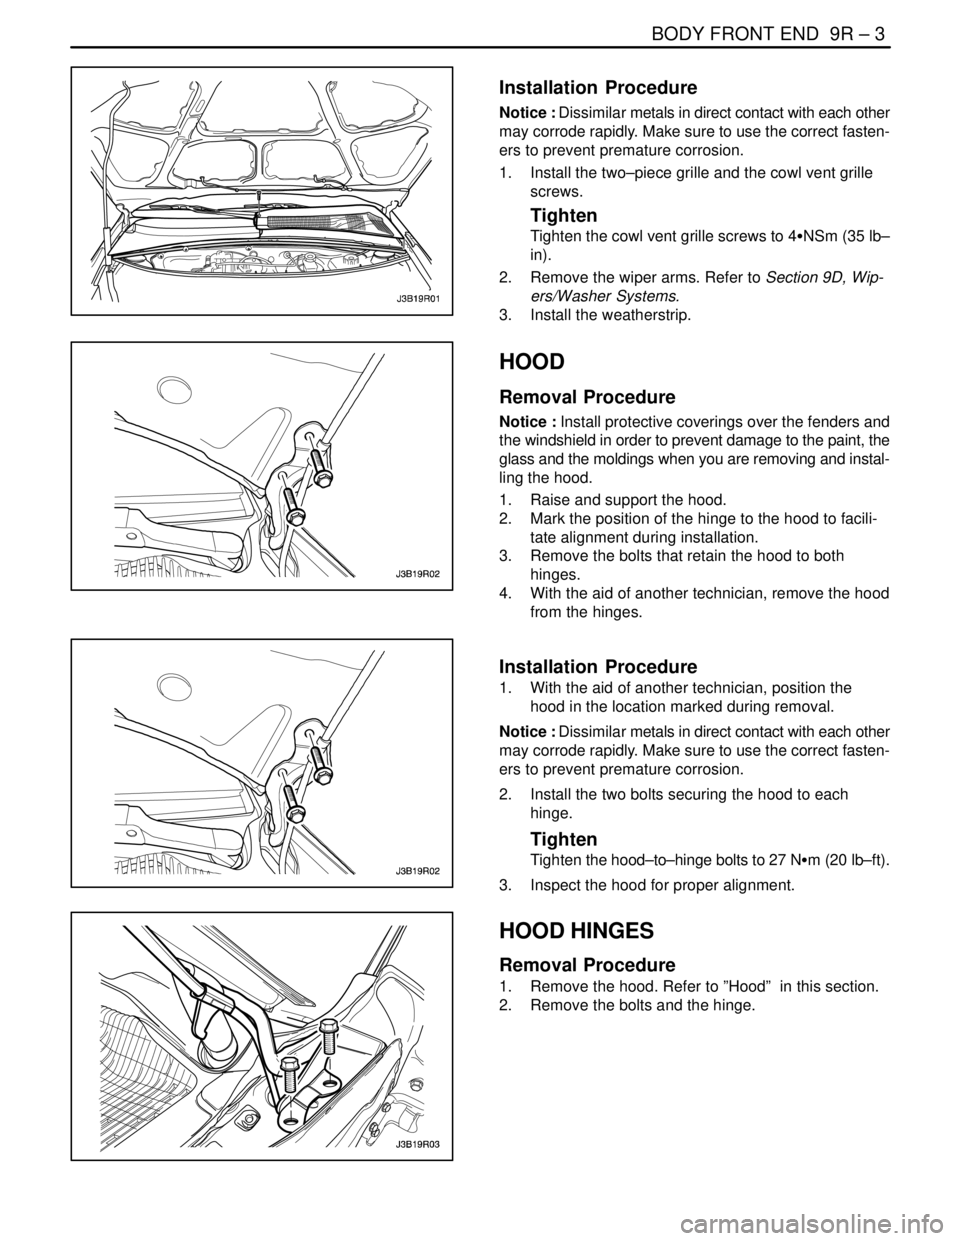
HOOD
Removal Procedure
Notice : Install protective coverings over the fenders and
the windshield in order to prevent damage to the paint, the
glass and the moldings when you are removing and instal-
ling the hood.
1. Raise and support the hood.
2. Mark the position of the hinge to the hood to facili-
tate alignment during installation.
3. Remove the bolts that retain the hood to both
hinges.
4. With the aid of another technician, remove the hood
from the hinges.
Installation Procedure
1. With the aid of another technician, position the
hood in the location marked during removal.
Notice : Dissimilar metals in direct contact with each other
may corrode rapidly. Make sure to use the correct fasten-
ers to prevent premature corrosion.
2. Install the two bolts securing the hood to each
hinge.
Tighten
Tighten the hood–to–hinge bolts to 27 NSm (20 lb–ft).
3. Inspect the hood for proper alignment.
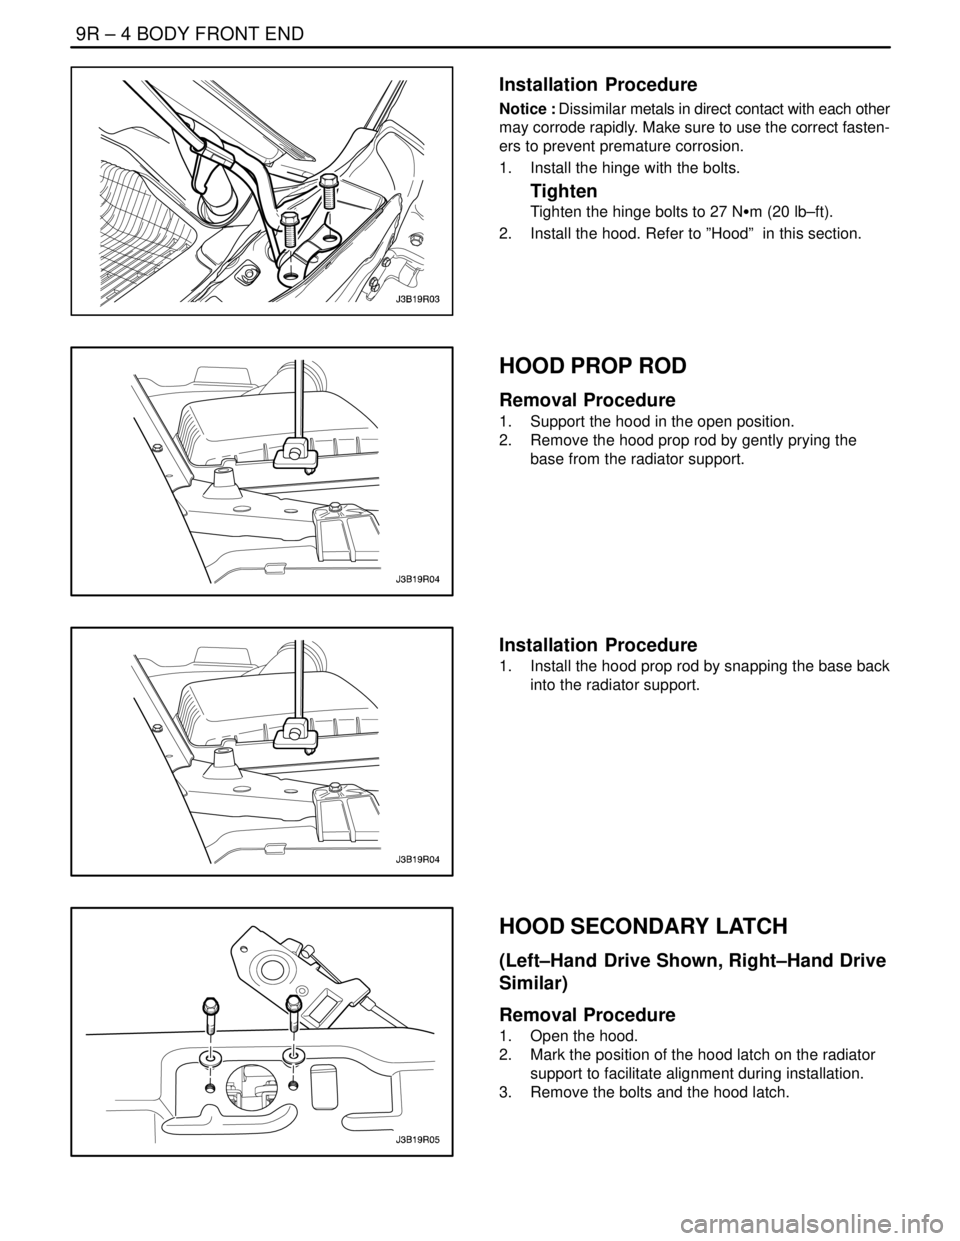
HOOD HINGES
Removal Procedure
1. Remove the hood. Refer to ”Hood” in this section.
2. Remove the bolts and the hinge.
Page 2465 of 2643
9R – 4IBODY FRONT END
DAEWOO V–121 BL4
Installation Procedure
Notice : Dissimilar metals in direct contact with each other
may corrode rapidly. Make sure to use the correct fasten-
ers to prevent premature corrosion.
1. Install the hinge with the bolts.
Tighten
Tighten the hinge bolts to 27 NSm (20 lb–ft).
2. Install the hood. Refer to ”Hood” in this section.
HOOD PROP ROD
Removal Procedure
1. Support the hood in the open position.
2. Remove the hood prop rod by gently prying the
base from the radiator support.
Installation Procedure
1. Install the hood prop rod by snapping the base back
into the radiator support.
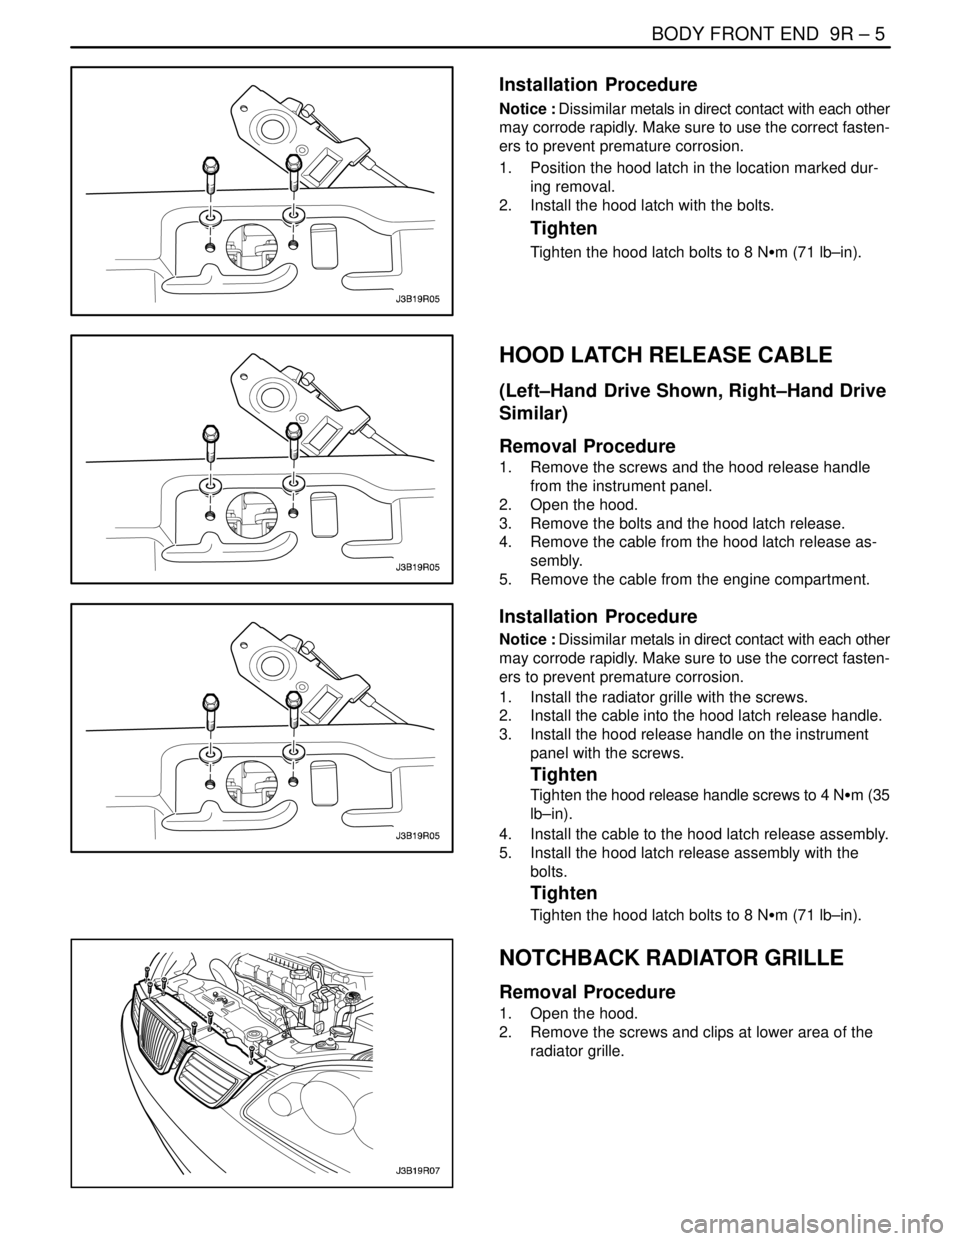
HOOD SECONDARY LATCH
(Left–Hand Drive Shown, Right–Hand Drive
Similar)
Removal Procedure
1. Open the hood.
2. Mark the position of the hood latch on the radiator
support to facilitate alignment during installation.
3. Remove the bolts and the hood latch.
Page 2466 of 2643
BODY FRONT END 9R – 5
DAEWOO V–121 BL4
Installation Procedure
Notice : Dissimilar metals in direct contact with each other
may corrode rapidly. Make sure to use the correct fasten-
ers to prevent premature corrosion.
1. Position the hood latch in the location marked dur-
ing removal.
2. Install the hood latch with the bolts.
Tighten
Tighten the hood latch bolts to 8 NSm (71 lb–in).
HOOD LATCH RELEASE CABLE
(Left–Hand Drive Shown, Right–Hand Drive
Similar)
Removal Procedure
1. Remove the screws and the hood release handle
from the instrument panel.
2. Open the hood.
3. Remove the bolts and the hood latch release.
4. Remove the cable from the hood latch release as-
sembly.
5. Remove the cable from the engine compartment.
Installation Procedure
Notice : Dissimilar metals in direct contact with each other
may corrode rapidly. Make sure to use the correct fasten-
ers to prevent premature corrosion.
1. Install the radiator grille with the screws.
2. Install the cable into the hood latch release handle.
3. Install the hood release handle on the instrument
panel with the screws.
Tighten
Tighten the hood release handle screws to 4 NSm (35
lb–in).
4. Install the cable to the hood latch release assembly.
5. Install the hood latch release assembly with the
bolts.
Tighten
Tighten the hood latch bolts to 8 NSm (71 lb–in).
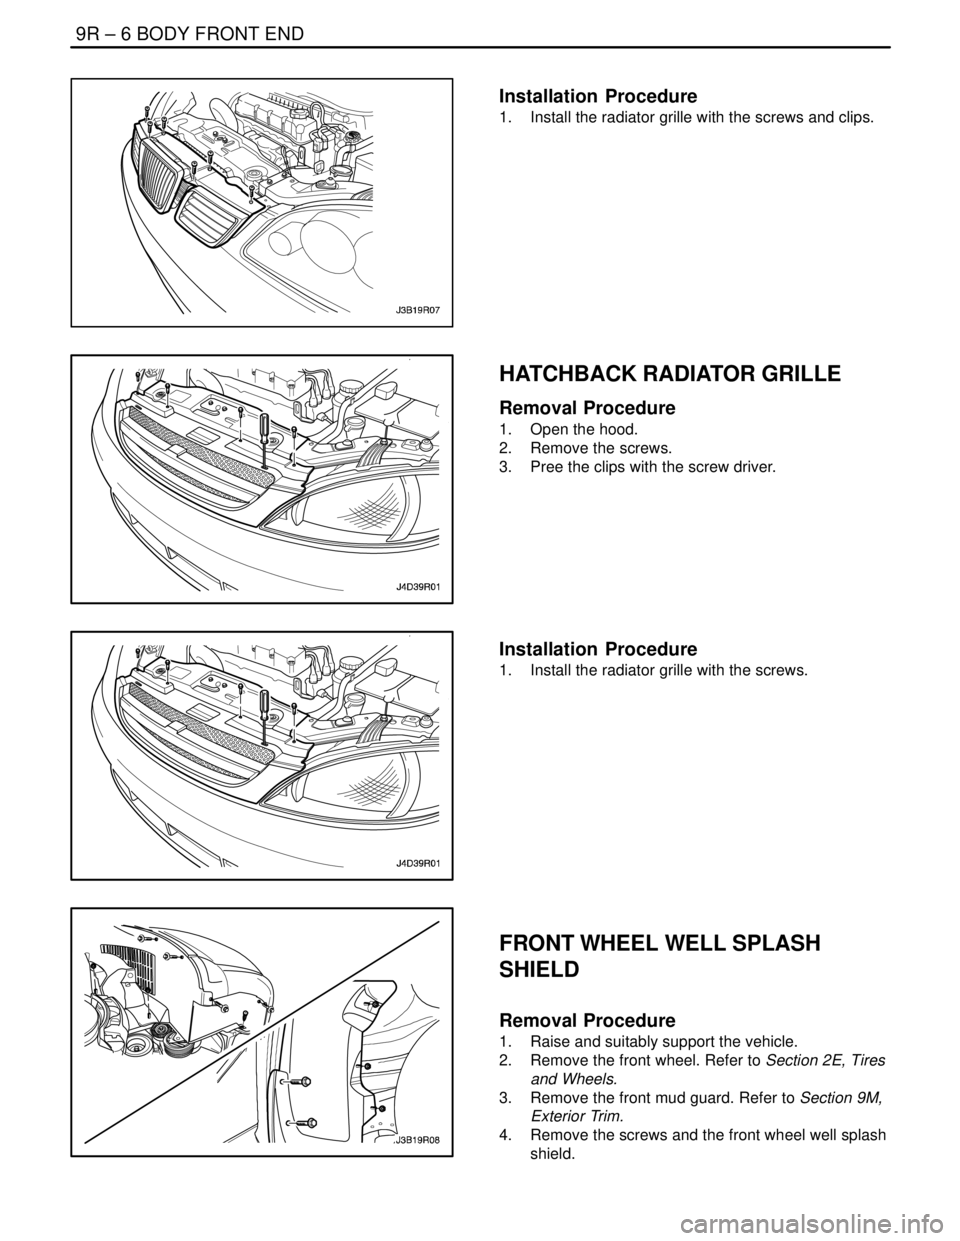
NOTCHBACK RADIATOR GRILLE
Removal Procedure
1. Open the hood.
2. Remove the screws and clips at lower area of the
radiator grille.
Page 2467 of 2643
9R – 6IBODY FRONT END
DAEWOO V–121 BL4
Installation Procedure
1. Install the radiator grille with the screws and clips.
HATCHBACK RADIATOR GRILLE
Removal Procedure
1. Open the hood.
2. Remove the screws.
3. Pree the clips with the screw driver.
Installation Procedure
1. Install the radiator grille with the screws.
FRONT WHEEL WELL SPLASH
SHIELD
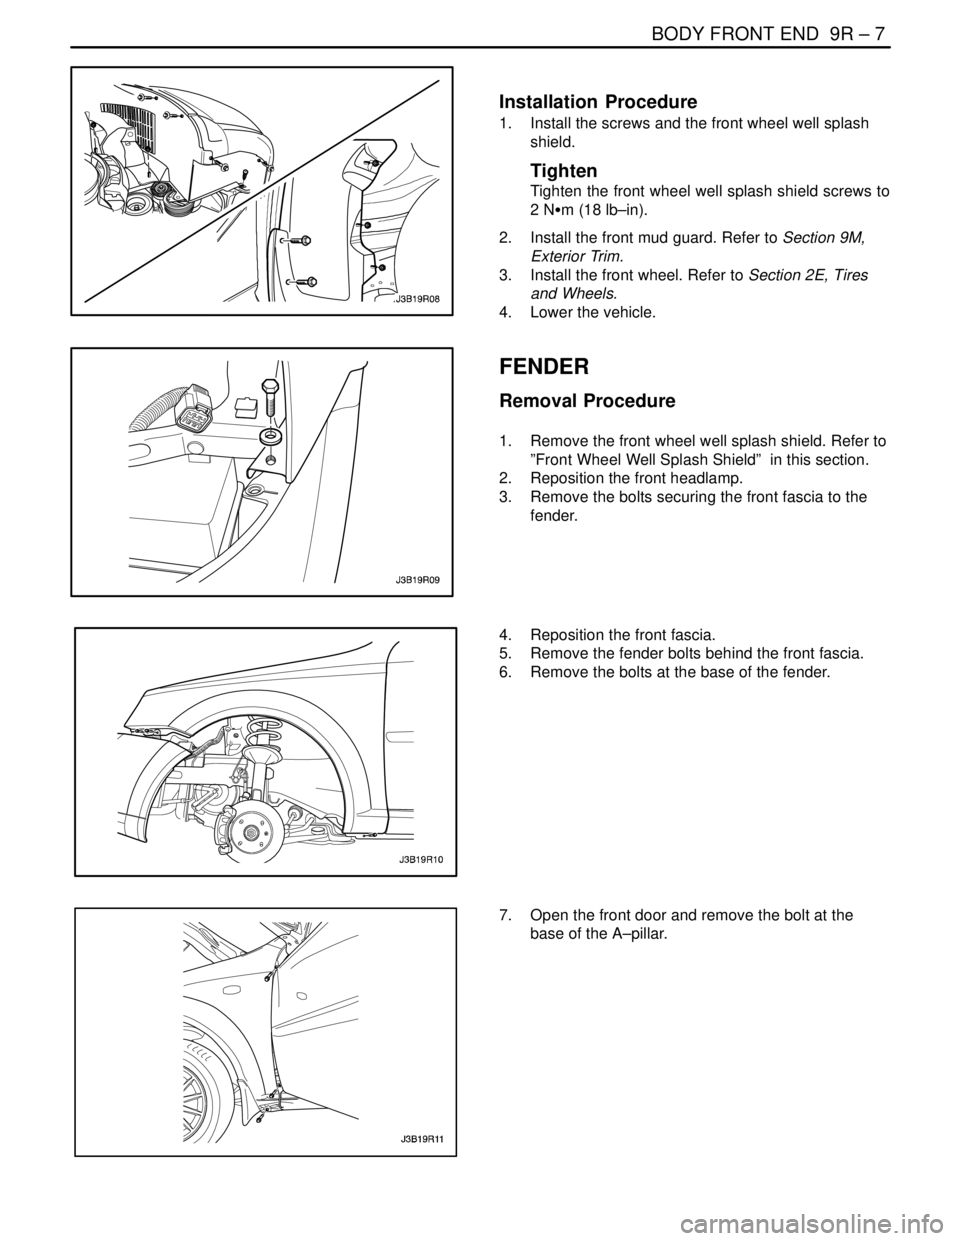
Removal Procedure
1. Raise and suitably support the vehicle.
2. Remove the front wheel. Refer to Section 2E, Tires
and Wheels.
3. Remove the front mud guard. Refer to Section 9M,
Exterior Trim.
4. Remove the screws and the front wheel well splash
shield.
Page 2468 of 2643
BODY FRONT END 9R – 7
DAEWOO V–121 BL4
Installation Procedure
1. Install the screws and the front wheel well splash
shield.
Tighten
Tighten the front wheel well splash shield screws to
2 NSm (18 lb–in).
2. Install the front mud guard. Refer to Section 9M,
Exterior Trim.
3. Install the front wheel. Refer to Section 2E, Tires
and Wheels.
4. Lower the vehicle.
FENDER
Removal Procedure
1. Remove the front wheel well splash shield. Refer to
”Front Wheel Well Splash Shield” in this section.
2. Reposition the front headlamp.
3. Remove the bolts securing the front fascia to the
fender.
4. Reposition the front fascia.
5. Remove the fender bolts behind the front fascia.
6. Remove the bolts at the base of the fender.
7. Open the front door and remove the bolt at the
base of the A–pillar.
Page 2469 of 2643
9R – 8IBODY FRONT END
DAEWOO V–121 BL4
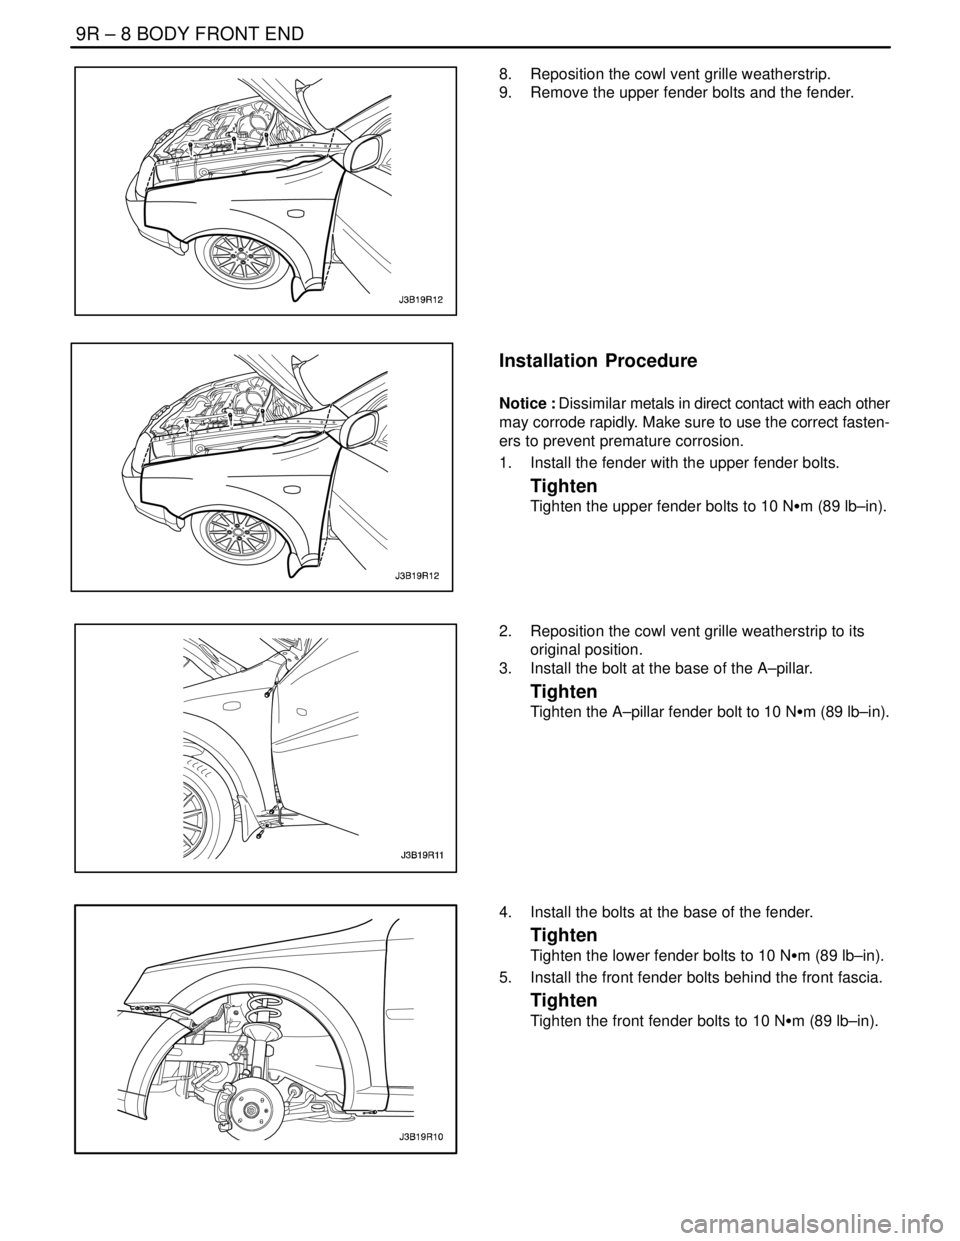
8. Reposition the cowl vent grille weatherstrip.
9. Remove the upper fender bolts and the fender.
Installation Procedure
Notice : Dissimilar metals in direct contact with each other
may corrode rapidly. Make sure to use the correct fasten-
ers to prevent premature corrosion.
1. Install the fender with the upper fender bolts.
Tighten
Tighten the upper fender bolts to 10 NSm (89 lb–in).
2. Reposition the cowl vent grille weatherstrip to its
original position.
3. Install the bolt at the base of the A–pillar.
Tighten
Tighten the A–pillar fender bolt to 10 NSm (89 lb–in).
4. Install the bolts at the base of the fender.
Tighten
Tighten the lower fender bolts to 10 NSm (89 lb–in).
5. Install the front fender bolts behind the front fascia.
Tighten
Tighten the front fender bolts to 10 NSm (89 lb–in).
Page 2470 of 2643
BODY FRONT END 9R – 9
DAEWOO V–121 BL4
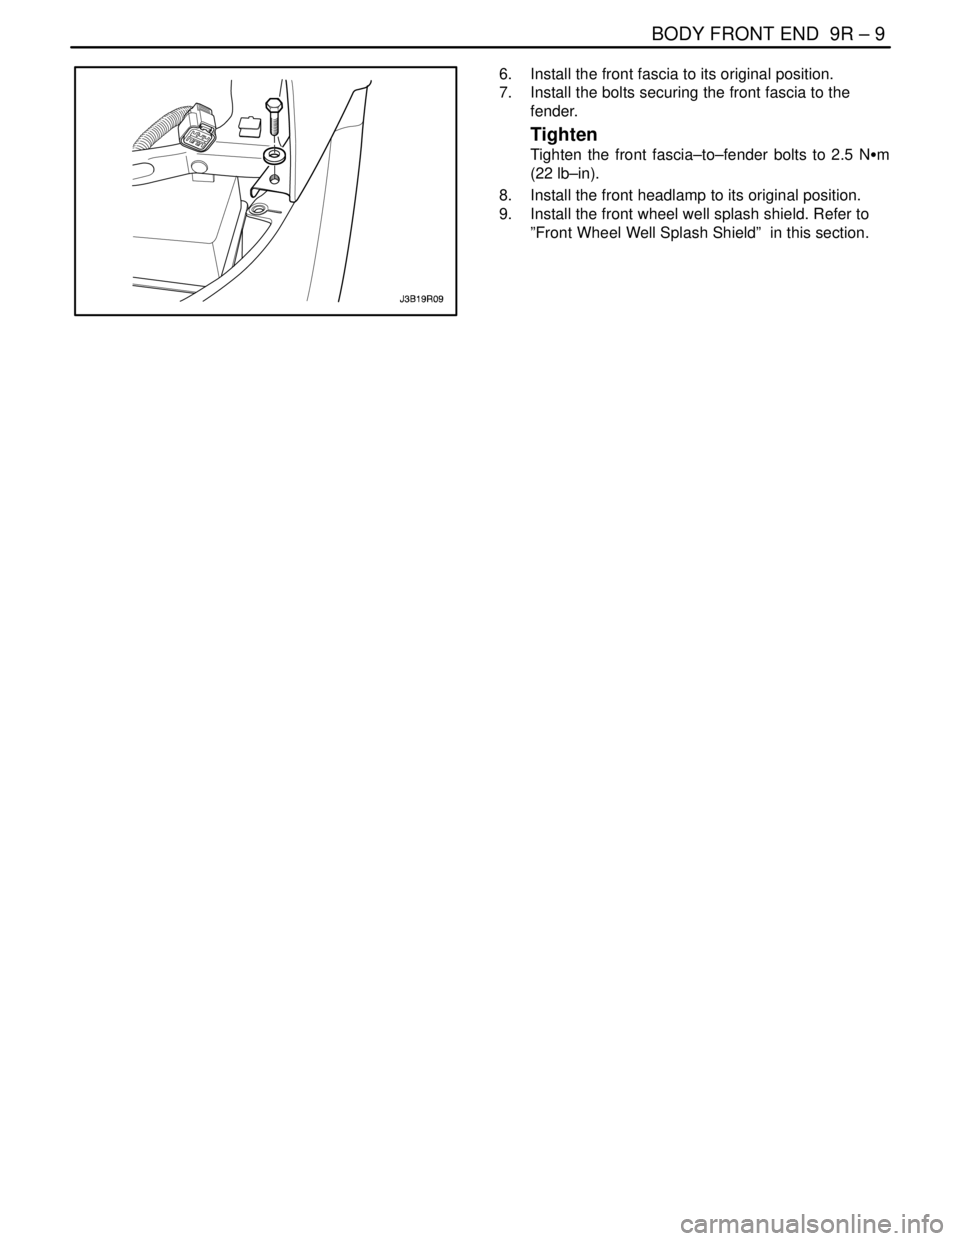
6. Install the front fascia to its original position.
7. Install the bolts securing the front fascia to the
fender.
Tighten
Tighten the front fascia–to–fender bolts to 2.5 NSm
(22 lb–in).
8. Install the front headlamp to its original position.
9. Install the front wheel well splash shield. Refer to
”Front Wheel Well Splash Shield” in this section.