height adjustment DATSUN PICK-UP 1977 User Guide
[x] Cancel search | Manufacturer: DATSUN, Model Year: 1977, Model line: PICK-UP, Model: DATSUN PICK-UP 1977Pages: 537, PDF Size: 35.48 MB
Page 432 of 537

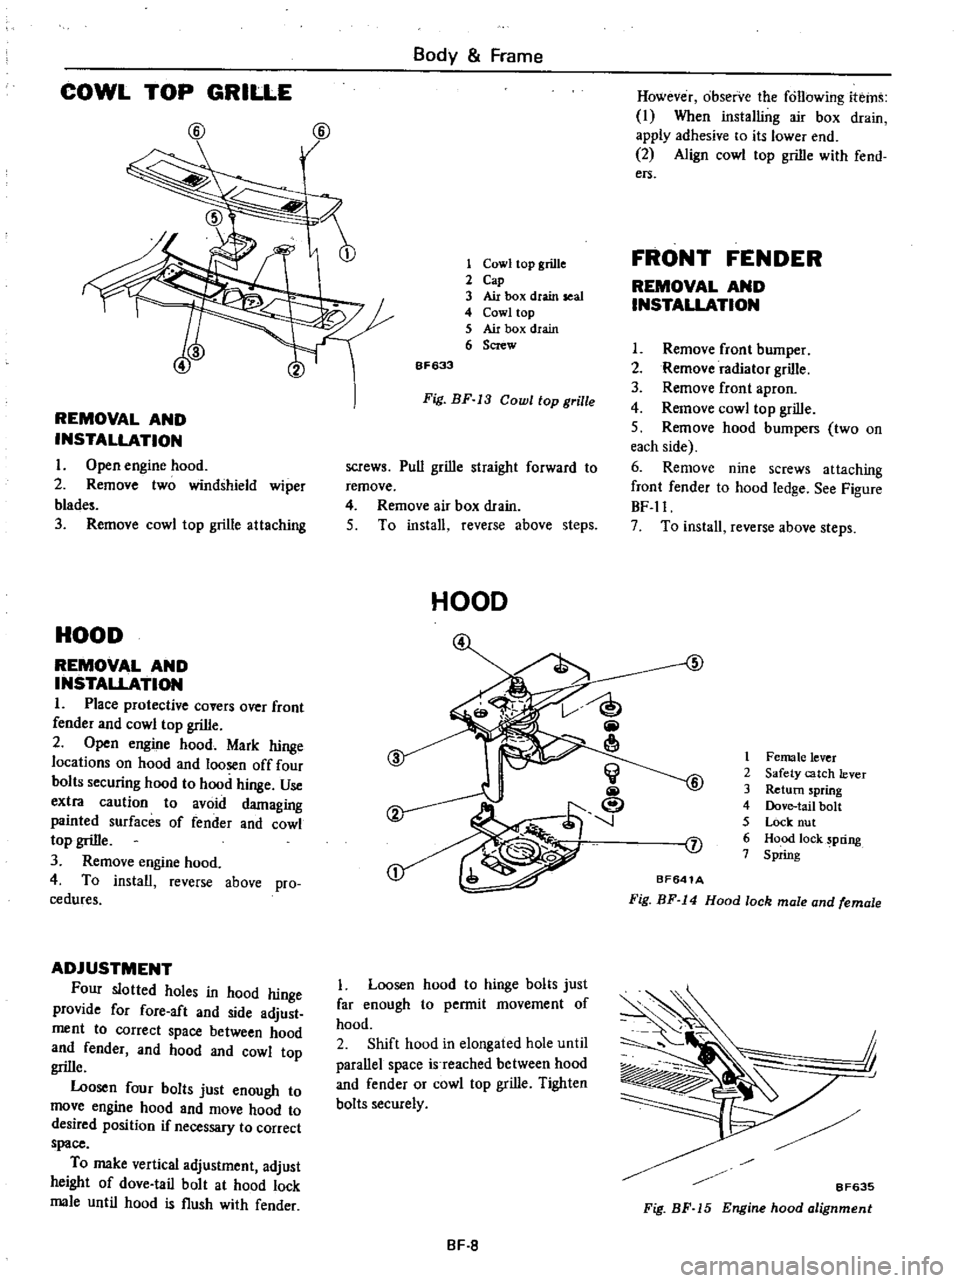
COWL
TOP
GRILLE
@
@
REMOVAL
AND
INSTALLATION
I
Open
engine
hood
2
Remove
two
windshield
wiper
blad
3
Remove
cowl
top
grille
attaching
HOOD
REMOVAL
AND
INSTALLATION
1
Place
protective
covers
over
front
fender
and
cowl
top
grille
2
Open
engine
hood
Mark
hinge
locations
on
hood
and
loosen
off
four
bolts
securing
hood
to
hood
hinge
Use
extra
caution
to
avoid
damaging
painted
surfaces
of
fender
and
cowl
top
grille
3
Remove
engine
hood
4
To
install
reverse
above
pro
cedures
ADJUSTMENT
Four
slotted
holes
in
hood
hinge
provide
for
fore
aft
and
side
adjust
ment
to
correct
space
between
hood
and
fender
and
hood
and
cowl
top
grille
Loosen
four
bolts
just
enough
to
move
engine
hood
and
move
hood
to
desired
position
if
necessary
to
correct
space
To
make
vertical
adjustment
adjust
height
of
dove
tail
bolt
at
hood
lock
male
until
hood
is
flush
with
fender
Body
Frame
1
Cowl
top
grille
2
Cap
3
Air
box
dtain
seal
4
Cowl
top
5
Air
box
drain
6
Screw
6F633
Fig
BF
13
Cowl
top
grille
screws
Pull
grille
straight
forward
to
remove
4
Remove
air
box
drain
5
To
install
reverse
above
steps
HOOD
Loosen
hood
to
hinge
bolts
just
far
enough
to
permit
movement
of
hood
2
Shift
hood
in
elongated
hole
until
parallel
space
is
reached
between
hood
and
fender
or
cowl
top
grille
Tighten
bolts
securely
BF
8
However
observe
the
following
items
I
When
installing
air
box
drain
apply
adhesive
to
its
lower
end
2
Align
cowl
top
grille
with
fend
ers
FRONT
FENDER
REMOVAL
AND
INSTALLATION
I
Remove
front
bumper
2
Remove
radiator
grille
3
Remove
front
apron
4
Remove
cowl
top
grille
S
Remove
hood
bumpers
two
on
each
side
6
Remove
nine
screws
attaching
front
fender
to
hood
ledge
See
Figure
BF
ll
7
To
install
reverse
above
steps
5
1
Female
lever
2
Safety
catch
lever
3
Return
spring
4
Dove
tail
bolt
S
Lock
nut
6
Hood
lock
pring
7
Spring
J
BF641A
Fig
BF
14
Hood
lock
male
and
female
j
I
8F635
Fig
BF
15
Engine
hood
alignment
Page 433 of 537

Body
Frame
Note
Vertical
adjustment
should
be
carried
out
after
hood
lock
male
and
female
adjustment
has
been
completed
3
To
correct
hood
lock
alignment
loosen
two
hood
lock
male
attaching
bolts
and
move
hood
lock
male
and
female
in
the
lateral
and
fore
and
aft
directions
as
required
D
1r
r
BF642A
Fig
BF
16
Adjusting
hood
lock
male
Tightening
torque
Male
and
female
attaching
bolts
0
45
to
0
60
kg
m
3
3
to
4
3
ft
Ib
4
Dove
tail
bolt
at
hood
lock
male
provides
for
vertical
adjustment
in
aligning
hood
to
make
it
flush
with
fender
To
correct
loosen
lock
nut
on
dove
tail
bolt
and
turn
dove
tail
bolt
in
or
out
as
necessary
to
obtain
a
correct
height
HOOD
LOCK
CONTROL
JI
I
i
I
r
lPP
J
jJ
J
Sr
aj
I
I
I
J
f
ifry
ff
I
ii1iiilliii
j
iW
r
U
I
j
Y
f
7
j
1
JJ
J
8F
9
5
Tighten
lock
nut
firmly
while
holding
dove
tail
bolt
with
a
screw
driver
to
secure
adjustment
Tightening
torque
Lock
nut
of
dove
tail
1
9
to
2
6
kg
m
14
to
19
ft
lb
BF643A
1
Lock
nut
2
Hood
lock
male
3
Safety
catch
Fig
BF
17
Doue
tail
bolt
height
adjustment
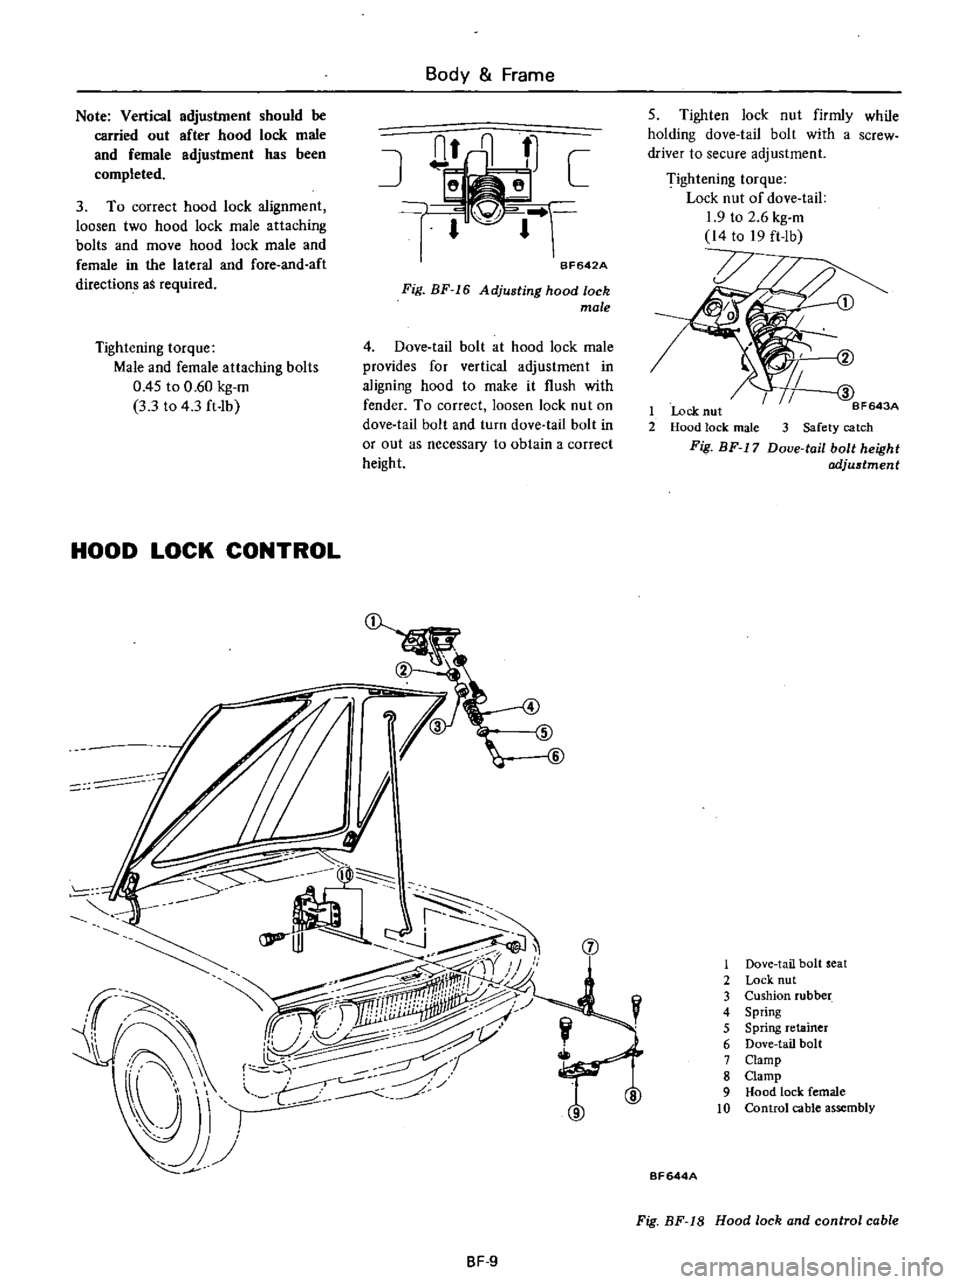
1
Dove
tail
bolt
seat
2
Lock
nut
3
Cushion
rubber
4
Spring
5
Spring
retainer
6
Dove
tail
bolt
7
Clamp
8
Clamp
9
Hood
lock
female
10
Control
cable
assembly
BF644A
Fig
BF
18
Hood
lock
and
control
cable