bulb DODGE AVENGER 2008 Owners Manual
[x] Cancel search | Manufacturer: DODGE, Model Year: 2008, Model line: AVENGER, Model: DODGE AVENGER 2008Pages: 467, PDF Size: 7.16 MB
Page 17 of 467
the vehicle. The system will shut the engine off in two
seconds if someone uses an invalid key to try to start the
engine.
NOTE: A key that has not been programmed is also
considered an invalid key, even if it is cut to fit the
ignition switch lock cylinder for that vehicle.
During normal operation, after turning on the ignition
switch, the Vehicle Security Light will turn on for three
seconds for a bulb check. If the light remains on after the
bulb check, it indicates that there is a problem with the
electronics. In addition, if the light begins to flash after
the bulb check, it indicates that someone used an invalid
key to try to start the engine. Either of these conditions
will result in the engine being shut off after two seconds.
If the Vehicle Security Light turns on during normal
vehicle operation (vehicle running for longer than 10 seconds), it indicates that there is a fault in the electron-
ics. Should this occur, have the vehicle serviced as soon
as possible.
NOTE:
² The Sentry Key t Immobilizer System is not compat-
ible with some aftermarket remote starting systems.
Use of these systems may result in vehicle starting
problems and loss of security protection.
² Exxon/Mobil SpeedpassŸ, additional Sentry Keys t ,
or any other transponder-equipped components on
the same key chain will not cause a key-related
(transponder) fault unless the additional part is physi-
cally held against the ignition key being used when
starting the vehicle. Cell phones, pagers, or other RF
electronics will not cause interference with this system.
All of the keys provided with your new vehicle have
been programmed to the vehicle electronics. THINGS TO KNOW BEFORE STARTING YOUR VEHICLE 15
2
Page 81 of 467
Do not run the engine in a closed garage or in confined
areas any longer than needed to move your vehicle in or
out of the area.
If it is necessary to sit in a parked vehicle with the engine
running, adjust your heating or cooling controls to force
outside air into the vehicle. Set the blower at high speed.
WARNING!If you are required to drive with the deck lid open,
make sure that all windows are closed, and the
climate control blower switch is set at high speed.
DO NOT use the recirculation mode. Safety Checks You Should Make Inside The
Vehicle
Seat Belts
Inspect the belt system periodically, checking for cuts,
frays and loose parts. Damaged parts must be replaced
immediately. Do not disassemble or modify the system.
Front seat belt assemblies must be replaced after a
collision. Rear seat belt assemblies must be replaced after
a collision if they have been damaged (bent retractor, torn
webbing, etc.). If there is any question regarding belt or
retractor condition, replace the belt.
Airbag Light
The light should come on and remain on for six to eight
seconds as a bulb check when the ignition switch is first
turned ON. If the LED is not lit during starting, have it
checked. If the light stays on or comes on while driving,
have the system checked by an authorized dealer. THINGS TO KNOW BEFORE STARTING YOUR VEHICLE 79
2
Page 136 of 467
If either light remains on and does not flash, or there is a
very fast flash rate, check for a defective outside light
bulb. If an indicator fails to light when the lever is
moved, it would suggest that the fuse or indicator bulb is
defective.
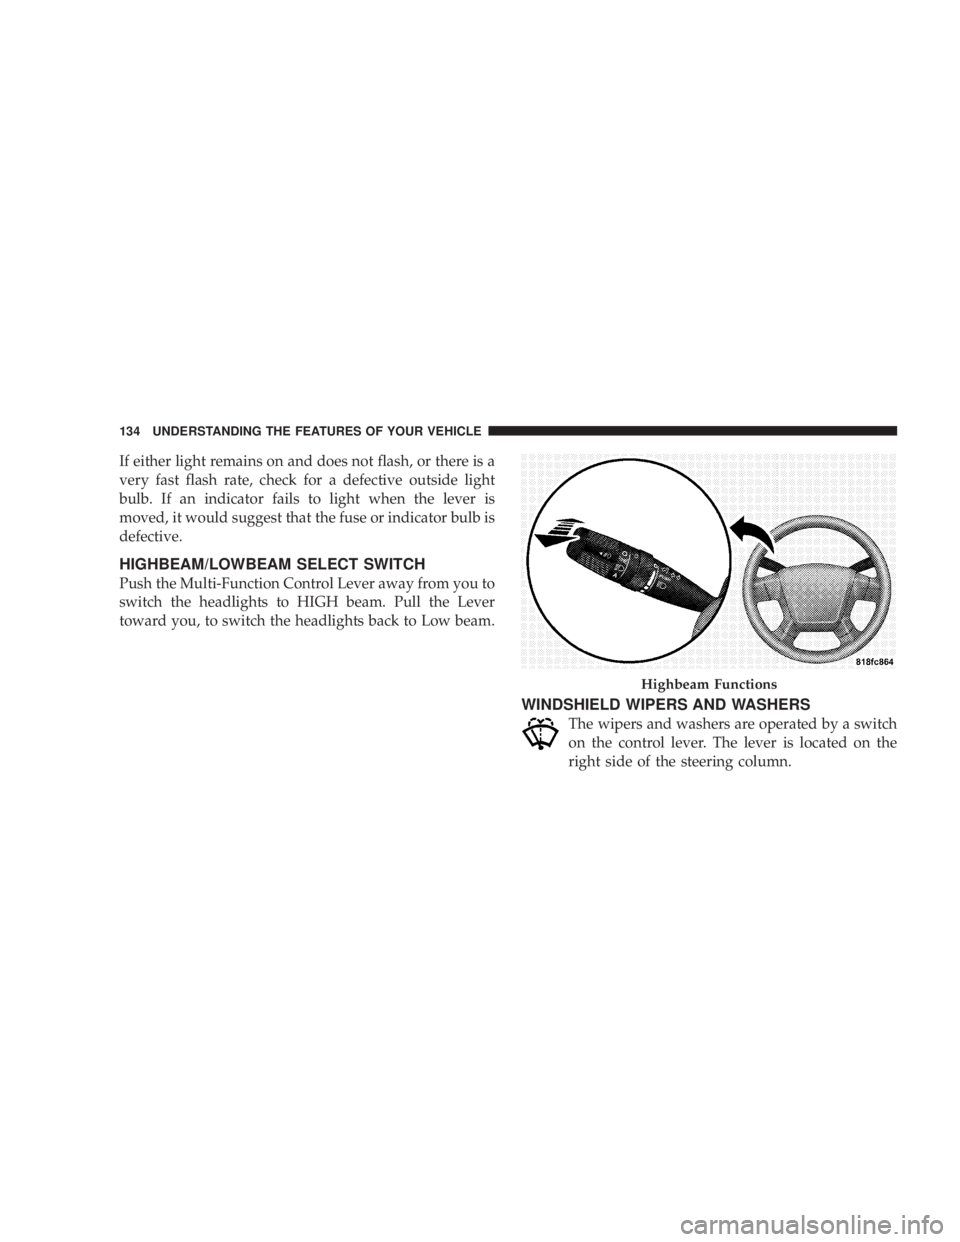
HIGHBEAM/LOWBEAM SELECT SWITCH
Push the Multi-Function Control Lever away from you to
switch the headlights to HIGH beam. Pull the Lever
toward you, to switch the headlights back to Low beam.
WINDSHIELD WIPERS AND WASHERS
The wipers and washers are operated by a switch
on the control lever. The lever is located on the
right side of the steering column. Highbeam Functions134 UNDERSTANDING THE FEATURES OF YOUR VEHICLE
Page 173 of 467
5. Low Fuel Light
When the fuel level drops to 2 gallons, the fuel
symbol will light and a single chime will sound.
6. Charging System Light
This light shows the status of the electrical charg-
ing system. The light should come on briefly when
the ignition is first turned on and remain on briefly as a
bulb check. If the light stays on or comes on while
driving, turn off some of the vehicle's electrical devices,
such as the Fog Lights or Rear Defroster. If the Charging
System Light remains on, it means that the vehicle is
experiencing a problem with the charging system. Obtain
SERVICE IMMEDIATELY. See your authorized dealer.
7. Airbag Light
The light comes on and remains on for 6 to 8
seconds as a bulb check when the ignition
switch is first turned ON. If the light does not come on during starting, stays on, or comes on while
driving, have the system checked by an authorized
dealer.
8. Theft Alarm Light Ð If Equipped
This light will flash rapidly for several seconds when the
alarm system is arming. The light will begin to flash
slowly indicating that the system is armed.
9. Seat Belt Reminder Light
When the ignition switch is first turned ON, this
light will come on for about six seconds. A chime
will sound if you have not pulled the shoulder belt
out of the retractor. This is a reminder to ªbuckle upº. If
you do not buckle up, the light will remain on.
10. Oil Pressure Light
Shows low engine oil pressure. The light will come
on and remain on when the ignition switch is
turned from the OFF to the ON position, and the light UNDERSTANDING YOUR INSTRUMENT PANEL 171
4
Page 174 of 467
will turn off after the engine is started. If the bulb does
not come on during starting, have the system checked by
an authorized dealer.
If the light comes on and remains on while driving, stop
the vehicle and shut off the engine. DO NOT OPERATE
THE VEHICLE UNTIL THE CAUSE IS CORRECTED.
The light does not show the quantity of oil in the engine.
This can be determined using the procedure shown in
Section 7.
11. Engine Temperature Warning Light
This light warns of an overheated engine condi-
tion. If the engine is critically hot, a warning chime
will sound 10 times. After the chime turns off, the
engine will still be critically hot until the light goes out.
12. Speedometer
Indicates vehicle speed in kilometers per hour Ð Km/h. 13. Tachometer
The white area of the scale shows the permissible engine
revolutions-per-minute (rpm x 1000) for each gear range.
Before reaching the red area, ease up on the accelerator to
prevent engine damage.
14. Transmission Range Indicator
This display indicator shows the automatic transaxle gear
selection.
15. Odometer/Trip Odometer
The odometer shows the total distance the vehicle has
been driven. U.S. federal regulations require that upon
transfer of vehicle ownership, the seller certify to the
purchaser the correct mileage that the vehicle has been
driven. Therefore, if the odometer reading is changed
during repair or replacement, be sure to keep a record of
the reading before and after the service so that the correct
mileage can be determined.172 UNDERSTANDING YOUR INSTRUMENT PANEL
Page 177 of 467
Dual Trip Odometer Ð If Equipped
Press and release this button to change the display from
odometer to ªTrip A.º Press and release it a second time
to change the display to ªTrip B.º Press and release it a
third time to change the display back to the odometer.
To reset the trip odometer, first display the trip mileage
that you want to reset, ªTrip Aº or ªTrip B.º Then push
and hold the button (approximately 2 seconds) until the
display resets to 0. The odometer must be in Trip Mode to
reset the trip odometer.
18. Electronic Throttle Control Indicator Light
This red illuminated light informs you of a
problem with the Electronic Throttle Control
system. If a problem is detected, the light will
come on while the engine is running. If the
light remains lit with the engine running your vehicle
will usually be drivable and not need towing, however
see your dealer for service as soon as possible. If the light is flashing when the engine is running you
may experience power loss, an elevated/rough idle, and
increased brake pedal effort, and your vehicle may
require towing. Immediate service is required.
The light will come on when the ignition switch is first
turned on and remain on briefly as a bulb check. This is
normal. If the light does not come on during starting,
have the system checked by an authorized dealer.
19. Electronic Stability Program (ESP) Indicator
Light/Traction Control System (TCS) Indicator Light Ð
If Equipped
If this indicator light flashes during accelera-
tion, apply as little throttle as possible. While
driving, ease up on the accelerator. Adapt your
speed and driving to the prevailing road con-
ditions, and do not switch off the ESP, or TCS Ð if
equipped. UNDERSTANDING YOUR INSTRUMENT PANEL 175
4
Page 180 of 467
CAUTION!The TPMS has been optimized for the original
equipment tires and wheels. TPMS pressures and
warning have been established for the tire size
equipped on your vehicle. Undesirable system opera-
tion or sensor damage may result when using re-
placement equipment that is not of the same size,
type, and/or style. Aftermarket wheels can cause
sensor damage. Do not use aftermarket tire sealants
or balance beads if your vehicle is equipped with a
TPMS, as damage to the sensors may result.
(Refer to ªTire Inflation Pressuresº under ªTires Ð Gen-
eral Informationº and to ªTire Pressure Monitor System
(TPMS)º in Section 5 of this manual for more informa-
tion). 25. Malfunction Indicator Light
This light is part of an onboard diagnostic system
called OBD that monitors emissions, engine, and
automatic transaxle control systems. The light
will illuminate when the key is in the ON/RUN position
before engine start. If the bulb does not come on when
turning the key from LOCK/OFF to ON/RUN, have the
condition checked promptly.
Certain conditions such as a loose or missing gas cap,
poor fuel quality, etc. may illuminate the light after
engine start. The vehicle should be serviced if the light
stays on through several of your typical driving cycles. In
most situations the vehicle will drive normally and will
not require towing.
If the Malfunction Indicator Light flashes when the
engine is running, serious conditions may exist that178 UNDERSTANDING YOUR INSTRUMENT PANEL
Page 282 of 467
The ABS light monitors the Anti-Lock Brake
System. The light will come on when the
ignition switch is turned to the ON position
and may stay on for as long as four seconds.
If the ABS light remains on or comes on while driving, it
indicates that the Anti-Lock portion of the brake system
is not functioning and that service is required. However,
the conventional brake system will continue to operate
normally if the BRAKE warning light is not on.
If the ABS light is on, the brake system should be serviced
as soon as possible to restore the benefits of Anti-Lock
brakes. If the ABS light does not come on when the
ignition switch is turned to the ON position, have the
bulb repaired as soon as possible.
If both the Brake Warning Light and the ABS Light
remain on, the Anti-Lock brakes (ABS) and Electronic Brake Force Distribution (EBD) systems are not function-
ing. Immediate repair to the ABS system is required. See
your authorized Dealer Service Center.
When the vehicle is driven over 7 mph (11 km/h), you
may also hear a slight clicking sound as well as some
related motor noises. These noises are the system per-
forming its self-check cycle to ensure that the ABS system
is working properly. This self check occurs each time the
vehicle is started and accelerated past 7 mph (11 km/h).
ABS is activated during braking under certain road or
stopping conditions. ABS-inducing conditions can in-
clude ice, snow, gravel, bumps, railroad tracks, loose
debris, or panic stops.
You also may experience the following when the brake
system goes into Anti-lock:
² The ABS motor running (it may continue to run for a
short time after the stop),280 STARTING AND OPERATING
Page 368 of 467
N A/C Air Filter Ð If Equipped ............383
N Power Steering .......................385
N Front Suspension .....................385
N Steering Linkage ......................386
N Body Lubrication .....................386
N Windshield Wiper Blades ................386
N Windshield Washers ...................387
N Exhaust System ......................387
N Cooling System .......................388
N Hoses And Vacuum/Vapor Harnesses .......394
N Fuel System .........................394
N Brake System ........................394
N Automatic Transaxle ...................397 N Front And Rear Wheel Bearings ...........400
N Appearance Care And Protection From
Corrosion ...........................400
N Cleaning Center Console Cupholders .......405
m Fuses Ð Totally Integrated Power Module
(TIPM) ..............................406
m Vehicle Storage ........................411
m Replacement Bulbs ......................411
m Bulb Replacement ......................412
N Headlight Bulb Replacement .............412
N Fog Lights ..........................415
N Taillights, Rear Turn Signals And Backup Lights Ð
Replacement .........................416
N License Plate Light Ð Rear ..............418366 MAINTAINING YOUR VEHICLE
Page 374 of 467
RESET button to turn off the message. If the problem
persists, the message will appear the next time the
vehicle is started. This might indicate a damaged cap. If
the problem is detected twice in a row, the system will
turn on the MIL. Resolving the problem will turn the MIL
light off.
EMISSIONS INSPECTION AND MAINTENANCE
PROGRAMS
In some localities, it may be a legal requirement to pass
an inspection of this vehicle's emissions control system.
Failure to pass could prevent vehicle registration.
For states that require an Inspection and Mainte-
nance (I/M), this check verifies the Malfunction
Indicator Light (MIL) is functioning and is not on
when the engine is running, and that the OBD II system
is ready for testing. Normally, the OBD II system will be ready. The OBD II
system may not be ready if the vehicle was recently
serviced, recently had a dead battery, or a battery replace-
ment. If the OBD II system should be determined not
ready for the I/M test, the vehicle may fail the test.
This vehicle has a simple ignition key-actuated test,
which you can use prior to going to the test station. To
check if this vehicle's OBD II system is ready, you must
do the following:
1. Insert the ignition key into the ignition switch.
2. Turn the ignition to the ON position, but do not crank
or start the engine.
3. If you crank or start the engine, you will have to start
this test over.
4. As soon as you turn the ignition key to the ON
position, you will see the MIL symbol come on as part of
a normal bulb check.372 MAINTAINING YOUR VEHICLE