instrument cluster DODGE CHARGER SRT 2015 7.G Owner's Manual
[x] Cancel search | Manufacturer: DODGE, Model Year: 2015, Model line: CHARGER SRT, Model: DODGE CHARGER SRT 2015 7.GPages: 595, PDF Size: 16.43 MB
Page 385 of 595
![DODGE CHARGER SRT 2015 7.G Owners Manual During extremely cold temperatures (-22°F [-30°C] or
below), transmission operation may be modified depend-
ing on engine and transmission temperature as well as
vehicle speed. Normal operation will DODGE CHARGER SRT 2015 7.G Owners Manual During extremely cold temperatures (-22°F [-30°C] or
below), transmission operation may be modified depend-
ing on engine and transmission temperature as well as
vehicle speed. Normal operation will](/img/12/5578/w960_5578-384.png)
During extremely cold temperatures (-22°F [-30°C] or
below), transmission operation may be modified depend-
ing on engine and transmission temperature as well as
vehicle speed. Normal operation will resume once the
transmission temperature has risen to a suitable level.
MANUAL (M)
The MANUAL (M, +/-) position (beside the DRIVE
position) enables full manual control of transmission
shifting (also known as AutoStick mode; refer to
“AutoStick” in this section for further information). Tog-
gling the shift lever forward (-) or rearward (+) while in
the MANUAL (AutoStick) position will manually select
the transmission gear, and will display the current gear in
the instrument cluster as M1, M2, M3, etc.
Transmission Limp Home Mode
Transmission function is monitored electronically for
abnormal conditions. If a condition is detected that could
result in transmission damage, Transmission Limp Home
Mode is activated. In this mode, the transmission may
operate only in certain gears, or may not shift at all.
Vehicle performance may be severely degraded and the
engine may stall. In some situations, the transmission
may not re-engage if the engine is turned off and
restarted. The Malfunction Indicator Light (MIL) may be
illuminated. A message in the instrument cluster will
inform the driver of the more serious conditions, and
indicate what actions may be necessary.
In the event of a momentary problem, the transmission
can be reset to regain all forward gears by performing the
following steps.
NOTE:In cases where the instrument cluster message
indicates the transmission may not re-engage after en-
gine shutdown, perform this procedure only in a desired
location (preferably, at your authorized dealer).
1. Stop the vehicle.
5
STARTING AND OPERATING 383
Page 387 of 595
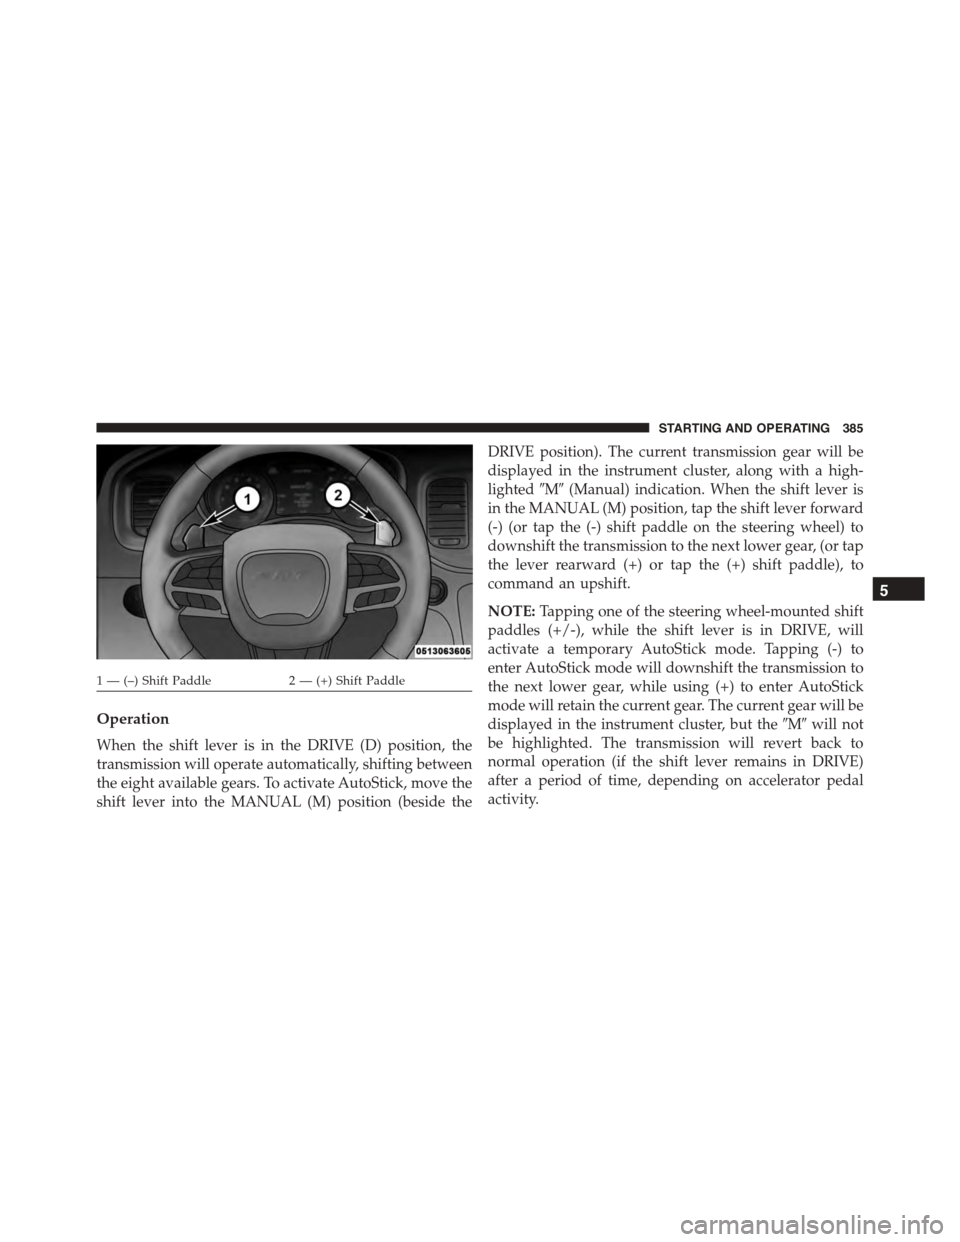
Operation
When the shift lever is in the DRIVE (D) position, the
transmission will operate automatically, shifting between
the eight available gears. To activate AutoStick, move the
shift lever into the MANUAL (M) position (beside the
DRIVE position). The current transmission gear will be
displayed in the instrument cluster, along with a high-
lighted#M#(Manual) indication. When the shift lever is
in the MANUAL (M) position, tap the shift lever forward
(-) (or tap the (-) shift paddle on the steering wheel) to
downshift the transmission to the next lower gear, (or tap
the lever rearward (+) or tap the (+) shift paddle), to
command an upshift.
NOTE:Tapping one of the steering wheel-mounted shift
paddles (+/-), while the shift lever is in DRIVE, will
activate a temporary AutoStick mode. Tapping (-) to
enter AutoStick mode will downshift the transmission to
the next lower gear, while using (+) to enter AutoStick
mode will retain the current gear. The current gear will be
displayed in the instrument cluster, but the#M#will not
be highlighted. The transmission will revert back to
normal operation (if the shift lever remains in DRIVE)
after a period of time, depending on accelerator pedal
activity.
1 — (–) Shift Paddle2 — (+) Shift Paddle
5
STARTING AND OPERATING 385
Page 389 of 595
•Holding the (-) paddle depressed, or holding the shift
lever in the (-) position, will downshift the transmis-
sion to the lowest gear possible at the current speed.
•Transmission shifting will be more noticeable when
AutoStick is engaged.
•The system may revert to automatic shift mode if a
fault or overheat condition is detected.
To disengage AutoStick mode, return the shift lever to the
DRIVE position, or press and hold the (+) shift paddle (if
the shift lever is already in DRIVE) until “D” is once
again indicated in the instrument cluster. You can shift in
or out of the AutoStick mode at any time without taking
your foot off the accelerator pedal.
WARNING!
Do not downshift for additional engine braking on a
slippery surface. The drive wheels could lose their
grip and the vehicle could skid, causing a collision or
personal injury.
DRIVE MODES
Your SRT vehicle is equipped with a SRT Drive Mode
feature. This feature gives the driver control over the
systems in the vehicle which affect its performance,
enabling the driver to tune it for desired driving sce-
narios. Below are the modes of operation:
NOTE:Refer to “Uconnect® Settings” in “Understanding
Your Instrument Panel” for further descriptions of these
modes.
5
STARTING AND OPERATING 387
Page 405 of 595
NOTE:This system may take some time to return to full
functionality after a battery disconnect.
PARKING BRAKE
Before leaving the vehicle, make sure that the parking
brake is fully applied and place the shift lever/gear
selector in the PARK position.
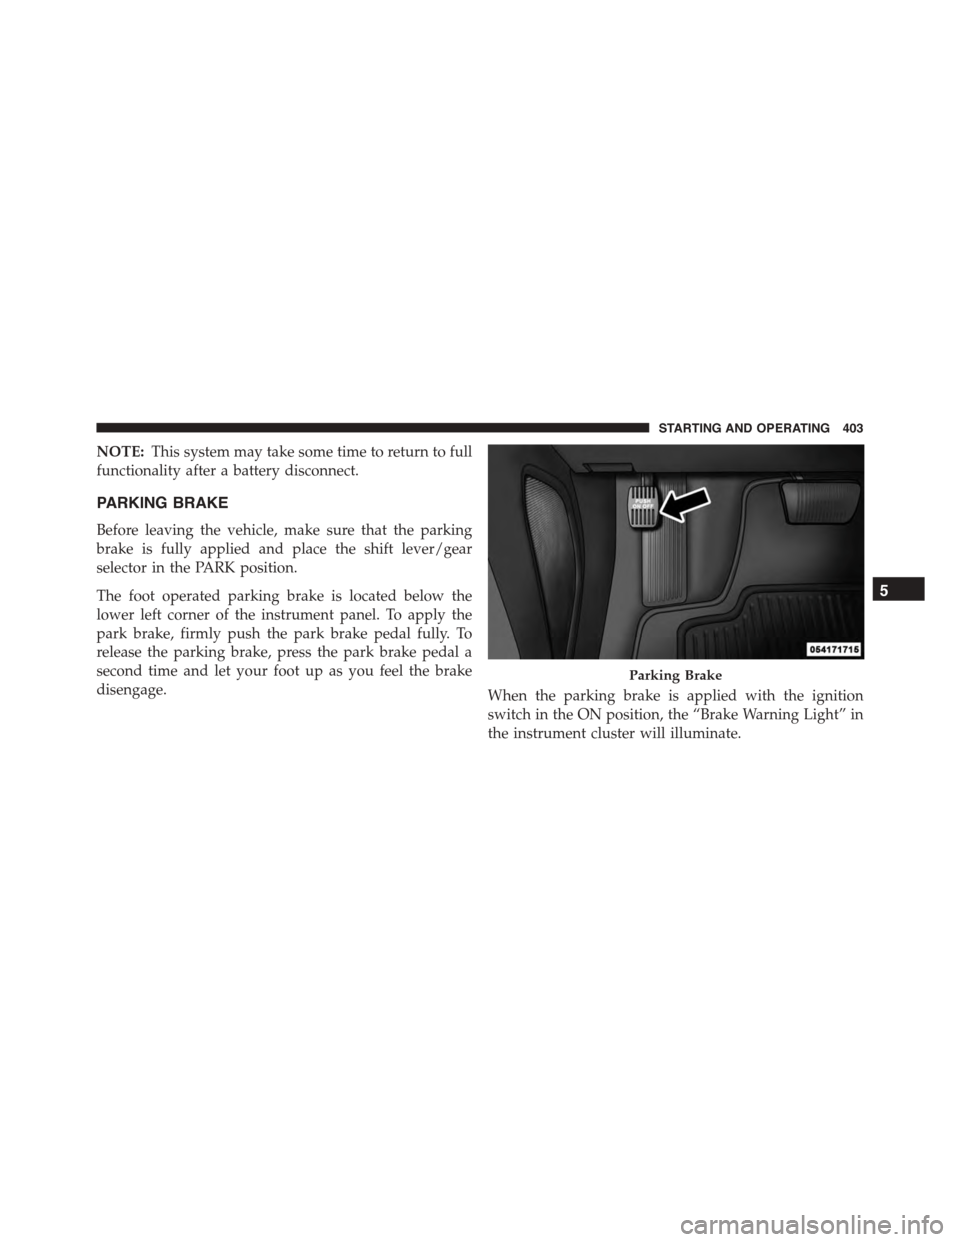
The foot operated parking brake is located below the
lower left corner of the instrument panel. To apply the
park brake, firmly push the park brake pedal fully. To
release the parking brake, press the park brake pedal a
second time and let your foot up as you feel the brake
disengage.When the parking brake is applied with the ignition
switch in the ON position, the “Brake Warning Light” in
the instrument cluster will illuminate.
Parking Brake
5
STARTING AND OPERATING 403
Page 418 of 595
Rain Brake Support
Rain Brake Support may improve braking performance
in wet conditions. It will periodically apply a small
amount of brake pressure to remove any water buildup
on the front brake rotors. It only functions when the
windshield wipers are in the LO or HI mode, it does not
function in the intermittent mode. When Rain Brake
Support is active, there is no notification to the driver and
no driver interaction is required.
ESC Activation/Malfunction Indicator Light And
ESC OFF Indicator Light
The “ESC Activation/Malfunction Indicator
Light” in the instrument cluster will come on
when the ignition switch is cycled to the ON/
RUN position. It should go out with the engine
running. If the “ESC Activation/Malfunction Indicator
Light” comes on continuously with the engine running, a
malfunction has been detected in the ESC system. If this
light remains on after several ignition cycles, and the
vehicle has been driven several miles (kilometers) at
speeds greater than 30 mph (48 km/h), see your autho-
rized dealer as soon as possible to have the problem
diagnosed and corrected.
The “ESC Activation/Malfunction Indicator Light” (lo-
cated in the instrument cluster) starts to flash as soon as
the tires lose traction and the ESC system becomes active.
The “ESC Activation/Malfunction Indicator Light” also
flashes when TCS is active. If the “ESC Activation/
Malfunction Indicator Light” begins to flash during ac-
celeration, ease up on the accelerator and apply as little
throttle as possible. Be sure to adapt your speed and
driving to the prevailing road conditions.
416 STARTING AND OPERATING
Page 449 of 595
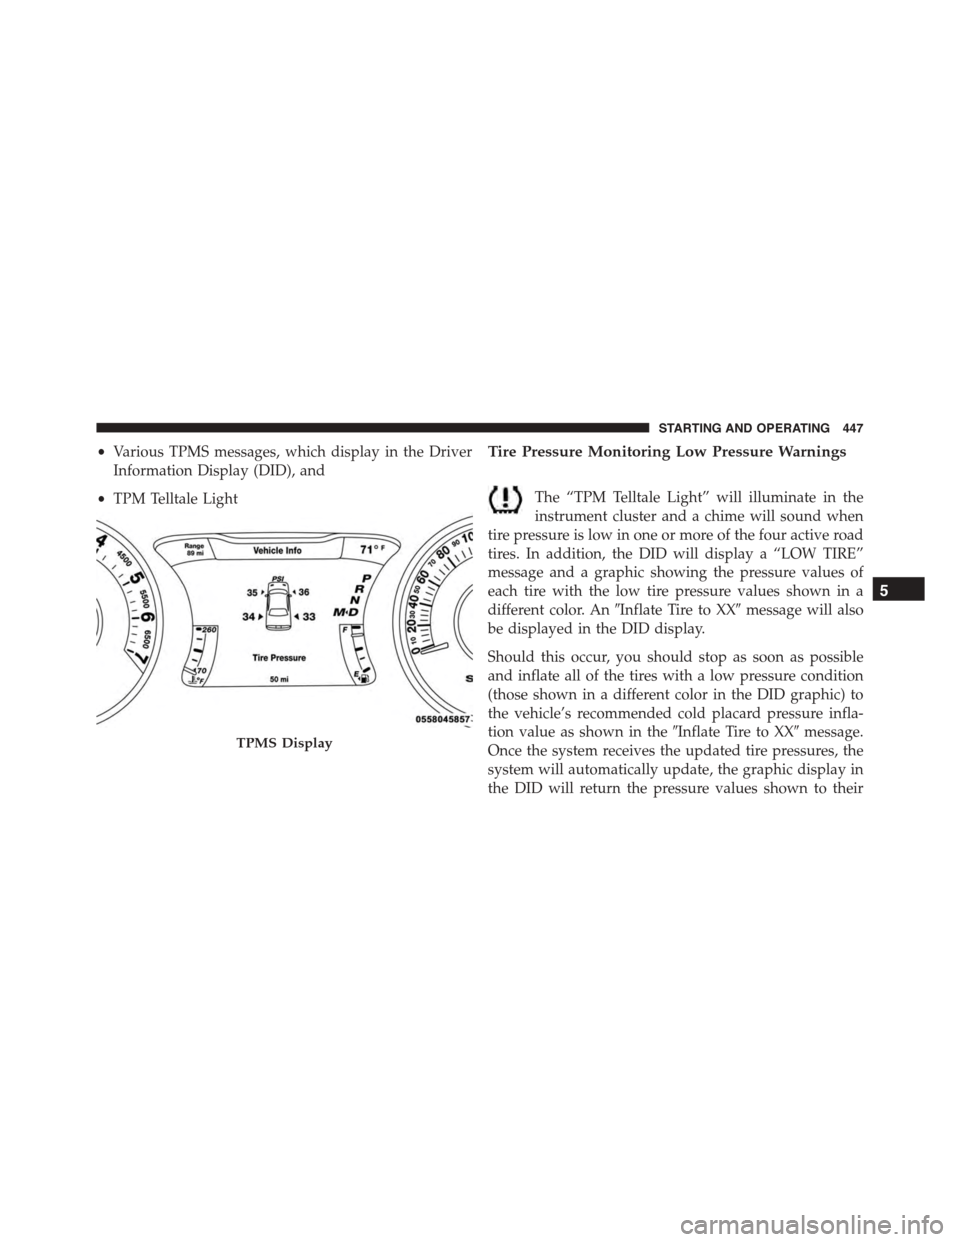
•Various TPMS messages, which display in the Driver
Information Display (DID), and
•TPM Telltale Light
Tire Pressure Monitoring Low Pressure Warnings
The “TPM Telltale Light” will illuminate in the
instrument cluster and a chime will sound when
tire pressure is low in one or more of the four active road
tires. In addition, the DID will display a “LOW TIRE”
message and a graphic showing the pressure values of
each tire with the low tire pressure values shown in a
different color. An#Inflate Tire to XX#message will also
be displayed in the DID display.
Should this occur, you should stop as soon as possible
and inflate all of the tires with a low pressure condition
(those shown in a different color in the DID graphic) to
the vehicle’s recommended cold placard pressure infla-
tion value as shown in the#Inflate Tire to XX#message.
Once the system receives the updated tire pressures, the
system will automatically update, the graphic display in
the DID will return the pressure values shown to their
TPMS Display
5
STARTING AND OPERATING 447
Page 528 of 595
CAUTION!
Do not use Alcohol and Alcohol-based and/or Keton
based cleaning products to clean leather seats, as
damage to the seat may result.
Cleaning Headlights
Your vehicle is equipped with plastic headlights and fog
lights that are lighter and less susceptible to stone break-
age than glass headlights.
Plastic is not as scratch resistant as glass and therefore
different lens cleaning procedures must be followed.
To minimize the possibility of scratching the lenses and
reducing light output, avoid wiping with a dry cloth. To
remove road dirt, wash with a mild soap solution fol-
lowed by rinsing.
Do not use abrasive cleaning components, solvents, steel
wool or other aggressive material to clean the lenses.
Glass Surfaces
All glass surfaces should be cleaned on a regular basis
with MOPAR® Glass Cleaner, or any commercial
household-type glass cleaner. Never use an abrasive type
cleaner. Use caution when cleaning the inside rear win-
dow equipped with electric defrosters or windows
equipped with radio antennas. Do not use scrapers or
other sharp instrument that may scratch the elements.
When cleaning the rear view mirror, spray cleaner on the
towel or rag that you are using. Do not spray cleaner
directly on the mirror.
Cleaning Plastic Instrument Cluster Lenses
The lenses in front of the instruments in this vehicle are
molded in clear plastic. When cleaning the lenses, care
must be taken to avoid scratching the plastic.
526 MAINTAINING YOUR VEHICLE
Page 578 of 595
Dealer Service............................495
Deck Lid, Emergency Release.................44
Deck Lid, Power Release.....................42
Defroster, Rear Window.....................243
Defroster, Windshield.......................98
Delay (Intermittent) Wipers..................156
Diagnostic System, Onboard.................493
Dimmer Switch, Headlight...................151
Dipsticks
Oil (Engine)...........................497
Disposal
Antifreeze (Engine Coolant)................514
Door Locks
Child-Protection Door Lock — Rear Doors......32
Door Locks............................22
Key Fob . . . . . . . . . . . . . . . . . . . . . . . . . . . . . . .29
Remote...............................29
Remote Keyless Entry (RKE)................29
Door Locks, Automatic......................31
Driver Information Display
DID . . . . . . . . . . . . . . . . . . . . . . . . . . . . . . . ..263
Instrument Cluster Display................263
Driving
Through Flowing, Rising, or Shallow Standing
Water................................398
Electrical Power Outlets.....................233
Electric Rear Window Defrost.................243
Electric Remote Mirrors.....................117
Electronic Brake Control System...............406
Brake Assist System.....................409
Traction Control System...................409
Electronic Power Distribution Center (Fuses)......529
Electronic Speed Control (Cruise Control)........165
Electronic Stability Control (ESC)..............410
Emergency Deck Lid Release..................44
Emergency, In Case of
Freeing Vehicle When Stuck................482
576 INDEX
Page 582 of 595
Hood Release............................144
Ignition
Key . . . . . . . . . . . . . . . . . . . . . . . . . . . . . . . . . .12
Illuminated Entry..........................20
Immobilizer (Sentry Key)....................16
Information Center, Vehicle..................260
Inside Rearview Mirror.....................108
Instrument Cluster........................249
Instrument Panel and Controls................248
Instrument Panel Lens Cleaning...............526
Interior Appearance Care....................525
Interior Lights...........................154
Intermittent Wipers (Delay Wipers).............156
Introduction..............................4
iPod®/USB/MP3 Control...................333
Jump Starting............................478
Key Fob
Arm The Alarm.........................19
Lock The Doors.........................22
Panic Alarm............................23
Programming Additional Key Fobs...........18
Programming Additional Transmitters.........18
Remote Keyless Entry (RKE)................21
Unlatch The Trunk.......................23
Unlock The Doors.......................22
Key-In Reminder..........................14
Keyless Enter-N-Go........................34
Keyless Enter-N-Go™.......................34
Enter The Trunk.........................23
Lock The Vehicle’s Doors..................22
Passive Entry...........................34
Passive Entry Programming.................34
Unlock From The Driver’s Side..............22
Unlock From The Passenger Side.............22
Keyless Entry System.......................21
580 INDEX
Page 583 of 595
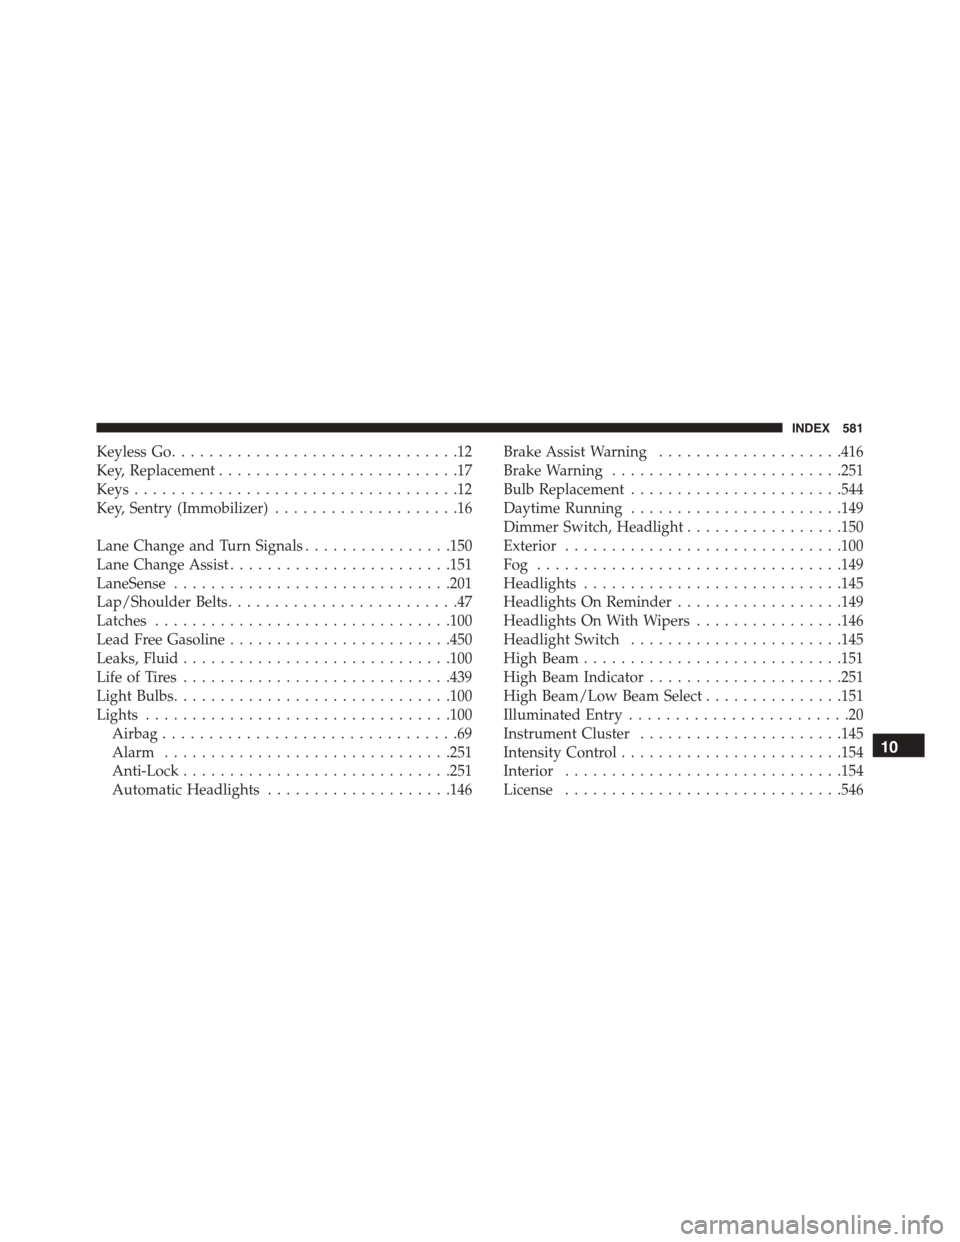
Keyless Go...............................12
Key, Replacement..........................17
Keys...................................12
Key, Sentry (Immobilizer)....................16
Lane Change and Turn Signals................150
Lane Change Assist........................151
LaneSense..............................201
Lap/Shoulder Belts.........................47
Latches................................100
Lead Free Gasoline........................450
Leaks, Fluid.............................100
Life of Tires.............................439
Light Bulbs..............................100
Lights.................................100
Airbag................................69
Alarm...............................251
Anti-Lock.............................251
Automatic Headlights....................146
Brake Assist Warning....................416
Brake Warning.........................251
Bulb Replacement.......................544
Daytime Running.......................149
Dimmer Switch, Headlight.................150
Exterior..............................100
Fog . . . . . . . . . . . . . . . . . . . . . . . . . . . . . . . ..149
Headlights............................145
Headlights On Reminder..................149
Headlights On With Wipers................146
Headlight Switch.......................145
High Beam............................151
High Beam Indicator.....................251
High Beam/Low Beam Select...............151
Illuminated Entry........................20
Instrument Cluster......................145
Intensity Control........................154
Interior..............................154
License..............................546
10
INDEX 581