remote control DODGE CHARGER SRT 2015 7.G Owners Manual
[x] Cancel search | Manufacturer: DODGE, Model Year: 2015, Model line: CHARGER SRT, Model: DODGE CHARGER SRT 2015 7.GPages: 595, PDF Size: 16.43 MB
Page 23 of 595
NOTE:
•The front courtesy overhead console and door cour-
tesy lights will turn on if the dimmer control is in the
“Dome ON” position (extreme top position).
•The Illuminated Entry system will not operate if the
dimmer control is in the “Dome defeat” position
(extreme bottom position).
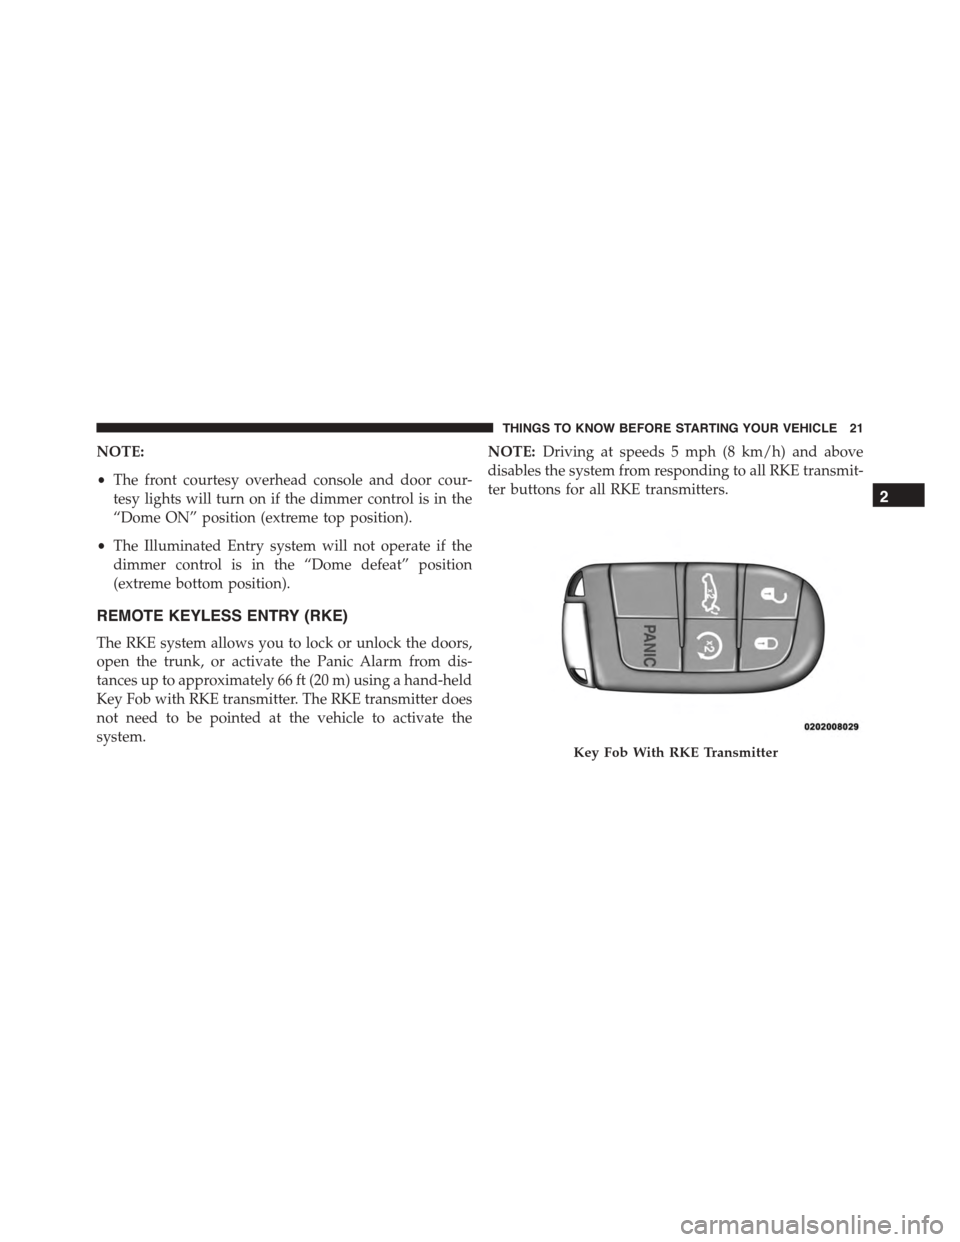
REMOTE KEYLESS ENTRY (RKE)
The RKE system allows you to lock or unlock the doors,
open the trunk, or activate the Panic Alarm from dis-
tances up to approximately 66 ft (20 m) using a hand-held
Key Fob with RKE transmitter. The RKE transmitter does
not need to be pointed at the vehicle to activate the
system.
NOTE:Driving at speeds 5 mph (8 km/h) and above
disables the system from responding to all RKE transmit-
ter buttons for all RKE transmitters.
Key Fob With RKE Transmitter
2
THINGS TO KNOW BEFORE STARTING YOUR VEHICLE 21
Page 29 of 595
How To Use Remote Start
All of the following conditions must be met before the
engine will remote start:
•Shift lever in PARK
•Doors closed
•Hood closed
•Hazard switch off
•Brake switch inactive (brake pedal not pushed)
•Battery at an acceptable charge level
•RKE PANIC button not pushed
•System not disabled from previous remote start event
•Vehicle security alarm not active
•Ignition in Off position (Keyless Enter-N-Go™)
WARNING!
•Do not start or run an engine in a closed garage or
confined area. Exhaust gas contains Carbon Mon-
oxide (CO) which is odorless and colorless. Carbon
Monoxide is poisonous and can cause serious in-
jury or death when inhaled.
•Keep Remote Keyless Entry (RKE) transmitters
away from children. Operation of the Remote Start
System, windows, door locks or other controls
could cause serious injury or death.
To Enter Remote Start Mode
Push and release the REMOTE START button on
the RKE transmitter twice within five seconds.
The vehicle doors will lock, the parking lights
will flash, and horn will chirp twice (if pro-
grammed). Then, the engine will start and the vehicle will
remain in the Remote Start mode for a 15-minute cycle.
2
THINGS TO KNOW BEFORE STARTING YOUR VEHICLE 27
Page 104 of 595
!SEATS . . . . . . . . . . . . . . . . . . . . . . . . . . . . ..128
▫Power Seats — If Equipped..............128
▫Power Lumbar — If Equipped............130
▫Heated Seats — If Equipped.............131
▫Front Ventilated Seats — If Equipped.......134
▫Head Restraints......................134
▫Folding Rear Seat.....................138
!DRIVER MEMORY SEAT — IF EQUIPPED . . . .139
▫Programming The Memory Feature.........140
▫Linking And Unlinking The Remote Keyless
Entry Transmitter To Memory.............141
▫Memory Position Recall.................142
▫Easy Entry/Exit Seat...................142
!TO OPEN AND CLOSE THE HOOD.........144
!LIGHTS.............................145
▫Headlight Switch.....................145
▫Automatic Headlights — If Equipped.......146
▫Headlights On With Wipers (Available With
Automatic Headlights Only).............146
▫Automatic High Beam Headlamp Control —
If Equipped.........................147
▫Headlight Time Delay..................148
▫Daytime Running Lights (DRL) —
If Equipped.........................149
▫Lights-On Reminder...................149
▫Fog Lights — If Equipped...............149
▫Multifunction Lever...................150
102 UNDERSTANDING THE FEATURES OF YOUR VEHICLE
Page 118 of 595
Outside Mirrors Folding Feature — If Equipped
Some models have outside mirrors that are hinged. The
hinge allows the mirror to pivot forward and rearward to
resist damage. The hinge has three detent positions: full
forward, full rearward and normal.
Driver’s Outside Automatic Dimming Mirror — If
Equipped
The driver ’s outside mirror will automatically adjust for
glare from vehicles behind you. This feature is controlled
by the inside automatic dimming mirror and will auto-
matically adjust for headlight glare when the inside
mirror adjusts.
Outside Mirrors Approach Light — If Equipped
Driver and passenger outside mirrors equipped with
approach lighting contain one LED, which is located in
the upper outboard mirror glass corner. The approach
light supplies illuminated entry lighting, which turns on
in both mirrors when you use the Remote Keyless Entry
(RKE) transmitter or open any door. This LED shines
outward to illuminate the front and rear door handles. It
also shines downward to illuminate the area in front of
the doors.
Tilt Mirrors In Reverse — If Equipped
Tilt Mirrors in Reverse provides automatic outside mirror
positioning which will aid the driver ’s view of the
ground rearward of the front doors. The outside mirrors
will move slightly downward from the present position
when the vehicle is shifted into REVERSE. The outside
mirrors will then return to the original position when the
vehicle is shifted out of the REVERSE position. Each
stored memory setting will have an associated Tilt Mir-
rors in Reverse position.
11 6 U N D E R S TA N D I N G T H E F E AT U R E S O F Y O U R V E H I C L E
Page 134 of 595
Front Heated Seats
The front heated seats control buttons are located within
the climate or controls screen of the touchscreen.
You can choose from HI, LO or OFF heat settings. The
indicator lights in each switch indicate the level of heat in
use. Two indicator lights will illuminate for HI, one for
LO and none for OFF.
•Press the heated seat buttononce to turn the HI
setting ON.
•Press the heated seat buttona second time to turn
the LO setting ON.
•Press the heated seat buttona third time to turn
the heating elements OFF.
If the HI-level setting is selected, the system will auto-
matically switch to LO-level after approximately 60 min-
utes of continuous operation. At that time, the display
will change from HI to LO, indicating the change. The
LO-level setting will turn OFF automatically after ap-
proximately 45 minutes.
NOTE:
•Once a heat setting is selected, heat will be felt within
two to five minutes.
•The engine must be running for the heated seats to
operate.
Vehicles Equipped With Remote Start
On models that are equipped with remote start, the
heated seats can be programed to come on during a
remote start.
This feature can be programmed through the Uconnect®
system. Refer to “Uconnect® Settings” in “Understand-
ing Your Instrument Panel” for further information.
132 UNDERSTANDING THE FEATURES OF YOUR VEHICLE
Page 136 of 595
Front Ventilated Seats — If Equipped
Located in the seat cushion and seat back are small fans
that draw the air from the passenger compartment and
move air through fine perforations in the seat cover to
help keep the driver and front passenger cooler in higher
ambient temperatures. The fans operate at two speeds,
HI and LO.
The front ventilated seats control buttons are located
within the Uconnect® system. You can gain access to the
control buttons through the climate screen or the controls
screen.
•Press the ventilated seat buttononce to choose HI.
•Press the ventilated seat buttona second time to
choose LO.
•Press the ventilated seat buttona third time to
turn the ventilated seat OFF.
NOTE:The engine must be running for the ventilated
seats to operate.
Vehicles Equipped With Remote Start
On models that are equipped with remote start, the
ventilated seats can be programed to come on during a
remote start.
This feature can be programmed through the Uconnect®
system. Refer to “Uconnect® Settings” in “Understand-
ing Your Instrument Panel” for further information.
Head Restraints
Head restraints are designed to reduce the risk of injury
by restricting head movement in the event of a rear
impact. Head restraints should be adjusted so that the top
of the head restraint is located above the top of your ear.
134 UNDERSTANDING THE FEATURES OF YOUR VEHICLE
Page 163 of 595
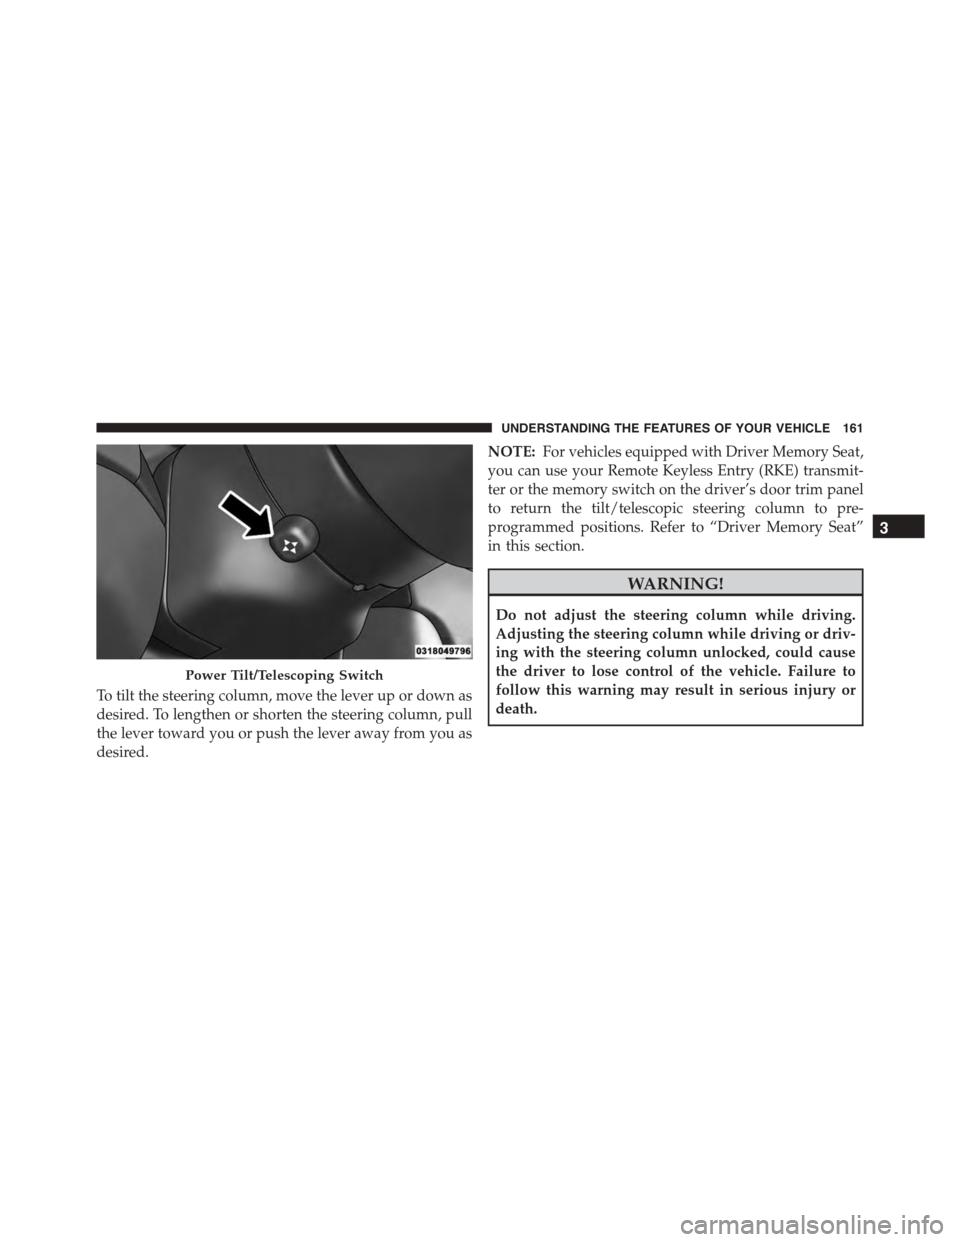
To tilt the steering column, move the lever up or down as
desired. To lengthen or shorten the steering column, pull
the lever toward you or push the lever away from you as
desired.
NOTE:For vehicles equipped with Driver Memory Seat,
you can use your Remote Keyless Entry (RKE) transmit-
ter or the memory switch on the driver’s door trim panel
to return the tilt/telescopic steering column to pre-
programmed positions. Refer to “Driver Memory Seat”
in this section.
WARNING!
Do not adjust the steering column while driving.
Adjusting the steering column while driving or driv-
ing with the steering column unlocked, could cause
the driver to lose control of the vehicle. Failure to
follow this warning may result in serious injury or
death.
Power Tilt/Telescoping Switch
3
UNDERSTANDING THE FEATURES OF YOUR VEHICLE 161
Page 164 of 595
HEATED STEERING WHEEL — IF EQUIPPED
The steering wheel contains a heating element that helps
warm your hands in cold weather. The heated steering
wheel has only one temperature setting. Once the heated
steering wheel has been turned on it will operate for up
to 80 minutes before automatically shutting off. The
heated steering wheel can shut off early or may not turn
on when the steering wheel is already warm.
The heated steering wheel control button is located within
the Uconnect® system. You can gain access to the control
button through the climate screen or the controls screen.
•Push the heated steering wheel buttononce to turn
the heating element ON.
•Push the heated steering wheel buttona second
time to turn the heating element OFF.
NOTE:The engine must be running for the heated
steering wheel to operate.
Vehicles Equipped With Remote Start
On models that are equipped with remote start, the
heated steering wheel can be programmed to come on
during a remote start through the Uconnect® system.
Refer to “Uconnect® Settings” in “Understanding Your
Instrument Panel” for further information.
WARNING!
•Persons who are unable to feel pain to the skin
because of advanced age, chronic illness, diabetes,
spinal cord injury, medication, alcohol use, exhaus-
tion, or other physical conditions must exercise
care when using the steering wheel heater. It may
cause burns even at low temperatures, especially if
used for long periods.
(Continued)
162 UNDERSTANDING THE FEATURES OF YOUR VEHICLE
Page 166 of 595
•The pedalscannotbe adjusted when the vehicle is in
REVERSE or when the Electronic Speed Control Sys-
tem is on. The following messages will be displayed on
vehicles equipped with the Driver Information Dis-
play (DID) if the pedals are attempted to be adjusted
when the system is locked out (“Adjustable Pedal
Disabled — Cruise Control Engaged” or “Adjustable
Pedal Disabled — Vehicle In Reverse”).
NOTE:
•Always adjust the pedals to a position that allows full
pedal travel.
•Further small adjustments may be necessary to find
the best possible seat/pedal position.
•For vehicles equipped with Driver Memory Seat, you
can use your Remote Keyless Entry (RKE) transmitter
or the memory switch on the driver ’s door trim panel
to return the adjustable pedals to pre-programmed
positions. Refer to “Driver Memory Seat” in “Under-
standing The Features Of Your Vehicle” for further
information.
CAUTION!
Do not place any article under the adjustable pedals
or impede its ability to move as it may cause damage
to the pedal controls. Pedal travel may become lim-
ited if movement is stopped by an obstruction in the
adjustable pedal’s path.
WARNING!
Do not adjust the pedals while the vehicle is moving.
You could lose control and have an accident. Always
adjust the pedals while the vehicle is parked.
164 UNDERSTANDING THE FEATURES OF YOUR VEHICLE
Page 283 of 595
Buttons On The Faceplate
Buttons on the faceplate are located below the Uconnect®
system in the center of the instrument panel. In addition,
there is a Scroll/Enter control knob located on the right
side. Turn the control knob to scroll through menus and
change settings (i.e., 30, 60, 90), push the center of the
control knob one or more times to select or change a
setting (i.e., ON, OFF).
Your Uconnect® system may also have a Screen Off and
Back buttons on the faceplate.
Push the Screen Off button on the faceplate to turn off the
Uconnect® screen. Push the Screen Off button on the
faceplate a second time to turn the screen on.
Push the Back button on the faceplate to exit out of a
Menu or certain option on the Uconnect® system.
Buttons On The Touchscreen
Buttons on the touchscreen are accessible on the
Uconnect® touchscreen.
Customer Programmable Features — Uconnect®
8.4 Settings
Press the “SRT & Apps” button on the touchscreen, then
press the “Settings” button on the touchscreen to display
the menu setting screen. In this mode the Uconnect®
system allows you to access programmable features that
may be equipped such as Display, Units, Voice, Clock,
Safety & Driving Assistance, Lights, Doors & Locks,
Auto-On Comfort & Remote Start, Engine Off Options,
Audio, Phone/Bluetooth®, SiriusXM Setup, Restore Set-
tings, Clear Personal Data and System Information.
4
UNDERSTANDING YOUR INSTRUMENT PANEL 281