start stop button DODGE CHARGER SRT 2015 7.G Owners Manual
[x] Cancel search | Manufacturer: DODGE, Model Year: 2015, Model line: CHARGER SRT, Model: DODGE CHARGER SRT 2015 7.GPages: 595, PDF Size: 16.43 MB
Page 14 of 595
A WORD ABOUT YOUR KEYS
Your vehicle uses a keyless ignition system. This system
consists of a Key Fob with Remote Keyless Entry (RKE)
transmitter and a Keyless Ignition Node (KIN).
Keyless Enter-N-Go™ Feature
This vehicle is equipped with the Keyless Enter-N-Go™
feature. Refer to#Keyless Enter-N-Go™#in#Things To
Know Before Starting Your Vehicle#for further informa-
tion.
Keyless Ignition Node (KIN)
This feature allows the driver to operate the ignition with
the push of a button as long as the Remote Keyless Entry
(RKE) transmitter is in the passenger compartment.
The Keyless Ignition Node (KIN System) has four oper-
ating positions, three of which are labeled and will
illuminate when in position. The three positions are: OFF,
ACC, and ON/RUN. The fourth position is START.
During start, ON/RUN will illuminate.
NOTE:In case the ignition does not change with the
push of a button, the RKE transmitter (Key Fob) may
have a low or dead battery. In this situation, a back up
method can be used to operate the ignition switch. Put
the nose side (side opposite of the emergency key) of the
Key Fob against the Engine START/STOP button and
push to operate the ignition.
12 THINGS TO KNOW BEFORE STARTING YOUR VEHICLE
Page 20 of 595

Customer Key Programming
Programming Key Fobs or RKE transmitters may be
performed at an authorized dealer.
General Information
The Sentry Key® system complies with FCC rules part 15
and with RSS-210 of Industry Canada. Operation is
subject to the following conditions:
•This device may not cause harmful interference.
•This device must accept any interference that may be
received, including interference that may cause unde-
sired operation.
NOTE:Changes or modifications not expressly approved
by the party responsible for compliance could void the
user’s authority to operate the equipment.
VEHICLE SECURITY ALARM — IF EQUIPPED
The Vehicle Security Alarm monitors the vehicle doors
for unauthorized entry and the Keyless Enter-N-Go™
START/STOP button for unauthorized operation. While
the Vehicle Security Alarm is armed, interior switches for
door locks and decklid release are disabled. If something
triggers the alarm, the Vehicle Security Alarm will pro-
vide the following audible and visible signals: the horn
will pulse, the park lamps and/or turn signals will flash,
and the Vehicle Security Light in the instrument cluster
will flash.
Rearming Of The System
If something triggers the alarm, and no action is taken to
disarm it, the Vehicle Security Alarm will turn the horn
off after 29 seconds, 5 seconds between cycles, up to 8
cycles if the trigger remains active and then the Vehicle
Security Alarm will rearm itself.
18 THINGS TO KNOW BEFORE STARTING YOUR VEHICLE
Page 21 of 595
To Arm The System
Follow these steps to arm the Vehicle Security Alarm:
1. Make sure the vehicles ignition is placed in the “OFF”
position (refer to#Starting Procedures#in#Starting
And Operating#for further information).
•Make sure the vehicle ignition system is OFF.
2. Perform one of the following methods to lock the
vehicle:
•Push LOCK on the interior power door lock switch
with the driver and/or passenger door open.
•Push the LOCK button on the exterior Passive Entry
Door Handle with a valid Key Fob available in the
same exterior zone (refer to#Keyless Enter-N-Go™#
in#Things To Know Before Starting Your Vehicle#for
further information).
•Push the LOCK button on the Remote Keyless Entry
(RKE) transmitter.
3. If any doors are open, close them.
To Disarm The System
The Vehicle Security Alarm can be disarmed using any of
the following methods:
•Push the UNLOCK button on the Remote Keyless
Entry (RKE) transmitter.
•Grasp the Passive Entry Unlock Door Handle if
equipped. Refer to “Keyless Enter-N-Go™” in “Things
To Know Before Starting Your Vehicle” for further
information.
•Place the vehicle ignition system in the OFF position.
•Push the Keyless Enter-N-Go™ START/STOP button
(requires at least one valid Key Fob in the vehicle).
2
THINGS TO KNOW BEFORE STARTING YOUR VEHICLE 19
Page 30 of 595
NOTE:
•If an engine fault is present, the vehicle will start and
then shut down 10 seconds later.
•The park lamps will turn on and remain on during
Remote Start mode.
•For security, power window and power sunroof op-
eration (if equipped) are disabled when the vehicle is
in the Remote Start mode.
•The engine can be started two consecutive times with
the RKE transmitter. However, the ignition must be
activated by pushing the START/STOP button twice
(or the ignition must be placed in the ON/RUN
position) before you can repeat the start sequence for a
third cycle.
To Exit Remote Start Mode Without Driving The
Vehicle
Push and release the REMOTE START button one time or
allow the engine to run for the entire 15-minute cycle.
NOTE:To avoid unintentional shut downs, the system
will disable the one time push of the REMOTE START
button for two seconds after receiving a valid Remote
Start request.
To Exit Remote Start Mode And Drive The Vehicle
Before the end of 15 minute cycle, push and release the
UNLOCK button on the RKE transmitter to unlock the
doors, or unlock the vehicle using Passive Entry via the
door handles, and disarm the Vehicle Security Alarm (if
equipped). Then, prior to the end of the 15 minute cycle,
push and release the START/STOP button.
28 THINGS TO KNOW BEFORE STARTING YOUR VEHICLE
Page 43 of 595
Reset Auto-Up
Should the Auto Up feature stop working, the window
may need to be reset. To reset Auto Up:
1. Make sure the door is fully closed.
2. Pull the window switch up to close the window
completely and continue to hold the switch up for an
additional two seconds after the window is closed.
3. Push the window switch down firmly to the second
detent to open the window completely and continue
to hold the switch down for an additional two seconds
after the window is fully open.
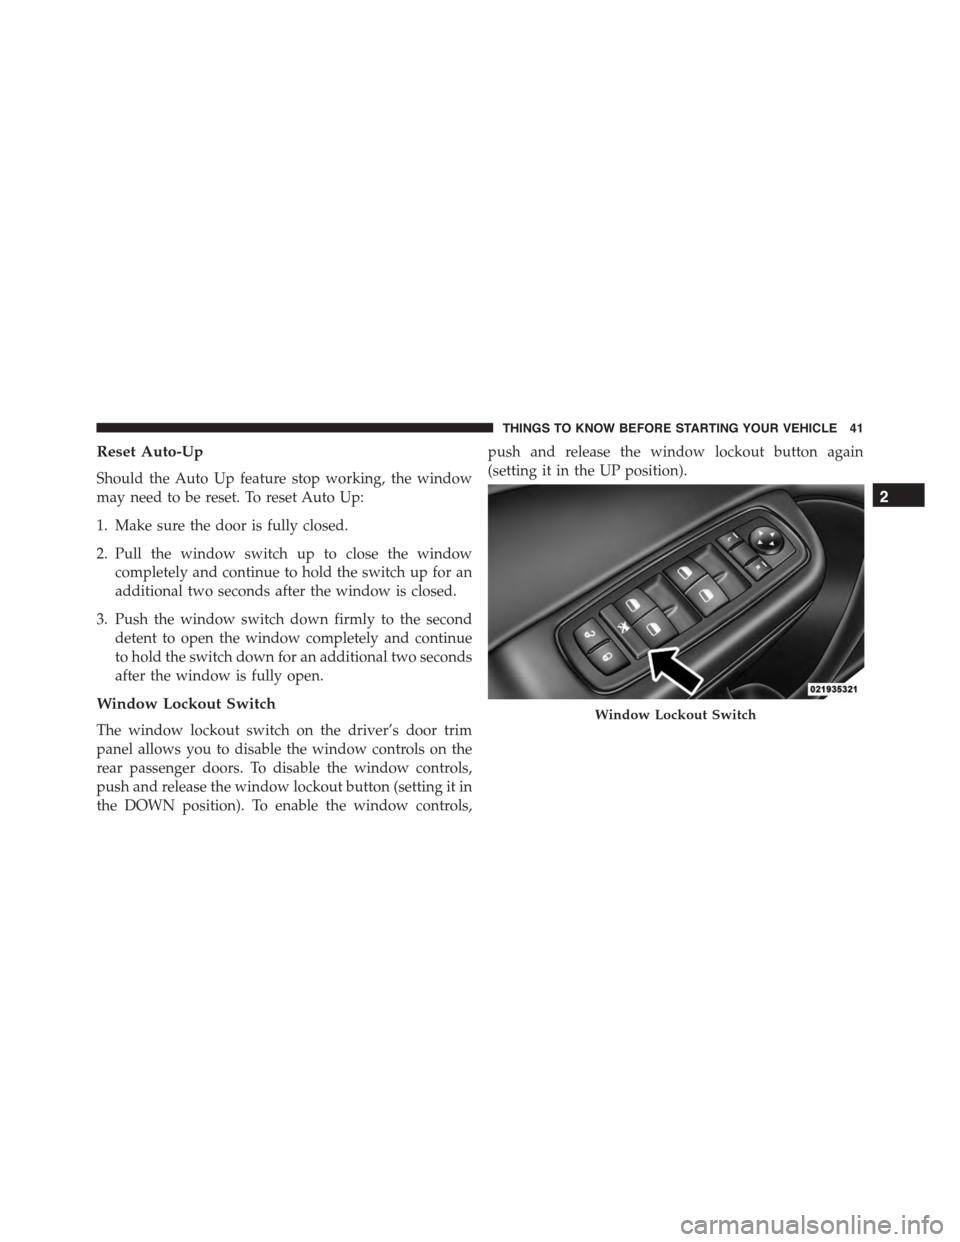
Window Lockout Switch
The window lockout switch on the driver’s door trim
panel allows you to disable the window controls on the
rear passenger doors. To disable the window controls,
push and release the window lockout button (setting it in
the DOWN position). To enable the window controls,
push and release the window lockout button again
(setting it in the UP position).
Window Lockout Switch
2
THINGS TO KNOW BEFORE STARTING YOUR VEHICLE 41
Page 186 of 595
If the target vehicle does not start moving within two
seconds of your vehicle coming to a standstill, the ACC with
Stop system will cancel and the brakes will release. A cancel
message will display on the DID and produce a warning
chime. Driver intervention will be required at this moment.
While ACC with Stop is holding your vehicle at a
standstill, if the driver seatbelt is unbuckled or the driver
door is opened, the ACC with Stop system will cancel
and the brakes will release. A cancel message will display
on the DID and produce a warning chime. Driver inter-
vention will be required at this moment.
WARNING!
When the ACC system is resumed, the driver must
ensure that there are no pedestrians, vehicles or
objects in the path of the vehicle. Failure to follow
these warnings can result in a collision and death or
serious personal injury.
Adaptive Cruise Control (ACC) Menu
The DID displays the current ACC system settings. The
DID is located in the center of the instrument cluster. The
information it displays depends on ACC system status.
Push the ADAPTIVE CRUISE CONTROL (ACC) ON/
OFF button (located on the steering wheel) until one of
the following displays in the DID:
Adaptive Cruise Control Off
When ACC is deactivated, the display will read “Adap-
tive Cruise Control Off.”
Adaptive Cruise Control Ready
When ACC is activated but the vehicle speed setting has
not been selected, the display will read “Adaptive Cruise
Control Ready.”
184 UNDERSTANDING THE FEATURES OF YOUR VEHICLE
Page 250 of 595
INSTRUMENT PANEL FEATURES
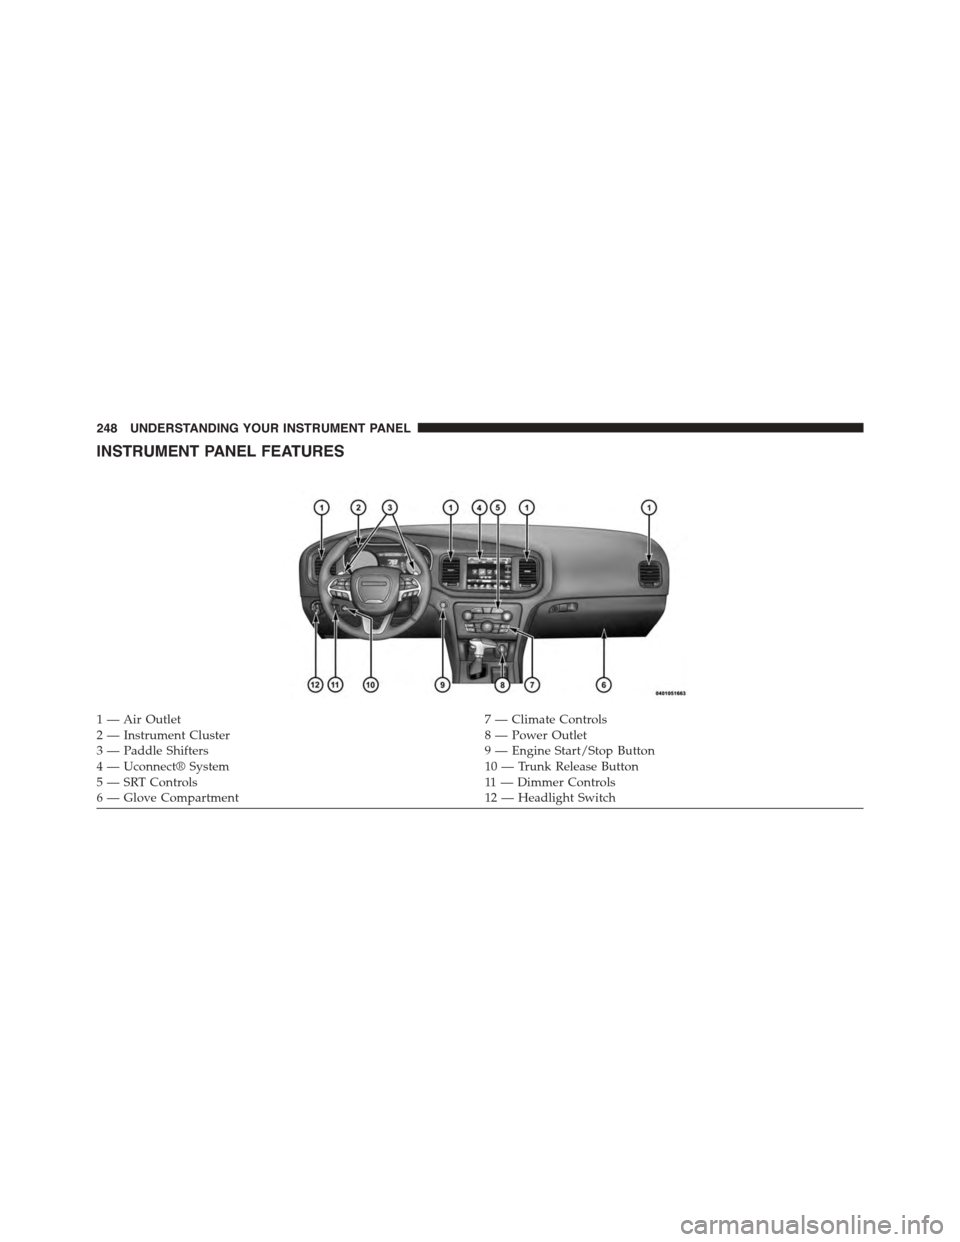
1 — Air Outlet7 — Climate Controls2 — Instrument Cluster8 — Power Outlet3—PaddleShifters9—EngineStart/StopButton4 — Uconnect® System10 — Trunk Release Button5—SRTControls11 — D i m m e r C o n t ro l s6—GloveCompartment12 — Headlight Switch
248 UNDERSTANDING YOUR INSTRUMENT PANEL
Page 265 of 595
•Pushing the left arrow button will exit each submenu
layer and return to the main menu.
For the Trip and Fuel Economy menus (and new Perfor-
mance Timers):
•Information is reset by pushing and holding the OK
button.
Engine Oil Life Reset
Oil Change Required
Your vehicle is equipped with an engine oil change
indicator system. The “Oil Change Required” message
will display in the DID for five seconds after a single
chime has sounded, to indicate the next scheduled oil
change interval. The engine oil change indicator system
is duty cycle based, which means the engine oil change
interval may fluctuate, dependent upon your personal
driving style.
Unless reset, this message will continue to display each
time you place the ignition in the ON/RUN position. To
turn off the message temporarily, push and release the
OK button. To reset the oil change indicator system (after
performing the scheduled maintenance), refer to the
following procedure.
Vehicles Equipped With Keyless Enter-N-Go™
1. Without pushing the brake pedal, push the ENGINE
START/STOP button and place the ignition to the
ON/RUN position (do not start the engine).
2. Fully push the accelerator pedal, slowly, three times
within 10 seconds.
3. Without pushing the brake pedal, push the ENGINE
START/STOP button once to return the ignition to the
OFF/LOCK position.
4
UNDERSTANDING YOUR INSTRUMENT PANEL 263
Page 277 of 595
Lap Timer
When selected, the Lap Timer page will show the timer
always at 0:00.00 with the previous Best and Last time
data (unless the driver has cleared it via hold to Reset).
•PushingOKwill start “current” timer from 0:00.0.
•WhenOKis pushed, the times are updated accord-
ingly.
•As soon as the driver exits the Lap Timer pages, the
“current” timer will stop and the time will be reset to
0:00.00.
•If the driver stays on the Lap Timer pages, the “cur-
rent” timer will reset to 0:00.0 when ignition is placed
in the off position, or ignition placed in the ON
position (or will roll over at 59:59.99 if ever possible).
•Each time the driver pushesOKfor a Lap that current
time populates, the Last time and also populates the
1st (top) space on the Timer History page the current
time resets to 0:00.0 at every push of theOKbutton.
•The timer will stop when the driver navigates away
from this page.
Lap History
When selected, this screen displays the Lap History, and
will color highlight the time that is the best time from the
Timer Page.
•Each time the driver presses the OK button (while on
the Lap Timer page) the current Lap Time populates
the 1st spot and the rest of the data shifts down.
•Color will indicate the time that is the best time from
the Timer Page.
•Holding theOKbutton only resets the page you are
on.
•Lap History page is a static display of lap times only.
4
UNDERSTANDING YOUR INSTRUMENT PANEL 275
Page 372 of 595
CAUTION!
Damage to the transmission may occur if the follow-
ing precautions are not observed:
•Do not shift from REVERSE, PARK, or NEUTRAL
into any forward gear when the engine is above
idle speed.
•Shift into PARK only after the vehicle has come to
a complete stop.
•Shift into or out of REVERSE only after the vehicle
has come to a complete stop and the engine is at
idle speed.
•Before shifting into any gear, make sure your foot
is firmly on the brake pedal.
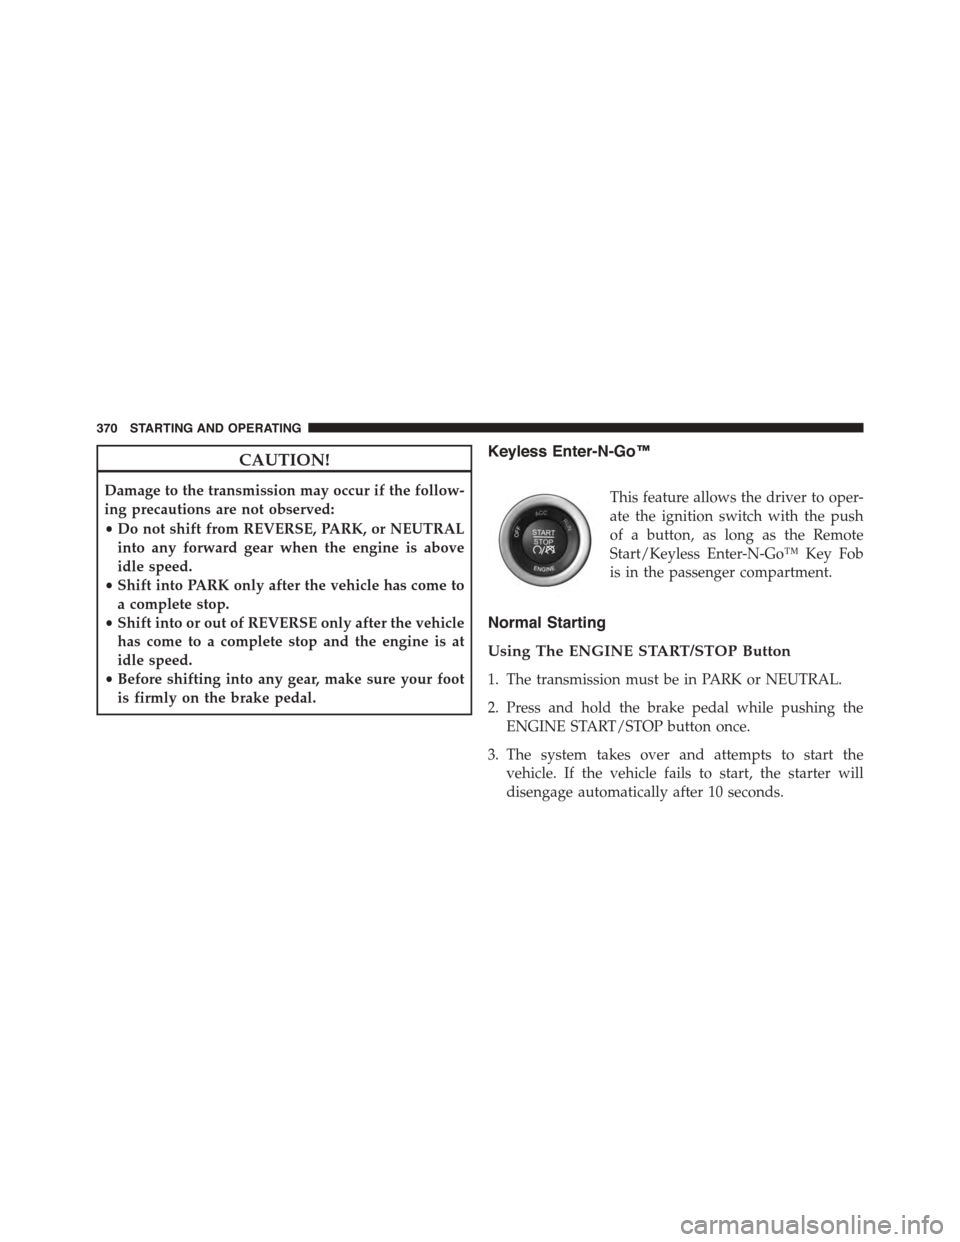
Keyless Enter-N-Go™
This feature allows the driver to oper-
ate the ignition switch with the push
of a button, as long as the Remote
Start/Keyless Enter-N-Go™ Key Fob
is in the passenger compartment.
Normal Starting
Using The ENGINE START/STOP Button
1. The transmission must be in PARK or NEUTRAL.
2. Press and hold the brake pedal while pushing the
ENGINE START/STOP button once.
3. The system takes over and attempts to start the
vehicle. If the vehicle fails to start, the starter will
disengage automatically after 10 seconds.
370 STARTING AND OPERATING