reset DODGE DART 2013 PF / 1.G User Guide
[x] Cancel search | Manufacturer: DODGE, Model Year: 2013, Model line: DART, Model: DODGE DART 2013 PF / 1.GPages: 132, PDF Size: 4.13 MB
Page 41 of 132
Clock Setting
• Press and hold the TIME button until the hours are highlighted.
• Adjust the hours by turning the right side TUNE/SCROLL control knob.
• After adjusting the hours, press the right side ENTER/BROWSE control knob to set theminutes. The minutes will highlight.
• Adjust the minutes using the right side TUNE/SCROLL control knob.
• To exit, press the TIME button or press the BACK button to return to the previous menu.
NOTE:
Time format has the options of 12HR or 24HR. Selecting one of these options will change
the way the clock is displayed.
Equalizer, Balance And Fade
• To set the Bass, Mid Range, Treble, Balance or Fade settings press the AUDIO button to access the Audio sub-menu.
• The Audio sub-menu can also be reached by pressing the MENU button until AUDIO appears in the display. Press the ENTER/BROWSE button to select the AUDIO menu and
use the TUNE/SCROLL knob to highlight select Bass, Mid Range, Treble, Balance or Fade.
Once the desired selection is highlighted, press the ENTER/BROWSE button to select the
item and use the TUNE/SCROLL knob to adjust the setting.
Radio Operation
RADIO Button
• Press the button to select either AM, FM or SiriusXM mode.
Seek Up/Down Buttons
• Press to seek through radio stations in AM, FM, or SXM bands.
• Hold either button to bypass stations without stopping.
Buttons1-5
• These buttons tune the radio to the stations that you commit to pushbutton memory AM (A, B, C), FM (A, B, C) and SXM (A,B,C) — 15 AM, 15 FM and 15 SXM stations.
Store Radio Presets
• When you are receiving a station that you wish to commit to pushbutton memory, pressand hold the button (1–5) you wish to lock onto this station for three seconds.
• You may add a second or third station to each pushbutton by repeating the above procedure with this exception: Press the A–B–C button to select the A, B or C mode. Each
button can be set for up to three stations in both AM and FM. This allows a total of 15 AM,
15 FM and 15 SXM stations to be stored into push-button memory.
ELECTRONICS
39
Page 52 of 132
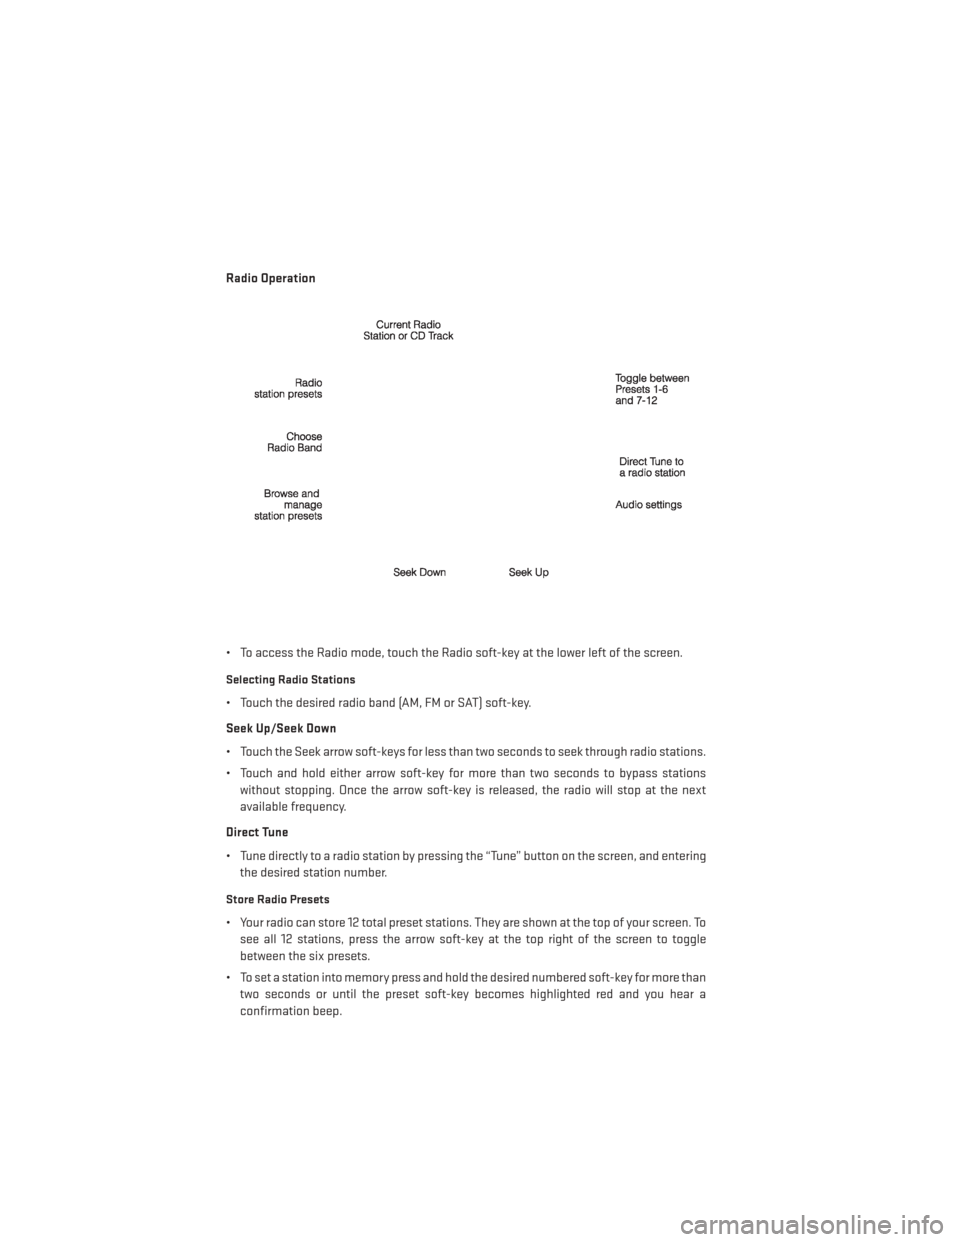
Radio Operation
• To access the Radio mode, touch the Radio soft-key at the lower left of the screen.
Selecting Radio Stations
• Touch the desired radio band (AM, FM or SAT) soft-key.
Seek Up/Seek Down
• Touch the Seek arrow soft-keys for less than two seconds to seek through radio stations.
• Touch and hold either arrow soft-key for more than two seconds to bypass stationswithout stopping. Once the arrow soft-key is released, the radio will stop at the next
available frequency.
Direct Tune
• Tune directly to a radio station by pressing the “Tune” button on the screen, and entering the desired station number.
Store Radio Presets
• Your radio can store 12 total preset stations. They are shown at the top of your screen. Tosee all 12 stations, press the arrow soft-key at the top right of the screen to toggle
between the six presets.
• To set a station into memory press and hold the desired numbered soft-key for more than two seconds or until the preset soft-key becomes highlighted red and you hear a
confirmation beep.
ELECTRONICS
50
Page 54 of 132
Browse
• Lets you browse the SiriusXM channel listing, Favorites, Genres, Game Zone, andWeather channels. Jump setting, and also provides the SiriusXM channel list. Browse
contains many sub-menus.
Browse Sub-
MenuSub-Menu Description
All Shows the channel listing.
Genre Provides a list of all genres, and lets you jump to a channel within the se-
lected genre.
Presets Lets you scroll the list of Preset satellite channels. Touch the channel, or press Enter on the Tune knob, to go to that channel. Touch the trash can
icon to delete a preset. Your presets are also shown at the top of the main
Satellite Radio screen.
Favorites Lets you manage artists and songs in the Favorites list and configure Alert Settings to let you know when favorite songs or artists are playing on other
channels). Also, view a list of channels airing any of your Favorites.
Game Zone Provides alerts when your favorite sports teams are starting a game which is being aired on other SiriusXM channels, or when their game score is
announced. You can select and manage your Teams list here, and config-
ure alerts.
Jump Lets you select your favorite cities for Traffic & Weather information, which
is used by the Jump feature on the main satellite radio screen.
Replay
• Lets you replay up to 44 minutes of the content of the current SiriusXM channel.
NOTE:
• You must be actively listening to the same station consistently for 44 minutes without changing stations.
• If you change to a different channel, you will lose the saved content.
Replay Option Option Description
Play/Pause Touch to Pause content playback. Touch Pause/Play again to resume play- back.
Rewind/RW Rewinds the channel content in steps of five seconds. Touch and hold to rewind continuously, then release to begin playing content at that point.
Fast
Forward/FW Forwards the content, and works similarly to Rewind/RW. However, Fast
Forward/FW can only be used when content has been previously rewound.
Replay Time Displays the amount of time in the upper center of the screen by which your content lags the Live channel.
Live Resumes playback of Live content at any time while replaying rewound content.
ELECTRONICS
52
Page 68 of 132
Changing The Volume
• Start a dialogue by pressing the Phone button, then say a command for example -
"Help".
• Use the radio ON/OFF VOLUME rotary knob to adjust the volume to a comfortable level while the Uconnect® system is speaking. Please note the volume setting for Uconnect® is
different than the audio system.
NOTE:
To access help, press the Uconnect® Phone
button on the steering wheel and say
"help." Touch the display or push either
orbutton and say "cancel" to cancel
the help session.
Voice Text Reply
• Uconnect® Phone can read or send new text messages on your mobile phone.
• Your mobile phone must support Voice Text Reply over Bluetooth® in order to use this feature. If the Uconnect® Phone determines your phone is not compatible with Voice Text
Reply messaging over Bluetooth® the “Messaging” button will be greyed out and the
feature will not be available for use.
NOTE: • For mobile phone compatibility and pairing instructions, please visitwww.UconnectPhone.com
• When the vehicle is in motion, Uconnect® Phone Voice Text Reply is only available though Voice Commands.
Read Messages:
• If you receive a new text message while your phone is connected to Uconnect® Phone, an announcement will be made to notify you that you have a new text message. Once a
message is received and viewed or listened to, you will have the following options:
• Send a Reply
•Forward
• Call
Send Messages Using Soft-Keys:
• With the vehicle in Park, you can send messages using Uconnect® Phone. To send a new message:
• Touch the “Phone” soft-key,
• Touch the “messaging” soft-key then “New Message”,
• Touch one of the 18 preset messages and the person you wish to send the message to,
• If multiple numbers are available for the contact select which number you would like tohave the message sent,
• Press “Send” or “Cancel”.
ELECTRONICS
66
Page 69 of 132
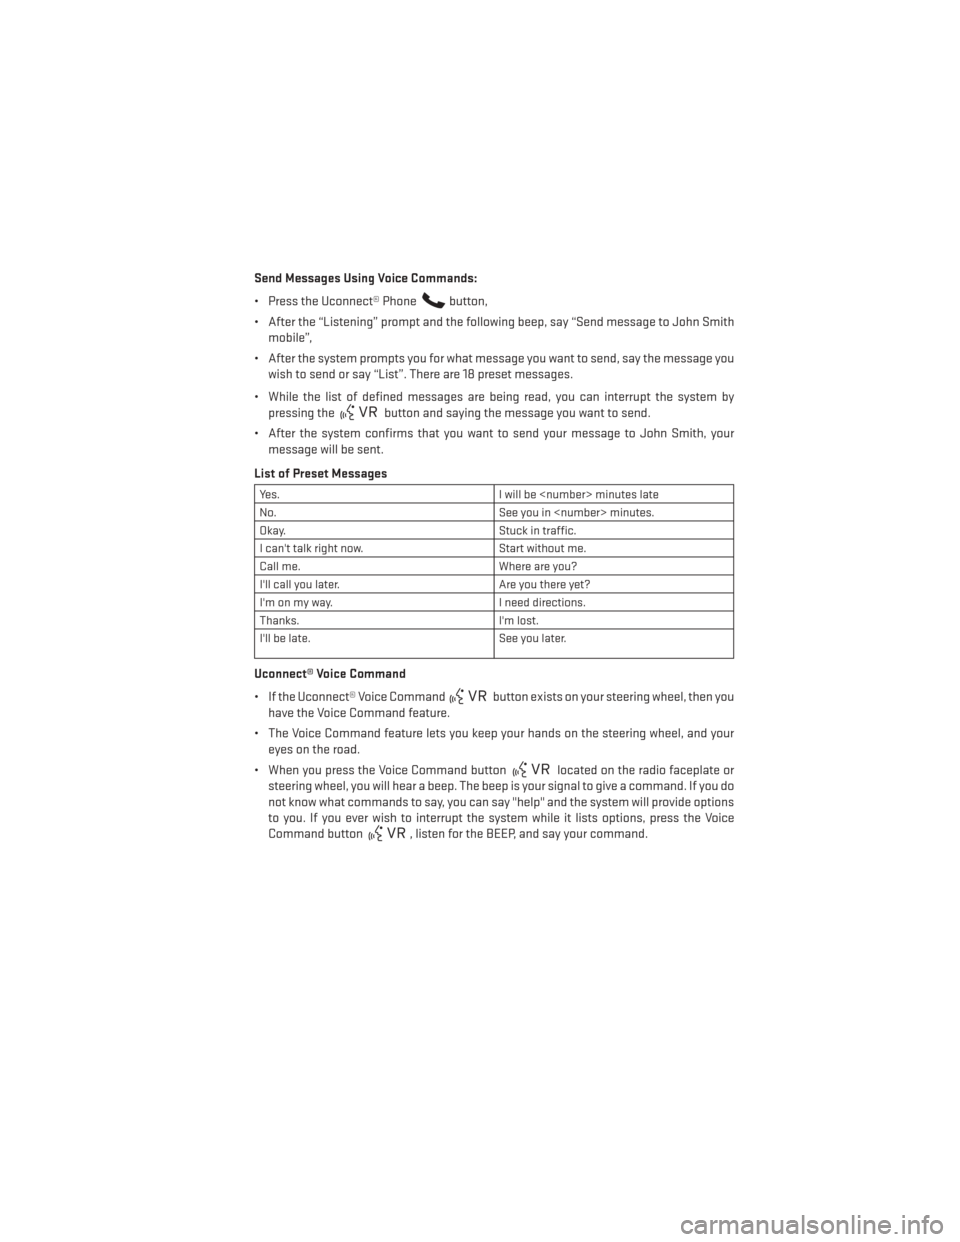
Send Messages Using Voice Commands:
• Press the Uconnect® Phone
button,
• After the “Listening” prompt and the following beep, say “Send message to John Smith mobile”,
• After the system prompts you for what message you want to send, say the message you wish to send or say “List”. There are 18 preset messages.
• While the list of defined messages are being read, you can interrupt the system by pressing the
button and saying the message you want to send.
• After the system confirms that you want to send your message to John Smith, your message will be sent.
List of Preset Messages
Yes. I will be
No. See you in
Okay. Stuck in traffic.
I can't talk right now. Start without me.
Call me. Where are you?
I'll call you later. Are you there yet?
I'm on my way. I need directions.
Thanks. I'm lost.
I'll be late. See you later.
Uconnect® Voice Command
• If the Uconnect® Voice Command
button exists on your steering wheel, then you
have the Voice Command feature.
• The Voice Command feature lets you keep your hands on the steering wheel, and your eyes on the road.
• When you press the Voice Command button
located on the radio faceplate or
steering wheel, you will hear a beep. The beep is your signal to give a command. If you do
not know what commands to say, you can say "help" and the system will provide options
to you. If you ever wish to interrupt the system while it lists options, press the Voice
Command button
, listen for the BEEP, and say your command.
ELECTRONICS
67
Page 70 of 132
Changing The Volume
• Start a dialogue by pressing the Phone button, then say a command for example -
"Help".
• Use the radio ON/OFF VOLUME rotary knob to adjust the volume to a comfortable level while the Uconnect® system is speaking. Please note the volume setting for Uconnect® is
different than the audio system.
NOTE:
To access help, press the Uconnect® Phone
button on the steering wheel and say
"help." Touch the display or push either
orbutton and say "cancel" to cancel
the help session.
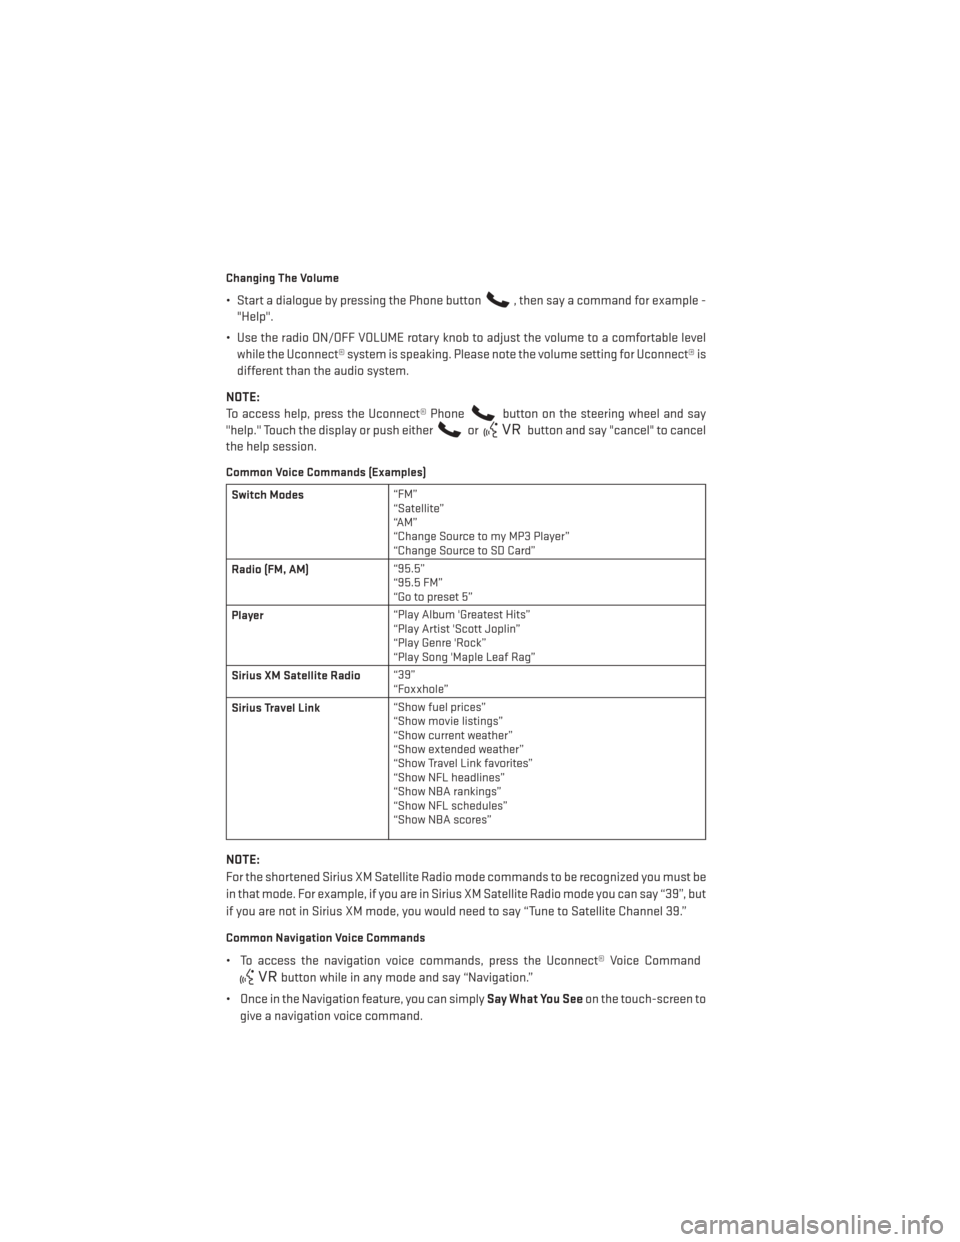
Common Voice Commands (Examples)
Switch Modes “FM”
“Satellite”
“AM”
“Change Source to my MP3 Player”
“Change Source to SD Card”
Radio (FM, AM) “95.5”
“95.5 FM”
“Go to preset 5”
Player “Play Album 'Greatest Hits”
“Play Artist 'Scott Joplin”
“Play Genre 'Rock”
“Play Song 'Maple Leaf Rag”
Sirius XM Satellite Radio “39”
“Foxxhole”
Sirius Travel Link “Show fuel prices”
“Show movie listings”
“Show current weather”
“Show extended weather”
“Show Travel Link favorites”
“Show NFL headlines”
“Show NBA rankings”
“Show NFL schedules”
“Show NBA scores”
NOTE:
For the shortened Sirius XM Satellite Radio mode commands to be recognized you must be
in that mode. For example, if you are in Sirius XM Satellite Radio mode you can say “39”, but
if you are not in Sirius XM mode, you would need to say “Tune to Satellite Channel 39.”
Common Navigation Voice Commands
• To access the navigation voice commands, press the Uconnect® Voice Command
button while in any mode and say “Navigation.”
• Once in the Navigation feature, you can simply Say What You Seeon the touch-screen to
give a navigation voice command.
ELECTRONICS
68
Page 72 of 132
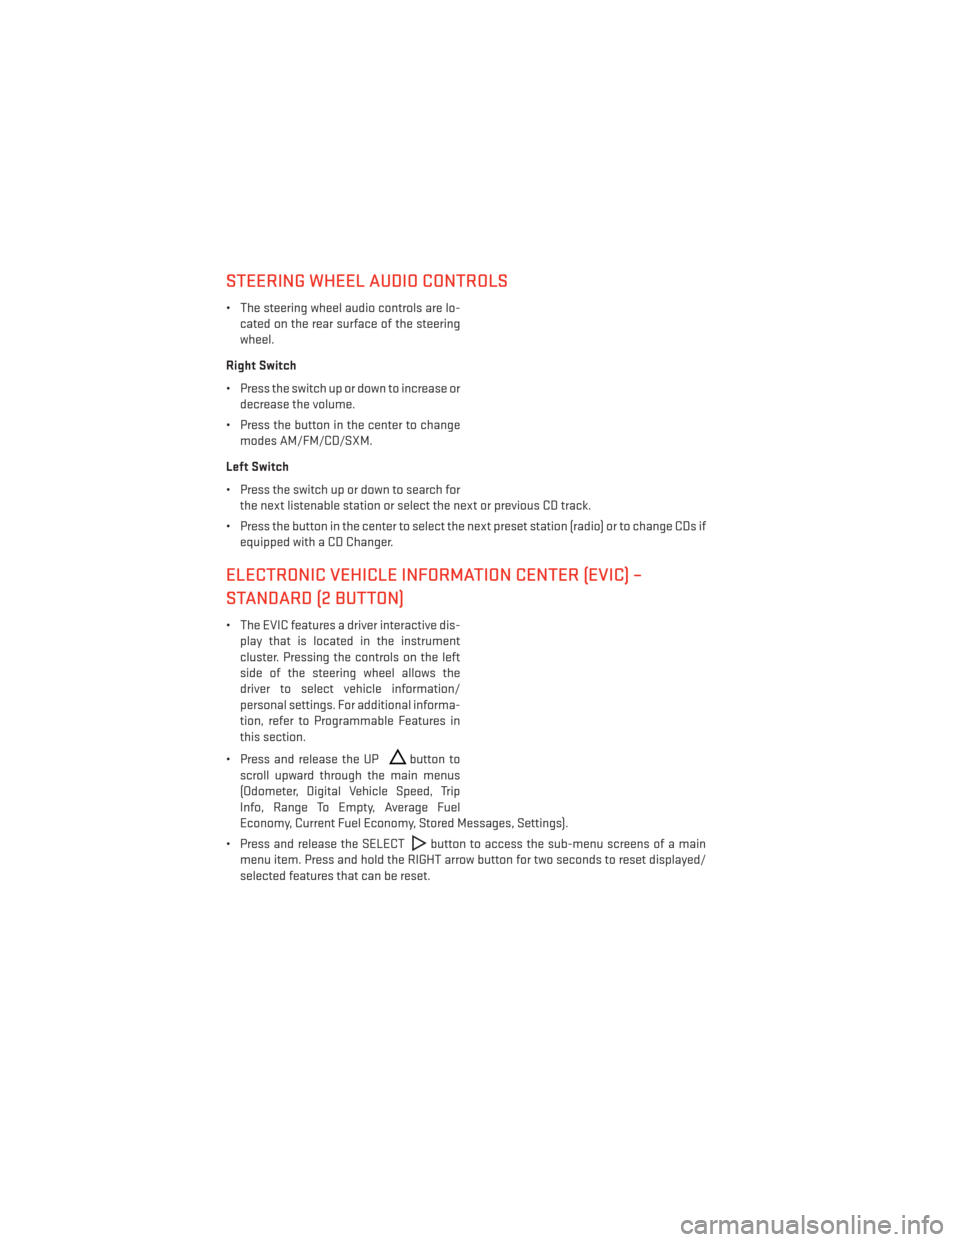
STEERING WHEEL AUDIO CONTROLS
• The steering wheel audio controls are lo-cated on the rear surface of the steering
wheel.
Right Switch
• Press the switch up or down to increase or decrease the volume.
• Press the button in the center to change modes AM/FM/CD/SXM.
Left Switch
• Press the switch up or down to search for the next listenable station or select the next or previous CD track.
• Press the button in the center to select the next preset station (radio) or to change CDs if equipped with a CD Changer.
ELECTRONIC VEHICLE INFORMATION CENTER (EVIC) –
STANDARD (2 BUTTON)
• The EVIC features a driver interactive dis-play that is located in the instrument
cluster. Pressing the controls on the left
side of the steering wheel allows the
driver to select vehicle information/
personal settings. For additional informa-
tion, refer to Programmable Features in
this section.
• Press and release the UP
button to
scroll upward through the main menus
(Odometer, Digital Vehicle Speed, Trip
Info, Range To Empty, Average Fuel
Economy, Current Fuel Economy, Stored Messages, Settings).
• Press and release the SELECT
button to access the sub-menu screens of a main
menu item. Press and hold the RIGHT arrow button for two seconds to reset displayed/
selected features that can be reset.
ELECTRONICS
70
Page 73 of 132
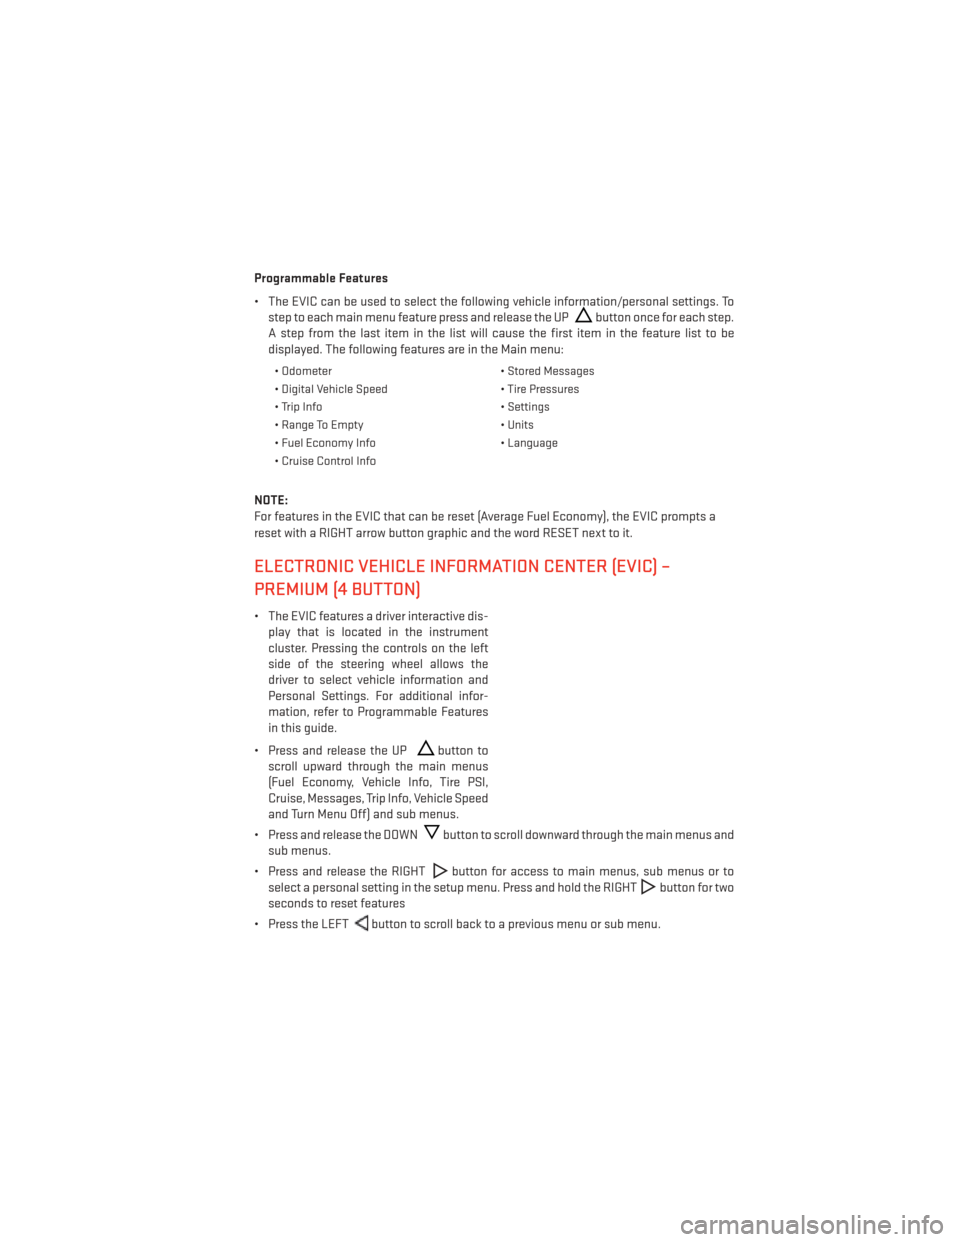
Programmable Features
• The EVIC can be used to select the following vehicle information/personal settings. Tostep to each main menu feature press and release the UP
button once for each step.
A step from the last item in the list will cause the first item in the feature list to be
displayed. The following features are in the Main menu:
• Odometer • Stored Messages
• Digital Vehicle Speed • Tire Pressures
• Trip Info • Settings
• Range To Empty • Units
• Fuel Economy Info • Language
• Cruise Control Info
NOTE:
For features in the EVIC that can be reset (Average Fuel Economy), the EVIC prompts a
reset with a RIGHT arrow button graphic and the word RESET next to it.
ELECTRONIC VEHICLE INFORMATION CENTER (EVIC) –
PREMIUM (4 BUTTON)
• The EVIC features a driver interactive dis- play that is located in the instrument
cluster. Pressing the controls on the left
side of the steering wheel allows the
driver to select vehicle information and
Personal Settings. For additional infor-
mation, refer to Programmable Features
in this guide.
• Press and release the UP
button to
scroll upward through the main menus
(Fuel Economy, Vehicle Info, Tire PSI,
Cruise, Messages, Trip Info, Vehicle Speed
and Turn Menu Off) and sub menus.
• Press and release the DOWN
button to scroll downward through the main menus and
sub menus.
• Press and release the RIGHT
button for access to main menus, sub menus or to
select a personal setting in the setup menu. Press and hold the RIGHT
button for two
seconds to reset features
• Press the LEFT
button to scroll back to a previous menu or sub menu.
ELECTRONICS
71
Page 85 of 132
- Anti-Lock Brake (ABS) Light
• This light monitors the Anti-Lock Brake System (ABS).
• If the light is not on during starting, stays on, or turns on while driving, we recommend you drive to the nearest authorized dealer immediately and have the vehicle serviced
immediately.
- Electronic Throttle Control (ETC) Indicator Light
• This light informs you of a problem with the system.
• If a problem is detected, the light will come on while the engine is running. Cycle the ignition when the vehicle has completely stopped and the shift lever is placed in the
PARK position; the light should turn off.
• If the light remains lit with the engine running, your vehicle will usually be drivable; however, see an authorized dealer immediately. If the light is flashing when the engine is
running, immediate service is required and you may experience reduced performance,
an elevated/rough idle or engine stall and your vehicle may require towing.
- Air Bag Warning Light
• If the light is not on during starting, stays on, or turns on while driving, have the vehicle serviced by an authorized dealer immediately.
Fuel Cap/Loose Gas Cap Message
• If a “gas cap” message (shown as gASCAP) appears, tighten the gas cap until a “clicking” sound is heard.
• Press the odometer reset button to turn the message off.
• If the message continues to appear for more than three days after tightening the gas cap, see your authorized service center.
Oil Change Indicator
• Your vehicle is equipped with an engine oil change indicator system. The “Oil Change Due” message will flash in the EVIC display for approximately 10 seconds after a single
chime has sounded, to indicate the next scheduled oil change interval. The engine oil
change indicator system is duty cycle based, which means the engine oil change interval
may fluctuate, dependent upon your personal driving style
• Unless reset, this message will continue to display each time you turn the ignition switch to the ON/RUN position or cycle the ignition to the ON/RUN position if equipped with
Keyless Enter-N-Go™. To turn off the message temporarily, press and release the MENU
button. To reset the oil change indicator system (after performing the scheduled main-
tenance) refer to the following procedure.
WHAT TO DO IN EMERGENCIES
83
Page 86 of 132
Vehicles Equipped With Keyless Enter-N-Go™
1. Without pressing the brake pedal, cycle the ignition to the ON/RUN position (do not startthe engine).
2. Fully depress the accelerator pedal, slowly, three times within 10 seconds.
3. Cycle the ignition to the OFF/LOCK position.
Vehicles Not Equipped With Keyless Enter-N-Go™
1. Turn the ignition switch to the ON/RUN position (do not start the engine).
2. Fully depress the accelerator pedal, slowly, three times within 10 seconds.
3. Turn the ignition switch to the OFF/LOCK position.
NOTE:
If the indicator message illuminates when you start the vehicle, the oil change indicator
system did not reset. If necessary, repeat this procedure.
Resetting The Light After Servicing
• Vehicles Equipped With Keyless Enter-N-Go™
• Without pressing the brake pedal, push the ENGINE START/STOP button and cycle the ignition to the ON/RUN position (Do not start the engine.)
• Fully depress the accelerator pedal, slowly, three times within 10 seconds.
• Without pressing the brake pedal, push the ENGINE START/STOP button once to return the ignition to the OFF/LOCK position.
• Vehicles Not Equipped With Keyless Enter-N-Go™
• Turn the ignition switch to the ON/RUN position (Do not start the engine.)
• Fully depress the accelerator pedal, slowly, three times within 10 seconds.
• Turn the ignition switch to the OFF/LOCK position.
WHAT TO DO IN EMERGENCIES
84