wheel DODGE DART 2015 PF / 1.G Owner's Manual
[x] Cancel search | Manufacturer: DODGE, Model Year: 2015, Model line: DART, Model: DODGE DART 2015 PF / 1.GPages: 664, PDF Size: 16.96 MB
Page 253 of 664
TILT/TELESCOPING STEERING COLUMN
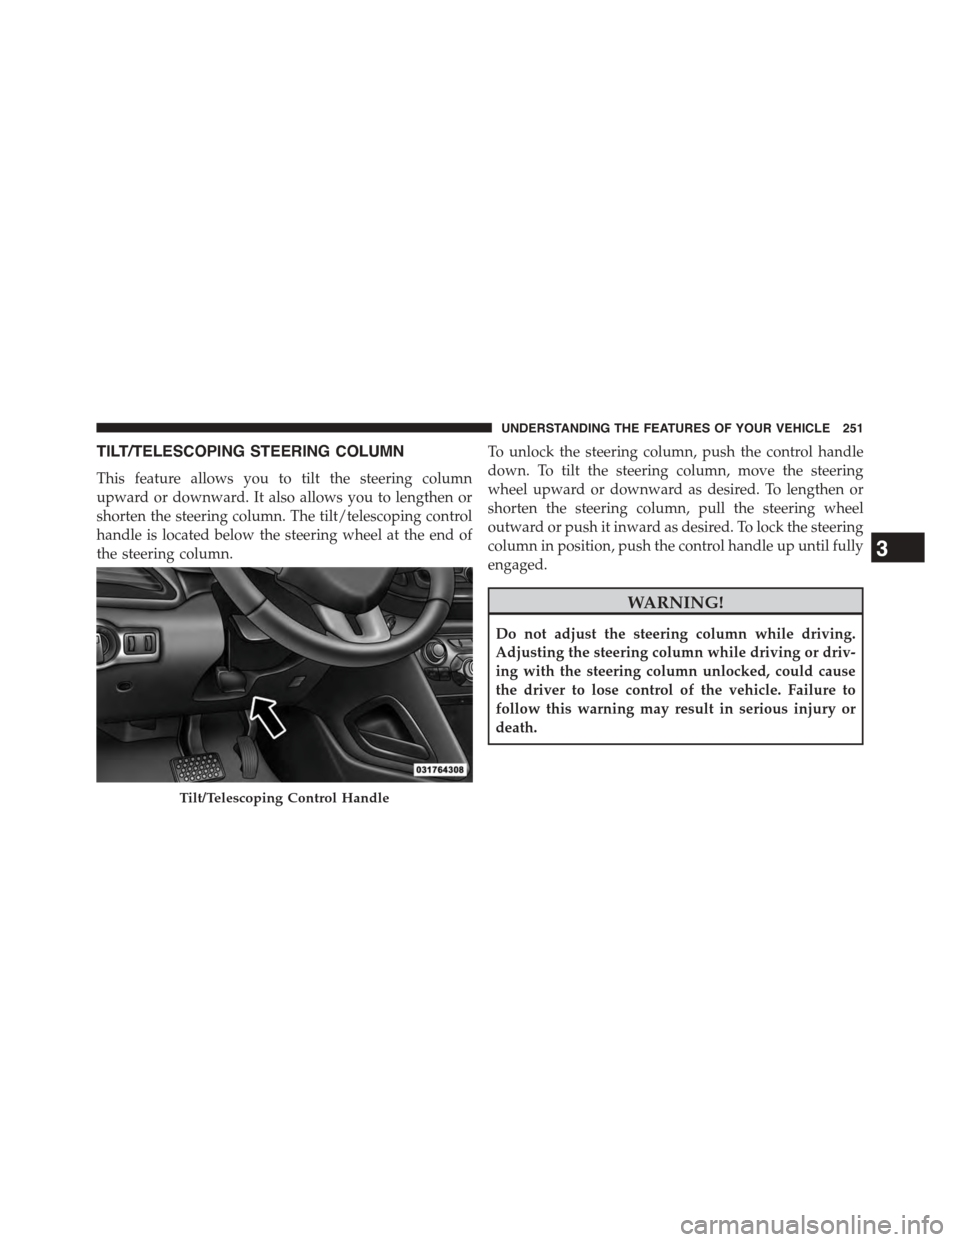
This feature allows you to tilt the steering column
upward or downward. It also allows you to lengthen or
shorten the steering column. The tilt/telescoping control
handle is located below the steering wheel at the end of
the steering column.
To unlock the steering column, push the control handle
down. To tilt the steering column, move the steering
wheel upward or downward as desired. To lengthen or
shorten the steering column, pull the steering wheel
outward or push it inward as desired. To lock the steering
column in position, push the control handle up until fully
engaged.
WARNING!
Do not adjust the steering column while driving.
Adjusting the steering column while driving or driv-
ing with the steering column unlocked, could cause
the driver to lose control of the vehicle. Failure to
follow this warning may result in serious injury or
death.
Tilt/Telescoping Control Handle
3
UNDERSTANDING THE FEATURES OF YOUR VEHICLE 251
Page 254 of 664
HEATED STEERING WHEEL — IF EQUIPPED
The steering wheel contains a heating element that helps
warm your hands in cold weather. The heated steering
wheel has only one temperature setting. Once the heated
steering wheel has been turned on it will operate for up
to 80 minutes before automatically shutting off. The
heated steering wheel can shut off early or may not turn
on when the steering wheel is already warm.
The heated steering wheel control button is located
within the Uconnect® system. You can gain access to the
control button through the climate screen or the controls
screen.
•Press the heated steering wheel buttononce to
turn the heating element ON.
•Press the heated steering wheel buttona second
time to turn the heating element OFF.
NOTE:The engine must be running for the heated
steering wheel to operate.
Vehicles Equipped With Remote Start
On models that are equipped with remote start, the
heated steering wheel can be programmed to come on
during a remote start through the Uconnect® system.
Refer to “Uconnect® Settings” in “Understanding Your
Instrument Panel” for further information.
252 UNDERSTANDING THE FEATURES OF YOUR VEHICLE
Page 255 of 664
WARNING!
•Persons who are unable to feel pain to the skin
because of advanced age, chronic illness, diabetes,
spinal cord injury, medication, alcohol use, exhaus-
tion, or other physical conditions must exercise
care when using the steering wheel heater. It may
cause burns even at low temperatures, especially if
used for long periods.
•Do not place anything on the steering wheel that
insulates against heat, such as a blanket or steering
wheel covers of any type and material. This may
cause the steering wheel heater to overheat.
ELECTRONIC SPEED CONTROL — IF EQUIPPED
When engaged, the Electronic Speed Control takes over
accelerator operations at speeds greater than 25 mph
(40 km/h).
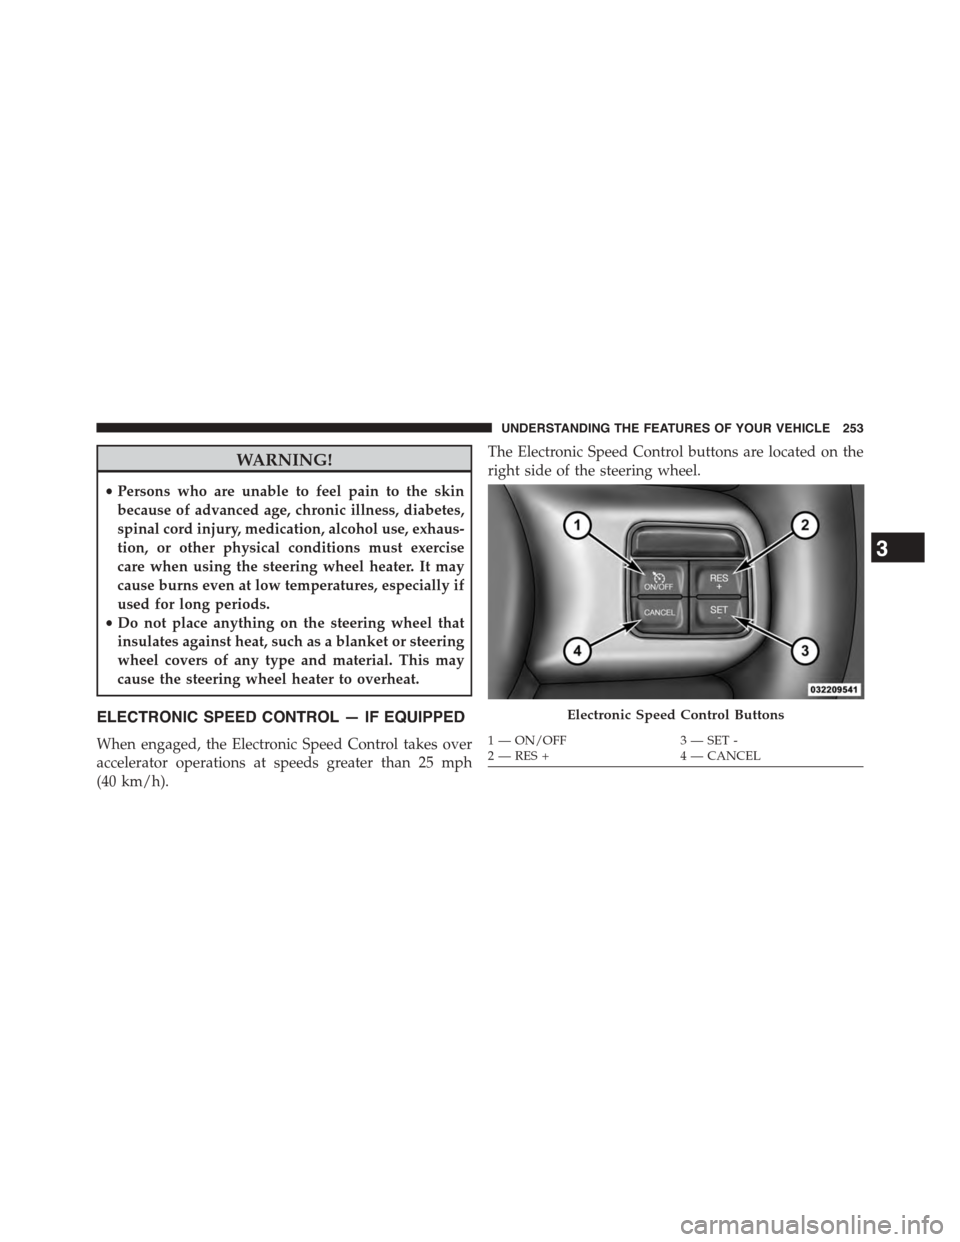
The Electronic Speed Control buttons are located on the
right side of the steering wheel.
Electronic Speed Control Buttons
1—ON/OFF3—SET-2—RES+4—CANCEL
3
UNDERSTANDING THE FEATURES OF YOUR VEHICLE 253
Page 304 of 664
▫Operating Instructions — Radio Mode.......367
▫Operation Instructions — CD MODE For CD
And MP3 Audio Play...................372
▫Notes On Playing MP3 Files.............374
▫Enter/Browse Button (CD Mode For MP3/WMA
Play)..............................377
▫INFO Button (CD Mode For MP3/WMA
Play)..............................377
▫Operation Instructions — Auxiliary Mode . . . .377
▫Operation Instructions — Universal Serial Bus
(USB) — If Equipped...................378
▫Security............................378
!CD PLAYER — IF EQUIPPED.............379
▫CD Player Operating Instructions..........380
!iPod®/USB/MP3 CONTROL WITH Uconnect®
VOICE COMMAND — IF EQUIPPED........380
▫Connecting The iPod® Or External USB
Device.............................381
▫Using This Feature.....................382
▫Controlling The iPod® Or External USB Device
Using Radio Buttons...................383
▫Play Mode..........................383
▫List Or Browse Mode...................384
▫Bluetooth® Streaming Audio (BTSA).......386
!STEERING WHEEL AUDIO CONTROLS......387
▫Radio Operation......................388
▫CD Player...........................388
!CD/DVD DISC MAINTENANCE...........389
302 UNDERSTANDING YOUR INSTRUMENT PANEL
Page 311 of 664
approximately one minute and then remain continuously
illuminated. This sequence will continue upon subse-
quent vehicle start-ups as long as the malfunction exists.
When the malfunction indicator is illuminated, the sys-
tem may not be able to detect or signal low tire pressure
as intended. TPMS malfunctions may occur for a variety
of reasons, including the installation of replacement or
alternate tires or wheels on the vehicle that prevent the
TPMS from functioning properly. Always check the
TPMS malfunction telltale after replacing one or more
tires or wheels on your vehicle, to ensure that the
replacement or alternate tires and wheels allow the TPMS
to continue to function properly.
CAUTION!
The TPMS has been optimized for the original
equipment tires and wheels. TPMS pressures and
(Continued)
CAUTION!(Continued)
warning have been established for the tire size
equipped on your vehicle. Undesirable system opera-
tion or sensor damage may result when using re-
placement equipment that is not of the same size,
type, and/or style. Aftermarket wheels can cause
sensor damage. Do not use tire sealant from a can or
balance beads if your vehicle is equipped with a
TPMS, as damage to the sensors may result.
3. Turn Signal Indicators
The arrow will flash with the exterior turn
signal when the turn signal lever is operated.
If the vehicle electronics sense that the vehicle
is driven more than 1 mile (1.6 km) with either turn signal
on, a continuous chime will sound to alert you to turn the
signals off. If either indicator flashes at a rapid rate, check
for a defective outside light bulb.
4
UNDERSTANDING YOUR INSTRUMENT PANEL 309
Page 324 of 664
•Unstored Messages Until RUN
These messages deal primarily with the Remote Start
feature. This message type is displayed until the ignition
is in the RUN state. Examples of this message type are
#Remote Start Aborted - Door Ajar#and#Press Brake
Pedal and Push Button to Start#.
•Five Second Unstored Messages
When the appropriate conditions occur, this type of
message takes control of the main display area for five
seconds and then returns to the previous screen. An
example of this message type is#Automatic High Beams
On#.
Two Button EVIC — If Equipped
This system allows the driver to select a variety of useful
information by pushing the switches mounted on the
steering wheel. The EVIC consists of the following:
•Odometer
•Digital Vehicle Speed
•Trip
•Range To Empty
•Average Fuel Economy
•Current Fuel Economy
•Stored Messages
•Oil Life
322 UNDERSTANDING YOUR INSTRUMENT PANEL
Page 325 of 664
•Settings
•Units
•Language
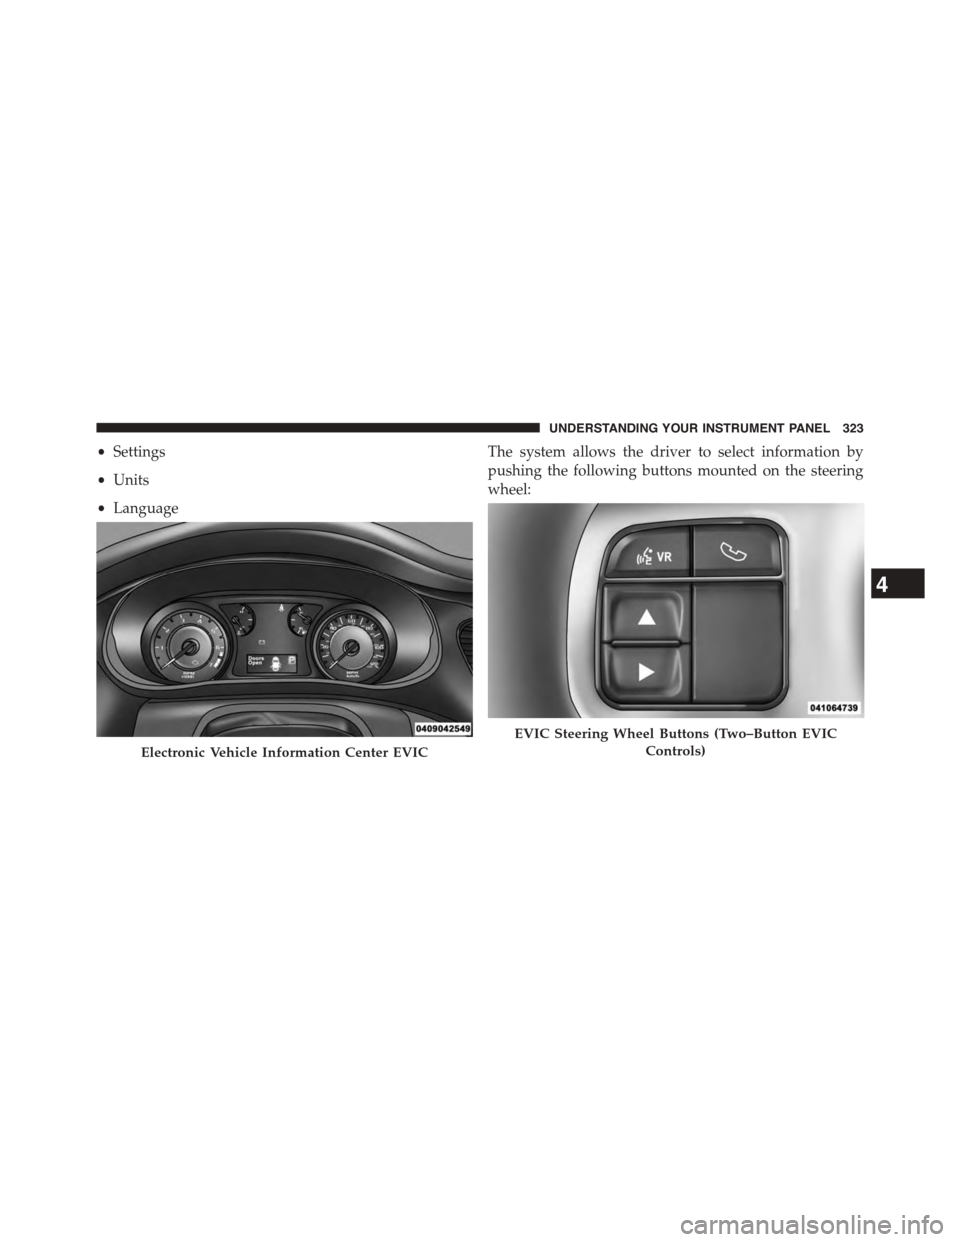
The system allows the driver to select information by
pushing the following buttons mounted on the steering
wheel:
Electronic Vehicle Information Center EVIC
EVIC Steering Wheel Buttons (Two–Button EVIC
Controls)
4
UNDERSTANDING YOUR INSTRUMENT PANEL 323
Page 335 of 664
and then returns to the previous screen. An example of this
message type is#Automatic High Beams On#.
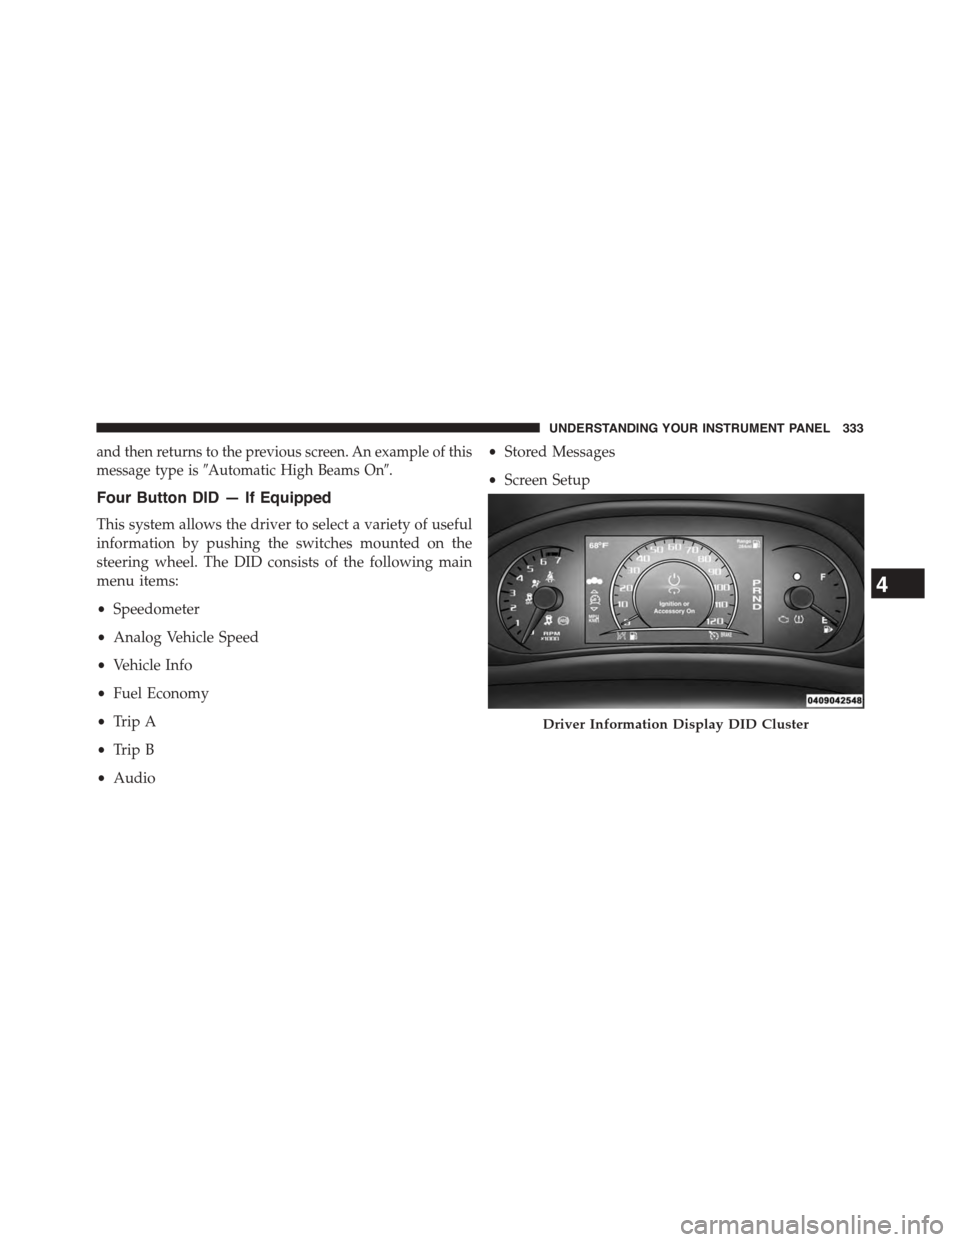
Four Button DID — If Equipped
This system allows the driver to select a variety of useful
information by pushing the switches mounted on the
steering wheel. The DID consists of the following main
menu items:
•Speedometer
•Analog Vehicle Speed
•Vehicle Info
•Fuel Economy
•Trip A
•Trip B
•Audio
•Stored Messages
•Screen Setup
Driver Information Display DID Cluster
4
UNDERSTANDING YOUR INSTRUMENT PANEL 333
Page 336 of 664
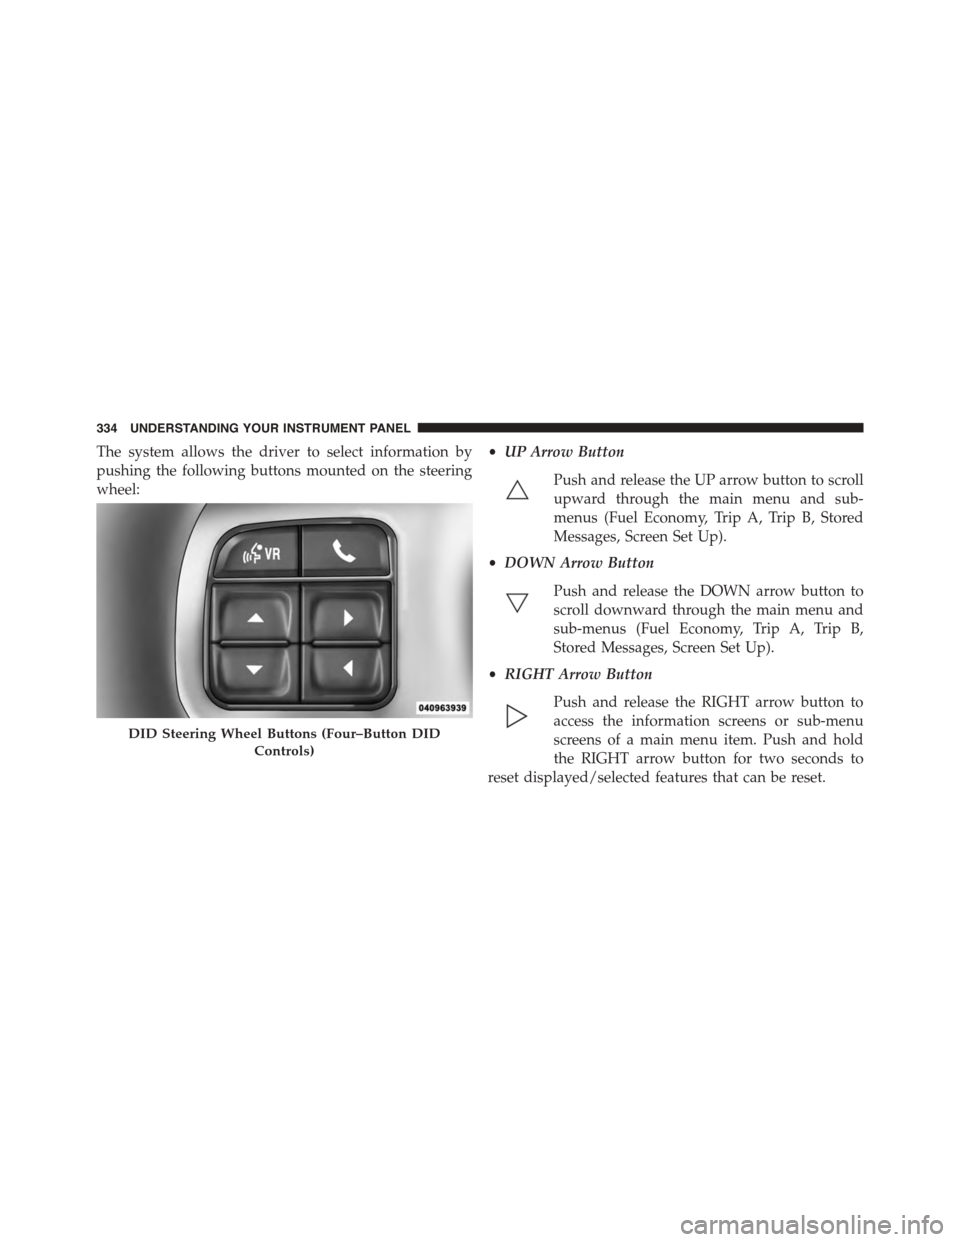
The system allows the driver to select information by
pushing the following buttons mounted on the steering
wheel:
•UP Arrow Button
Push and release the UP arrow button to scroll
upward through the main menu and sub-
menus (Fuel Economy, Trip A, Trip B, Stored
Messages, Screen Set Up).
•DOWN Arrow Button
Push and release the DOWN arrow button to
scroll downward through the main menu and
sub-menus (Fuel Economy, Trip A, Trip B,
Stored Messages, Screen Set Up).
•RIGHT Arrow Button
Push and release the RIGHT arrow button to
access the information screens or sub-menu
screens of a main menu item. Push and hold
the RIGHT arrow button for two seconds to
reset displayed/selected features that can be reset.
DID Steering Wheel Buttons (Four–Button DID
Controls)
334 UNDERSTANDING YOUR INSTRUMENT PANEL
Page 364 of 664
Auto-On Comfort & Remote Start
After pressing the Auto-On Comfort & Remote Start
button on the touchscreen the following settings will be
available.
•Horn With Remote Start
When this feature is selected, the horn will sound when
the remote start is activated. To make your selection,
press the Sound Horn With Remote Start button on the
touchscreen, until a check-mark appears next to setting,
showing that setting has been selected. Press the back
arrow button on the touchscreen to return to the previous
menu.
•Auto-On Driver Heated Seat & Steering Wheel With
Vehicle Start — If Equipped
When this feature is selected the driver’s heated seat and
heated steering wheel will automatically turn on when
temperatures are below 40° F (4.4° C). To make your
selection, press the Auto Heated Seats button on the
touchscreen, until a check-mark appears next to setting,
showing that setting has been selected. Press the back
arrow button on the touchscreen to return to the previous
menu.
Engine Off Options
After pressing the “Engine Off Options” button on the
touchscreen the following settings will be available.
•Engine Off Power Delay
When this feature is selected, the power window
switches, radio, Uconnect® system (if equipped), DVD
video system (if equipped), power sunroof (if equipped),
and power outlets will remain active for up to 10 minutes
after the ignition is cycled to OFF. Opening either front
door will cancel this feature. To change the Engine Off
Power Delay status press the “0 seconds,” “45 seconds,#
“5 minutes” or “10 minutes” button on the touchscreen.
Then press the back arrow button on the touchscreen.
362 UNDERSTANDING YOUR INSTRUMENT PANEL