ignition DODGE HORNET 2023 User Guide
[x] Cancel search | Manufacturer: DODGE, Model Year: 2023, Model line: HORNET, Model: DODGE HORNET 2023Pages: 288, PDF Size: 14.2 MB
Page 23 of 288
GETTING TO KNOW YOUR VEHICLE21
TO DISARM THE SYSTEM
The Vehicle Security system can be disarmed using any of
the following methods:
Push the unlock button on the key fob.
Grab the Passive Entry door handle to unlock the door
Úpage 23.
Cycle the ignition out of the OFF position to disarm the
system.
NOTE:
The driver's door key cylinder and liftgate button on the
key fob cannot arm or disarm the Vehicle Security
system. Use of the door key cylinder when the system
is armed will sound the alarm when the door is opened.
If the door is unlocked using the emergency key in the
driver’s door key cylinder when the alarm is active, the
alarm will not deactivate and will sound. The alarm can
then be disarmed by placing the ignition in the ON/RUN
position, or pushing the unlock button in the key fob.
The Vehicle Security system is designed to protect your
vehicle. However, you can create conditions where the
system will give you a false alarm. If one of the previously
described arming sequences has occurred, the Vehicle
Security system will arm regardless of whether you are in
the vehicle or not. If you remain in the vehicle and open a
door, the alarm will sound. If this occurs, disarm the
Vehicle Security system. If the Vehicle Security system is armed and the battery
becomes disconnected, the Vehicle Security system will
remain armed when the battery is reconnected; the
exterior lights will flash, and the horn will sound. If this
occurs, disarm the Vehicle Security system.
NOTE:The alarm does not turn off when the doors are unlocked
by inserting the blade of the emergency key (found inside
the key fob) into the door handle lock cylinder.
Disabling The System
To completely disable the system (e.g. during a lengthy
period of car inactivity), close the doors by turning the
emergency key in the door lock.
NOTE:If the key fob batteries become depleted, or the system
fails, the system can be switched off by cycling the ignition
out of the OFF position. Manually open the doors by
inserting the emergency key into the door lock cylinder,
and then place the key fob in the cupholder.
VOLUMETRIC/ANTI-LIFT PROTECTION —
I
F EQUIPPED
To ensure the correct operation of the Volumetric/Anti-Lift
Protection system, completely close the side windows and
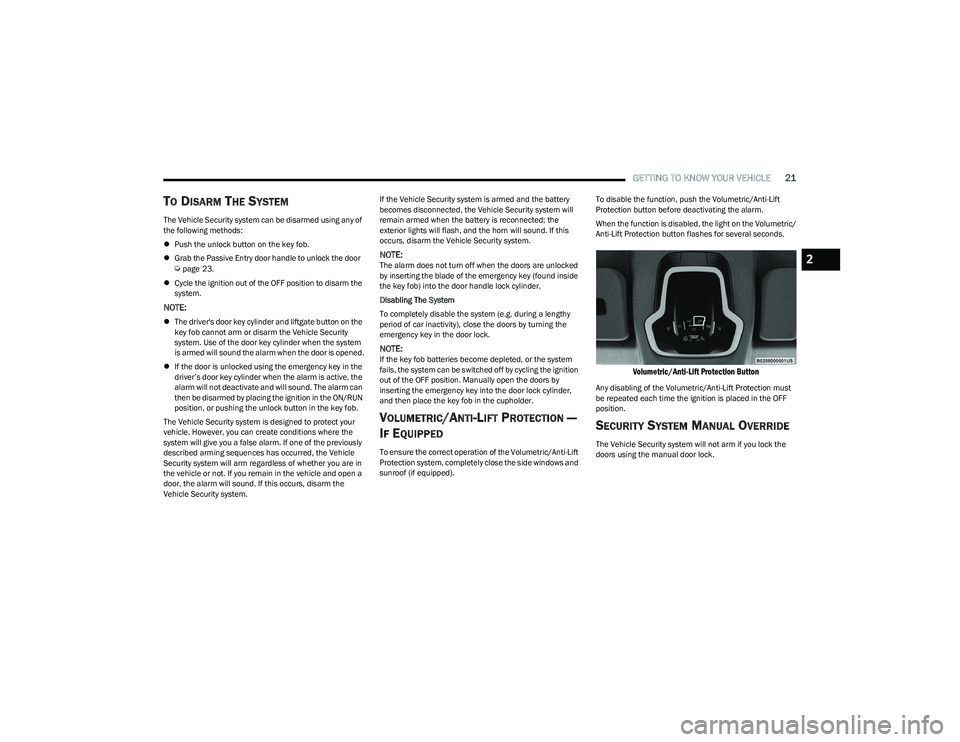
sunroof (if equipped). To disable the function, push the Volumetric/Anti-Lift
Protection button before deactivating the alarm.
When the function is disabled, the light on the Volumetric/
Anti-Lift Protection button flashes for several seconds.
Volumetric/Anti-Lift Protection Button
Any disabling of the Volumetric/Anti-Lift Protection must
be repeated each time the ignition is placed in the OFF
position.
SECURITY SYSTEM MANUAL OVERRIDE
The Vehicle Security system will not arm if you lock the
doors using the manual door lock.
2
23_GG_OM_EN_USC_t.book Page 21
Page 24 of 288
22GETTING TO KNOW YOUR VEHICLE
(Continued)
DOORS
MANUAL DOOR LOCKS
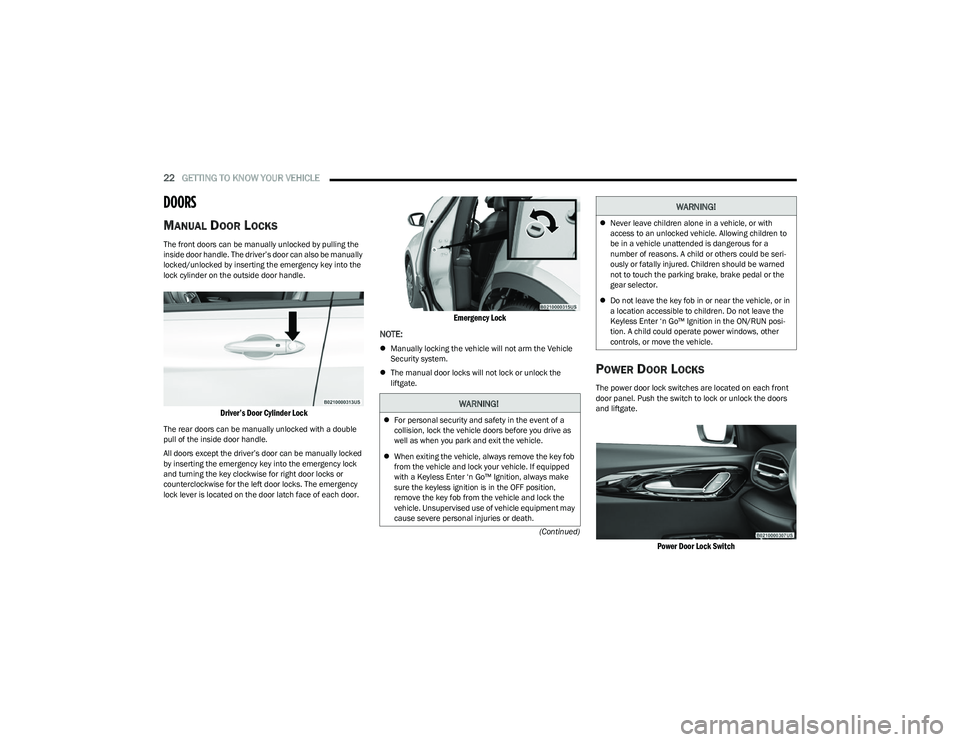
The front doors can be manually unlocked by pulling the
inside door handle. The driver’s door can also be manually
locked/unlocked by inserting the emergency key into the
lock cylinder on the outside door handle.
Driver’s Door Cylinder Lock
The rear doors can be manually unlocked with a double
pull of the inside door handle.
All doors except the driver’s door can be manually locked
by inserting the emergency key into the emergency lock
and turning the key clockwise for right door locks or
counterclockwise for the left door locks. The emergency
lock lever is located on the door latch face of each door.
Emergency Lock
NOTE:
Manually locking the vehicle will not arm the Vehicle
Security system.
The manual door locks will not lock or unlock the
liftgate.
POWER DOOR LOCKS
The power door lock switches are located on each front
door panel. Push the switch to lock or unlock the doors
and liftgate.
Power Door Lock Switch
WARNING!
For personal security and safety in the event of a
collision, lock the vehicle doors before you drive as
well as when you park and exit the vehicle.
When exiting the vehicle, always remove the key fob
from the vehicle and lock your vehicle. If equipped
with a Keyless Enter ‘n Go™ Ignition, always make
sure the keyless ignition is in the OFF position,
remove the key fob from the vehicle and lock the
vehicle. Unsupervised use of vehicle equipment may
cause severe personal injuries or death.
Never leave children alone in a vehicle, or with
access to an unlocked vehicle. Allowing children to
be in a vehicle unattended is dangerous for a
number of reasons. A child or others could be seri -
ously or fatally injured. Children should be warned
not to touch the parking brake, brake pedal or the
gear selector.
Do not leave the key fob in or near the vehicle, or in
a location accessible to children. Do not leave the
Keyless Enter ‘n Go™ Ignition in the ON/RUN posi -
tion. A child could operate power windows, other
controls, or move the vehicle.
WARNING!
23_GG_OM_EN_USC_t.book Page 22
Page 25 of 288
GETTING TO KNOW YOUR VEHICLE23
If you push the power door lock switch while the ignition is
in the ON/RUN position, and any door or the liftgate is
open, the power locks will not operate. This prevents you
from accidentally locking the key fob in the vehicle.
Placing the ignition in the OFF position or closing the doors
and liftgate will allow the locks to operate.
KEYLESS ENTER ‘N GO™ — PASSIVE
E
NTRY
The Passive Entry system is an enhancement to the
vehicle’s Remote Keyless Entry system and a feature of
Keyless Enter ‘n Go™ — Passive Entry. This feature allows
you to lock and unlock the vehicle’s door(s) without having
to push the key fob lock or unlock buttons.
NOTE:
Passive Entry may be programmed on/off through
Uconnect Settings Úpage 130.
The key fob may not detect the Passive Entry system if
it is located next to a mobile phone, laptop or other
electronic device; these devices may block the key
fob’s wireless signal and prevent the Passive Entry
system from locking and unlocking the vehicle.
If wearing gloves, if it has been raining/snowing, or
there is salt/dirt covering the Passive Entry door
handle, the unlock sensitivity can be affected, resulting
in a slower response time.
The doors may unlock when water is sprayed on the
Passive Entry door handles, if the key fob is located
outside of the vehicle within 5 ft (1.5 m) of the handle.
If the vehicle is unlocked by Passive Entry and no door
is opened within 60 seconds, the vehicle will relock
and, will arm the Vehicle Security system (if equipped). To Unlock From The Driver's Side Or Passenger’s Side
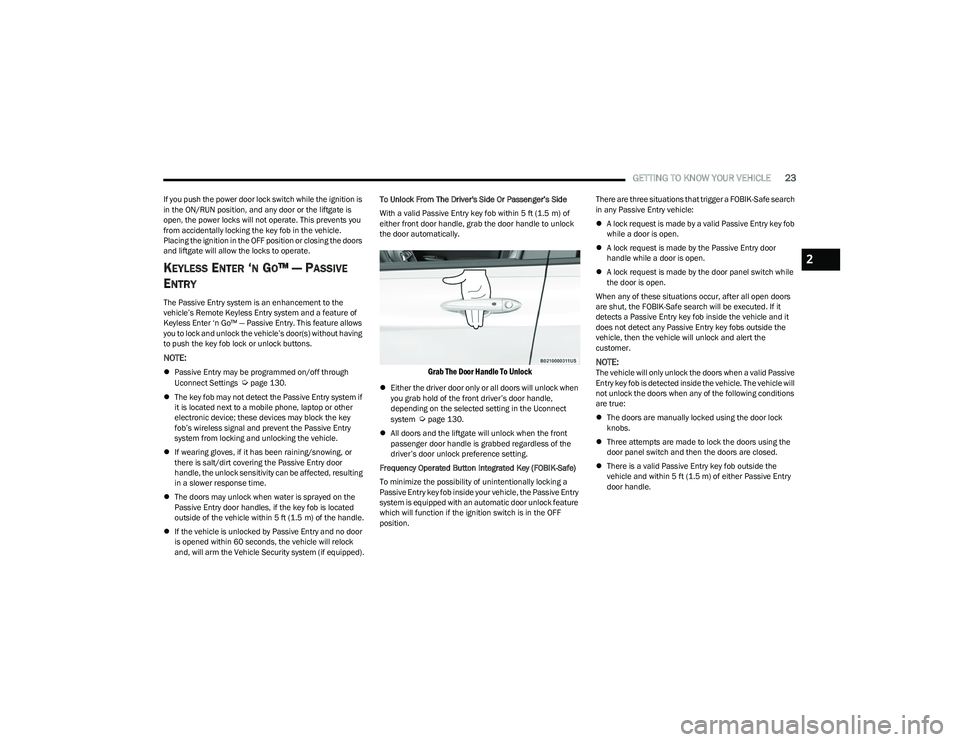
With a valid Passive Entry key fob within 5 ft (1.5 m) of
either front door handle, grab the door handle to unlock
the door automatically.
Grab The Door Handle To Unlock
Either the driver door only or all doors will unlock when
you grab hold of the front driver’s door handle,
depending on the selected setting in the Uconnect
system
Úpage 130.
All doors and the liftgate will unlock when the front
passenger door handle is grabbed regardless of the
driver’s door unlock preference setting.
Frequency Operated Button Integrated Key (FOBIK-Safe)
To minimize the possibility of unintentionally locking a
Passive Entry key fob inside your vehicle, the Passive Entry
system is equipped with an automatic door unlock feature
which will function if the ignition switch is in the OFF
position. There are three situations that trigger a FOBIK-Safe search
in any Passive Entry vehicle:
A lock request is made by a valid Passive Entry key fob
while a door is open.
A lock request is made by the Passive Entry door
handle while a door is open.
A lock request is made by the door panel switch while
the door is open.
When any of these situations occur, after all open doors
are shut, the FOBIK-Safe search will be executed. If it
detects a Passive Entry key fob inside the vehicle and it
does not detect any Passive Entry key fobs outside the
vehicle, then the vehicle will unlock and alert the
customer.
NOTE:The vehicle will only unlock the doors when a valid Passive
Entry key fob is detected inside the vehicle. The vehicle will
not unlock the doors when any of the following conditions
are true:
The doors are manually locked using the door lock
knobs.
Three attempts are made to lock the doors using the
door panel switch and then the doors are closed.
There is a valid Passive Entry key fob outside the
vehicle and within 5 ft (1.5 m) of either Passive Entry
door handle.
2
23_GG_OM_EN_USC_t.book Page 23
Page 27 of 288
GETTING TO KNOW YOUR VEHICLE25
To Lock The Liftgate
With a valid Passive Entry key fob within 5 ft (1.5 m) of the
liftgate, push the Passive Entry lock button located on the
outside liftgate door handle.
NOTE:The liftgate Passive Entry lock button will lock all doors
and the liftgate Úpage 275.
AUTOMATIC DOOR LOCKS —
I
F EQUIPPED
When enabled, the door locks will lock automatically when
the vehicle's speed exceeds 12 mph (20 km/h). The auto
door lock feature is enabled or disabled within the
Uconnect system
Úpage 130.
AUTOMATIC UNLOCK DOORS ON EXIT
The doors will unlock automatically on vehicles with power
door locks if:
1. The Automatic Unlock Doors On Exit feature is
enabled.
2. All doors are closed.
3. The gear selector was not in PARK, then is placed in PARK.
4. Any door is opened.
DEAD LOCK DEVICE — IF EQUIPPED
The Dead Lock Device is a safety device that prevents the
use of the internal door handles of the vehicle and the
power door lock switch. This device prevents the doors
from opening within the passenger compartment.
The device works on all doors.
Arming The Device
The device is armed after two pushes of the lock button
on the key fob
For vehicles equipped with Passive Entry, the device
will also work by pushing the lock button on the driver’s
or passenger’s side exterior door handle
The arming of the device is indicated by three flashes of
the turn signals.
NOTE:The device does not operate if one or more doors are not
properly closed.
Disarming The Device
The device will automatically disarm by pushing the
unlock button on the key fob
By placing the ignition in the ON/RUN position
For vehicles equipped with Passive Entry, the device
will also disarm by using the driver’s or passenger’s
Passive Entry door handle to unlock and open the door
CHILD-PROTECTION DOOR LOCK
S
YSTEM — REAR DOORS
To provide a safer environment for small children riding in
the rear seats, the rear doors are equipped with a
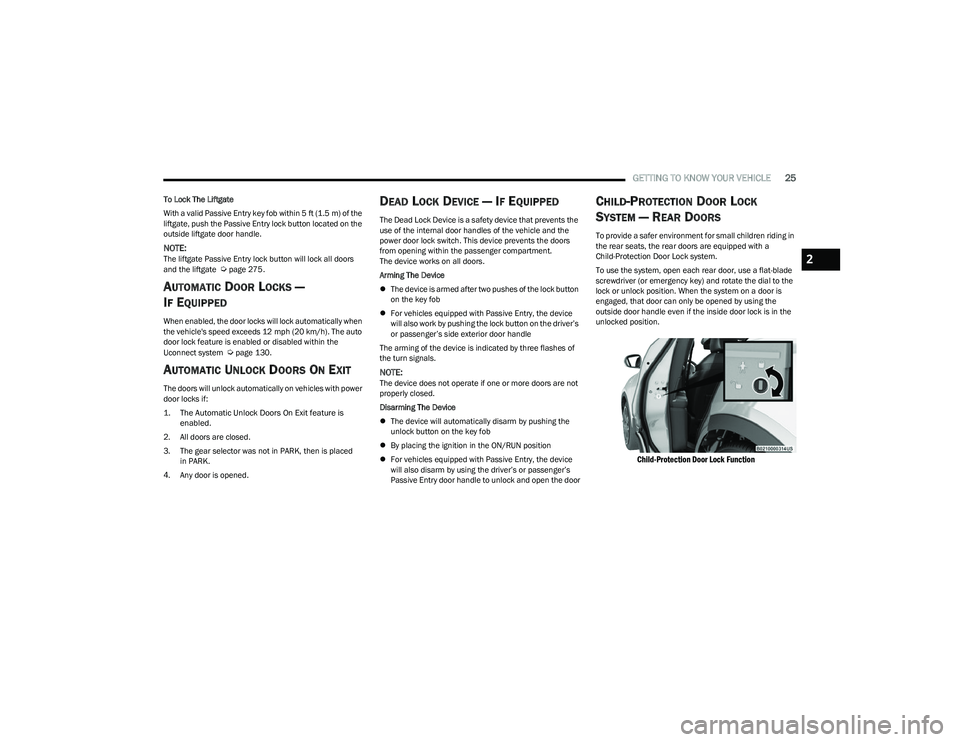
Child-Protection Door Lock system.
To use the system, open each rear door, use a flat-blade
screwdriver (or emergency key) and rotate the dial to the
lock or unlock position. When the system on a door is
engaged, that door can only be opened by using the
outside door handle even if the inside door lock is in the
unlocked position.
Child-Protection Door Lock Function
2
23_GG_OM_EN_USC_t.book Page 25
Page 29 of 288
GETTING TO KNOW YOUR VEHICLE27
For information on use with the Remote Start system, see Úpage 19.
DRIVER MEMORY SETTINGS — IF EQUIPPED
This feature allows the driver to save up to two different
memory profiles for easy recall through a memory switch.
Each memory profile saves desired position settings for
the following features:
Driver seat position
A set of desired radio station presets
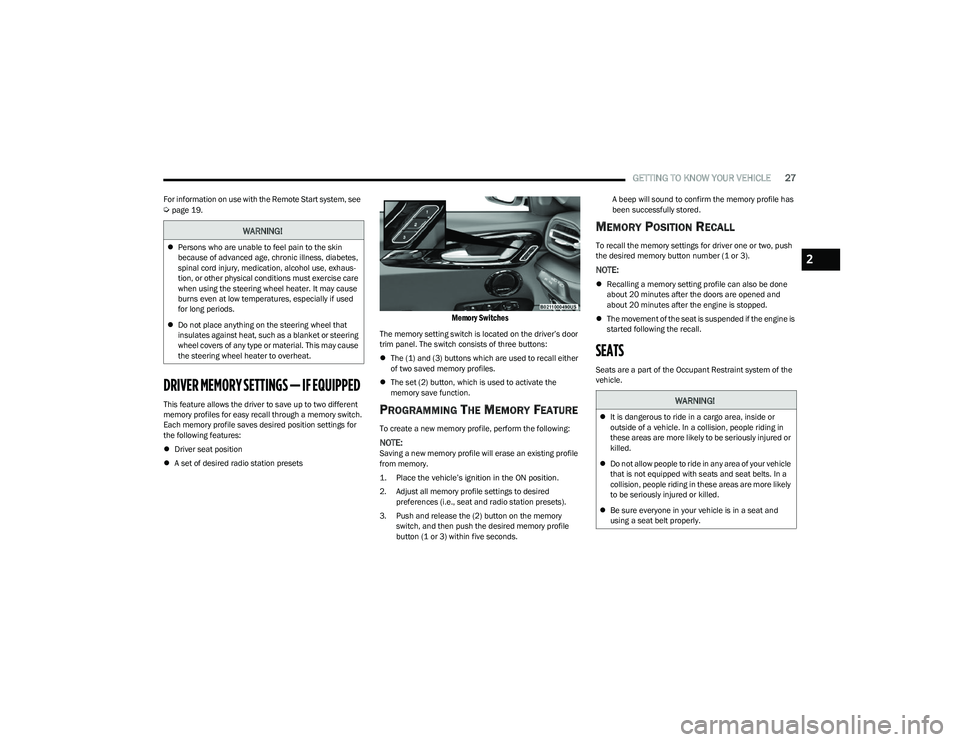
Memory Switches
The memory setting switch is located on the driver’s door
trim panel. The switch consists of three buttons:
The (1) and (3) buttons which are used to recall either
of two saved memory profiles.
The set (2) button, which is used to activate the
memory save function.
PROGRAMMING THE MEMORY FEATURE
To create a new memory profile, perform the following:
NOTE:Saving a new memory profile will erase an existing profile
from memory.
1. Place the vehicle’s ignition in the ON position.
2. Adjust all memory profile settings to desired
preferences (i.e., seat and radio station presets).
3. Push and release the (2) button on the memory switch, and then push the desired memory profile
button (1 or 3) within five seconds. A beep will sound to confirm the memory profile has
been successfully stored.
MEMORY POSITION RECALL
To recall the memory settings for driver one or two, push
the desired memory button number (1 or 3).
NOTE:
Recalling a memory setting profile can also be done
about 20 minutes after the doors are opened and
about 20 minutes after the engine is stopped.
The movement of the seat is suspended if the engine is
started following the recall.
SEATS
Seats are a part of the Occupant Restraint system of the
vehicle.
WARNING!
Persons who are unable to feel pain to the skin
because of advanced age, chronic illness, diabetes,
spinal cord injury, medication, alcohol use, exhaus -
tion, or other physical conditions must exercise care
when using the steering wheel heater. It may cause
burns even at low temperatures, especially if used
for long periods.
Do not place anything on the steering wheel that
insulates against heat, such as a blanket or steering
wheel covers of any type or material. This may cause
the steering wheel heater to overheat.
WARNING!
It is dangerous to ride in a cargo area, inside or
outside of a vehicle. In a collision, people riding in
these areas are more likely to be seriously injured or
killed.
Do not allow people to ride in any area of your vehicle
that is not equipped with seats and seat belts. In a
collision, people riding in these areas are more likely
to be seriously injured or killed.
Be sure everyone in your vehicle is in a seat and
using a seat belt properly.
2
23_GG_OM_EN_USC_t.book Page 27
Page 37 of 288
GETTING TO KNOW YOUR VEHICLE35
OUTSIDE MIRRORS
The outside mirror(s) can be adjusted to the center of the
adjacent lane of traffic to achieve the optimal view.
NOTE:The passenger side convex outside mirror will give a much
wider view to the rear, and especially of the lane next to
your vehicle.
POWER ADJUSTMENT MIRRORS
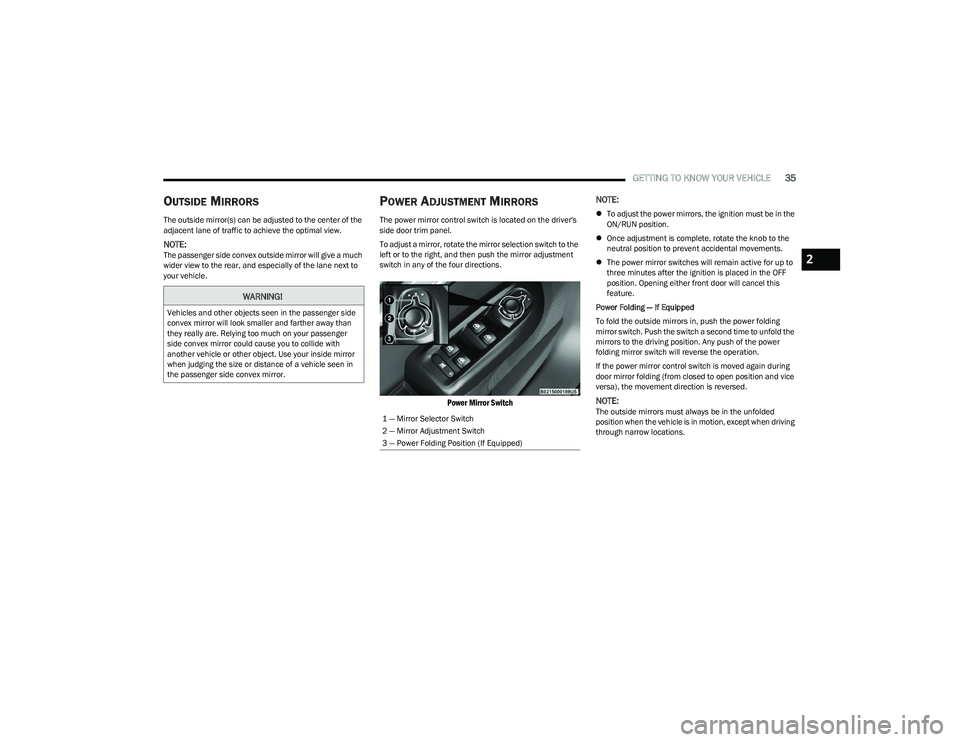
The power mirror control switch is located on the driver's
side door trim panel.
To adjust a mirror, rotate the mirror selection switch to the
left or to the right, and then push the mirror adjustment
switch in any of the four directions.
Power Mirror Switch
NOTE:
To adjust the power mirrors, the ignition must be in the
ON/RUN position.
Once adjustment is complete, rotate the knob to the
neutral position to prevent accidental movements.
The power mirror switches will remain active for up to
three minutes after the ignition is placed in the OFF
position. Opening either front door will cancel this
feature.
Power Folding — If Equipped
To fold the outside mirrors in, push the power folding
mirror switch. Push the switch a second time to unfold the
mirrors to the driving position. Any push of the power
folding mirror switch will reverse the operation.
If the power mirror control switch is moved again during
door mirror folding (from closed to open position and vice
versa), the movement direction is reversed.
NOTE:The outside mirrors must always be in the unfolded
position when the vehicle is in motion, except when driving
through narrow locations.
WARNING!
Vehicles and other objects seen in the passenger side
convex mirror will look smaller and farther away than
they really are. Relying too much on your passenger
side convex mirror could cause you to collide with
another vehicle or other object. Use your inside mirror
when judging the size or distance of a vehicle seen in
the passenger side convex mirror.
1 — Mirror Selector Switch
2 — Mirror Adjustment Switch
3 — Power Folding Position (If Equipped)
2
23_GG_OM_EN_USC_t.book Page 35
Page 39 of 288
GETTING TO KNOW YOUR VEHICLE37
ERASING ALL THE HOMELINK®
C
HANNELS
To erase the channels, follow this procedure:
1. Place the ignition switch in the ON/RUN position.
2. Push and hold the two outside HomeLink® buttons
(I and III) for up to 20 seconds, or until the
HomeLink® indicator light flashes.
NOTE:Erasing all channels should only be performed when
programming HomeLink® for the first time. Do not erase
channels when programming additional buttons.
IDENTIFYING WHETHER YOU HAVE A
R
OLLING CODE OR NON-ROLLING CODE
D
EVICE
Before programming a device to one of your HomeLink®
buttons, you must determine whether the device has a
rolling code or non-rolling code.
Rolling Code Devices
To determine if your device has a rolling code, a good
indicator is its manufacturing date. Typically, devices
manufactured after 1995 have rolling codes. A device with
a rolling code will also have a “LEARN” or “TRAIN” button
located where the antenna is attached to the device. The
button may not be immediately visible when looking at the
device. The name and color of the button may vary slightly
by manufacturer.
NOTE:The “LEARN” or “TRAIN” button is not the button you
normally use to operate the device.
Non-rolling Code Devices
Most devices manufactured before 1995 will not have a
rolling code. These devices will also not have a “LEARN” or
“TRAIN” button.
PROGRAMMING HOMELINK® TO A
G
ARAGE DOOR OPENER
To program any of the HomeLink® buttons to activate your
garage door opener motor, proceed as follows:
NOTE:All HomeLink® buttons are programmed using this
procedure. You do not need to erase all channels when
programming additional buttons.
1. Place the ignition switch in the ON/RUN position.
2. Place the garage door opener transmitter 1 to
3 inches (3 to 8 cm) away from the HomeLink®
button you wish to program, while keeping the
HomeLink® indicator light in view.
3. Push and hold the HomeLink® button you want to program while you push and hold the garage door
opener transmitter button you are trying to replicate. 4. Continue to hold both buttons and observe the
HomeLink® indicator light. The HomeLink® indicator
light will flash slowly and then rapidly. Once this
happens, release both buttons.
NOTE:Make sure the garage door opener motor is plugged in
before moving on to the rolling code/non-rolling code final
steps.
Rolling Code Garage Door Opener Final Steps
NOTE:You have 30 seconds in which to initiate rolling code final
step 2, after completing rolling code final step 1.
1. At the garage door opener motor (in the garage), locate the “LEARN” or “TRAIN” button. This can
usually be found where the hanging antenna wire is
attached to the garage door opener motor. Firmly
push and release the “LEARN” or “TRAIN” button.
2. Return to the vehicle and push the programmed HomeLink® button three times (holding the button
for two seconds each time). If the garage door opener
motor operates, programming is complete.
3. Push the programmed HomeLink® button to confirm that the garage door opener motor operates. If the
garage door opener motor does not operate, repeat
the final steps for the rolling code procedure.
2
23_GG_OM_EN_USC_t.book Page 37
Page 40 of 288
38GETTING TO KNOW YOUR VEHICLE
Non-Rolling Code Garage Door Opener Final Steps
1. Push and hold the programmed HomeLink® button
and observe the HomeLink® indicator light. If the
HomeLink® indicator light stays on constantly,
programming is complete.
2. Push the programmed HomeLink® button to confirm that the garage door opener motor operates. If the
garage door opener motor does not operate, repeat
the steps from the beginning.PROGRAMMING HOMELINK® TO A
M
ISCELLANEOUS DEVICE
The procedure on how to program HomeLink® to a
miscellaneous device follows the same procedure as
programming to a garage door opener
Úpage 130.
Be sure to determine if the device has a rolling code, or
non-rolling code before beginning the programming
process.
NOTE:Canadian Radio Frequency (RF) laws require transmitter
signals to time-out (or quit) after several seconds of trans -
mission, which may not be long enough for HomeLink® to
pick up the signal during programming. Similar to this
Canadian law, some U.S. gate operators are designed to
time-out in the same manner. The procedure may need to
be performed multiple times to successfully pair the
device to your HomeLink® buttons.
REPROGRAMMING A SINGLE
H
OMELINK® BUTTON
To reprogram a single HomeLink® button that has been
previously trained, without erasing all the channels,
proceed as follows. Be sure to determine whether the new
device you want to program the HomeLink® button to has
a rolling code, or non-rolling code.
1. Place the ignition in the ON/RUN position, without
starting the engine.
2. Push and hold the desired HomeLink® button until
the HomeLink® indicator light begins to flash after
20 seconds. Do not release the button.
3. Without releasing the button , proceed with Step 2 in
“Programming HomeLink® To A Garage Door
Opener” and follow all remaining steps.
CANADIAN/GATE OPERATOR
P
ROGRAMMING
For programming transmitters in Canada/United States
that require the transmitter signals to “time-out” after
several seconds of transmission:
Canadian Radio Frequency (RF) laws require transmitter
signals to time-out (or quit) after several seconds of
transmission, which may not be long enough for
HomeLink® to pick up the signal during programming.
Similar to this Canadian law, some U.S. gate operators are
designed to time-out in the same manner.
It may be helpful to unplug the device during the cycling
process to prevent possible overheating of the garage
door or gate motor.
1. Place the ignition in the ON/RUN position.
NOTE:For vehicles equipped with Keyless Enter ‘n Go™, place
the ignition in the RUN position. Make sure while
programming HomeLink® with the engine on that your
vehicle is outside of your garage, or that the garage door
remains open at all times.
WARNING!
Your motorized door or gate will open and close while
you are programming the universal transmitter. Do
not program the transmitter if people or pets are in
the path of the door or gate.
Do not run your vehicle in a closed garage or
confined area while programming the transmitter.
Exhaust gas from your vehicle contains carbon
monoxide (CO) which is odorless and colorless.
Carbon monoxide is poisonous when inhaled and
can cause you and others to be severely injured
or killed.
23_GG_OM_EN_USC_t.book Page 38
Page 41 of 288
GETTING TO KNOW YOUR VEHICLE39
2. Place the hand-held transmitter 1 to 3 inches
(3 to 8 cm) away from the HomeLink® button you
wish to program while keeping the HomeLink®
indicator light in view.
3. Continue to push and hold the HomeLink® button while you push and release (cycle) your hand-held
transmitter every two seconds until HomeLink® has
successfully accepted the frequency signal. The
indicator light will flash slowly and then rapidly when
fully trained.
4. Watch for the HomeLink® indicator to change flash rates. When it changes, it is programmed. It may take
up to 30 seconds or longer in rare cases. The garage
door may open and close while you are programming.
5. Push and hold the programmed HomeLink® button and observe the indicator light.
NOTE:
If the indicator light stays on constantly, program -
ming is complete and the garage door/device
should activate when the HomeLink® button is
pushed.
To program the two remaining HomeLink®
buttons, repeat each step for each remaining
button. DO NOT erase the channels.
If you unplugged the garage door opener/device for
programming, plug it back in at this time. Reprogramming A Single HomeLink® Button (Canadian/
Gate Operator)
To reprogram a channel that has been previously trained,
follow these steps:
1. Place the ignition in the ON/RUN position.
2. Press and hold the desired HomeLink® button until
the indicator light begins to flash after 20 seconds.
Do not release the button.
3. Without releasing the button, proceed with “Canadian/Gate Operator Programming” Step 2 and
follow all remaining steps.
SECURITY
It is advised to erase all channels before you sell or turn in
your vehicle.
To do this, push and hold the two outside buttons for
20 seconds until the indicator flashes. Note that all
channels will be erased. Individual channels cannot be
erased.
The HomeLink® universal transmitter is disabled when
the Vehicle Security system is active.
TROUBLESHOOTING TIPS
If you are having trouble programming HomeLink®, here
are some of the most common solutions:
Replace the battery in the garage door opener
hand-held transmitter.
Push the LEARN button on the garage door opener to
complete the training for a rolling code.
Did you unplug the device for programming and
remember to plug it back in?
If you have any problems, or require assistance, please
call toll-free 1-800-355-3515 or on the Internet at
HomeLink.com for information or assistance.
WARNING!
Vehicle exhaust contains carbon monoxide, a
dangerous gas. Do not run your vehicle in the garage
while programming the transmitter. Exhaust gas can
cause serious injury or death.
Your motorized door or gate will open and close while
you are programming the universal transmitter. Do
not program the transmitter if people, pets or other
objects are in the path of the door or gate. Only use
this transmitter with a garage door opener that has a
“stop and reverse” feature as required by Federal
safety standards. This includes most garage door
opener models manufactured after 1982. Do not use
a garage door opener without these safety features.
2
23_GG_OM_EN_USC_t.book Page 39
Page 42 of 288
40GETTING TO KNOW YOUR VEHICLE
EXTERIOR LIGHTS
MULTIFUNCTION LEVER
Multifunction Lever
The multifunction lever controls the operation of the
turn signals, headlight beam selection and passing lights.
The multifunction lever is located on the left side of the
steering column.
HEADLIGHT SWITCH
The headlight switch is located on the left side of the
instrument panel. This switch controls the operation of the
headlights, parking lights, automatic headlights (if
equipped), instrument panel lights, and interior lights.
Headlight Switch
To turn on the headlights, rotate the headlight switch
clockwise. When the headlight switch is on, the parking
lights, taillights, license plate light and instrument panel
lights are also turned on.
The headlight switch is equipped with a momentary O (off)
detent. When the vehicle is at a standstill and the
headlight switch is held in the O (off) position, the Daytime
Running Lights (DRLs) will turn on. As soon as the vehicle
starts to move, the O (off) position is disabled and the
DRLs may turn off and low beam headlights may
automatically turn on based on exterior ambient
light levels. From the O (off) position, rotate the headlight switch
clockwise to the first detent for automatic headlights, the
second detent for parking lights and instrument panel
lights operation, or to the third detent for headlights,
parking lights, and instrument panel lights operation.
DAYTIME RUNNING LIGHTS (DRLS) —
I
F EQUIPPED
The Daytime Running Lights (DRLs) (low intensity) come
on automatically whenever the ignition is placed in the
ON/RUN position, and the headlight switch is turned to the
AUTO position, and the dusk sensor detects sufficient
external light.
NOTE:On some vehicles, the Daytime Running Lights may deac -
tivate, or reduce intensity, on one side of the vehicle (when
a turn signal is activated on that side), or on both sides of
the vehicle (when the hazard warning lights are activated).
HIGH/LOW BEAM SWITCH
Push the multifunction lever towards the instrument panel
to switch the headlights to high beams. The headlight
switch must first be turned to the AUTO or on position.
The high beam indicator will illuminate in the instrument
cluster when the high beams are active.
Push the lever forward again to return to low beam
headlights.
1 — Rotate Headlight Control
2 — Instrument Panel Dimmer Control
23_GG_OM_EN_USC_t.book Page 40