ignition DODGE HORNET 2023 Owner's Manual
[x] Cancel search | Manufacturer: DODGE, Model Year: 2023, Model line: HORNET, Model: DODGE HORNET 2023Pages: 288, PDF Size: 14.2 MB
Page 43 of 288
GETTING TO KNOW YOUR VEHICLE41
AUTOMATIC HIGH BEAM HEADLAMP
C
ONTROL — IF EQUIPPED
The Automatic High Beam Headlamp Control system
provides increased forward lighting at night by automating
high beam control through the use of a digital camera
mounted on the windshield. This camera detects vehicle
specific light and automatically switches from high beams
to low beams until the approaching vehicle is out of view.
NOTE:
The Automatic High Beam Headlamp Control can be
turned on or off through Uconnect Settings.
This function can only be activated with the headlight
switch in the AUTO position.
Broken, muddy, or obstructed headlights and taillights
of vehicles in the field of view will cause headlights to
remain on longer (closer to the vehicle). Also, dirt, film,
and other obstructions on the windshield or camera
lens will cause the system to function improperly.
FLASH-TO-PASS
You can signal another vehicle with your headlights by
lightly pulling the multifunction lever toward you. This will
cause the high beam headlights to turn on, and remain on,
until the lever is released.
AUTOMATIC HEADLIGHTS — IF EQUIPPED
This system automatically turns the headlights
on or off according to ambient light levels. To
turn the system on, rotate the headlight switch
clockwise to the AUTO position.
When the system is on, the headlight time delay feature is
also on. This means the headlights will stay on for up to
90 seconds after you place the ignition into the OFF
position. To turn the automatic system off, move the
headlight switch out of the AUTO position.
NOTE:The engine must be running before the headlights will
come on in the automatic mode.
HEADLIGHTS ON AUTOMATICALLY WITH
W
IPERS — IF EQUIPPED
If your vehicle is equipped with Automatic Headlights, it
also has this customer-programmable feature. When your
headlights are in the automatic mode and the engine is
running, they will automatically turn on when the wiper
system is on. This feature is programmable through the
Uconnect system.
NOTE:When your headlights come on during the daytime, the
vehicle will monitor outside brightness and decide if the
instrument panel needs to be dimmed.
HEADLIGHT DELAY
To aid in your exit, your vehicle is equipped with a
headlight delay that will leave the headlights on for
approximately 90 seconds. This delay is initiated when the
ignition is placed in the OFF position while the headlight
switch is on, and then the headlight switch is cycled off.
Headlight delay can be canceled by either turning the
headlight switch on then off, or by placing the ignition in
the ON/RUN position.
NOTE:The headlight delay time is programmable through
Uconnect Settings Úpage 130.
LIGHTS-ON REMINDER
If the headlights or parking lights are on after the ignition
is in the OFF position, a chime will sound to alert the driver
when the driver's door is opened.
CORNERING LIGHTS — IF EQUIPPED
The cornering lights are a feature to improve visibility at
night while turning the vehicle. When activated, a light
incorporated in the headlight assembly will illuminate on
the side of the vehicle the steering wheel is rotated, or that
the turn signal indicator is on. It can be activated through
the Uconnect system
Úpage 130.
2
23_GG_OM_EN_USC_t.book Page 41
Page 44 of 288
42GETTING TO KNOW YOUR VEHICLE
TURN SIGNALS
Move the multifunction lever up or down to activate the
turn signals. The arrows on each side of the instrument
cluster display flash to show proper operation.
Once the turn signal lever is activated, it will return to its
original position. To cancel the turn signal action, the lever
must be moved again or the turn in that direction must be
completed.
NOTE:If either light remains on and does not flash, or there is a
very fast flash rate, check for a defective outside light
bulb.
LANE CHANGE ASSIST
Lightly push the multifunction lever up or down, without
moving beyond the detent, and the turn signal will flash
three times then automatically turn off.
To turn off the flashing before the end of the cycle, move
the lever in the opposite direction until the first click
(about half way).
BATTERY SAVER FEATURE
To protect the battery, if the headlight switch is left in the
low beam or parking lights position when the ignition is
placed in the OFF position, the lights are deactivated after
eight minutes. The lights can also be turned off manually
by rotating the headlight switch to the O (off) position.
INTERIOR LIGHTS
INTERIOR COURTESY LIGHTS
Courtesy and dome lights are turned on when the front
doors are opened.
To protect the battery, the interior lights will turn off
automatically 15 minutes after the ignition is placed in the
OFF position, and no other activity in the vehicle has
occurred. This will occur if the interior lights were turned
on manually or are on because a door is open. This
includes the glove compartment light and the cargo area
light. To restore interior light operation, either place the
ignition in the ON/RUN position, or push the light switch on
and then back off.
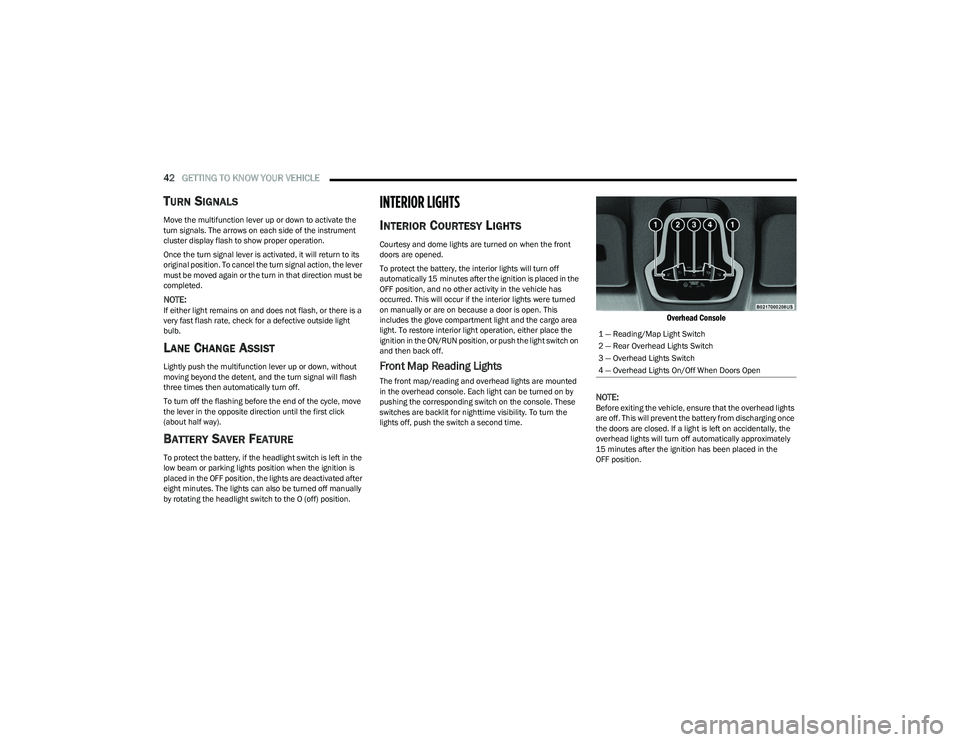
Front Map Reading Lights
The front map/reading and overhead lights are mounted
in the overhead console. Each light can be turned on by
pushing the corresponding switch on the console. These
switches are backlit for nighttime visibility. To turn the
lights off, push the switch a second time.
Overhead Console
NOTE:
Before exiting the vehicle, ensure that the overhead lights
are off. This will prevent the battery from discharging once
the doors are closed. If a light is left on accidentally, the
overhead lights will turn off automatically approximately
15 minutes after the ignition has been placed in the
OFF position. 1 — Reading/Map Light Switch
2 — Rear Overhead Lights Switch
3 — Overhead Lights Switch
4 — Overhead Lights On/Off When Doors Open
23_GG_OM_EN_USC_t.book Page 42
Page 45 of 288
GETTING TO KNOW YOUR VEHICLE43
Overhead Light Timing
On certain models, to assist getting in and out of the
vehicle at night or in poorly-lit areas, two timed modes
have been provided.
Timing While Getting Into The Vehicle
The overhead lights turn on according to the following
modes:
Will illuminate for approximately three minutes when
the doors are unlocked.
Will illuminate for approximately three minutes when
one of the doors is opened.
Will illuminate for approximately 27 seconds when
each individual door is closed and switch off simultane -
ously when the doors are locked.
Timing is interrupted when the ignition is placed in the
ON/RUN position.
Three Modes Are Available For Turning Off Overhead
Lighting:
When all doors are closed after entering the vehicle,
the three-minute timer will stop and a seconds timer
will start for the interior lights. This timing will stop
when the ignition is placed in the ON/RUN position.
When doors are locked (either with key fob or with the
emergency key inserted in driver side door), the over -
head light turns off.
The interior lights will turn off after 15 minutes to
preserve the battery. Timing While Getting Out Of The Vehicle
After placing the ignition in the OFF position, the overhead
lights will turn on as follows:
For a few seconds after the engine stops.
For approximately three minutes when one of the doors
is opened.
For several seconds when the last door is closed.
The timing stops automatically when the doors are locked.
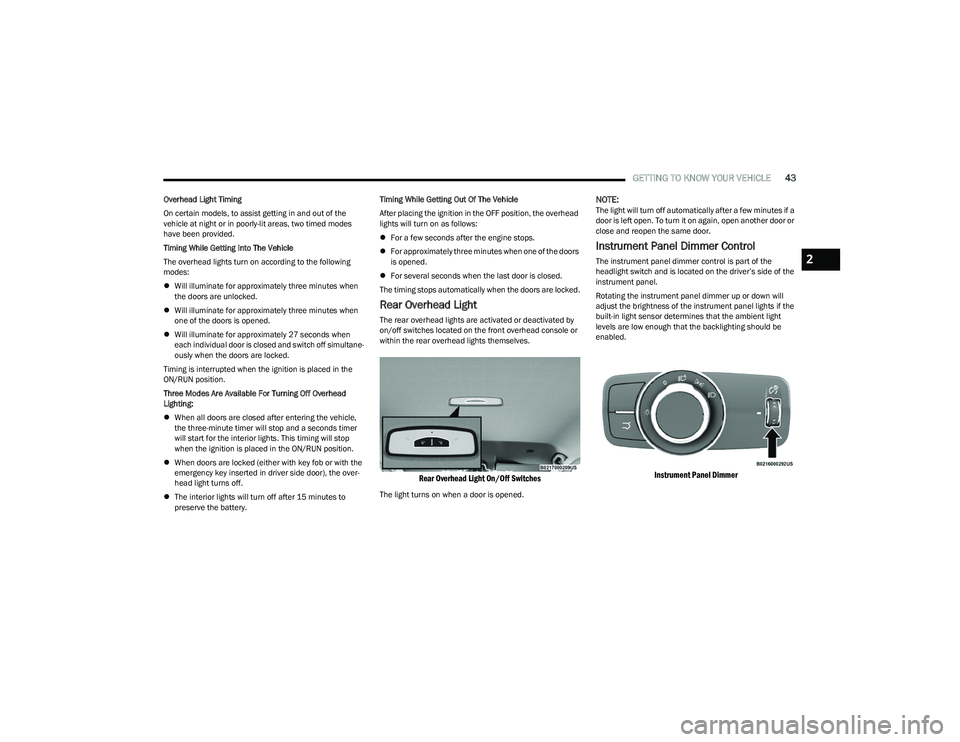
Rear Overhead Light
The rear overhead lights are activated or deactivated by
on/off switches located on the front overhead console or
within the rear overhead lights themselves.
Rear Overhead Light On/Off Switches
The light turns on when a door is opened.
NOTE:The light will turn off automatically after a few minutes if a
door is left open. To turn it on again, open another door or
close and reopen the same door.
Instrument Panel Dimmer Control
The instrument panel dimmer control is part of the
headlight switch and is located on the driver’s side of the
instrument panel.
Rotating the instrument panel dimmer up or down will
adjust the brightness of the instrument panel lights if the
built-in light sensor determines that the ambient light
levels are low enough that the backlighting should be
enabled.
Instrument Panel Dimmer
2
23_GG_OM_EN_USC_t.book Page 43
Page 46 of 288
44GETTING TO KNOW YOUR VEHICLE
Interior Ambient Lighting — If Equipped
The brightness of the interior passenger compartment
lights can be adjusted through Uconnect Settings
Úpage 130.
The lights can be adjusted to seven different levels of
brightness.
Battery Saver Feature
To protect the battery, the interior lights will turn off
automatically 15 minutes after the ignition switch is
placed in the OFF position. This will occur if the interior
lights were switched on manually or are on because a
door is open.
WINDSHIELD WIPERS AND WASHERS
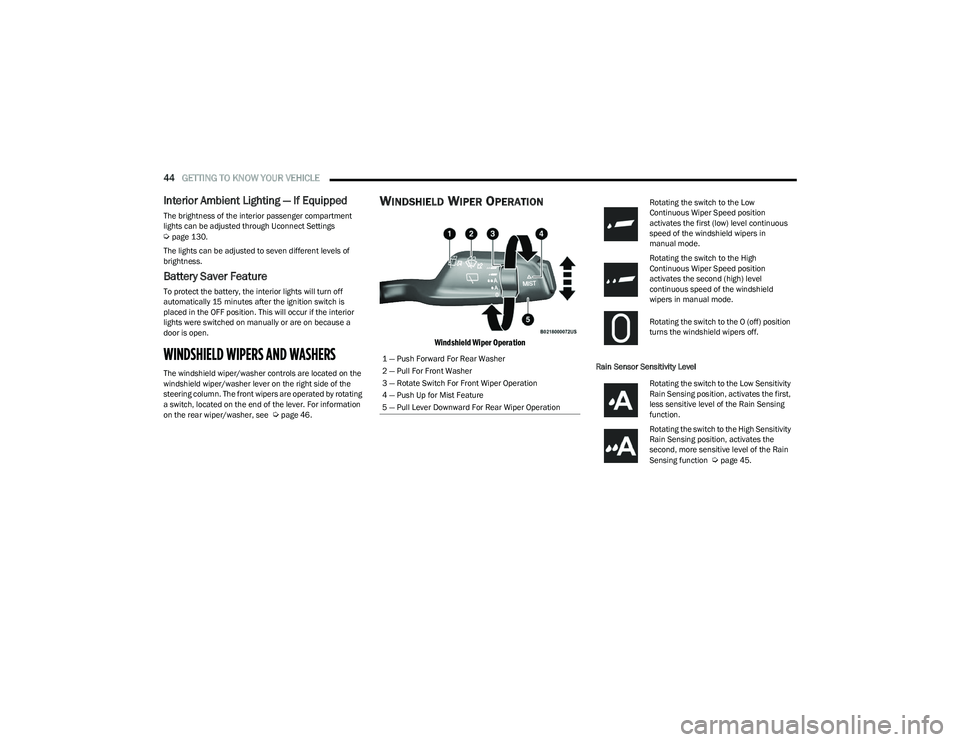
The windshield wiper/washer controls are located on the
windshield wiper/washer lever on the right side of the
steering column. The front wipers are operated by rotating
a switch, located on the end of the lever. For information
on the rear wiper/washer, see
Úpage 46.
WINDSHIELD WIPER OPERATION
Windshield Wiper Operation
Rain Sensor Sensitivity Level
1 — Push Forward For Rear Washer
2 — Pull For Front Washer
3 — Rotate Switch For Front Wiper Operation
4 — Push Up for Mist Feature
5 — Pull Lever Downward For Rear Wiper Operation
Rotating the switch to the Low
Continuous Wiper Speed position
activates the first (low) level continuous
speed of the windshield wipers in
manual mode.
Rotating the switch to the High
Continuous Wiper Speed position
activates the second (high) level
continuous speed of the windshield
wipers in manual mode.
Rotating the switch to the O (off) position
turns the windshield wipers off.
Rotating the switch to the Low Sensitivity
Rain Sensing position, activates the first,
less sensitive level of the Rain Sensing
function.
Rotating the switch to the High Sensitivity
Rain Sensing position, activates the
second, more sensitive level of the Rain
Sensing function
Úpage 45.
23_GG_OM_EN_USC_t.book Page 44
Page 47 of 288
GETTING TO KNOW YOUR VEHICLE45
Windshield Washer
To use the washer, pull the windshield wiper lever toward
the steering wheel and hold.
Both the windshield washer jet and the windshield wipers
will be activated. The wipers and washer will continue to
operate until you let go of the lever.
The windshield wipers stop working three strokes after the
stalk is released, followed by a final stroke six seconds
later to complete the cycle.
Mist
Push the lever upward to the MIST position and release for
a single wiping cycle.
NOTE:The Mist feature does not activate the washer pump;
therefore, no washer fluid will be sprayed on the wind -
shield. The washer function must be used in order to spray
the windshield with washer fluid.
For information on wiper care and replacement, see
Úpage 230.
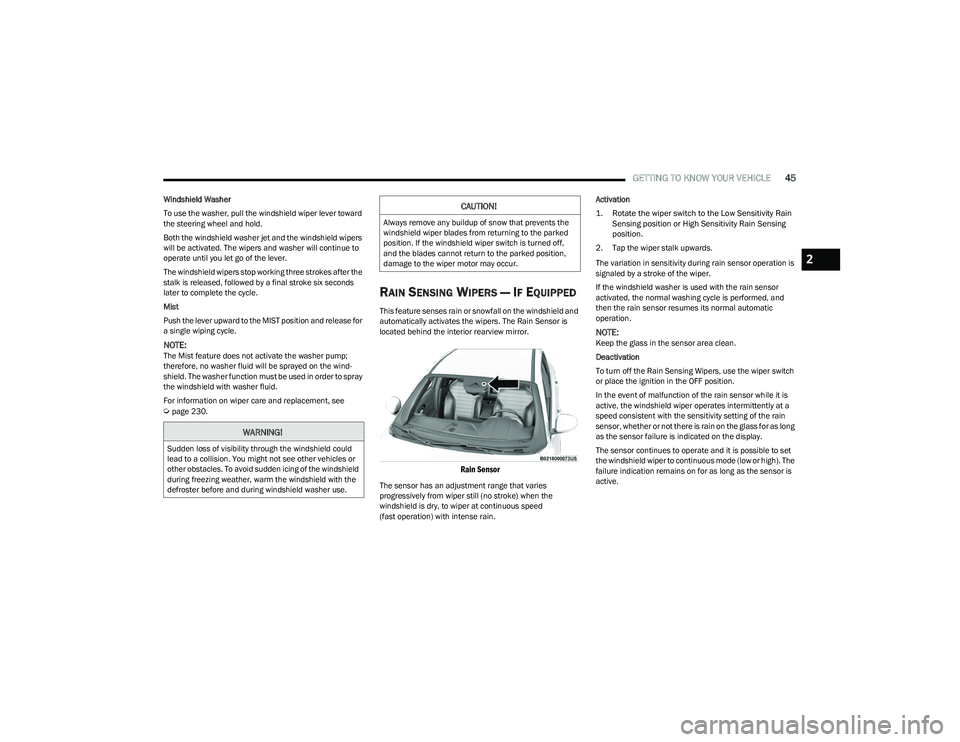
RAIN SENSING WIPERS — IF EQUIPPED
This feature senses rain or snowfall on the windshield and
automatically activates the wipers. The Rain Sensor is
located behind the interior rearview mirror.
Rain Sensor
The sensor has an adjustment range that varies
progressively from wiper still (no stroke) when the
windshield is dry, to wiper at continuous speed
(fast operation) with intense rain. Activation
1. Rotate the wiper switch to the Low Sensitivity Rain
Sensing position or High Sensitivity Rain Sensing
position.
2. Tap the wiper stalk upwards.
The variation in sensitivity during rain sensor operation is
signaled by a stroke of the wiper.
If the windshield washer is used with the rain sensor
activated, the normal washing cycle is performed, and
then the rain sensor resumes its normal automatic
operation.
NOTE:Keep the glass in the sensor area clean.
Deactivation
To turn off the Rain Sensing Wipers, use the wiper switch
or place the ignition in the OFF position.
In the event of malfunction of the rain sensor while it is
active, the windshield wiper operates intermittently at a
speed consistent with the sensitivity setting of the rain
sensor, whether or not there is rain on the glass for as long
as the sensor failure is indicated on the display.
The sensor continues to operate and it is possible to set
the windshield wiper to continuous mode (low or high). The
failure indication remains on for as long as the sensor is
active.
WARNING!
Sudden loss of visibility through the windshield could
lead to a collision. You might not see other vehicles or
other obstacles. To avoid sudden icing of the windshield
during freezing weather, warm the windshield with the
defroster before and during windshield washer use.
CAUTION!
Always remove any buildup of snow that prevents the
windshield wiper blades from returning to the parked
position. If the windshield wiper switch is turned off,
and the blades cannot return to the parked position,
damage to the wiper motor may occur.
2
23_GG_OM_EN_USC_t.book Page 45
Page 54 of 288
52GETTING TO KNOW YOUR VEHICLE
By using a USB cable to connect an external device:
The device can be played on the vehicle’s sound
system, providing the artist, track title, and album infor -
mation on the radio display.
NOTE:Depending on track configuration, track information may
not be present on the radio display.
The device can be controlled using the radio buttons to
play, and browse the contents of the device.
The audio device battery charges when plugged into
the USB port.
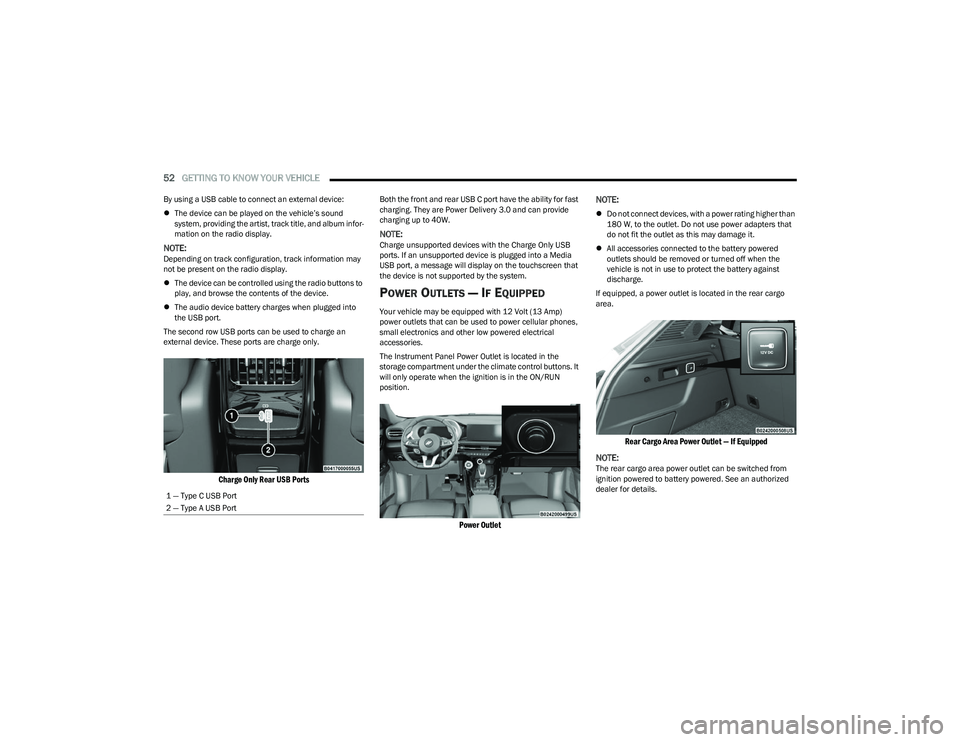
The second row USB ports can be used to charge an
external device. These ports are charge only.
Charge Only Rear USB Ports
Both the front and rear USB C port have the ability for fast
charging. They are Power Delivery 3.0 and can provide
charging up to 40W.
NOTE:Charge unsupported devices with the Charge Only USB
ports. If an unsupported device is plugged into a Media
USB port, a message will display on the touchscreen that
the device is not supported by the system.
POWER OUTLETS — IF EQUIPPED
Your vehicle may be equipped with 12 Volt (13 Amp)
power outlets that can be used to power cellular phones,
small electronics and other low powered electrical
accessories.
The Instrument Panel Power Outlet is located in the
storage compartment under the climate control buttons. It
will only operate when the ignition is in the ON/RUN
position.
Power Outlet
NOTE:
Do not connect devices, with a power rating higher than
180 W, to the outlet. Do not use power adapters that
do not fit the outlet as this may damage it.
All accessories connected to the battery powered
outlets should be removed or turned off when the
vehicle is not in use to protect the battery against
discharge.
If equipped, a power outlet is located in the rear cargo
area.
Rear Cargo Area Power Outlet — If Equipped
NOTE:
The rear cargo area power outlet can be switched from
ignition powered to battery powered. See an authorized
dealer for details.
1 — Type C USB Port
2 — Type A USB Port
23_GG_OM_EN_USC_t.book Page 52
Page 55 of 288
GETTING TO KNOW YOUR VEHICLE53
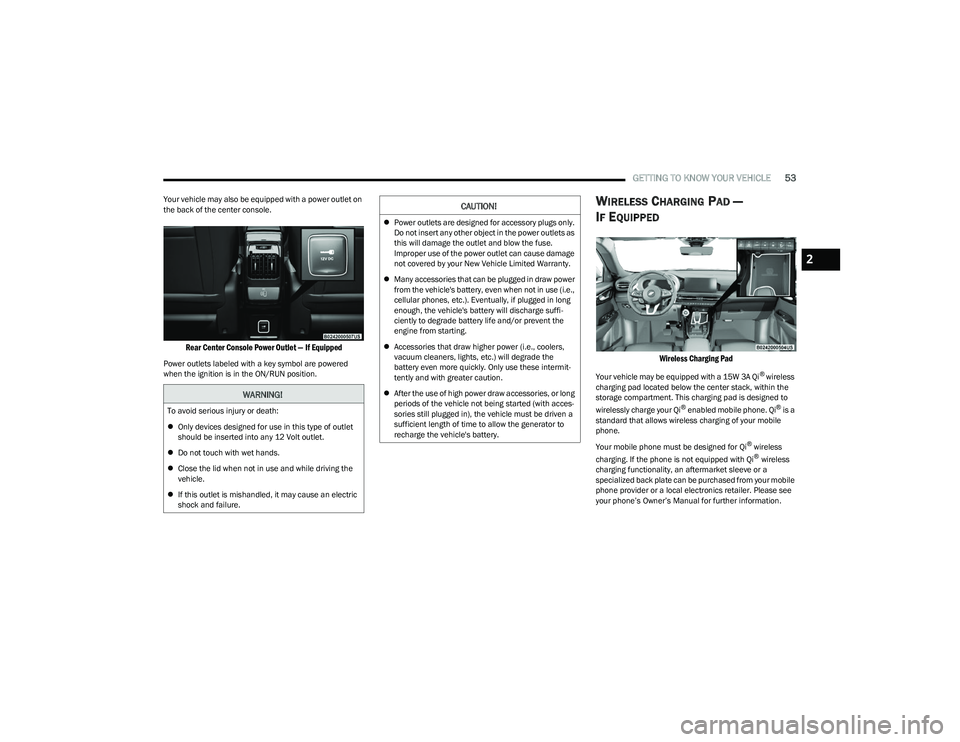
Your vehicle may also be equipped with a power outlet on
the back of the center console.
Rear Center Console Power Outlet — If Equipped
Power outlets labeled with a key symbol are powered
when the ignition is in the ON/RUN position.
WIRELESS CHARGING PAD —
I
F EQUIPPED
Wireless Charging Pad
Your vehicle may be equipped with a 15W 3A Qi® wireless
charging pad located below the center stack, within the
storage compartment. This charging pad is designed to
wirelessly charge your Qi
® enabled mobile phone. Qi® is a
standard that allows wireless charging of your mobile
phone.
Your mobile phone must be designed for Qi
® wireless
charging. If the phone is not equipped with Qi® wireless
charging functionality, an aftermarket sleeve or a
specialized back plate can be purchased from your mobile
phone provider or a local electronics retailer. Please see
your phone’s Owner’s Manual for further information.
WARNING!
To avoid serious injury or death:
Only devices designed for use in this type of outlet
should be inserted into any 12 Volt outlet.
Do not touch with wet hands.
Close the lid when not in use and while driving the
vehicle.
If this outlet is mishandled, it may cause an electric
shock and failure.
CAUTION!
Power outlets are designed for accessory plugs only.
Do not insert any other object in the power outlets as
this will damage the outlet and blow the fuse.
Improper use of the power outlet can cause damage
not covered by your New Vehicle Limited Warranty.
Many accessories that can be plugged in draw power
from the vehicle's battery, even when not in use (i.e.,
cellular phones, etc.). Eventually, if plugged in long
enough, the vehicle's battery will discharge suffi -
ciently to degrade battery life and/or prevent the
engine from starting.
Accessories that draw higher power (i.e., coolers,
vacuum cleaners, lights, etc.) will degrade the
battery even more quickly. Only use these intermit -
tently and with greater caution.
After the use of high power draw accessories, or long
periods of the vehicle not being started (with acces -
sories still plugged in), the vehicle must be driven a
sufficient length of time to allow the generator to
recharge the vehicle's battery.
2
23_GG_OM_EN_USC_t.book Page 53
Page 56 of 288
54GETTING TO KNOW YOUR VEHICLE
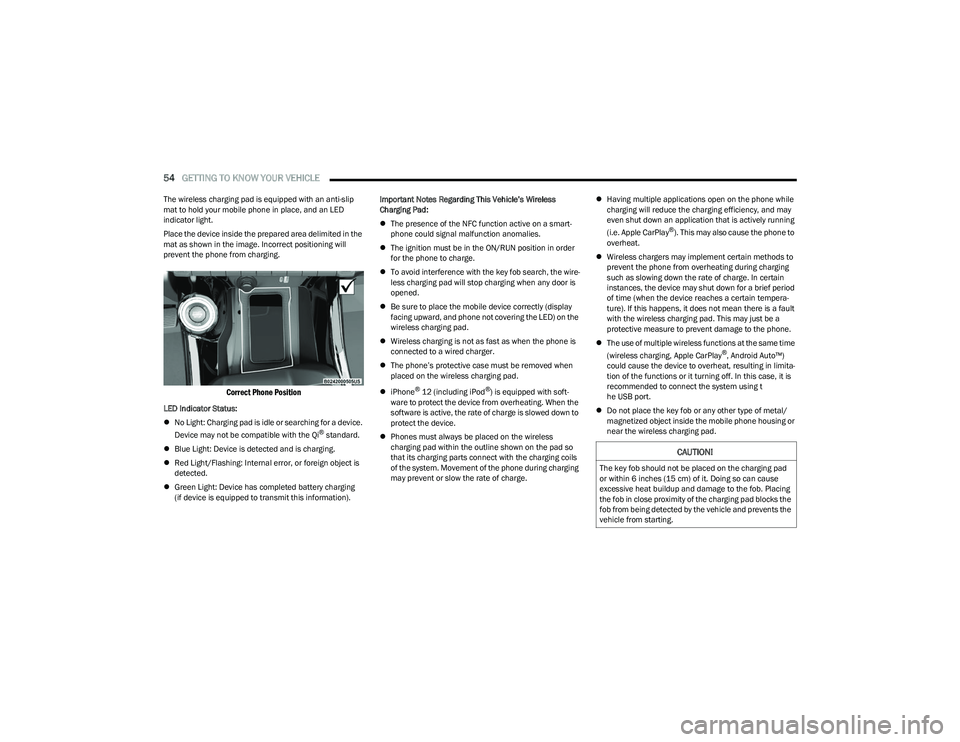
The wireless charging pad is equipped with an anti-slip
mat to hold your mobile phone in place, and an LED
indicator light.
Place the device inside the prepared area delimited in the
mat as shown in the image. Incorrect positioning will
prevent the phone from charging.
Correct Phone Position
LED Indicator Status:
No Light: Charging pad is idle or searching for a device.
Device may not be compatible with the Qi
® standard.
Blue Light: Device is detected and is charging.
Red Light/Flashing: Internal error, or foreign object is
detected.
Green Light: Device has completed battery charging
(if device is equipped to transmit this information). Important Notes Regarding This Vehicle’s Wireless
Charging Pad:
The presence of the NFC function active on a smart -
phone could signal malfunction anomalies.
The ignition must be in the ON/RUN position in order
for the phone to charge.
To avoid interference with the key fob search, the wire -
less charging pad will stop charging when any door is
opened.
Be sure to place the mobile device correctly (display
facing upward, and phone not covering the LED) on the
wireless charging pad.
Wireless charging is not as fast as when the phone is
connected to a wired charger.
The phone’s protective case must be removed when
placed on the wireless charging pad.
iPhone
® 12 (including iPod®) is equipped with soft -
ware to protect the device from overheating. When the
software is active, the rate of charge is slowed down to
protect the device.
Phones must always be placed on the wireless
charging pad within the outline shown on the pad so
that its charging parts connect with the charging coils
of the system. Movement of the phone during charging
may prevent or slow the rate of charge.
Having multiple applications open on the phone while
charging will reduce the charging efficiency, and may
even shut down an application that is actively running
(i.e. Apple CarPlay
®). This may also cause the phone to
overheat.
Wireless chargers may implement certain methods to
prevent the phone from overheating during charging
such as slowing down the rate of charge. In certain
instances, the device may shut down for a brief period
of time (when the device reaches a certain tempera -
ture). If this happens, it does not mean there is a fault
with the wireless charging pad. This may just be a
protective measure to prevent damage to the phone.
The use of multiple wireless functions at the same time
(wireless charging, Apple CarPlay
®, Android Auto™)
could cause the device to overheat, resulting in limita -
tion of the functions or it turning off. In this case, it is
recommended to connect the system using t
he USB port.
Do not place the key fob or any other type of metal/
magnetized object inside the mobile phone housing or
near the wireless charging pad.
CAUTION!
The key fob should not be placed on the charging pad
or within 6 inches (15 cm) of it. Doing so can cause
excessive heat buildup and damage to the fob. Placing
the fob in close proximity of the charging pad blocks the
fob from being detected by the vehicle and prevents the
vehicle from starting.
23_GG_OM_EN_USC_t.book Page 54
Page 57 of 288
GETTING TO KNOW YOUR VEHICLE55
WINDOWS
POWER WINDOW CONTROLS
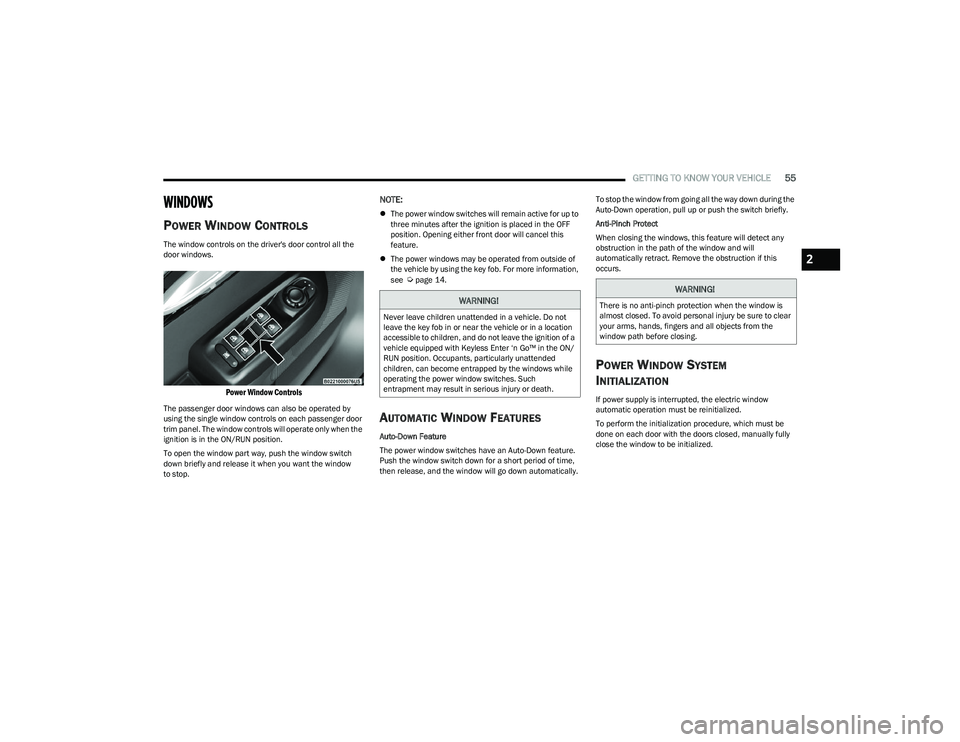
The window controls on the driver's door control all the
door windows.
Power Window Controls
The passenger door windows can also be operated by
using the single window controls on each passenger door
trim panel. The window controls will operate only when the
ignition is in the ON/RUN position.
To open the window part way, push the window switch
down briefly and release it when you want the window
to stop.
NOTE:
The power window switches will remain active for up to
three minutes after the ignition is placed in the OFF
position. Opening either front door will cancel this
feature.
The power windows may be operated from outside of
the vehicle by using the key fob. For more information,
see
Úpage 14.
AUTOMATIC WINDOW FEATURES
Auto-Down Feature
The power window switches have an Auto-Down feature.
Push the window switch down for a short period of time,
then release, and the window will go down automatically. To stop the window from going all the way down during the
Auto-Down operation, pull up or push the switch briefly.
Anti-Pinch Protect
When closing the windows, this feature will detect any
obstruction in the path of the window and will
automatically retract. Remove the obstruction if this
occurs.
POWER WINDOW SYSTEM
I
NITIALIZATION
If power supply is interrupted, the electric window
automatic operation must be reinitialized.
To perform the initialization procedure, which must be
done on each door with the doors closed, manually fully
close the window to be initialized.
WARNING!
Never leave children unattended in a vehicle. Do not
leave the key fob in or near the vehicle or in a location
accessible to children, and do not leave the ignition of a
vehicle equipped with Keyless Enter ‘n Go™ in the ON/
RUN position. Occupants, particularly unattended
children, can become entrapped by the windows while
operating the power window switches. Such
entrapment may result in serious injury or death.
WARNING!
There is no anti-pinch protection when the window is
almost closed. To avoid personal injury be sure to clear
your arms, hands, fingers and all objects from the
window path before closing.
2
23_GG_OM_EN_USC_t.book Page 55
Page 58 of 288
56GETTING TO KNOW YOUR VEHICLE
WINDOW LOCKOUT SWITCH
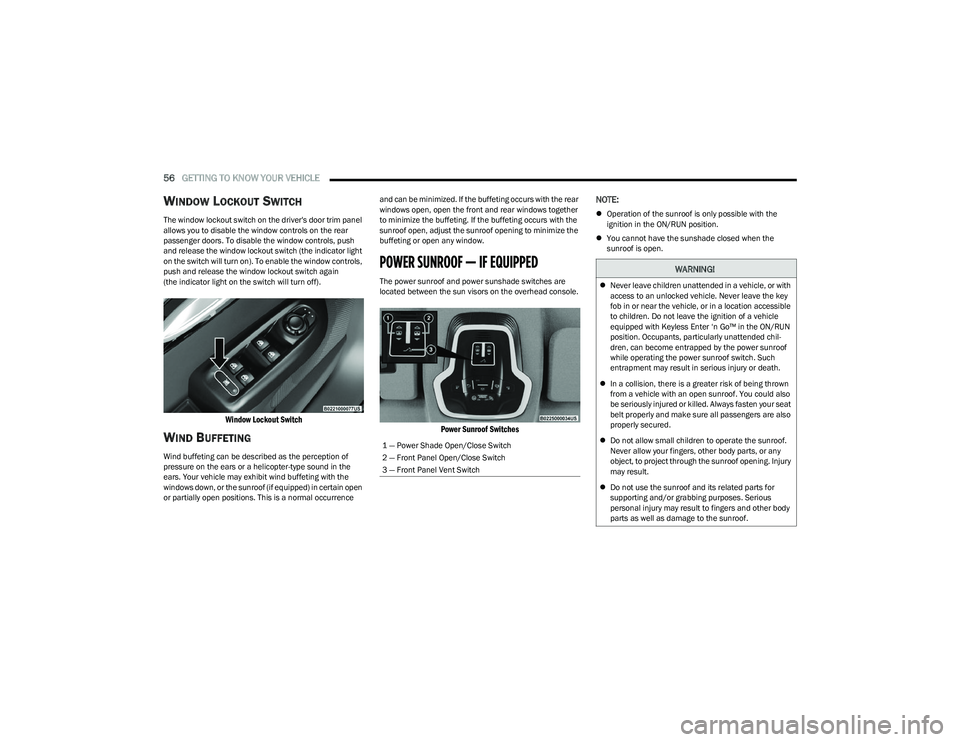
The window lockout switch on the driver's door trim panel
allows you to disable the window controls on the rear
passenger doors. To disable the window controls, push
and release the window lockout switch (the indicator light
on the switch will turn on). To enable the window controls,
push and release the window lockout switch again
(the indicator light on the switch will turn off).
Window Lockout Switch
WIND BUFFETING
Wind buffeting can be described as the perception of
pressure on the ears or a helicopter-type sound in the
ears. Your vehicle may exhibit wind buffeting with the
windows down, or the sunroof (if equipped) in certain open
or partially open positions. This is a normal occurrence and can be minimized. If the buffeting occurs with the rear
windows open, open the front and rear windows together
to minimize the buffeting. If the buffeting occurs with the
sunroof open, adjust the sunroof opening to minimize the
buffeting or open any window.
POWER SUNROOF — IF EQUIPPED
The power sunroof and power sunshade switches are
located between the sun visors on the overhead console.
Power Sunroof Switches
NOTE:
Operation of the sunroof is only possible with the
ignition in the ON/RUN position.
You cannot have the sunshade closed when the
sunroof is open.
1 — Power Shade Open/Close Switch
2 — Front Panel Open/Close Switch
3 — Front Panel Vent Switch
WARNING!
Never leave children unattended in a vehicle, or with
access to an unlocked vehicle. Never leave the key
fob in or near the vehicle, or in a location accessible
to children. Do not leave the ignition of a vehicle
equipped with Keyless Enter ‘n Go™ in the ON/RUN
position. Occupants, particularly unattended chil -
dren, can become entrapped by the power sunroof
while operating the power sunroof switch. Such
entrapment may result in serious injury or death.
In a collision, there is a greater risk of being thrown
from a vehicle with an open sunroof. You could also
be seriously injured or killed. Always fasten your seat
belt properly and make sure all passengers are also
properly secured.
Do not allow small children to operate the sunroof.
Never allow your fingers, other body parts, or any
object, to project through the sunroof opening. Injury
may result.
Do not use the sunroof and its related parts for
supporting and/or grabbing purposes. Serious
personal injury may result to fingers and other body
parts as well as damage to the sunroof.
23_GG_OM_EN_USC_t.book Page 56