high beam DODGE HORNET 2023 Owners Manual
[x] Cancel search | Manufacturer: DODGE, Model Year: 2023, Model line: HORNET, Model: DODGE HORNET 2023Pages: 288, PDF Size: 14.2 MB
Page 5 of 288
3
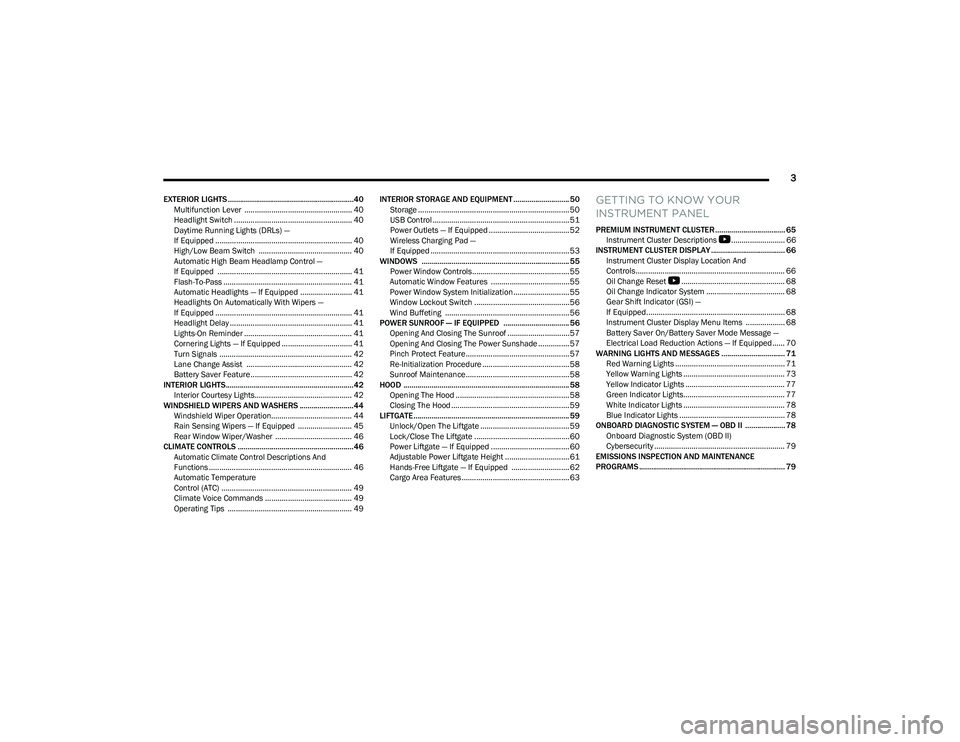
EXTERIOR LIGHTS ...............................................................40Multifunction Lever .................................................... 40
Headlight Switch ......................................................... 40
Daytime Running Lights (DRLs) —
If Equipped .................................................................. 40
High/Low Beam Switch ............................................. 40
Automatic High Beam Headlamp Control —
If Equipped ................................................................. 41
Flash-To-Pass .............................................................. 41
Automatic Headlights — If Equipped ......................... 41
Headlights On Automatically With Wipers —
If Equipped .................................................................. 41
Headlight Delay ........................................................... 41
Lights-On Reminder .................................................... 41
Cornering Lights — If Equipped .................................. 41
Turn Signals ................................................................ 42
Lane Change Assist ................................................... 42
Battery Saver Feature................................................. 42
INTERIOR LIGHTS................................................................42 Interior Courtesy Lights............................................... 42
WINDSHIELD WIPERS AND WASHERS ........................... 44 Windshield Wiper Operation....................................... 44
Rain Sensing Wipers — If Equipped .......................... 45
Rear Window Wiper/Washer ..................................... 46
CLIMATE CONTROLS ..........................................................46 Automatic Climate Control Descriptions And
Functions ..................................................................... 46
Automatic Temperature
Control (ATC) ............................................................... 49
Climate Voice Commands .......................................... 49
Operating Tips ............................................................ 49 INTERIOR STORAGE AND EQUIPMENT ............................ 50
Storage ......................................................................... 50
USB Control .................................................................. 51
Power Outlets — If Equipped ....................................... 52
Wireless Charging Pad —
If Equipped ................................................................... 53
WINDOWS .......................................................................... 55 Power Window Controls............................................... 55
Automatic Window Features ......................................55
Power Window System Initialization........................... 55
Window Lockout Switch ..............................................56
Wind Buffeting ............................................................ 56
POWER SUNROOF — IF EQUIPPED ................................. 56 Opening And Closing The Sunroof ..............................57
Opening And Closing The Power Sunshade ............... 57
Pinch Protect Feature.................................................. 57
Re-Initialization Procedure .......................................... 58
Sunroof Maintenance.................................................. 58
HOOD ................................................................................... 58 Opening The Hood .......................................................58
Closing The Hood ......................................................... 59
LIFTGATE .............................................................................. 59 Unlock/Open The Liftgate ........................................... 59
Lock/Close The Liftgate ..............................................60
Power Liftgate — If Equipped ......................................60
Adjustable Power Liftgate Height ............................... 61
Hands-Free Liftgate — If Equipped ............................ 62
Cargo Area Features.................................................... 63GETTING TO KNOW YOUR
INSTRUMENT PANEL
PREMIUM INSTRUMENT CLUSTER................................... 65 Instrument Cluster Descriptions
b
.......................... 66
INSTRUMENT CLUSTER DISPLAY ..................................... 66 Instrument Cluster Display Location And
Controls........................................................................ 66
Oil Change Reset
b
.................................................. 68
Oil Change Indicator System ...................................... 68
Gear Shift Indicator (GSI) —
If Equipped................................................................... 68
Instrument Cluster Display Menu Items ................... 68
Battery Saver On/Battery Saver Mode Message —
Electrical Load Reduction Actions — If Equipped ...... 70
WARNING LIGHTS AND MESSAGES ................................ 71 Red Warning Lights ..................................................... 71
Yellow Warning Lights ................................................. 73
Yellow Indicator Lights ................................................ 77
Green Indicator Lights................................................. 77
White Indicator Lights ................................................. 78
Blue Indicator Lights ................................................... 78
ONBOARD DIAGNOSTIC SYSTEM — OBD II .................... 78 Onboard Diagnostic System (OBD II)
Cybersecurity ............................................................... 79
EMISSIONS INSPECTION AND MAINTENANCE
PROGRAMS ......................................................................... 79
23_GG_OM_EN_USC_t.book Page 3
Page 14 of 288
12
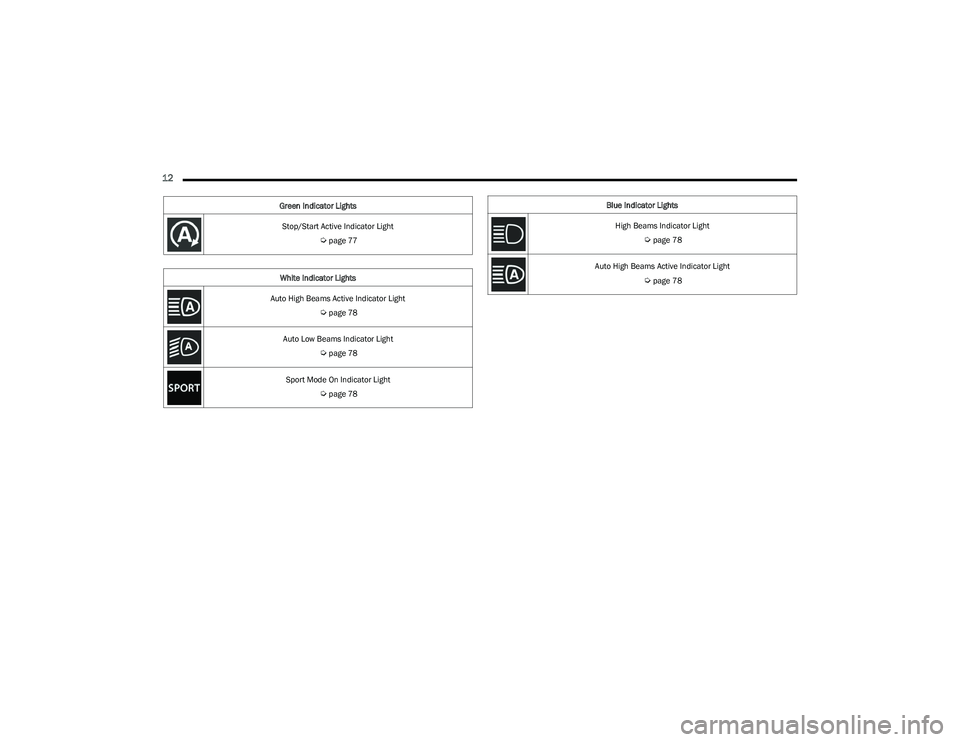
Stop/Start Active Indicator Light
Úpage 77
White Indicator Lights
Auto High Beams Active Indicator Light
Úpage 78
Auto Low Beams Indicator Light
Úpage 78
Sport Mode On Indicator Light
Úpage 78
Green Indicator Lights
Blue Indicator Lights
High Beams Indicator Light
Úpage 78
Auto High Beams Active Indicator Light
Úpage 78
23_GG_OM_EN_USC_t.book Page 12
Page 42 of 288
40GETTING TO KNOW YOUR VEHICLE
EXTERIOR LIGHTS
MULTIFUNCTION LEVER
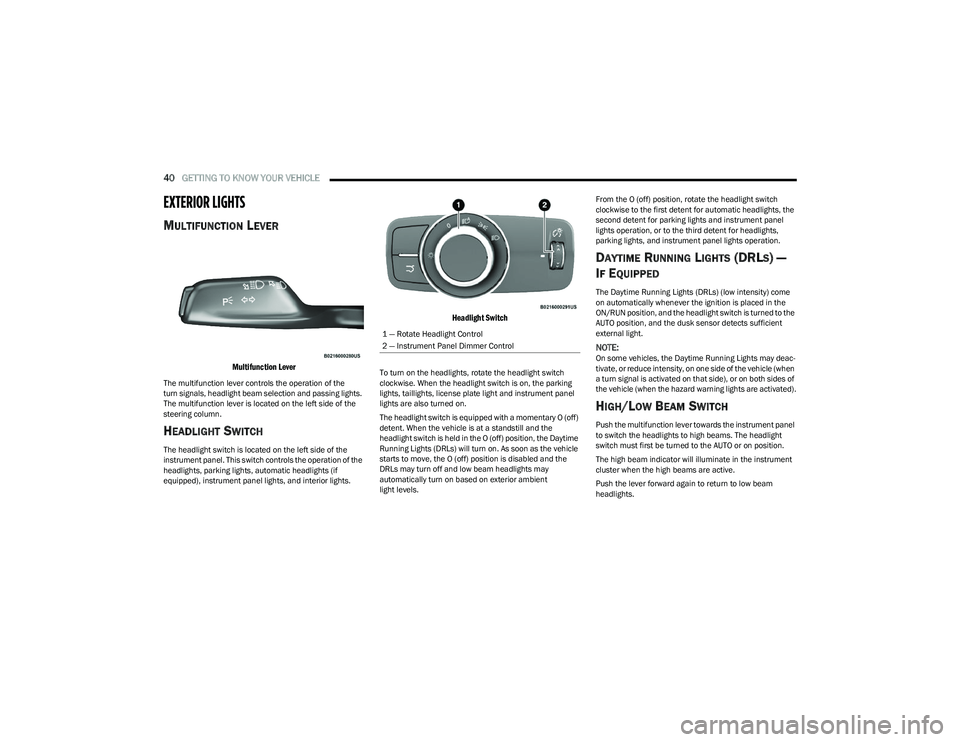
Multifunction Lever
The multifunction lever controls the operation of the
turn signals, headlight beam selection and passing lights.
The multifunction lever is located on the left side of the
steering column.
HEADLIGHT SWITCH
The headlight switch is located on the left side of the
instrument panel. This switch controls the operation of the
headlights, parking lights, automatic headlights (if
equipped), instrument panel lights, and interior lights.
Headlight Switch
To turn on the headlights, rotate the headlight switch
clockwise. When the headlight switch is on, the parking
lights, taillights, license plate light and instrument panel
lights are also turned on.
The headlight switch is equipped with a momentary O (off)
detent. When the vehicle is at a standstill and the
headlight switch is held in the O (off) position, the Daytime
Running Lights (DRLs) will turn on. As soon as the vehicle
starts to move, the O (off) position is disabled and the
DRLs may turn off and low beam headlights may
automatically turn on based on exterior ambient
light levels. From the O (off) position, rotate the headlight switch
clockwise to the first detent for automatic headlights, the
second detent for parking lights and instrument panel
lights operation, or to the third detent for headlights,
parking lights, and instrument panel lights operation.
DAYTIME RUNNING LIGHTS (DRLS) —
I
F EQUIPPED
The Daytime Running Lights (DRLs) (low intensity) come
on automatically whenever the ignition is placed in the
ON/RUN position, and the headlight switch is turned to the
AUTO position, and the dusk sensor detects sufficient
external light.
NOTE:On some vehicles, the Daytime Running Lights may deac -
tivate, or reduce intensity, on one side of the vehicle (when
a turn signal is activated on that side), or on both sides of
the vehicle (when the hazard warning lights are activated).
HIGH/LOW BEAM SWITCH
Push the multifunction lever towards the instrument panel
to switch the headlights to high beams. The headlight
switch must first be turned to the AUTO or on position.
The high beam indicator will illuminate in the instrument
cluster when the high beams are active.
Push the lever forward again to return to low beam
headlights.
1 — Rotate Headlight Control
2 — Instrument Panel Dimmer Control
23_GG_OM_EN_USC_t.book Page 40
Page 43 of 288
GETTING TO KNOW YOUR VEHICLE41
AUTOMATIC HIGH BEAM HEADLAMP
C
ONTROL — IF EQUIPPED
The Automatic High Beam Headlamp Control system
provides increased forward lighting at night by automating
high beam control through the use of a digital camera
mounted on the windshield. This camera detects vehicle
specific light and automatically switches from high beams
to low beams until the approaching vehicle is out of view.
NOTE:
The Automatic High Beam Headlamp Control can be
turned on or off through Uconnect Settings.
This function can only be activated with the headlight
switch in the AUTO position.
Broken, muddy, or obstructed headlights and taillights
of vehicles in the field of view will cause headlights to
remain on longer (closer to the vehicle). Also, dirt, film,
and other obstructions on the windshield or camera
lens will cause the system to function improperly.
FLASH-TO-PASS
You can signal another vehicle with your headlights by
lightly pulling the multifunction lever toward you. This will
cause the high beam headlights to turn on, and remain on,
until the lever is released.
AUTOMATIC HEADLIGHTS — IF EQUIPPED
This system automatically turns the headlights
on or off according to ambient light levels. To
turn the system on, rotate the headlight switch
clockwise to the AUTO position.
When the system is on, the headlight time delay feature is
also on. This means the headlights will stay on for up to
90 seconds after you place the ignition into the OFF
position. To turn the automatic system off, move the
headlight switch out of the AUTO position.
NOTE:The engine must be running before the headlights will
come on in the automatic mode.
HEADLIGHTS ON AUTOMATICALLY WITH
W
IPERS — IF EQUIPPED
If your vehicle is equipped with Automatic Headlights, it
also has this customer-programmable feature. When your
headlights are in the automatic mode and the engine is
running, they will automatically turn on when the wiper
system is on. This feature is programmable through the
Uconnect system.
NOTE:When your headlights come on during the daytime, the
vehicle will monitor outside brightness and decide if the
instrument panel needs to be dimmed.
HEADLIGHT DELAY
To aid in your exit, your vehicle is equipped with a
headlight delay that will leave the headlights on for
approximately 90 seconds. This delay is initiated when the
ignition is placed in the OFF position while the headlight
switch is on, and then the headlight switch is cycled off.
Headlight delay can be canceled by either turning the
headlight switch on then off, or by placing the ignition in
the ON/RUN position.
NOTE:The headlight delay time is programmable through
Uconnect Settings Úpage 130.
LIGHTS-ON REMINDER
If the headlights or parking lights are on after the ignition
is in the OFF position, a chime will sound to alert the driver
when the driver's door is opened.
CORNERING LIGHTS — IF EQUIPPED
The cornering lights are a feature to improve visibility at
night while turning the vehicle. When activated, a light
incorporated in the headlight assembly will illuminate on
the side of the vehicle the steering wheel is rotated, or that
the turn signal indicator is on. It can be activated through
the Uconnect system
Úpage 130.
2
23_GG_OM_EN_USC_t.book Page 41
Page 70 of 288
68GETTING TO KNOW YOUR INSTRUMENT PANEL
Unstored Messages
This message type is displayed indefinitely or until the
condition that activated the message is cleared. Exam -
ples of this message type are “Turn Signal On” (if a turn
signal is left on) and “Lights On” (if driver leaves the
vehicle with the lights on).
Unstored Messages Until RUN
These messages deal primarily with the Remote Start
feature. This message type is displayed until the igni -
tion is in the RUN state. Examples of this message type
are “Remote Start Canceled - Door Ajar” and
“Press Brake Pedal and Push Button to Start.”
Five Second Unstored Messages
When the appropriate conditions occur, this type of
message takes control of the main display area for
five seconds and then returns to the previous screen.
An example of this message type is “Automatic High
Beams On.”
OIL CHANGE RESET
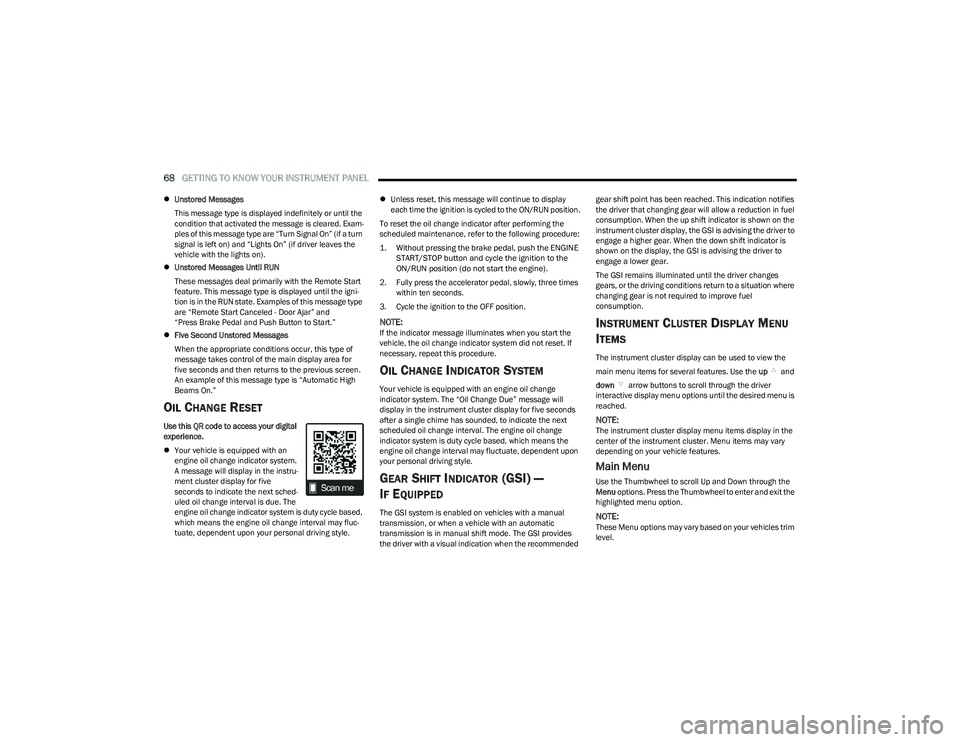
Use this QR code to access your digital
experience.
Your vehicle is equipped with an
engine oil change indicator system.
A message will display in the instru -
ment cluster display for five
seconds to indicate the next sched -
uled oil change interval is due. The
engine oil change indicator system is duty cycle based,
which means the engine oil change interval may fluc -
tuate, dependent upon your personal driving style.
Unless reset, this message will continue to display
each time the ignition is cycled to the ON/RUN position.
To reset the oil change indicator after performing the
scheduled maintenance, refer to the following procedure:
1. Without pressing the brake pedal, push the ENGINE START/STOP button and cycle the ignition to the
ON/RUN position (do not start the engine).
2. Fully press the accelerator pedal, slowly, three times within ten seconds.
3. Cycle the ignition to the OFF position.
NOTE:If the indicator message illuminates when you start the
vehicle, the oil change indicator system did not reset. If
necessary, repeat this procedure.
OIL CHANGE INDICATOR SYSTEM
Your vehicle is equipped with an engine oil change
indicator system. The “Oil Change Due” message will
display in the instrument cluster display for five seconds
after a single chime has sounded, to indicate the next
scheduled oil change interval. The engine oil change
indicator system is duty cycle based, which means the
engine oil change interval may fluctuate, dependent upon
your personal driving style.
GEAR SHIFT INDICATOR (GSI) —
I
F EQUIPPED
The GSI system is enabled on vehicles with a manual
transmission, or when a vehicle with an automatic
transmission is in manual shift mode. The GSI provides
the driver with a visual indication when the recommended gear shift point has been reached. This indication notifies
the driver that changing gear will allow a reduction in fuel
consumption. When the up shift indicator is shown on the
instrument cluster display, the GSI is advising the driver to
engage a higher gear. When the down shift indicator is
shown on the display, the GSI is advising the driver to
engage a lower gear.
The GSI remains illuminated until the driver changes
gears, or the driving conditions return to a situation where
changing gear is not required to improve fuel
consumption.
INSTRUMENT CLUSTER DISPLAY MENU
I
TEMS
The instrument cluster display can be used to view the
main menu items for several features. Use the up and
down arrow buttons to scroll through the driver
interactive display menu options until the desired menu is
reached.
NOTE:The instrument cluster display menu items display in the
center of the instrument cluster. Menu items may vary
depending on your vehicle features.
Main Menu
Use the Thumbwheel to scroll Up and Down through the
Menu options. Press the Thumbwheel to enter and exit the
highlighted menu option.
NOTE:These Menu options may vary based on your vehicles trim
level.
23_GG_OM_EN_USC_t.book Page 68
Page 80 of 288
78GETTING TO KNOW YOUR INSTRUMENT PANEL
WHITE INDICATOR LIGHTS
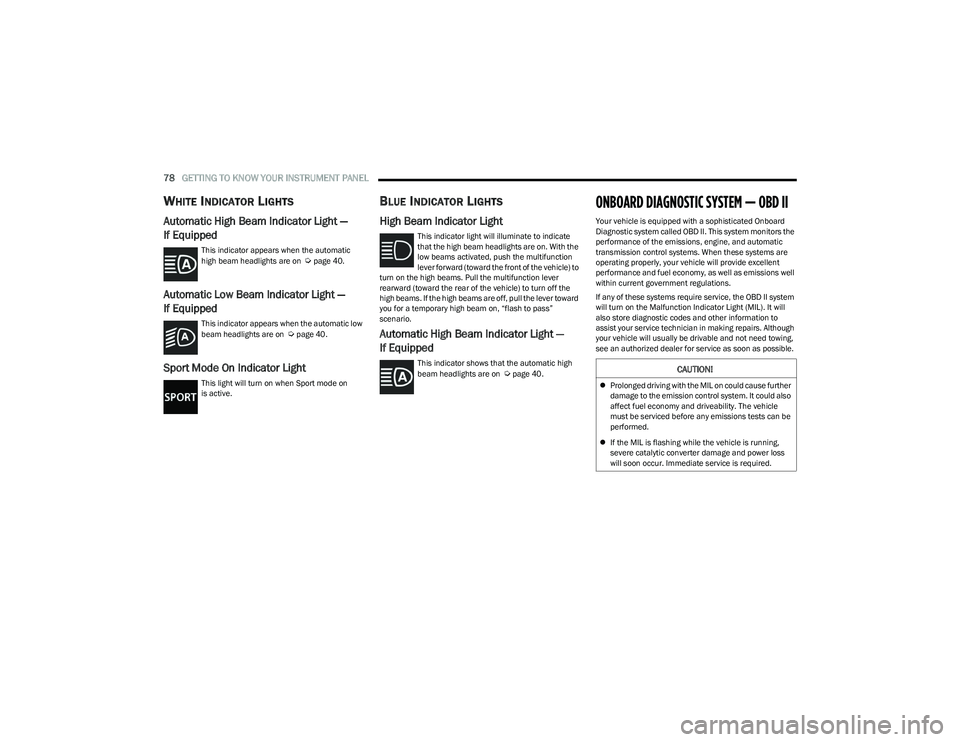
Automatic High Beam Indicator Light —
If Equipped
This indicator appears when the automatic
high beam headlights are on Úpage 40.
Automatic Low Beam Indicator Light —
If Equipped
This indicator appears when the automatic low
beam headlights are on Úpage 40.
Sport Mode On Indicator Light
This light will turn on when Sport mode on
is active.
BLUE INDICATOR LIGHTS
High Beam Indicator Light
This indicator light will illuminate to indicate
that the high beam headlights are on. With the
low beams activated, push the multifunction
lever forward (toward the front of the vehicle) to
turn on the high beams. Pull the multifunction lever
rearward (toward the rear of the vehicle) to turn off the
high beams. If the high beams are off, pull the lever toward
you for a temporary high beam on, “flash to pass”
scenario.
Automatic High Beam Indicator Light —
If Equipped
This indicator shows that the automatic high
beam headlights are on Úpage 40.
ONBOARD DIAGNOSTIC SYSTEM — OBD II
Your vehicle is equipped with a sophisticated Onboard
Diagnostic system called OBD II. This system monitors the
performance of the emissions, engine, and automatic
transmission control systems. When these systems are
operating properly, your vehicle will provide excellent
performance and fuel economy, as well as emissions well
within current government regulations.
If any of these systems require service, the OBD II system
will turn on the Malfunction Indicator Light (MIL). It will
also store diagnostic codes and other information to
assist your service technician in making repairs. Although
your vehicle will usually be drivable and not need towing,
see an authorized dealer for service as soon as possible.
CAUTION!
Prolonged driving with the MIL on could cause further
damage to the emission control system. It could also
affect fuel economy and driveability. The vehicle
must be serviced before any emissions tests can be
performed.
If the MIL is flashing while the vehicle is running,
severe catalytic converter damage and power loss
will soon occur. Immediate service is required.
23_GG_OM_EN_USC_t.book Page 78
Page 143 of 288
MULTIMEDIA141
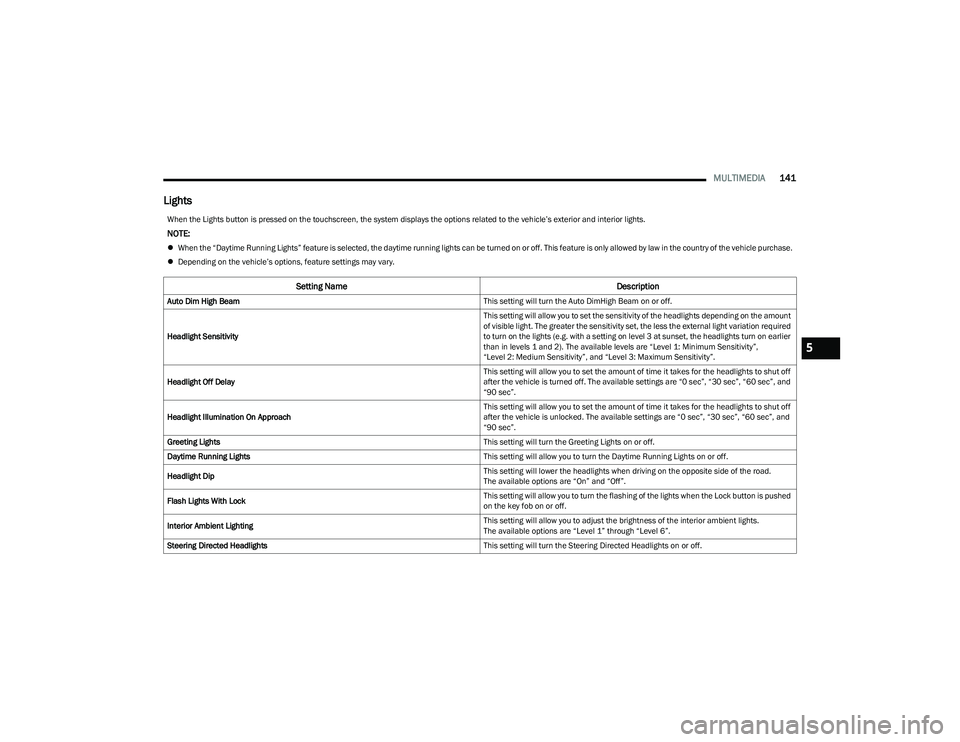
Lights
When the Lights button is pressed on the touchscreen, the system displays the options related to the vehicle’s exterior and interior lights.
NOTE:
When the “Daytime Running Lights” feature is selected, the daytime running lights can be turned on or off. This feature is only allowed by law in the country of the vehicle purchase.
Depending on the vehicle’s options, feature settings may vary.
Setting Name Description
Auto Dim High Beam This setting will turn the Auto DimHigh Beam on or off.
Headlight Sensitivity This setting will allow you to set the sensitivity of the headlights depending on the amount
of visible light. The greater the sensitivity set, the less the external light variation required
to turn on the lights (e.g. with a setting on level 3 at sunset, the headlights turn on earlier
than in levels 1 and 2). The available levels are “Level 1: Minimum Sensitivity”,
“Level 2: Medium Sensitivity”, and “Level 3: Maximum Sensitivity”.
Headlight Off Delay This setting will allow you to set the amount of time it takes for the headlights to shut off
after the vehicle is turned off. The available settings are “0 sec”, “30 sec”, “60 sec”, and
“90 sec”.
Headlight Illumination On Approach This setting will allow you to set the amount of time it takes for the headlights to shut off
after the vehicle is unlocked. The available settings are “0 sec”, “30 sec”, “60 sec”, and
“90 sec”.
Greeting Lights This setting will turn the Greeting Lights on or off.
Daytime Running Lights This setting will allow you to turn the Daytime Running Lights on or off.
Headlight Dip This setting will lower the headlights when driving on the opposite side of the road.
The available options are “On” and “Off”.
Flash Lights With Lock This setting will allow you to turn the flashing of the lights when the Lock button is pushed
on the key fob on or off.
Interior Ambient Lighting This setting will allow you to adjust the brightness of the interior ambient lights.
The available options are “Level 1” through “Level 6”.
Steering Directed Headlights This setting will turn the Steering Directed Headlights on or off.
5
23_GG_OM_EN_USC_t.book Page 141
Page 203 of 288
SAFETY201
PERIODIC SAFETY CHECKS YOU SHOULD
M
AKE OUTSIDE THE VEHICLE
Tires
Examine tires for excessive tread wear and uneven wear
patterns. Check for stones, nails, glass, or other objects
lodged in the tread or sidewall. Inspect the tread for cuts
and cracks. Inspect sidewalls for cuts, cracks, and bulges.
Check the lug nut/bolt torque for tightness. Check the
tires (including spare) for proper cold inflation pressure.
Lights
Have someone observe the operation of brake lights and
exterior lights while you work the controls. Check turn
signal and high beam indicator lights on the instrument
panel.
Door Latches
Check for proper closing, latching, and locking.
Fluid Leaks
Check area under the vehicle after overnight parking for
fuel, coolant, oil, or other fluid leaks. Also, if gasoline
fumes are detected or if fuel or brake fluid leaks are
suspected, the cause should be located and corrected
immediately.
ALWAYS make sure objects cannot fall or slide into
the driver’s side floor area when the vehicle is
moving. Objects can become trapped under acceler -
ator, brake, or clutch pedals and could cause a loss
of vehicle control.
NEVER place any objects under the floor mat (e.g.,
towels, keys, etc.). These objects could change the
position of the floor mat and may cause interference
with the accelerator, brake, or clutch pedals.
If the vehicle carpet has been removed and
re-installed, always properly attach carpet to the floor
and check the floor mat fasteners are secure to the
vehicle carpet. Fully depress each pedal to check for
interference with the accelerator, brake, or clutch
pedals then re-install the floor mats.
It is recommended to only use mild soap and water
to clean your floor mats. After cleaning, always check
your floor mat has been properly installed and is
secured to your vehicle using the floor mat fasteners
by lightly pulling mat.
WARNING!
6
23_GG_OM_EN_USC_t.book Page 201
Page 279 of 288
277
INDEX
AActive Driving Assist System ....................................... 101
Active Speed Limiter ....................................................... 90
Adaptive Cruise Control (ACC) ........................................92
Adding Engine Coolant (Antifreeze) ............................ 234
Additives, Fuel .............................................................. 267
Air Bag........................................................................... 176Air Bag Operation.................................................... 177
Air Bag Warning Light .................................... 176
, 178
Driver Knee Air Bag ................................................ 181
Enhanced Accident Response ...................... 184
, 222
Event Data Recorder (EDR).................................... 222 Front Air Bag ........................................................... 178
If Deployment Occurs ............................................. 184
Knee Impact Bolsters ............................................. 181
Maintaining Your Air Bag System .......................... 187
Maintenance ........................................................... 187
Redundant Air Bag Warning Light ......................... 176
Side Air Bags ........................................................... 181
Transporting Pets.................................................... 199
Air Bag Light ........................................................ 176
, 200
Air Cleaner, Engine (Engine Air Cleaner Filter) ........... 229
Air Conditioner Maintenance ...................................... 229
Air Conditioner Refrigerant ................................. 229
, 230
Air Conditioner System ................................................ 229
Air Conditioning ............................................................... 46
Air Conditioning Filter ........................................... 50
, 230
Air Conditioning, Operating Tips ..................................... 49 Air Filter......................................................................... 229 Air Pressure
Tires.......................................................................... 254
Alarm Arm The System......................................................... 20
Disarm The System ................................................... 21
Panic........................................................................... 13
Security Alarm..................................................... 20
, 73
Alarm System Security Alarm............................................................ 20
All Wheel Drive Towing ...................................................................... 221
All Wheel Drive (AWD)............................................88
, 221
Alterations/Modifications Vehicle.......................................................................... 8
Antifreeze (Engine Coolant) ............................... 233
, 268
Disposal ...................................................................234
Anti-Lock Brake System (ABS) ..................................... 154
Anti-Lock Warning Light.................................................. 74
Arming System Security Alarm............................................................ 20
Assist, Hill Start ............................................................. 158
Audio Systems (Radio) ................................................. 129
Auto Down Power Windows............................................ 55
Auto Hold ......................................................................... 84
Auto Liftgate Fault Warning Light .................................. 73
Automatic Dimming Mirror ............................................. 34 Automatic Door Locks .................................................... 25Automatic Headlights ..................................................... 41 Automatic High Beams .................................................. 41
Automatic Temperature Control (ATC) .......................... 49
Automatic Transaxle....................................................... 85
Automatic Transmission ................................................ 86 Adding Fluid .................................................... 237
, 269
Fluid And Filter Change........................................... 237
Fluid Change ........................................................... 237
Fluid Level Check .................................................... 236
Fluid Type .......................................................237
, 269
Special Additives ..................................................... 236
Auxiliary Electrical Outlet (Power Outlet) ...................... 52
Axle Fluid....................................................................... 269
Axle Lubrication ............................................................ 269
BBattery.................................................................... 72, 227
Charging System Light .............................................. 72
Keyless Key Fob Replacement................................. 14
Battery Saver Feature .................................................... 70
Belts, Seat..................................................................... 200
Blind Spot Monitoring .................................................. 159
Body Mechanism Lubrication ...................................... 230
B-Pillar Location ........................................................... 251
Brake Assist System..................................................... 155
Brake Control System, Electronic................................ 155
Brake Fluid.................................................................... 269
11
23_GG_OM_EN_USC_t.book Page 277
Page 282 of 288
280 H
Hazard Driving Through Flowing, Rising, Or Shallow Standing Water ............................... 128
Hazard Warning Flashers ............................................ 203
Head Restraints .............................................................. 31
Head Rests ...................................................................... 31
Headlights ....................................................................... 40 Automatic ...................................................................41
Cleaning................................................................... 263
Delay ...........................................................................41
High Beam/Low Beam Select Switch .......................40
Lights On Reminder ...................................................41
On With Wipers ..........................................................41
Passing ....................................................................... 41
Switch .........................................................................40
Time Delay..................................................................41
Heated Mirrors .........................................................34
, 36
Heated Seats...................................................................30
High Beam/Low Beam Select (Dimmer) Switch ...........40
Hill Start Assist ............................................................. 158
HomeLink® (Garage Door Opener) ...............................36
Hood Release ..................................................................58
IIgnition .............................................................................16 Switch .........................................................................16
Inside Rearview Mirror.......................................... 34
, 203
Instrument Cluster ............................................ 65, 66, 68
Descriptions ............................................................... 66
Display ........................................................................66
Driver Assist ............................................................... 70
Menu Items ................................................................68
Messages ...................................................................70 Instrument Cluster Display
Locations and Controls ............................................. 66
Navigation .................................................................. 69
Instrument Panel Lens Cleaning ................................. 264
Intelligent Adaptive Cruise Control System.................100
Intelligent Speed Assist System .................................... 91
Interior Appearance Care ............................................. 263
Interior Fuses ................................................................ 242
Interior Lights .................................................................. 42
iPod/USB/MP3 Control .................................................. 51
JJack Location ................................................................ 207
Jack Operation .................................................... 206, 208
Jacking And Tire Changing — If Equipped
b
............. 206
Jacking Instructions ...................................................... 208
Jump Starting ................................................................ 215
KKey Fob Arm The Alarm ........................................................... 20
Disarm The Alarm ...................................................... 21
Programming Additional Key Fobs ........................... 15
Remote Keyless Entry ............................................... 13
Key Fob Battery Service (Remote Keyless Entry) ......... 14
Key Fob Programming (Remote Keyless Entry) ............ 15
Keyless Enter 'n Go™ .............................................. 13
, 23
Keys ................................................................................. 13
LLane Change And Turn Signals...................................... 42 Lane Change Assist ........................................................ 42
LaneSense ....................................................................113
Lap/Shoulder Belts ...................................................... 170 Latches ......................................................................... 201
Hood........................................................................... 58
Leaks, Fluid................................................................... 201
Life Of Tires ................................................................... 256
Liftgate ............................................................................ 59 Hands-Free ................................................................ 62
Liftgate Window Wiper/Washer .................................... 46
Light Bulbs .................................................................... 201
Lights ............................................................................. 201 Active Speed Limiter Fault........................................ 74
Active Speed Limiter SET.......................................... 77
Air Bag...................................................... 71
, 176, 200
Anti Lock Brake System ............................................ 74
Automatic Headlights ............................................... 41
Automatic High Beam ................................. 41
, 77, 78
Battery Charge .......................................................... 72
Battery Saver ...................................................... 42
, 44
Brake Assist Warning.............................................. 157
Brake Warning........................................................... 71
Bulb Replacement .................................................. 246
Cornering ................................................................... 41
Cruise ......................................................................... 77
Daytime Running....................................................... 40
Dimmer Switch, Headlight ........................................ 42
Door Open.................................................................. 72
Drowsiness Detected ................................................ 72
Electric Power Steering Fault ................................... 72
Electronic Park Brake ............................................... 74
Electronic Stability Control ....................................... 74
Electronic Throttle Control ........................................ 72
Engine Temperature ................................................. 73
Exterior..................................................................... 201 Forward Collision Warning........................................ 77
Fuel Cutoff ................................................................. 74
Fuel Level Sensor Fail............................................... 74
23_GG_OM_EN_USC_t.book Page 280