manual radio set DODGE HORNET 2023 Owners Manual
[x] Cancel search | Manufacturer: DODGE, Model Year: 2023, Model line: HORNET, Model: DODGE HORNET 2023Pages: 288, PDF Size: 14.2 MB
Page 48 of 288
46GETTING TO KNOW YOUR VEHICLE
The rain sensor is able to recognize and automatically
adjust itself when the following conditions occur:
Presence of dirt on the controlled surface
(e.g. salt, dirt, etc.).
Presence of streaks of water caused by the worn
window wiper blades.
Difference between day and night.
REAR WINDOW WIPER/WASHER
Shifting the vehicle into REVERSE with the windshield wiper
operating activates a single cycle of the rear window wiper.
Push the windshield wiper lever downward (with the
vehicle in REVERSE) to activate/deactivate continuous
rear wiper operation.
Push the windshield wiper lever downward (without the
vehicle in REVERSE) to activate/deactivate intermittent
rear wiper operation.
Push the windshield wiper lever towards the instrument
panel to activate the rear window washer (a brief push
activates one washing cycle, while keeping the stalk
pushed washes continuously until the stalk is released).
NOTE:Make sure the rear wiper is turned off when cleaning the
windshield glass.
CLIMATE CONTROLS
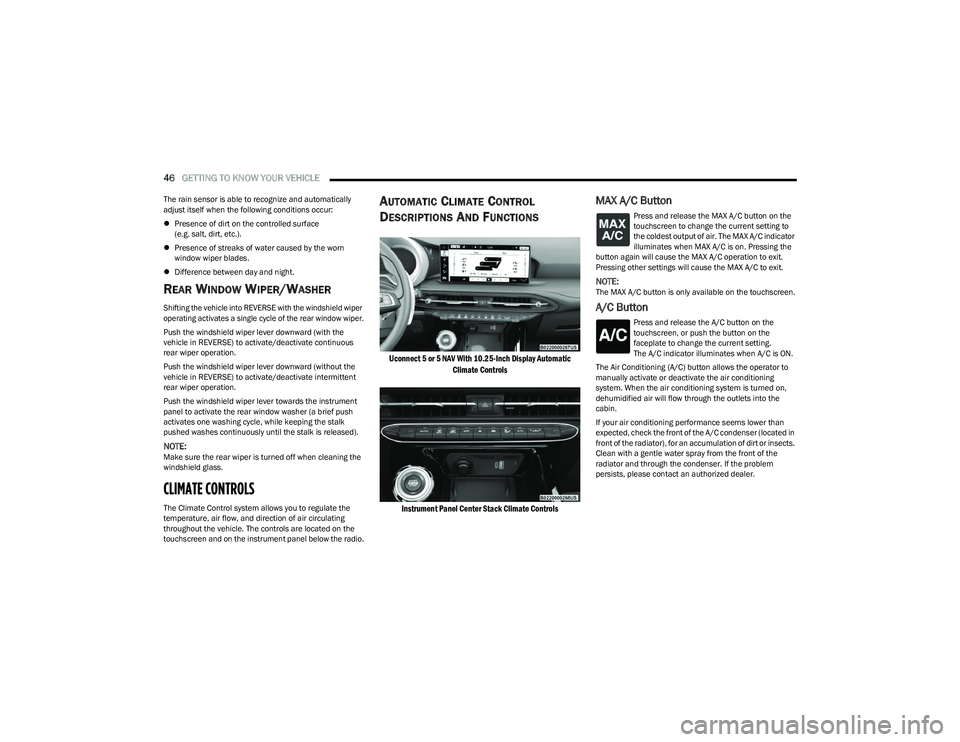
The Climate Control system allows you to regulate the
temperature, air flow, and direction of air circulating
throughout the vehicle. The controls are located on the
touchscreen and on the instrument panel below the radio.
AUTOMATIC CLIMATE CONTROL
D
ESCRIPTIONS AND FUNCTIONS
Uconnect 5 or 5 NAV With 10.25-Inch Display Automatic
Climate Controls
Instrument Panel Center Stack Climate Controls
MAX A/C Button
Press and release the MAX A/C button on the
touchscreen to change the current setting to
the coldest output of air. The MAX A/C indicator
illuminates when MAX A/C is on. Pressing the
button again will cause the MAX A/C operation to exit.
Pressing other settings will cause the MAX A/C to exit.
NOTE:The MAX A/C button is only available on the touchscreen.
A/C Button
Press and release the A/C button on the
touchscreen, or push the button on the
faceplate to change the current setting.
The A/C indicator illuminates when A/C is ON.
The Air Conditioning (A/C) button allows the operator to
manually activate or deactivate the air conditioning
system. When the air conditioning system is turned on,
dehumidified air will flow through the outlets into the
cabin.
If your air conditioning performance seems lower than
expected, check the front of the A/C condenser (located in
front of the radiator), for an accumulation of dirt or insects.
Clean with a gentle water spray from the front of the
radiator and through the condenser. If the problem
persists, please contact an authorized dealer.
23_GG_OM_EN_USC_t.book Page 46
Page 73 of 288
GETTING TO KNOW YOUR INSTRUMENT PANEL71
The battery was recently replaced and was not charged
completely.
The battery was discharged by an electrical load left on
when the vehicle was parked.
The battery was used for an extended period with the
engine not running to supply radio, lights, chargers,
+12 Volts portable appliances like vacuum cleaners,
game consoles and similar devices.
What to do when an electrical load reduction action
message is present (“Battery Saver On” or
“Battery Saver Mode”)
During a trip:
Reduce power to unnecessary loads if possible:
Turn off redundant lights (interior or exterior)
Check what may be plugged into power outlets
+12 Volts, 150W, USB ports
Check HVAC settings (blower, temperature)
Check the audio settings (volume)
After a trip:
Check if any aftermarket equipment was installed
(additional lights, upfitter electrical accessories,
audio systems, alarms) and review specifications if any
(load and Ignition Off Draw currents).
Evaluate the latest driving cycles (distance, driving
time and parking time).
The vehicle should have service performed if the
message is still present during consecutive trips and
the evaluation of the vehicle and driving pattern did not
help to identify the cause.WARNING LIGHTS AND MESSAGES
The warning/indicator lights will illuminate in the
instrument panel together with a dedicated message and/
or acoustic signal when applicable. These indications are
indicative and precautionary and as such must not be
considered as exhaustive and/or alternative to the
information contained in the Owner’s Manual, which you
are advised to read carefully in all cases. Always refer to
the information in this chapter in the event of a failure
indication. All active telltales will display first if applicable.
The system check menu may appear different based upon
equipment options and current vehicle status. Some
telltales are optional and may not appear.
RED WARNING LIGHTS
Air Bag Warning Light
This warning light will illuminate to indicate a
fault with the air bag, and will turn on for four to
eight seconds as a bulb check when the
ignition is placed in the ON/RUN position. This
light will illuminate with a single chime when a fault with
the air bag has been detected, it will stay on until the fault
is cleared. If the light is either not on during startup, stays
on, or turns on while driving, have the system inspected at
an authorized dealer as soon as possible.
Brake Warning Light
This warning light monitors various brake
functions, including brake fluid level and
parking brake application. If the brake light
turns on it may indicate that the parking brake
is applied, that the brake fluid level is low, or that there is
a problem with the Anti-Lock Brake System reservoir. If the light remains on when the parking brake has been
disengaged, and the fluid level is at the full mark on the
master cylinder reservoir, it indicates a possible brake
hydraulic system malfunction or that a problem with the
Brake Booster has been detected by the Anti-Lock Brake
System (ABS) / Electronic Stability Control (ESC) system.
In this case, the light will remain on until the condition has
been corrected. If the problem is related to the brake
booster, the ABS pump will run when applying the brake,
and a brake pedal pulsation may be felt during each stop.
The dual brake system provides a reserve braking capacity
in the event of a failure to a portion of the hydraulic
system. A leak in either half of the dual brake system is
indicated by the Brake Warning Light, which will turn on
when the brake fluid level in the master cylinder has
dropped below a specified level.
The light will remain on until the cause is corrected.
NOTE:The light may flash momentarily during sharp cornering
maneuvers, which change fluid level conditions. The
vehicle should have service performed, and the brake
fluid level checked.
If brake failure is indicated, immediate repair is necessary.
WARNING!
Driving a vehicle with the red brake light on is
dangerous. Part of the brake system may have failed.
It will take longer to stop the vehicle. You could have a
collision. Have the vehicle checked immediately.
3
23_GG_OM_EN_USC_t.book Page 71
Page 118 of 288
116STARTING AND OPERATING
CHANGING LANESENSE STATUS
The LaneSense system has settings to adjust the intensity
of the torque warning (low/med/high) and the warning
zone sensitivity (early/late) that you can configure through
the Uconnect system
Úpage 130.
NOTE:
When enabled the system operates above 37 mph
(60 km/h) and below 112 mph (180 km/h).
Use of the turn signal suppresses the warnings.
The system will not apply torque to the steering wheel
whenever a safety system engages (Anti-Lock Brakes,
Traction Control System, Electronic Stability Control,
Forward Collision Warning, etc.).
PARKVIEW REAR BACK UP CAMERA
The ParkView Rear Back Up Camera allows you to see an
on-screen image of the rear surroundings of your vehicle
whenever the gear selector is put into REVERSE. The
image will be displayed on the Navigation/Multimedia
radio display screen along with a caution note to
“Check Entire Surroundings” across the top of the screen.
After five seconds this note will disappear. The ParkView
camera is located on the rear of the vehicle above the rear
license plate. When the vehicle is shifted out of REVERSE with camera
delay turned off, the rear camera mode is exited and the
previous screen appears.
Manual Activation Of The Back Up Camera
1. Press the Controls button located in the Vehicle
Controls menu, or within the Apps drawer. This
button can also be configured as a shortcut on the
bottom of the Uconnect display.
2. Press the Back Up Camera button to turn the Rear View Camera system on.
NOTE:The ParkView Rear Back Up Camera has programmable
modes of operation that may be selected through the
Uconnect system
Úpage 130.
When the vehicle is shifted out of REVERSE with camera
delay turned off, the rear camera mode is exited and the
previous screen appears. When the vehicle is shifted out
of REVERSE with camera delay turned on, the camera
image will continue to be displayed for up to 10 seconds
unless the following conditions occur: The vehicle speed
exceeds 8 mph (13 km/h), the vehicle is shifted into PARK, the vehicle’s ignition is placed in the OFF position,
or the user presses the touchscreen X button to exit out of
the camera video display. When enabled, active guidelines are overlaid on the image
to illustrate the width of the vehicle and its projected back
up path based on the steering wheel position. A dashed
center line overlay indicates the center of the vehicle to
assist with parking or aligning to a hitch/receiver.
Different colored zones indicate the distance to the rear of
the vehicle. The following table shows the approximate
distances for each zone:
Zone Distance To The Rear Of
The Vehicle
Red 0 - 1 ft (0 - 30 cm)
Yellow 1 ft - 3 ft (30 cm - 1 m)
Green 3 ft - 9.5 ft (1 m - 3 m)
WARNING!
Drivers must be careful when backing up even when
using the ParkView Rear Back Up Camera. Always
check carefully behind your vehicle, and be sure to
check for pedestrians, animals, other vehicles,
obstructions, or blind spots before backing up. You are
responsible for the safety of your surroundings and
must continue to pay attention while backing up.
Failure to do so can result in serious injury or death.
23_GG_OM_EN_USC_t.book Page 116
Page 134 of 288
132MULTIMEDIA
My Profile
Navigation Turn-by-Turn Displayed in Cluster This setting will display Navigation prompts in the Instrument Cluster Display.
Phone Pop-ups Displayed In Cluster This setting will display smartphone notifications and messages in the Instrument Cluster
Display.
Setting Name
Description
When the My Profile button is pressed on the touchscreen, the system displays options related to the vehicle’s profiles.
NOTE:Depending on the vehicle’s options, feature settings may vary.
Setting NameDescription
Language This setting will change the language of the Uconnect system and Instrument Cluster
Display. The available languages are Español (Mexico), English (United States), Italiano,
and Français (Canada).
Display Mode This setting will adjust the display for the radio to “Auto” or “Manual”. “Manual” allows for
more customization with the radio display.
Display Brightness Nighttime This setting will allow you to adjust the “Brightness Nighttime” setting. Selectable options
are 1 through 10.
Display Brightness Daytime This setting will allow you to adjust the “Brightness Daytime” setting. Selectable options
are 1 through 10.
Set Theme This setting will allow you to change the display theme.
Units This setting will allow you to customize the units for “Speed” (MPH or km/h), “Distance”
(mi or km), “Fuel Consumption” (MPG [US], MPG [UK], L/100 km, or km/L), “Pressure”
(psi, kPa, or bar), “Temperature” (°C or °F), and “Torque” (Nm or lb-ft) units of
measurement independently. Unit settings can be selected for “US”, “Metric A”,
“Metric B”, “Imperial”, or “Custom”.
23_GG_OM_EN_USC_t.book Page 132
Page 135 of 288
MULTIMEDIA133
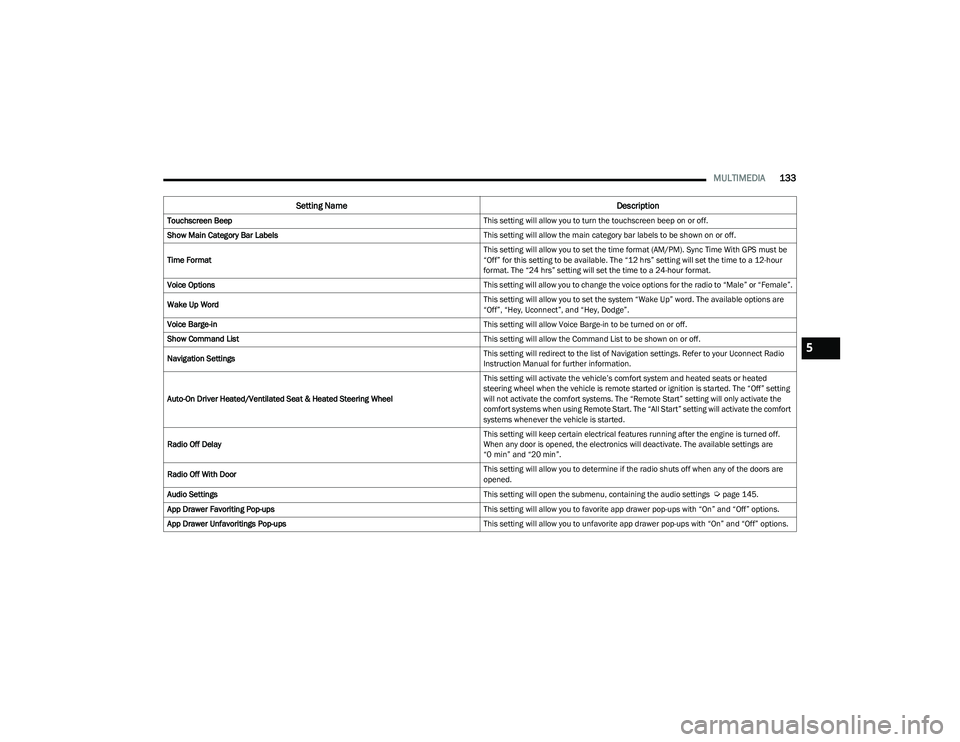
Touchscreen Beep This setting will allow you to turn the touchscreen beep on or off.
Show Main Category Bar Labels This setting will allow the main category bar labels to be shown on or off.
Time Format This setting will allow you to set the time format (AM/PM). Sync Time With GPS must be
“Off” for this setting to be available. The “12 hrs” setting will set the time to a 12-hour
format. The “24 hrs” setting will set the time to a 24-hour format.
Voice Options This setting will allow you to change the voice options for the radio to “Male” or “Female”.
Wake Up Word This setting will allow you to set the system “Wake Up” word. The available options are
“Off”, “Hey, Uconnect”, and “Hey, Dodge”.
Voice Barge-in This setting will allow Voice Barge-in to be turned on or off.
Show Command List This setting will allow the Command List to be shown on or off.
Navigation Settings This setting will redirect to the list of Navigation settings. Refer to your Uconnect Radio
Instruction Manual for further information.
Auto-On Driver Heated/Ventilated Seat & Heated Steering Wheel This setting will activate the vehicle’s comfort system and heated seats or heated
steering wheel when the vehicle is remote started or ignition is started. The “Off” setting
will not activate the comfort systems. The “Remote Start” setting will only activate the
comfort systems when using Remote Start. The “All Start” setting will activate the comfort
systems whenever the vehicle is started.
Radio Off Delay This setting will keep certain electrical features running after the engine is turned off.
When any door is opened, the electronics will deactivate. The available settings are
“0 min” and “20 min”.
Radio Off With Door This setting will allow you to determine if the radio shuts off when any of the doors are
opened.
Audio Settings This setting will open the submenu, containing the audio settings
Úpage 145.
App Drawer Favoriting Pop-ups This setting will allow you to favorite app drawer pop-ups with “On” and “Off” options.
App Drawer Unfavoritings Pop-ups This setting will allow you to unfavorite app drawer pop-ups with “On” and “Off” options.
Setting NameDescription
5
23_GG_OM_EN_USC_t.book Page 133
Page 141 of 288
MULTIMEDIA139
Voice — If Equipped
Navigation — If Equipped
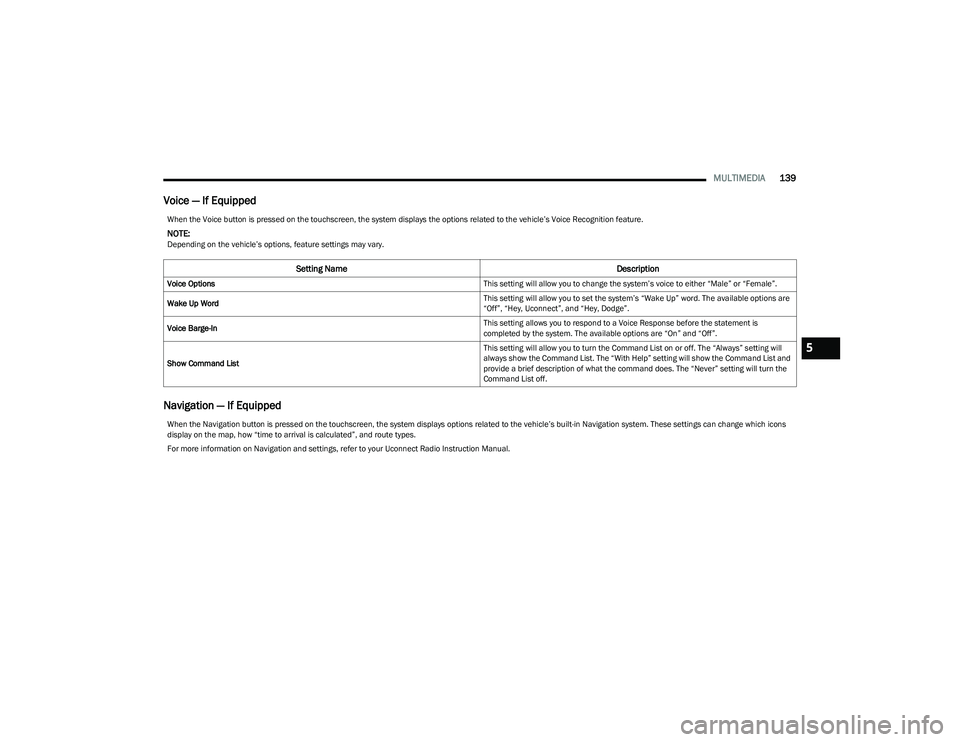
When the Voice button is pressed on the touchscreen, the system displays the options related to the vehicle’s Voice Recognition feature.
NOTE:Depending on the vehicle’s options, feature settings may vary.
Setting Name Description
Voice Options This setting will allow you to change the system’s voice to either “Male” or “Female”.
Wake Up Word This setting will allow you to set the system’s “Wake Up” word. The available options are
“Off”, “Hey, Uconnect”, and “Hey, Dodge”.
Voice Barge-In This setting allows you to respond to a Voice Response before the statement is
completed by the system. The available options are “On” and “Off”.
Show Command List This setting will allow you to turn the Command List on or off. The “Always” setting will
always show the Command List. The “With Help” setting will show the Command List and
provide a brief description of what the command does. The “Never” setting will turn the
Command List off.
When the Navigation button is pressed on the touchscreen, the system displays options related to the vehicle’s built-in Navigation system. These settings can change which icons
display on the map, how “time to arrival is calculated”, and route types.
For more information on Navigation and settings, refer to your Uconnect Radio Instruction Manual.
5
23_GG_OM_EN_USC_t.book Page 139
Page 278 of 288
276CUSTOMER ASSISTANCE
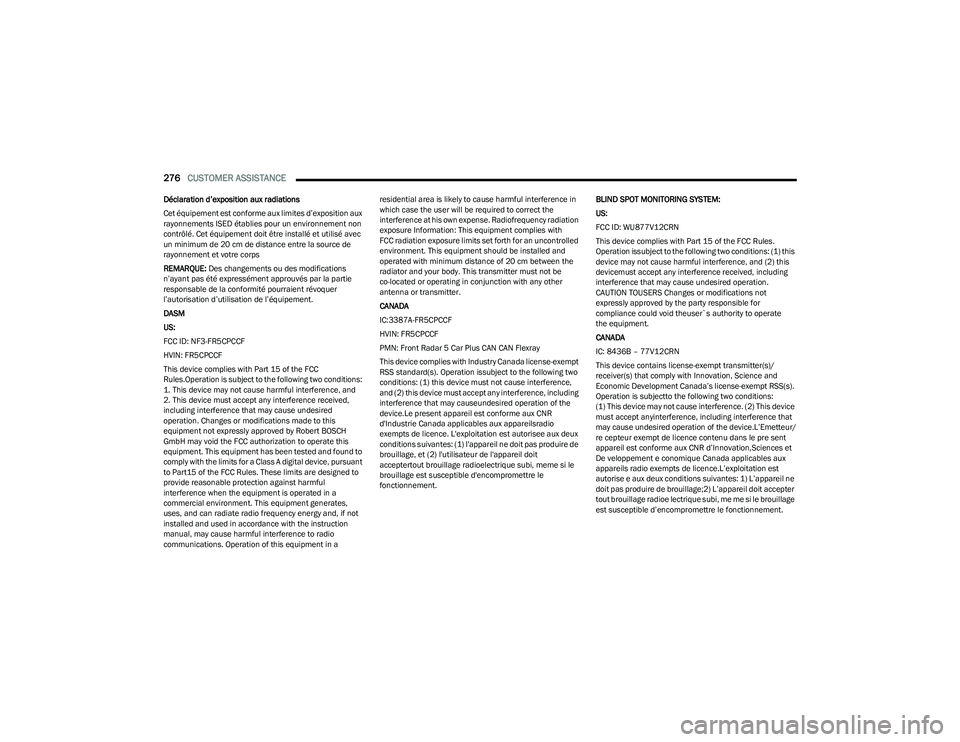
Déclaration d’exposition aux radiations
Cet équipement est conforme aux limites d’exposition aux
rayonnements ISED établies pour un environnement non
contrôlé. Cet équipement doit être installé et utilisé avec
un minimum de 20 cm de distance entre la source de
rayonnement et votre corps
REMARQUE: Des changements ou des modifications
n’ayant pas été expressément approuvés par la partie
responsable de la conformité pourraient révoquer
l’autorisation d’utilisation de l’équipement.
DASM
US:
FCC ID: NF3-FR5CPCCF
HVIN: FR5CPCCF
This device complies with Part 15 of the FCC
Rules.Operation is subject to the following two conditions:
1. This device may not cause harmful interference, and
2. This device must accept any interference received,
including interference that may cause undesired
operation. Changes or modifications made to this
equipment not expressly approved by Robert BOSCH
GmbH may void the FCC authorization to operate this
equipment. This equipment has been tested and found to
comply with the limits for a Class A digital device, pursuant
to Part15 of the FCC Rules. These limits are designed to
provide reasonable protection against harmful
interference when the equipment is operated in a
commercial environment. This equipment generates,
uses, and can radiate radio frequency energy and, if not
installed and used in accordance with the instruction
manual, may cause harmful interference to radio
communications. Operation of this equipment in a residential area is likely to cause harmful interference in
which case the user will be required to correct the
interference at his own expense. Radiofrequency radiation
exposure Information: This equipment complies with
FCC radiation exposure limits set forth for an uncontrolled
environment. This equipment should be installed and
operated with minimum distance of 20 cm between the
radiator and your body. This transmitter must not be
co-located or operating in conjunction with any other
antenna or transmitter.
CANADA
IC:3387A-FR5CPCCF
HVIN: FR5CPCCF
PMN: Front Radar 5 Car Plus CAN CAN Flexray
This device complies with Industry Canada license-exempt
RSS standard(s). Operation issubject to the following two
conditions: (1) this device must not cause interference,
and (2) this device must accept any interference, including
interference that may causeundesired operation of the
device.Le present appareil est conforme aux CNR
d'Industrie Canada applicables aux appareilsradio
exempts de licence. L'exploitation est autorisee aux deux
conditions suivantes: (1) l'appareil ne doit pas produire de
brouillage, et (2) l'utilisateur de l'appareil doit
acceptertout brouillage radioelectrique subi, meme si le
brouillage est susceptible d'encompromettre le
fonctionnement.
BLIND SPOT MONITORING SYSTEM:
US:
FCC ID: WU877V12CRN
This device complies with Part 15 of the FCC Rules.
Operation issubject to the following two conditions: (1) this
device may not cause harmful interference, and (2) this
devicemust accept any interference received, including
interference that may cause undesired operation.
CAUTION TOUSERS Changes or modifications not
expressly approved by the party responsible for
compliance could void theuser`s authority to operate
the equipment.
CANADA
IC: 8436B – 77V12CRN
This device contains license-exempt transmitter(s)/
receiver(s) that comply with Innovation, Science and
Economic Development Canada’s license-exempt RSS(s).
Operation is subjectto the following two conditions:
(1) This device may not cause interference. (2) This device
must accept anyinterference, including interference that
may cause undesired operation of the device.L’Emetteur/
re cepteur exempt de licence contenu dans le pre sent
appareil est conforme aux CNR d’Innovation,Sciences et
De veloppement e conomique Canada applicables aux
appareils radio exempts de licence.L’exploitation est
autorise e aux deux conditions suivantes: 1) L’appareil ne
doit pas produire de brouillage;2) L’appareil doit accepter
tout brouillage radioe lectrique subi, me me si le brouillage
est susceptible d’encompromettre le fonctionnement.
23_GG_OM_EN_USC_t.book Page 276