DODGE JOURNEY 2017 1.G Owners Manual
Manufacturer: DODGE, Model Year: 2017, Model line: JOURNEY, Model: DODGE JOURNEY 2017 1.GPages: 510
Page 91 of 510
MIRRORS
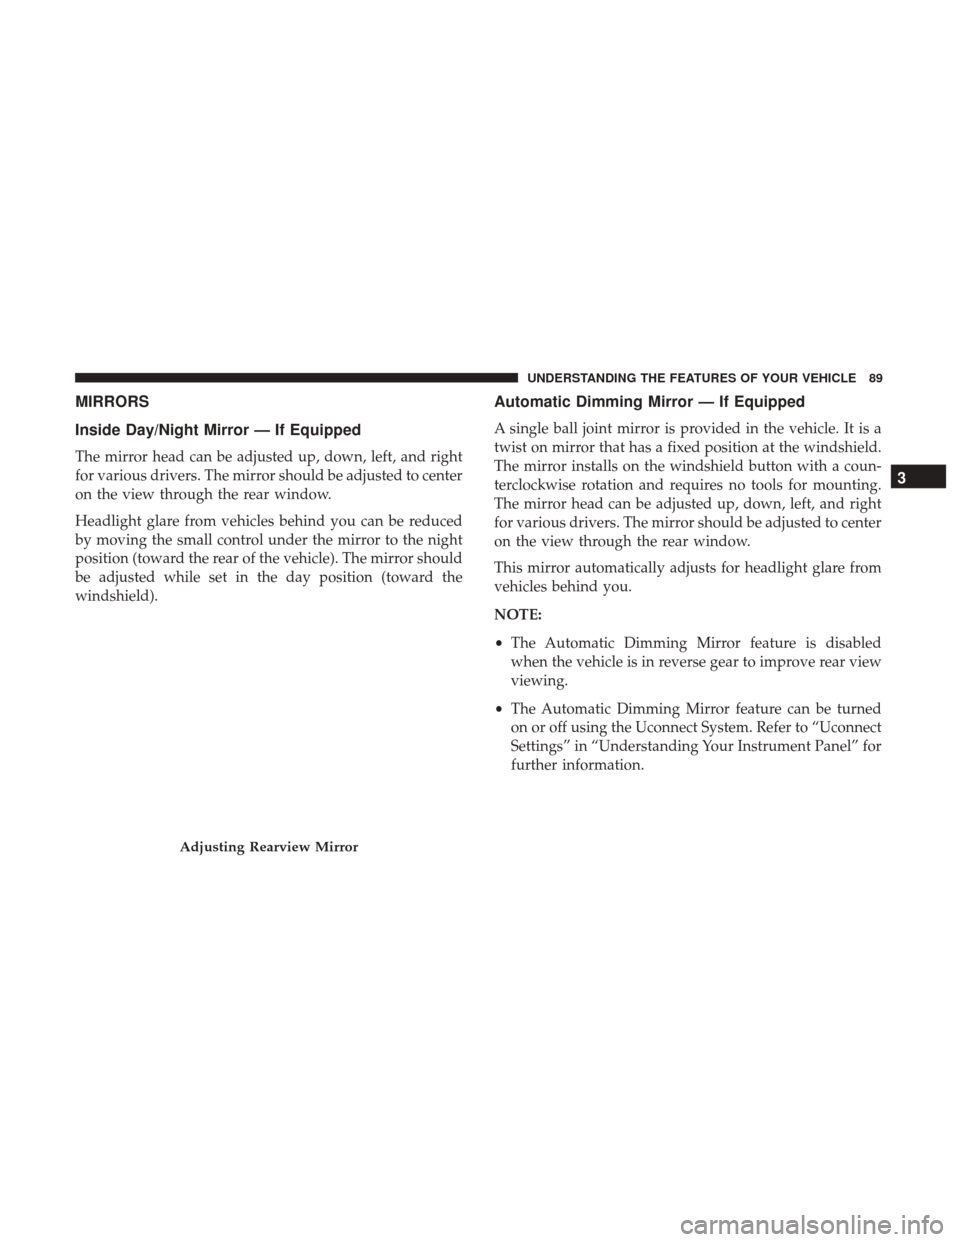
Inside Day/Night Mirror — If Equipped
The mirror head can be adjusted up, down, left, and right
for various drivers. The mirror should be adjusted to center
on the view through the rear window.
Headlight glare from vehicles behind you can be reduced
by moving the small control under the mirror to the night
position (toward the rear of the vehicle). The mirror should
be adjusted while set in the day position (toward the
windshield).
Automatic Dimming Mirror — If Equipped
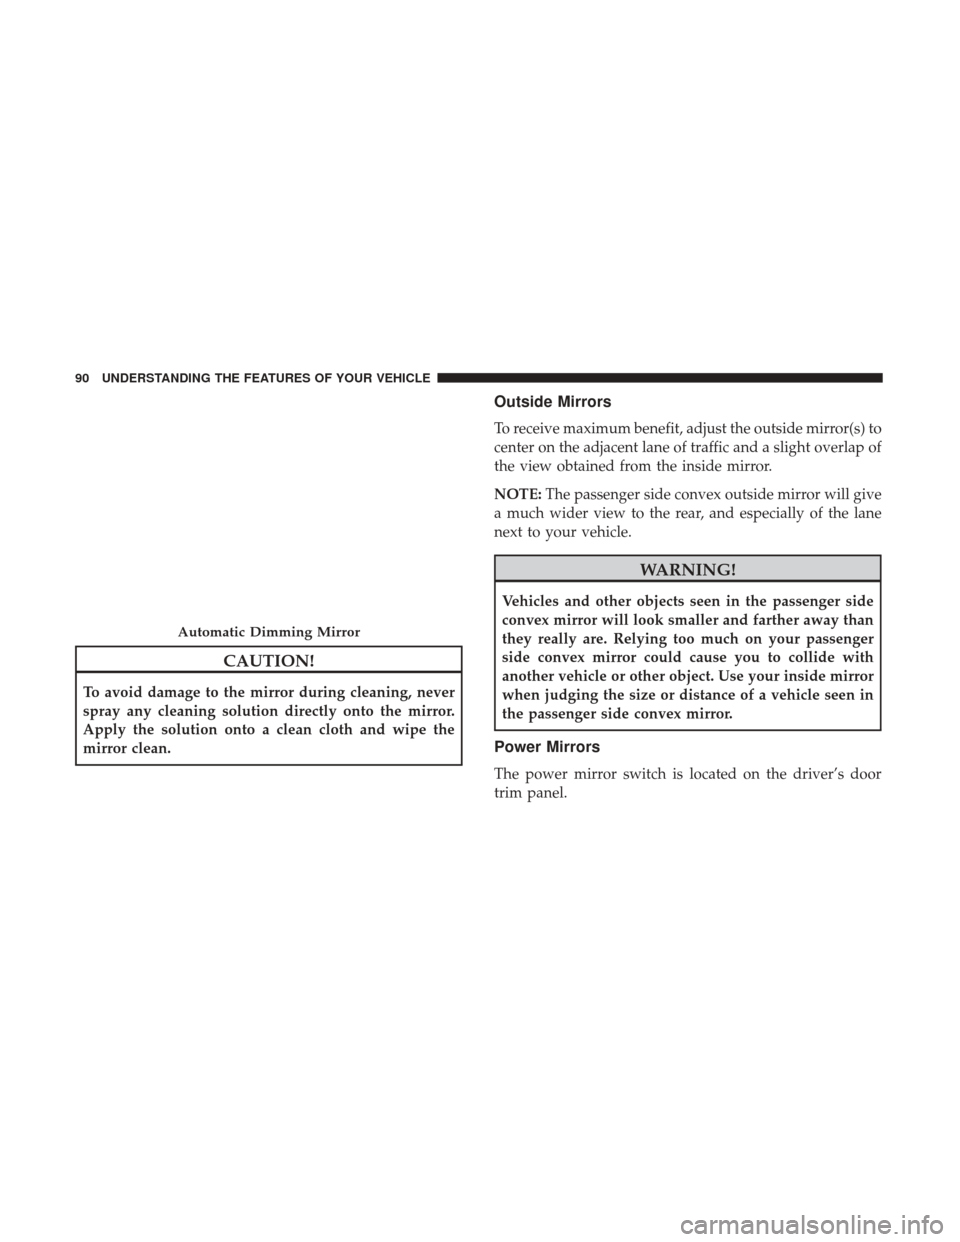
A single ball joint mirror is provided in the vehicle. It is a
twist on mirror that has a fixed position at the windshield.
The mirror installs on the windshield button with a coun-
terclockwise rotation and requires no tools for mounting.
The mirror head can be adjusted up, down, left, and right
for various drivers. The mirror should be adjusted to center
on the view through the rear window.
This mirror automatically adjusts for headlight glare from
vehicles behind you.
NOTE:
•The Automatic Dimming Mirror feature is disabled
when the vehicle is in reverse gear to improve rear view
viewing.
• The Automatic Dimming Mirror feature can be turned
on or off using the Uconnect System. Refer to “Uconnect
Settings” in “Understanding Your Instrument Panel” for
further information.
Adjusting Rearview Mirror
3
UNDERSTANDING THE FEATURES OF YOUR VEHICLE 89
Page 92 of 510
CAUTION!
To avoid damage to the mirror during cleaning, never
spray any cleaning solution directly onto the mirror.
Apply the solution onto a clean cloth and wipe the
mirror clean.
Outside Mirrors
To receive maximum benefit, adjust the outside mirror(s) to
center on the adjacent lane of traffic and a slight overlap of
the view obtained from the inside mirror.
NOTE:The passenger side convex outside mirror will give
a much wider view to the rear, and especially of the lane
next to your vehicle.
WARNING!
Vehicles and other objects seen in the passenger side
convex mirror will look smaller and farther away than
they really are. Relying too much on your passenger
side convex mirror could cause you to collide with
another vehicle or other object. Use your inside mirror
when judging the size or distance of a vehicle seen in
the passenger side convex mirror.
Power Mirrors
The power mirror switch is located on the driver’s door
trim panel.
Automatic Dimming Mirror
90 UNDERSTANDING THE FEATURES OF YOUR VEHICLE
Page 93 of 510
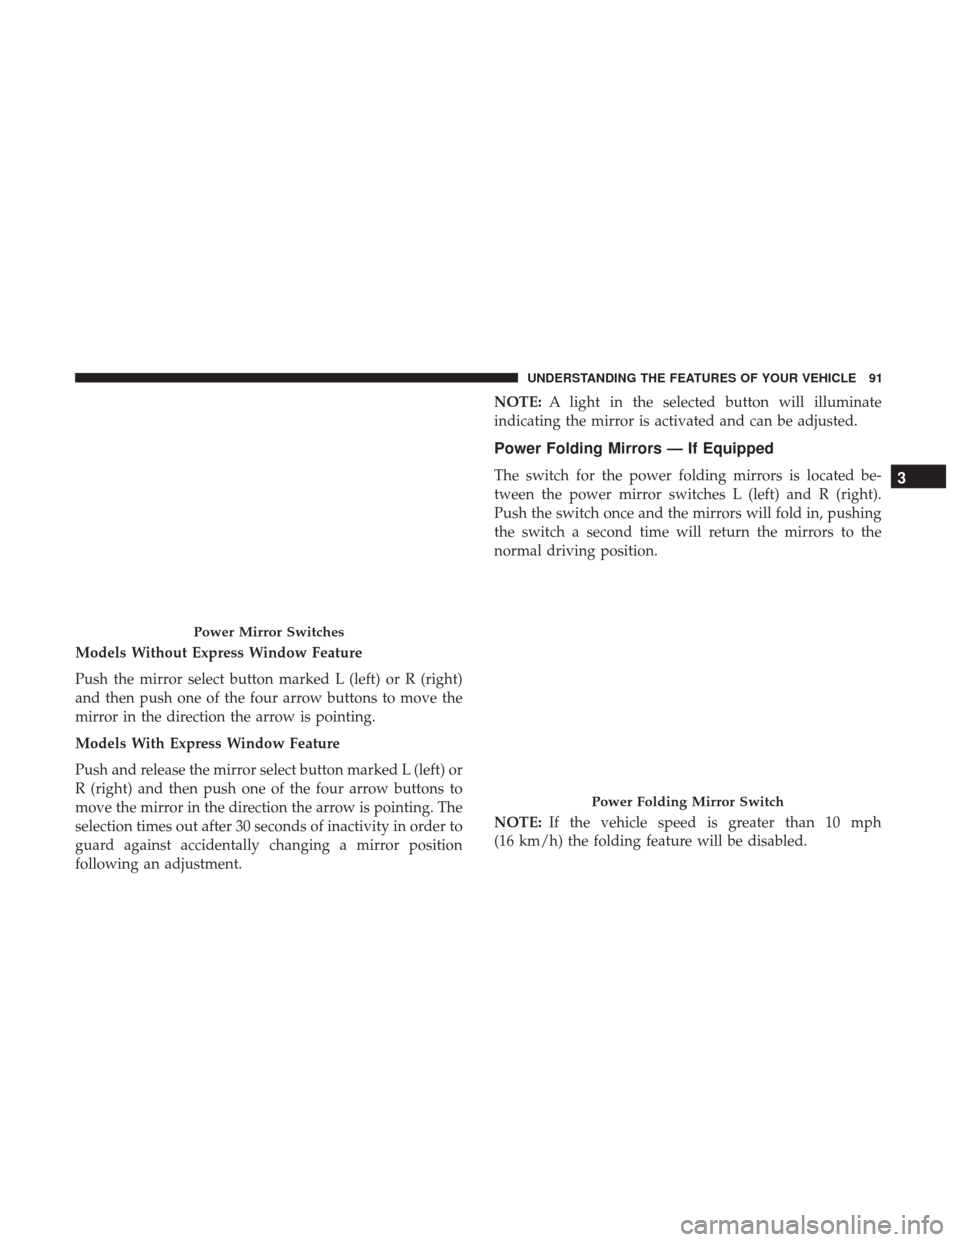
Models Without Express Window Feature
Push the mirror select button marked L (left) or R (right)
and then push one of the four arrow buttons to move the
mirror in the direction the arrow is pointing.
Models With Express Window Feature
Push and release the mirror select button marked L (left) or
R (right) and then push one of the four arrow buttons to
move the mirror in the direction the arrow is pointing. The
selection times out after 30 seconds of inactivity in order to
guard against accidentally changing a mirror position
following an adjustment.NOTE:
A light in the selected button will illuminate
indicating the mirror is activated and can be adjusted.
Power Folding Mirrors — If Equipped
The switch for the power folding mirrors is located be-
tween the power mirror switches L (left) and R (right).
Push the switch once and the mirrors will fold in, pushing
the switch a second time will return the mirrors to the
normal driving position.
NOTE: If the vehicle speed is greater than 10 mph
(16 km/h) the folding feature will be disabled.
Power Mirror Switches
Power Folding Mirror Switch
3
UNDERSTANDING THE FEATURES OF YOUR VEHICLE 91
Page 94 of 510
If the mirrors are in the folded position, and vehicle speed
is equal or greater than 10 mph (16 km/h), they will
automatically unfold.
Resetting The Power Folding Outside Mirrors
You may need to reset the power folding mirrors if the
following occurs:
•The mirrors are accidentally blocked while folding.
• The mirrors are accidentally manually folded/unfolded.
• The mirrors come out of the unfolded position.
• The mirrors shake and vibrate at normal driving speeds.
To reset the power folding mirrors: Fold and unfold them
by pushing the button. (this may require multiple button
pushes). This resets them to their normal position.Manual Folding Mirrors — If Equipped
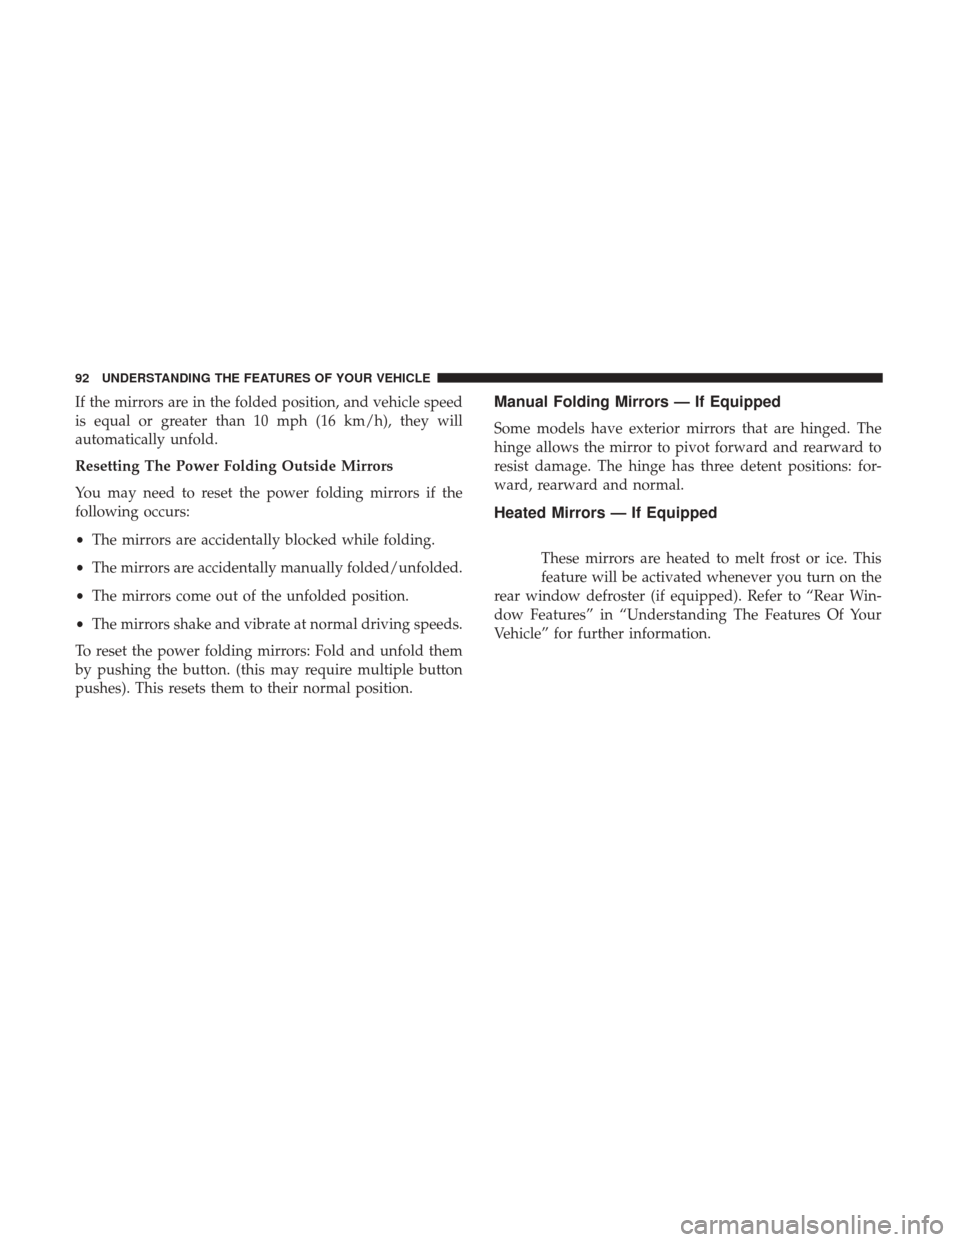
Some models have exterior mirrors that are hinged. The
hinge allows the mirror to pivot forward and rearward to
resist damage. The hinge has three detent positions: for-
ward, rearward and normal.
Heated Mirrors — If Equipped
These mirrors are heated to melt frost or ice. This
feature will be activated whenever you turn on the
rear window defroster (if equipped). Refer to “Rear Win-
dow Features” in “Understanding The Features Of Your
Vehicle” for further information.
92 UNDERSTANDING THE FEATURES OF YOUR VEHICLE
Page 95 of 510
Illuminated Vanity Mirrors — If Equipped
An illuminated vanity mirror is on each sun visor. To use
the mirror, rotate the sun visor downward and swing the
mirror cover upward. The light will turn on automatically.
Closing the mirror cover will turn off the light.
Sun Visor “Slide-On Rod” Feature — If Equipped
This feature allows for additional flexibility in positioning
the visor to block out the sun.
1. Fold down the sun visor.
2. Unclip the visor from the center clip.3. Pull the sun visor toward the inside rearview mirror to
extend it.
UCONNECT PHONE (4.3)
Radio 4.3
Uconnect Phone is a voice-activated, hands-free, in-vehicle
communications system. Uconnect Phone allows you to
dial a phone number with your mobile phone.
Uconnect Phone supports the following features:
Voice Activated Features:
•Hands Free dialing via Voice (“Call John Smith Mobile”
or, “Dial 248-555-1212”)
• Redialing last dialed numbers (“Redial”)
• Calling Back the last incoming call number (“Call Back”)
• View Call logs on screen (“Show incoming calls,” “Show
Outgoing calls,” “Show missed Calls,” “Show Recent
Calls”)
• Searching Contacts phone number (“Search for John
Smith Mobile”)
Illuminated Vanity Mirror
3
UNDERSTANDING THE FEATURES OF YOUR VEHICLE 93
Page 96 of 510
Screen Activated Features:
•Dialing via Keypad using touchscreen
• Viewing and Calling contacts from Phonebooks dis-
played on the touchscreen
• Setting Favorite Contact Phone numbers so they are
easily accessible on the Main Phone screen
• Viewing and Calling contacts from Recent Call logs
• Listen to Music on your Bluetooth Device via the
touchscreen
• Pairing up to 10 phones/audio devices for easy access to
connect to them quickly
Your mobile phone’s audio is transmitted through your
vehicle’s audio system; the system will automatically mute
your radio when using the Uconnect Phone.
For Uconnect Customer Support:
• U.S. residents – visit UconnectPhone.com or call 1-877-
855-8400.
• Canadian Residents - visit UconnectPhone.com or call,
1-800-465-2001 (English) or 1-800-387-9983 (French). If your mobile phone only supports the Headset Profile
you may not be able to use any Uconnect Phone features.
Refer to your mobile service provider or the phone manu-
facturer for details.
Uconnect Phone allows you to transfer calls between the
system and your mobile phone as you enter or exit your
vehicle and enables you to mute the system’s microphone
for private conversation.
WARNING!
Any voice commanded system should be used only in
safe driving conditions following all applicable laws,
including laws regarding phone use. Your attention
should be focused on safely operating the vehicle.
Failure to do so may result in a collision causing
serious injury or death.
The Uconnect Phone is driven through your Bluetooth
“Hands-Free Profile” mobile phone. Uconnect features
Bluetooth technology - the global standard that enables
different electronic devices to connect to each other with-
out wires or a docking station, so Uconnect Phone works
no matter where you stow your mobile phone (be it your
purse, pocket, or briefcase), as long as your phone is turned
94 UNDERSTANDING THE FEATURES OF YOUR VEHICLE
Page 97 of 510
on and has been paired to the vehicle’s Uconnect Phone.
The Uconnect Phone allows up to ten mobile phones or
audio devices to be linked to the system. Only one linked
(or paired) mobile phone and one audio device can be used
with the system at a time. The system is available in
English, Spanish, or French languages.
Uconnect Phone ButtonThe Uconnect Phone
Button is used to enter
the phone mode and make calls, show recent,
incoming, outgoing calls, view phonebook
etc., When you press the button you will hear
a BEEP. The beep is your signal to give a command.
Uconnect Voice Command Button
The Uconnect Voice Command
Button is
only used for “barge in” and when you are
already in a call and you want to send Tones or
make another call.
The Uconnect Phone is fully integrated with the vehicle’s
audio system. The volume of the Uconnect Phone can be
adjusted either from the radio volume control knob or from
the steering wheel radio control (right switch), if so
equipped.
Operation
Voice commands can be used to operate the Uconnect
Phone and to navigate through the Uconnect Phone menu
structure. Voice commands are required after most
Uconnect Phone prompts. There are two general methods
for how Voice Command works:
1. Say compound commands like “Call John Smith mo- bile.”
2. Say the individual commands and allow the system to guide you to complete the task.
You will be prompted for a specific command and then
guided through the available options.
• Prior to giving a voice command, one must wait for the
beep, which follows the “Listen” prompt or another
prompt.
• For certain operations, compound commands can be
used. For example, instead of saying “Call” and then
“John Smith” and then “mobile,” the following com-
pound command can be said: “Call John Smith mobile.”
• For each feature explanation in this section, only the
compound command form of the voice command is
given. You can also break the commands into parts and
3
UNDERSTANDING THE FEATURES OF YOUR VEHICLE 95
Page 98 of 510
say each part of the command when you are asked for it.
For example, you can use the compound command form
voice command “Search for John Smith,” or you can
break the compound command form into two voice
commands: “Search Contact” and when asked “John
Smith.” Please remember, the Uconnect Phone works
best when you talk in a normal conversational tone, as if
speaking to someone sitting a few feet/meters away
from you.
Natural Speech
Your Uconnect Phone Voice system uses a Natural Lan-
guage Voice Recognition (VR) engine.
Natural speech allows the user to speak commands in
phrases or complete sentences. The system filters out
certain non-word utterances and sounds such as “ah” and
“eh.” The system handles fill-in words such as “I would
like to.”
The system handles multiple inputs in the same phrase or
sentence such as “make a phone call” and “to Kelly Smith.”
For multiple inputs in the same phrase or sentence, the
system identifies the topic or context and provides the
associated follow-up prompt such as “Who do you want to
call?” in the case where a phone call was requested but the
specific name was not recognized.The system utilizes continuous dialog; when the system
requires more information from the user it will ask a
question to which the user can respond without pushing
the “Voice Command”
button on your steering wheel.
Voice Command Tree
Refer to “Voice Tree” in this section.
Help Command
If you need assistance at any prompt, or if you want to
know your options at any prompt, say “Help” following
the beep.
To activate the Uconnect Phone from idle, simply push the
Phone
button on your steering wheel and say a
command or say “help.” All Uconnect Phone sessions
begin with a push of the Phone
button on the radio
control head.
Cancel Command
At any prompt, after the beep, you can say “Cancel” and
you will be returned to the main menu.
You can also push the Phone
or Voice Command
button on your steering wheel when the system is
listening for a command and be returned to the main or
previous menu.
96 UNDERSTANDING THE FEATURES OF YOUR VEHICLE
Page 99 of 510
Pair (Link) Uconnect Phone To A Mobile Phone
To begin using your Uconnect Phone, you must pair your
compatible Bluetooth enabled mobile phone.
To complete the pairing process, you will need to reference
your mobile phone Owner’s Manual. The Uconnect web-
site may also provide detailed instructions for pairing.
NOTE:
•You must have Bluetooth enabled on your phone to
complete this procedure.
• The vehicle must be in PARK.
1. You can do either of the following: a. Push the SETTINGS button on the faceplate, pagedown to the “Phone/Bluetooth” button on the touch-
screen, press it and you will see the Paired Phones
screen. If there are no paired phones you will see
b. Push the MORE button on the faceplate, then press the “Phone” button on the touchscreen and you will
go to the Uconnect Phone main screen. Press the
“Settings” button on the touchscreen. If there are no
phones currently paired a pop-up will appear. If you select Yes you will go the Paired Phones screen, if you
select No you will return to the Uconnect Phone main
menu.
2. At the Paired Phones screen press the “Add Device” button on the touchscreen and a pop-up with instruc-
tions will appear.
3. Search for available devices on your Bluetooth enabled mobile phone. When prompted on the phone, select the
“Uconnect” device and enter the PIN.
4. When the pairing process has successfully completed, the system will prompt you to choose whether or not
this is your favorite phone. Selecting Yes will make this
phone the highest priority. This phone will take prece-
dence over other paired phones within range.
Pair A Bluetooth Streaming Audio Device
1. Push the PLAYER button on the faceplate to begin.
2. Press the “Source” button on the touchscreen.
3. Change the Source to Bluetooth.
4. Press the “Add Device” button on the touchscreen.
3
UNDERSTANDING THE FEATURES OF YOUR VEHICLE 97
Page 100 of 510
5. Search for available devices on your Bluetooth enabledAudio Device. When prompted on the device, select the
“Uconnect” device and enter the PIN.
6. Uconnect Phone will display an in process screen while the system is connecting.
7. When the pairing process has successfully completed, the system will prompt you to choose whether or not
this is your favorite device. Selecting Yes will make this
device the highest priority. This device will take prece-
dence over other paired devices within range.
NOTE: If No is selected, device priority is determined by
the order in which it was paired. The latest device paired
will have the higher priority.
You can also use the following VR command to bring up a
list of paired audio devices.
• “Show Paired Audio Devices.”
Connecting To A Particular Mobile Phone Or Audio
Device
Uconnect Phone will automatically connect to the highest
priority paired phone and/or Audio Device within range.
If you need to choose a particular Phone or Audio Device
follow these steps: 1. Push the SETTINGS button on the faceplate.
2. Press the “Phone/Bluetooth” button on the touchscreen.
3. Press to select the particular Phone or the “Phone/
Audio” button on the touchscreen and then an Audio
Device.
4. At the Options pop-up screen press the “Connect De- vice” button on the touchscreen.
5. Press the “X” to exit out of the Settings screen.
Disconnecting A Phone Or Audio Device
1. Push the SETTINGS button on the faceplate.
2. Press the “Phone/Bluetooth” button on the touchscreen.
3. Select the Phone or Audio Device.
4. At the Options pop-up screen press the “Disconnect Device” button on the touchscreen.
5. Press the “X” to exit out of the Settings screen.
Deleting A Phone Or Audio Device
1. Push the SETTINGS button on the faceplate.
2. Press the “Phone/Bluetooth” button on the touchscreen.
98 UNDERSTANDING THE FEATURES OF YOUR VEHICLE