UCONNECT SETTINGS DODGE JOURNEY 2019 Owners Manual
[x] Cancel search | Manufacturer: DODGE, Model Year: 2019, Model line: JOURNEY, Model: DODGE JOURNEY 2019Pages: 524, PDF Size: 5.29 MB
Page 20 of 524
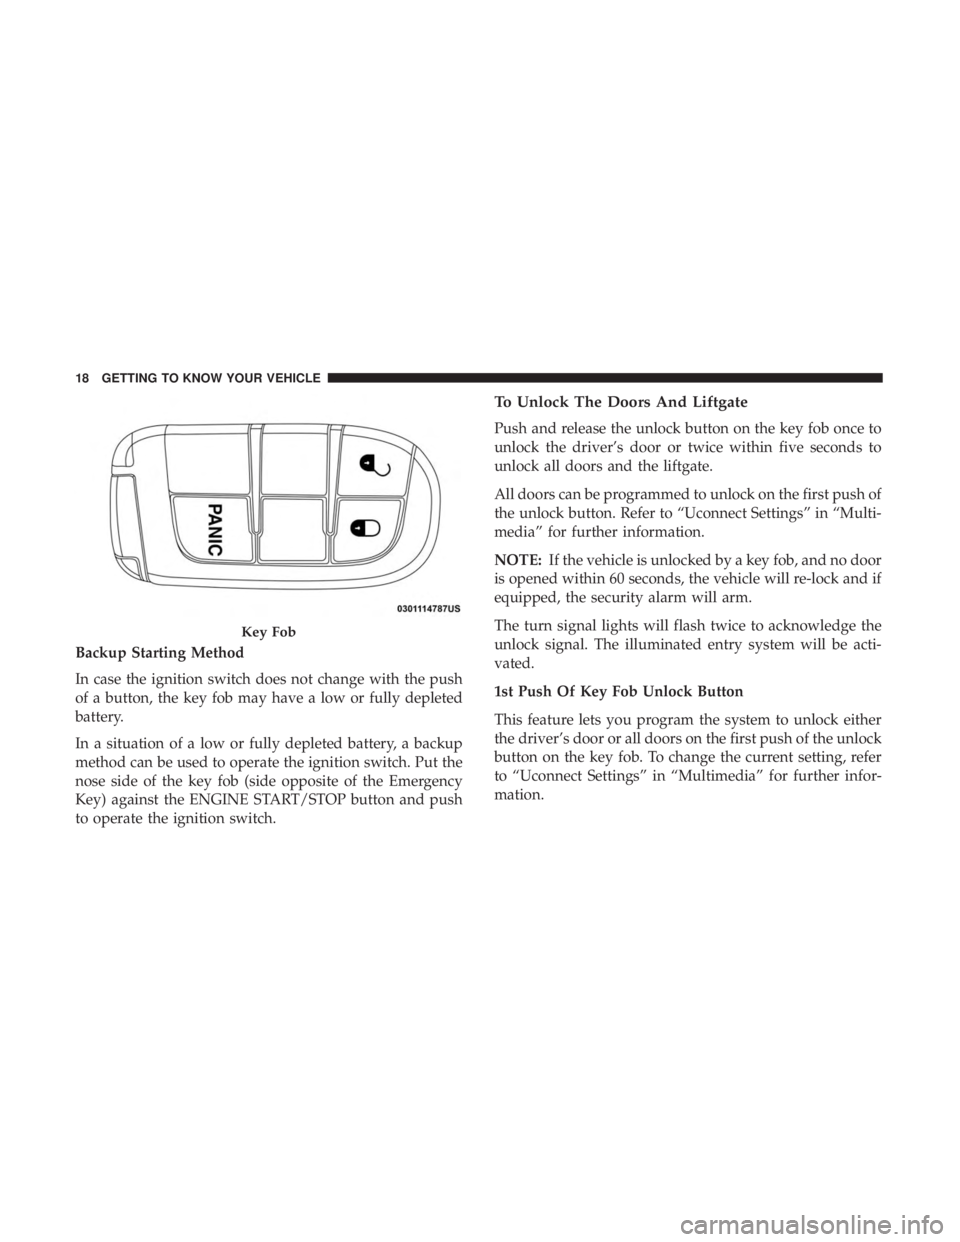
Backup Starting Method
In case the ignition switch does not change with the push
of a button, the key fob may have a low or fully depleted
battery.
In a situation of a low or fully depleted battery, a backup
method can be used to operate the ignition switch. Put the
nose side of the key fob (side opposite of the Emergency
Key) against the ENGINE START/STOP button and push
to operate the ignition switch.
To Unlock The Doors And Liftgate
Push and release the unlock button on the key fob once to
unlock the driver’s door or twice within five seconds to
unlock all doors and the liftgate.
All doors can be programmed to unlock on the first push of
the unlock button. Refer to “Uconnect Settings” in “Multi-
media” for further information.
NOTE:If the vehicle is unlocked by a key fob, and no door
is opened within 60 seconds, the vehicle will re-lock and if
equipped, the security alarm will arm.
The turn signal lights will flash twice to acknowledge the
unlock signal. The illuminated entry system will be acti-
vated.
1st Push Of Key Fob Unlock Button
This feature lets you program the system to unlock either
the driver’s door or all doors on the first push of the unlock
button on the key fob. To change the current setting, refer
to “Uconnect Settings” in “Multimedia” for further infor-
mation.
Key Fob
18 GETTING TO KNOW YOUR VEHICLE
Page 21 of 524
NOTE:If the vehicle is equipped with Passive Entry, refer
to “Keyless Enter-N-Go — Passive Entry” located in
“Doors” in “Getting To Know Your Vehicle” for further
information.
Headlight Illumination On Approach
This feature activates the headlights for up to 90 seconds
when the doors are unlocked with the key fob. The time for
this feature is programmable, on vehicles equipped,
through Uconnect Settings. To change the current setting,
refer to “Uconnect Settings” in “Multimedia” for further
information.
To Lock The Doors And Liftgate
Push and release the lock button on the key fob to lock all
doors and liftgate.
The turn signal lights will flash and the horn will chirp to
acknowledge the signal. Refer to “Uconnect Settings”
located in “Multimedia” for further programmable infor-
mation.
If the vehicle is equipped with Passive Entry, refer to
“Keyless Enter-N-Go — Passive Entry” located in “Doors”
in “Getting To Know Your Vehicle” for further information. Vehicles Equipped With Keyless Enter-N-Go — Passive
Entry
If one or more doors are open, or the liftgate is open, the
doors will lock. The doors will unlock again automatically
if the key is left inside the passenger compartment, other-
wise the doors will stay locked.
Sound Horn With Lock
This feature will cause the horn to chirp when the doors are
locked with the key fob. This feature can be turned on or
turned off. To change the current setting, refer to
“Uconnect Settings” in “Multimedia” for further informa-
tion.
Using The Panic Alarm
To turn the Panic Alarm feature on or off, push the Panic
button on the key fob. When the Panic Alarm is activated,
the turn signals will flash, the horn will pulse on and off,
and the interior lights will turn on.
The Panic Alarm will stay on for three minutes unless you
turn it off by either pushing the Panic button a second time
or drive the vehicle at a speed of 15 mph (24 km/h) or
greater.
3
GETTING TO KNOW YOUR VEHICLE 19
Page 26 of 524
Ignition Or Accessory On Message
Opening the driver’s door when the ignition is in ACC or
ON (engine not running), a chime will sound to remind
you to cycle the ignition to OFF. In addition to the chime,
the ignition or accessory on message will display in the
cluster.
NOTE:With the Uconnect system, the power window
switches, radio, power sunroof (if equipped), and power
outlets will remain active for up to 10 minutes after the
ignition is cycled to the OFF position. Opening either front
door will cancel this feature. The time for this feature is
programmable. Refer to “Uconnect Settings” in “Multime-
dia” for further information.
WARNING!
• Before exiting a vehicle, always shift the automatic
transmission into PARK and apply the parking
brake. Always make sure the keyless ignition node is
in the “OFF” mode, remove the key fob from the
vehicle and lock the vehicle.
• Never leave children alone in a vehicle, or with
access to an unlocked vehicle.
(Continued)
WARNING! (Continued)
•Allowing children to be in a vehicle unattended is
dangerous for a number of reasons. A child or others
could be seriously or fatally injured. Children
should be warned not to touch the parking brake,
brake pedal or the gear selector.
• Do not leave the key fob in or near the vehicle, or in
a location accessible to children, and do not leave the
ignition of a vehicle equipped with Keyless Enter-
N-Go in the ACC or ON/RUN mode. A child could
operate power windows, other controls, or move the
vehicle.
• Do not leave children or animals inside parked
vehicles in hot weather. Interior heat build-up may
cause serious injury or death.
CAUTION!
An unlocked vehicle is an invitation. Always remove
the key fobs from vehicle, place the ignition in the OFF
position and lock all doors when leaving the vehicle
unattended.
24 GETTING TO KNOW YOUR VEHICLE
Page 28 of 524
To Enter Remote Start Mode
Push and release the remote start button on the key fob
twice within five seconds. The vehicle doors will lock, the
parking lights will flash and the horn will chirp twice (if
programmed). Then, the engine will start and the vehicle
will remain in the Remote Start mode for a 15-minute cycle.
NOTE:
•If an engine fault is present or fuel level is low, the
vehicle will start and then shut down in 10 seconds.
• The park lamps will turn on and remain on during
Remote Start mode.
• For security, power window and power sunroof opera-
tion (if equipped) are disabled when the vehicle is in the
Remote Start mode.
• The engine can be started two consecutive times (two
15-minute cycles) with the key fob. However, the igni-
tion must be cycled to the RUN position before you can
repeat the start sequence for a third cycle.
To Exit Remote Start Mode Without Driving The
Vehicle
Push and release the remote start button one time or allow
the engine to run for the entire 15-minute cycle. NOTE:
To avoid unintentional shutdowns, the system will
disable the one time push of the remote start button for two
seconds after receiving a valid Remote Start request.
To Exit Remote Start Mode And Drive The Vehicle
Before the end of 15-minute cycle, push and release the
unlock button on the key fob to unlock the doors and
disarm the vehicle security alarm (if equipped). Then, prior
to the end of the 15-minute cycle, push and release the
ignition START/STOP button.
NOTE: The message “Push Start Button” will appear in the
instrument cluster display until you push the ignition
START/STOP button.
Remote Start Comfort Systems — If Equipped
When Remote Start is activated, the driver heated seat
feature will automatically turn on in cold weather. This
feature will stay on through the duration of Remote Start or
until the ignition switch is turned to the ON/RUN posi-
tion.
The Remote Start Comfort System can be activated and
deactivated through the Uconnect system. Refer to
“Uconnect Settings” in “Multimedia” for further informa-
tion on Remote Start Comfort System operation.
26 GETTING TO KNOW YOUR VEHICLE
Page 35 of 524
To change the current setting, refer to “Uconnect Settings”
in “Multimedia” for further information.
NOTE:Use the Automatic Unlock Doors On Exit feature
in accordance with local laws.
Keyless Enter-N-Go — Passive Entry (If Equipped)
The Passive Entry system is an enhancement to the vehi-
cle’s Remote Keyless Entry (RKE) system and a feature of
Keyless Enter-N-Go. This feature allows you to lock and
unlock the vehicle’s door(s) without having to push the key
fob lock or unlock buttons.
NOTE:
• Passive Entry may be programmed ON/OFF; refer to
“Uconnect Settings” in “Multimedia” for further infor-
mation.
• If wearing gloves on your hands, or if it has been
raining/snowing on the Passive Entry door handle, the
unlock sensitivity can be affected, resulting in a slower
response time.
• If the vehicle is unlocked by Passive Entry and no door
is opened within 60 seconds, the vehicle will re-lock and
if equipped will arm the security alarm. •
The key fob may not be detected by the vehicle passive
entry system if it is located next to a mobile phone,
laptop, or other electronic device; these devices may
interfere with the key fob’s wireless signal and prevent
the passive entry system from locking/unlocking the
vehicle.
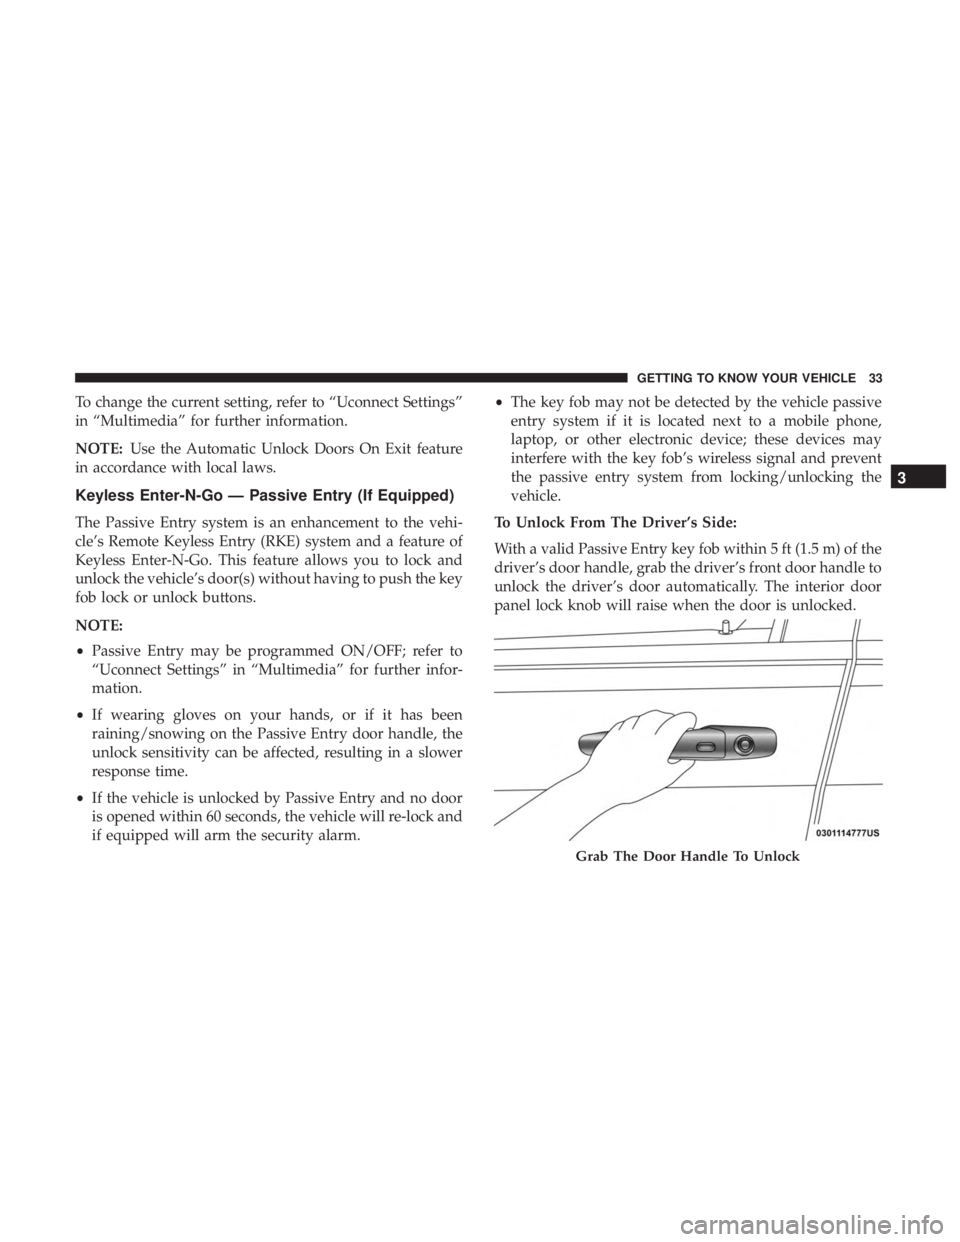
To Unlock From The Driver’s Side:
With a valid Passive Entry key fob within 5 ft (1.5 m) of the
driver’s door handle, grab the driver’s front door handle to
unlock the driver’s door automatically. The interior door
panel lock knob will raise when the door is unlocked.
Grab The Door Handle To Unlock
3
GETTING TO KNOW YOUR VEHICLE 33
Page 36 of 524
NOTE:If “Unlock All Doors 1st Press” is programmed all
doors will unlock when you grab hold of the driver ’s front
door handle. To select between “Unlock Driver Door 1st
Press” and “Unlock All Doors 1st Press,” refer to
“Uconnect Settings” in “Multimedia” for further informa-
tion.
To Unlock From The Passenger Side:
With a valid Passive Entry key fob within 5 ft (1.5 m) of the
passenger door handle, grab the front passenger door
handle to unlock all four doors and the liftgate automati-
cally.
NOTE: All doors and the liftgate will unlock when the
front passenger door handle is grabbed regardless of the
driver ’s door unlock preference setting (“Unlock Driver
Door 1st Press” or “Unlock All Doors 1st Press”). Preventing Inadvertent Locking Of Passive Entry Key
Fob In Vehicle:
To minimize the possibility of unintentionally locking a
Passive Entry key fob inside your vehicle, the Passive Entry
system is equipped with an automatic door unlock feature
which will function if the ignition is OFF.
If one of the vehicle doors is open and the vehicle is locked
with a door panel switch, key fob button or door handle
button, once all open doors have been closed the vehicle
checks the inside and outside of the vehicle for any valid
Passive Entry key fobs. If one of the vehicle’s Passive Entry
key fobs is detected inside the vehicle, and no other valid
Passive Entry key fobs are detected outside the vehicle, the
Passive Entry System automatically unlocks all vehicle
doors and chirps the horn three times (on the third attempt,
ALL doors will lock and the Passive Entry key fob can be
locked in the vehicle).
34 GETTING TO KNOW YOUR VEHICLE
Page 53 of 524
If the HI-level setting is selected, the system will automati-
cally switch to LO-level after approximately 60 minutes of
continuous operation. At that time, the display will change
from HI to LO, indicating the change. The LO-level setting
will turn off automatically after approximately 45 minutes.
NOTE:The engine must be running for the heated seats to
operate.
Vehicles Equipped With Remote Start
On models that are equipped with remote start, the heated
seats can be programmed to come on during a remote start.
This feature can be programmed through the Uconnect
system. Refer to “Uconnect Settings” in “Multimedia” for
further information.
WARNING!
• Persons who are unable to feel pain to the skin
because of advanced age, chronic illness, diabetes,
spinal cord injury, medication, alcohol use, exhaus-
tion or other physical condition must exercise care
when using the seat heater. It may cause burns even
at low temperatures, especially if used for long
periods of time.
(Continued)
WARNING! (Continued)
•Do not place anything on the seat or seatback that
insulates against heat, such as a blanket or cushion.
This may cause the seat heater to overheat. Sitting in
a seat that has been overheated could cause serious
burns due to the increased surface temperature of the
seat.
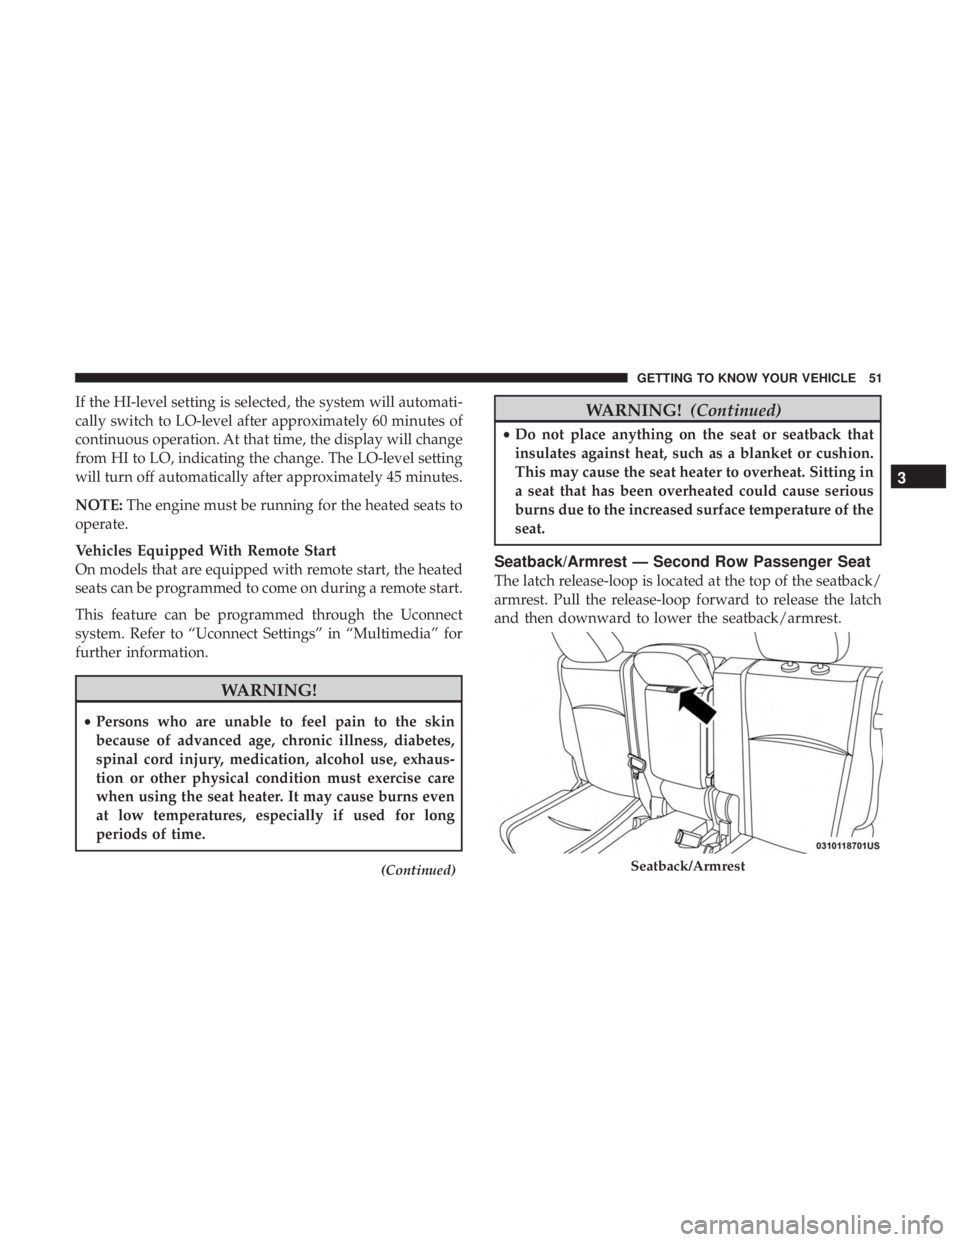
Seatback/Armrest — Second Row Passenger Seat
The latch release-loop is located at the top of the seatback/
armrest. Pull the release-loop forward to release the latch
and then downward to lower the seatback/armrest.
Seatback/Armrest
3
GETTING TO KNOW YOUR VEHICLE 51
Page 59 of 524
WARNING!
Do not adjust the steering column while driving.
Adjusting the steering column while driving or driv-
ing with the steering column unlocked, could cause the
driver to lose control of the vehicle. Failure to follow
this warning may result in serious injury or death.
Heated Steering Wheel — If Equipped
The steering wheel contains a heating element that helps
warm your hands in cold weather. The heated steering
wheel has only one temperature setting. Once the heated
steering wheel has been turned on, it will stay on for an
average of 80 minutes before automatically shutting off.
This time will vary based on environmental temperatures.
The heated steering wheel can shut off early or may not
turn on when the steering wheel is already warm.
The heated steering wheel control button is located within
the Uconnect system. You can gain access to the control
button through the climate screen or the controls screen.
•Press the heated steering wheel button
once to turn
the heating element on.
• Press the heated steering wheel buttona second time
to turn the heating element off.
NOTE: The engine must be running for the heated steering
wheel to operate.
Vehicles Equipped With Remote Start
On models that are equipped with remote start, the heated
steering wheel can be programmed to come on during a
remote start through the Uconnect system. Refer to
“Uconnect Settings” in “Multimedia” for further informa-
tion.
WARNING!
• Persons who are unable to feel pain to the skin
because of advanced age, chronic illness, diabetes,
spinal cord injury, medication, alcohol use, exhaus-
tion, or other physical conditions must exercise care
when using the steering wheel heater. It may cause
burns even at low temperatures, especially if used
for long periods.
• Do not place anything on the steering wheel that
insulates against heat, such as a blanket or steering
wheel covers of any type and material. This may
cause the steering wheel heater to overheat.
3
GETTING TO KNOW YOUR VEHICLE 57
Page 61 of 524
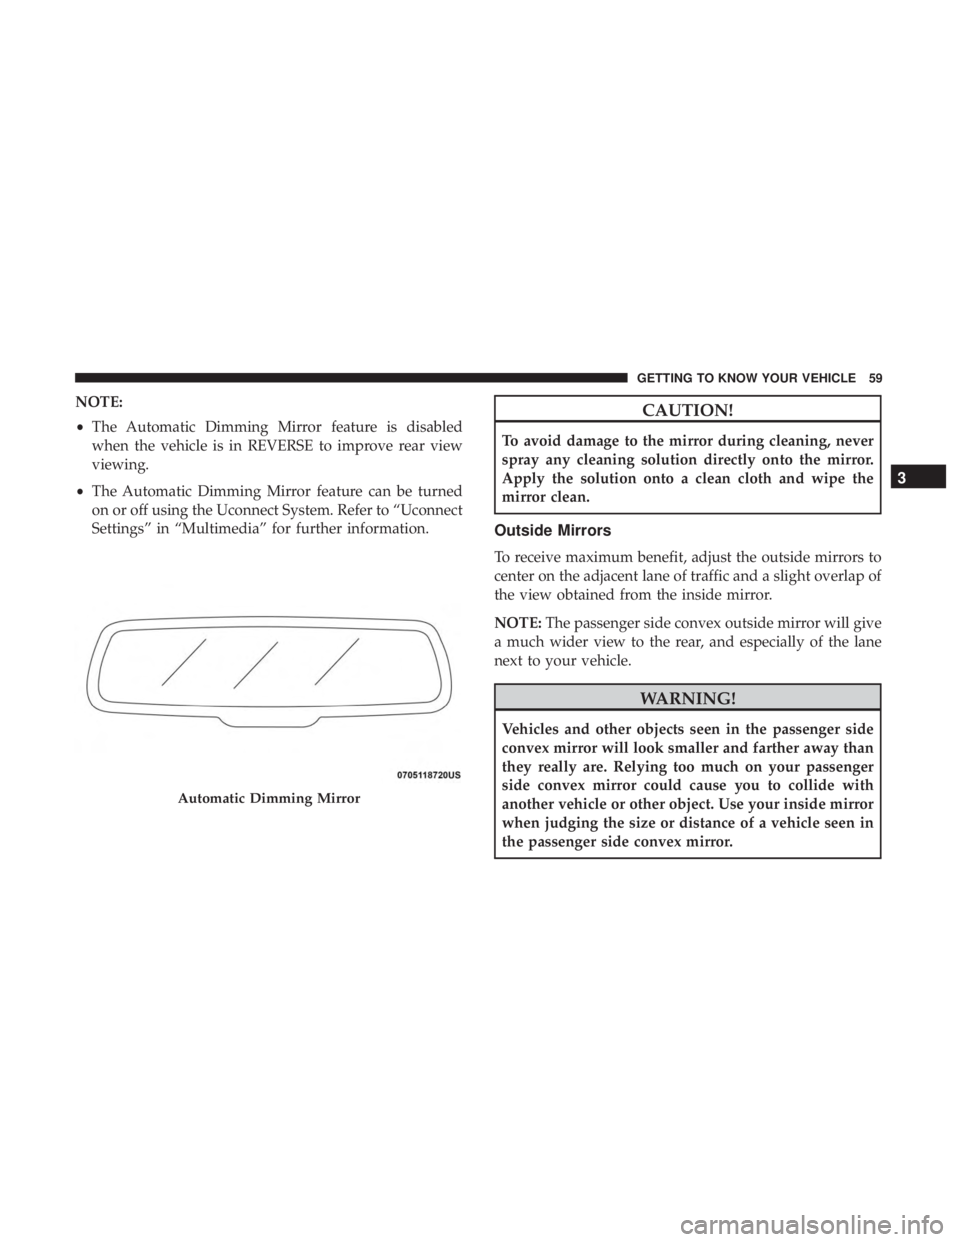
NOTE:
•The Automatic Dimming Mirror feature is disabled
when the vehicle is in REVERSE to improve rear view
viewing.
• The Automatic Dimming Mirror feature can be turned
on or off using the Uconnect System. Refer to “Uconnect
Settings” in “Multimedia” for further information.CAUTION!
To avoid damage to the mirror during cleaning, never
spray any cleaning solution directly onto the mirror.
Apply the solution onto a clean cloth and wipe the
mirror clean.
Outside Mirrors
To receive maximum benefit, adjust the outside mirrors to
center on the adjacent lane of traffic and a slight overlap of
the view obtained from the inside mirror.
NOTE: The passenger side convex outside mirror will give
a much wider view to the rear, and especially of the lane
next to your vehicle.
WARNING!
Vehicles and other objects seen in the passenger side
convex mirror will look smaller and farther away than
they really are. Relying too much on your passenger
side convex mirror could cause you to collide with
another vehicle or other object. Use your inside mirror
when judging the size or distance of a vehicle seen in
the passenger side convex mirror.
Automatic Dimming Mirror
3
GETTING TO KNOW YOUR VEHICLE 59
Page 66 of 524
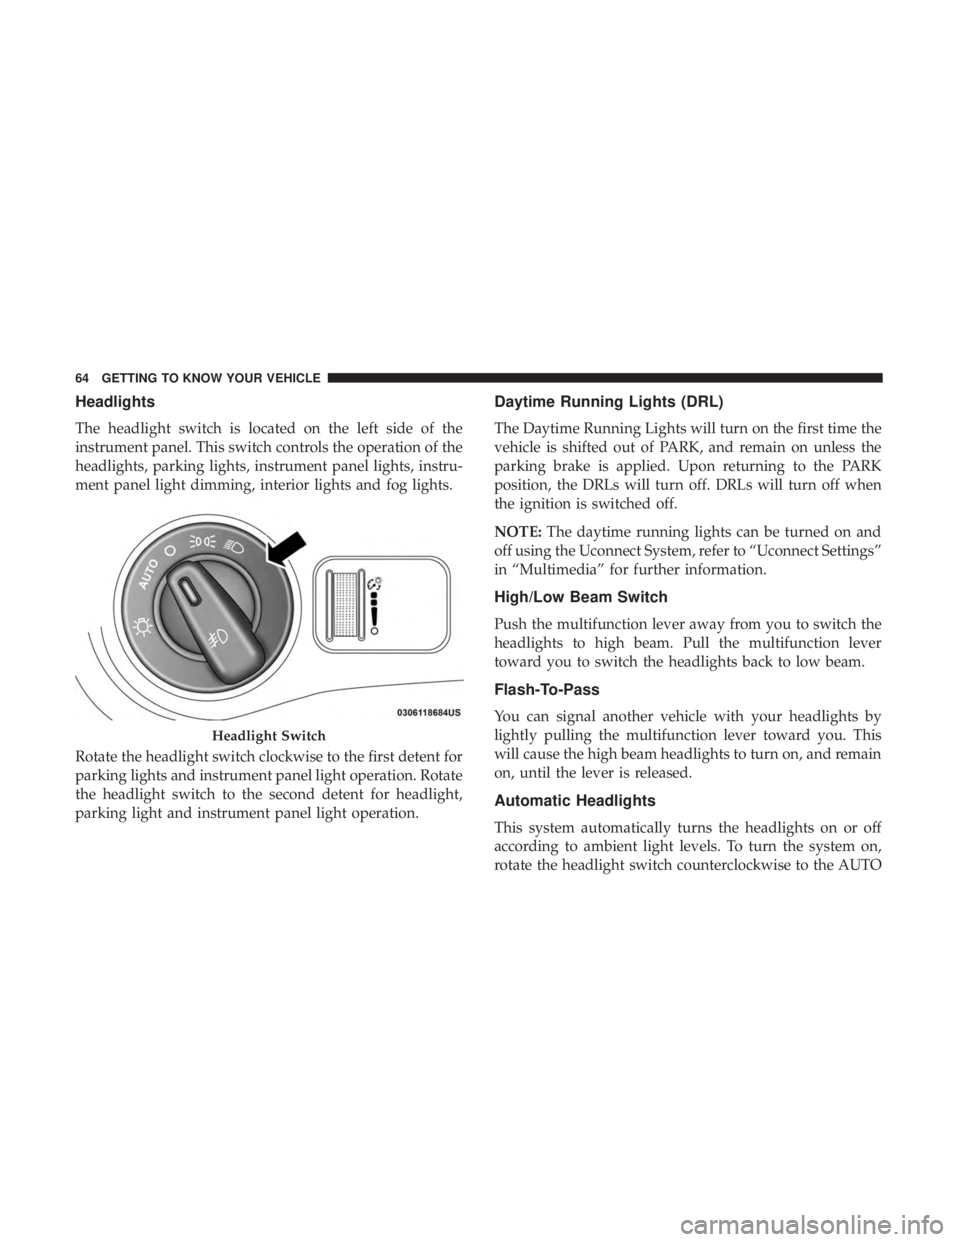
Headlights
The headlight switch is located on the left side of the
instrument panel. This switch controls the operation of the
headlights, parking lights, instrument panel lights, instru-
ment panel light dimming, interior lights and fog lights.
Rotate the headlight switch clockwise to the first detent for
parking lights and instrument panel light operation. Rotate
the headlight switch to the second detent for headlight,
parking light and instrument panel light operation.
Daytime Running Lights (DRL)
The Daytime Running Lights will turn on the first time the
vehicle is shifted out of PARK, and remain on unless the
parking brake is applied. Upon returning to the PARK
position, the DRLs will turn off. DRLs will turn off when
the ignition is switched off.
NOTE:The daytime running lights can be turned on and
off using the Uconnect System, refer to “Uconnect Settings”
in “Multimedia” for further information.
High/Low Beam Switch
Push the multifunction lever away from you to switch the
headlights to high beam. Pull the multifunction lever
toward you to switch the headlights back to low beam.
Flash-To-Pass
You can signal another vehicle with your headlights by
lightly pulling the multifunction lever toward you. This
will cause the high beam headlights to turn on, and remain
on, until the lever is released.
Automatic Headlights
This system automatically turns the headlights on or off
according to ambient light levels. To turn the system on,
rotate the headlight switch counterclockwise to the AUTO
Headlight Switch
64 GETTING TO KNOW YOUR VEHICLE