display DODGE JOURNEY 2020 Owners Manual
[x] Cancel search | Manufacturer: DODGE, Model Year: 2020, Model line: JOURNEY, Model: DODGE JOURNEY 2020Pages: 396, PDF Size: 25.53 MB
Page 4 of 396
2
INTRODUCTION
HOW TO USE THIS MANUAL .................................. 8
Essential Information .. .................................. 8
Symbols . ......................................................... 8
W
ARNINGS AND CAUTIONS . . ............................... 8
VEHICLE MODIFICATIONS/ALTERATIONS .. ........ 8
GETTING TO KNOW YOUR VEHICLE
KEYS ........................................................................ 9
Key Fob........................................................... 9
I
GNITION SWITCH . . ...............................................12
Keyless Push Button Ignition .. .................... 12
Ignition Or Accessory On Message . . .......... 14
REMOTE START — IF EQUIPPED . . .......................14
How To Use Remote Start .. ......................... 14
Remote Start Abort Message . . .................... 15
To Enter Remote Start Mode . . .................... 15
To Exit Remote Start Mode Without
Driving The Vehicle . .
................................... 15
To Exit Remote Start Mode And Drive
The Vehicle . .
................................................. 15
Remote Start Comfort System —
If Equipped . .
................................................. 16
General Information . . .................................. 16
SENTRY KEY . . .......................................................16
Key Programming .. ..................................... 17
Replacement Keys. . ..................................... 17
General Information . . .................................. 17 VEHICLE SECURITY ALARM — IF EQUIPPED .
.
... 18
To Arm The System .. .................................... 18
To Disarm The System . . .............................. 18
Rearming Of The System. . ........................... 19
Security System Manual Override . . ............ 19
Tamper Alert. . ............................................... 19
DOORS . ................................................................. 19
M anual Door Locks..
.................................... 19
Power Door Locks . . ..................................... 20
Keyless Enter-N-Go — Passive Entry
(If Equipped) . .
.............................................. 21
Child-Protection Door Lock System —
Rear Doors . .
................................................ 23
SEATS . ................................................................... 25
M anual Adjustment (Front Seats) .. ............ 25
Manual Adjustment (Rear Seats) . . ............. 26
Power Adjustment (Front Seat). . ................. 30
Front Heated Seats — If Equipped. . ............ 31
Seatback/Armrest — Second Row
Passenger Seat . .
.......................................... 32
HEAD RESTRAINTS . . ............................................ 32
Supplemental Active Head Restraints
(AHR) — Front Seats. .
................................... 33
Rear Head Restraint Adjustment. . .............. 34
Rear Head Restraint Removal . . .................. 35
STEERING WHEEL . . .............................................. 35
Tilt/Telescoping Steering Column .. ............ 35
Heated Steering Wheel — If Equipped . . .... 35MIRRORS .
.............................................................36
I
nside Day/Night Mirror — If Equipped .. ..... 36
Automatic Dimming Mirror — If Equipped . . . 37
Automatic Dimming Mirror With Rear View
Camera Display — If Equipped . .
................. 37
Outside Mirrors . . ......................................... 38
Interior Observation Mirror . . ...................... 38
Power Mirrors. . ............................................. 38
Heated Mirrors — If Equipped . . ................... 39
Power Folding Mirrors — If Equipped . . ....... 39
Illuminated Vanity Mirrors — If Equipped . . 40
EXTERIOR LIGHTS. . ...............................................40
Multifunction Lever .. ................................... 40
Headlights . ................................................... 40
D aytime Running Lights (DRLs) . . ................ 41
High/Low Beam Switch . . ............................. 41
Flash-To-Pass . . ............................................. 41
Automatic Headlights . . ............................... 41
Headlights On With Wipers (Available With
Automatic Headlights Only) . .
...................... 41
Headlight Time Delay . . ............................... 41
Lights-On Reminder . . ................................... 42
Fog Lights — If Equipped . . ........................... 42
Turn Signals . . .............................................. 42
Lane Change Assist — If Equipped . . ........... 42
INTERIOR LIGHTS . . ...............................................43
Courtesy/Interior Lighting .. ........................ 43
WIPERS AND WASHERS . . ..................................44
Windshield Wiper Operation .. ..................... 44
Rear Window Wiper/Washer . . ................... 46
Page 5 of 396
3
CLIMATE CONTROLS ...........................................47
Manual Climate Control Overview .. ............ 47
Automatic Climate Controls Overview . . ...... 58
Climate Control Functions . . ......................... 70
Automatic Temperature Control (ATC) — If
Equipped . ..................................................... 70
O
perating Tips . . ........................................... 71
WINDOWS . . ..........................................................72
Power Windows .. ......................................... 72
Wind Buffeting . . .......................................... 74
POWER SUNROOF — IF EQUIPPED. . ...................74
Opening Sunroof .. ........................................ 75
Closing Sunroof . . .......................................... 75
Wind Buffeting . . ........................................... 75
Sunshade Operation. . .................................. 75
Anti Pinch Protect Feature . . ........................ 75
Sunroof Maintenance . . ................................ 75
Ignition Off Operation . . ................................ 76
HOOD. .....................................................................76
O pening ........................................................ 76
C losing . ......................................................... 76
L
IFTGATE . ...............................................................77
O pening ........................................................ 77
C argo Area Features . . ................................. 78
GARAGE DOOR OPENER — IF EQUIPPED . . ........80
Before You Begin Programming
HomeLink® . .
................................................ 80
Canadian/Gate Operator Programming . . ... 82Using HomeLink®.
.
...................................... 83
Security. ........................................................ 83
T roubleshooting Tips . . ................................. 83
General Information . . .................................. 84
INTERNAL EQUIPMENT . . ...................................... 84
Storage ......................................................... 84
C upholders . . ................................................ 86
Power Outlets. . ............................................. 87
Power Inverter — If Equipped . . ................... 89
Sunglasses Storage . . .................................. 90
ROOF LUGGAGE RACK — IF EQUIPPED . . .......... 91
GETTING TO KNOW YOUR
INSTRUMENT PANEL
INSTRUMENT CLUSTER ....................................... 93
Instrument Cluster Descriptions .. ............... 94
INSTRUMENT CLUSTER DISPLAY. . ..................... 95
Instrument Cluster Display Location And
Controls . ....................................................... 95
O
il Change Due . . ......................................... 96
Instrument Cluster Display Selectable
Menu Items . .
................................................ 96
Battery Saver On/Battery Saver Mode
Message — Electrical Load Reduction
Actions — If Equipped . .
............................... 99 WARNING LIGHTS AND MESSAGES .
.
............. 100
Red Warning Lights .. ................................. 100
Yellow Warning Lights . . ............................. 103
Green Indicator Lights . . ............................. 106
White Indicator Lights . . ............................. 106
Blue Indicator Lights . . ............................... 106
ONBOARD DIAGNOSTIC SYSTEM — OBD II . . . 107
Onboard Diagnostic System (OBD II)
Cybersecurity . .
........................................... 107
EMISSIONS INSPECTION AND MAINTENANCE
PROGRAMS . .
...................................................... 108
SAFETY
SAFETY FEATURES ............................................ 109
Anti-Lock Brake System (ABS) .. ............... 109
Electronic Brake Control (EBC) System. . .. 110
AUXILIARY DRIVING SYSTEMS . . ...................... 116
Tire Pressure Monitoring System
(TPMS) . ....................................................... 116
O
CCUPANT RESTRAINT SYSTEMS . . ............... 120
Occupant Restraint Systems Features .. .. 120
Important Safety Precautions . . ................. 121
Seat Belt Systems . . .................................. 121
Supplemental Restraint
Systems (SRS) . .
......................................... 130
Child Restraints . . ....................................... 139
Transporting Pets . . ................................... 154
Page 6 of 396
4
SAFETY TIPS ...................................................... 154
Transporting Passengers .. ........................154
Exhaust Gas . . .............................................154
Safety Checks You Should Make Inside
The Vehicle . .
..............................................155
Periodic Safety Checks You Should
Make Outside The Vehicle . .
...................... 156
STARTING AND OPERATING
STARTING THE ENGINE .................................... 157
Automatic Transmission .. .........................157
Normal Starting . . .......................................158
Keyless Enter-N-Go — Ignition . . .................158
Cold Weather Operation
(Below –22°F Or −30°C) . .
.......................159
If Engine Fails To Start . . ............................ 159
After Starting . . ............................................159
ENGINE BLOCK HEATER — IF EQUIPPED . . ...... 159
ENGINE BREAK-IN RECOMMENDATIONS .. .... 160
PARKING BRAKE .. ............................................ 160
AUTOMATIC TRANSMISSION.. .......................... 161
Ignition Park Interlock .. .............................162
Brake/Transmission Shift Interlock
System . ......................................................162
F
our-Speed Automatic Transmission . . .....163
Gear Ranges . . ...........................................163
POWER STEERING . . ........................................... 168
Power Steering Fluid Check .. ....................168SPEED CONTROL — IF EQUIPPED .
.
................. 168
To Activate.................................................. 169
T o Set A Desired Speed. . ........................... 169
To Vary The Speed Setting . . ...................... 169
To Accelerate For Passing . . ....................... 170
To Resume Speed . . ................................... 170
To Deactivate . . ........................................... 171
PARKSENSE REAR PARK ASSIST . . ................. 171
ParkSense Sensors .. ................................. 171
ParkSense Display . . ................................... 172
ParkSense Warning Display . . .................... 173
Enabling And Disabling ParkSense . . ........ 173
Service The ParkSense Rear Park
Assist System . .
........................................... 173
Cleaning The ParkSense System. . ............ 174
ParkSense System Usage Precautions . . .. 174
PARKVIEW REAR BACK UP CAMERA. . ............175
REFUELING THE VEHICLE .. ................................ 176
Loose Fuel Filler Cap Message .. ............... 177
VEHICLE LOADING . . ..........................................177
Vehicle Certification Label .. ...................... 177
Gross Vehicle Weight Rating (GVWR) . . ..... 178
Gross Axle Weight Rating (GAWR) . . ......... 178
Overloading . . .............................................. 178
Loading . ..................................................... 178 T RAILER TOWING .
.
............................................ 178
Common Towing Definitions .. ................... 178
Trailer Hitch Classification . . ...................... 180
Trailer Towing Weights (Maximum Trailer
Weight Ratings) . .
....................................... 181
Trailer And Tongue Weight . . ..................... 181
Towing Requirements . . ............................ 182
Towing Tips . . ............................................. 184
RECREATIONAL TOWING (BEHIND
MOTORHOME, ETC.) . .
....................................... 186
Towing This Vehicle Behind Another
Vehicle . ....................................................... 186
D
RIVING TIPS . . ................................................... 187
Driving On Slippery Surfaces .. ................. 187
Driving Through Water . . ........................... 187
IN CASE OF EMERGENCY
HAZARD WARNING FLASHERS ...................... 189
BULB REPLACEMENT ........................................ 189
Replacement Bulbs .. ................................ 189
Replacing Exterior Bulbs . . ......................... 191
FUSES . ................................................................. 193
I nterior Fuses .. .......................................... 193
Underhood Fuses (Power Distribution
Center) . ...................................................... 196
Page 8 of 396
6
MULTIMEDIA
CYBERSECURITY ............................................... 265
UCONNECT SETTINGS .. .................................... 266
Customer Programmable
Features — Radio 4.3 Settings. .
................266
Customer Programmable Features —
Uconnect 3/3 NAV Settings .
.
....................274
SAFETY AND GENERAL INFORMATION . . ........ 285
Safety Guidelines .. .....................................285
RADIO 4.3 . .......................................................... 286
I ntroduction .. ..............................................286
Radio Mode . . ..............................................287
Media Mode . . .............................................291
Uconnect Phone (4.3) . . .............................294
More Mode . . ...............................................305
UCONNECT 3/3 NAV WITH 8.4-INCH
DISPLAY . ............................................................. 306
I
ntroduction To the Uconnect 3/3 NAV
With 8.4-Inch Display. .
...............................306
Radio Mode . . ..............................................307
Media Mode . . .............................................316
Uconnect Phone. . .......................................324
Navigation Mode — If Equipped . . ..............339
More Mode . . ...............................................363
STEERING WHEEL AUDIO CONTROLS — IF
EQUIPPED . .
........................................................ 363
Radio Operation .. .......................................364
Media Mode . . .............................................364
IPOD®/USB/MP3 CONTROL . . ......................... 364UCONNECT MULTIMEDIA — VIDEO
ENTERTAINMENT SYSTEM (VES)
(IF EQUIPPED) . .
..................................................365
Getting Started .. ........................................ 365
Single Video Screen. . ................................. 365
Play Video Games . . .................................... 365
Listen To An Audio Source On Channel 2 While
A Video Is Playing On Channel 1 . .
............. 366
Play A DVD Using The Touchscreen
Radio . ......................................................... 367
V
ES Remote Control — If Equipped . . ........ 367
Remote Control Storage . . .......................... 369
Locking The Remote Control. . ................... 369
Replacing The Remote Control
Batteries . .................................................... 369
I
mportant Notes For Single Video Screen
System . ....................................................... 369
U
connect Headphones Operation . . .......... 370
Controls . ..................................................... 370
R eplacing The Headphone Batteries . . ..... 371
Accessibility. . .............................................. 371
Stereo Headphone Lifetime Limited
Warranty . .................................................... 371
S
ystem Information . . ................................. 372
RADIO OPERATION AND MOBILE PHONES . . .. 376
Regulatory And Safety Information.. ......... 377
VOICE COMMAND (UCONNECT 3/3 NAV) .
..... 378
U
connect 3/3 NAV ..................................... 378
U
connect Voice Commands . . .................... 379
CUSTOMER ASSISTANCE
SUGGESTIONS FOR OBTAINING SERVICE FOR
YOUR VEHICLE .................................................. 380
Prepare For The Appointment .. ................ 380
Prepare A List. . ........................................... 380
Be Reasonable With Requests . . ............... 380
IF YOU NEED ASSISTANCE . . ............................ 380
FCA US LLC Customer Center ..
................. 381
FCA Canada Inc. Customer Center . . ......... 381
In Mexico Contact . . .................................... 381
Puerto Rico And US Virgin Islands . . .......... 381
Customer Assistance For The Hearing Or
Speech Impaired (TDD/TTY) . .
................... 381
Service Contract . . ..................................... 381
WARRANTY INFORMATION . . ............................ 382
MOPAR PARTS.. ................................................. 382
REPORTING SAFETY DEFECTS .. ...................... 382
In The 50 United States And
Washington, D.C. . .
..................................... 382
In Canada . .................................................. 383
P
UBLICATION ORDER FORMS . . ...................... 383
Page 16 of 396
14 GETTING TO KNOW YOUR VEHICLE
(Continued)
IGNITION OR ACCESSORY ON MESSAGE
Opening the driver's door when the ignition is in
the ACC or ON (engine not running) position, a
chime will sound to remind you to place the
ignition in the OFF position. In addition to the
chime, the ignition or accessory on message will
display in the cluster.
NOTE:
With the Uconnect system, the power window
s w
itches, radio, power sunroof (if equipped),
and power outlets will remain active for up to
10 minutes after the ignition is placed in the
O F
F position. Opening either front door will
cancel this feature. The time for this feature is
programmable. Refer to “Uconnect Settings” in
“Multimedia” for further information.
REMOTE START — IF EQUIPPED
HOW TO USE REMOTE START
All of the following conditions must be met
before the engine will remote start:
Gear selector in PARK
Doors closed
Hood closed
Liftgate closed
Hazard switch off
Brake switch inactive (brake pedal not pushed)
Battery at an acceptable charge level
System not disabled from previous remote
start event
Vehicle security alarm not active
Ignition in the OFF position
Malfunction Indicator Light (MIL) is not illumi -
nated
WARNING!
Before exiting a vehicle, always shift the
automatic transmission into PARK and
apply the parking brake. Always make sure
the keyless ignition is in the OFF position,
remove the key fob from the vehicle and
lock the vehicle.
Never leave children alone in a vehicle, or
with access to an unlocked vehicle.
Allowing children to be in a vehicle unat -
tended is dangerous for a number of
r e
asons. A child or others could be seriously
or fatally injured. Children should be
warned not to touch the parking brake,
brake pedal or the gear selector.
Do not leave the key fob in or near the
vehicle, or in a location accessible to chil-
dren, and do not leave the ignition of a
v e
hicle equipped with Keyless Enter-N-Go
in the ACC or ON/RUN position. A child
could operate power windows, other
controls, or move the vehicle.
Do not leave children or animals inside parked
vehicles in hot weather. Interior heat build-up
may cause serious injury or death.
CAUTION!
An unlocked vehicle is an invitation for
thieves. Always remove the key fobs from
vehicle, place the ignition in the OFF position
and lock all doors when leaving the vehicle
unattended.
WARNING! (Continued)
Page 17 of 396
GETTING TO KNOW YOUR VEHICLE 15
REMOTE START ABORT MESSAGE
The following messages will appear in the
instrument cluster display if the vehicle fails to
remote start or exits remote start prematurely if
equipped with Remote Start:
Remote Start Cancelled — Door Open
Remote Start Cancelled — Hood Open
Remote Start Cancelled — Fuel Low
Remote Start Cancelled — L/Gate Open
Remote Start Disabled — Start Vehicle To
Reset The message stays active until the ignition is
p
l
aced in the ON/RUN position.
TO ENTER REMOTE START MODE
Push and release the remote start button on the
key fob twice within five seconds. The vehicle
doors will lock, the parking lights will flash and
the horn will chirp twice (if programmed). Then,
the engine will start and the vehicle will remain
in the Remote Start mode for a 15 minute cycle.
NOTE:
If an engine fault is present or fuel level is
low, the vehicle will start and then shut down
in 10 seconds.
The park lamps will turn on and remain on
during Remote Start mode.
For security, power window and power
sunroof operation (if equipped) are disabled
when the vehicle is in the Remote Start
mode.
The engine can be started two consecutive
times (two 15 minute cycles) with the key
f o
b. However, the ignition must be placed in
the ON/RUN position before you can repeat
the start sequence for a third cycle.
TO EXIT REMOTE START MODE
W
ITHOUT DRIVING THE VEHICLE
Push and release the remote start button one
time or allow the engine to run for the entire
15 minute cycle.
NOTE:
To avoid unintentional shutdowns, the system
wi
ll disable for two seconds after receiving a
valid Remote Start request.
TO EXIT REMOTE START MODE AND
D
RIVE THE VEHICLE
Before the end of 15 minute cycle, push and
re
lease the unlock button on the key fob to
unlock the doors and disarm the vehicle
security alarm (if equipped). Then, prior to the
end of the 15 minute cycle, push and release
t h
e START/STOP ignition button.
NOTE:
The message “Push Start Button” will appear in
t h
e instrument cluster display until you push the
START/STOP ignition button.
WARNING!
Do not start or run an engine in a closed
garage or confined area. Exhaust gas
contains Carbon Monoxide (CO) which is
odorless and colorless. Carbon Monoxide is
poisonous and can cause serious injury or
death when inhaled.
Keep key fobs away from children. Opera -
tion of the Remote Start System, windows,
d o
or locks or other controls could cause
serious injury or death.
2
Page 33 of 396
GETTING TO KNOW YOUR VEHICLE 31
direction of the switch. Release the switch when
the desired position has been reached.
Tilting The Seat Up Or Down
The angle of the seat cushion can be adjusted
in four directions. Pull upward or push
downward on the front or rear of the seat
switch; the front or rear of the seat cushion will
move in the direction of the switch. Release the
switch when the desired position is reached.
Power Lumbar — If Equipped
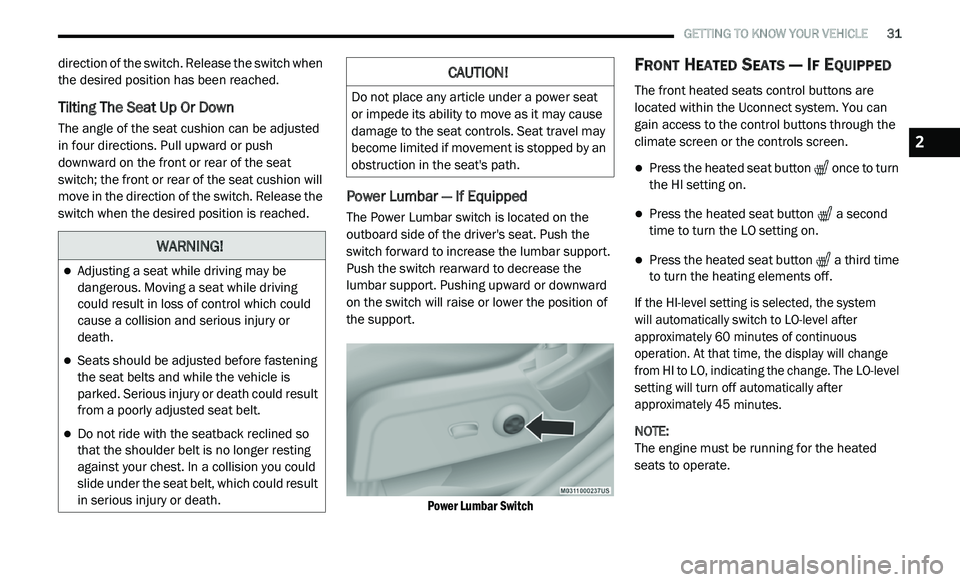
The Power Lumbar switch is located on the
outboard side of the driver's seat. Push the
switch forward to increase the lumbar support.
Push the switch rearward to decrease the
lumbar support. Pushing upward or downward
on the switch will raise or lower the position of
the support.
Power Lumbar Switch
FRONT HEATED SEATS — IF EQUIPPED
The front heated seats control buttons are
located within the Uconnect system. You can
gain access to the control buttons through the
climate screen or the controls screen.
Press the heated seat button once to turn
the HI setting on.
Press the heated seat button a second
time to turn the LO setting on.
Press the heated seat button a third time
to turn the heating elements off.
If the HI-level setting is selected, the system
will automatically switch to LO-level after
a p
proximately 60 minutes of continuous
o p
eration. At that time, the display will change
from HI to LO, indicating the change. The LO-level
setting will turn off automatically after
approximately 45 minutes.
NOTE:
The engine must be running for the heated
s e
ats to operate.
WARNING!
Adjusting a seat while driving may be
dangerous. Moving a seat while driving
could result in loss of control which could
cause a collision and serious injury or
death.
Seats should be adjusted before fastening
the seat belts and while the vehicle is
parked. Serious injury or death could result
from a poorly adjusted seat belt.
Do not ride with the seatback reclined so
that the shoulder belt is no longer resting
against your chest. In a collision you could
slide under the seat belt, which could result
in serious injury or death.
CAUTION!
Do not place any article under a power seat
or impede its ability to move as it may cause
damage to the seat controls. Seat travel may
become limited if movement is stopped by an
obstruction in the seat's path.
2
Page 39 of 396
GETTING TO KNOW YOUR VEHICLE 37
AUTOMATIC DIMMING MIRROR — IF
E
QUIPPED
A single ball joint mirror is provided in the
vehicle. It is a twist on mirror that has a fixed
position at the windshield. The mirror installs on
the windshield button with a counterclockwise
rotation and requires no tools for mounting.
The mirror head can be adjusted up, down, left,
a n
d right for various drivers. The mirror should
be adjusted to center on the view through the
rear window.
This mirror automatically adjusts for headlight
g l
are from vehicles behind you.
NOTE:
The Automatic Dimming Mirror feature is
disabled when the vehicle is in REVERSE to
improve rear view viewing.
The Automatic Dimming Mirror feature can
be turned on or off using the Uconnect
system. Refer to “Uconnect Settings” in
“Multimedia” for further information.
Automatic Dimming Mirror
AUTOMATIC DIMMING MIRROR WITH
R
EAR VIEW CAMERA DISPLAY — IF
E
QUIPPED
A single ball joint mirror is provided in the
vehicle. It is a twist on mirror that has a fixed
position at the windshield. The mirror installs on
the windshield button with a counterclockwise
rotation and requires no tools for mounting. The mirror head can be adjusted up, down, left,
a
n
d right for various drivers. The mirror should
be adjusted to center on the view through the
rear window.
This mirror automatically adjusts for headlight
g l
are from vehicles behind you.
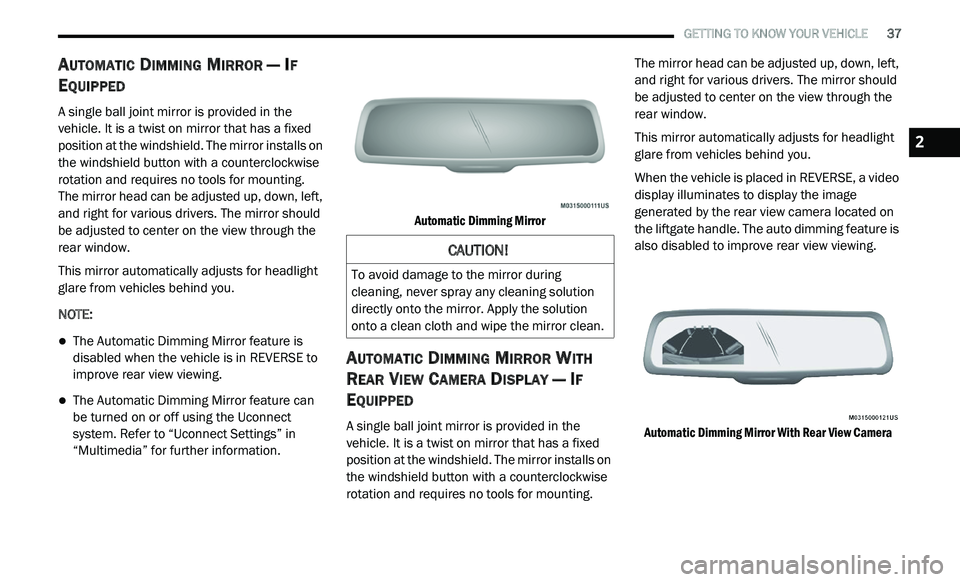
When the vehicle is placed in REVERSE, a video
d i
splay illuminates to display the image
generated by the rear view camera located on
the liftgate handle. The auto dimming feature is
also disabled to improve rear view viewing.
Automatic Dimming Mirror With Rear View Camera
CAUTION!
To avoid damage to the mirror during
cleaning, never spray any cleaning solution
directly onto the mirror. Apply the solution
onto a clean cloth and wipe the mirror clean.
2
Page 44 of 396
42 GETTING TO KNOW YOUR VEHICLE
NOTE:
The lights must be turned off within 45 seconds
o f
placing the ignition in the OFF position to acti -
vate this feature.
If you turn on the headlights or parking lights, or
p l
ace the ignition in the ON position again, the
system will cancel the delay.
If you turn the headlights off before the ignition,
t h
ey will turn off in the normal manner.
NOTE:
The Headlight Time Delay is programmable
using the Uconnect System, refer to “Uconnect
S e
ttings” in “Multimedia” for further information.
LIGHTS-ON REMINDER
If the headlights or parking lights are on after
the ignition is placed in the OFF position, a
chime will sound to alert the driver when the
driver's door is opened.
FOG LIGHTS — IF EQUIPPED
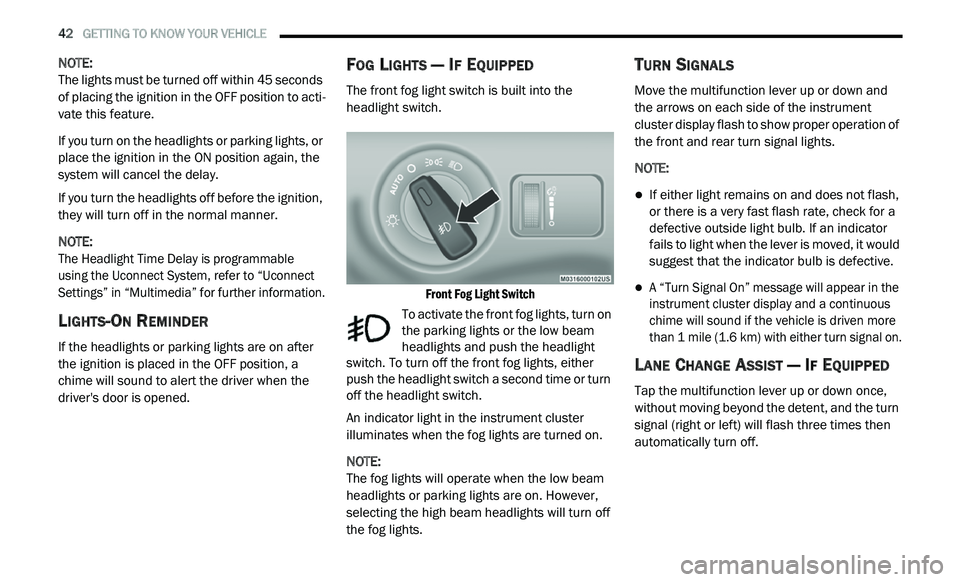
The front fog light switch is built into the
headlight switch.
Front Fog Light Switch
To activate the front fog lights, turn on
the parking lights or the low beam
h e
adlights and push the headlight
switch. To turn off the front fog lights, either
push the headlight switch a second time or turn
off the headlight switch.
An indicator light in the instrument cluster
i l
luminates when the fog lights are turned on.
NOTE:
The fog lights will operate when the low beam
h e
adlights or parking lights are on. However,
selecting the high beam headlights will turn off
the fog lights.
TURN SIGNALS
Move the multifunction lever up or down and
the arrows on each side of the instrument
cluster display flash to show proper operation of
the front and rear turn signal lights.
NOTE:
If either light remains on and does not flash,
or there is a very fast flash rate, check for a
defective outside light bulb. If an indicator
fails to light when the lever is moved, it would
suggest that the indicator bulb is defective.
A “Turn Signal On” message will appear in the
instrument cluster display and a continuous
chime will sound if the vehicle is driven more
than 1 mile (1.6 km) with either turn signal on.
LANE CHANGE ASSIST — IF EQUIPPED
Tap the multifunction lever up or down once,
without moving beyond the detent, and the turn
signal (right or left) will flash three times then
automatically turn off.
Page 45 of 396
GETTING TO KNOW YOUR VEHICLE 43
INTERIOR LIGHTS
COURTESY/INTERIOR LIGHTING
The interior lights come on when a door is
opened.
To protect the battery, the interior lights will turn
of
f automatically 10 minutes after the ignition is
p l
aced in the OFF position. This will occur if the
interior lights were switched on manually or are
on because a door is open. The battery
protection also includes the glove compartment
light. To restore interior light operation after
automatic battery protection is enabled (lights
off), either place the ignition in the ON/RUN
position or cycle the light switch.
Courtesy Lights
The overhead console has two courtesy lights.
The lights turn on when a front door, a rear door
or the liftgate is opened. If your vehicle is
equipped with Remote Keyless Entry, the lights
will also turn on when the unlock button on the
key fob is pushed. The courtesy lights also
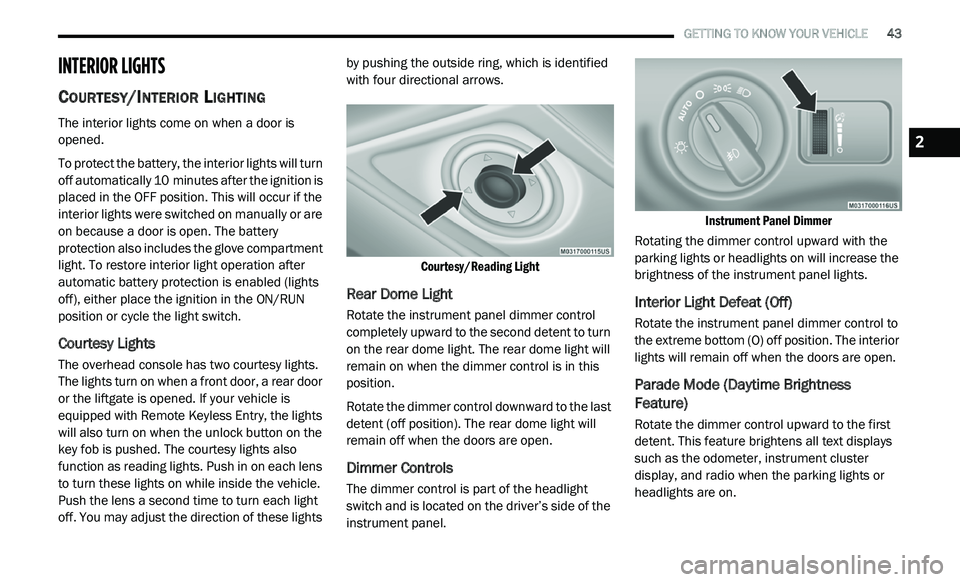
function as reading lights. Push in on each lens
to turn these lights on while inside the vehicle.
Push the lens a second time to turn each light
off. You may adjust the direction of these lights by pushing the outside ring, which is identified
with four directional arrows.
Courtesy/Reading Light
Rear Dome Light
Rotate the instrument panel dimmer control
completely upward to the second detent to turn
on the rear dome light. The rear dome light will
remain on when the dimmer control is in this
position.
Rotate the dimmer control downward to the last
de
tent (off position). The rear dome light will
remain off when the doors are open.
Dimmer Controls
The dimmer control is part of the headlight
switch and is located on the driver’s side of the
instrument panel.
Instrument Panel Dimmer
Rotating the dimmer control upward with the
p a
rking lights or headlights on will increase the
brightness of the instrument panel lights.
Interior Light Defeat (Off)
Rotate the instrument panel dimmer control to
the extreme bottom (O) off position. The interior
lights will remain off when the doors are open.
Parade Mode (Daytime Brightness
Feature)
Rotate the dimmer control upward to the first
detent. This feature brightens all text displays
such as the odometer, instrument cluster
display, and radio when the parking lights or
headlights are on.
2