sensor DODGE RAM 2003 Service Repair Manual
[x] Cancel search | Manufacturer: DODGE, Model Year: 2003, Model line: RAM, Model: DODGE RAM 2003Pages: 2895, PDF Size: 83.15 MB
Page 2832 of 2895
pump by drawing air into the pump cavity and also
closes the vent seal. During non test conditions the
vent seal is held open by the pump diaphragm
assembly which pushes it open at the full travel posi-
tion. The vent seal will remain closed while the
pump is cycling due to the reed switch triggering of
the three port solenoid that prevents the diaphragm
assembly from reaching full travel. After the brief
initialization period, the solenoid is de-energized
allowing atmospheric pressure to enter the pump
cavity, thus permitting the spring to drive the dia-
phragm which forces air out of the pump cavity and
into the vent system. When the solenoid is energized
and de energized, the cycle is repeated creating flow
in typical diaphragm pump fashion. The pump is con-
trolled in 2 modes:
Pump Mode: The pump is cycled at a fixed rate to
achieve a rapid pressure build in order to shorten the
overall test length.
Test Mode: The solenoid is energized with a fixed
duration pulse. Subsequent fixed pulses occur when
the diaphragm reaches the Switch closure point.
The spring in the pump is set so that the system
will achieve an equalized pressure of about 7.5º H20.
The cycle rate of pump strokes is quite rapid as the
system begins to pump up to this pressure. As the
pressure increases, the cycle rate starts to drop off. If
there is no leak in the system, the pump would even-
tually stop pumping at the equalized pressure. If
there is a leak, it will continue to pump at a rate rep-
resentative of the flow characteristic of the size of the
leak. From this information we can determine if the
leak is larger than the required detection limit (cur-
rently set at .040º orifice by CARB). If a leak is
revealed during the leak test portion of the test, the
test is terminated at the end of the test mode and no
further system checks will be performed.
After passing the leak detection phase of the test,
system pressure is maintained by turning on the
LDP's solenoid until the purge system is activated.
Purge activation in effect creates a leak. The cycle
rate is again interrogated and when it increases due
to the flow through the purge system, the leak check
portion of the diagnostic is complete.
The canister vent valve will unseal the system
after completion of the test sequence as the pump
diaphragm assembly moves to the full travel position.
Evaporative system functionality will be verified by
using the stricter evap purge flow monitor. At an
appropriate warm idle the LDP will be energized to
seal the canister vent. The purge flow will be clocked
up from some small value in an attempt to see a
shift in the 02 control system. If fuel vapor, indicated
by a shift in the 02 control, is present the test is
passed. If not, it is assumed that the purge system isnot functioning in some respect. The LDP is again
turned off and the test is ended.
MISFIRE MONITOR
Excessive engine misfire results in increased cata-
lyst temperature and causes an increase in HC emis-
sions. Severe misfires could cause catalyst damage.
To prevent catalytic convertor damage, the PCM
monitors engine misfire.
The Powertrain Control Module (PCM) monitors
for misfire during most engine operating conditions
(positive torque) by looking at changes in the crank-
shaft speed. If a misfire occurs the speed of the
crankshaft will vary more than normal.
FUEL SYSTEM MONITOR
To comply with clean air regulations, vehicles are
equipped with catalytic converters. These converters
reduce the emission of hydrocarbons, oxides of nitro-
gen and carbon monoxide. The catalyst works best
when the Air Fuel (A/F) ratio is at or near the opti-
mum of 14.7 to 1.
The PCM is programmed to maintain the optimum
air/fuel ratio of 14.7 to 1. This is done by making
short term corrections in the fuel injector pulse width
based on the O2S sensor output. The programmed
memory acts as a self calibration tool that the engine
controller uses to compensate for variations in engine
specifications, sensor tolerances and engine fatigue
over the life span of the engine. By monitoring the
actual fuel-air ratio with the O2S sensor (short term)
and multiplying that with the program long-term
(adaptive) memory and comparing that to the limit,
it can be determined whether it will pass an emis-
sions test. If a malfunction occurs such that the PCM
cannot maintain the optimum A/F ratio, then the
MIL will be illuminated.
CATALYST MONITOR
To comply with clean air regulations, vehicles are
equipped with catalytic converters. These converters
reduce the emission of hydrocarbons, oxides of nitro-
gen and carbon monoxide.
Normal vehicle miles or engine misfire can cause a
catalyst to decay. This can increase vehicle emissions
and deteriorate engine performance, driveability and
fuel economy.
The catalyst monitor uses dual oxygen sensors
(O2S's) to monitor the efficiency of the converter. The
dual O2S's sensor strategy is based on the fact that
as a catalyst deteriorates, its oxygen storage capacity
and its efficiency are both reduced. By monitoring
the oxygen storage capacity of a catalyst, its effi-
ciency can be indirectly calculated. The upstream
O2S is used to detect the amount of oxygen in the
exhaust gas before the gas enters the catalytic con-
DREMISSIONS CONTROL 25 - 3
EMISSIONS CONTROL (Continued)
Page 2833 of 2895
verter. The PCM calculates the A/F mixture from the
output of the O2S. A low voltage indicates high oxy-
gen content (lean mixture). A high voltage indicates a
low content of oxygen (rich mixture).
When the upstream O2S detects a lean condition,
there is an abundance of oxygen in the exhaust gas.
A functioning converter would store this oxygen so it
can use it for the oxidation of HC and CO. As the
converter absorbs the oxygen, there will be a lack of
oxygen downstream of the converter. The output of
the downstream O2S will indicate limited activity in
this condition.
As the converter loses the ability to store oxygen,
the condition can be detected from the behavior of
the downstream O2S. When the efficiency drops, no
chemical reaction takes place. This means the con-
centration of oxygen will be the same downstream as
upstream. The output voltage of the downstream
O2S copies the voltage of the upstream sensor. The
only difference is a time lag (seen by the PCM)
between the switching of the O2S's.
To monitor the system, the number of lean-to-rich
switches of upstream and downstream O2S's is
counted. The ratio of downstream switches to
upstream switches is used to determine whether the
catalyst is operating properly. An effective catalyst
will have fewer downstream switches than it has
upstream switches i.e., a ratio closer to zero. For a
totally ineffective catalyst, this ratio will be one-to-
one, indicating that no oxidation occurs in the device.
The system must be monitored so that when cata-
lyst efficiency deteriorates and exhaust emissions
increase to over the legal limit, the MIL will be illu-
minated.
DESCRIPTION - TRIP DEFINITION
The term ªTripº has different meanings depending
on what the circumstances are. If the MIL (Malfunc-
tion Indicator Lamp) is OFF, a Trip is defined as
when the Oxygen Sensor Monitor and the Catalyst
Monitor have been completed in the same drive cycle.
When any Emission DTC is set, the MIL on the
dash is turned ON. When the MIL is ON, it takes 3
good trips to turn the MIL OFF. In this case, it
depends on what type of DTC is set to know what a
ªTripº is.
For the Fuel Monitor or Mis-Fire Monitor (contin-
uous monitor), the vehicle must be operated in the
ªSimilar Condition Windowº for a specified amount of
time to be considered a Good Trip.
If a Non-Contiuous OBDII Monitor fails twice in a
row and turns ON the MIL, re-running that monitor
which previously failed, on the next start-up and
passing the monitor, is considered to be a Good Trip.
These will include the following:
²Oxygen Sensor²Catalyst Monitor
²Purge Flow Monitor
²Leak Detection Pump Monitor (if equipped)
²EGR Monitor (if equipped)
²Oxygen Sensor Heater Monitor
If any other Emission DTC is set (not an OBDII
Monitor), a Good Trip is considered to be when the
Oxygen Sensor Monitor and Catalyst Monitor have
been completed; or 2 Minutes of engine run time if
the Oxygen Sensor Monitor or Catalyst Monitor have
been stopped from running.
It can take up to 2 Failures in a row to turn on the
MIL. After the MIL is ON, it takes 3 Good Trips to
turn the MIL OFF. After the MIL is OFF, the PCM
will self-erase the DTC after 40 Warm-up cycles. A
Warm-up cycle is counted when the ECT (Engine
Coolant Temperature Sensor) has crossed 160ÉF and
has risen by at least 40ÉF since the engine has been
started.
DESCRIPTION - COMPONENT MONITORS
There are several components that will affect vehi-
cle emissions if they malfunction. If one of these com-
ponents malfunctions the Malfunction Indicator
Lamp (MIL) will illuminate.
Some of the component monitors are checking for
proper operation of the part. Electrically operated
components now have input (rationality) and output
(functionality) checks. Previously, a component like
the Throttle Position sensor (TPS) was checked by
the PCM for an open or shorted circuit. If one of
these conditions occurred, a DTC was set. Now there
is a check to ensure that the component is working.
This is done by watching for a TPS indication of a
greater or lesser throttle opening than MAP and
engine rpm indicate. In the case of the TPS, if engine
vacuum is high and engine rpm is 1600 or greater,
and the TPS indicates a large throttle opening, a
DTC will be set. The same applies to low vacuum if
the TPS indicates a small throttle opening.
All open/short circuit checks, or any component
that has an associated limp-in, will set a fault after 1
trip with the malfunction present. Components with-
out an associated limp-in will take two trips to illu-
minate the MIL.
OPERATION
OPERATION
The Powertrain Control Module (PCM) monitors
many different circuits in the fuel injection, ignition,
emission and engine systems. If the PCM senses a
problem with a monitored circuit often enough to
indicate an actual problem, it stores a Diagnostic
Trouble Code (DTC) in the PCM's memory. If the
25 - 4 EMISSIONS CONTROLDR
EMISSIONS CONTROL (Continued)
Page 2834 of 2895
problem is repaired or ceases to exist, the PCM can-
cels the code after 40 warm-up cycles. Diagnostic
trouble codes that affect vehicle emissions illuminate
the Malfunction Indicator Lamp (MIL). The MIL is
displayed as an engine icon (graphic) on the instru-
ment panel. Refer to Malfunction Indicator Lamp in
this section.
Certain criteria must be met before the PCM
stores a DTC in memory. The criteria may be a spe-
cific range of engine RPM, engine temperature,
and/or input voltage to the PCM.
The PCM might not store a DTC for a monitored
circuit even though a malfunction has occurred. This
may happen because one of the DTC criteria for the
circuit has not been met.For example,assume the
diagnostic trouble code criteria requires the PCM to
monitor the circuit only when the engine operates
between 750 and 2000 RPM. Suppose the sensor's
output circuit shorts to ground when engine operates
above 2400 RPM (resulting in 0 volt input to the
PCM). Because the condition happens at an engine
speed above the maximum threshold (2000 rpm), the
PCM will not store a DTC.
There are several operating conditions for which
the PCM monitors and sets DTC's. Refer to Moni-
tored Systems, Components, and Non-Monitored Cir-
cuits in this section.
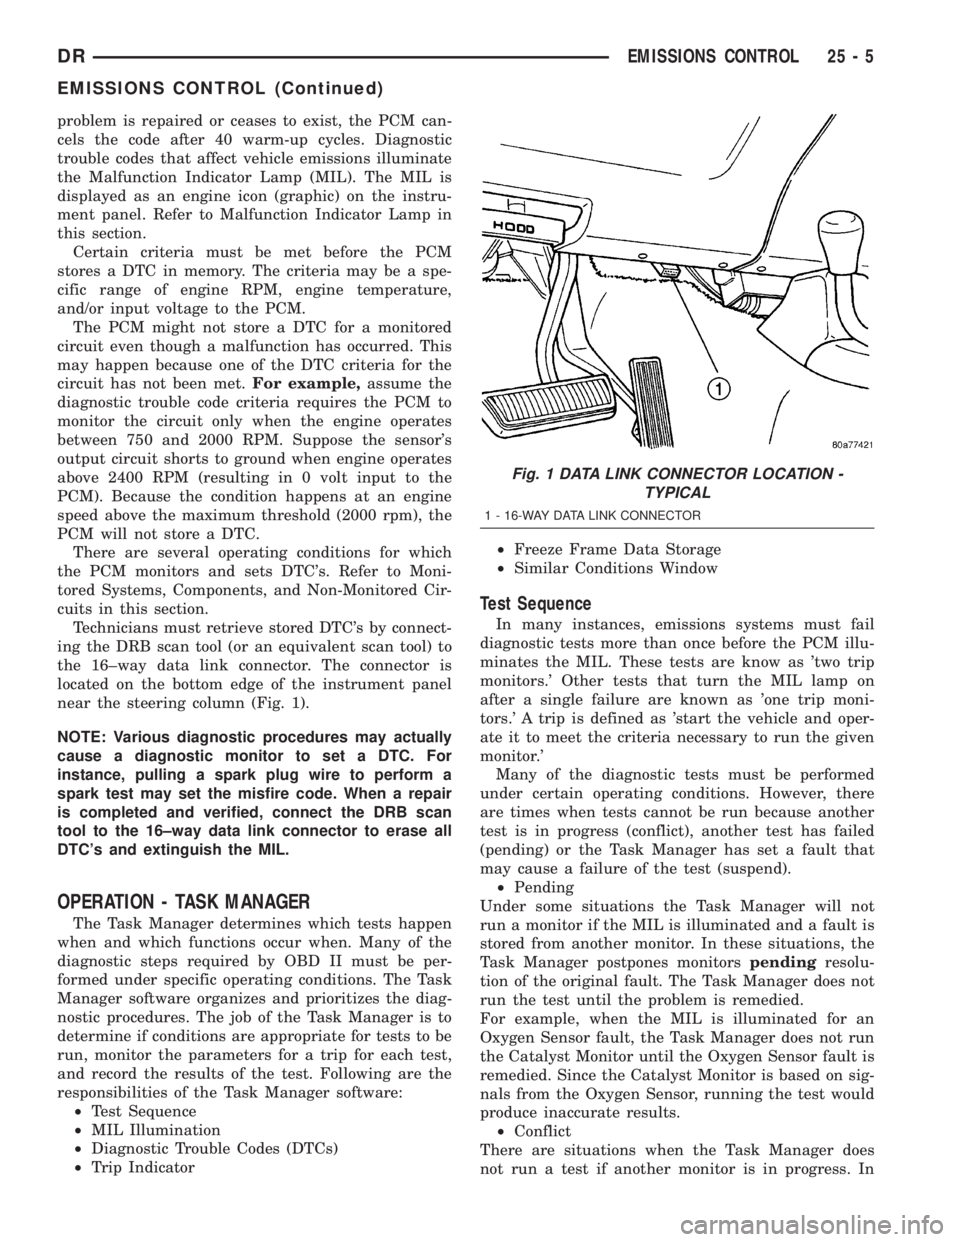
Technicians must retrieve stored DTC's by connect-
ing the DRB scan tool (or an equivalent scan tool) to
the 16±way data link connector. The connector is
located on the bottom edge of the instrument panel
near the steering column (Fig. 1).
NOTE: Various diagnostic procedures may actually
cause a diagnostic monitor to set a DTC. For
instance, pulling a spark plug wire to perform a
spark test may set the misfire code. When a repair
is completed and verified, connect the DRB scan
tool to the 16±way data link connector to erase all
DTC's and extinguish the MIL.
OPERATION - TASK MANAGER
The Task Manager determines which tests happen
when and which functions occur when. Many of the
diagnostic steps required by OBD II must be per-
formed under specific operating conditions. The Task
Manager software organizes and prioritizes the diag-
nostic procedures. The job of the Task Manager is to
determine if conditions are appropriate for tests to be
run, monitor the parameters for a trip for each test,
and record the results of the test. Following are the
responsibilities of the Task Manager software:
²Test Sequence
²MIL Illumination
²Diagnostic Trouble Codes (DTCs)
²Trip Indicator²Freeze Frame Data Storage
²Similar Conditions Window
Test Sequence
In many instances, emissions systems must fail
diagnostic tests more than once before the PCM illu-
minates the MIL. These tests are know as 'two trip
monitors.' Other tests that turn the MIL lamp on
after a single failure are known as 'one trip moni-
tors.' A trip is defined as 'start the vehicle and oper-
ate it to meet the criteria necessary to run the given
monitor.'
Many of the diagnostic tests must be performed
under certain operating conditions. However, there
are times when tests cannot be run because another
test is in progress (conflict), another test has failed
(pending) or the Task Manager has set a fault that
may cause a failure of the test (suspend).
²Pending
Under some situations the Task Manager will not
run a monitor if the MIL is illuminated and a fault is
stored from another monitor. In these situations, the
Task Manager postpones monitorspendingresolu-
tion of the original fault. The Task Manager does not
run the test until the problem is remedied.
For example, when the MIL is illuminated for an
Oxygen Sensor fault, the Task Manager does not run
the Catalyst Monitor until the Oxygen Sensor fault is
remedied. Since the Catalyst Monitor is based on sig-
nals from the Oxygen Sensor, running the test would
produce inaccurate results.
²Conflict
There are situations when the Task Manager does
not run a test if another monitor is in progress. In
Fig. 1 DATA LINK CONNECTOR LOCATION -
TYPICAL
1 - 16-WAY DATA LINK CONNECTOR
DREMISSIONS CONTROL 25 - 5
EMISSIONS CONTROL (Continued)
Page 2835 of 2895
these situations, the effects of another monitor run-
ning could result in an erroneous failure. If thiscon-
flictis present, the monitor is not run until the
conflicting condition passes. Most likely the monitor
will run later after the conflicting monitor has
passed.
For example, if the Fuel System Monitor is in
progress, the Task Manager does not run the EGR
Monitor. Since both tests monitor changes in air/fuel
ratio and adaptive fuel compensation, the monitors
will conflict with each other.
²Suspend
Occasionally the Task Manager may not allow a two
trip fault to mature. The Task Manager willsus-
pendthe maturing of a fault if a condition exists
that may induce an erroneous failure. This prevents
illuminating the MIL for the wrong fault and allows
more precis diagnosis.
For example, if the PCM is storing a one trip fault
for the Oxygen Sensor and the EGR monitor, the
Task Manager may still run the EGR Monitor but
will suspend the results until the Oxygen Sensor
Monitor either passes or fails. At that point the Task
Manager can determine if the EGR system is actu-
ally failing or if an Oxygen Sensor is failing.
MIL Illumination
The PCM Task Manager carries out the illumina-
tion of the MIL. The Task Manager triggers MIL illu-
mination upon test failure, depending on monitor
failure criteria.
The Task Manager Screen shows both a Requested
MIL state and an Actual MIL state. When the MIL is
illuminated upon completion of a test for a third trip,
the Requested MIL state changes to OFF. However,
the MIL remains illuminated until the next key
cycle. (On some vehicles, the MIL will actually turn
OFF during the third key cycle) During the key cycle
for the third good trip, the Requested MIL state is
OFF, while the Actual MILL state is ON. After the
next key cycle, the MIL is not illuminated and both
MIL states read OFF.
Diagnostic Trouble Codes (DTCs)
With OBD II, different DTC faults have different
priorities according to regulations. As a result, the
priorities determine MIL illumination and DTC era-
sure. DTCs are entered according to individual prior-
ity. DTCs with a higher priority overwrite lower
priority DTCs.
Priorities
²Priority 0 ÐNon-emissions related trouble codes
²Priority 1 Ð One trip failure of a two trip fault
for non-fuel system and non-misfire.²Priority 2 Ð One trip failure of a two trip fault
for fuel system (rich/lean) or misfire.
²Priority3ÐTwotrip failure for a non-fuel sys-
tem and non-misfire or matured one trip comprehen-
sive component fault.
²Priority4ÐTwotrip failure or matured fault
for fuel system (rich/lean) and misfire or one trip cat-
alyst damaging misfire.
Non-emissions related failures have no priority.
One trip failures of two trip faults have low priority.
Two trip failures or matured faults have higher pri-
ority. One and two trip failures of fuel system and
misfire monitor take precedence over non-fuel system
and non-misfire failures.
DTC Self Erasure
With one trip components or systems, the MIL is
illuminated upon test failure and DTCs are stored.
Two trip monitors are components requiring failure
in two consecutive trips for MIL illumination. Upon
failure of the first test, the Task Manager enters a
maturing code. If the component fails the test for a
second time the code matures and a DTC is set.
After three good trips the MIL is extinguished and
the Task Manager automatically switches the trip
counter to a warm-up cycle counter. DTCs are auto-
matically erased following 40 warm-up cycles if the
component does not fail again.
For misfire and fuel system monitors, the compo-
nent must pass the test under a Similar Conditions
Window in order to record a good trip. A Similar Con-
ditions Window is when engine RPM is within 375
RPM and load is within 10% of when the fault
occurred.
NOTE: It is important to understand that a compo-
nent does not have to fail under a similar window of
operation to mature. It must pass the test under a
Similar Conditions Window when it failed to record
a Good Trip for DTC erasure for misfire and fuel
system monitors.
DTCs can be erased anytime with a DRB III. Eras-
ing the DTC with the DRB III erases all OBD II
information. The DRB III automatically displays a
warning that erasing the DTC will also erase all
OBD II monitor data. This includes all counter infor-
mation for warm-up cycles, trips and Freeze Frame.
Trip Indicator
TheTripis essential for running monitors and
extinguishing the MIL. In OBD II terms, a trip is a
set of vehicle operating conditions that must be met
for a specific monitor to run. All trips begin with a
key cycle.
Good Trip
The Good Trip counters are as follows:
25 - 6 EMISSIONS CONTROLDR
EMISSIONS CONTROL (Continued)
Page 2836 of 2895
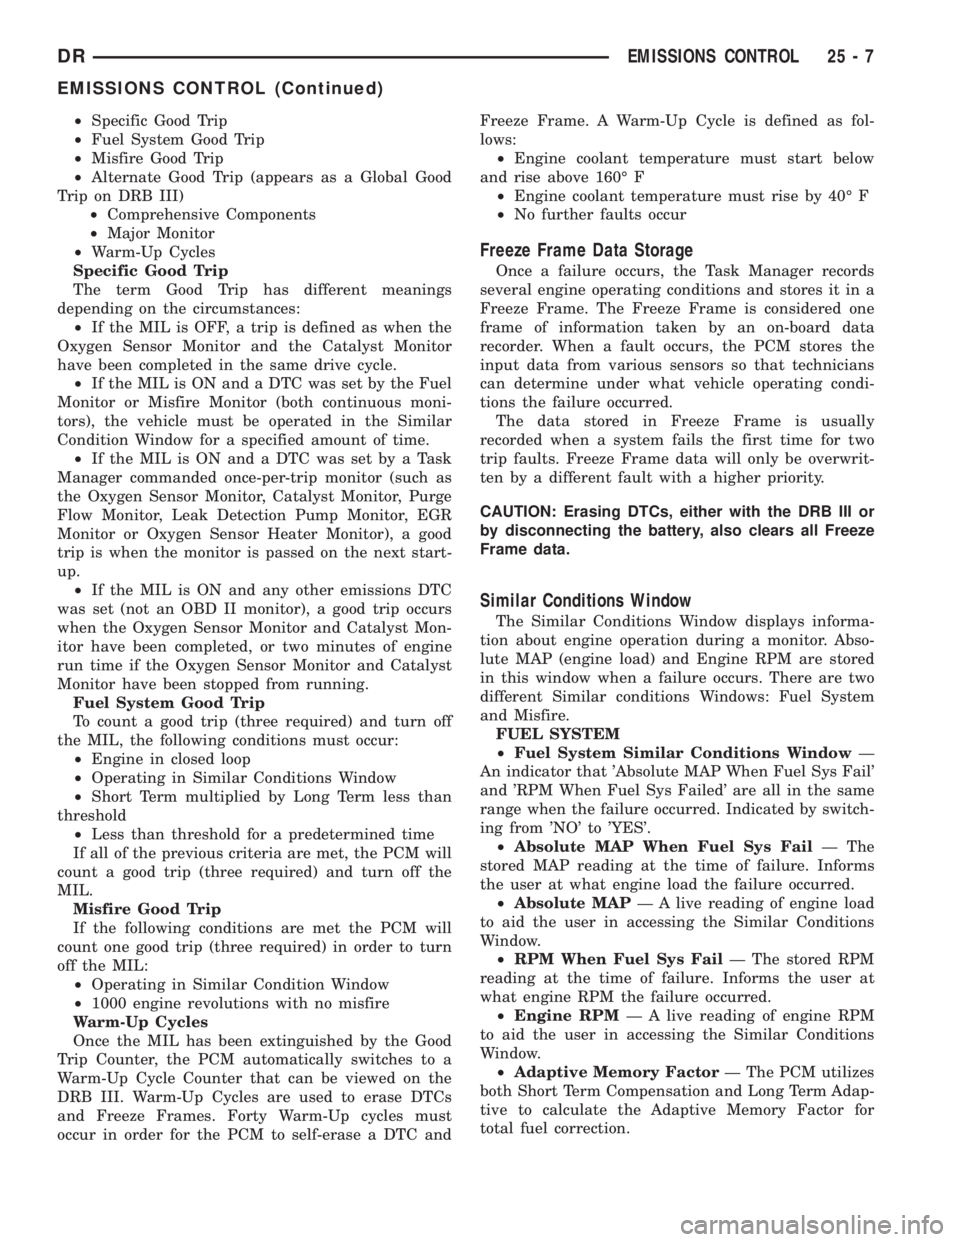
²Specific Good Trip
²Fuel System Good Trip
²Misfire Good Trip
²Alternate Good Trip (appears as a Global Good
Trip on DRB III)
²Comprehensive Components
²Major Monitor
²Warm-Up Cycles
Specific Good Trip
The term Good Trip has different meanings
depending on the circumstances:
²If the MIL is OFF, a trip is defined as when the
Oxygen Sensor Monitor and the Catalyst Monitor
have been completed in the same drive cycle.
²If the MIL is ON and a DTC was set by the Fuel
Monitor or Misfire Monitor (both continuous moni-
tors), the vehicle must be operated in the Similar
Condition Window for a specified amount of time.
²If the MIL is ON and a DTC was set by a Task
Manager commanded once-per-trip monitor (such as
the Oxygen Sensor Monitor, Catalyst Monitor, Purge
Flow Monitor, Leak Detection Pump Monitor, EGR
Monitor or Oxygen Sensor Heater Monitor), a good
trip is when the monitor is passed on the next start-
up.
²If the MIL is ON and any other emissions DTC
was set (not an OBD II monitor), a good trip occurs
when the Oxygen Sensor Monitor and Catalyst Mon-
itor have been completed, or two minutes of engine
run time if the Oxygen Sensor Monitor and Catalyst
Monitor have been stopped from running.
Fuel System Good Trip
To count a good trip (three required) and turn off
the MIL, the following conditions must occur:
²Engine in closed loop
²Operating in Similar Conditions Window
²Short Term multiplied by Long Term less than
threshold
²Less than threshold for a predetermined time
If all of the previous criteria are met, the PCM will
count a good trip (three required) and turn off the
MIL.
Misfire Good Trip
If the following conditions are met the PCM will
count one good trip (three required) in order to turn
off the MIL:
²Operating in Similar Condition Window
²1000 engine revolutions with no misfire
Warm-Up Cycles
Once the MIL has been extinguished by the Good
Trip Counter, the PCM automatically switches to a
Warm-Up Cycle Counter that can be viewed on the
DRB III. Warm-Up Cycles are used to erase DTCs
and Freeze Frames. Forty Warm-Up cycles must
occur in order for the PCM to self-erase a DTC andFreeze Frame. A Warm-Up Cycle is defined as fol-
lows:
²Engine coolant temperature must start below
and rise above 160É F
²Engine coolant temperature must rise by 40É F
²No further faults occur
Freeze Frame Data Storage
Once a failure occurs, the Task Manager records
several engine operating conditions and stores it in a
Freeze Frame. The Freeze Frame is considered one
frame of information taken by an on-board data
recorder. When a fault occurs, the PCM stores the
input data from various sensors so that technicians
can determine under what vehicle operating condi-
tions the failure occurred.
The data stored in Freeze Frame is usually
recorded when a system fails the first time for two
trip faults. Freeze Frame data will only be overwrit-
ten by a different fault with a higher priority.
CAUTION: Erasing DTCs, either with the DRB III or
by disconnecting the battery, also clears all Freeze
Frame data.
Similar Conditions Window
The Similar Conditions Window displays informa-
tion about engine operation during a monitor. Abso-
lute MAP (engine load) and Engine RPM are stored
in this window when a failure occurs. There are two
different Similar conditions Windows: Fuel System
and Misfire.
FUEL SYSTEM
²Fuel System Similar Conditions WindowÐ
An indicator that 'Absolute MAP When Fuel Sys Fail'
and 'RPM When Fuel Sys Failed' are all in the same
range when the failure occurred. Indicated by switch-
ing from 'NO' to 'YES'.
²Absolute MAP When Fuel Sys FailÐ The
stored MAP reading at the time of failure. Informs
the user at what engine load the failure occurred.
²Absolute MAPÐ A live reading of engine load
to aid the user in accessing the Similar Conditions
Window.
²RPM When Fuel Sys FailÐ The stored RPM
reading at the time of failure. Informs the user at
what engine RPM the failure occurred.
²Engine RPMÐ A live reading of engine RPM
to aid the user in accessing the Similar Conditions
Window.
²Adaptive Memory FactorÐ The PCM utilizes
both Short Term Compensation and Long Term Adap-
tive to calculate the Adaptive Memory Factor for
total fuel correction.
DREMISSIONS CONTROL 25 - 7
EMISSIONS CONTROL (Continued)
Page 2837 of 2895
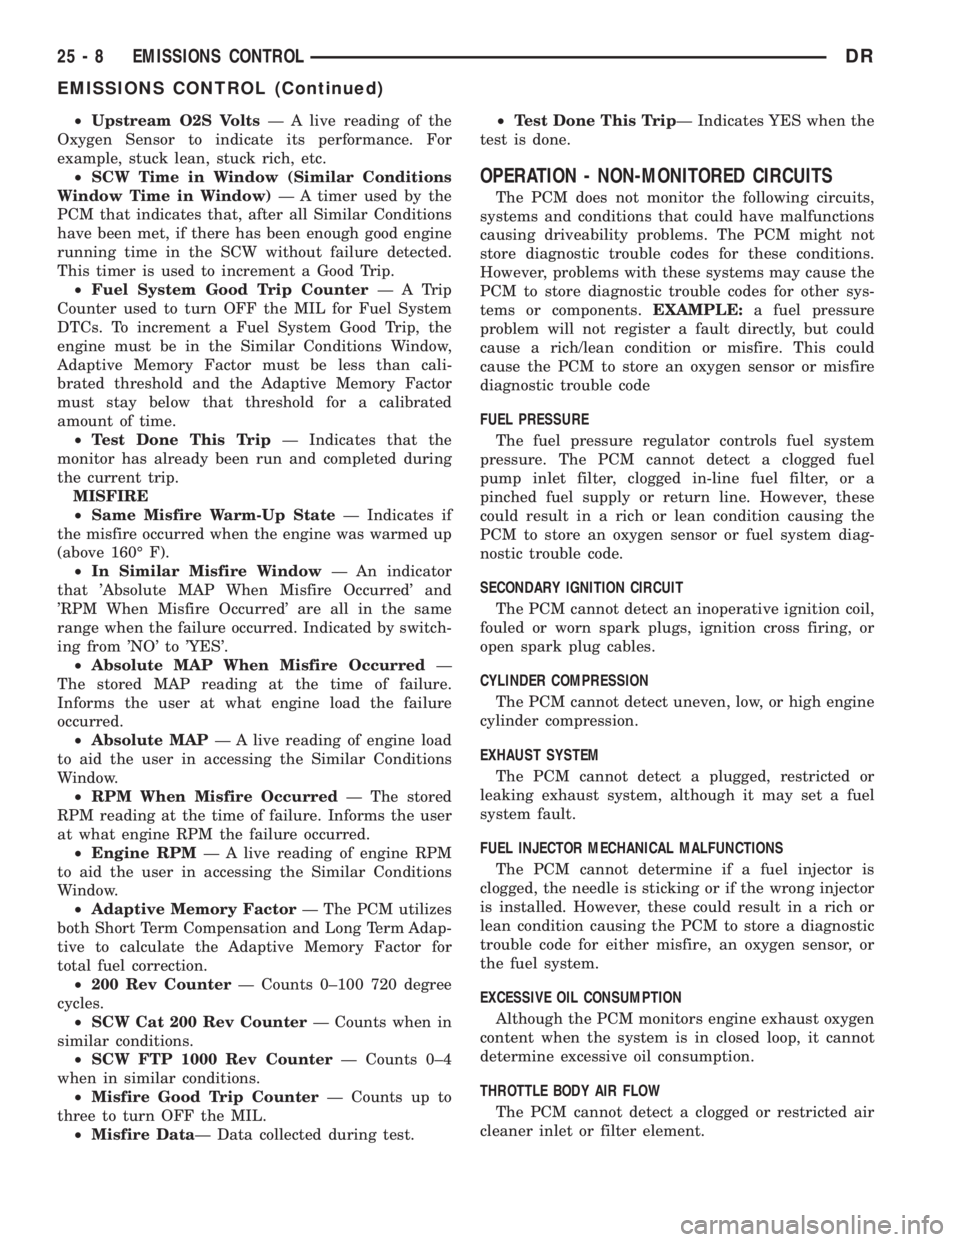
²Upstream O2S VoltsÐ A live reading of the
Oxygen Sensor to indicate its performance. For
example, stuck lean, stuck rich, etc.
²SCW Time in Window (Similar Conditions
Window Time in Window)Ð A timer used by the
PCM that indicates that, after all Similar Conditions
have been met, if there has been enough good engine
running time in the SCW without failure detected.
This timer is used to increment a Good Trip.
²Fuel System Good Trip CounterÐATrip
Counter used to turn OFF the MIL for Fuel System
DTCs. To increment a Fuel System Good Trip, the
engine must be in the Similar Conditions Window,
Adaptive Memory Factor must be less than cali-
brated threshold and the Adaptive Memory Factor
must stay below that threshold for a calibrated
amount of time.
²Test Done This TripÐ Indicates that the
monitor has already been run and completed during
the current trip.
MISFIRE
²Same Misfire Warm-Up StateÐ Indicates if
the misfire occurred when the engine was warmed up
(above 160É F).
²In Similar Misfire WindowÐ An indicator
that 'Absolute MAP When Misfire Occurred' and
'RPM When Misfire Occurred' are all in the same
range when the failure occurred. Indicated by switch-
ing from 'NO' to 'YES'.
²Absolute MAP When Misfire OccurredÐ
The stored MAP reading at the time of failure.
Informs the user at what engine load the failure
occurred.
²Absolute MAPÐ A live reading of engine load
to aid the user in accessing the Similar Conditions
Window.
²RPM When Misfire OccurredÐ The stored
RPM reading at the time of failure. Informs the user
at what engine RPM the failure occurred.
²Engine RPMÐ A live reading of engine RPM
to aid the user in accessing the Similar Conditions
Window.
²Adaptive Memory FactorÐ The PCM utilizes
both Short Term Compensation and Long Term Adap-
tive to calculate the Adaptive Memory Factor for
total fuel correction.
²200 Rev CounterÐ Counts 0±100 720 degree
cycles.
²SCW Cat 200 Rev CounterÐ Counts when in
similar conditions.
²SCW FTP 1000 Rev CounterÐ Counts 0±4
when in similar conditions.
²Misfire Good Trip CounterÐ Counts up to
three to turn OFF the MIL.
²Misfire DataÐ Data collected during test.²Test Done This TripÐ Indicates YES when the
test is done.
OPERATION - NON-MONITORED CIRCUITS
The PCM does not monitor the following circuits,
systems and conditions that could have malfunctions
causing driveability problems. The PCM might not
store diagnostic trouble codes for these conditions.
However, problems with these systems may cause the
PCM to store diagnostic trouble codes for other sys-
tems or components.EXAMPLE:a fuel pressure
problem will not register a fault directly, but could
cause a rich/lean condition or misfire. This could
cause the PCM to store an oxygen sensor or misfire
diagnostic trouble code
FUEL PRESSURE
The fuel pressure regulator controls fuel system
pressure. The PCM cannot detect a clogged fuel
pump inlet filter, clogged in-line fuel filter, or a
pinched fuel supply or return line. However, these
could result in a rich or lean condition causing the
PCM to store an oxygen sensor or fuel system diag-
nostic trouble code.
SECONDARY IGNITION CIRCUIT
The PCM cannot detect an inoperative ignition coil,
fouled or worn spark plugs, ignition cross firing, or
open spark plug cables.
CYLINDER COMPRESSION
The PCM cannot detect uneven, low, or high engine
cylinder compression.
EXHAUST SYSTEM
The PCM cannot detect a plugged, restricted or
leaking exhaust system, although it may set a fuel
system fault.
FUEL INJECTOR MECHANICAL MALFUNCTIONS
The PCM cannot determine if a fuel injector is
clogged, the needle is sticking or if the wrong injector
is installed. However, these could result in a rich or
lean condition causing the PCM to store a diagnostic
trouble code for either misfire, an oxygen sensor, or
the fuel system.
EXCESSIVE OIL CONSUMPTION
Although the PCM monitors engine exhaust oxygen
content when the system is in closed loop, it cannot
determine excessive oil consumption.
THROTTLE BODY AIR FLOW
The PCM cannot detect a clogged or restricted air
cleaner inlet or filter element.
25 - 8 EMISSIONS CONTROLDR
EMISSIONS CONTROL (Continued)
Page 2838 of 2895
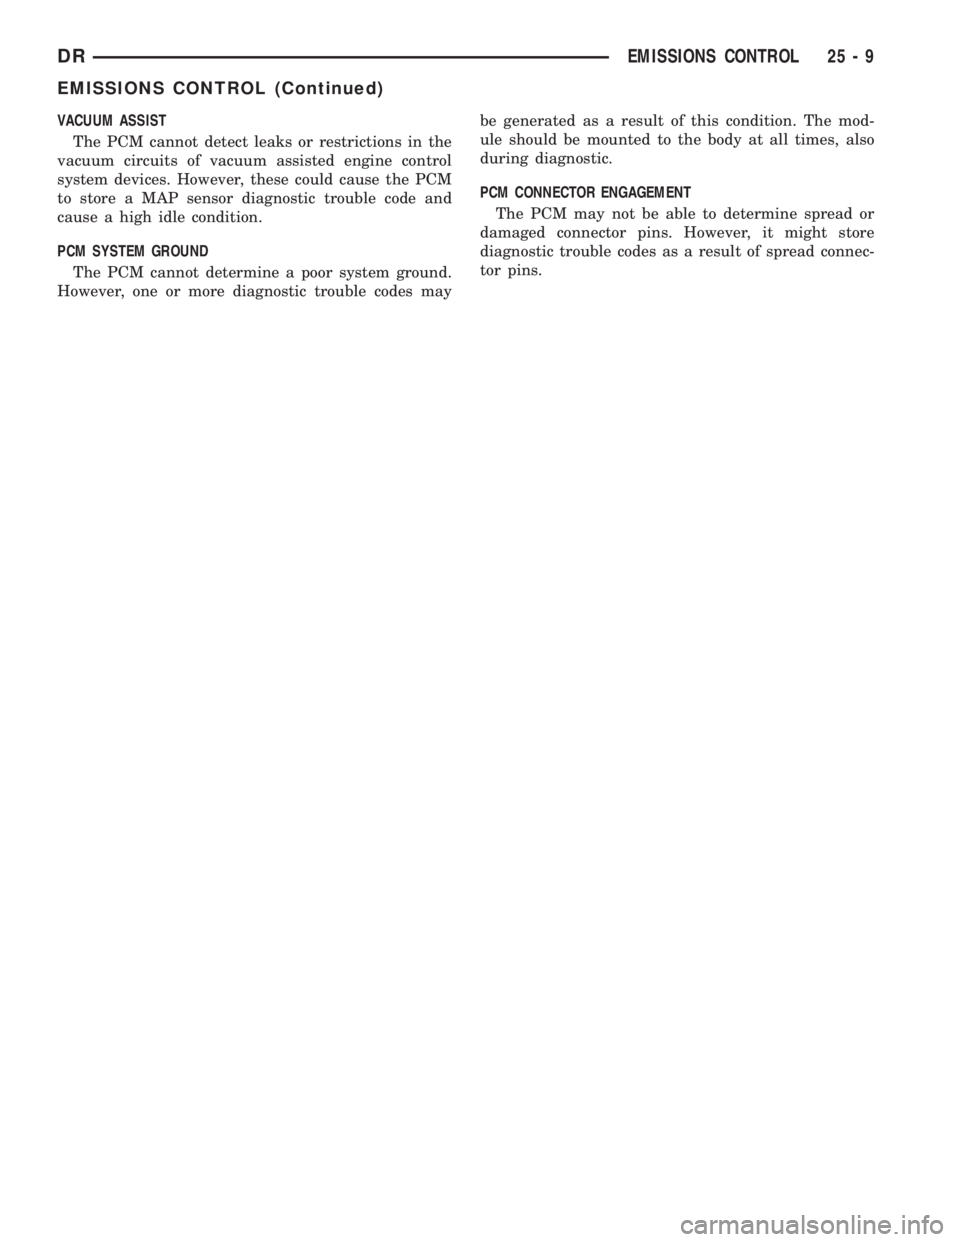
VACUUM ASSIST
The PCM cannot detect leaks or restrictions in the
vacuum circuits of vacuum assisted engine control
system devices. However, these could cause the PCM
to store a MAP sensor diagnostic trouble code and
cause a high idle condition.
PCM SYSTEM GROUND
The PCM cannot determine a poor system ground.
However, one or more diagnostic trouble codes maybe generated as a result of this condition. The mod-
ule should be mounted to the body at all times, also
during diagnostic.
PCM CONNECTOR ENGAGEMENT
The PCM may not be able to determine spread or
damaged connector pins. However, it might store
diagnostic trouble codes as a result of spread connec-
tor pins.
DREMISSIONS CONTROL 25 - 9
EMISSIONS CONTROL (Continued)
Page 2856 of 2895
ABS - DESCRIPTION, BRAKES...........5-39
ABS - OPERATION, BRAKES.............5-39
ABS BRAKE BLEEDING - STANDARD
PROCEDURE.........................5-40
ABS INDICATOR - DESCRIPTION.........8J-17
ABS INDICATOR - OPERATION..........8J-17
A/C APPLICATION TABLE,
SPECIFICATIONS......................24-7
A/C COMPRESSOR CLUTCH -
DESCRIPTION........................24-9
A/C COMPRESSOR CLUTCH -
INSPECTION........................24-12
A/C COMPRESSOR CLUTCH -
INSTALLATION.......................24-12
A/C COMPRESSOR CLUTCH -
OPERATION..........................24-9
A/C COMPRESSOR CLUTCH - REMOVAL . . 24-10
A/C COMPRESSOR CLUTCH BREAK-IN -
STANDARD PROCEDURE...............24-10
A/C COMPRESSOR CLUTCH COIL -
DIAGNOSIS AND TESTING.............24-10
A/C COMPRESSOR CLUTCH RELAY -
DESCRIPTION.......................24-13
A/C COMPRESSOR CLUTCH RELAY -
INSTALLATION.......................24-14
A/C COMPRESSOR CLUTCH RELAY -
OPERATION.........................24-13
A/C COMPRESSOR CLUTCH RELAY -
REMOVAL..........................24-14
A/C COMPRESSOR NOISE - DIAGNOSIS
AND TESTING.......................24-36
A/C CONDENSER - DESCRIPTION.........24-39
A/C CONDENSER - OPERATION..........24-39
A/C EVAPORATOR - DESCRIPTION.......24-47
A/C EVAPORATOR - INSTALLATION......24-47
A/C EVAPORATOR - OPERATION.........24-47
A/C EVAPORATOR - REMOVAL..........24-47
A/C HEATER CONTROL - DESCRIPTION . . . 24-14
A/C HEATER CONTROL - INSTALLATION . . . 24-15
A/C HEATER CONTROL - REMOVAL......24-14
A/C ORIFICE TUBE - DESCRIPTION.......24-48
A/C ORIFICE TUBE - INSTALLATION......24-49
A/C ORIFICE TUBE - OPERATION........24-48
A/C ORIFICE TUBE - REMOVAL..........24-49
A/C PERFORMANCE - DIAGNOSIS AND
TESTING............................24-2
A/C PRESSURE TRANSDUCER -
DESCRIPTION.......................24-15
A/C PRESSURE TRANSDUCER -
DIAGNOSIS AND TESTING.............24-15
A/C PRESSURE TRANSDUCER -
INSTALLATION.......................24-16
A/C PRESSURE TRANSDUCER -
OPERATION.........................24-15
A/C PRESSURE TRANSDUCER -
REMOVAL..........................24-16
ACCELERATOR PEDAL - INSTALLATION . . . 14-24
ACCELERATOR PEDAL - REMOVAL.......14-24
ACCELERATOR PEDAL POSITION
SENSOR - DESCRIPTION...............14-25
ACCELERATOR PEDAL POSITION
SENSOR - INSTALLATION..............14-25
ACCELERATOR PEDAL POSITION
SENSOR - OPERATION................14-25
ACCELERATOR PEDAL POSITION
SENSOR - REMOVAL..................14-25
ACCESSORY DRIVE BELT - DIAGNOSIS
AND TESTING................7-25,7-28,7-31
ACCUMULATOR - DESCRIPTION.........24-49
ACCUMULATOR - DESCRIPTION
. . 21-191,21-372
ACCUMULATOR - INSPECTION
. . . 21-192,21-373
ACCUMULATOR - INSTALLATION
........24-50
ACCUMULATOR - OPERATION
..........24-49
ACCUMULATOR - OPERATION
....21-192,21-373
ACCUMULATOR - REMOVAL
............24-49
ACM COVER - INSTALLATION
............8O-9
ACM COVER - REMOVAL
...............8O-9
ACTUATION TEST MODE - DESCRIPTION,
CIRCUIT
.............................25-1
ACTUATOR - DESCRIPTION, BLEND
DOOR
.............................24-16
ACTUATOR - DESCRIPTION, FUEL
CONTROL
..........................14-85
ACTUATOR - DESCRIPTION, MODE
DOOR
.............................24-20
ACTUATOR - DESCRIPTION,
RECIRCULATION DOOR
................24-22ACTUATOR - INSTALLATION, BLEND
DOOR.............................24-17
ACTUATOR - INSTALLATION, FLOOR -
DEFROST DOOR.....................24-20
ACTUATOR - INSTALLATION, FUEL
CONTROL..........................14-85
ACTUATOR - INSTALLATION, INSIDE
HANDLE.......................23-22,23-32
ACTUATOR - INSTALLATION, MODE
DOOR.............................24-22
ACTUATOR - INSTALLATION,
RECIRCULATION DOOR................24-23
ACTUATOR - OPERATION, BLEND DOOR . . 24-16
ACTUATOR - OPERATION, FUEL
CONTROL..........................14-85
ACTUATOR - OPERATION, MODE DOOR . . . 24-21
ACTUATOR - OPERATION,
RECIRCULATION DOOR................24-22
ACTUATOR - REMOVAL, BLEND DOOR....24-17
ACTUATOR - REMOVAL, FLOOR -
DEFROST DOOR.....................24-19
ACTUATOR - REMOVAL, FUEL CONTROL . . 14-85
ACTUATOR - REMOVAL, INSIDE HANDLE . 23-22,
23-31
ACTUATOR - REMOVAL, MODE DOOR....24-21
ACTUATOR - REMOVAL, RECIRCULATION
DOOR.............................24-22
ADAPTER HOUSING SEAL -
INSTALLATION...........21-127,21-539,21-83
ADAPTER HOUSING SEAL - REMOVAL . . 21-127,
21-539,21-83
ADAPTER MOUNT - INSTALLATION, DISC
BRAKE CALIPER......................5-17
ADDING ADDITIONAL COOLANT -
STANDARD PROCEDURE................7-19
ADDITIONAL COOLANT - STANDARD
PROCEDURE, ADDING..................7-19
ADHESIVE LOCATIONS -
SPECIFICATIONS, STRUCTURAL........23-113
ADJUSTABLE PEDAL MOTOR -
DESCRIPTION........................5-24
ADJUSTABLE PEDAL MOTOR -
INSTALLATION........................5-24
ADJUSTABLE PEDAL MOTOR - REMOVAL . . 5-24
ADJUSTABLE PEDAL SWITCH -
INSTALLATION.........................5-6
ADJUSTABLE PEDAL SWITCH -
REMOVAL............................5-6
ADJUSTER - DIAGNOSIS AND TESTING,
HYDRAULIC LASH................9-124,9-31
ADJUSTER - INSTALLATION, SEAT BELT
TURNING LOOP.....................8O-50
ADJUSTER - REMOVAL, SEAT BELT
TURNING LOOP.....................8O-50
ADJUSTER ASSEMBLY - DESCRIPTION,
ROCKER ARM.......................9-124
ADJUSTER ASSEMBLY - INSTALLATION,
ROCKER ARM..................9-124,9-249
ADJUSTER ASSEMBLY - REMOVAL,
ROCKER ARM..................9-124,9-249
ADJUSTER ASSY - CLEANING, ROCKER
ARM
..............................9-310
ADJUSTER ASSY - DESCRIPTION,
ROCKER ARM
.......................9-310
ADJUSTER ASSY - INSPECTION,
ROCKER ARM
.......................9-311
ADJUSTER ASSY - INSTALLATION,
ROCKER ARM
.............9-198,9-312,9-379
ADJUSTER ASSY - REMOVAL, ROCKER
ARM
....................9-198,9-310,9-379
ADJUSTING TOOL - ADJUSTMENT, WITH
. . . 5-36
AFTER A SUPPLEMENTAL RESTRAINT
DEPLOYMENT - STANDARD
PROCEDURE, SERVICE
.................8O-7
AIR CHECKING TRANSMISSION CLUTCH
OPERATION - DIAGNOSIS AND
TESTING
..........................21-494
AIR CLEANER ELEMENT - INSTALLATION
. 9-105,
9-20,9-242,9-298,9-370
AIR CLEANER ELEMENT - REMOVAL
. 9-105,9-20,
9-242,9-297,9-370
AIR CONDITIONER - DESCRIPTION,
HEATER
.............................24-1
AIR CONDITIONER - OPERATION,
HEATER
.............................24-1
AIR CONDITIONING - INSTALLATION,
WATER PUMP BYPASS HOSE WITH
.......7-70AIR CONDITIONING - INSTALLATION,
WATER PUMP BYPASS HOSE
WITHOUT............................7-70
AIR CONDITIONING - REMOVAL, WATER
PUMP BYPASS HOSE WITH.............7-68
AIR CONDITIONING - REMOVAL, WATER
PUMP BYPASS HOSE WITHOUT..........7-69
AIR CONTROL MOTOR - DESCRIPTION,
IDLE...............................14-33
AIR CONTROL MOTOR - INSTALLATION,
IDLE...............................14-35
AIR CONTROL MOTOR - OPERATION,
IDLE...............................14-33
AIR CONTROL MOTOR - REMOVAL, IDLE . . 14-34
AIR COOLER AND PLUMBING -
CLEANING, CHARGE..................11-16
AIR COOLER AND PLUMBING -
DESCRIPTION, CHARGE...............11-15
AIR COOLER AND PLUMBING -
INSPECTION, CHARGE.................11-16
AIR COOLER AND PLUMBING -
INSTALLATION, CHARGE...............11-16
AIR COOLER AND PLUMBING -
OPERATION, CHARGE.................11-15
AIR COOLER AND PLUMBING -
REMOVAL, CHARGE..................11-15
AIR COOLER SYSTEM - LEAKS -
DIAGNOSIS AND TESTING, CHARGE......11-15
AIR DAM - INSTALLATION, FRONT........13-2
AIR DAM - REMOVAL, FRONT...........13-2
AIR HEATER - DESCRIPTION, INTAKE.....14-91
AIR HEATER - INSTALLATION, INTAKE....14-91
AIR HEATER - OPERATION, INTAKE......14-91
AIR HEATER - REMOVAL, INTAKE........14-91
AIR HEATER RELAY - DESCRIPTION,
INTAKE ............................14-92
AIR HEATER RELAY - INSTALLATION,
INTAKE ............................14-93
AIR HEATER RELAY - OPERATION,
INTAKE ............................14-92
AIR HEATER RELAY - REMOVAL, INTAKE . . 14-93
AIR INTAKE SYSTEM - INSTALLATION....9-194
AIR INTAKE SYSTEM - REMOVAL........9-194
AIR TEMPERATURE SENSOR -
DESCRIPTION, INTAKE................14-36
AIR TEMPERATURE SENSOR -
INSTALLATION, INTAKE................14-38
AIR TEMPERATURE SENSOR -
OPERATION, INTAKE..................14-36
AIR TEMPERATURE SENSOR -
REMOVAL, INTAKE...................14-36
AIR TEMPERATURE SENSOR/MAP
SENSOR - DESCRIPTION, INTAKE........14-93
AIR TEMPERATURE SENSOR/MAP
SENSOR - INSTALLATION, INTAKE.......14-94
AIR TEMPERATURE SENSOR/MAP
SENSOR - OPERATION, INTAKE.........14-93
AIR TEMPERATURE SENSOR/MAP
SENSOR - REMOVAL, INTAKE...........14-93
AIR TEMPERATURE SENSOR/PRESSURE
SENSOR - DESCRIPTION, INLET.........14-90
AIR TEMPERATURE SENSOR/PRESSURE
SENSOR - INSTALLATION, INLET........14-90
AIR TEMPERATURE SENSOR/PRESSURE
SENSOR - OPERATION, INLET..........14-90
AIR TEMPERATURE SENSOR/PRESSURE
SENSOR - REMOVAL, INLET............14-90
AIR TESTING TRANSMISSION CLUTCH
AND BAND OPERATION - DIAGNOSIS
AND TESTING................21-143,21-324
AIR TO OIL COOLER - INSTALLATION.....7-75
AIR TO OIL COOLER - REMOVAL.........7-74
AIRBAG - DESCRIPTION, DRIVER........8O-22
AIRBAG - DESCRIPTION, PASSENGER....8O-34
AIRBAG - DESCRIPTION, SIDE CURTAIN . . 8O-51
AIRBAG - INSTALLATION, DRIVER.......8O-24
AIRBAG - INSTALLATION, PASSENGER . . . 8O-37
AIRBAG - INSTALLATION, SIDE CURTAIN . . 8O-53
AIRBAG - OPERATION, DRIVER.........8O-23
AIRBAG - OPERATION, PASSENGER......8O-35
AIRBAG - OPERATION, SIDE CURTAIN....8O-51
AIRBAG - REMOVAL, DRIVER
...........8O-23
AIRBAG - REMOVAL, PASSENGER
.......8O-35
AIRBAG - REMOVAL, SIDE CURTAIN
.....8O-52
AIRBAG CONTROL MODULE -
DESCRIPTION
.......................8O-10
AIRBAG CONTROL MODULE -
DESCRIPTION, SIDE IMPACT
...........8O-53
DRINDEX 1
Description Group-Page Description Group-Page Description Group-Page
Page 2857 of 2895
AIRBAG CONTROL MODULE -
INSTALLATION......................8O-12
AIRBAG CONTROL MODULE -
OPERATION.........................8O-10
AIRBAG CONTROL MODULE -
OPERATION, SIDE IMPACT.............8O-54
AIRBAG CONTROL MODULE - REMOVAL . . 8O-11
AIRBAG INDICATOR - DESCRIPTION......8J-18
AIRBAG INDICATOR - OPERATION.......8J-18
AIRBAG ON/OFF SWITCH -
DESCRIPTION, PASSENGER............8O-38
AIRBAG ON/OFF SWITCH -
INSTALLATION, PASSENGER...........8O-39
AIRBAG ON/OFF SWITCH - OPERATION,
PASSENGER........................8O-38
AIRBAG ON/OFF SWITCH - REMOVAL,
PASSENGER........................8O-39
AJAR INDICATOR - DESCRIPTION, DOOR . . 8J-23
AJAR INDICATOR - OPERATION, DOOR . . . 8J-23
AJAR SWITCH - DESCRIPTION, DOOR....8L-25
AJAR SWITCH - OPERATION, DOOR......8L-25
ALIGNMENT - DESCRIPTION, WHEEL.......2-1
ALIGNMENT - OPERATION, WHEEL........2-2
ALIGNMENT - SPECIAL TOOLS,
HEADLAMP..........................8L-7
ALIGNMENT LINK/COIL SUSPENSION -
STANDARD PROCEDURE.................2-5
ALIGNMENT, SPECIAL TOOLS - WHEEL.....2-7
ALIGNMENT, SPECIFICATIONS............2-6
ALUMINUM THREAD REPAIR -
STANDARD PROCEDURE . . 21-156,21-337,21-495
AMBIENT TEMP SENSOR - DESCRIPTION . 8M-10
AMBIENT TEMP SENSOR - OPERATION . . 8M-10
AMBIENT TEMPERATURE SENSOR -
DIAGNOSIS AND TESTING.............8M-11
AMBIENT TEMPERATURE SENSOR
CIRCUIT - DIAGNOSIS AND TESTING....8M-11
AMPLIFIER - DESCRIPTION.............8A-3
AMPLIFIER - INSTALLATION.............8A-4
AMPLIFIER - OPERATION...............8A-3
AMPLIFIER - REMOVAL................8A-3
ANCHOR - DESCRIPTION, CHILD
RESTRAINT.........................8O-14
ANCHOR - INSTALLATION, CHILD
RESTRAINT.........................8O-17
ANCHOR - OPERATION, CHILD
RESTRAINT.........................8O-16
ANCHOR - REMOVAL, CHILD RESTRAINT . 8O-16
ANCHOR & RIGHT OUTBOARD -
INSTALLATION, CENTER...............8O-45
ANCHOR & RIGHT OUTBOARD -
REMOVAL, CENTER...................8O-43
ANTENNA BODY & CABLE -
DESCRIPTION........................8A-4
ANTENNA BODY & CABLE -
INSTALLATION.......................8A-6
ANTENNA BODY & CABLE - OPERATION . . . 8A-4
ANTENNA BODY & CABLE - REMOVAL.....8A-6
ANTENNA BODY AND CABLE -
DIAGNOSIS AND TESTING..............8A-4
ANTENNA CABLE - INSTALLATION,
INSTRUMENT PANEL..................8A-7
ANTENNA CABLE - REMOVAL,
INSTRUMENT PANEL..................8A-6
ANTILOCK - DIAGNOSIS AND TESTING,
REAR WHEEL........................5-42
ANTILOCK BRAKE - DESCRIPTION,
CONTROLLER........................8E-3
ANTILOCK BRAKE - INSTALLATION,
CONTROLLER........................8E-3
ANTILOCK BRAKE - OPERATION,
CONTROLLER........................8E-3
ANTILOCK BRAKE - REMOVAL,
CONTROLLER........................8E-3
A-PILLAR TRIM/GRAB HANDLE -
INSTALLATION.......................23-64
A-PILLAR TRIM/GRAB HANDLE -
REMOVAL..........................23-64
A-PILLAR WEATHERSTRIP RETAINER -
INSTALLATION
.......................23-91
A-PILLAR WEATHERSTRIP RETAINER -
REMOVAL
..........................23-91
APPLICATION TABLE, SPECIFICATIONS -
A/C
................................24-7
AREA LEAKS - DIAGNOSIS AND
TESTING, REAR SEAL
........9-135,9-204,9-64
ARM / ADJUSTER ASSEMBLY -
DESCRIPTION, ROCKER
...............9-124ARM / ADJUSTER ASSEMBLY -
INSTALLATION, ROCKER..........9-124,9-249
ARM / ADJUSTER ASSEMBLY -
REMOVAL, ROCKER.............9-124,9-249
ARM / ADJUSTER ASSY - CLEANING,
ROCKER............................9-310
ARM / ADJUSTER ASSY - DESCRIPTION,
ROCKER............................9-310
ARM / ADJUSTER ASSY - INSPECTION,
ROCKER............................9-311
ARM / ADJUSTER ASSY -
INSTALLATION, ROCKER.....9-198,9-312,9-379
ARM / ADJUSTER ASSY - REMOVAL,
ROCKER.................9-198,9-310,9-379
ARM - DESCRIPTION, ROCKER......9-30,9-36
ARM - DESCRIPTION, WIPER...........8R-18
ARM - INSTALLATION, LOWER
SUSPENSION.........................2-35
ARM - INSTALLATION, PITMAN.........19-36
ARM - INSTALLATION, ROCKER..........9-30
ARM - INSTALLATION, UPPER CONTROL . . . 2-27
ARM - INSTALLATION, WIPER..........8R-19
ARM - OPERATION, WIPER............8R-18
ARM - REMOVAL, LOWER SUSPENSION . . . 2-35
ARM - REMOVAL, PITMAN.............19-35
ARM - REMOVAL, ROCKER..........9-30,9-36
ARM - REMOVAL, UPPER CONTROL......2-27
ARM - REMOVAL, WIPER..............8R-18
ARM BUSHINGS - 2WD (LD) -
INSTALLATION, LOWER CONTROL..........2-14
ARM BUSHINGS - 2WD (LD) -
REMOVAL, LOWER CONTROL............2-12
ARM BUSHINGS - 4WD (LD) -
INSTALLATION, LOWER CONTROL........2-13
ARM BUSHINGS - 4WD (LD) -
REMOVAL, LOWER CONTROL............2-12
ARMREST / SEAT BACK - INSTALLATION,
CENTER............................23-78
ARMREST / SEAT BACK - REMOVAL,
CENTER............................23-77
ASD AND FUEL PUMP RELAYS -
DIAGNOSIS AND TESTING...............8I-7
ASD SENSE - PCM INPUT - OPERATION....8I-6
ASH RECEIVER - INSTALLATION.........23-52
ASH RECEIVER - REMOVAL............23-51
AUDIO - DESCRIPTION.................8A-1
AUDIO - DIAGNOSIS AND TESTING.......8A-2
AUDIO - OPERATION...................8A-1
AUTOMATIC DAY / NIGHT MIRROR -
DESCRIPTION.......................8N-12
AUTOMATIC DAY / NIGHT MIRROR -
DIAGNOSIS AND TESTING.............8N-12
AUTOMATIC DAY / NIGHT MIRROR -
OPERATION.........................8N-12
AUTOMATIC DAY / NIGHT MIRROR -
REMOVAL..........................8N-13
AUTOMATIC LOCKING RETRACTOR -
DESCRIPTION.......................8O-13
AUTOMATIC LOCKING RETRACTOR -
OPERATION.........................8O-14
AUTOMATIC TRANSMISSION -
45RFE/545RFE - DESCRIPTION.........21-489
AUTOMATIC TRANSMISSION -
45RFE/545RFE - OPERATION...........21-490
AUTOMATIC TRANSMISSION - 46RE -
DESCRIPTION......................21-131
AUTOMATIC TRANSMISSION - 46RE -
OPERATION........................21-133
AUTOMATIC TRANSMISSION - 48RE -
DESCRIPTION......................21-312
AUTOMATIC TRANSMISSION - 48RE -
OPERATION........................21-314
AUTOMATIC TRANSMISSION -
DIAGNOSIS AND TESTING......21-139,21-320,
21-491
AUTOMATIC TRANSMISSION FLUID -
DESCRIPTION.........................0-4
AUTOMATIC TRANSMISSION FLUID -
OPERATION...........................0-5
AUXILIARY SPRING BUMPERS (3500) -
INSTALLATION
........................2-40
AUXILIARY SPRING BUMPERS (3500) -
REMOVAL
...........................2-40
AXLE - 10 1/2 AA - ADJUSTMENTS,
REAR
..............................3-104
AXLE - 10 1/2 AA - DESCRIPTION, REAR
. . 3-100
AXLE - 10 1/2 AA - DIAGNOSIS AND
TESTING, REAR
......................3-100AXLE - 10 1/2 AA - INSTALLATION,
REAR..............................3-103
AXLE - 10 1/2 AA - OPERATION, REAR . . . 3-100
AXLE - 10 1/2 AA - REMOVAL, REAR.....3-103
AXLE - 10 1/2 AA - SPECIAL TOOLS,
REAR..............................3-108
AXLE - 10 1/2 AA - SPECIFICATIONS,
REAR..............................3-108
AXLE - 11 1/2 AA - ADJUSTMENTS,
REAR..............................3-131
AXLE - 11 1/2 AA - DESCRIPTION, REAR . . 3-127
AXLE - 11 1/2 AA - DIAGNOSIS AND
TESTING, REAR......................3-127
AXLE - 11 1/2 AA - INSTALLATION,
REAR..............................3-130
AXLE - 11 1/2 AA - OPERATION, REAR . . . 3-127
AXLE - 11 1/2 AA - REMOVAL, REAR.....3-130
AXLE - 11 1/2 AA - SPECIAL TOOLS,
REAR..............................3-135
AXLE - 11 1/2 AA - SPECIFICATIONS,
REAR..............................3-135
AXLE - 9 1/4 - ADJUSTMENTS, REAR.....3-74
AXLE - 9 1/4 - DESCRIPTION, REAR......3-69
AXLE - 9 1/4 - DIAGNOSIS AND
TESTING, REAR.......................3-69
AXLE - 9 1/4 - INSTALLATION, REAR......3-74
AXLE - 9 1/4 - OPERATION, REAR........3-69
AXLE - 9 1/4 - REMOVAL, REAR..........3-74
AXLE - 9 1/4 - SPECIAL TOOLS, REAR.....3-80
AXLE - 9 1/4 - SPECIFICATIONS, REAR......3-79
AXLE - 9 1/4 AA - ADJUSTMENTS,
FRONT..............................3-49
AXLE - 9 1/4 AA - DESCRIPTION, FRONT . . . 3-45
AXLE - 9 1/4 AA - DIAGNOSIS AND
TESTING, FRONT......................3-45
AXLE - 9 1/4 AA - INSTALLATION,
FRONT..............................3-48
AXLE - 9 1/4 AA - OPERATION, FRONT....3-45
AXLE - 9 1/4 AA - REMOVAL, FRONT......3-48
AXLE - 9 1/4 AA - SPECIAL TOOLS,
FRONT..............................3-53
AXLE - 9 1/4 AA - SPECIFICATIONS,
FRONT..............................3-53
AXLE - C205F - ADJUSTMENTS, FRONT....3-21
AXLE - C205F - DESCRIPTION, FRONT.....3-18
AXLE - C205F - DIAGNOSIS AND
TESTING, FRONT......................3-18
AXLE - C205F - INSTALLATION, FRONT....3-21
AXLE - C205F - OPERATION, FRONT......3-18
AXLE - C205F - REMOVAL, FRONT........3-21
AXLE - C205F - SPECIAL TOOLS, FRONT . . . 3-30
AXLE - C205F - SPECIFICATIONS, FRONT . . . 3-29
AXLE - DESCRIPTION...................0-4
AXLE BEARINGS - INSTALLATION . . 3-112,3-139,
3-34,3-84
AXLE BEARINGS - REMOVAL . . 3-112,3-138,3-33,
3-84
AXLE SHAFT SEALS - INSTALLATION . 3-33,3-58,
3-84
AXLE SHAFT SEALS - REMOVAL . 3-33,3-58,3-84
AXLE SHAFTS - ASSEMBLY.............3-58
AXLE SHAFTS - DISASSEMBLY...........3-56
AXLE SHAFTS - INSTALLATION....3-111,3-138,
3-33,3-58,3-83
AXLE SHAFTS - REMOVAL
....3-111,3-138,3-33,
3-56,3-83
BACK - INSTALLATION, CENTER
ARMREST / SEAT
....................23-78
BACK - REAR - INSTALLATION, SEAT
.....23-84
BACK - REAR - REMOVAL, SEAT
........23-84
BACK - REMOVAL, CENTER ARMREST /
SEAT
..............................23-77
BACK CUSHION / COVER - FRONT -
INSTALLATION, SEAT
.................23-83
BACK CUSHION / COVER - FRONT -
REMOVAL, SEAT
.....................23-83
BACK CUSHION / COVER - REAR -
INSTALLATION, SEAT
.................23-85
BACK CUSHION / COVER - REAR -
REMOVAL, SEAT
.....................23-85
BACK HINGE - INSTALLATION, CENTER
SEAT
..............................23-80
BACK HINGE - REMOVAL, CENTER SEAT
. . 23-79
BACK INERTIA HINGE COVER -
INSTALLATION, CENTER SEAT
..........23-78
BACK INERTIA HINGE COVER -
REMOVAL, CENTER SEAT
..............23-78
2 INDEXDR
Description Group-Page Description Group-Page Description Group-Page
Page 2858 of 2895
BACK LID - INSTALLATION, CENTER
SEAT ..............................23-80
BACK LID - REMOVAL, CENTER SEAT....23-80
BACK PANEL TRIM - INSTALLATION,
REAR CAB..........................23-70
BACK PANEL TRIM - REMOVAL, REAR
CAB ...............................23-70
BACK REAR - FOOTMANS LOOP
BRACKETS - INSTALLATION, SEAT.......23-85
BACK REAR - FOOTMANS LOOP
BRACKETS - REMOVAL, SEAT...........23-85
BACKLITE - INSTALLATION.............23-86
BACKLITE - REMOVAL.................23-86
BACKLITE VENT GLASS - INSTALLATION . . 23-87
BACKLITE VENT GLASS - REMOVAL......23-87
BACKUP LAMP - INSTALLATION..........8L-7
BACKUP LAMP - REMOVAL.............8L-7
BACKUP LAMP SWITCH - DESCRIPTION . . . 8L-7
BACKUP LAMP SWITCH - DIAGNOSIS
AND TESTING........................8L-8
BACKUP LAMP SWITCH - OPERATION.....8L-8
BALANCE - STANDARD PROCEDURE,
TIRE AND WHEEL.....................22-4
BALANCE SHAFT - INSTALLATION........9-79
BALANCE SHAFT - REMOVAL............9-79
BALL JOINT - DIAGNOSIS AND TESTING,
LOWER.............................2-18
BALL JOINT - DIAGNOSIS AND TESTING,
UPPER..............................2-26
BALL JOINT - INSTALLATION, LOWER . . 2-19,2-33
BALL JOINT - INSTALLATION, UPPER.....2-33
BALL JOINT - REMOVAL, LOWER.....2-18,2-32
BALL JOINT - REMOVAL, UPPER.........2-33
BAND OPERATION - DIAGNOSIS AND
TESTING, AIR TESTING
TRANSMISSION CLUTCH.......21-143,21-324
BANDS - ADJUSTMENT.........21-193,21-374
BANDS - DESCRIPTION.........21-193,21-373
BANDS - OPERATION..........21-193,21-374
BAR - DESCRIPTION, STABILIZER........2-24
BAR - DESCRIPTION, TORSION..........2-25
BAR - INSTALLATION, STABILIZER....2-24,2-37
BAR - INSTALLATION, TORSION..........2-26
BAR - INSTALLATION, TRACK...........19-37
BAR - OPERATION, STABILIZER..........2-24
BAR - OPERATION, TORSION............2-25
BAR - REMOVAL, STABILIZER.......2-24,2-37
BAR - REMOVAL, TORSION.............2-25
BAR - REMOVAL, TRACK..............19-37
BAR CROSS MEMBER BUSHING -
INSTALLATION, TORSION...............2-14
BAR CROSSMEMBER BUSHING -
REMOVAL, TORSION...................2-12
BASE BRAKE, SPECIFICATIONS............5-7
BASE BRAKE SYSTEM - DIAGNOSIS AND
TESTING.............................5-2
BASE BRAKES, SPECIAL TOOLS...........5-5
BASECOAT/CLEARCOAT FINISH -
DESCRIPTION.......................23-74
BATTERIES - STANDARD PROCEDURE,
RKE TRANSMITTER...................8N-9
BATTERY - DESCRIPTION...............8F-7
BATTERY - DIAGNOSIS AND TESTING.....8F-7
BATTERY CABLES - DESCRIPTION.......8F-14
BATTERY CABLES - DIAGNOSIS AND
TESTING...........................8F-15
BATTERY CABLES - INSTALLATION.......8F-17
BATTERY CABLES - OPERATION.........8F-14
BATTERY CABLES - REMOVAL..........8F-16
BATTERY CHARGING - STANDARD
PROCEDURE.........................8F-8
BATTERY HOLDDOWN - DESCRIPTION....8F-14
BATTERY HOLDDOWN - INSTALLATION . . . 8F-14
BATTERY HOLDDOWN - OPERATION.....8F-14
BATTERY HOLDDOWN - REMOVAL.......8F-14
BATTERY SYSTEM - CLEANING...........8F-4
BATTERY SYSTEM - DESCRIPTION........8F-1
BATTERY SYSTEM - DIAGNOSIS AND
TESTING............................8F-2
BATTERY SYSTEM - INSPECTION.........8F-6
BATTERY SYSTEM - OPERATION
.........8F-2
BATTERY SYSTEM - SPECIFICATIONS
......8F-6
BATTERY SYSTEM SPECIAL TOOLS,
SPECIAL TOOLS
......................8F-7
BATTERY TEMPERATURE SENSOR -
DESCRIPTION
.......................8F-21
BATTERY TEMPERATURE SENSOR -
INSTALLATION
.......................8F-21BATTERY TEMPERATURE SENSOR -
OPERATION.........................8F-21
BATTERY TEMPERATURE SENSOR -
REMOVAL..........................8F-21
BATTERY TESTER - STANDARD
PROCEDURE, USING MICRO 420........8F-12
BATTERY TRAY - DESCRIPTION.........8F-17
BATTERY TRAY - INSTALLATION.........8F-18
BATTERY TRAY - OPERATION...........8F-17
BATTERY TRAY - REMOVAL............8F-17
BEAM INDICATOR - DESCRIPTION, HIGH . . 8J-27
BEAM INDICATOR - OPERATION, HIGH....8J-28
BEARING - ADJUSTMENTS, CENTER.......3-8
BEARING - FITTING - STANDARD
PROCEDURE, CRANKSHAFT MAIN . . 9-133,9-202
BEARING - INSTALLATION, CENTER........3-8
BEARING - INSTALLATION, CLUTCH
RELEASE............................6-11
BEARING - INSTALLATION, HUB..........2-31
BEARING - INSTALLATION, OUTPUT
SHAFT FRONT................21-217,21-395
BEARING - INSTALLATION, OUTPUT
SHAFT REAR.................21-217,21-396
BEARING - INSTALLATION, PILOT........6-12
BEARING - REMOVAL, CENTER...........3-8
BEARING - REMOVAL, CLUTCH RELEASE . . . 6-11
BEARING - REMOVAL, HUB.............2-30
BEARING - REMOVAL, OUTPUT SHAFT
FRONT......................21-217,21-395
BEARING - REMOVAL, OUTPUT SHAFT
REAR.......................21-217,21-395
BEARING - REMOVAL, PILOT............6-12
BEARING AND CRANKSHAFT JOURNAL
CLEARANCE - STANDARD
PROCEDURE, CONNECTING ROD........9-321
BEARING CLEARANCE - STANDARD
PROCEDURE, MAIN...................9-322
BEARING FITTING - STANDARD
PROCEDURE, CONNECTING ROD . . . 9-128,9-251,
9-382
BEARING FITTING - STANDARD
PROCEDURE, CRANKSHAFT MAIN.......9-253
BEARING FITTING, STANDARD
PROCEDURE - CONNECTING ROD........9-48
BEARING FITTING, STANDARD
PROCEDURE - MAIN...................9-43
BEARINGS - DESCRIPTION,
CRANKSHAFT MAIN..................9-253
BEARINGS - INSPECTION, CRANKSHAFT
MAIN.........................9-133,9-203
BEARINGS - INSTALLATION, AXLE . . 3-112,3-139,
3-34,3-84
BEARINGS - INSTALLATION, CAMSHAFT . . 9-320,
9-381
BEARINGS - INSTALLATION,
CRANKSHAFT MAIN.............9-254,9-383
BEARINGS - INSTALLATION,
DIFFERENTIAL CASE . 3-121,3-148,3-39,3-65,3-94
BEARINGS - OPERATION, CRANKSHAFT
MAIN..............................9-253
BEARINGS - REMOVAL, AXLE . 3-112,3-138,3-33,
3-84
BEARINGS - REMOVAL, CAMSHAFT . 9-317,9-380
BEARINGS - REMOVAL, CRANKSHAFT
MAIN.........................9-254,9-383
BEARINGS - REMOVAL, DIFFERENTIAL
CASE.............3-121,3-148,3-39,3-64,3-93
BEARINGS - STANDARD PROCEDURE,
FITTING CRANKSHAFT MAIN...........9-383
BELT / CHAIN COVER(S) -
INSTALLATION, TIMING . 9-169,9-278,9-404,9-81
BELT / CHAIN COVER(S) - REMOVAL,
TIMING..............9-168,9-278,9-404,9-80
BELT - DIAGNOSIS AND TESTING,
ACCESSORY DRIVE............7-25,7-28,7-31
BELT - INSTALLATION, FRONT CENTER
SEAT ..............................8O-27
BELT - REMOVAL, FRONT CENTER SEAT . . 8O-26
BELT & RETRACTOR - INSTALLATION,
FRONT CENTER SEAT
.................8O-26
BELT & RETRACTOR - INSTALLATION,
REAR CENTER SEAT
..................8O-40
BELT & RETRACTOR - INSTALLATION,
REAR OUTBOARD SEAT
...............8O-42
BELT & RETRACTOR - REMOVAL, FRONT
CENTER SEAT
.......................8O-25
BELT & RETRACTOR - REMOVAL, REAR
CENTER SEAT
.......................8O-39BELT & RETRACTOR - REMOVAL, REAR
OUTBOARD SEAT....................8O-41
BELT BUCKLE - INSTALLATION, FRONT
OUTBOARD SEAT....................8O-34
BELT BUCKLE - REMOVAL, FRONT
OUTBOARD SEAT....................8O-33
BELT MOLDING - INSTALLATION, FRONT
DOOR INNER........................23-93
BELT MOLDING - INSTALLATION, FRONT
DOOR OUTER.......................23-93
BELT MOLDING - INSTALLATION, REAR
DOOR INNER........................23-94
BELT MOLDING - INSTALLATION, REAR
DOOR OUTER.......................23-94
BELT MOLDING - REMOVAL, FRONT
DOOR INNER........................23-93
BELT MOLDING - REMOVAL, FRONT
DOOR OUTER.......................23-93
BELT MOLDING - REMOVAL, REAR
DOOR INNER........................23-94
BELT MOLDING - REMOVAL, REAR
DOOR OUTER.......................23-94
BELT SWITCH - DESCRIPTION, SEAT.....8O-46
BELT SWITCH - DIAGNOSIS AND
TESTING, SEAT......................8O-47
BELT SWITCH - OPERATION, SEAT.......8O-46
BELT TENSION REDUCER -
DESCRIPTION, SEAT..................8O-48
BELT TENSION REDUCER - DIAGNOSIS
AND TESTING, SEAT..................8O-49
BELT TENSION REDUCER - OPERATION,
SEAT ..............................8O-49
BELT TENSIONER - DESCRIPTION, SEAT....8O-47
BELT TENSIONER - OPERATION, SEAT....8O-48
BELT TENSIONERS - 3.7L / 4.7L -
DESCRIPTION........................7-22
BELT TENSIONERS - 3.7L / 4.7L -
INSTALLATION........................7-23
BELT TENSIONERS - 3.7L / 4.7L -
OPERATION..........................7-22
BELT TENSIONERS - 3.7L / 4.7L -
REMOVAL...........................7-22
BELT TENSIONERS - 5.9L -
DESCRIPTION........................7-23
BELT TENSIONERS - 5.9L -
INSTALLATION........................7-24
BELT TENSIONERS - 5.9L - OPERATION....7-23
BELT TENSIONERS - 5.9L - REMOVAL.....7-23
BELT TENSIONERS - 5.9L DIESEL -
DESCRIPTION........................7-24
BELT TENSIONERS - 5.9L DIESEL -
INSTALLATION........................7-25
BELT TENSIONERS - 5.9L DIESEL -
OPERATION..........................7-24
BELT TENSIONERS - 5.9L DIESEL -
REMOVAL...........................7-25
BELT TURNING LOOP ADJUSTER -
INSTALLATION, SEAT.................8O-50
BELT TURNING LOOP ADJUSTER -
REMOVAL, SEAT.....................8O-50
BELT/CHAIN AND SPROCKETS -
INSPECTION, TIMING.............9-171,9-83
BELT/CHAIN AND SPROCKETS -
INSTALLATION, TIMING . 9-172,9-279,9-406,9-84
BELT/CHAIN AND SPROCKETS -
REMOVAL, TIMING.....9-169,9-279,9-405,9-81
BELTS - 3.7L / 4.7L - INSTALLATION,
DRIVE..............................7-27
BELTS - 3.7L / 4.7L - REMOVAL, DRIVE....7-27
BELTS - 5.9L - INSTALLATION, DRIVE.....7-31
BELTS - 5.9L - REMOVAL, DRIVE.........7-30
BELTS - 5.9L DIESEL - INSTALLATION,
DRIVE..............................7-34
BELTS - 5.9L DIESEL - REMOVAL, DRIVE . . 7-34
BEZEL - INSTALLATION, CLUSTER.......23-50
BEZEL - INSTALLATION, INSTRUMENT
PANEL CENTER......................23-58
BEZEL - INSTALLATION, INSTRUMENT
PANEL DRIVER SIDE..................23-59
BEZEL - INSTALLATION, INSTRUMENT
PANEL HEADLAMP SWITCH
............23-57
BEZEL - REMOVAL, CLUSTER
...........23-50
BEZEL - REMOVAL, INSTRUMENT PANEL
CENTER
............................23-58
BEZEL - REMOVAL, INSTRUMENT PANEL
DRIVER SIDE
........................23-58
BEZEL - REMOVAL, INSTRUMENT PANEL
HEADLAMP SWITCH
..................23-57
DRINDEX 3
Description Group-Page Description Group-Page Description Group-Page