remove DODGE SPRINTER 2007 2.G Owner's Manual
[x] Cancel search | Manufacturer: DODGE, Model Year: 2007, Model line: SPRINTER, Model: DODGE SPRINTER 2007 2.GPages: 393, PDF Size: 7.61 MB
Page 171 of 393
170 Controls in detailFeatures
3
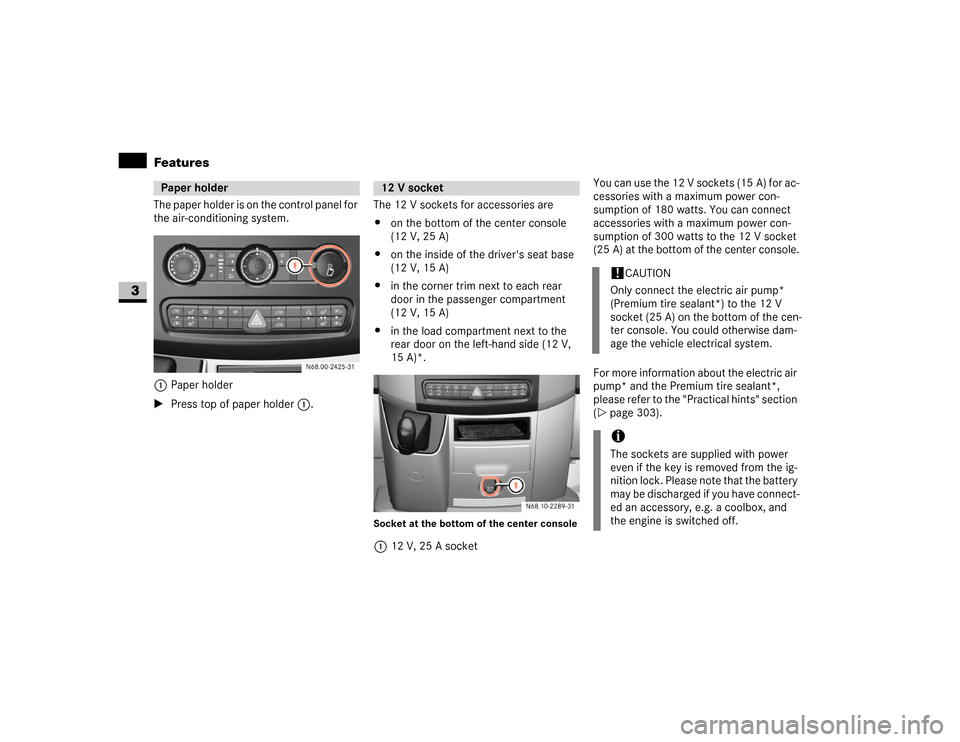
The paper holder is on the control panel for
the air-conditioning system. 1Paper holder
\1Press top of paper holder1.The 12 V sockets for accessories are
\4on the bottom of the center console
(12 V, 25 A)
\4on the inside of the driver's seat base
(12 V, 15 A)
\4in the corner trim next to each rear
door in the passenger compartment
(12 V, 15 A)
\4in the load compartment next to the
rear door on the left-hand side (12 V,
15 A)*.
Socket at the bottom of the center console112 V, 25 A socketYou can use the 12 V sockets (15 A) for ac-
cessories with a maximum power con-
sumption of 180 watts. You can connect
accessories with a maximum power con-
sumption of 300 watts to the 12 V socket
(25 A) at the bottom of the center console.
For more information about the electric air
pump* and the Premium tire sealant*,
please refer to the "Practical hints" section
(\2page 303).
Paper holder
N68.00-2425-31
12 V socket
!
CAUTION
Only connect the electric air pump*
(Premium tire sealant*) to the 12 V
socket (25 A) on the bottom of the cen-
ter console. You could otherwise dam-
age the vehicle electrical system.
iThe sockets are supplied with power
even if the key is removed from the ig-
nition lock. Please note that the battery
may be discharged if you have connect-
ed an accessory, e.g. a coolbox, and
the engine is switched off.
Page 185 of 393
184 OperationRefueling
4
\3 Refueling
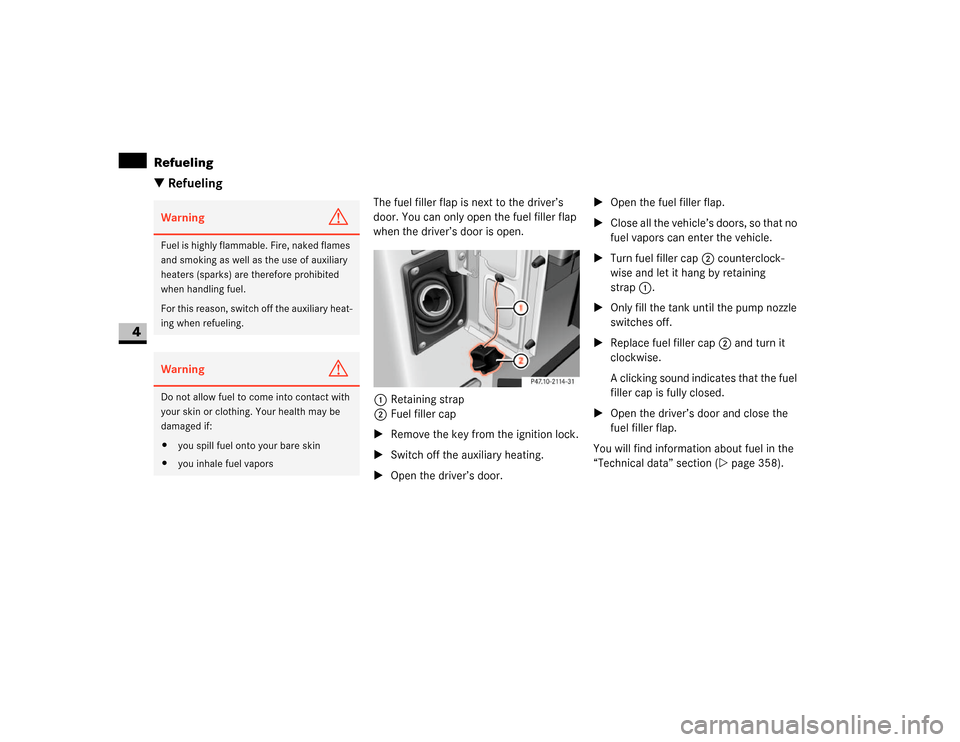
The fuel filler flap is next to the driver’s
door. You can only open the fuel filler flap
when the driver’s door is open.
1Retaining strap
2Fuel filler cap
\1Remove the key from the ignition lock.
\1Switch off the auxiliary heating.
\1Open the driver’s door.\1Open the fuel filler flap.
\1Close all the vehicle’s doors, so that no
fuel vapors can enter the vehicle.
\1Turn fuel filler cap2 counterclock-
wise and let it hang by retaining
strap1.
\1Only fill the tank until the pump nozzle
switches off.
\1Replace fuel filler cap2 and turn it
clockwise.
A clicking sound indicates that the fuel
filler cap is fully closed.
\1Open the driver’s door and close the
fuel filler flap.
You will find information about fuel in the
“Technical data” section (\2page 358).
Warning
G
Fuel is highly flammable. Fire, naked flames
and smoking as well as the use of auxiliary
heaters (sparks) are therefore prohibited
when handling fuel.
For this reason, switch off the auxiliary heat-
ing when refueling.Warning
G
Do not allow fuel to come into contact with
your skin or clothing. Your health may be
damaged if:
\4you spill fuel onto your bare skin
\4you inhale fuel vapors
Page 192 of 393
191 Operation
Engine
4
The expansion tank is in the engine com-
partment. Only add coolant with the vehi-
cle standing on a level surface and with the
engine switched off. The coolant tempera-
ture must have dropped below 122 °F
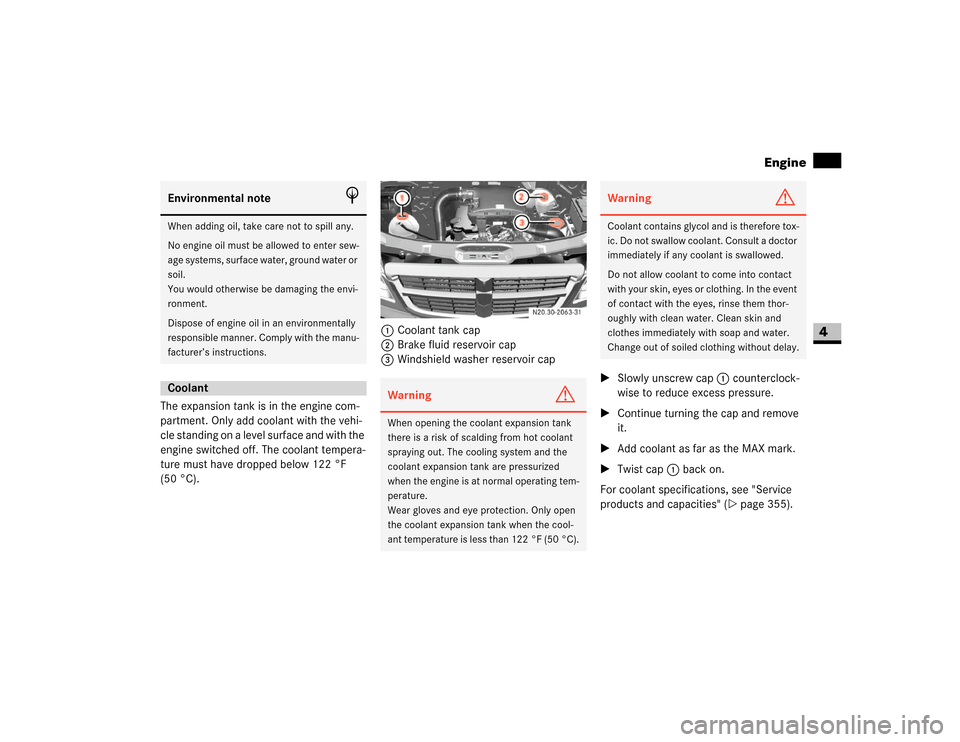
(50 °C).1Coolant tank cap
2Brake fluid reservoir cap
3Windshield washer reservoir cap
\1Slowly unscrew cap1 counterclock-
wise to reduce excess pressure.
\1Continue turning the cap and remove
it.
\1Add coolant as far as the MAX mark.
\1Twist cap1 back on.
For coolant specifications, see "Service
products and capacities" (\2page 355).Environmental note
H
When adding oil, take care not to spill any.
No engine oil must be allowed to enter sew-
age systems, surface water, ground water or
soil.
You would otherwise be damaging the envi-
ronment.
Dispose of engine oil in an environmentally
responsible manner. Comply with the manu-
facturer’s instructions.Coolant
Warning
G
When opening the coolant expansion tank
there is a risk of scalding from hot coolant
spraying out. The cooling system and the
coolant expansion tank are pressurized
when the engine is at normal operating tem-
perature.
Wear gloves and eye protection. Only open
the coolant expansion tank when the cool-
ant temperature is less than 122 °F (50 °C).
N20.30-2063-31
Warning
G
Coolant contains glycol and is therefore tox-
ic. Do not swallow coolant. Consult a doctor
immediately if any coolant is swallowed.
Do not allow coolant to come into contact
with your skin, eyes or clothing. In the event
of contact with the eyes, rinse them thor-
oughly with clean water. Clean skin and
clothes immediately with soap and water.
Change out of soiled clothing without delay.
Page 194 of 393
193 Operation
Engine
4
For specifications of brake fluid, see
"Service products and capacities"
(\2page 362).The windshield washer reservoir is in the
engine compartment. It holds approx.
7.4 US qt (7.0 l).
On vehicles with a headlamp cleaning sys-
tem, this is also supplied from the wind-
shield washer reservoir.
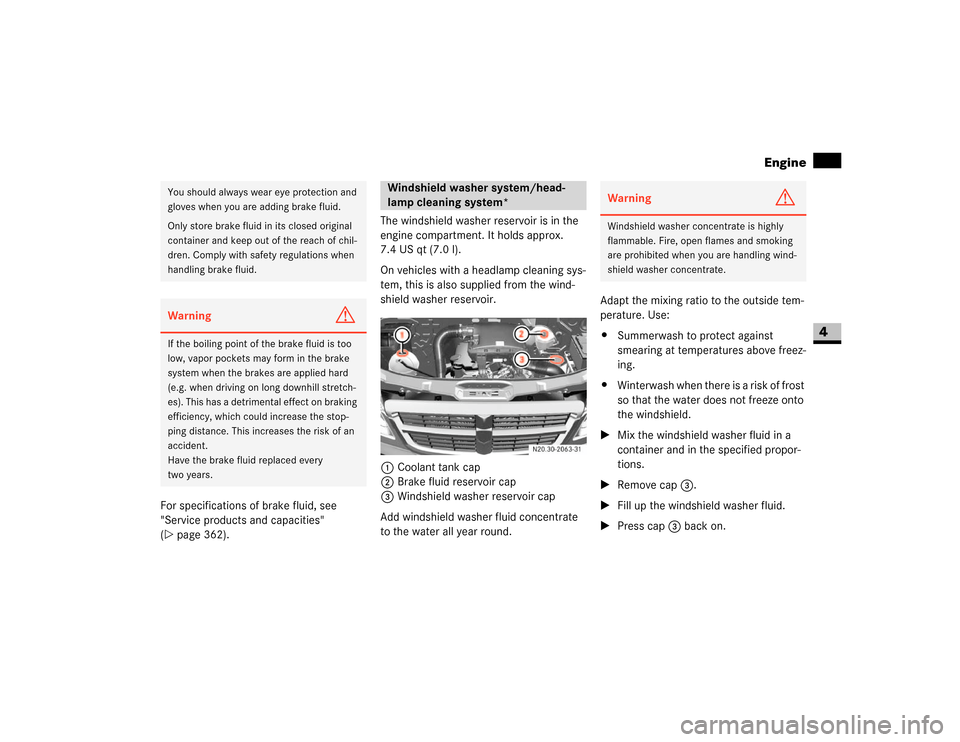
1Coolant tank cap
2Brake fluid reservoir cap
3Windshield washer reservoir cap
Add windshield washer fluid concentrate
to the water all year round.Adapt the mixing ratio to the outside tem-
perature. Use:
\4Summerwash to protect against
smearing at temperatures above freez-
ing.
\4Winterwash when there is a risk of frost
so that the water does not freeze onto
the windshield.
\1Mix the windshield washer fluid in a
container and in the specified propor-
tions.
\1Remove cap3.
\1Fill up the windshield washer fluid.
\1Press cap3 back on.You should always wear eye protection and
gloves when you are adding brake fluid.
Only store brake fluid in its closed original
container and keep out of the reach of chil-
dren. Comply with safety regulations when
handling brake fluid.Warning
G
If the boiling point of the brake fluid is too
low, vapor pockets may form in the brake
system when the brakes are applied hard
(e.g. when driving on long downhill stretch-
es). This has a detrimental effect on braking
efficiency, which could increase the stop-
ping distance. This increases the risk of an
accident.
Have the brake fluid replaced every
two years.
Windshield washer system/head-
lamp cleaning system*
N20.30-2063-31
Warning
G
Windshield washer concentrate is highly
flammable. Fire, open flames and smoking
are prohibited when you are handling wind-
shield washer concentrate.
Page 214 of 393
213 Operation
Tires and wheels
4
The tire inflation pressure should be
checked regularly, i.e. at least each time
you refuel the vehicle. The preferred inter-
val for checking the tire inflation pressure,
however, is before each trip.
The inflation pressures specified either on
the tire and loading information placard on
the driver’s door B-pillar or on tire pressure
label below the driver’s seat on an outward
facing position of the mounting pillar are
always cold tire inflation pressures. Check
and adjust the tire inflation pressure when
the tires are cold. Cold tire inflation pres-
sure is defined as the tire pressure after
the vehicle has been parked for at least
3 hours or driven less than 1 mile (1.6 km)
at an ambient temperature of approxi-
mately 68 °F (20 °C).
The cold tire inflation pressure must not
exceed the maximum tire inflation pres-
sure molded into the tire side wall, see
"Tire labeling" (\2page 222).
If you check the tire inflation pressure
when the tires are warm (the vehicle has
been driven for several miles or sitting less than 3 hours), the reading will be higher
than the cold reading. This is normal. Do
not let air out to match the specified cold
tire inflation pressure. Otherwise, the tire
will be underinflated.Checking tire inflation pressure manu-
ally
Follow the steps below to achieve correct
tire inflation pressure:
\1Remove the cap from the valve on one
tire.
\1Firmly press a tire gauge onto the
valve.
\1Read the tire inflation pressure on the
tire gauge and compare it with the rec-
ommended tire inflation pressure on
the placard on the driver’s door B-pillar
or on the tire pressure label below the
driver’s seat. If necessary, add air to
achieve the recommended tire inflation
pressure.
\1Reattach the valve cap.Checking tire inflation pressure
Warning
G
Observe the recommended tire inflation
pressures.
Do not underinflate tires. Underinflated tires
wear excessively and/or unevenly, adverse-
ly affect handling and fuel economy, and are
more likely to fail from being overheated.
Do not overinflate tires. Overinflated tires
can adversely affect handling and ride com-
fort, wear unevenly, increase stopping dis-
tance, and result in sudden deflation
(blowout) because they are more likely to
become punctured or damaged by road de-
bris, potholes etc.
Do not overload the tires by exceeding the
specified load limit as indicated on the tire
and loading information placard on the driv-
er’s door B-pillar. Overloading the tires can
overheat them, possibly causing a blowout.
iIf you have overfilled the tire, release
tire inflation pressure by pushing the
metal stem of the valve with for exam-
ple a tip of a pen. Then recheck the tire
inflation pressure with the tire gauge.
Page 219 of 393
218 OperationTires and wheels
4
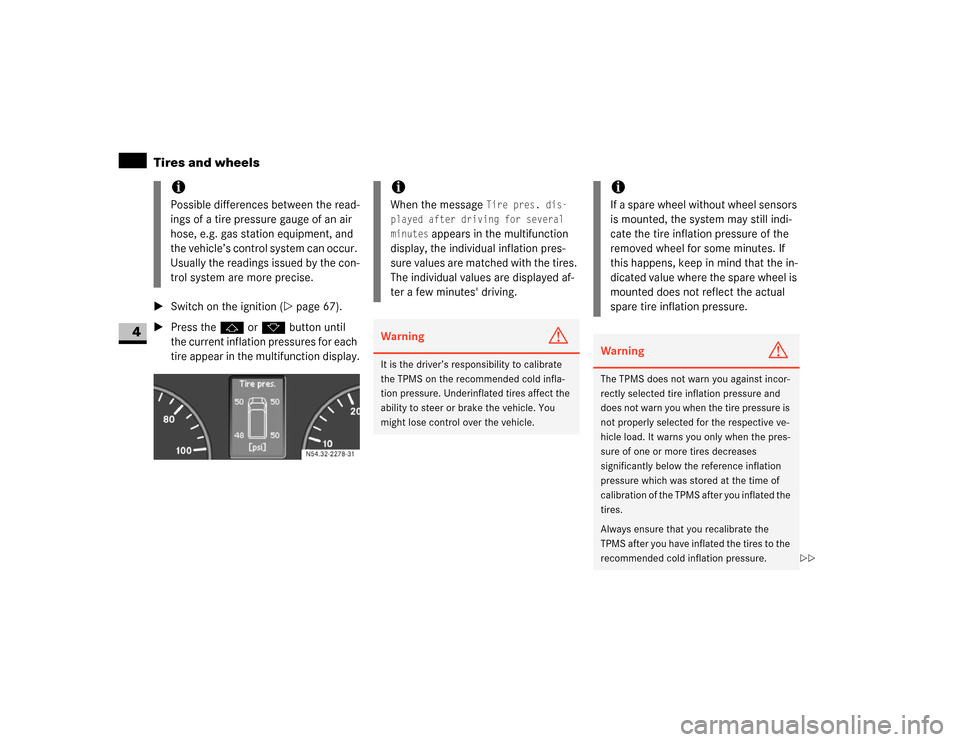
\1Switch on the ignition (\2page 67).
\1Press thej or kbutton until
the current inflation pressures for each
tire appear in the multifunction display.
iPossible differences between the read-
ings of a tire pressure gauge of an air
hose, e.g. gas station equipment, and
the vehicle’s control system can occur.
Usually the readings issued by the con-
trol system are more precise.
54.32-2278-31
iWhen the message
Tire pres. dis-
played after driving for several
minutes
appears in the multifunction
display, the individual inflation pres-
sure values are matched with the tires.
The individual values are displayed af-
ter a few minutes' driving.
Warning
G
It is the driver’s responsibility to calibrate
the TPMS on the recommended cold infla-
tion pressure. Underinflated tires affect the
ability to steer or brake the vehicle. You
might lose control over the vehicle.
iIf a spare wheel without wheel sensors
is mounted, the system may still indi-
cate the tire inflation pressure of the
removed wheel for some minutes. If
this happens, keep in mind that the in-
dicated value where the spare wheel is
mounted does not reflect the actual
spare tire inflation pressure.Warning
G
The TPMS does not warn you against incor-
rectly selected tire inflation pressure and
does not warn you when the tire pressure is
not properly selected for the respective ve-
hicle load. It warns you only when the pres-
sure of one or more tires decreases
significantly below the reference inflation
pressure which was stored at the time of
calibration of the TPMS after you inflated the
tires.
Always ensure that you recalibrate the
TPMS after you have inflated the tires to the
recommended cold inflation pressure.
\2\2
Page 236 of 393
235 Operation
Winter driving
4
Drive with particular care on icy roads.
Avoid sudden acceleration, steering move-
ments and braking.If it seems likely that the vehicle is about to
enter a skid or cannot be stopped at a low
speed:
\4Move the selector lever to position N.
\4Try to maintain control of the vehicle
using light corrective steering.
Road salt may adversely affect braking ef-
ficiency. It may therefore be necessary to
apply the brakes more forcefully in order to
achieve the same braking force as normal.
Apply the brakes regularly when making
longer journeys on gritted or salted roads.
This will have the effect of restoring the
brakes to their normal level of perfor-
mance.
When stopping the vehicle after traveling
on roads that have been salted, check that
the brakes are fully functional before pro-
ceeding further.
Warning
G
If you use your spare tire when winter tires
are fitted on the other wheels, be aware that
the difference in tire characteristics may im-
pair turning stability and overall driving sta-
bility may be reduced. Adapt your driving
style accordingly.
Have the spare tire replaced with a winter
tire at the nearest authorized Sprinter Deal-
er.iWhen they have been removed, store
wheels and tires in a cool, dry, and if
possible dark place. Protect the tires
from oil, grease, and gasoline / diesel.
Driving in winterWarning
G
Downshifting to brake could cause the drive
wheels to lose grip on a slippery surface due
to the increased difference in speed be-
tween the engine and the drive wheels at
this time.
Do not downshift for additional engine brak-
ing on a slippery surface. Use the service
brake in accordance with road conditions.
Only downshift to a lower gear when travel-
ing at a low engine speed.
Page 237 of 393
236 OperationWinter driving
4
Use "Class U" chains, or other traction aids
that meet SAE Type "U" specifications.
Snow chains must be the proper size for
the vehicle, as recommended by the chain
manufacturer. They should only be driven
on snow-covered roads at speeds not to
exceed 30 mph (50 km / h). Remove
chains as soon as possible when driving on
roads without snow.Please observe the following guidelines
when using snow chains:
\4Snow chains should only be used on
rear wheels. In vehicles with dual rear
wheels, they should be mounted on the
exterior wheels. Follow the manufac-
turer’s mounting instructions.
\4Only use snow chains that are ap-
proved by the vehicle manufacturer.
For approved snow chains, please con-
tact your authorized Sprinter Dealer.
\4Use of snow chains may be prohibited
depending on location. Always check
local and state laws before mounting
snow chains.
To avoid damage to your vehicle, tires or
chains, observe the following precautions:
\4Because of limited chain clearance be-
tween tires and other suspension com-
ponents, it is important that only
chains in good condition are used. Bro-
ken chains can cause serious vehicle
damage. Stop the vehicle immediately if noise occurs that could suggest chain
breakage. Remove the damaged parts
of the chain before further use.
\4Install chains as tightly as possible and
then retighten after driving about 1/2
mile (0.8 km).
\4Do not exceed 30 mph (50 km/h).
\4Drive cautiously and avoid severe turns
and large bumps, especially with a
loaded vehicle.
\4Do not install tire chains on front
wheels.
\4Do not drive for a prolonged period on
dry pavement.
\4Observe the tire chain manufacturer’s
instructions on method of installation,
operating speed, and conditions for us-
age. Always use the lower suggested
operating speed of the chain manufac-
turer if different than the speed recom-
mended by the manufacturer.Snow chains!
CAUTION
Use snow chains on rear wheels only.
Some tire sizes do not leave adequate
clearance for snow chains. To help
avoid serious damage to your vehicle or
tires, use of snow chains is not permis-
sible with the spare wheel.
iWhen driving with snow chains, you
may wish to deactivate the ASR
(\2page 44) before setting the vehicle
in motion. This will improve the vehi-
cle’s traction.
Page 241 of 393
240 OperationMaintenance and servicing
4
Vehicles without steering wheel buttons
\1Press the menu button on the in-
strument cluster repeatedly until you
see the following in the display:
\49 for service A
\4´ for service B
The following are also shown, depend-
ing on the style of driving:
\4the remaining distance in miles (kilo-
meters)
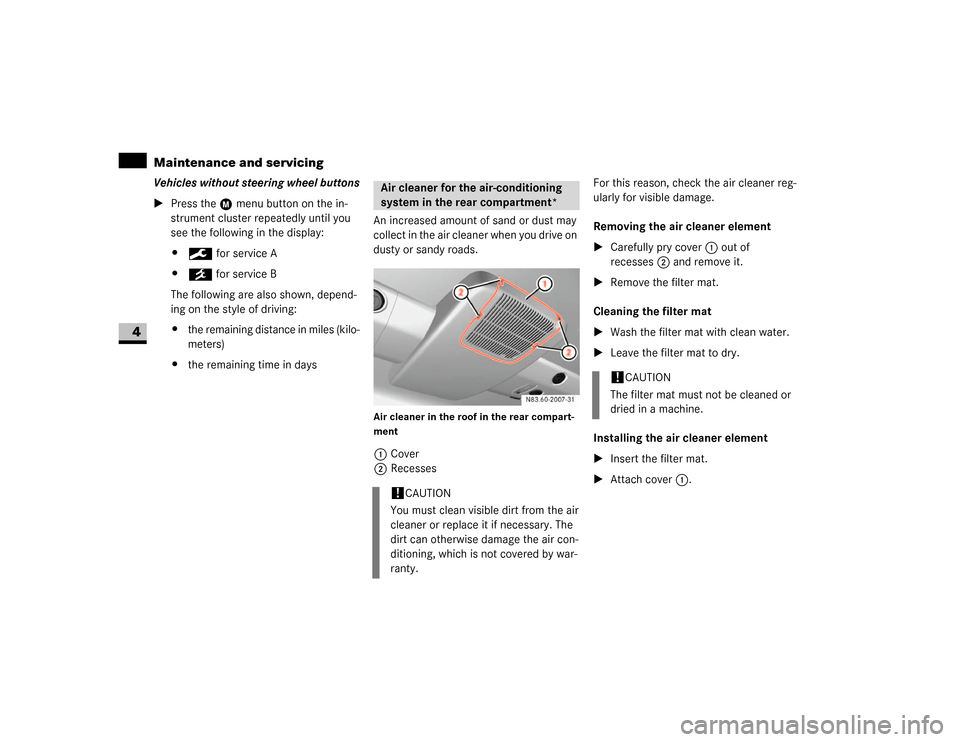
\4the remaining time in daysAn increased amount of sand or dust may
collect in the air cleaner when you drive on
dusty or sandy roads.
Air cleaner in the roof in the rear compart-
ment1Cover
2RecessesFor this reason, check the air cleaner reg-
ularly for visible damage.
Removing the air cleaner element
\1Carefully pry cover1 out of
recesses2 and remove it.
\1Remove the filter mat.
Cleaning the filter mat
\1Wash the filter mat with clean water.
\1Leave the filter mat to dry.
Installing the air cleaner element
\1Insert the filter mat.
\1Attach cover1.Air cleaner for the air-conditioning
system in the rear compartment*!
CAUTION
You must clean visible dirt from the air
cleaner or replace it if necessary. The
dirt can otherwise damage the air con-
ditioning, which is not covered by war-
ranty.
!
CAUTION
The filter mat must not be cleaned or
dried in a machine.
Page 242 of 393
241 Operation
Cleaning and care of the vehicle
4
\3 Cleaning and care of the vehicleRegular and proper care will help to main-
tain the value of your vehicle. The best way
to protect your vehicle from harmful envi-
ronmental influences is to wash it and use
protective treatments regularly.
Scratches, corrosive deposits, areas af-
fected by corrosion and damage caused by
neglect or inadequate care cannot always
be completely remedied. In such cases,
visit an authorized Sprinter Dealer.Repair damage caused by loose chippings
and remove the following substances im-
mediately:
\4Insect remains
\4Bird droppings
\4Tree resin
\4Oils and grease
\4Fuel
\4Tar stains
Wash the vehicle more frequently in winter
to remove salt residue.
iIt is recommended that you use Mopar
care products. These have been spe-
cially adapted to Sprinter vehicles and
are state of the art. Mopar care prod-
ucts are available from any authorized
Sprinter Dealer.
Warning
G
Always follow the instructions for using the
care products.
Always keep care products sealed and out
of the reach of children.
Do not use fuel as a cleaning agent. Fuel is
flammable and constitutes a health hazard.
Environmental note
H
Only clean the vehicle in a suitable place for
washing vehicles. Dispose of empty contain-
ers and used cleaning materials in an envi-
ronmentally responsible manner.iIf you need to clean the areas towards
the top of the vehicle, always use
\4suitable ladders
\4secure steps!
CAUTION
Under no circumstances should you af-
fix unsuitable stickers, films, magnets
or similar to painted surfaces. You
could otherwise damage the paint-
work.