headlamp DODGE SPRINTER 2008 2.G Owners Manual
[x] Cancel search | Manufacturer: DODGE, Model Year: 2008, Model line: SPRINTER, Model: DODGE SPRINTER 2008 2.GPages: 666, PDF Size: 14.11 MB
Page 25 of 666
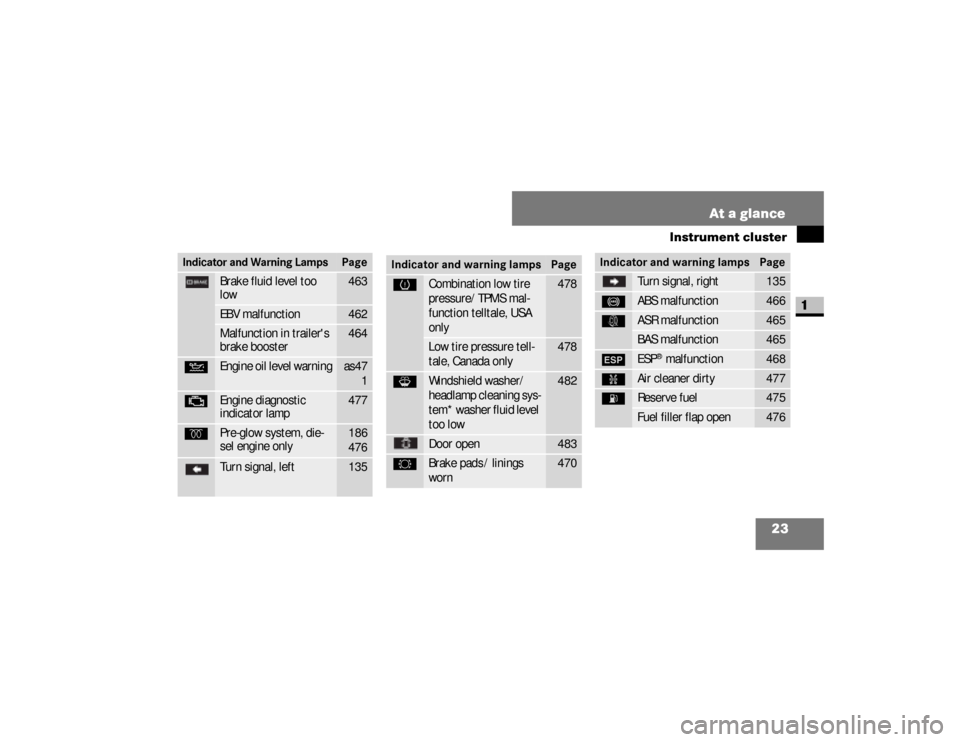
23 At a glance
Instrument cluster
1
Brake fluid level too
low
463
EBV malfunction
462
Malfunction in trailer's
brake booster
464
N
Engine oil level warning
as47
1
±
Engine diagnostic
indicator lamp
477
q
Pre-glow system, die-
sel engine only
186
476
Turn signal, left
135
Indicator and Warning Lamps
Page
Indicator and warning lamps
Page
X
Combination low tire
pressure/TPMS mal-
function telltale, USA
only
478
Low tire pressure tell-
tale, Canada only
478
J
Windshield washer/
headlamp cleaning sys-
tem* washer fluid level
too low
482
Door open
483
2
Brake pads / linings
worn
470
Turn signal, right
135
-
ABS malfunction
466
k
ASR malfunction
465
BAS malfunction
465
#
ESP
® malfunction
468
‰
Air cleaner dirty
477
A
Reserve fuel
475
Fuel filler flap open
476
Indicator and warning lamps
Page
nf_BA.book Page 23 Friday, January 25, 2008 3:53 PM
Page 26 of 666
24 At a glanceInstrument cluster
1
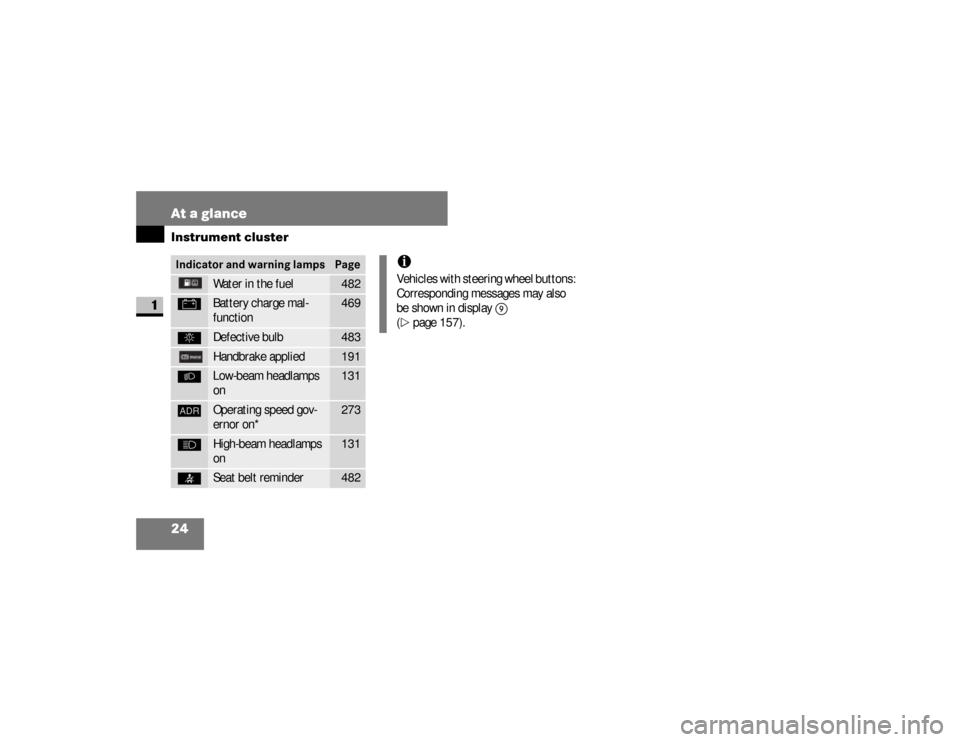
Indicator and warning lamps
Page
Water in the fuel
482
#
Battery charge mal-
function
469
.
Defective bulb
483
Handbrake applied
191
B
Low-beam headlamps
on
131
™
Operating speed gov-
ernor on*
273
A
High-beam headlamps
on
131
<
Seat belt reminder
482
iVehicles with steering wheel buttons:
Corresponding messages may also
be shown in display
9
(
\2
page 157).
nf_BA.book Page 24 Friday, January 25, 2008 3:53 PM
Page 131 of 666
129 Controls in detail
Lighting
3
\3 LightingLegal requirements may impose variati-
ons in certain countries.
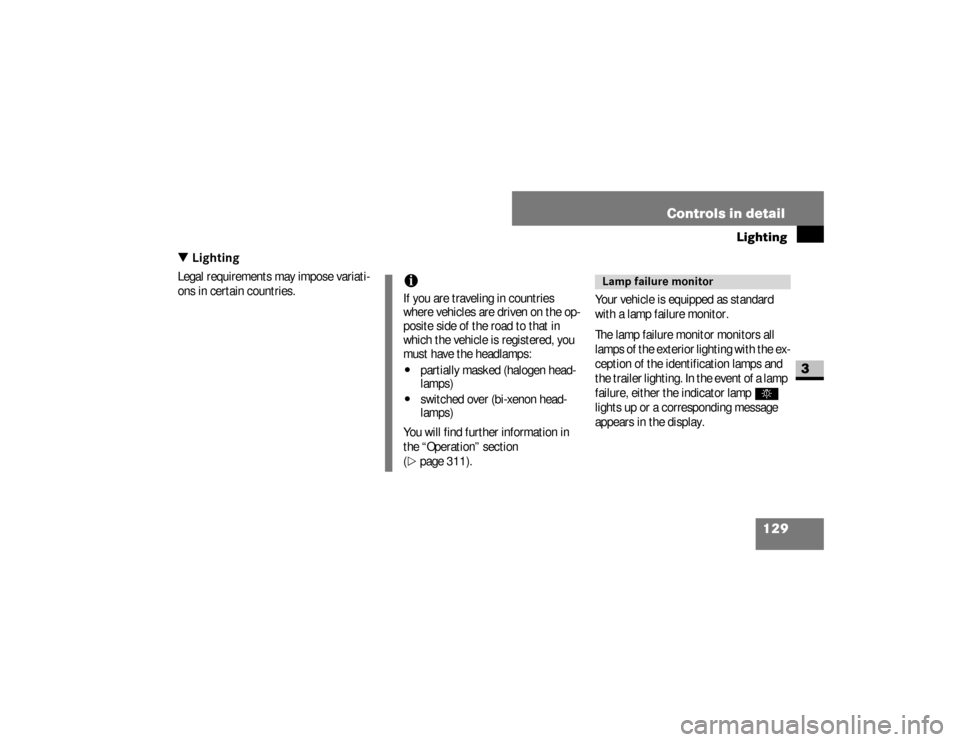
Your vehicle is equipped as standard
with a lamp failure monitor.
The lamp failure monitor monitors all
lamps of the exterior lighting with the ex-
ception of the identification lamps and
the trailer lighting. In the event of a lamp
failure, either the indicator lamp
.
lights up or a corresponding message
appears in the display.
iIf you are traveling in countries
where vehicles are driven on the op-
posite side of the road to that in
which the vehicle is registered, you
must have the headlamps:\4
partially masked (halogen head-
lamps)
\4
switched over (bi-xenon head-
lamps)
You will find further information in
the “Operation” section
(
\2
page 311).
Lamp failure monitor
nf_BA.book Page 129 Friday, January 25, 2008 3:53 PM
Page 133 of 666
131 Controls in detail
Lighting
3
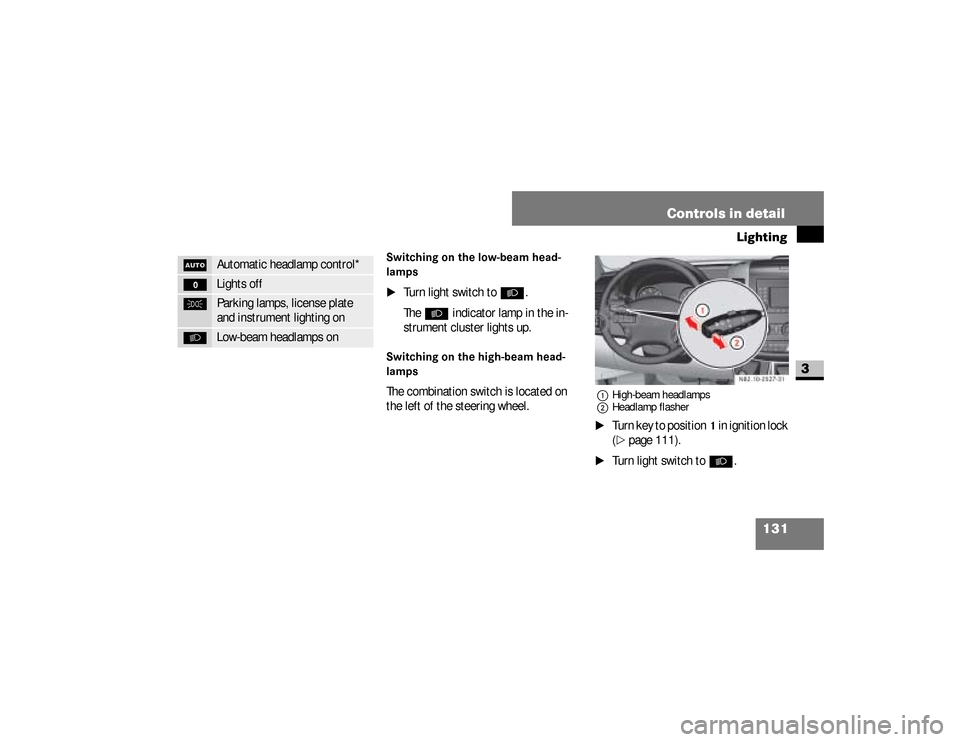
Switching on the low-beam head-
lamps
\1
Turn light switch to
B
.
The
B
indicator lamp in the in-
strument cluster lights up.
Switching on the high-beam head-
lampsThe combination switch is located on
the left of the steering wheel.
1High-beam headlamps
2Headlamp flasher\1
Turn key to position
1 in ignition lock
(
\2
page 111).
\1
Turn light switch to
B
.
U
Automatic headlamp control*
M
Lights off
C
Parking lamps, license plate
and instrument lighting on
B
Low-beam headlamps on
N82.10-2527-31
nf_BA.book Page 131 Friday, January 25, 2008 3:53 PM
Page 134 of 666
132 Controls in detailLighting
3
\1
Press combination switch forward 1
.
The indicator lamp
A
in the in-
strument cluster lights up.
Headlamp flasher
\1
Turn key to position
1 in ignition lock
(
\2
page 111).
\1
Pull combination switch briefly in
direction
2
.
Constant headlamp mode*On vehicles with steering wheel buttons,
you can set constant headlamp mode
(\2
page 171). This does not apply to
countries in which there is a legal re-
quirement to use constant headlamp
mode.
\1
Turn light switch to
M
.
The low-beam headlamps, parking
lamps and license plate lamp are
switched on when the engine is
running.
The
B
indicator lamp in the in-
strument cluster lights up.
Automatic headlamp control*The parking lamps, low-beam head-
lamps and license plate lamp are
switched on automatically when the
brightness of ambient light falls below a
predetermined level.
nf_BA.book Page 132 Friday, January 25, 2008 3:53 PM
Page 135 of 666
133 Controls in detail
Lighting
3
\1
Turn light switch to
U
.The parking lamps are switched on /
off automatically when the key is in
position
1 (\2
page 111) in the igni-
tion lock.
The parking lamps, low-beam head-
lamps and license plate lamp are
switched on / off automatically when
the engine is running, depending on
the ambient light conditions.
Only use manual headlamp mode when
you are driving in countries where driv-
ing with the low-beam headlamps
switched on is required by law.
\1
In this case, turn the light switch to B
.
Warning
G
If the light switch is atU:
\4the headlamps could switch off tem-
porarily due to extreme glare, e.g.
from oncoming traffic
\4the lights do not switch on automati-
cally in foggy conditions
Set the light switch to B. Otherwise
you are endangering yourself and others.
Continued
Warning (Continued)
G
If it is dark, only turn the light switch from
U toB when the vehicle is station-
ary. You could otherwise cause an acci-
dent if the headlamps were to switch off
briefly.
Automatic headlamp mode is only a driv-
ing aid. You are responsible for the vehi-
cle’s lighting at all times.
nf_BA.book Page 133 Friday, January 25, 2008 3:53 PM
Page 136 of 666
134 Controls in detailLighting
3
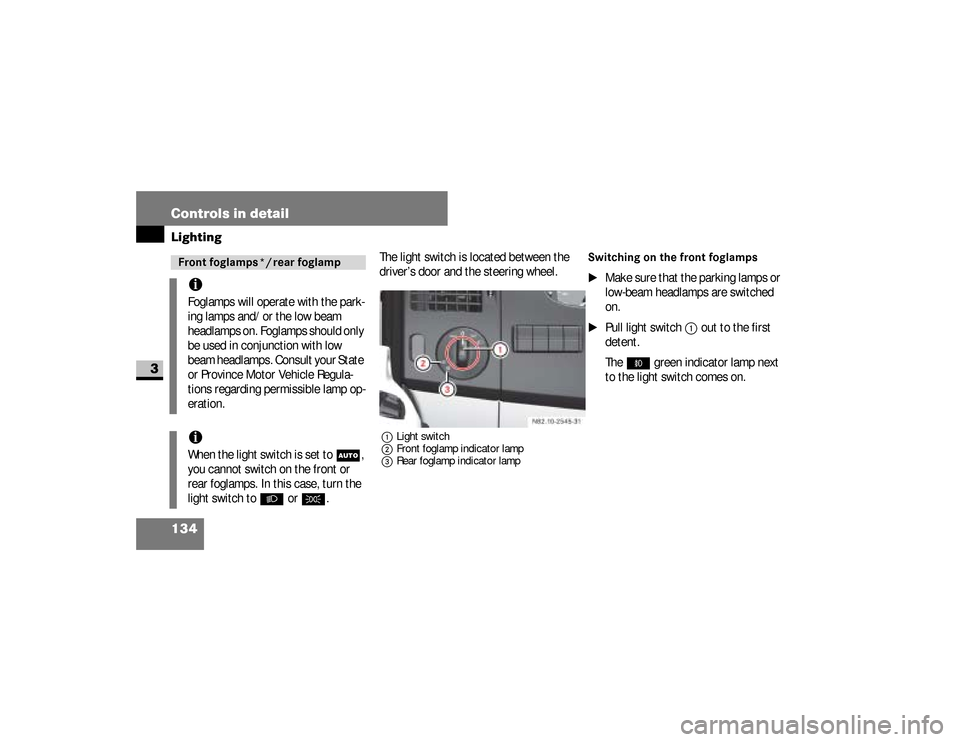
The light switch is located between the
driver’s door and the steering wheel.1Light switch
2Front foglamp indicator lamp
3Rear foglamp indicator lamp
Switching on the front foglamps
\1
Make sure that the parking lamps or
low-beam headlamps are switched
on.
\1
Pull light switch
1
out to the first
detent.
The
‡
green indicator lamp next
to the light switch comes on.
Front foglamps */ rear foglampiFoglamps will operate with the park-
ing lamps and/or the low beam
headlamps on. Foglamps should only
be used in conjunction with low
beam headlamps. Consult your State
or Province Motor Vehicle Regula-
tions regarding permissible lamp op-
eration.iWhen the light switch is set to
U
,
you cannot switch on the front or
rear foglamps. In this case, turn the
light switch to
B
or
C
.
nf_BA.book Page 134 Friday, January 25, 2008 3:53 PM
Page 137 of 666
135 Controls in detail
Lighting
3
Switching on the rear foglamp
\1
Make sure that the parking lamps or
low-beam headlamps are switched
on.
\1
Pull light switch
1
out to the second
detent.
The
†
yellow indicator lamp next
to the light switch comes on.
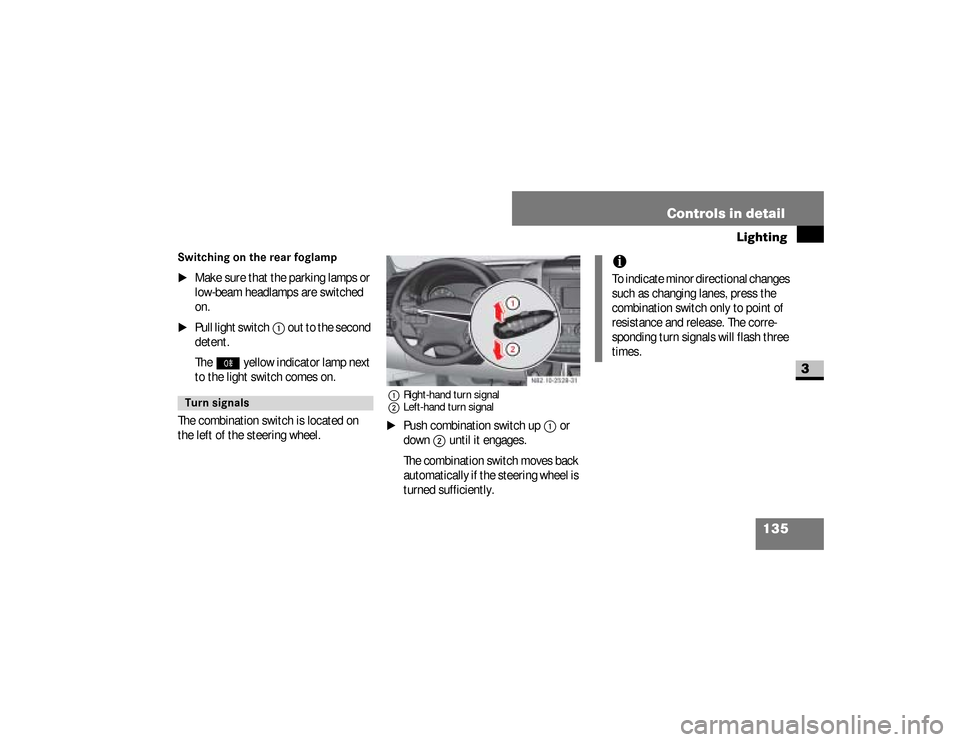
The combination switch is located on
the left of the steering wheel.
1Right-hand turn signal
2Left-hand turn signal\1
Push combination switch up
1
or
down
2
until it engages.
The combination switch moves back
automatically if the steering wheel is
turned sufficiently.
Turn signals
N82.10-2528-31
iTo indicate minor directional changes
such as changing lanes, press the
combination switch only to point of
resistance and release. The corre-
sponding turn signals will flash three
times.
nf_BA.book Page 135 Friday, January 25, 2008 3:53 PM
Page 146 of 666
144 Controls in detailInstrument cluster
3
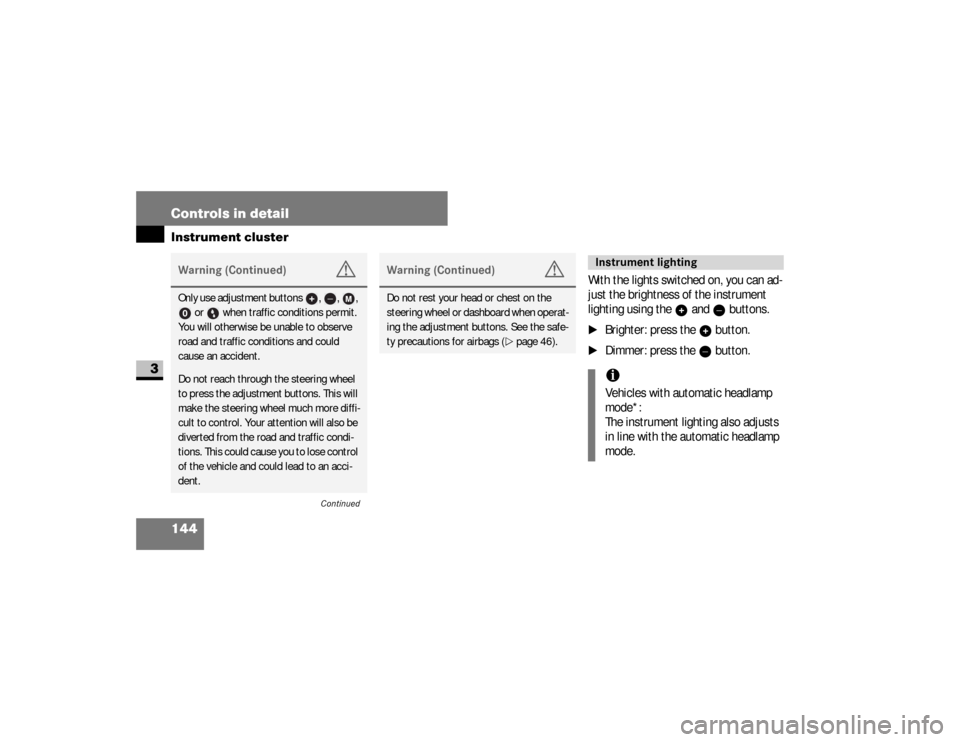
With the lights switched on, you can ad-
just the brightness of the instrument
lighting using the and buttons.\1
Brighter: press the button.
\1
Dimmer: press the button.
Warning (Continued)
G
Only use adjustment buttons , , ,
or when traffic conditions permit.
You will otherwise be unable to observe
road and traffic conditions and could
cause an accident.Do not reach through the steering wheel
to press the adjustment buttons. This will
make the steering wheel much more diffi-
cult to control. Your attention will also be
diverted from the road and traffic condi-
tions. This could cause you to lose control
of the vehicle and could lead to an acci-
dent.
Continued
Warning (Continued)
G
Do not rest your head or chest on the
steering wheel or dashboard when operat-
ing the adjustment buttons. See the safe-
ty precautions for airbags (\2page 46).
Instrument lightingiVehicles with automatic headlamp
mode*:
The instrument lighting also adjusts
in line with the automatic headlamp
mode.
nf_BA.book Page 144 Friday, January 25, 2008 3:53 PM
Page 166 of 666
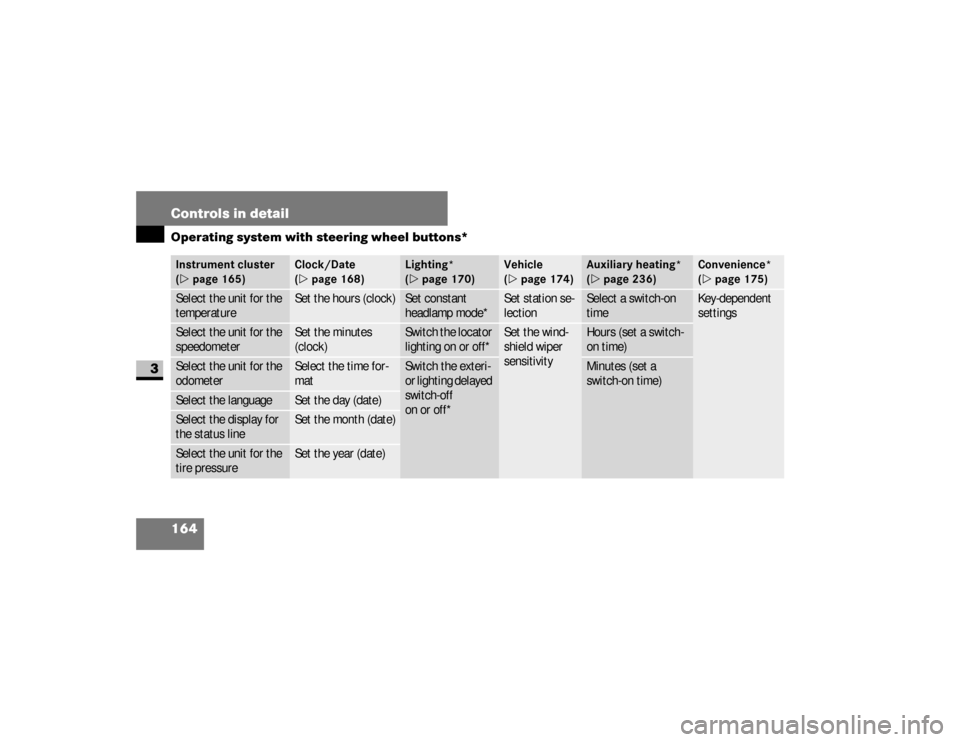
164 Controls in detailOperating system with steering wheel buttons*
3
Instrument cluster
(\2page 165)
Clock/Date
(\2page 168)
Lighting*
(\2page 170)
Vehicle
(\2page 174)
Auxiliary heating*
(\2page 236)
Convenience*
(\2page 175)
Select the unit for the
temperature
Set the hours (clock)
Set constant
headlamp mode*
Set station se-
lection
Select a switch-on
time
Key-dependent
settings
Select the unit for the
speedometer
Set the minutes
(clock)
Switch the locator
lighting on or off*
Set the wind-
shield wiper
sensitivity
Hours (set a switch-
on time)
Select the unit for the
odometer
Select the time for-
mat
Switch the exteri-
or lighting delayed
switch-off
on or off*
Minutes (set a
switch-on time)
Select the language
Set the day (date)
Select the display for
the status line
Set the month (date)
Select the unit for the
tire pressure
Set the year (date)
nf_BA.book Page 164 Friday, January 25, 2008 3:53 PM