DODGE STRATUS COUPE 2004 2.G Owners Manual
Manufacturer: DODGE, Model Year: 2004, Model line: STRATUS COUPE, Model: DODGE STRATUS COUPE 2004 2.GPages: 388, PDF Size: 2.28 MB
Page 201 of 388

6. Always obey applicable laws and regulations. Be a
courteous and alert driver.
Always leave room for unexpected events, such as sud-
den braking.
7. Never drive when you are sleepy or fatigued. Never
drive under the influence of alcohol, drugs, or medica-
tion.
8. Never leave the engine running while you take a short
sleep/rest. Leaving the engine running while sleeping
risks injury or death from accidentally moving the gear-
shift lever or the accumulation of toxic exhaust fumes in
the passenger compartment.
DRIVING, ALCOHOL AND DRUGS
Drunk driving is one of the most frequent causes of
accidents.
Your driving ability can be seriously impaired even with
blood alcohol levels far below the legal minimum. If you
have been drinking, don't drive. Ride with a designated
non-drinking driver, call a cab, a friend, or use public
transportation. Drinking coffee, or taking a cold shower,
will not make you sober.Similarly, prescription and nonprescription drugs affect
your alertness, perception and reaction time. Consult
with your doctor or pharmacist.
WARNING!
NEVER DRINK AND DRIVE.
Your perceptions are less, your reflexes slower and
your judgment impaired.
WARNING!
Driving after drinking alcohol can lead to an acci-
dent. Your perceptions are less sharp, your reflexes
are slower, and your judgment is impaired when you
have been drinking.
NEVER DRINK AND DRIVE.
TIPS FOR DRIVING IN VARIOUS CONDITIONS
1. Your front bumper fascia may become damaged if you
do not stop your vehicle prior to the bumper extending
STARTING AND DRIVING 201
5
Page 202 of 388

over curbs or parking stop blocks. Always use caution
when traveling up or down sharp inclines as your
bumper may contact the road surface.
2. Maintain specified tire inflation pressures. Replace
tires before they are excessively worn.
3. If you plan to drive in another country, comply with
the vehicle registration laws and confirm the availability
of the correct fuel.
OPERATION DURING COLD WEATHER
1. Check the battery, including terminals and cables.
During extremely cold weather, the battery capacity will
decrease. Also, the battery power level may drop because
more power is needed for cold starting and operation.
Before driving the vehicle, check to see if the engine runs
at the proper speed and if the headlights are at their usual
intensity. Charge or replace the battery if necessary.
During cold weather, it is possible that a discharged
battery could freeze.
WARNING!
The battery gives off explosive hydrogen gas. Any
spark or flame can cause the battery to explode,
which could seriously injury or kill you.
Always wear protective clothes and a face shield
when doing battery maintenance, or let a skilled
technician do it.
2. Manual transaxles may be more difficult to shift
during cold weather operation. This is normal and shift
effort will become easier as the transaxle reaches a
normal operating temperature.
Maintain low-speed operation at first to allow the trans-
axle oil to be distributed to all lubrication points.
3. Check the engine antifreeze.
If there is a shortage of coolant due to leakage or engine
overheating, add high-quality ethylene glycol antifreeze
and water. The recommended ratio is about 50% water
and 50% anti-freeze. This ratio provides adequate corro-
sion, boiling, and freeze protection.
202 STARTING AND DRIVING
Page 203 of 388

WARNING!
Never open the radiator cap when the radiator is hot.
You could be seriously burned.
TRAILER TOWING
Warranty Requirements
The Manufacturer's Passenger Vehicle Warranty will
apply to vehicles used to tow trailers for non-commercial
use. However the following conditions must be met:
²The maximum trailer load for vehicles with manual
transaxles is 1,000 lbs (454 kg).
²The maximum trailer load for vehicles with automatic
transaxles is 1,000 lbs (454 kg).
²The maximum frontal area of the trailer cannot exceed
20 square feet (1.86 square meters).
²If using a manual transaxle vehicle for trailer towing,
all starts must be in FIRST gear to avoid excessive
clutch slippage.The trailer tongue load must be considered as part of the
tow vehicle load capacity when loading the vehicle.
NOTE:Check the automatic transmission fluid level
before towing. Fluid discoloration, or a burnt odor,
shows the need for transmission fluid replacement.
WARNING!
Connecting trailer brakes to your vehicle's hydraulic
brake lines can overload your brake system and
cause it to fail. You might not have brakes when you
need them and could have an accident.
Whenever you pull a trailer, regardless of the trailer size,
stop lights and turn signals on the trailer are recom-
mended for motoring safety.
STARTING AND DRIVING 203
5
Page 204 of 388

Weight limits
Never exceed the maximum trailer weight (A), maximum
tongue weight (B), Gross Vehicle Weight Rating (GVWR)
and Gross Axle Weight Rating (GAWR).
I26A1290
204 STARTING AND DRIVING
Page 205 of 388

FOR PLEASANT DRIVING
CONTENTS
mSun visors............................209
NTo adjust the sun visor position...........209
NVanity mirror........................210
mAccessory socket.......................211
mCup holder...........................212
mAccessory boxes.......................213
NGlove compartment....................214
NCenter console with lid..................215
NTrunk net (if so equipped)...............215
mElectronic digital clock...................216
NClock setting procedure.................216
mGeneral information about your radio.......216
NSignal transmission....................217NWeak reception (fading).................217
NReflections...........................217
NCross modulation......................218
NFM stereo reception....................218
NCauses of disturbances..................218
mWhip antenna.........................219
mAM Stereo & FM Stereo Radio With Graphic
Equalizer, Cassette Tape Player And CD Player
(if so equipped)
.......................219
NOperating Instructions - Radio Mode.......219
NPower Switch, Volume Control............220
NSeek Button (Radio Mode)...............220
NTuning.............................220
NBalance............................220
6
Page 206 of 388

NFade..............................220
NGraphic Equalizer.....................220
NAM/FM Selection.....................220
NScan Button.........................220
NTo Set The Radio Pushbutton Memory......221
NGeneral Information...................221
NTo Change From Clock To Radio Mode......221
NTape Player Operation..................221
NSeek Button.........................222
NFast Forward (FF).....................222
NRewind (RW)........................222
NTape Eject...........................222
NScan Button.........................222
NChanging Tape Direction................222
NMetal Tape Selection...................222
NPinch Roller Release...................222NNoise Reduction......................223
NOperation InstructionsÐCD Player.........223
NInserting The Compact Disc..............223
NSeek Button.........................223
NEJT CD (Eject) Button..................223
NFF/Tune/RW Button...................223
NProgram Button 4 (Random Play)..........224
NTape /CD Button.....................224
NTime Button.........................224
NScan Button.........................224
mCassette Tape And Player Maintenance......224
mAM/FM Stereo Radio With 4 Disc CD Changer
(if so equipped)
.......................225
NOperating Instructions - Radio Mode.......225
NPower Switch, Volume Control............225
NSeek Button (Radio Mode)...............226
206 FOR PLEASANT DRIVING
Page 207 of 388

NTuning.............................226
NBalance............................226
NFade..............................226
NTone Control........................226
NMODE Selection......................226
NPTY (Program Type) Selection.............226
NScan Button.........................226
NTo Set The Pushbutton Memory...........227
NTo Change From Clock To Radio Mode......227
NGeneral Information...................227
NOperating Instructions Ð CD Changer......227
NInserting the Compact Disc..............227
NSeek Button.........................228
NFF /Tune/ RW Button..................228
NRandom Play........................228
NRadio/CD Button.....................228NTime Button.........................228
NScan Button.........................228
NLoading The CD Changer...............228
NPlaying Discs........................229
NRemoving Discs From The CD Changer.....229
mSteering wheel remote control switches (if so
equipped)
...........................229
NHow to adjust the volume...............230
NTo listen to the audio system..............230
NTo listen to the radio...................230
NAutomatic tuning the radio...............230
NTo select the preset memory..............230
NTo listen to a tape.....................231
NTo listen to a CD......................231
NHandling of compact discs...............232
mRadio operation and cellular phones........234
FOR PLEASANT DRIVING 207
6
Page 208 of 388

mVents................................235
NAir flow rate and direction adjustments......235
mAir conditioning.......................236
NControl panel........................236
NChanging the blower speed...............237
NChanging the temperature...............237
NChanging mode selection................238
NChanging air selection..................242
NAir conditioning switch.................243NHow to use the controls.................244
NDefrosting or defogging of the windshield
and door windows.....................244
NImportant operation tips for air conditioning . . 247
NAir conditioning system refrigerant and
lubricant recommendations...............247
NDuring a long period of disuse............248
mInstallation of accessories.................248
208 FOR PLEASANT DRIVING
Page 209 of 388

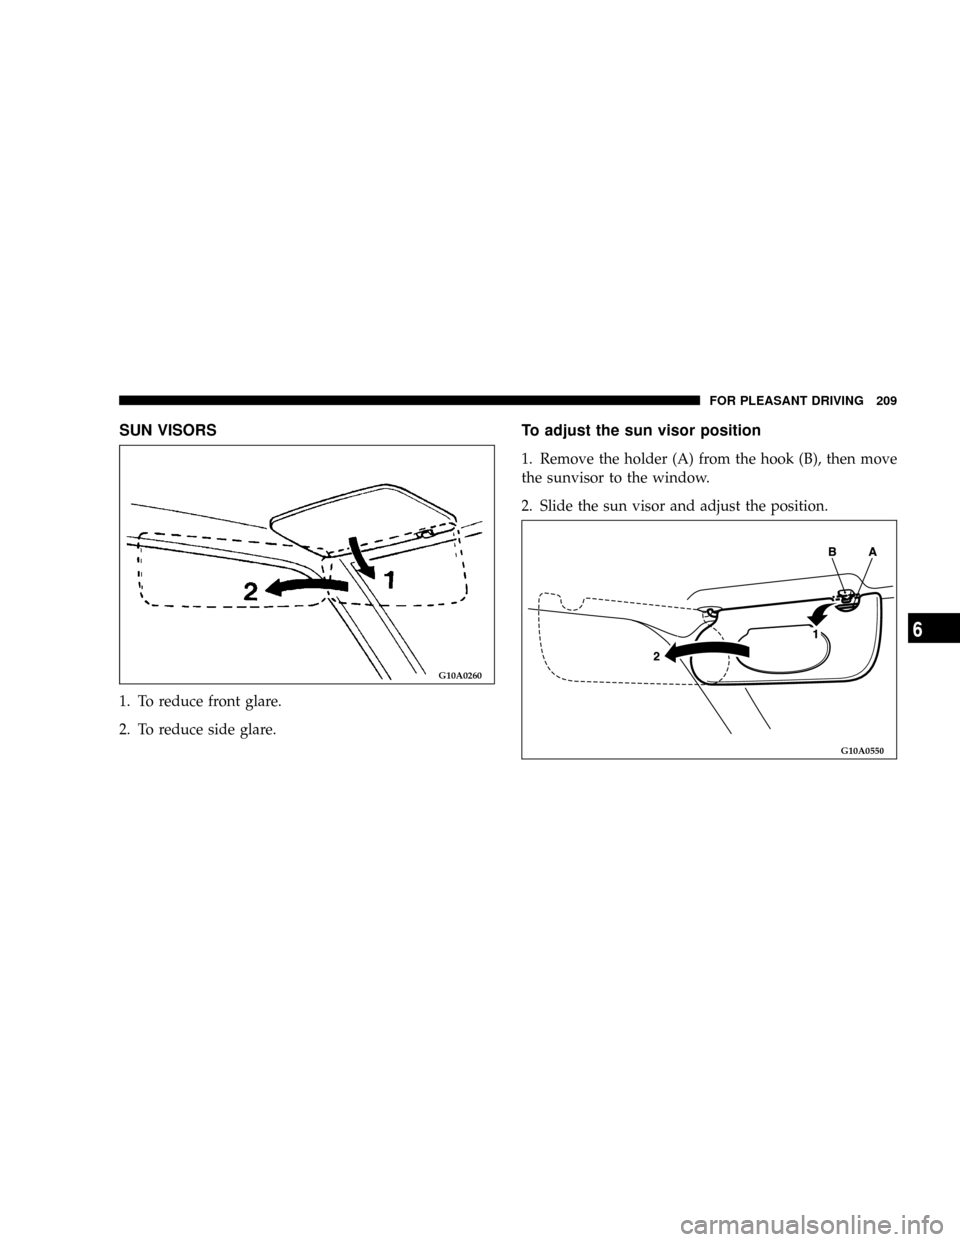
SUN VISORS
1. To reduce front glare.
2. To reduce side glare.
To adjust the sun visor position
1. Remove the holder (A) from the hook (B), then move
the sunvisor to the window.
2. Slide the sun visor and adjust the position.
G10A0260
G10A0550
FOR PLEASANT DRIVING 209
6
Page 210 of 388

WARNING!
²Do not attempt to adjust the sun visor while
driving. This can be dangerous.
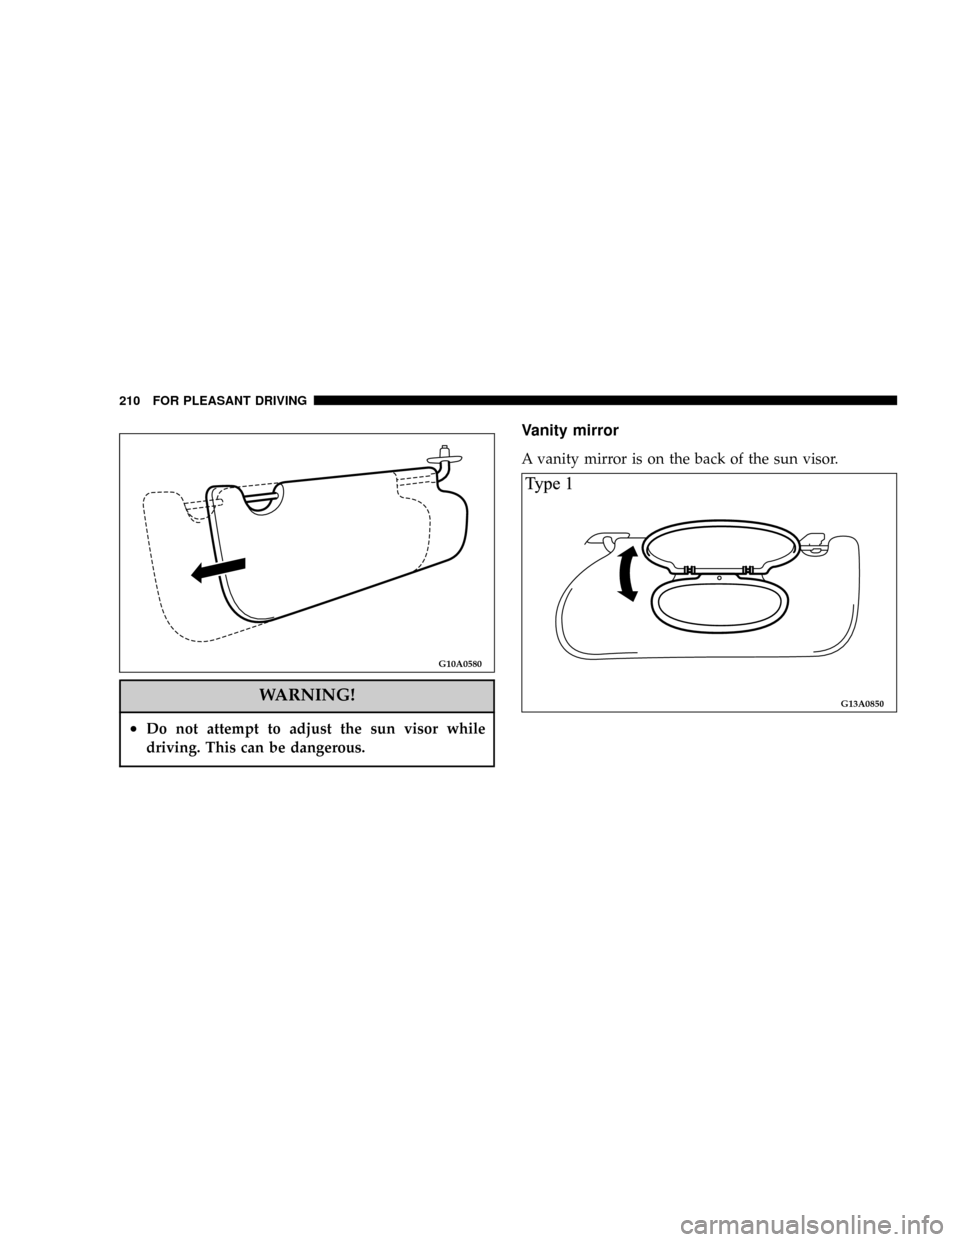
Vanity mirror
A vanity mirror is on the back of the sun visor.
G10A0580
G13A0850
210 FOR PLEASANT DRIVING