DODGE VIPER 2010 ZB II / 2.G Workshop Manual
Manufacturer: DODGE, Model Year: 2010, Model line: VIPER, Model: DODGE VIPER 2010 ZB II / 2.GPages: 80, PDF Size: 8.08 MB
Page 51 of 80
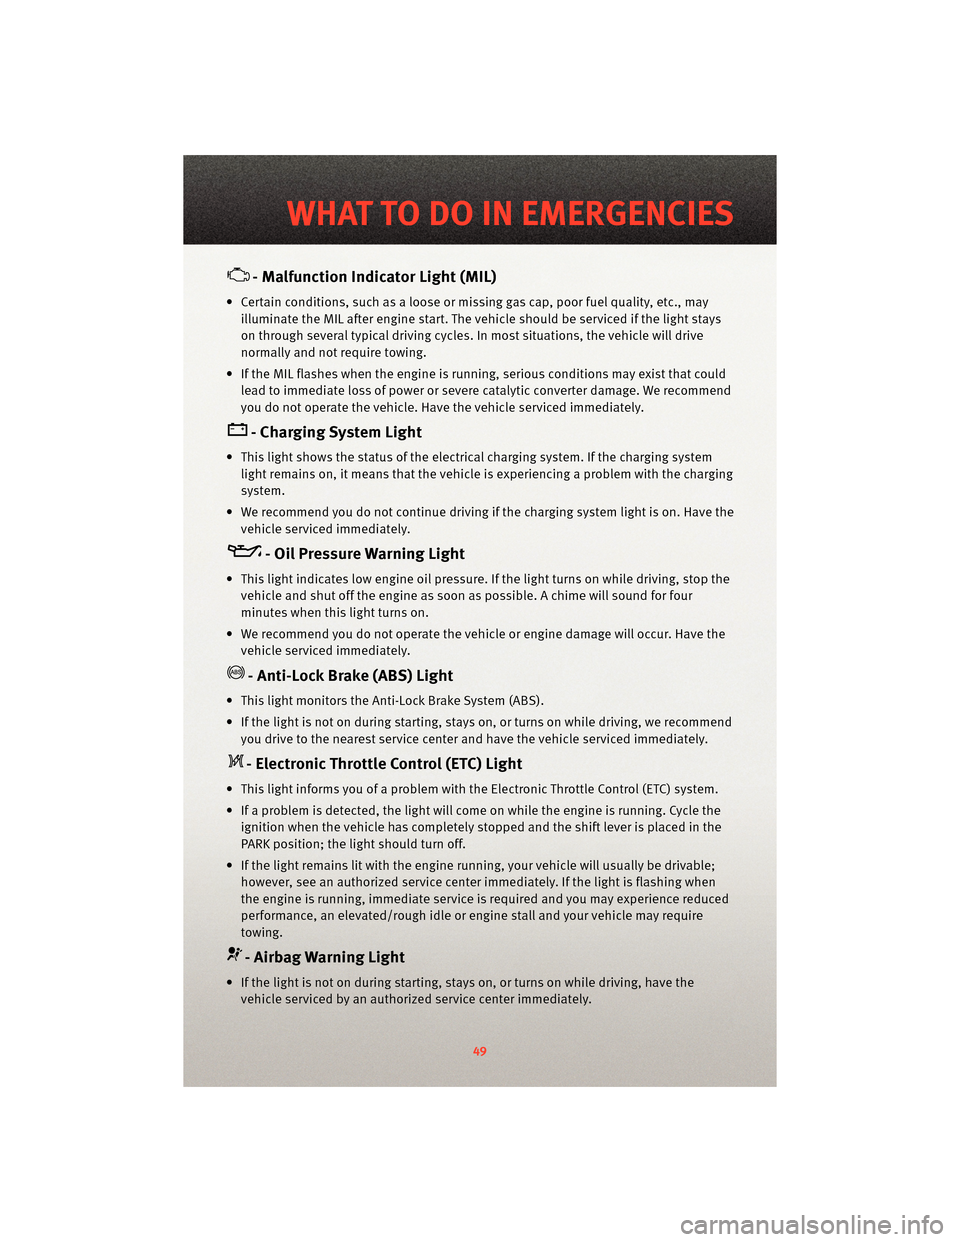
- Malfunction Indicator Light (MIL)
• Certain conditions, such as a loose or missing gas cap,poor fuel quality, etc., may
illuminate the MIL after engine start. The vehicle should be serviced if the light stays
on through several typical driving cycles. In most situations, the vehicle will drive
normally and not require towing.
• If the MIL flashes when the engine is running, serious conditions may exist that could lead to immediate loss of power or severe catalytic converter damage. We recommend
you do not operate the vehicle. Hav e the vehicle serviced immediately.
- Charging System Light
• This light shows the status of the electrical ch arging system. If the charging system
light remains on, it means that the vehicle is experiencing a problem with the charging
system.
• We recommend you do not continue driving if the charging system light is on. Have the vehicle serviced immediately.
- Oil Pressure Warning Light
• This light indicates low engine oil pressure. If the light turns on while driving, stop thevehicle and shut off the engine as soon as possible. A chime will sound for four
minutes when this light turns on.
• We recommend you do not operate the vehicle or engine damage will occur. Have the vehicle serviced immediately.
- Anti-Lock Brake (ABS) Light
• This light monitors the Anti-Lock Brake System (ABS).
• If the light is not on during starting, stays on, or turns on while driving, we recommendyou drive to the nearest service center and have the vehicle serviced immediately.
- Electronic Throttle Control (ETC) Light
• This light informs you of a problem with the Electronic Throttle Control (ETC) system.
• If a problem is detected, the light will come on while the engine is running. Cycle theignition when the vehicle has completely stopped and the shift lever is placed in the
PARK position; the light should turn off.
• If the light remains lit with the engine running, your vehicle will usually be drivable; however, see an authorized service center immediately. If the light is flashing when
the engine is running, immediate service is required and you may experience reduced
performance, an elevated/rough idle or en gine stall and your vehicle may require
towing.
- Airbag Warning Light
• If the light is not on during starting, stays on, or turns on while driving, have the vehicle serviced by an authorized service center immediately.
49
WHAT TO DO IN EMERGENCIES
Page 52 of 80
IF YOUR ENGINE OVERHEATS
• In any of the following situations, you can reduce the potential for overheating by
taking the appropriate action.
• On the highways — slow down.
• In city traffic — while stopped, shift tran smission intoNEUTRAL, but do not increase
engine idle speed.
• In city traffic — while moving, shift into the highest gear possible to reduce engine RPM.
NOTE: There are steps that you can take to slow down an impending overheat
condition:
• If your air conditioner (A/C) is on, turn it off. The A/C system adds heat to the engine cooling system and turning the A/C off can help remove this heat.
• You can also turn the Temperature Control to maximum heat, the Mode Control to floor and the Fan Control to high. This allows the heater core to act as a supplement to the
radiator and aids in removing heat from the engine cooling system.
• If the temperature reading does not re turn to normal, turn the engine off immediately.
• We recommend that you do not operate the vehicle or engine damage will occur. Have the vehicle serviced immediately.
CAUTION!
Driving with a hot cooling system could dama ge your vehicle. If the temperature gauge
reads HOT (H), pull over and stop the vehicle. Idle the vehicle with the air conditioner
turned off until the pointer drops back into the normal range. If the pointer remains on
HOT (H), and you hear continuous chimes, t urn the engine off immediately and call for
service.
WARNING!
You or others can be badly burned by hot engine coolant (antifreeze) or steam from
your radiator. If you see or hear steam coming from under the hood, do not open the
hood until the radiator has had time to co ol. Never try to open a cooling system
pressure cap when the radiator or coolant bottle is hot.
WHAT TO DO IN EMERGENCIES
50
Page 53 of 80
TIREFIT TIRE REPAIR
WARNING!
• Do not attempt to seal a tire on the side of the vehicle close to moving traffic. Pullfar enough off the road to avoid the danger of being hit while using the TIREFIT kit.
• Replace (or repair) the original tire at the first opportunity and reinstall it on your vehicle. Failure to do so could result in loss of vehicle control.
• A loose TIREFIT kit thrown forward in an accident or hard stop, could endanger the occupants of the vehicle. Always stow the TIREFIT kit in the place provided.
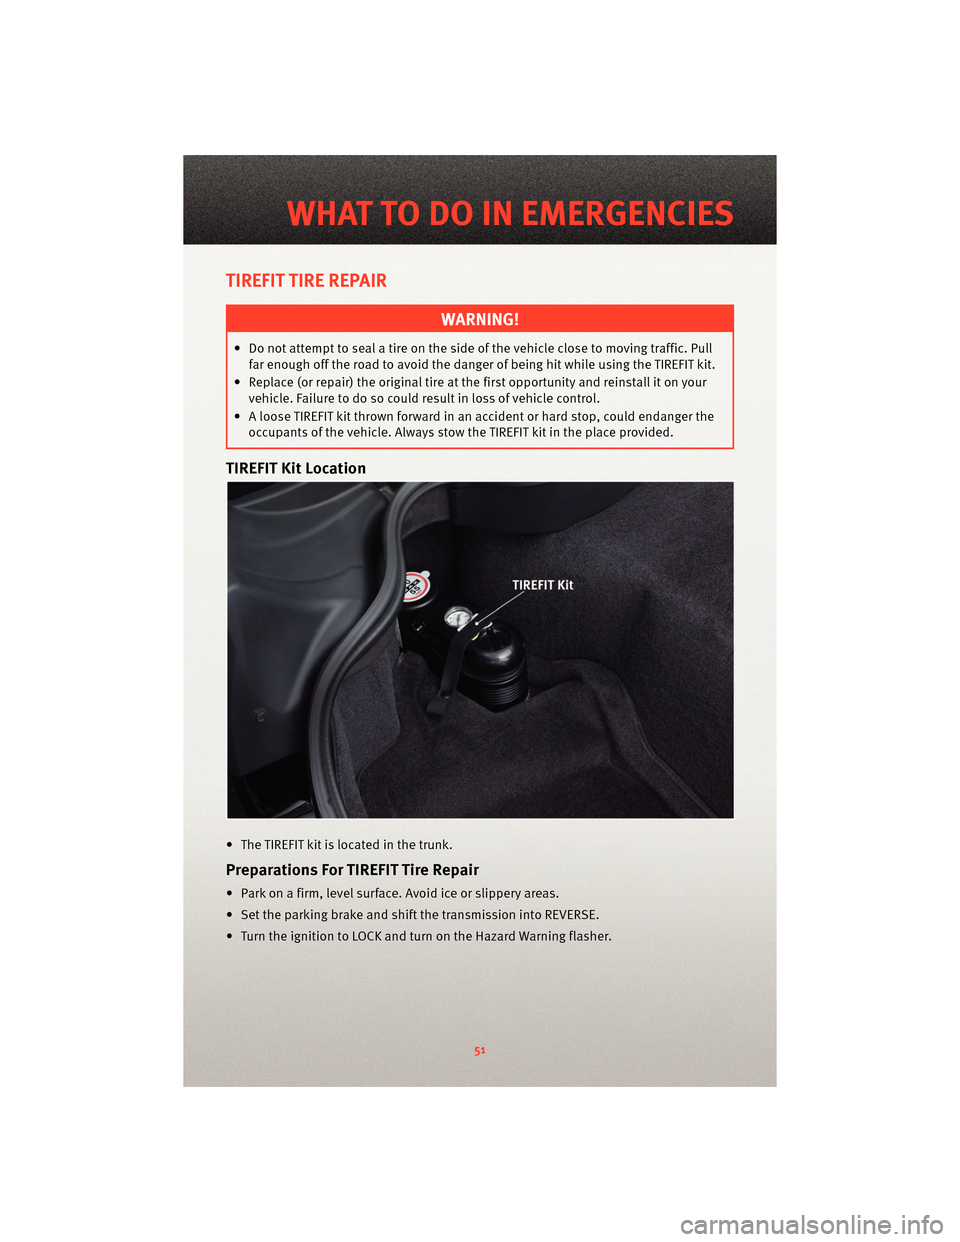
TIREFIT Kit Location
• The TIREFIT kit is located in the trunk.
Preparations For TIREFIT Tire Repair
• Park on a firm, level surface. Avoid ice or slippery areas.
• Set the parking brake and shif t the transmission into REVERSE.
• Turn the ignition to LOCK and turn on the Hazard Warning flasher.
51
WHAT TO DO IN EMERGENCIES
Page 54 of 80
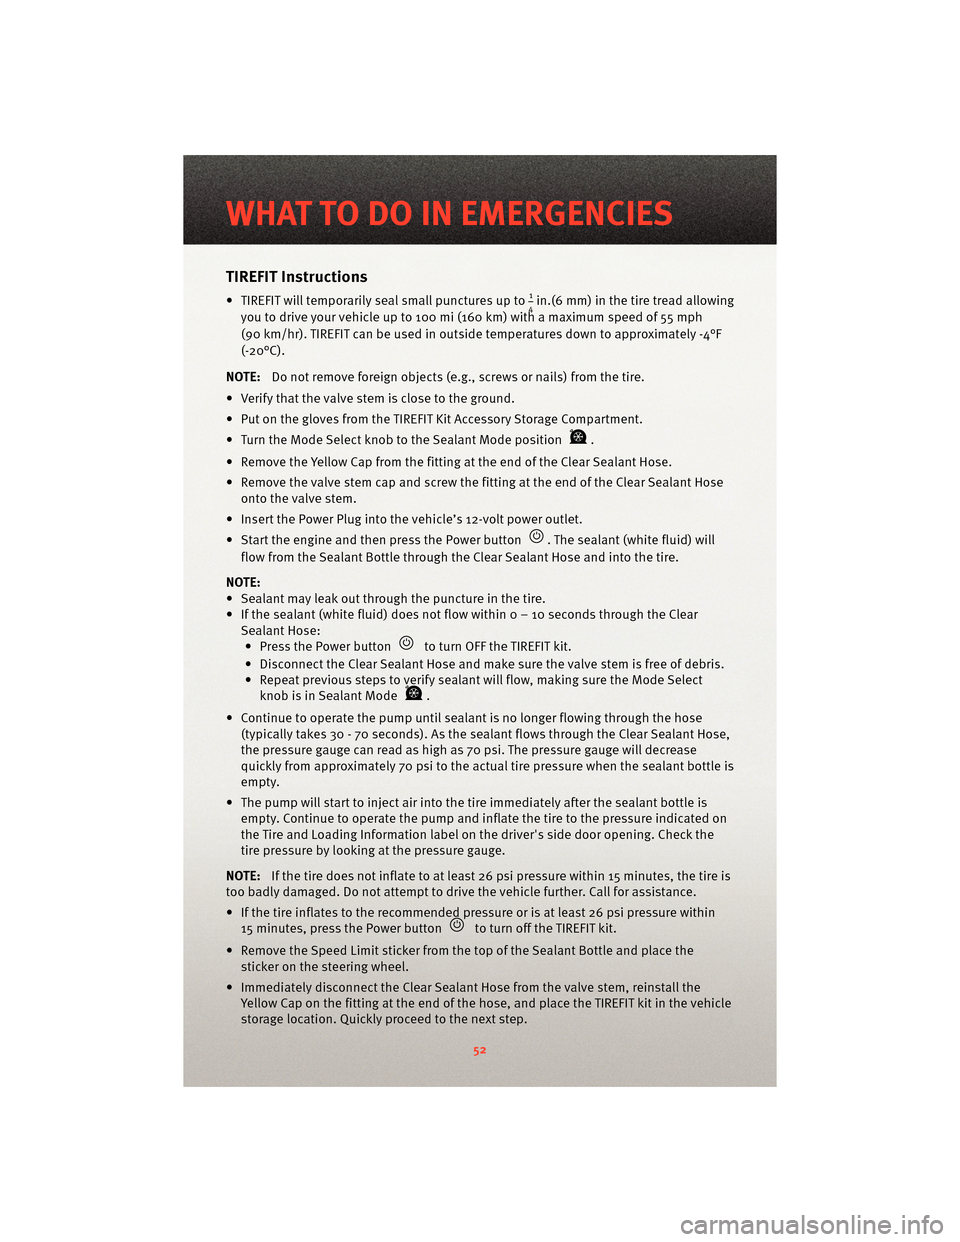
TIREFIT Instructions
• TIREFIT will temporarily seal small punctures up to14in.(6 mm) in the tire tread allowing
you to drive your vehicle up to 100 mi (160 km) with a maximum speed of 55 mph
(90 km/hr). TIREFIT can be used in outside temperatures down to approximately -4°F
(-20°C).
NOTE: Do not remove foreign objects (e.g., screws or nails) from the tire.
• Verify that the valve stem is close to the ground.
• Put on the gloves from the TIREFIT Kit Accessory Storage Compartment.
• Turn the Mode Select knob to the Sealant Mode position
.
• Remove the Yellow Cap from the fitting at the end of the Clear Sealant Hose.
• Remove the valve stem cap and screw the fitting at the end of the Clear Sealant Hose onto the valve stem.
• Insert the Power Plug into the vehicle’s 12-volt power outlet.
• Start the engine and then press the Power button
. The sealant (white fluid) will
flow from the Sealant Bottle through the Clear Sealant Hose and into the tire.
NOTE:
• Sealant may leak out through the puncture in the tire.
• If the sealant (white fluid) does not flow withi n0–10secondsthrough the Clear
Sealant Hose: • Press the Power button
to turn OFF the TIREFIT kit.
• Disconnect the Clear Sealant Hose and make sure the valve stem is free of debris.
• Repeat previous steps to verify sealant will flow, making sure the Mode Select knob is in Sealant Mode
.
• Continue to operate the pump until seal ant is no longer flowing through the hose
(typically takes 30 - 70 seconds). As the sealant flows through the Clear Sealant Hose,
the pressure gauge can read as high as 70 psi. The pressure gauge will decrease
quickly from approximately 70 psi to the actual tire pressure when the sealant bottle is
empty.
• The pump will start to inject air into the tire immediately after the sealant bottle is
empty. Continue to operate the pump and inflate the tire to the pressure indicated on
the Tire and Loading Information label on the driver's side door opening. Check the
tire pressure by looking at the pressure gauge.
NOTE: If the tire does not inflate to at least 26 psi pressure within 15 minutes, the tire is
too badly damaged. Do not attempt to drive the vehicle further. Call for assistance.
• If the tire inflates to the recommended pressure or is at least 26 psi pressure within 15 minutes, press the Power button
to turn off the TIREFIT kit.
• Remove the Speed Limit sticker from the top of the Sealant Bottle and place the sticker on the steering wheel.
• Immediately disconnect the Clear Sealant Ho se from the valve stem, reinstall the
Yellow Cap on the fitting at the end of the hose, and place the TIREFIT kit in the vehicle
storage location. Quickly proceed to the next step.
WHAT TO DO IN EMERGENCIES
52
Page 55 of 80
CAUTION!
• The metal end fitting from the Power Plug and Cable may get hot after use andshould be handled carefully.
• Failure to reinstall the Yellow Cap on the fitting at the end of the Clear Sealant Hose can result in sealant contacting your skin, clothing, and the vehicle’s interior. It can
also result in sealant contacting internal TIREFIT kit components which may cause
permanent damage to the kit.
• Immediately after injecting sealant and infl ating the tire, drive the vehicle 5 mi (8 km)
or 10 minutes to ensure distribution of the TIREFIT Sealant within the tire. Do not
exceed 55 mph (88 km/h).
• Pull over and repeat Preparations for Jacking or Tire Repair.
• Turn the Mode Select knob to the Air Mode position
.
• Connect the Black Air Pump Hose to the valve stem.
• Check the pressure in the tire by reading the Pressure Gauge.
NOTE: If tire pressure is less than 19 psi, the tire is too badly damaged. Do not attempt
to drive the vehicle fur ther. Call forassistance.
• If the tire pressure is 19 psi or higher, press the Power button
and inflate the tire
to the pressure indicated on the Tire and Loading Information label on the driver's
side door opening.
• Disconnect the TIREFIT kit from the valve stem and then reinstall the valve stem cap.
• Place the TIREFIT kit in its proper storage area in the vehicle.
• Have the tire inspected and repaired or replaced at the earliest opportunity at an authorized service center.
NOTE: When having the tire serviced, advise the authorized dealer or service center
that the tire has been sealed using the TIREFIT service kit.
• Refer to the Owner's Manual on the DVD for Sealant Bottle and Hose Replacement.
WARNING!
Do not use TIREFIT or drive the vehicle under the following circumstances:
• If the cut or puncture in the tire tread is approximately 0.24 in (6 mm) or larger.
• If the tire has any sidewall damage.
• If the tire has any damage from driv ing with extremely low tire pressure.
• If the tire has any damage from driving on a flat tire.
• If the wheel has any damage.
• If you are unsure of the condition of the tire or the wheel.
53
WHAT TO DO IN EMERGENCIES
Page 56 of 80
WARNING!
• Keep TIREFIT away from any open flames or heat sources.
• TIREFIT is not a permanent flat tire repair.Have the tire inspected and repaired or
replaced after using TIREFIT. Do not exceed 55 mph (90 km/h) until having the tire
repaired or replaced.
• Take care not to allow the contents of TIREFIT to come in contact with hair, eyes, or clothing. TIREFIT is harmful if inhaled, sw allowed, or absorbed through the skin; it
causes skin, eye, and respiratory irrit ation. Flush immediately with plenty of water
if there is any contact with eyes or skin. Change clothing as soon as possible if
there is any contact with clothing.
• TIREFIT Sealant solution contains latex. In case of allergic reaction or rash, consult a physician immediately. Keep TIREFIT out of the reach of children. If swallowed, rinse
mouth immediately with plenty of water and drink plenty of water. Do not induce
vomiting! Consult a physician immediately.
• Use the gloves provided in the Accessory Storage Compartment when operating the TIREFIT kit.
JUMP-STARTING
WARNING!
Any procedure other than the following could result in:
• Personal injury caused by electro lyte squirting out the battery vent,
• Personal injury or property dama ge due to battery explosion,
• Damage to the charging system of the booster vehicle or of the immobilized vehicle.
WHAT TO DO IN EMERGENCIES
54
Page 57 of 80
WARNING!
• Take care to avoid the radiator cooling fan whenever the hood is raised. It can start
anytime the ignition switch is in the ON/RUN position. You can be hurt by the fan.
• Battery fluid is a corrosive acid solution; do not allow battery fluid to contact eyes, skin or clothing. Do not lean over a battery when attaching clamps or allow the
clamps to touch each other. If acid splashes in your eyes or on skin, flush the
contaminated area immediately w ith large quantities of water.
• A battery generates hydrogen gas which is flammable and explosive. Keep flames or sparks away from the battery vent holes. Don’t lean over the battery when
attaching clamps or allow the clamps to touch each other.
• If the vehicle has a discharged battery, booster cables may be used to obtain a start from another vehicle. This type of start can be dangerous if done improperly, so
follow this procedure carefully.
• Do not use a booster battery or any other booster source with an output that exceeds 12-volts (i.e., do not use a 24-volt power source).
• The battery is located underneath an acce ss panel inside the rear compartment on the
left side of the vehicle. A remote batt ery terminal is located in the engine
compartment for jump-starting.
• Remove all metal jewelry, such as watch bands or bracelets, which might make an unintended electrical contact.
WARNING!
Do not permit vehicles to touch each other as this could establish a ground
connection and personal injury could result.
• Park the booster vehicle within cable reach but without letting the vehicles touch. Set the parking brake on both vehicles, shif t the transmissioninto NEUTRAL, and turn the
ignition to LOCK.
• Turn off the heater, radio, and all unnecessary electrical loads.
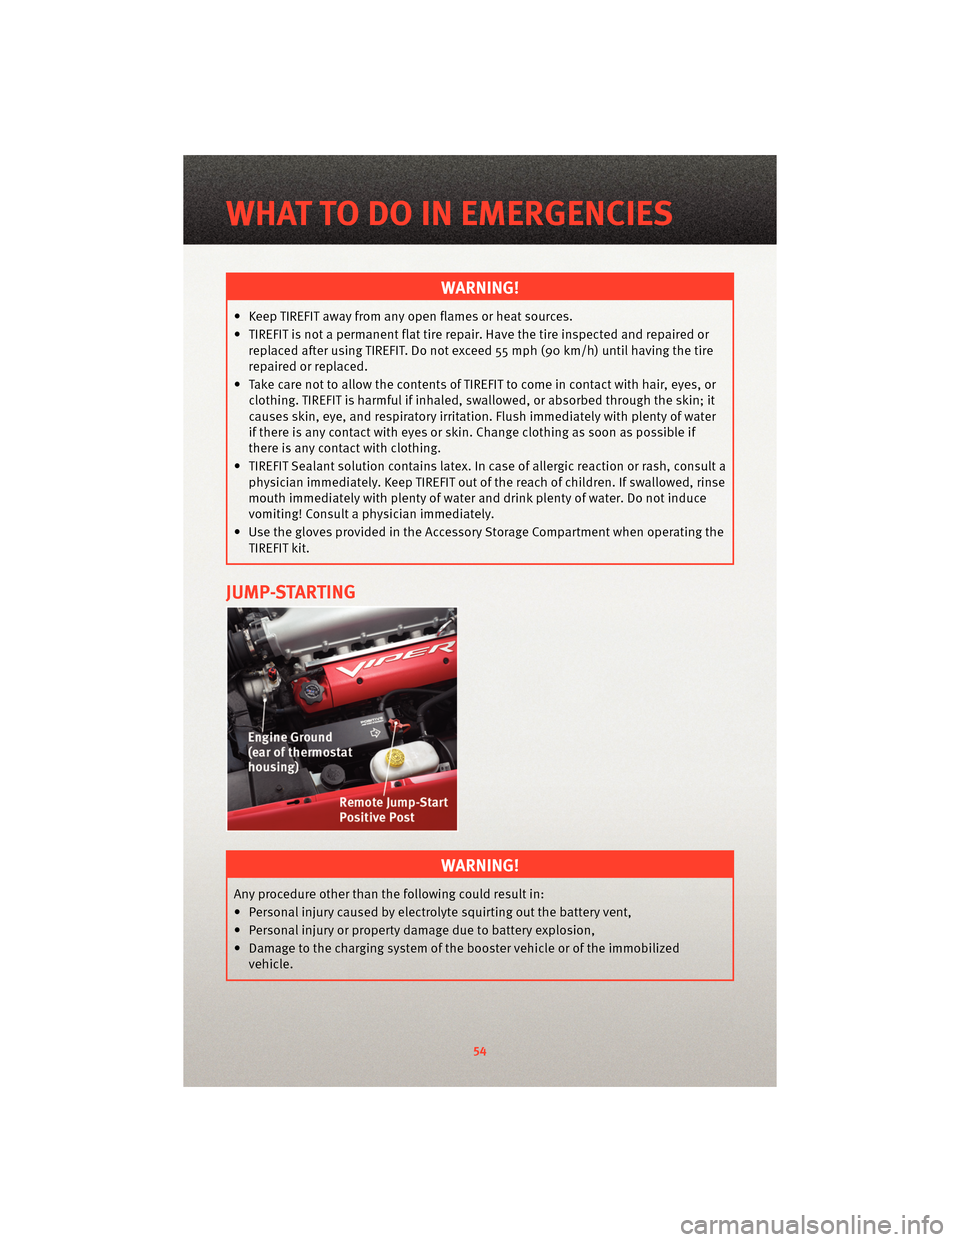
• Remove the plastic cover from the remote jump-start positive post (+) in the engine compartment.
If You Are Jump-Starting Your Vehicle:
• Connect one end of a jumper cable to the positive (+) terminal on the boosterbattery. Connect the other end of the same cable to the remote jump-start positive
post (+).
• Connect the other cable to the negative terminal on the booster battery. Connect the other end of the same cable to the ear of the thermostat housing on the engine
in your vehicle. Make sure you have a good contact.
55
WHAT TO DO IN EMERGENCIES
Page 58 of 80
If You Are Jump-Starting Another Vehicle:
• Connect one end of a jumper cable to the remote jump-start positive post (+).Connect the other end of the same cable to the positive (+) terminal of the
discharged battery.
• Connect the other cable to the ear of the thermostat housing on the engine in your vehicle. Connect the other end of the same cable to a good ground on the engine in
the other vehicle. Make sure that you have a good contact.
• Start the engine in the vehicle which has the booster battery; let the engine idle a few minutes.
NOTE: The Vehicle Security Alarm System will prevent the engine from starting.
• Turn off the Vehicle Security Alarm System.
• Start the engine in the vehicle with the discha rged battery. If engine does not start in
15 seconds, stop cranking engine and allow s tarter to cool down before cranking
again.
• When removing the jumper cables, reverse the above sequence exactly. Be careful of the moving belts and fan.
WARNING!
During cold weather when temperatures are below the freezingpoint, electrolyte in a
discharged battery may freeze. Do not attempt jump-starting because the battery
could rupture or explode. The battery t emperature must be brought up above the
freezing point before attempting a jump-start.
TOWING A DISABLED VEHICLE
• Do not tow with sling type equipment. Only use flat bed equipment. Always comply
with applicable state or local towing ordinances.
CAUTION!
Towing with equipment other than flat bed types may damage your vehicle.
WHAT TO DO IN EMERGENCIES
56
Page 59 of 80
FREEING A STUCK VEHICLE
• If your vehicle becomes stuck in mud, sand or snow, it can often be moved by arocking motion. Turn your steering wheel right and left to clear the area around the
front wheels. Then shift back and forth between REVERSE and 1st gear. Using minimal
accelerator pedal pressure to maintain the rocking motion, without spinning the
wheels, is most effective.
WARNING!
Fast spinning tires can be dangerous. Forces generated by excessive wheel speeds
may cause tire damage or failure. A tire could explode and injure someone. Do not
spin your vehicle's wheels faster than 30 mph (48 km/h) when you are stuck. Do not
let anyone near a spinning wheel, no matter what the speed.
CAUTION!
• When “rocking” a stuck vehicle by moving between 1st and REVERSE, do not spin the wheels faster than 15 mph (24 km/h), or drivetrain damage may result.
• Revving the engine or s pinning the wheels too fast ma y lead to transmission
overheating and failure. It can also damage the tires. Do not spin the wheels above
30 mph (48 km/h) while in gear (no transmission shifting occurring).
57
WHAT TO DO IN EMERGENCIES
Page 60 of 80
EVENT DATA RECORDER (EDR)
• This vehicle is equipped with an event data recorder (EDR). The main purpose of anEDR is to record, in certain crash or near crash-like situations, such as an air bag
deployment or hitting a road obst acle, data that willassist in understanding how a
vehicle’s systems performed. The EDR is designed to record data related to vehicle
dynamics and safety systems for a short period of time, typically 30 seconds or less.
The EDR in this vehicle is designed to record such data as:
• How various systems in your vehicle were operating;
• Whether or not the driver and passenger s afety belts were buckled/fastened;
• How far (if at all) the driver was depressing the accelerator and/or brake pedal; and,
• How fast the vehicle was traveling.
• These data can help provide a better u nderstanding of the circumstances in which
crashes and injuries occur.
NOTE: EDR data are recorded by your vehicle only if a non-trivial crash situation occurs;
no data are recorded by the EDR under normal driving conditions and no personal data
(e.g. name, gender, age, and crash location) are recorded. However, other parties, such
as law enforcement, could combine the EDR data with the type of personally identifying
data routinely acquired during a crash investigation.
• To read data recorded by an EDR, special equipment is required, and access to the vehicle or the EDR is needed. In addition to the vehicle manufacturer, other parties
such as law enforcement, that have the special equipment, can read the information if
they have access to the vehicle or the EDR.
WHAT TO DO IN EMERGENCIES
58