DODGE VIPER 2010 ZB II / 2.G Owner's Manual
Manufacturer: DODGE, Model Year: 2010, Model line: VIPER, Model: DODGE VIPER 2010 ZB II / 2.GPages: 80, PDF Size: 8.08 MB
Page 11 of 80
MANUAL DOOR LOCK
• The driver's door can be unlocked with the key.
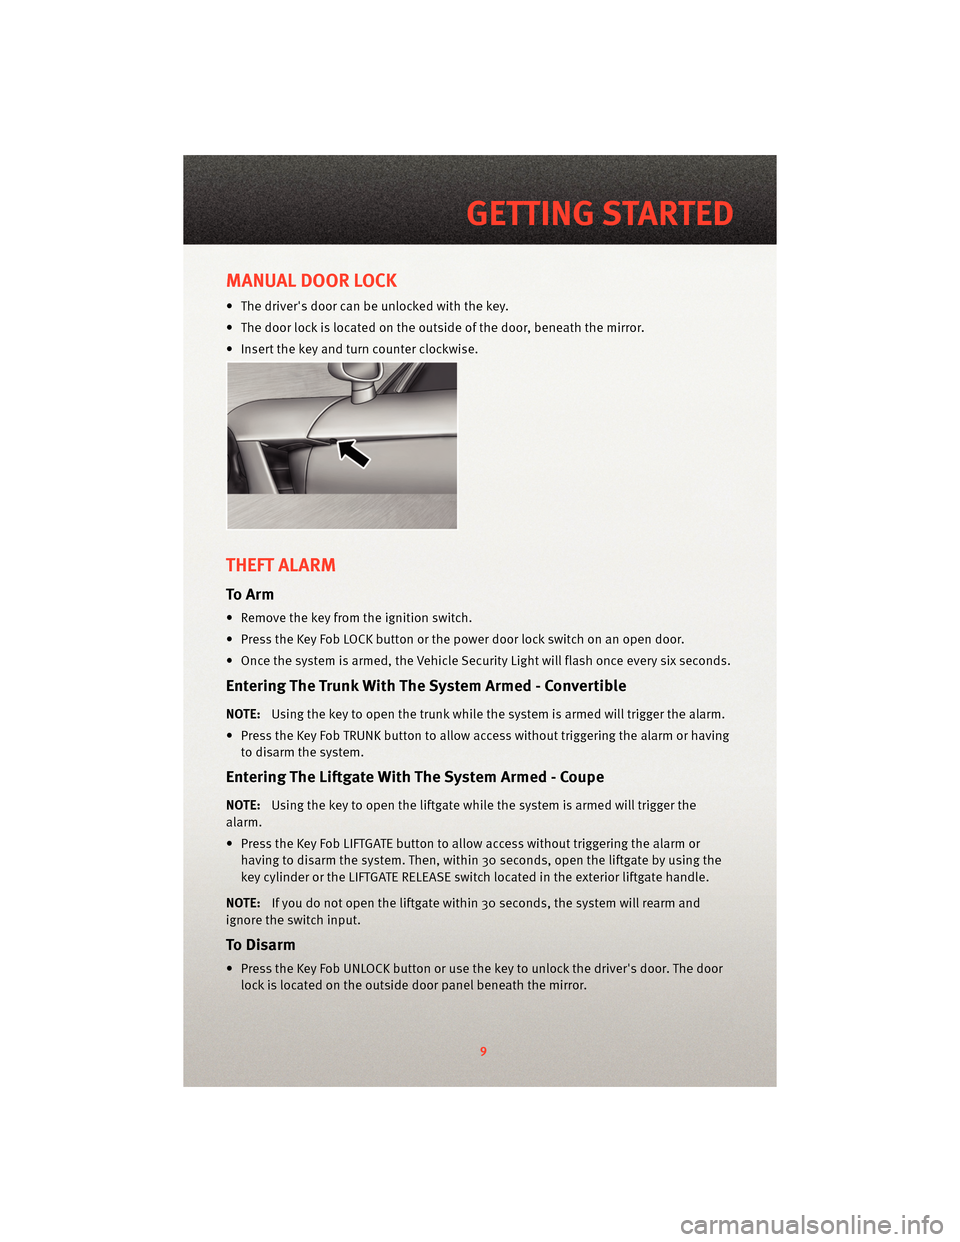
• The door lock is located on the outside of the door, beneath the mirror.
• Insert the key and turn counter clockwise.
THEFT ALARM
To Arm
• Remove the key from the ignition switch.
• Press the Key Fob LOCK button or the power door lock switch on an open door.
• Once the system is armed, the Vehicle Security Light will flash once every six seconds.
Entering The Trunk With The System Armed - Convertible
NOTE:Using the key to open the trunk while the system is armed will trigger the alarm.
• Press the Key Fob TRUNK button to allow access without triggering the alarm or having to disarm the system.
Entering The Liftgate With The System Armed - Coupe
NOTE: Using the key to open the liftgate while the system is armed will trigger the
alarm.
• Press the Key Fob LIFTGATE button to allow access without triggering the alarm or having to disarm the system. Then, within 30 seconds, open the liftgate by using the
key cylinder or the LIFTGATE RELEASE switch located in the exterior liftgate handle.
NOTE: If you do not open the liftgate within 30 seconds, the system will rearm and
ignore the switch input.
To Disarm
• Press the Key Fob UNLOCK button or use the key to unlock the driver's door. The door lock is located on the outside door panel beneath the mirror.
9
GETTING STARTED
Page 12 of 80
Electronic Immobilization System - Canada Only
• The Electronic Immobilization system prevents unauthorized vehicle operation bydisabling the engine.
• Operation is automatic, regardless of whether the vehicle is locked or unlocked.
• The system will passi vely arm 30 seconds after the key is removed from the vehicle.
• When the system is armed the Vehicle Security Light will flash at a rate of a half-second ON, a half-second OFF, a half-second ON, followed by a 10–second pause
and the vehicle will not start.
• Pressing the Key Fob UNLOCK button will allow the driver 60 seconds to start the
vehicle. Failure to complete the process within 60 seconds will cause the system to
passively re-arm. The driver must repeat the pr ocess again by pressingthe UNLOCK
button on the Key Fob to start the vehicle.
NOTE: Pressing the Key Fob UNLOCK button during the 30 second Electronic
Immobilization arming process will allow the driver 60 seconds to start the vehicle.
ENGINE START BUTTON
Starting
• Fully apply the Parking Brake and press the clutch to the floor.
• Place the Shift Lever in NEUTRAL.
• Insert key into the ignition switch and turn to the ON/RUN position.
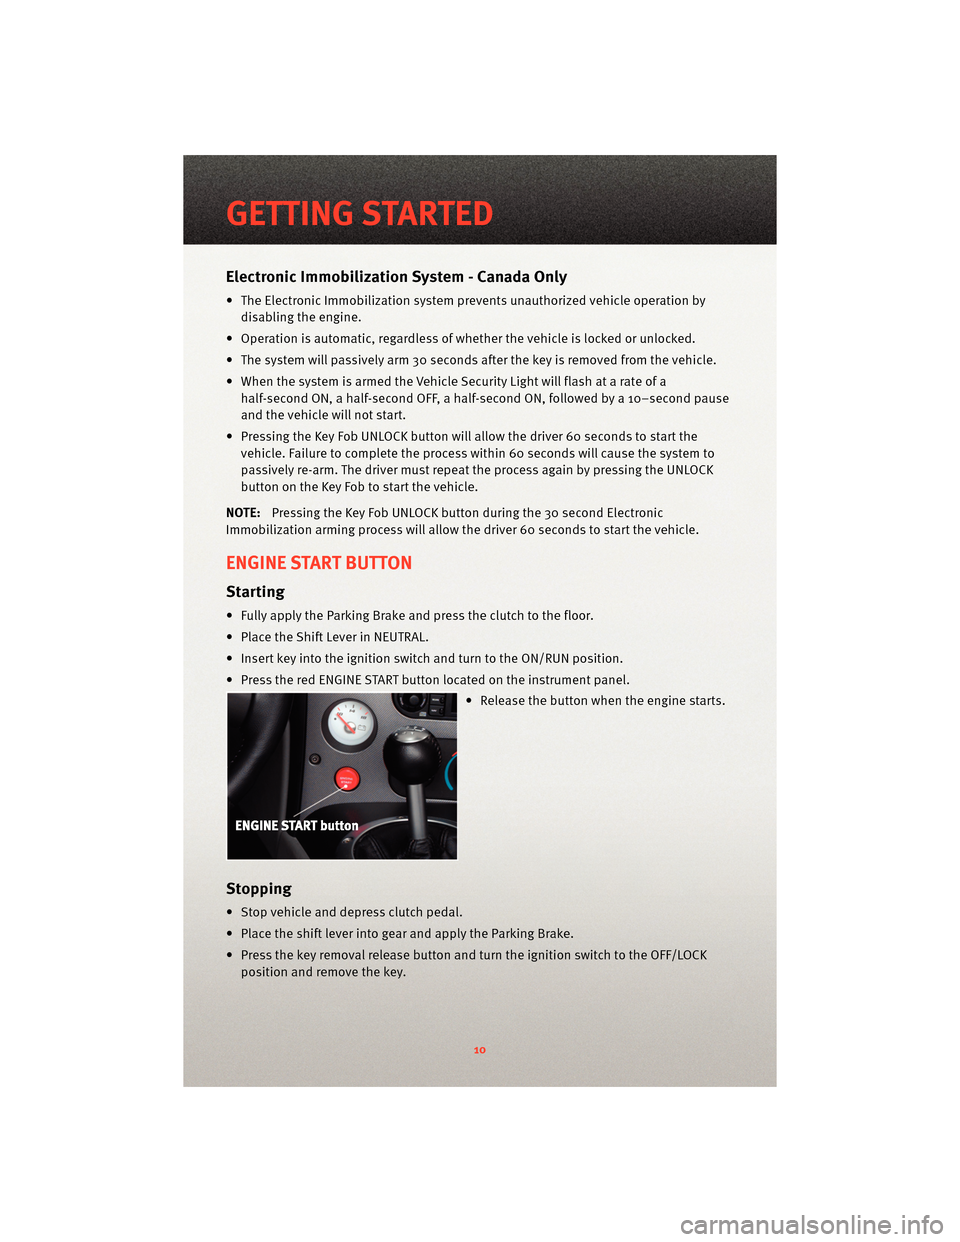
• Press the red ENGINE START button located on the instrument panel.
• Release the button when the engine starts.
Stopping
• Stop vehicle and depress clutch pedal.
• Place the shift lever into gear and apply the Parking Brake.
• Press the key removal release button and turn the ignition switch to the OFF/LOCKposition and remove the key.
GETTING STARTED
10
Page 13 of 80
SEAT BELT
• Be sure everyone in your vehicle is in a seat and using a seat belt properly.
WARNING!
In a collision, you and your passengerscan suffer much greater injuries if you are not
properly buckled up. You can strike the interior of your vehicle or other passengers, or
you can be thrown out of the vehicle. Always be sure you and others in your vehicle
are buckled up properly.
CHILD RESTRAINTS
• Every state in the United States and all Canadian provinces require that small children ride in proper restraint systems. This is the law, and you can be prosecuted for
ignoring it.
WARNING!
• In a collision, an unrestrained child, even a tiny baby, can become a projectileinside the vehicle. The force required to hold even an infant on your lap could
become so great that you could not hold the child, no matter how strong you are.
The child and others could be severely injur ed or killed. Any child riding in your
vehicle should be in a proper restraint for the child's size.
• A rearward-facing infant restraint must not be used in your vehicle unless the passenger airbag has been turned off. A rearward-facing infant restraint may be
struck by a deploying passenger airbag, which may cause severe or fatal injury to
the infant.
11
GETTING STARTED
Page 14 of 80
Child Restraint Tether Anchor
NOTE:It is recommended to complete this task first.
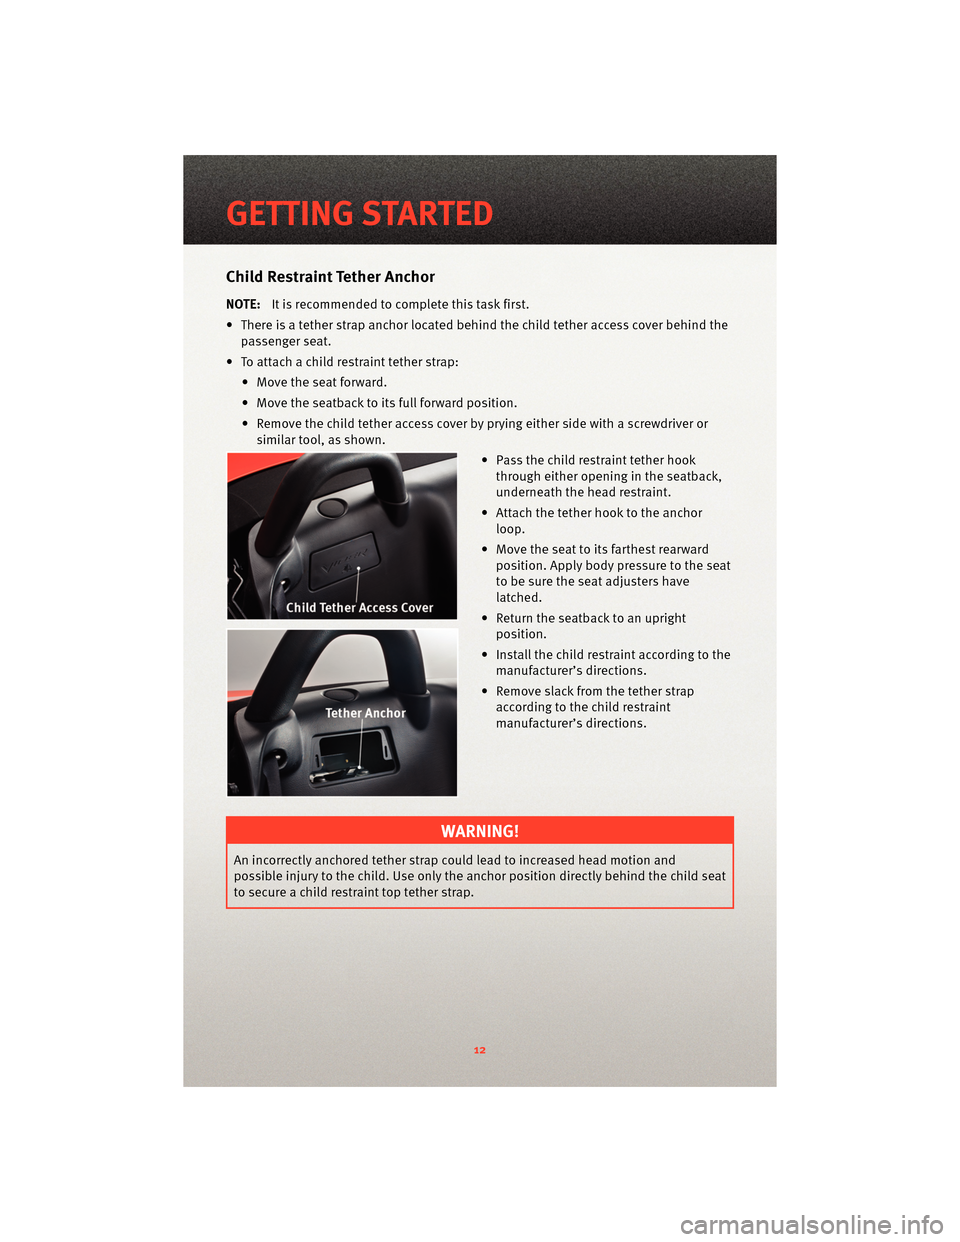
• There is a tether strap anchor located behind the child tether access cover behind the passenger seat.
• To attach a child restraint tether strap: • Move the seat forward.
• Move the seatback to its full forward position.
• Remove the child tether access cover by prying either side with a screwdriver orsimilar tool, as shown.
• Pass the child restraint tether hook
through either opening in the seatback,
underneath the head restraint.
• Attach the tether hook to the anchor loop.
• Move the seat to its farthest rearward position. Apply body pressure to the seat
to be sure the seat adjusters have
latched.
• Return the seatback to an upright position.
• Install the child restraint according to the manufacturer’s directions.
• Remove slack from the tether strap according to the child restraint
manufacturer’s directions.
WARNING!
An incorrectly anchored tether strap could lead to increased head motion and
possible injury to the child. Use only the anchor position directly behind the child seat
to secure a child restraint top tether strap.
GETTING STARTED
12
Page 15 of 80
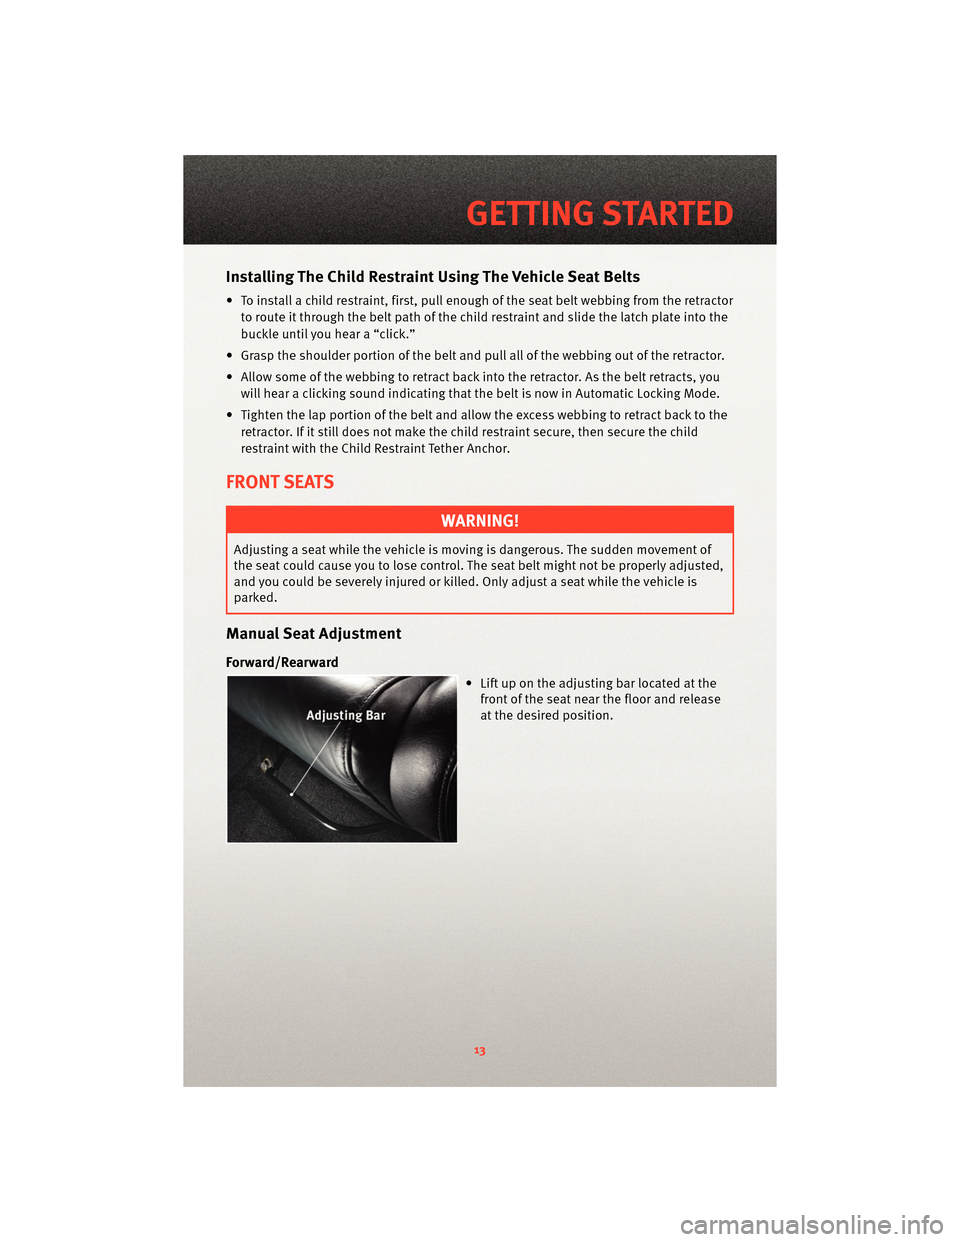
Installing The Child Restraint Using The Vehicle Seat Belts
• To install a child restraint, first, pull enough of the seat belt webbing from the retractorto route it through the belt path of the child restraint and slide the latch plate into the
buckle until you hear a “click.”
• Grasp the shoulder portion of the belt and pull all of the webbing out of the retractor.
• Allow some of the webbing to retract back into the retractor. As the belt retracts, you will hear a clicking sound indicating that the belt is now in Automatic Locking Mode.
• Tighten the lap portion of the belt and allow the excess webbing to retract back to the retractor. If it still does not make the child restraint secure, then secure the child
restraint with the Child Restraint Tether Anchor.
FRONT SEATS
WARNING!
Adjusting a seat while the vehicle is movi ng is dangerous. The sudden movement of
the seat could cause you to lose control. The seat belt might not be properly adjusted,
and you could be severely injured or killed. Only adjust a seat while the vehicle is
parked.
Manual Seat Adjustment
Forward/Rearward
• Lift up on the adjusting bar located at the front of the seat near the floor and release
at the desired position.
13
GETTING STARTED
Page 16 of 80
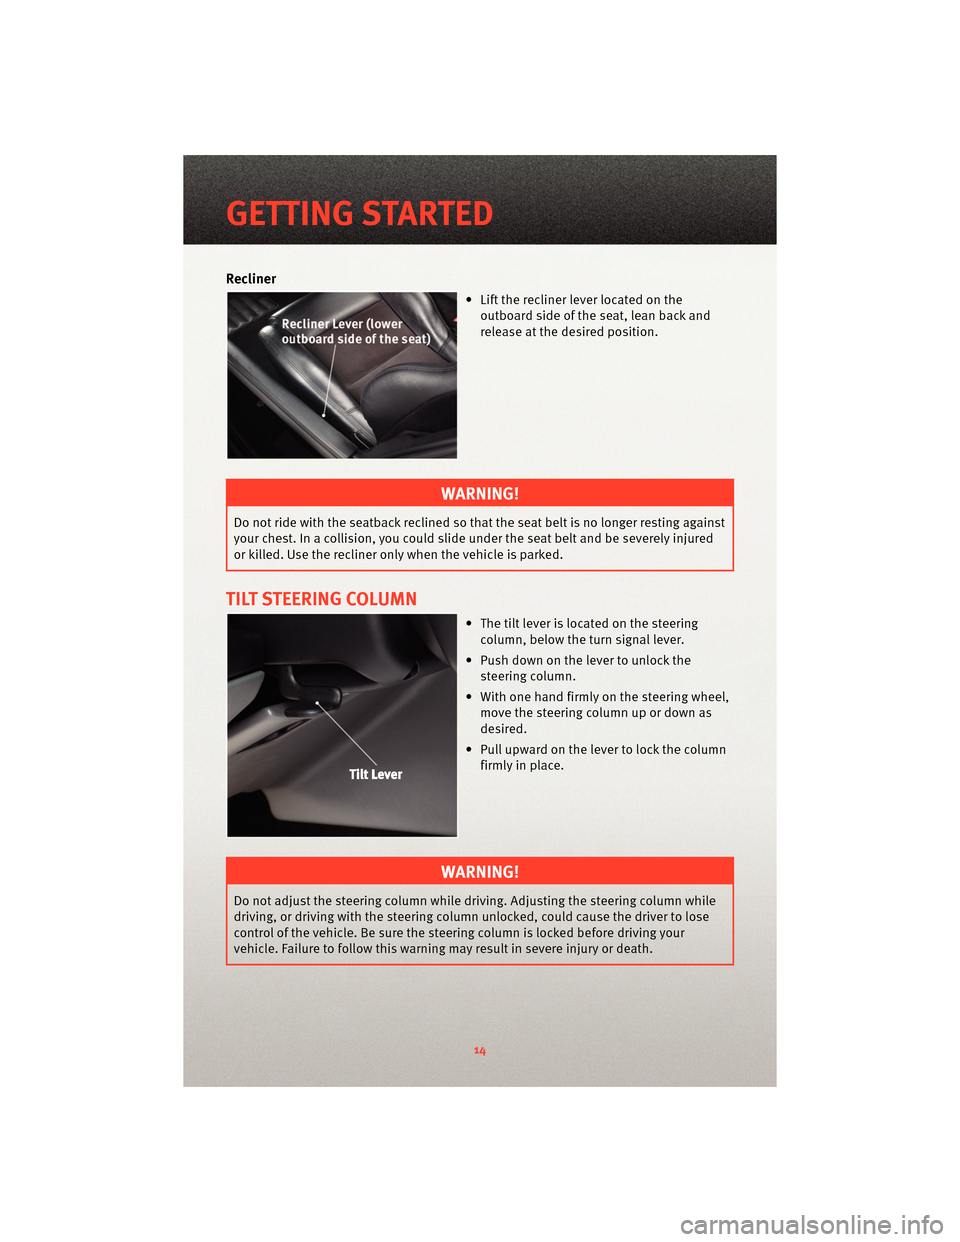
Recliner
• Lift the recliner lever located on theoutboard side of the seat, lean back and
release at the desired position.
WARNING!
Do not ride with the seatback reclined so that the seat belt is no longer resting against
your chest. In a collision, you could slide under the seat belt and be severely injured
or killed. Use the recliner only when the vehicle is parked.
TILT STEERING COLUMN
• The tilt lever is located on the steeringcolumn, below the turn signal lever.
• Push down on the lever to unlock the steering column.
• With one hand firmly on the steering wheel, move the steering column up or down as
desired.
• Pull upward on the lever to lock the column firmly in place.
WARNING!
Do not adjust the steering column while driving. Adjusting the steering column while
driving, or driving with the steering column un locked, could cause the driver to lose
control of the vehicle. Be sure the steerin g column is locked before driving your
vehicle. Failure to follow this warning may result in severe injury or death.
GETTING STARTED
14
Page 17 of 80
ADJUSTABLE PEDALS
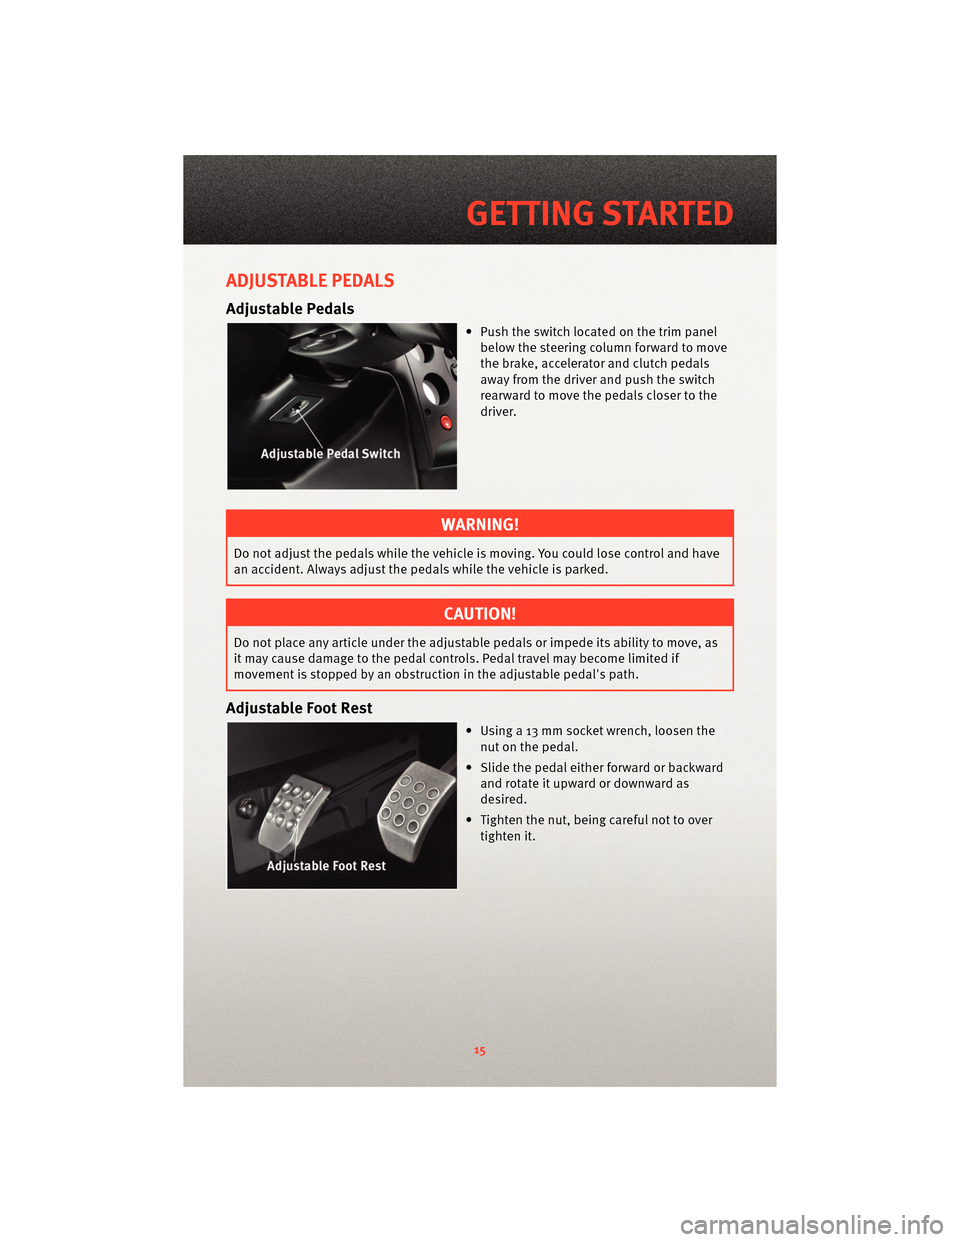
Adjustable Pedals
• Push the switch located on the trim panelbelow the steering column forward to move
the brake, accelerator and clutch pedals
away from the driver and push the switch
rearward to move the pedals closer to the
driver.
WARNING!
Do not adjust the pedals while the vehicle is moving. You could lose control and have
an accident. Always adjust the pedals while the vehicle is parked.
CAUTION!
Do not place any article under the adjustable pedals or impede its ability to move, as
it may cause damage to the pedal controls. Pedal travel may become limited if
movement is stopped by an obstruction in the adjustable pedal's path.
Adjustable Foot Rest
• Using a 13 mm socket wrench, loosen the
nut on the pedal.
• Slide the pedal either forward or backward and rotate it upward or downward as
desired.
• Tighten the nut, being careful not to over tighten it.
15
GETTING STARTED
Page 18 of 80
PROGRAMMABLE FEATURES
• The following features may be programmed using the Key Fob transmitter.
NOTE:Pressing the LOCK button while you are inside the vehicle will activate the
Vehicle Security Alarm. Opening a door with the Vehicle Security Alarm activated will
cause the alarm to sound. Press the UNLOCK button to deactivate the Vehicle Security
Alarm.
Unlock On First Press
• To unlock either the driver's side, or both doors, on the first press of the UNLOCK button:
• Press and hold the Key Fob UNLOCK button for at least 4 seconds, but no longer than 10 seconds. Then, press and hold the Key Fob LOCK button while still holding
the UNLOCK button.
• Release both buttons at the same time.
Sound Horn With Remote Lock
• To turn the horn chirp on or off when the doors are locked: • Press the Key Fob LOCK button for at least 4 seconds, but no longer than10 seconds. Then, press the Key Fob UNLOCK button while still holding the LOCK
button.
• Release both buttons at the same time.
Flashing Lights With Lock
• The park lights and turn signal lights flashing, when the doors are locked or unlocked, feature can be turned on or off. To turn this feature on or off:
• Press and hold the Key Fob LOCK button for at least 4 seconds, but no longer than 10 seconds. Then, press and hold the TRUNK/LIFTGATE button while still holding the
LOCK button.
• Release both buttons at the same time.
GETTING STARTED
16
Page 19 of 80
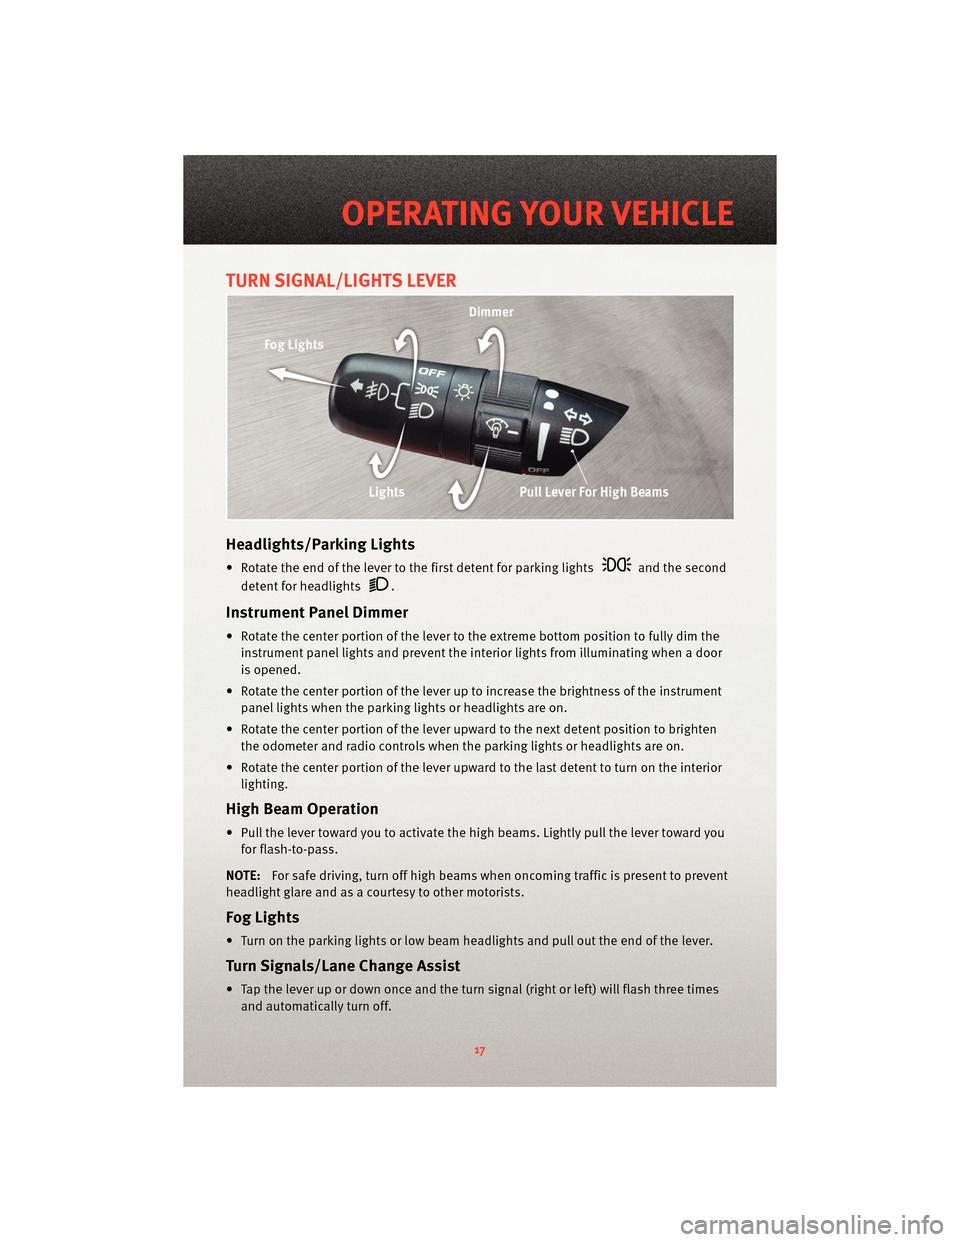
TURN SIGNAL/LIGHTS LEVER
Headlights/Parking Lights
• Rotate the end of the lever to the first detent for parking lightsand the second
detent for headlights
.
Instrument Panel Dimmer
• Rotate the center portion of the lever t o the extreme bottom position to fully dim the
instrument panel lights and prevent the int erior lights from illuminating when a door
is opened.
• Rotate the center portion of the lever up to increase the brightness of the instrument panel lights when the parking lights or headlights are on.
• Rotate the center portion of the lever u pward to the next detent position to brighten
the odometer and radio controls when the parking lights or headlights are on.
• Rotate the center portion of the lever upward to the last detent to turn on the interior lighting.
High Beam Operation
• Pull the lever toward you to activate the high beams. Lightly pull the lever toward youfor flash-to-pass.
NOTE: For safe driving, turn off high beams when oncoming traffic is present to prevent
headlight glare and as a courtesy to other motorists.
Fog Lights
• Turn on the parking lights or low beam headlights and pull out the end of the lever.
Turn Signal s/Lane Change Assist
• Tap the lever up or down once and the turn signal (right or left) will flash three times
and automatically turn off.
17
OPERATING YOUR VEHICLE
Page 20 of 80
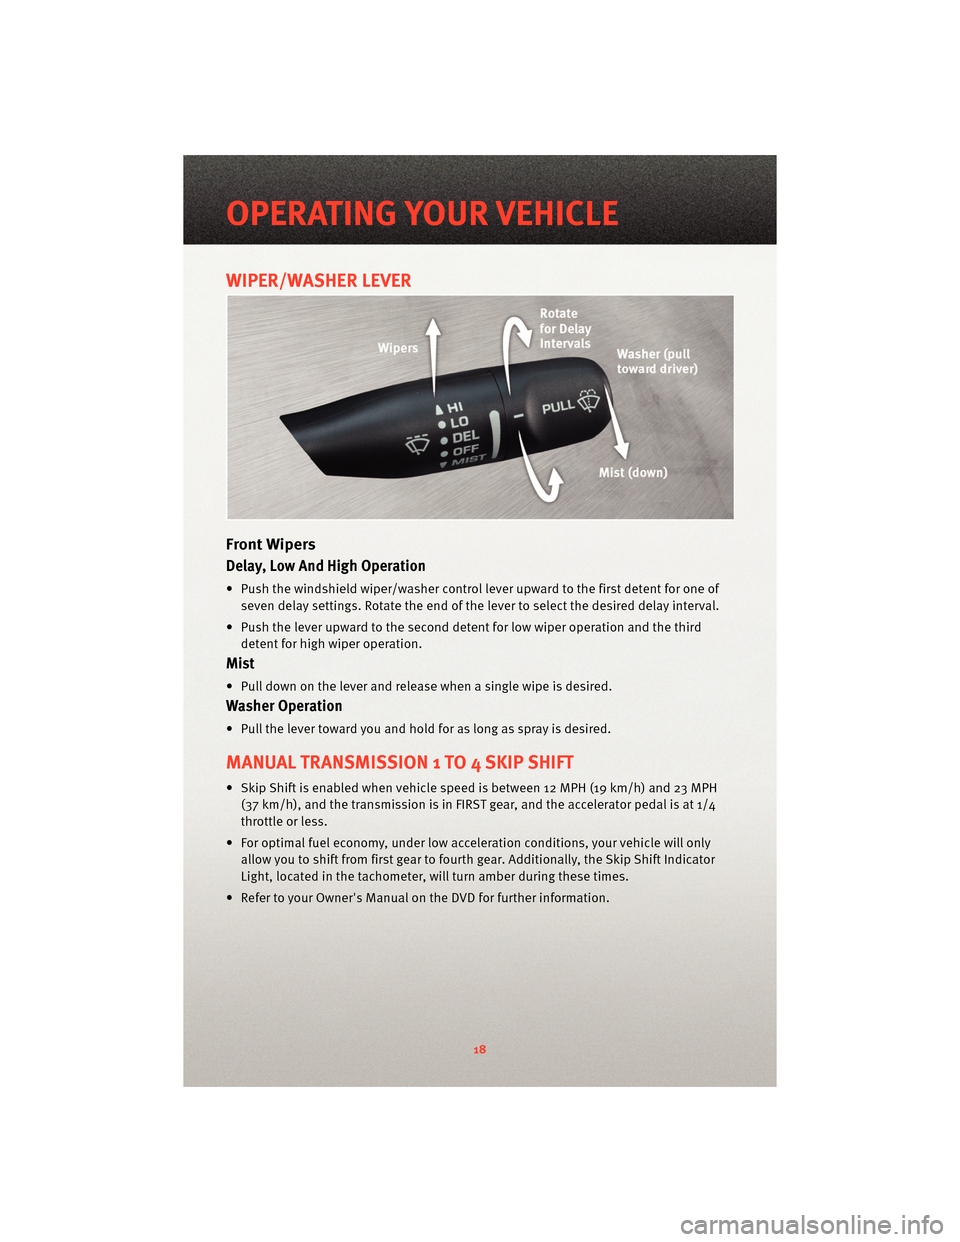
WIPER/WASHER LEVER
Front Wipers
Delay, Low And High Operation
• Push the windshield wiper/washer control lever upward to the first detent for one ofseven delay settings. Rotate the end of the lever to select the desired delay interval.
• Push the lever upward to the second detent for low wiper operation and the third detent for high wiper operation.
Mist
• Pull down on the lever and release when a single wipe is desired.
Washer Operation
• Pull the lever toward you and hold for as long as spray is desired.
MANUAL TRANSMISSION 1 TO 4 SKIP SHIFT
• Skip Shift is enabled when vehicle speed is between 12 MPH (19 km/h) and 23 MPH(37 km/h), and the transm ission is in FIRST gear, and the a ccelerator pedal is at 1/4
throttle or less.
• For optimal fuel economy, under low acceleration conditions, your vehicle will only allow you to shift from first gear to fourth gear. Additionally, the Skip Shift Indicator
Light, located in the tachometer, w ill turn amber during these times.
• Refer to your Owner's Manual on the DVD for further information.
OPERATING YOUR VEHICLE
18